ensure incubator
TRANSCRIPT

SciCan Ltd. · 1440 Don Mills Road · Toronto · Ontario · M3B 3P9
Incubator
Ensure Incubator Operators Manual SD-406, Rev 0 Copyright 2012 SciCan Ltd. All rights reserved.
Operator’s Manual
Table of Contents Incubator Model Reference Chart……………………………… 2 1 - Introduction……………………………………..................... 2 2 – Important Information 2.1 – Disclaimers………………………….......................... 3 2.2 – Important Symbols…………………………………… 3 2.3 – Package Contents……………………………………. 4 2.4 – Unit Overview…………………………………………. 4 3 – Installation 3.1 – Environmental Considerations………………………. 5 3.2 – Unit Placement and Installation……………………... 6 3.3 – Incubator Programming……………………………… 7 4 – Selecting a Program………………………………………… 8 5 – Maintenance………………………………………………….. 10 Appendix A – Troubleshooting………………………………….. 11 Appendix B – Technical Specifications………………………… 11 Appendix C – Wiring Diagram………………………………….. 12 Appendix D – Warranty………………………………………….. 13 Appendix E – Notes……………………………………………… 14
Optim is a registered trademark and Ensure and Your Infection Control Specialist are trademarks of SciCan Ltd. All other trademarks referred to in this manual
are the property of their respective owners. EU Representative: SciCan GmbH SciCan, Inc. Wangener Strasse 78 701 Technology Drive 88299 Leutkirch im Allgäu Canonsburg PA 15317 GERMANY U.S.A Tel.: +49 (0)7561 98343 – 0 Phone: (724) 820-1600 Fax: +49 (0)7561 98343 – 699 Fax: (724) 820-1479 Toll Free: (800) 572-1211 Manufactured for: SciCan Ltd.
1440 Don Mills Road Toronto ON M3B 3P9 Canada Phone: (416) 445-1600 Fax: (416) 445-2727 Toll Free: (800) 667-7733
Appendix E - Notes
1
14
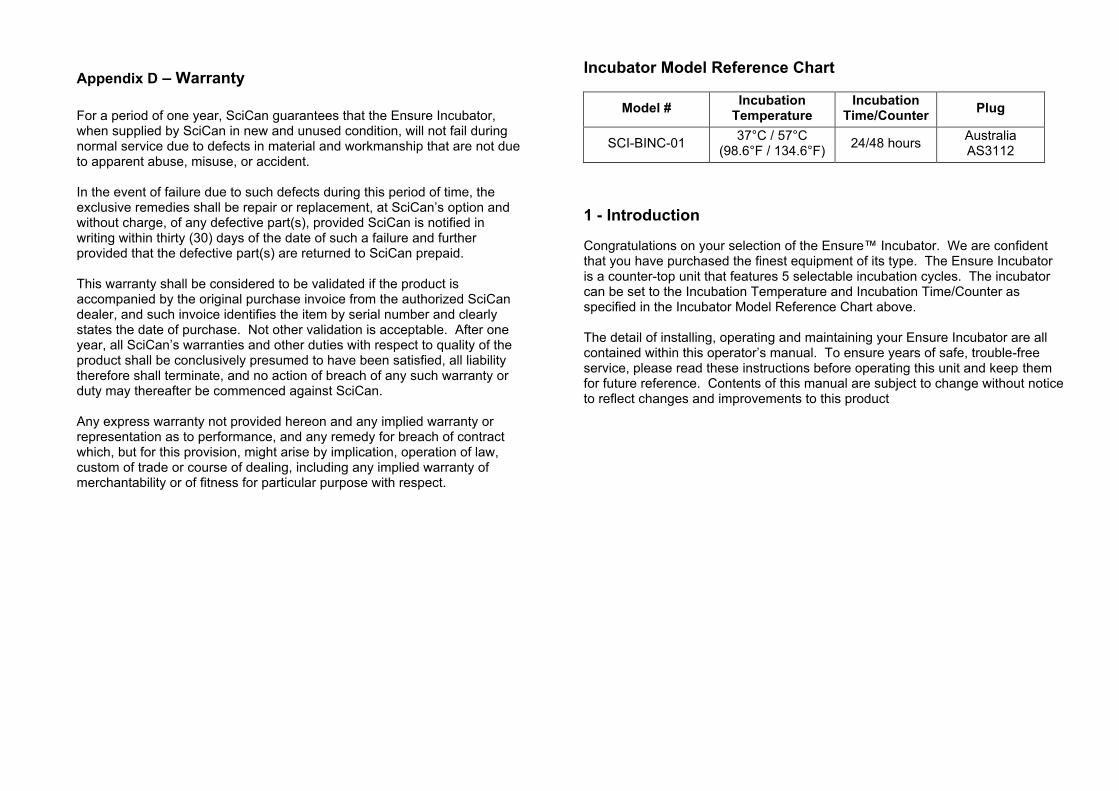
Appendix D – Warranty For a period of one year, SciCan guarantees that the Ensure Incubator, when supplied by SciCan in new and unused condition, will not fail during normal service due to defects in material and workmanship that are not due to apparent abuse, misuse, or accident. In the event of failure due to such defects during this period of time, the exclusive remedies shall be repair or replacement, at SciCan’s option and without charge, of any defective part(s), provided SciCan is notified in writing within thirty (30) days of the date of such a failure and further provided that the defective part(s) are returned to SciCan prepaid. This warranty shall be considered to be validated if the product is accompanied by the original purchase invoice from the authorized SciCan dealer, and such invoice identifies the item by serial number and clearly states the date of purchase. Not other validation is acceptable. After one year, all SciCan’s warranties and other duties with respect to quality of the product shall be conclusively presumed to have been satisfied, all liability therefore shall terminate, and no action of breach of any such warranty or duty may thereafter be commenced against SciCan. Any express warranty not provided hereon and any implied warranty or representation as to performance, and any remedy for breach of contract which, but for this provision, might arise by implication, operation of law, custom of trade or course of dealing, including any implied warranty of merchantability or of fitness for particular purpose with respect.
Incubator Model Reference Chart
Model # Incubation Temperature
Incubation Time/Counter Plug
SCI-BINC-01 37°C / 57°C (98.6°F / 134.6°F) 24/48 hours Australia
AS3112 1 - Introduction Congratulations on your selection of the Ensure™ Incubator. We are confident that you have purchased the finest equipment of its type. The Ensure Incubator is a counter-top unit that features 5 selectable incubation cycles. The incubator can be set to the Incubation Temperature and Incubation Time/Counter as specified in the Incubator Model Reference Chart above. The detail of installing, operating and maintaining your Ensure Incubator are all contained within this operator’s manual. To ensure years of safe, trouble-free service, please read these instructions before operating this unit and keep them for future reference. Contents of this manual are subject to change without notice to reflect changes and improvements to this product
2 13

2 - Important Information
2.1 Disclaimers Do not permit any person other than a certified personnel to supply parts for service or maintain your Ensure incubator. SciCan shall not be liable for incidental, special or consequential damages caused by any maintenance or services performed on the Ensure incubator by a third party, or for the use of equipment or parts manufactured by a third party, including lost profits, any commercial loss, economic loss, or loss arising from personal injury. Never remove the cover of the unit and never insert objects through holes or openings in the unit. Doing so may damage the unit and/or pose a hazard to the operator. IMPORTANT: Follow your leading infection control authorities and local regulatory guidelines / recommendations for routine monitoring of any sterilizer
2.2 Important Symbols
NOTE
THIS SYMBOL INDICATES IMPORTANT INFORMATION.
WARNING
THIS SYMBOL INDICATES A POTENTIAL DANGER OF INJURY. FOLLOW THE PROCEDURES DESCRIBED IN THE MANUAL TO AVOID INJURING THE USER AND/OR OTHERS.
DANGER
THIS SYMBOL INDICATES A POTENTIAL DANGER OF PROPERTY DAMAGE. FOLLOW THE INSTRUCTIONS IN THE MANUAL TO PREVENT POTENTIAL DAMAGE TO MATERIALS, EQUIPMENT OR OTHER PROPERTY.
DANGER
THIS SYMBOL INDICATES A POTENTIAL DANGER DUE TO HIGH TEMPERATURE.
Appendix C - Wiring Diagram
100-240V~
Adapter 12V 48W
Main switch
Heater
Display
Main board
J7 J4
J3
J1
Panel
J2
Sensor J5
12 3

Appendix A - Troubleshooting Problem Cause Corrective Action
No LCD Display No power to unit Check all the electrical connections
‘OPEN’ is displayed on the LCD
Defective sensor or loose connection
Contact SciCan Service Dealer
‘SHORT’ is displayed on the LCD Defective sensor Contact SciCan
Service Dealer
The temperature does not increase
Main heater element may have failed
Contact SciCan Service Dealer
Keypad buttons don’t work Keyboard failed Contact SciCan
Service Dealer
Appendix B – Technical Specifications Power Voltage DC 12V, 4A
Power 35 W
Temperature Range Incubation temp. ± 0.5°C (± 0.9°F)
Accuracy of temperature ± 0.5°C (± 0.9°F)
LCD display accuracy ± 0.1°C (± 0.2°F)
Operating temperature 5°C – 35°C (41°F – 95°F)
Dimensions (W x D x H) 110mm×150mm×80mm (4.3” x 5.8” x 4.7”)
Weight 0.5 kg (1.1 lbs)
2.3 - Package Contents When you receive your Ensure Incubator carton, the items listed below will be included. If any of the items are missing, contact your dealer immediately so that the situation can be corrected. Part Number SCI-BINC-01 (1) Incubator (1) Power adapter (1) Vial crusher support peg (1) Operator manual
2.4 - Unit Overview
LCD Display
Power Connector
Power Switch
Dry Block
Start/Stop/Reset (Enter button if in menu option)
Key Pad
4
Vial Crusher Support Peg
Dry Block
Keypad
Program Selection (Menu option if held for 5 seconds)
11

3 - Installation
3.1 - Environmental Considerations There are several factors that may affect the performance of your Ensure Incubator. Please review these factors, and select a suitable location in which to install the unit.
• Temperature and Humidity
Avoid installing your Ensure Incubator in direct sunlight or close to a heat source (e.g. vents, heat lamps, radiators). The recommended operating temperatures are 5°C – 35°C (41°F – 95°F)
• Spacing The vents on the bottom of the Ensue Incubator should remain unobstructed.
• Venting The Ensure Incubator should be operated in a clean, dust free environment with adequate air flow and away from any corrosive gases.
• Work Surface The Ensure Incubator should be placed on a flat, dry, solid level working surface.
• Electromagnetic Environment While the Ensure Incubator does not emit any radiation, it may be affected by other equipment which does. We recommend that the unit be kept away from potential sources of interference.
• Electrical Requirements The Ensure Incubator is a low voltage device. Use the supplied voltage power adapter or a supply with the same voltage rating as indicated on the label at the back of the Ensure Incubator.
5 - Maintenance
WARNING
ALWAYS DISCONNECT THE POWER SUPPLY PRIOR TO CLEANING ANY OF THE INCUBATOR SURFACES AND WAIT 10 MINUTES FOR THE INCUBATOR TO COOL DOWN PRIOR TO CLEANING.
• The Ensure Incubator should be cleaned regularly with a damp cloth
to remove any dust and debris from the surface. SciCan Optim™ 33 TB wipes can also be used to wipe the surface.
WARNING
DO NOT WASHER THE INCUBATOR IN ANY TYPE OF WASHER OR UNDER RUNNING WATER AS THIS MAY DAMAGE THE ELECTRONIC COMPONENTS WITHIN.
• The wells of the incubator should be cleaned regularly with an alcohol
dipped cloth. This will ensure the surface walls of the well are clean from any contaminants for proper heat transfer to the vials. Never pour any cleaning agent in the wells.
WARNING
NEVER POUR ANY CLEANING AGENT IN THE WELLS. CORROSIVE CLEANING AGENTS ARE STRONGLY PROHIBITED.
5 10

NOTE
2 HOURS AFTER THE LAST CYCLE IS COMPLETED, THE INCUBATOR WILL GO INTO STANDBY MODE AND THE TEMPERATURE WILL DECREASE TO ROOM TEMPERATURE.
TO REACTIVATE THE INCUBATOR, PRESS THE BUTTON ONCE. THE INCUBATOR WILL START TO WARM UP TO THE REQUIRED TEMPERATURE.
NOTE
PRESSING THE BUTTON DURING A CYCLE WILL STOP THE TIMER. THIS IS INDICATED BY THE “:” NOT
FLASHING. PRESSING THE AGAIN WILL RESTART THE TIMER, INDICATED BY THE “:” FLASHING.
NOTE
IF A PROGRAM NEEDS TO BE STOPPED AND RESET,
PRESS THE BUTTON ONCE TO STOP THE TIMER
AND THEN PRESS AND HOLD THE BUTTON FOR 3 SECONDS TO RESET THE PROGRAM TO 00:00
NOTE
IT IS RECOMMENED PRACTICE TO POWER OFF THE UNIT AT THE END OF EACH DAY OR WHEN NOT IN USE.
3.2 - Unit Placement and Installation • When placing the unit on a counter or working surface, ensure the
unit is stable and all four feet should be in contact with the working surface.
• Insert the 12V, 4A power adapter to the power connector on the back
of the unit and then insert the other end to the main power supply.
• Turn on the power switch on the back of the unit by pressing “I” identified on the switch.
• The following messages will appear on the LCD display
This message will flash 3 times. This message, ‘XX’, will appear until the unit is ready, indicated by “OK”. The temperature will increase slowly to incubation temperature. This message indicates the unit has reached the required temperature and is ready to be used.
DANGER
THE SURFACE OF THE DRY BLOCK MAY BE HOT.
DC 12V
9
P1 57.0C 24HR OK
100-240V
P1 57.0C 24HR XX
SYSTEM TESTING
6

3.3 – Incubator Programming The incubator may be programmable to different incubation temperatures and times. Please refer to the Incubator Model Reference Chart to verify if your incubator is programmable. If possible, you can change the incubation temperature and time by;
1) Press and hold the button for 5 seconds or until you see the following screen
2) Press the button once to change the incubation time
3) Press the button once to accept the incubation time and move to the incubation temperature setting option.
4) Press the button once to change the incubation temperature
5) Press the button to accept the incubation time and return to the main screen, where you will see the chosen incubation time and temperature.
NOTE
ALL CYCLE (P1, P2, P3, P4, P5) WILL BE SET TO THE SAME INCUBATION TIME AND TEMPERATURE.
4 – Selecting a Program The Ensure incubator is equipped with 5 individual programs (P1, P2, P3, P4, P5). Each program can be started at different intervals and will count up to its set incubation time.
NOTE
IT IS RECOMMENDED THE USER PLACE THE VIALS IN THE CORRESPONDING BLOCK WELLS TO HELP IDENTIFY THE INCUBATION TIME FOR THAT VIAL
NOTE
REFER TO THE INSTRUCTIONS PROVIDED WITH THE VIALS BEING USED FOR STEPS REQUIRED PRIOR TO PLACING THEM INTO THE INCUBATOR
• Once the unit shows ‘OK’ you can start a program by pressing the button until the desired program (P1 or P2 or P3 or P4 or P5) is selected.
• Press the button to start the timer. The timer will start to blink, indicating the timer has started.
• Upon completion of the timer the unit will beep 1 to 5 times, depending on
the chosen program (1 beep for P1, 2 beeps for P2……5 beeps for P5) and the following will be displayed on the LCD
example
• Once √√ is displayed, the program can be reset to restart by pressing
and holding the button for 3 seconds.
6
8
P5 57.0C 24HR √√
P1 57.0C 24HR √√
Time: 24HR
Time: 24HR
Time: 48HR
Temp: 37.0C
Temp: 57.0C
(24HR will be flashing)
7