コマンド:参考例 - cisco...コマンド:参考例...
TRANSCRIPT
コマンド:参考例
この章は、次の項で構成されています。
•リストの読み方(2ページ)•高度なマルウェア防御(2ページ)•スパムとグレイメールの管理(12ページ)•アンチウイルス(21ページ)•コマンドラインの管理(24ページ)•コンフィギュレーションファイルの管理(27ページ)•外部脅威フィードを消費する Cisco Eメールセキュリティゲートウェイの設定(32ページ)
•クラスタの管理(36ページ)•データ損失の防止(38ページ)•ドメイン例外リスト(39ページ)• S/MIMEセキュリティサービス(40ページ)•ドメインキー(42ページ)• DMARC検証(53ページ)• DNS(58ページ)• How-Toウィジェットを使用したユーザエクスペリエンスの強化 (68ページ)•一般的な管理/トラブルシューティング(69ページ)•コンテンツスキャン(129ページ)• LDAP(130ページ)•メール配信の設定/モニタリング(136ページ)•ネットワーキング設定とネットワークツール(171ページ)•アウトブレイクフィルタ(191ページ)•ポリシーの適用(194ページ)•ロギングとアラート(231ページ)•レポート(247ページ)• Senderbase(250ページ)•送信者ドメインレピュテーションフィルタリング(251ページ)•スマートソフトウェアライセンシング(255ページ)
コマンド:参考例
1

• SMTPサービスの設定(259ページ)•システムのセットアップ(294ページ)• URLフィルタリング (297ページ)•ユーザ管理(303ページ)•仮想アプライアンスの管理 (310ページ)•位置情報(312ページ)
リストの読み方コマンドごとに説明と1つ以上の使用例が示されています。「使い方」の欄には、以下のコマンド属性についての説明があります。
手順
ステップ 1 そのコマンドは、アプライアンス上で commitコマンドを実行して確定する必要があるかどうか。
ステップ 2 そのコマンドは特定のモード(クラスタ、グループ、またはマシン)でのみ実行可能か。
ステップ 3 そのコマンドをバッチ形式で実行できるか。
集中管理の詳細については、『User Guide for AsyncOS for Cisco Email Security Appliances』を参照してください。
バッチ形式の詳細については、コマンドラインインターフェイスの概要を参照してください。
高度なマルウェア防御• ampconfig(2ページ)• ampstatus(12ページ)
ampconfigファイルレピュテーションフィルタリングとファイル分析Cisco TACの指導なしで詳細オプションを変更しないでください。
使用方法
確定:このコマンドは「commit」が必要です。
クラスタ管理:このコマンドは、すべてのマシンモード(クラスタ、グループ、マシン)で使
用できます。
コマンド:参考例
2
コマンド:参考例
リストの読み方
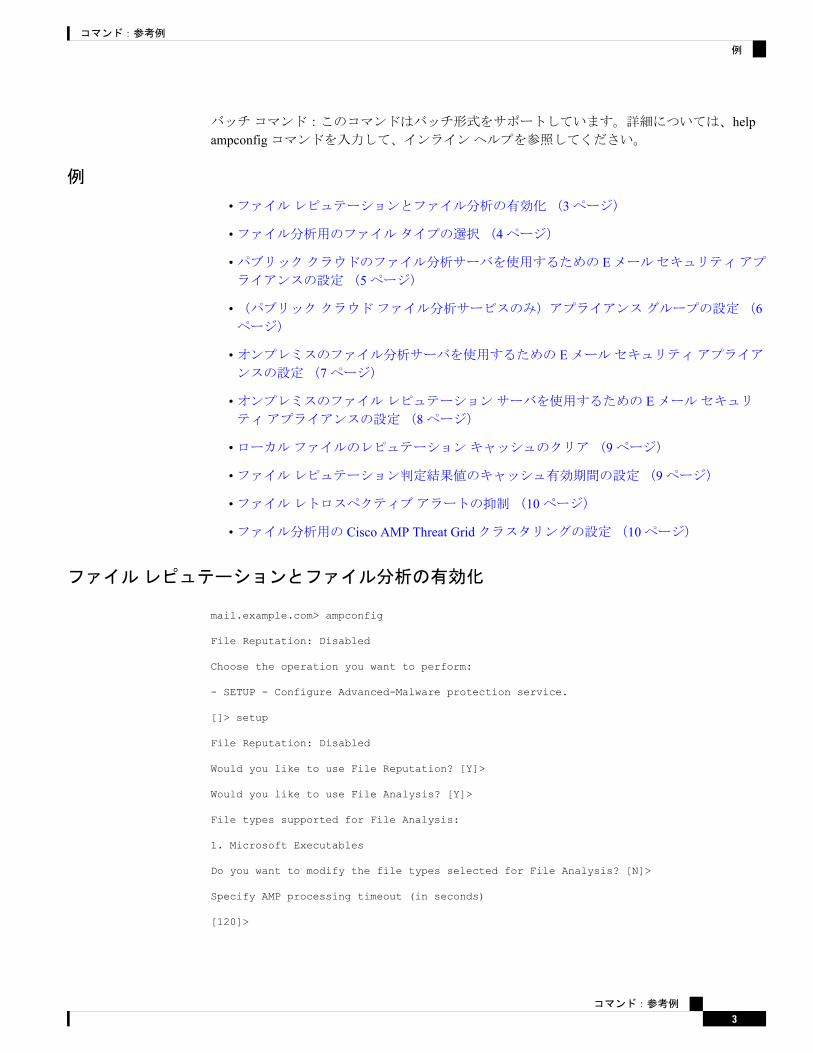
バッチコマンド:このコマンドはバッチ形式をサポートしています。詳細については、helpampconfigコマンドを入力して、インラインヘルプを参照してください。
例
•ファイルレピュテーションとファイル分析の有効化(3ページ)
•ファイル分析用のファイルタイプの選択(4ページ)
•パブリッククラウドのファイル分析サーバを使用するための Eメールセキュリティアプライアンスの設定(5ページ)
•(パブリッククラウドファイル分析サービスのみ)アプライアンスグループの設定(6ページ)
•オンプレミスのファイル分析サーバを使用するための Eメールセキュリティアプライアンスの設定(7ページ)
•オンプレミスのファイルレピュテーションサーバを使用するための Eメールセキュリティアプライアンスの設定(8ページ)
•ローカルファイルのレピュテーションキャッシュのクリア(9ページ)
•ファイルレピュテーション判定結果値のキャッシュ有効期間の設定(9ページ)
•ファイルレトロスペクティブアラートの抑制(10ページ)
•ファイル分析用の Cisco AMP Threat Gridクラスタリングの設定(10ページ)
ファイルレピュテーションとファイル分析の有効化
mail.example.com> ampconfig
File Reputation: Disabled
Choose the operation you want to perform:
- SETUP - Configure Advanced-Malware protection service.
[]> setup
File Reputation: Disabled
Would you like to use File Reputation? [Y]>
Would you like to use File Analysis? [Y]>
File types supported for File Analysis:
1. Microsoft Executables
Do you want to modify the file types selected for File Analysis? [N]>
Specify AMP processing timeout (in seconds)
[120]>
コマンド:参考例
3
コマンド:参考例
例

Advanced-Malware protection is now enabled on the system.
Please note: you must issue the 'policyconfig' command (CLI) or Mail
Policies (GUI) to configure advanced malware scanning behavior for
default and custom Incoming Mail Policies.
This is recommended for your DEFAULT policy.
File Reputation: Enabled
File Analysis: Enabled
File types selected for File Analysis:
1. Microsoft Executables
Choose the operation you want to perform:
- SETUP - Configure Advanced-Malware protection service.
- ADVANCED - Set values for AMP parameters (Advanced configuration).
- CLEARCACHE - Clears the local File Reputation cache.
[]>
ファイル分析用のファイルタイプの選択
mail.example.com> ampconfigFile Reputation: EnabledFile Analysis: EnabledAppliance Group ID/Name: Not part of any group yet
Choose the operation you want to perform:- SETUP - Configure Advanced-Malware protection service.- ADVANCED - Set values for AMP parameters (Advanced configuration).- SETGROUP - Add this appliance to the group of appliances that can share File Analysisreporting details.- CACHESETTINGS - Configure the cache settings for AMP.[]> setup
File Reputation: EnabledWould you like to use File Reputation? [Y]> yes
Would you like to use File Analysis? [Y]> yes
Do you want to modify the file types selected for File Analysis? [N]> yes
Enter comma separated serial numbers from the list of groups to select file typesassociated with the group.
1. Archived and compressed2. Configuration3. Database4. Document5. Email6. Encoded and Encrypted7. Executables [partly selected]8. Font & Graphics and Images9. Microsoft Documents
コマンド:参考例
4
コマンド:参考例
ファイル分析用のファイルタイプの選択

10. Miscellaneous11. Multimedia[]> 9File types belonging to the group "Microsoft Documents":1. Access.Extension.14(mda)2. Access.MDBFile(mdb)3. Access.MDEFile.14(mde)4. Access.Shortcut.DataAccessPage.1(maw)5. Access.Shortcut.Form.1(maf)6. …………Choose the operation you want to perform:- PRINT - Print the file types for File Analysis- ADD - Add the file type(s) for File Analysis[]> addChoose the file type(s) to be added for File Analysis from the listFile types that are not selected for File Analysis from group "Microsoft Documents":1. Access.Extension.14(mda)2. Access.MDBFile(mdb)3. Access.MDEFile.14(mde)4. Access.Shortcut.DataAccessPage.1(maw)5. Access.Shortcut.Form.1(maf)6. …….. ….[]> 1-3, 5Choose the operation you want to perform:- PRINT - Print the file types for File Analysis- DELETE - Delete the file type(s) for File Analysis- ADD - Add the file type(s) for File Analysis[]> printFile types belonging to the group:1. Access.Extension.14(mda) [selected]2. Access.MDBFile(mdb) [selected]3. Access.MDEFile.14(mde) [selected]4. Access.Shortcut.DataAccessPage.1(maw)5. Access.Shortcut.Form.1(maf) [selected]6. …….. ….Choose the operation you want to perform:- PRINT - Print the file types for File Analysis- DELETE - Delete the file type(s) for File Analysis- ADD - Add the file type(s) for File AnalysisSpecify AMP processing timeout (in seconds)[120]>
Advanced-Malware protection is now enabled on the system.
Please note: you must issue the 'policyconfig' command (CLI) or Mail Policies (GUI) toconfigure advanced malwarescanning behavior for default and custom Incoming Mail Policies.This is recommended for your DEFAULT policy. File Reputation: EnabledFile Analysis: EnabledAppliance Group ID/Name: Not part of any group yetChoose the operation you want to perform:- SETUP - Configure Advanced-Malware protection service.- ADVANCED - Set values for AMP parameters (Advanced configuration).- SETGROUP - Add this appliance to the group of appliances that can share FileAnalysis reporting details.- CACHESETTINGS - Configure the cache settings for AMP.[]>
パブリッククラウドのファイル分析サーバを使用するための Eメールセキュリティアプライアンスの設定
mail.example.com> ampconfig
コマンド:参考例
5
コマンド:参考例
パブリッククラウドのファイル分析サーバを使用するための Eメールセキュリティアプライアンスの設定
File Reputation: EnabledFile Analysis: EnabledFile types selected for File Analysis:
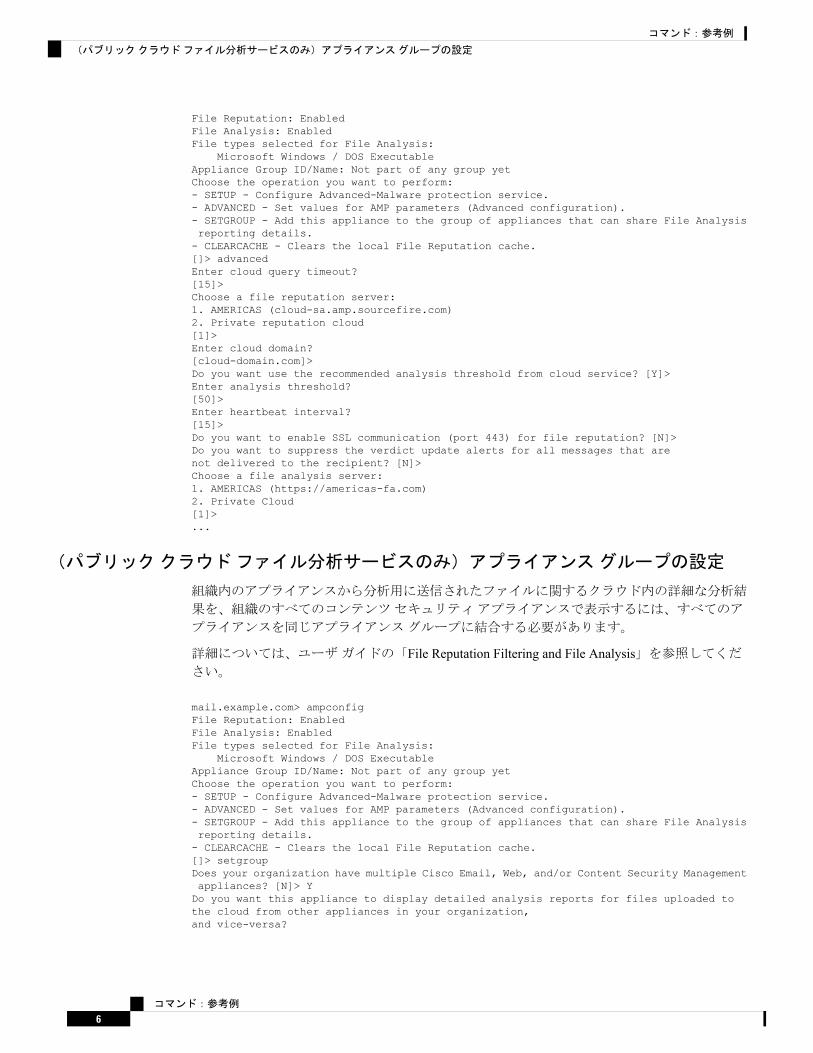
Microsoft Windows / DOS ExecutableAppliance Group ID/Name: Not part of any group yetChoose the operation you want to perform:- SETUP - Configure Advanced-Malware protection service.- ADVANCED - Set values for AMP parameters (Advanced configuration).- SETGROUP - Add this appliance to the group of appliances that can share File Analysisreporting details.- CLEARCACHE - Clears the local File Reputation cache.[]> advancedEnter cloud query timeout?[15]>Choose a file reputation server:1. AMERICAS (cloud-sa.amp.sourcefire.com)2. Private reputation cloud[1]>Enter cloud domain?[cloud-domain.com]>Do you want use the recommended analysis threshold from cloud service? [Y]>Enter analysis threshold?[50]>Enter heartbeat interval?[15]>Do you want to enable SSL communication (port 443) for file reputation? [N]>Do you want to suppress the verdict update alerts for all messages that arenot delivered to the recipient? [N]>Choose a file analysis server:1. AMERICAS (https://americas-fa.com)2. Private Cloud[1]>...
(パブリッククラウドファイル分析サービスのみ)アプライアンスグループの設定
組織内のアプライアンスから分析用に送信されたファイルに関するクラウド内の詳細な分析結
果を、組織のすべてのコンテンツセキュリティアプライアンスで表示するには、すべてのア
プライアンスを同じアプライアンスグループに結合する必要があります。
詳細については、ユーザガイドの「File Reputation Filtering and File Analysis」を参照してください。
mail.example.com> ampconfigFile Reputation: EnabledFile Analysis: EnabledFile types selected for File Analysis:
Microsoft Windows / DOS ExecutableAppliance Group ID/Name: Not part of any group yetChoose the operation you want to perform:- SETUP - Configure Advanced-Malware protection service.- ADVANCED - Set values for AMP parameters (Advanced configuration).- SETGROUP - Add this appliance to the group of appliances that can share File Analysisreporting details.- CLEARCACHE - Clears the local File Reputation cache.[]> setgroupDoes your organization have multiple Cisco Email, Web, and/or Content Security Managementappliances? [N]> YDo you want this appliance to display detailed analysis reports for files uploaded tothe cloud from other appliances in your organization,and vice-versa?
コマンド:参考例
6
コマンド:参考例
(パブリッククラウドファイル分析サービスのみ)アプライアンスグループの設定

[Y]> Enter an Analysis Group name. This name is case-sensitive and must be configuredidentically on each appliance in the Analysis Group.[]> FA_ReportingRegistration is successful with the group name. This does not require commitFile Reputation: EnabledFile Analysis: EnabledFile types selected for File Analysis:
Microsoft Windows / DOS ExecutableAppliance Group ID/Name: FA_ReportingChoose the operation you want to perform:- SETUP - Configure Advanced-Malware protection service.- ADVANCED - Set values for AMP parameters (Advanced configuration).- VIEWGROUP - view the group members details.- CLEARCACHE - Clears the local File Reputation cache.[]>
アプライアンスグループの設定後は、setgroupサブコマンドを使用できません。グループを何らかの理由で変更する必要がある場合は、Cisco TACでケースを開く必要があります。アプライアンスグループの詳細は、viewgroupサブコマンドを使用して表示できます。
(注)
オンプレミスのファイル分析サーバを使用するためのEメールセキュリティアプライアンスの設定
mail.example.com> ampconfigFile Reputation: EnabledFile Analysis: EnabledFile types selected for File Analysis:
Microsoft Windows / DOS ExecutableChoose the operation you want to perform:- SETUP - Configure Advanced-Malware protection service.- ADVANCED - Set values for AMP parameters (Advanced configuration).- SETGROUP - Add this appliance to the group of appliances that can share File Analysisreporting details.- CLEARCACHE - Clears the local File Reputation cache.[]> advancedEnter cloud query timeout?[15]>Choose a file reputation server:1. AMERICAS (cloud-sa.amp.sourcefire.com)2. Private reputation cloud[1]>Enter cloud domain?[a.immunet.com]>Do you want use the recommended analysis threshold from cloud service? [Y]>Enter analysis threshold?[50]>Enter heartbeat interval?[15]>Do you want to enable SSL communication (port 443) for file reputation? [N]>Do you want to suppress the verdict update alerts for all messages that arenot delivered to the recipient? [N]>Choose a file analysis server:1. AMERICAS (https://panacea.threatgrid.com)2. Private Cloud[1]> 2Enter file analysis server url?[]> https://mycloud.example.com
コマンド:参考例
7
コマンド:参考例
オンプレミスのファイル分析サーバを使用するための Eメールセキュリティアプライアンスの設定

Certificate Authority:1. Use Cisco Trusted Root Certificate List2. Paste certificate to CLI[1]>File Reputation: EnabledFile Analysis: EnabledFile types selected for File Analysis:
Microsoft Windows / DOS ExecutableChoose the operation you want to perform:- SETUP - Configure Advanced-Malware protection service.- ADVANCED - Set values for AMP parameters (Advanced configuration).- SETGROUP - Add this appliance to the group of appliances that can share File Analysisreporting details.- CLEARCACHE - Clears the local File Reputation cache.[]>
オンプレミスのファイルレピュテーションサーバを使用するための Eメールセキュリティアプライアンスの設定
mail.example.com> ampconfigFile Reputation: EnabledFile Analysis: EnabledFile types selected for File Analysis:
Microsoft Windows / DOS ExecutableAppliance Group ID/Name: Not part of any group yetChoose the operation you want to perform:- SETUP - Configure Advanced-Malware protection service.- ADVANCED - Set values for AMP parameters (Advanced configuration).- SETGROUP - Add this appliance to the group of appliances that can share FileAnalysis reporting details.- CLEARCACHE - Clears the local File Reputation cache.[]> advancedEnter cloud query timeout?[15]>Choose a file reputation server:1. AMERICAS (cloud-sa.amp.domain.com)2. Private reputation cloud[1]> 2Enter AMP reputation server hostname or IP address?[]> myamp.domain.comPaste the public key followed by a . on a new line-----BEGIN PUBLIC KEY-----MIGfMA0GCSqGSIb3DQEBAQUAA4GNADCBiQKBgQCqGKukO1De7zhZj6+H0qtjTkVxwTCpvKe4eCZ0FPqri0cb2JZfXJ/DgYSF6vUpwmJG8wVQZKjeGcjDOL5UlsuusFncCzWBQ7RKNUSesmQRMSGkVb1/3j+skZ6UtW+5u09lHNsj6tQ51s1SPrCBkedbNf0Tp0GbMJDyR4e9T04ZZwIDAQAB-----END PUBLIC KEY-----.Enter cloud domain?[immunet.com]>Do you want use the recommended analysis threshold from cloud service? [Y]>Enter heartbeat interval?[15]>Do you want to enable SSL communication (port 443) for file reputation? [N]>Choose a file analysis server:1. AMERICAS (https://threatgrid.com)2. Private analysis cloud[1]>File Reputation: EnabledFile Analysis: EnabledFile types selected for File Analysis:
Microsoft Windows / DOS ExecutableAppliance Group ID/Name: Not part of any group yet
コマンド:参考例
8
コマンド:参考例
オンプレミスのファイルレピュテーションサーバを使用するための Eメールセキュリティアプライアンスの設定
Choose the operation you want to perform:- SETUP - Configure Advanced-Malware protection service.- ADVANCED - Set values for AMP parameters (Advanced configuration).- SETGROUP - Add this appliance to the group of appliances that can share FileAnalysis reporting details.- CLEARCACHE - Clears the local File Reputation cache.[]>
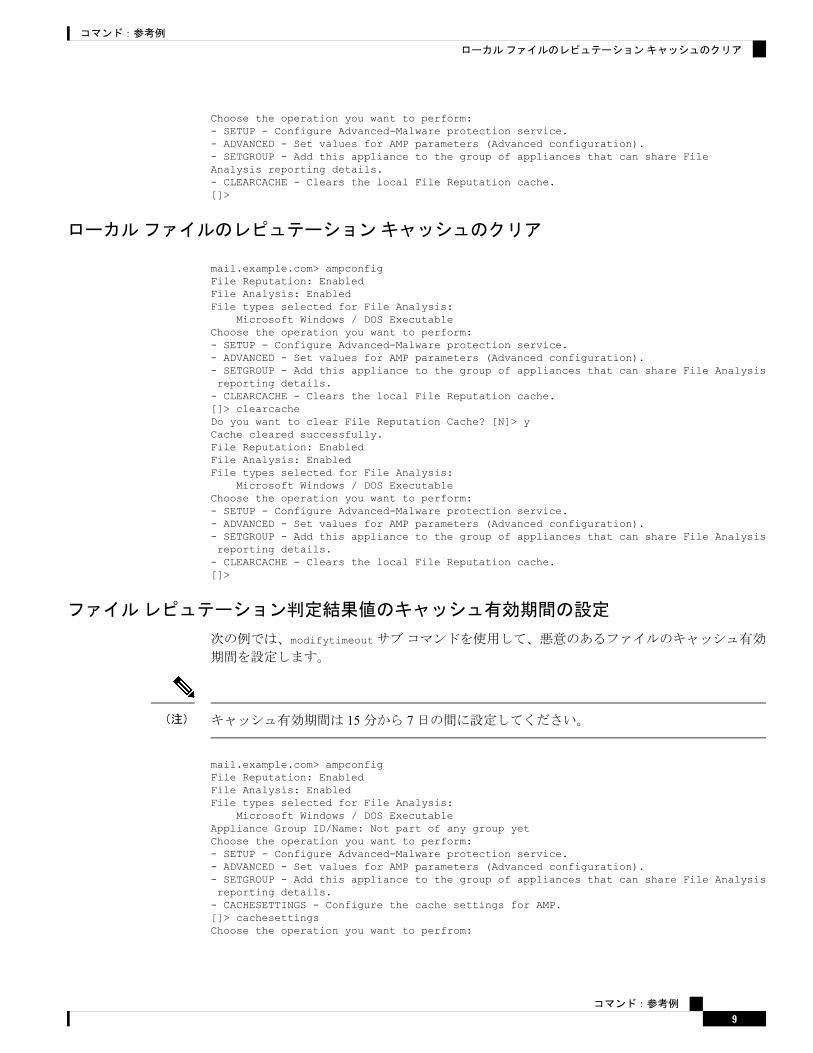
ローカルファイルのレピュテーションキャッシュのクリア
mail.example.com> ampconfigFile Reputation: EnabledFile Analysis: EnabledFile types selected for File Analysis:
Microsoft Windows / DOS ExecutableChoose the operation you want to perform:- SETUP - Configure Advanced-Malware protection service.- ADVANCED - Set values for AMP parameters (Advanced configuration).- SETGROUP - Add this appliance to the group of appliances that can share File Analysisreporting details.- CLEARCACHE - Clears the local File Reputation cache.[]> clearcacheDo you want to clear File Reputation Cache? [N]> yCache cleared successfully.File Reputation: EnabledFile Analysis: EnabledFile types selected for File Analysis:
Microsoft Windows / DOS ExecutableChoose the operation you want to perform:- SETUP - Configure Advanced-Malware protection service.- ADVANCED - Set values for AMP parameters (Advanced configuration).- SETGROUP - Add this appliance to the group of appliances that can share File Analysisreporting details.- CLEARCACHE - Clears the local File Reputation cache.[]>
ファイルレピュテーション判定結果値のキャッシュ有効期間の設定
次の例では、modifytimeoutサブコマンドを使用して、悪意のあるファイルのキャッシュ有効
期間を設定します。
キャッシュ有効期間は 15分から 7日の間に設定してください。(注)
mail.example.com> ampconfigFile Reputation: EnabledFile Analysis: EnabledFile types selected for File Analysis:
Microsoft Windows / DOS ExecutableAppliance Group ID/Name: Not part of any group yetChoose the operation you want to perform:- SETUP - Configure Advanced-Malware protection service.- ADVANCED - Set values for AMP parameters (Advanced configuration).- SETGROUP - Add this appliance to the group of appliances that can share File Analysisreporting details.- CACHESETTINGS - Configure the cache settings for AMP.[]> cachesettingsChoose the operation you want to perfrom:
コマンド:参考例
9
コマンド:参考例
ローカルファイルのレピュテーションキャッシュのクリア

- MODIFYTIMEOUT - Configure the cache expiry period based on File Reputation disposition.- CLEARCACHE - Clears the local File Reputation cache.[]> modifytimeoutChoose the operation you want to perform:- CLEAN - Configure the cache expiry period for clean files.- MALICIOUS - Configure the cache expiry period for malicious files.- UNKNOWN - Configure the cache expiry period for unknown files.[]> maliciousSpecify the cache expiry period for this file disposition (use 'd' for days, 'h' forhours, or 'm' for minutes). If youspecify a value without a unit, it is always treated as days.[1d]> 5d
ファイルレトロスペクティブアラートの抑制
mail.example.com> ampconfig
File Reputation: EnabledFile Analysis: EnabledAppliance Group ID/Name: Not part of any group yet
Choose the operation you want to perform:- SETUP - Configure Advanced-Malware protection service.- ADVANCED - Set values for AMP parameters (Advanced configuration).- SETGROUP - Add this appliance to the group of appliances that can share File Analysisreporting details.- CACHESETTINGS - Configure the cache settings for AMP.[]> advanced
Enter cloud query timeout?[15]>
Choose a file reputation server:1. AMERICAS (cloud-sa.amp.domain.com)2. Private reputation cloud[1]>
Do you want use the recommended reputation threshold from cloud service? [Y]>
Enter heartbeat interval?[15]>
Do you want to enable SSL communication (port 443) for file reputation? [N]>
Do you want to suppress the file retrospective verdict alerts for the messages that arenot delivered to the recipient[N]> yes
ファイル分析用の Cisco AMP Threat Gridクラスタリングの設定
mail.example.com> ampconfig
File Reputation: EnabledFile Analysis: EnabledAppliance Group ID/Name: Not part of any group yet
Choose the operation you want to perform:- SETUP - Configure Advanced-Malware protection service.- ADVANCED - Set values for AMP parameters (Advanced configuration).- SETGROUP - Add this appliance to the group of appliances that can share FileAnalysis reporting details.- CACHESETTINGS - Configure the cache settings for AMP.
コマンド:参考例
10
コマンド:参考例
ファイルレトロスペクティブアラートの抑制

[]> advanced
Enter cloud query timeout?[15]>
Choose a file reputation server:1. AMERICAS (cloud-sa.amp.cisco.com)2. AMERICAS(Legacy) (cloud-sa.amp.sourcefire.com)3. Private reputation cloud[1]>
Do you want use the recommended analysis threshold from cloud service? [Y]>
Enter heartbeat interval?[15]>
Do you want to enable SSL communication (port 443) for file reputation? [N]>
Do you want to suppress the verdict update alerts for all messages that are notdelivered to the recipient? [N]>
Choose a file analysis server:1. AMERICAS (https://panacea.threatgrid.com)2. Private analysis cloud[1]> 2
There are no private analysis servers configured.
Choose the operation you want to perform:- NEW - Configure a new private analysis server.[]> new
Enter the file analysis server hostname or IP or URL.[]> 192.1.10.20
Serial Number Private Analysis Server-----------------------------------1 192.1.10.20
Choose the operation you want to perform:- ADD - Add a new private analysis server to the cluster.- EDIT - Edit a private analysis server in the cluster.- DELETE - Delete a private analysis server from the cluster.[]> add
Enter the new private analysis server hostname or IP address or URL to thecluster.[]> 192.1.10.30
Serial Number Private Analysis Server-----------------------------------1 192.1.10.202 192.1.10.30
Choose the operation you want to perform:- ADD - Add a new private analysis server to the cluster.- EDIT - Edit a private analysis server in the cluster.- DELETE - Delete a private analysis server from the cluster.[]>
コマンド:参考例
11
コマンド:参考例
ファイル分析用の Cisco AMP Threat Gridクラスタリングの設定
ampstatus
説明
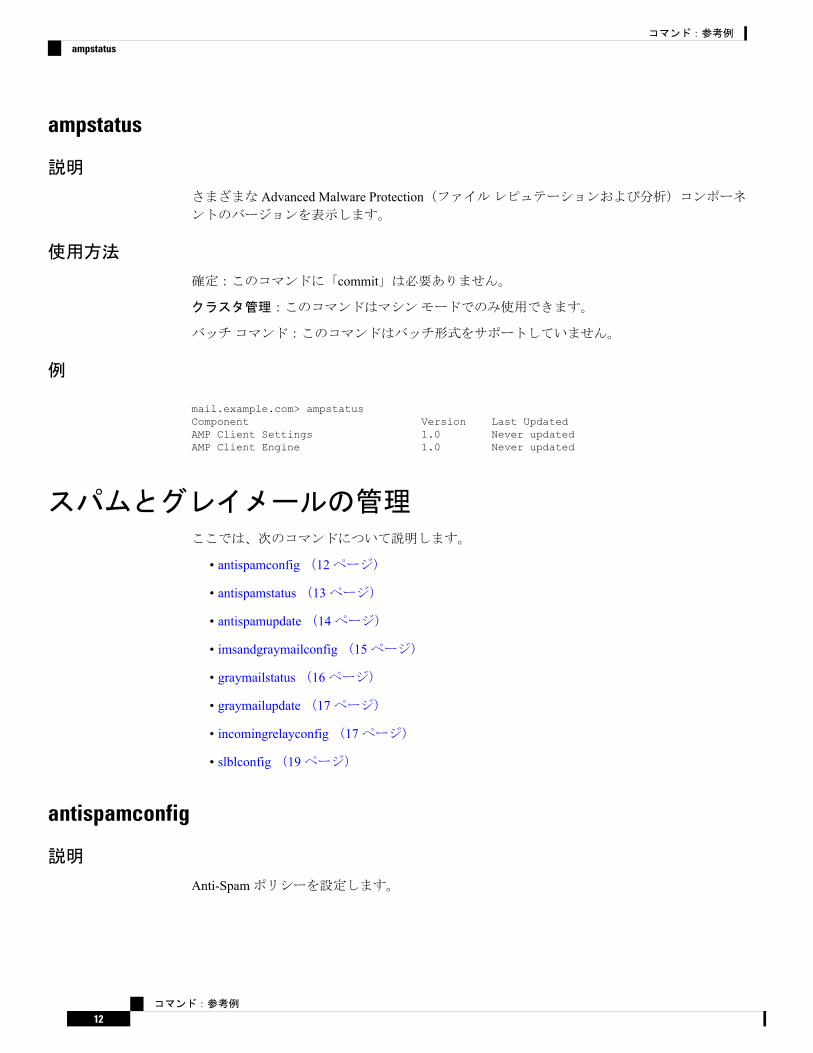
さまざまな Advanced Malware Protection(ファイルレピュテーションおよび分析)コンポーネントのバージョンを表示します。
使用方法
確定:このコマンドに「commit」は必要ありません。
クラスタ管理:このコマンドはマシンモードでのみ使用できます。
バッチコマンド:このコマンドはバッチ形式をサポートしていません。
例
mail.example.com> ampstatusComponent Version Last UpdatedAMP Client Settings 1.0 Never updatedAMP Client Engine 1.0 Never updated
スパムとグレイメールの管理ここでは、次のコマンドについて説明します。
• antispamconfig(12ページ)
• antispamstatus(13ページ)
• antispamupdate(14ページ)
• imsandgraymailconfig(15ページ)
• graymailstatus(16ページ)
• graymailupdate(17ページ)
• incomingrelayconfig(17ページ)
• slblconfig(19ページ)
antispamconfig
説明
Anti-Spamポリシーを設定します。
コマンド:参考例
12
コマンド:参考例
ampstatus
使用方法
確定:このコマンドは「commit」が必要です。
クラスタ管理:このコマンドは、すべてのマシンモード(クラスタ、グループ、マシン)で使
用できます。
バッチコマンド:このコマンドはバッチ形式をサポートしていません。
例
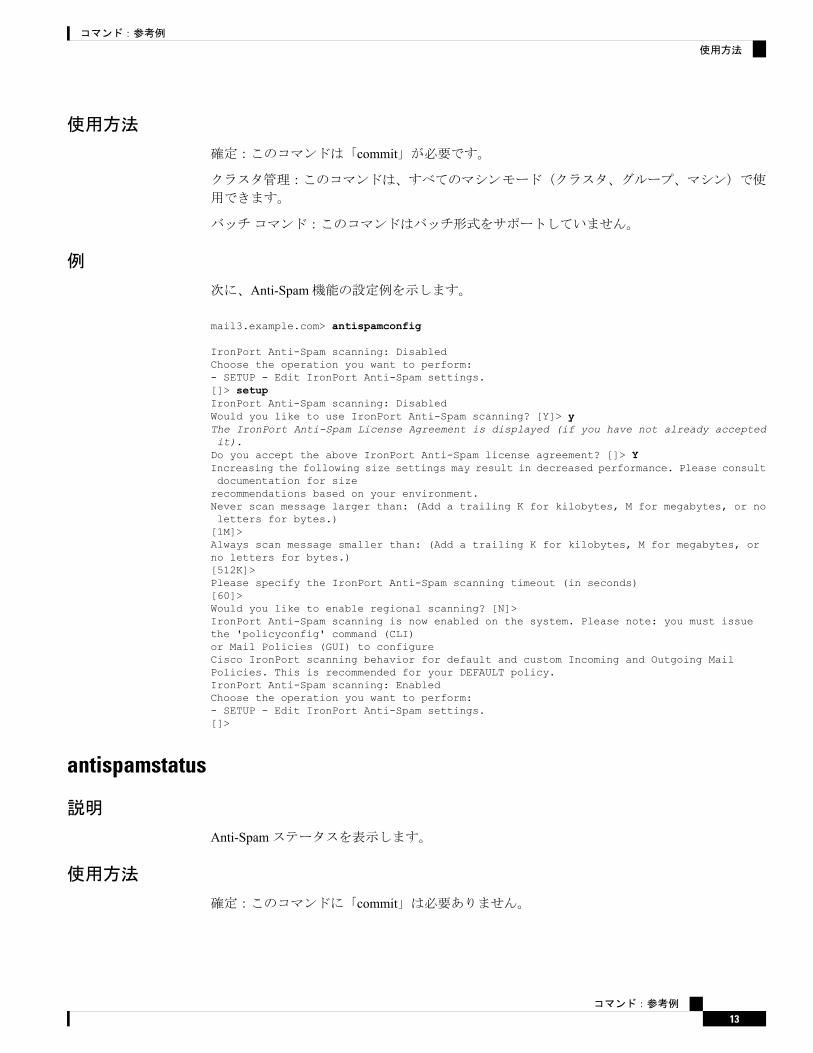
次に、Anti-Spam機能の設定例を示します。
mail3.example.com> antispamconfig
IronPort Anti-Spam scanning: DisabledChoose the operation you want to perform:- SETUP - Edit IronPort Anti-Spam settings.[]> setupIronPort Anti-Spam scanning: DisabledWould you like to use IronPort Anti-Spam scanning? [Y]> yThe IronPort Anti-Spam License Agreement is displayed (if you have not already acceptedit).Do you accept the above IronPort Anti-Spam license agreement? []> YIncreasing the following size settings may result in decreased performance. Please consultdocumentation for sizerecommendations based on your environment.Never scan message larger than: (Add a trailing K for kilobytes, M for megabytes, or noletters for bytes.)[1M]>Always scan message smaller than: (Add a trailing K for kilobytes, M for megabytes, orno letters for bytes.)[512K]>Please specify the IronPort Anti-Spam scanning timeout (in seconds)[60]>Would you like to enable regional scanning? [N]>IronPort Anti-Spam scanning is now enabled on the system. Please note: you must issuethe 'policyconfig' command (CLI)or Mail Policies (GUI) to configureCisco IronPort scanning behavior for default and custom Incoming and Outgoing MailPolicies. This is recommended for your DEFAULT policy.IronPort Anti-Spam scanning: EnabledChoose the operation you want to perform:- SETUP - Edit IronPort Anti-Spam settings.[]>
antispamstatus
説明
Anti-Spamステータスを表示します。
使用方法
確定:このコマンドに「commit」は必要ありません。
コマンド:参考例
13
コマンド:参考例
使用方法
クラスタ管理:このコマンドは、すべてのマシンモード(クラスタ、グループ、マシン)で使
用できます。
バッチコマンド:このコマンドはバッチ形式をサポートしていません。
例
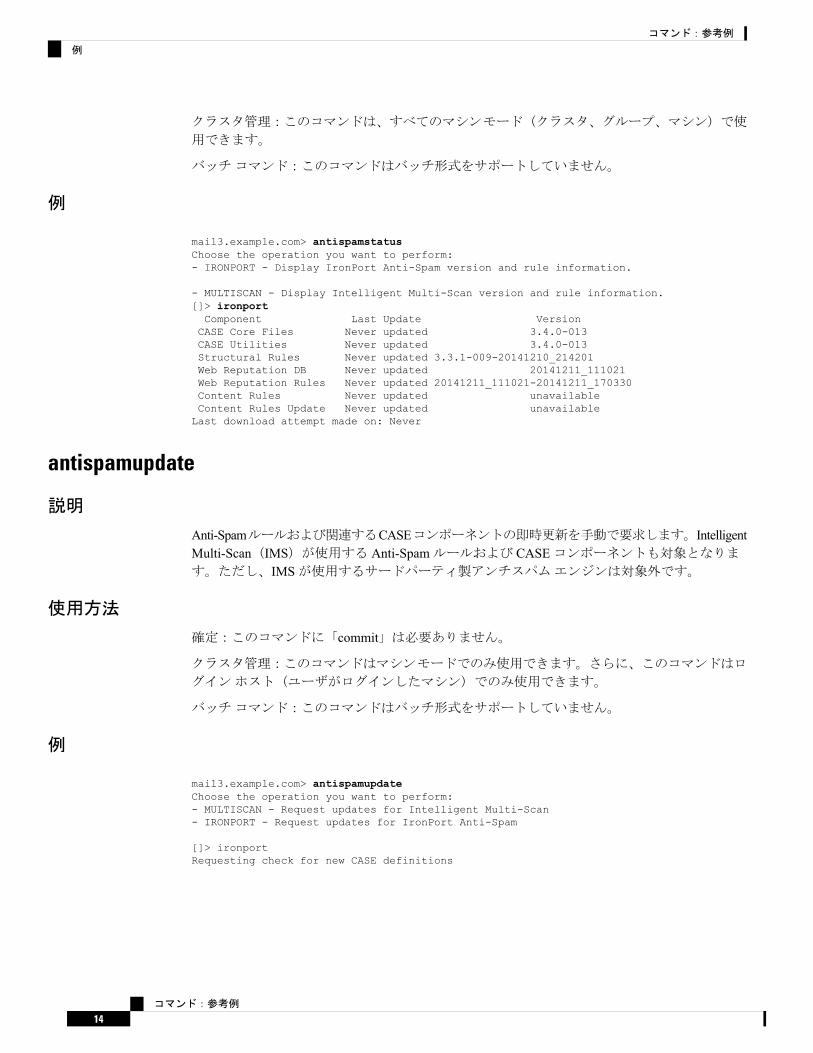
mail3.example.com> antispamstatusChoose the operation you want to perform:- IRONPORT - Display IronPort Anti-Spam version and rule information.
- MULTISCAN - Display Intelligent Multi-Scan version and rule information.[]> ironportComponent Last Update VersionCASE Core Files Never updated 3.4.0-013CASE Utilities Never updated 3.4.0-013Structural Rules Never updated 3.3.1-009-20141210_214201Web Reputation DB Never updated 20141211_111021Web Reputation Rules Never updated 20141211_111021-20141211_170330Content Rules Never updated unavailableContent Rules Update Never updated unavailableLast download attempt made on: Never
antispamupdate
説明
Anti-Spamルールおよび関連するCASEコンポーネントの即時更新を手動で要求します。IntelligentMulti-Scan(IMS)が使用する Anti-Spamルールおよび CASEコンポーネントも対象となります。ただし、IMSが使用するサードパーティ製アンチスパムエンジンは対象外です。
使用方法
確定:このコマンドに「commit」は必要ありません。
クラスタ管理:このコマンドはマシンモードでのみ使用できます。さらに、このコマンドはロ
グインホスト(ユーザがログインしたマシン)でのみ使用できます。
バッチコマンド:このコマンドはバッチ形式をサポートしていません。
例
mail3.example.com> antispamupdateChoose the operation you want to perform:- MULTISCAN - Request updates for Intelligent Multi-Scan- IRONPORT - Request updates for IronPort Anti-Spam
[]> ironportRequesting check for new CASE definitions
コマンド:参考例
14
コマンド:参考例
例
imsandgraymailconfig•説明(15ページ)
•使用方法(15ページ)
•例(15ページ)
説明
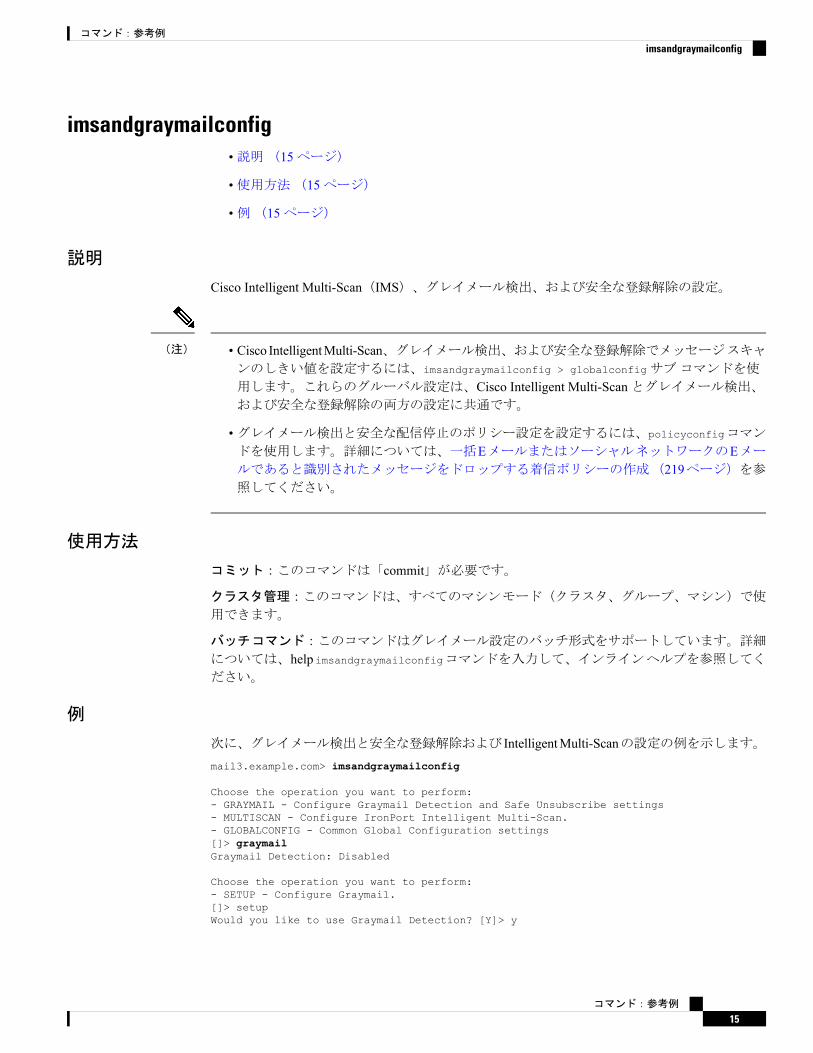
Cisco Intelligent Multi-Scan(IMS)、グレイメール検出、および安全な登録解除の設定。
• Cisco IntelligentMulti-Scan、グレイメール検出、および安全な登録解除でメッセージスキャンのしきい値を設定するには、imsandgraymailconfig > globalconfigサブコマンドを使
用します。これらのグルーバル設定は、Cisco Intelligent Multi-Scanとグレイメール検出、および安全な登録解除の両方の設定に共通です。
•グレイメール検出と安全な配信停止のポリシー設定を設定するには、policyconfigコマン
ドを使用します。詳細については、一括EメールまたはソーシャルネットワークのEメールであると識別されたメッセージをドロップする着信ポリシーの作成(219ページ)を参照してください。
(注)
使用方法
コミット:このコマンドは「commit」が必要です。
クラスタ管理:このコマンドは、すべてのマシンモード(クラスタ、グループ、マシン)で使
用できます。
バッチコマンド:このコマンドはグレイメール設定のバッチ形式をサポートしています。詳細
については、help imsandgraymailconfigコマンドを入力して、インラインヘルプを参照してください。
例
次に、グレイメール検出と安全な登録解除および IntelligentMulti-Scanの設定の例を示します。mail3.example.com> imsandgraymailconfig
Choose the operation you want to perform:- GRAYMAIL - Configure Graymail Detection and Safe Unsubscribe settings- MULTISCAN - Configure IronPort Intelligent Multi-Scan.- GLOBALCONFIG - Common Global Configuration settings[]> graymailGraymail Detection: Disabled
Choose the operation you want to perform:- SETUP - Configure Graymail.[]> setupWould you like to use Graymail Detection? [Y]> y
コマンド:参考例
15
コマンド:参考例
imsandgraymailconfig

Would you like to enable automatic updates for Graymail engine? [Y]> y
Graymail Safe Unsubscribe: DisabledWould you like to use Graymail Safe Unsubscribe? [Y]> y
Graymail Detection and Safe Unsubscribe is now enabled. Please note: The global settingsare recommended only for your DEFAULT mail policy. To configure policy settings, usethe incomingor outgoing policy page on web interface or the 'policyconfig' command in CLI.
[]> multiscanIronPort Intelligent Multi-Scan: Disabled
Choose the operation you want to perform:- SETUP - Edit Intelligent Multi-Scan settings.[]> setup
IronPort Intelligent Multi-Scan scanning: DisabledWould you like to use IronPort Intelligent Multi-Scan scanning? [Y]> yWould you like to enable regional scanning? [N]> n
Intelligent Multi-Scan scanning is now enabled on the system. Please note: you must issuethe 'policyconfig' command (CLI) or Mail Policies (GUI) to configureIntelligent Multi-Scan scanning behavior for default and custom Incoming and OutgoingMail Policies. This is recommended for your DEFAULT policy.
IronPort Intelligent Multi-Scan: Enabled
[]> globalconfig
Choose the operation you want to perform:- SETUP - Configure Common Global settings[]> setup
Increasing the following size settings may result in decreased performance.Please consult documentation for size recommendations based on your environment.
Never scan message larger than: (Add a trailing K for kilobytes,M for megabytes, or no letters for bytes.)[1M]>
Always scan message smaller than: (Add a trailing K for kilobytes,M for megabytes, or no letters for bytes.)[512K]>
Timeout for Scanning Single Message(in seconds):[60]>[]>
graymailstatus
説明
既存のグレイメールルールの詳細を表示します。
使用方法
確定:このコマンドに「commit」は必要ありません。
コマンド:参考例
16
コマンド:参考例
graymailstatus

クラスタ管理:このコマンドは、すべてのマシンモード(クラスタ、グループ、マシン)で使
用できます。
バッチコマンド:このコマンドはバッチ形式をサポートしていません。
例
mail.example.com> graymailstatusComponent Version Last UpdatedGraymail Engine 01.378.53 Never UpdatedGraymail Rules 01.378.53#15 Never updatedGraymail Tools 1.0.03 Never updated
graymailupdate
説明
手動でグレイメールルールの更新を要求します。
使用方法
確定:このコマンドに「commit」は必要ありません。
クラスタ管理:このコマンドは、すべてのマシンモード(クラスタ、グループ、マシン)で使
用できます。
バッチコマンド:このコマンドはバッチ形式をサポートしていません。
例
mail.example.com> graymailupdate
新しいグレイメール更新の検査を要求します。
incomingrelayconfig
説明
incomingrelayconfigコマンドは、着信リレー機能をイネーブルにして設定するために使用します。次の例では、まず着信リレー機能をイネーブルにし、2つのリレーを追加してから、一方を変更し、もう一方を削除しています。
使用方法
確定:このコマンドは「commit」が必要です。
クラスタ管理:このコマンドは、すべてのマシンモード(クラスタ、グループ、マシン)で使
用できます。
バッチコマンド:このコマンドはバッチ形式をサポートしていません。
コマンド:参考例
17
コマンド:参考例
例
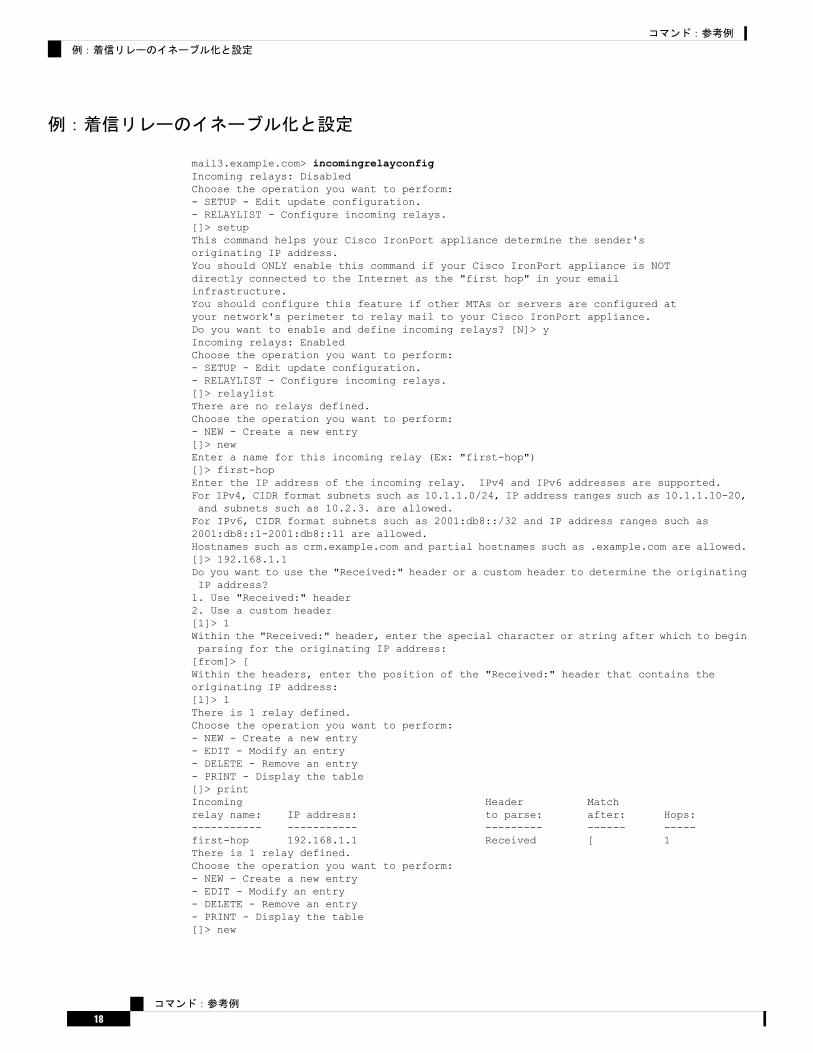
例:着信リレーのイネーブル化と設定
mail3.example.com> incomingrelayconfigIncoming relays: DisabledChoose the operation you want to perform:- SETUP - Edit update configuration.- RELAYLIST - Configure incoming relays.[]> setupThis command helps your Cisco IronPort appliance determine the sender'soriginating IP address.You should ONLY enable this command if your Cisco IronPort appliance is NOTdirectly connected to the Internet as the "first hop" in your emailinfrastructure.You should configure this feature if other MTAs or servers are configured atyour network's perimeter to relay mail to your Cisco IronPort appliance.Do you want to enable and define incoming relays? [N]> yIncoming relays: EnabledChoose the operation you want to perform:- SETUP - Edit update configuration.- RELAYLIST - Configure incoming relays.[]> relaylistThere are no relays defined.Choose the operation you want to perform:- NEW - Create a new entry[]> newEnter a name for this incoming relay (Ex: "first-hop")[]> first-hopEnter the IP address of the incoming relay. IPv4 and IPv6 addresses are supported.For IPv4, CIDR format subnets such as 10.1.1.0/24, IP address ranges such as 10.1.1.10-20,and subnets such as 10.2.3. are allowed.For IPv6, CIDR format subnets such as 2001:db8::/32 and IP address ranges such as2001:db8::1-2001:db8::11 are allowed.Hostnames such as crm.example.com and partial hostnames such as .example.com are allowed.[]> 192.168.1.1Do you want to use the "Received:" header or a custom header to determine the originatingIP address?1. Use "Received:" header2. Use a custom header[1]> 1Within the "Received:" header, enter the special character or string after which to beginparsing for the originating IP address:[from]> [Within the headers, enter the position of the "Received:" header that contains theoriginating IP address:[1]> 1There is 1 relay defined.Choose the operation you want to perform:- NEW - Create a new entry- EDIT - Modify an entry- DELETE - Remove an entry- PRINT - Display the table[]> printIncoming Header Matchrelay name: IP address: to parse: after: Hops:----------- ----------- --------- ------ -----first-hop 192.168.1.1 Received [ 1There is 1 relay defined.Choose the operation you want to perform:- NEW - Create a new entry- EDIT - Modify an entry- DELETE - Remove an entry- PRINT - Display the table[]> new
コマンド:参考例
18
コマンド:参考例
例:着信リレーのイネーブル化と設定
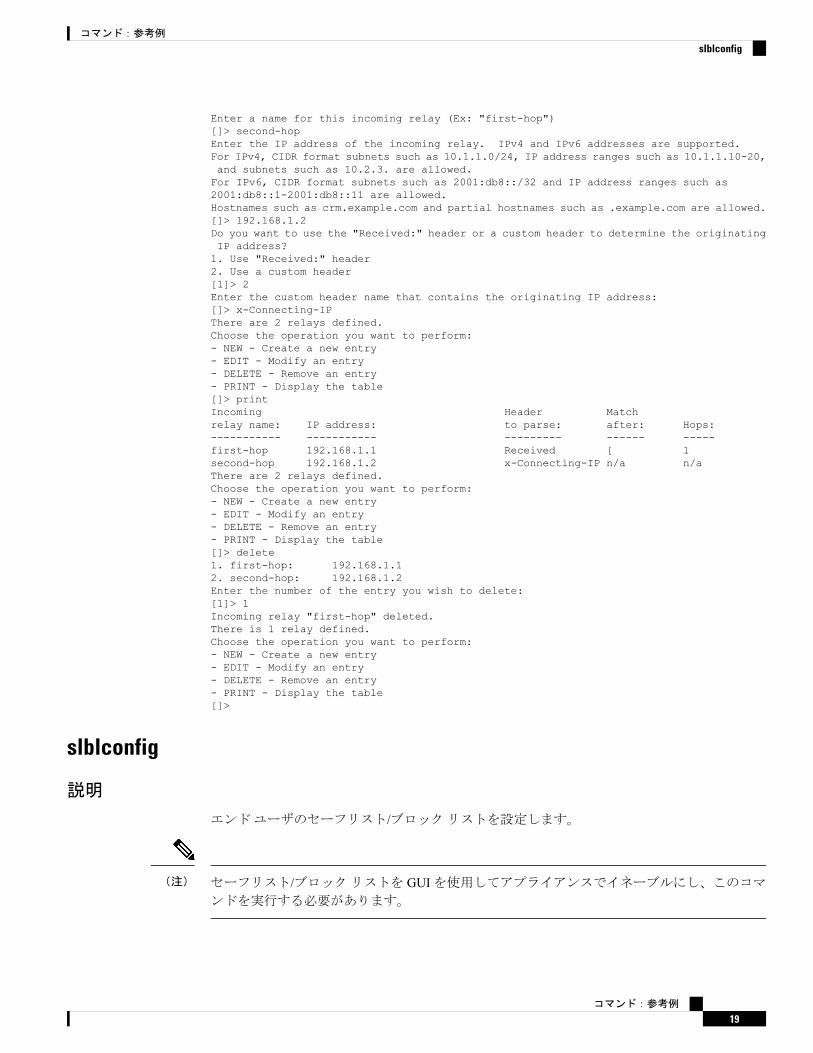
Enter a name for this incoming relay (Ex: "first-hop")[]> second-hopEnter the IP address of the incoming relay. IPv4 and IPv6 addresses are supported.For IPv4, CIDR format subnets such as 10.1.1.0/24, IP address ranges such as 10.1.1.10-20,and subnets such as 10.2.3. are allowed.For IPv6, CIDR format subnets such as 2001:db8::/32 and IP address ranges such as2001:db8::1-2001:db8::11 are allowed.Hostnames such as crm.example.com and partial hostnames such as .example.com are allowed.[]> 192.168.1.2Do you want to use the "Received:" header or a custom header to determine the originatingIP address?1. Use "Received:" header2. Use a custom header[1]> 2Enter the custom header name that contains the originating IP address:[]> x-Connecting-IPThere are 2 relays defined.Choose the operation you want to perform:- NEW - Create a new entry- EDIT - Modify an entry- DELETE - Remove an entry- PRINT - Display the table[]> printIncoming Header Matchrelay name: IP address: to parse: after: Hops:----------- ----------- --------- ------ -----first-hop 192.168.1.1 Received [ 1second-hop 192.168.1.2 x-Connecting-IP n/a n/aThere are 2 relays defined.Choose the operation you want to perform:- NEW - Create a new entry- EDIT - Modify an entry- DELETE - Remove an entry- PRINT - Display the table[]> delete1. first-hop: 192.168.1.12. second-hop: 192.168.1.2Enter the number of the entry you wish to delete:[1]> 1Incoming relay "first-hop" deleted.There is 1 relay defined.Choose the operation you want to perform:- NEW - Create a new entry- EDIT - Modify an entry- DELETE - Remove an entry- PRINT - Display the table[]>
slblconfig
説明
エンドユーザのセーフリスト/ブロックリストを設定します。
セーフリスト/ブロックリストを GUIを使用してアプライアンスでイネーブルにし、このコマンドを実行する必要があります。
(注)
コマンド:参考例
19
コマンド:参考例
slblconfig

使用方法
確定:このコマンドに「commit」は必要ありません。
バッチコマンド:このコマンドはバッチ形式をサポートしています。
バッチ形式 -インポート
バッチ形式
エンドユーザのセーフリスト/ブロックリストすべてのエントリを、指定のファイルの現在のエントリと置き換えます。
slblconfig import <filename> <ignore invalid entries>
• filename:インポートする必要があるファイルの名前。ファイルは、アプライアンスの/configurationディレクトリに格納する必要があります。
• ignore invalid entries:無効なエントリを無視するかどうかを指定します。「はい(Yes)」または「いいえ(No)」。
バッチ形式 -エクスポート
エンドユーザのセーフリスト/ブロックリストすべてのエントリをアプライアンスのファイルにエクスポートします。
slblconfig export
アプライアンスは、次の命名規則を使用して /configurationディレクトリに CSVファイルを保存します。
slbl<timestamp><serial number>.csv.
例:セーフリスト/ブロックリストエントリのインポート
mail.example.com>slblconfigEnd-User Safelist/Blocklist: EnabledChoose the operation you want to perform:- IMPORT - Replace all entries in the End-User Safelist/Blocklist.- EXPORT - Export all entries from the End-User Safelist/Blocklist.[]>importCurrently available End-User Safelist/Blocklist files:1. slbl.csvChoose the file to import from.[1]>1Do you want to ignore invalid entries? [Y]>YEnd-User Safelist/Blocklist import has been initiated...
コマンド:参考例
20
コマンド:参考例
使用方法

Please wait while this operation executes.End-User Safelist/Blocklist successfully imported.Choose the operation you want to perform:- IMPORT - Replace all entries in the End-User Safelist/Blocklist.- EXPORT - Export all entries from the End-User Safelist/Blocklist.[]>
アンチウイルスここでは、次の CLIコマンドについて説明します。
• antivirusconfig(21ページ)• antivirusstatus(23ページ)• antivirusupdate(23ページ)
antivirusconfig
説明
Anti-Virusポリシーを設定します。
使用方法
確定:このコマンドは「commit」が必要です。
クラスタ管理:このコマンドは、すべてのマシンモード(クラスタ、グループ、マシン)で使
用できます。
バッチコマンド:このコマンドはバッチ形式をサポートしていません。
例
次の例では、antivirusconfigコマンドを使用して、システム上でSophosウイルススキャンをイネーブルにし、タイムアウト値を60秒に設定しています。アップデートサーバ、アップデート間隔、およびオプションのプロキシサーバを設定する方法については、updateconfig(122ページ)を参照してください。
systemsetupコマンドの実行時にライセンス契約に同意しなかった場合、antivirusconfigコマ
ンドを初めて実行するときにライセンス契約書が表示されます。ライセンス契約に同意しなけ
れば、Sophosウイルススキャンエンジンはアプライアンスでイネーブルになりません。
(注)
mail3.example.com> antivirusconfig
Choose the operation you want to perform:- SOPHOS - Configure Sophos Anti-Virus.- MCAFEE - Configure McAfee Anti-Virus.[]> sophos
コマンド:参考例
21
コマンド:参考例
アンチウイルス
Sophos Anti-Virus: Disabled
Choose the operation you want to perform:
- SETUP - Configure Sophos Anti-Virus.
[]> setup
Sophos Anti-Virus scanning: Disabled
Would you like to use Sophos Anti-Virus scanning? [Y]> y
(First time users see the license agreement displayed here.)
Please specify the Anti-Virus scanning timeout (in seconds)[60]> 60
Would you like to enable automatic updates for Sophos engine? [Y] > Y
Sophos Anti-Virus scanning is now enabled on the system.
Please note: you must issue the 'policyconfig' command (CLI) or MailPolicies (GUI) to configure Sophos Anti-Virus scanning behavior for default and customIncoming and Outgoing Mail Policies.This is recommended for your DEFAULT policy.
Sophos Anti-Virus: EnabledChoose the operation you want to perform:
- SETUP - Configure Sophos Anti-Virus.[]>
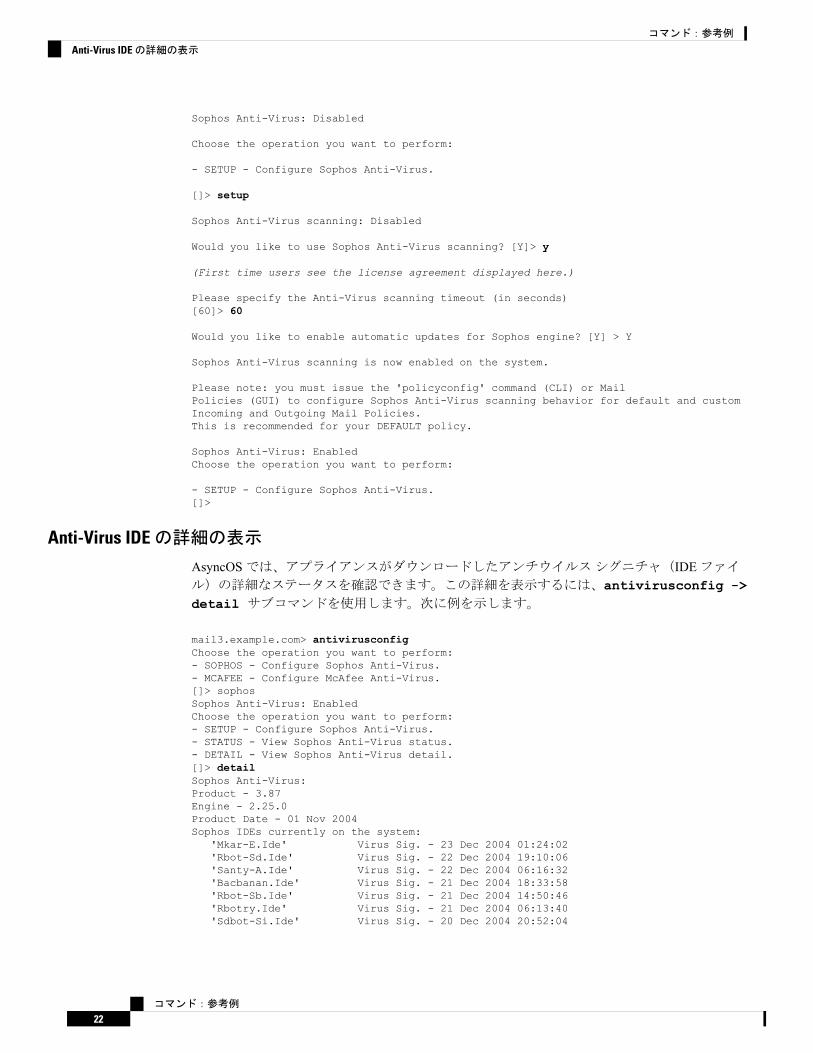
Anti-Virus IDEの詳細の表示
AsyncOSでは、アプライアンスがダウンロードしたアンチウイルスシグニチャ(IDEファイル)の詳細なステータスを確認できます。この詳細を表示するには、antivirusconfig ->detail サブコマンドを使用します。次に例を示します。
mail3.example.com> antivirusconfigChoose the operation you want to perform:- SOPHOS - Configure Sophos Anti-Virus.- MCAFEE - Configure McAfee Anti-Virus.[]> sophosSophos Anti-Virus: EnabledChoose the operation you want to perform:- SETUP - Configure Sophos Anti-Virus.- STATUS - View Sophos Anti-Virus status.- DETAIL - View Sophos Anti-Virus detail.[]> detailSophos Anti-Virus:Product - 3.87Engine - 2.25.0Product Date - 01 Nov 2004Sophos IDEs currently on the system:
'Mkar-E.Ide' Virus Sig. - 23 Dec 2004 01:24:02'Rbot-Sd.Ide' Virus Sig. - 22 Dec 2004 19:10:06'Santy-A.Ide' Virus Sig. - 22 Dec 2004 06:16:32'Bacbanan.Ide' Virus Sig. - 21 Dec 2004 18:33:58'Rbot-Sb.Ide' Virus Sig. - 21 Dec 2004 14:50:46'Rbotry.Ide' Virus Sig. - 21 Dec 2004 06:13:40'Sdbot-Si.Ide' Virus Sig. - 20 Dec 2004 20:52:04
コマンド:参考例
22
コマンド:参考例
Anti-Virus IDEの詳細の表示
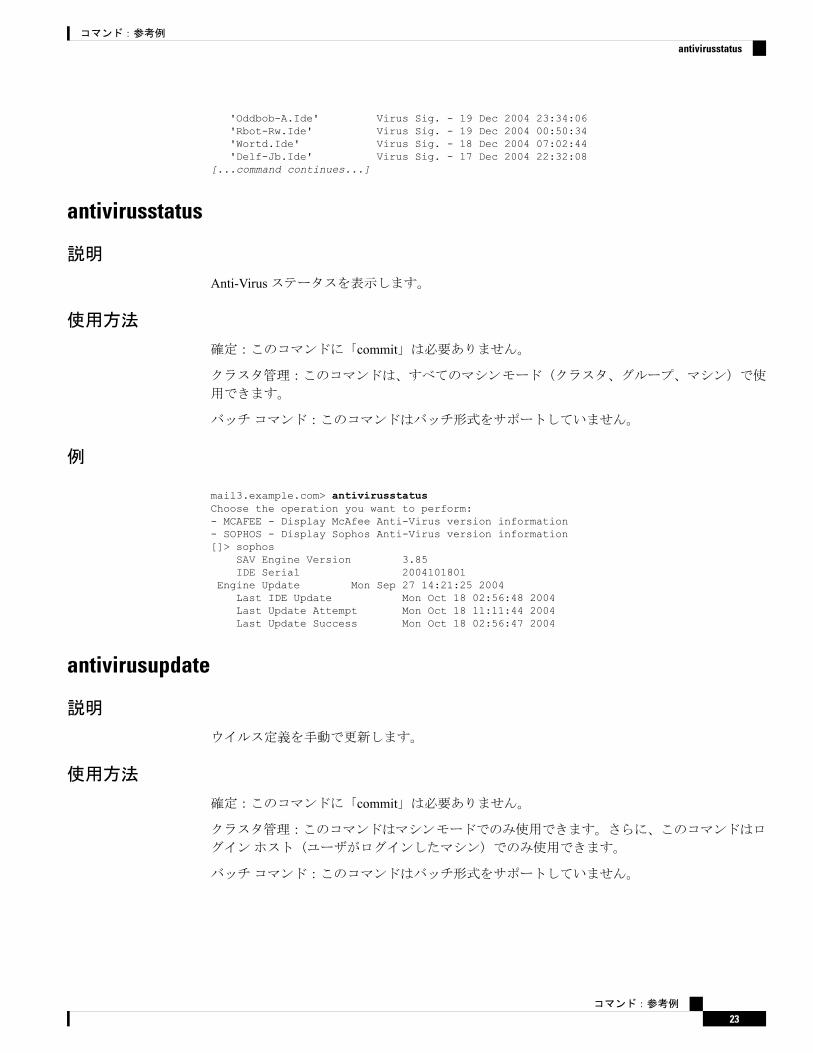
'Oddbob-A.Ide' Virus Sig. - 19 Dec 2004 23:34:06'Rbot-Rw.Ide' Virus Sig. - 19 Dec 2004 00:50:34'Wortd.Ide' Virus Sig. - 18 Dec 2004 07:02:44'Delf-Jb.Ide' Virus Sig. - 17 Dec 2004 22:32:08
[...command continues...]
antivirusstatus
説明
Anti-Virusステータスを表示します。
使用方法
確定:このコマンドに「commit」は必要ありません。
クラスタ管理:このコマンドは、すべてのマシンモード(クラスタ、グループ、マシン)で使
用できます。
バッチコマンド:このコマンドはバッチ形式をサポートしていません。
例
mail3.example.com> antivirusstatusChoose the operation you want to perform:- MCAFEE - Display McAfee Anti-Virus version information- SOPHOS - Display Sophos Anti-Virus version information[]> sophos
SAV Engine Version 3.85IDE Serial 2004101801
Engine Update Mon Sep 27 14:21:25 2004Last IDE Update Mon Oct 18 02:56:48 2004Last Update Attempt Mon Oct 18 11:11:44 2004Last Update Success Mon Oct 18 02:56:47 2004
antivirusupdate
説明
ウイルス定義を手動で更新します。
使用方法
確定:このコマンドに「commit」は必要ありません。
クラスタ管理:このコマンドはマシンモードでのみ使用できます。さらに、このコマンドはロ
グインホスト(ユーザがログインしたマシン)でのみ使用できます。
バッチコマンド:このコマンドはバッチ形式をサポートしていません。
コマンド:参考例
23
コマンド:参考例
antivirusstatus

例
mail3.example.com> antivirusupdateChoose the operation you want to perform:- MCAFEE - Request updates for McAfee Anti-Virus- SOPHOS - Request updates for Sophos Anti-Virus[]> sophosRequesting update of virus definitionsmail3.example.com>
コマンドラインの管理ここでは、次の CLIコマンドについて説明します。
• commit(24ページ)• commitdetail(25ページ)• clearchangesまたは clear(25ページ)• helpまたは hまたは ?(26ページ)• rollbackconfig(26ページ)• quitまたは qまたは exit(27ページ)
commit
説明
変更を確定します。commitコマンドの後のコメントの入力は任意です。
使用方法
確定:該当なし
クラスタ管理:このコマンドは、すべてのマシンモード(クラスタ、グループ、マシン)で使
用できます。
バッチコマンド:このコマンドはバッチ形式をサポートしていません。
例
mail3.example.com> commitPlease enter some comments describing your changes:[]> Changed "psinet" IP Interface to a different IP ad dressDo you want to save the current configuration for rollback? [Y]> nChanges committed: Fri May 23 11:42:12 2014 GMT
コマンド:参考例
24
コマンド:参考例
例

commitdetail
説明
最後の確定に関する詳細情報を表示します。
使用方法
確定:このコマンドに「commit」は必要ありません。
クラスタ管理:このコマンドは、すべてのマシンモード(クラスタ、グループ、マシン)で使
用できます。
バッチコマンド:このコマンドはバッチ形式をサポートしていません。
例
mail3.example.com> commitdetailCommit at Mon Apr 18 13:46:28 2005 PDT with comments: "Enabled loopback".mail3.example.com>
clearchangesまたは clear
説明
clearコマンドは、commitまたは clearコマンドが最後に実行された以降に設定に対して行われた変更をすべてクリアします。
使用方法
確定:このコマンドに「commit」は必要ありません。
クラスタ管理:このコマンドは、すべてのマシンモード(クラスタ、グループ、マシン)で使
用できます。
バッチコマンド:このコマンドはバッチ形式をサポートしていません。
例
mail3.example.com> clearAre you sure you want to clear all changes since the last commit? [Y]> yChanges cleared: Mon Jan 01 12:00:01 2003mail3.example.com>
コマンド:参考例
25
コマンド:参考例
commitdetail

helpまたは hまたは ?
説明
helpコマンドを実行すると、使用可能なすべての CLIコマンドが表示され、各コマンドの簡単な説明を参照できます。helpコマンドは、コマンドプロンプトで helpと入力するか、疑問符(?)を 1つ入力して実行できます。
使用方法
確定:このコマンドに「commit」は必要ありません。
クラスタ管理:このコマンドは、すべてのマシンモード(クラスタ、グループ、マシン)で使
用できます。
バッチコマンド:このコマンドはバッチ形式をサポートしていません。
例
mail3.example.com> helpDisplays the list of all available commands.
rollbackconfigrollbackconfigコマンドを使用すると、直前に確定した 10の設定のうち 1つをロールバックできます。
使用方法
確定:このコマンドは「commit」が必要です。
クラスタ管理:このコマンドはマシンモードでのみ使用できます。
バッチコマンド:このコマンドはバッチ形式をサポートしていません。
例
mail.example.com> rollbackconfigPrevious Commits:
Committed On User Description---------------------------------------------------------------------------------1. Fri May 23 06:53:43 2014 admin new user2. Fri May 23 06:50:57 2014 admin rollback3. Fri May 23 05:47:26 2014 admin4. Fri May 23 05:45:51 2014 admin edit userEnter the number of the config to revert to.[]> 2Are you sure you want to roll back the configuration? [N]> yReverted to Fri May 23 06:50:57 2014 admin rollbackDo you want to commit this configuration now? [N]> yCommitted the changes successfully
コマンド:参考例
26
コマンド:参考例
helpまたは hまたは ?

quitまたは qまたは exit
説明
quitコマンドを実行すると、CLIアプリケーションからログアウトします。確定されていない設定変更はクリアされます。quitコマンドは電子メール操作には影響しません。ログアウトはログファイルに記録されます(exitの入力は、quitの入力と同じです)。
使用方法
確定:このコマンドに「commit」は必要ありません。
クラスタ管理:このコマンドは、すべてのマシンモード(クラスタ、グループ、マシン)で使
用できます。
バッチコマンド:このコマンドはバッチ形式をサポートしていません。
例
mail3.example.com> quitConfiguration changes entered but not committed. Exiting will lose changes.Type 'commit' at the command prompt to commit changes.Are you sure you wish to exit? [N]> Y
コンフィギュレーションファイルの管理ここでは、次の CLIコマンドについて説明します。
• loadconfig(27ページ)• mailconfig(29ページ)• resetconfig (29ページ)• saveconfig(30ページ)• showconfig(31ページ)
loadconfig
説明
コンフィギュレーションファイルをロードします。
クラスタ化されたマシンへの設定のロードは GUIを使用する場合にのみサポートされます。手順については、『User Guide for AsyncOS for Cisco Email Security Appliances』を参照してください。
(注)
コマンド:参考例
27
コマンド:参考例
quitまたは qまたは exit
使用方法
確定:このコマンドは「commit」が必要です。
クラスタ管理:このコマンドは、すべてのマシンモード(クラスタ、グループ、マシン)で使
用できます。
バッチコマンド:このコマンドはバッチ形式をサポートしていません。
例
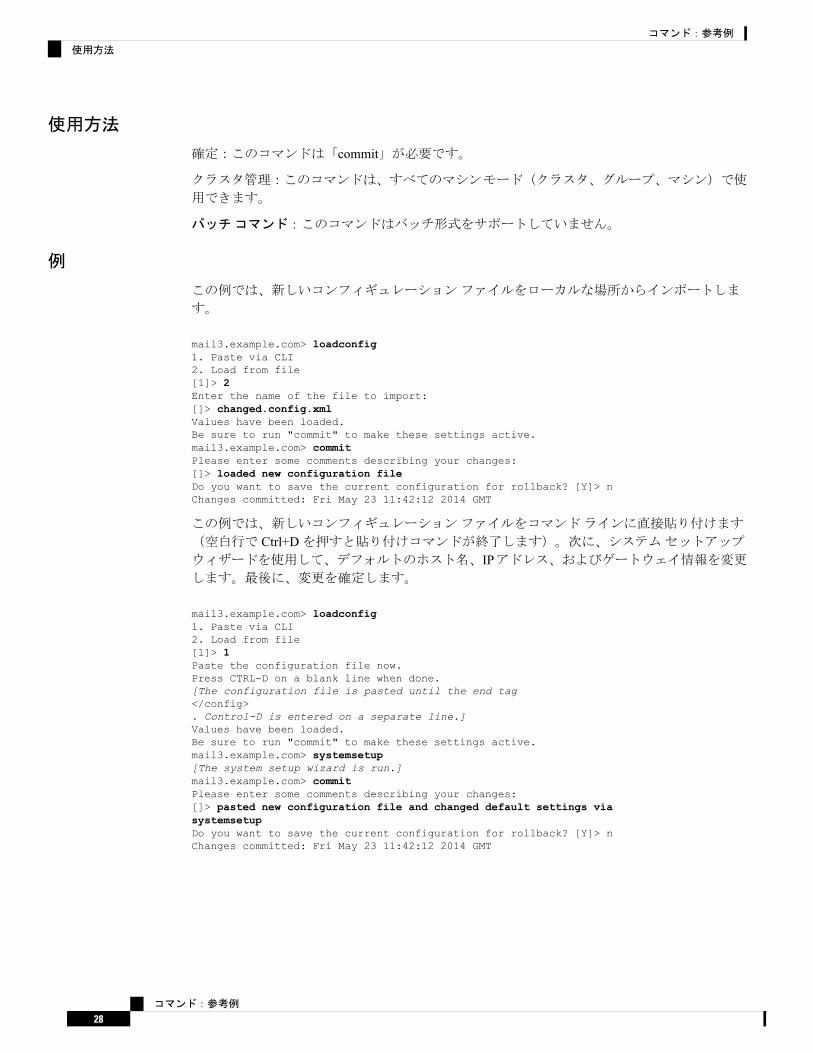
この例では、新しいコンフィギュレーションファイルをローカルな場所からインポートしま
す。
mail3.example.com> loadconfig1. Paste via CLI2. Load from file[1]> 2Enter the name of the file to import:[]> changed.config.xmlValues have been loaded.Be sure to run "commit" to make these settings active.mail3.example.com> commitPlease enter some comments describing your changes:[]> loaded new configuration fileDo you want to save the current configuration for rollback? [Y]> nChanges committed: Fri May 23 11:42:12 2014 GMT
この例では、新しいコンフィギュレーションファイルをコマンドラインに直接貼り付けます
(空白行で Ctrl+Dを押すと貼り付けコマンドが終了します)。次に、システムセットアップウィザードを使用して、デフォルトのホスト名、IPアドレス、およびゲートウェイ情報を変更します。最後に、変更を確定します。
mail3.example.com> loadconfig1. Paste via CLI2. Load from file[1]> 1Paste the configuration file now.Press CTRL-D on a blank line when done.[The configuration file is pasted until the end tag</config>. Control-D is entered on a separate line.]Values have been loaded.Be sure to run "commit" to make these settings active.mail3.example.com> systemsetup[The system setup wizard is run.]mail3.example.com> commitPlease enter some comments describing your changes:[]> pasted new configuration file and changed default settings viasystemsetupDo you want to save the current configuration for rollback? [Y]> nChanges committed: Fri May 23 11:42:12 2014 GMT
コマンド:参考例
28
コマンド:参考例
使用方法

mailconfig
説明
設定をテストする際は、mailconfigコマンドを使用して、systemsetupコマンドで作成したばかりのシステム設定データを含むテスト電子メールをただちに送信できます。
使用方法
確定:このコマンドに「commit」は必要ありません。
クラスタ管理:このコマンドは、すべてのマシンモード(クラスタ、グループ、マシン)で使
用できます。
バッチコマンド:このコマンドはバッチ形式をサポートしていません。
例
mail.example.com> mailconfigPlease enter the email address to which you want to send the configuration file.Separate multiple addresses with commas.[]> [email protected] the passphrase option:1. Mask passphrases (Files with masked passphrases cannot be loaded using loadconfigcommand)2. Encrypt passphrases3. Plain passphrases[1]> 2The configuration file has been sent to [email protected].
利用可能なメールボックスに設定を送信して、システムでネットワーク上に電子メールを送信
できることを確認します。
セキュリティを強化するために、アプライアンスの機密データの暗号化を fipsconfigコマンドでイネーブルにしている場合、Plain passwordsオプションは使用できません。
(注)
resetconfig
説明
アプライアンスを物理的に移動する際、出荷時の初期状態で始めなければならない場合があり
ます。resetconfigコマンドは、すべての設定値を出荷時の初期状態にリセットします。このコマンドを実行すると元に戻せないため、ユニットを移動する場合や、設定の問題を解決する最
後の手段としてのみ使用してください。resetconfigコマンドの実行後に CLIに再接続してからsystemsetupコマンドを実行することを推奨します。
コマンド:参考例
29
コマンド:参考例
mailconfig

resetconfigコマンドは、アプライアンスがオフライン状態にあるときにのみ動作します。resetconfigコマンドが完了すると、systemsetupコマンドを再び実行する前であってもアプライアンスは自動的にオンライン状態に戻ります。resetconfigコマンドを実行する前に電子メールの送信が中断された場合は、resetconfigコマンドが完了したときに電子メールの送信が再試行されます。
(注)
resetconfigコマンドを実行すると、すべてのネットワーク設定が出荷時デフォルト値に戻ります。場合によっては、CLIから切断され、アプライアンスに接続するために使用したサービス(FTP、Telnet、SSH、HTTP、HTTPS)がディセーブルにされ、userconfigコマンドで作成した追加のユーザアカウントが削除されます。このコマンドは、シリアルインターフェイスを使
用するか、またはデフォルトの Adminユーザアカウントから管理ポート上のデフォルト設定を使用して CLIに再接続できない場合は使用しないでください。
危険
使用方法
確定:このコマンドに「commit」は必要ありません。
クラスタ管理:このコマンドはマシンモードでのみ使用できます。さらに、このコマンドはロ
グインホスト(ユーザがログインしたマシン)でのみ使用できます。このコマンドを使用する
には、ローカルファイルシステムにアクセスできる必要があります。
バッチコマンド:このコマンドはバッチ形式をサポートしていません。
例
mail3.example.com> suspendDelay (seconds, minimum 30):[30]> 45Waiting for listeners to exit...Receiving suspended.Waiting for outgoing deliveries to finish...Mail delivery suspended.mail3.example.com>resetconfigAre you sure you want to reset all configuration values? [N]> YAll settings have been restored to the factory default.
saveconfig
説明
saveconfigコマンドは、一意のファイル名を使用してコンフィギュレーションファイルをconfigurationディレクトリに保存します。
コマンド:参考例
30
コマンド:参考例
使用方法

クラスタ化した環境の場合、このコマンドは、完全なクラスタ設定を保存します。クラスタ化
したマシンでこのコマンドを実行するには、コンフィギュレーションモードをクラスタに変更
します。
(注)
使用方法
確定:このコマンドに「commit」は必要ありません。
クラスタ管理:このコマンドは、すべてのマシンモード(クラスタ、グループ、マシン)で使
用できます。
バッチコマンド:このコマンドはバッチ形式をサポートしていません。
例
次の例では、コンフィギュレーションファイルのパスフレーズは暗号化され、configurationディレクトリに保存されます。
mail.example.com> saveconfigChoose the passphrase option:1. Mask passphrases (Files with masked passphrases cannot be loaded using loadconfigcommand)2. Encrypt passphrases
[1]> 2File written on machine "mail.example.com" to the location"/configuration/C100V-4232116C4E14C70C4C7F-7898DA3BD955-20140319T050635.xml".Configuration saved.
セキュリティを強化するために、アプライアンスの機密データの暗号化を fipsconfigコマンドでイネーブルにしている場合、Plain passwordsオプションは使用できません。
(注)
showconfig
説明
showconfigコマンドは、現在の設定を画面に出力します。
使用方法
確定:このコマンドに「commit」は必要ありません。
クラスタ管理:このコマンドは、すべてのマシンモード(クラスタ、グループ、マシン)で使
用できます。
バッチコマンド:このコマンドはバッチ形式をサポートしていません。
コマンド:参考例
31
コマンド:参考例
使用方法
例
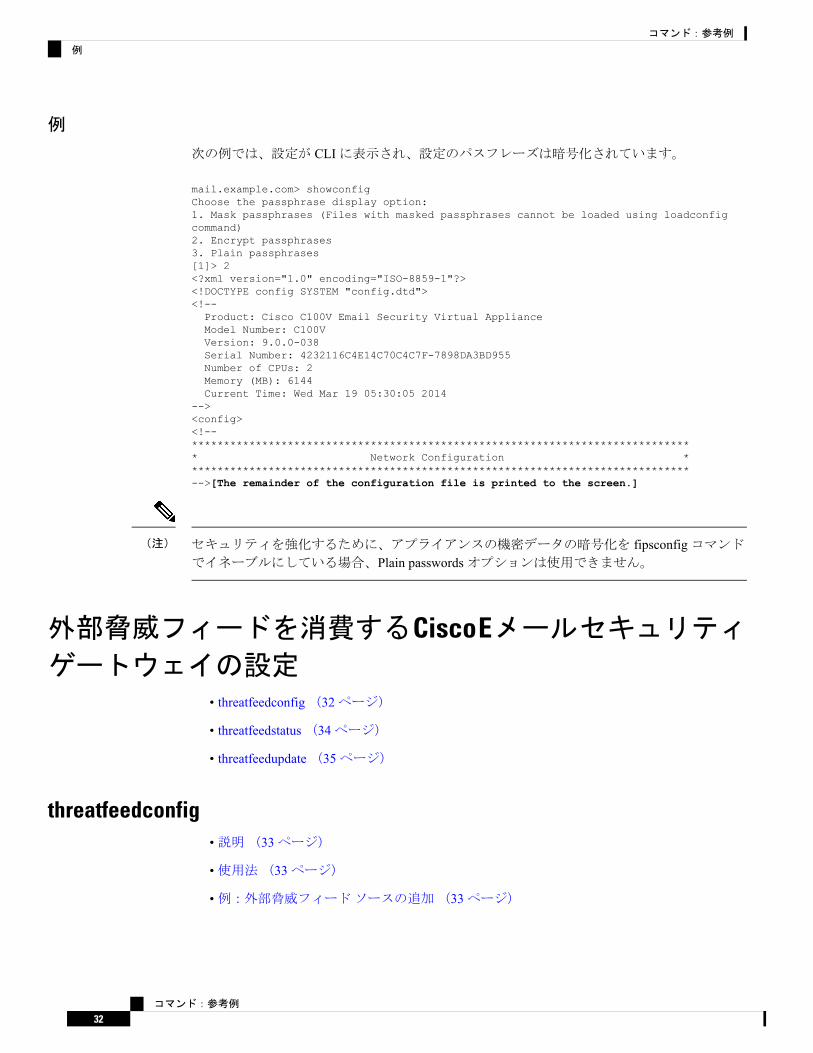
次の例では、設定が CLIに表示され、設定のパスフレーズは暗号化されています。
mail.example.com> showconfigChoose the passphrase display option:1. Mask passphrases (Files with masked passphrases cannot be loaded using loadconfigcommand)2. Encrypt passphrases3. Plain passphrases[1]> 2<?xml version="1.0" encoding="ISO-8859-1"?><!DOCTYPE config SYSTEM "config.dtd"><!--Product: Cisco C100V Email Security Virtual ApplianceModel Number: C100VVersion: 9.0.0-038Serial Number: 4232116C4E14C70C4C7F-7898DA3BD955Number of CPUs: 2Memory (MB): 6144Current Time: Wed Mar 19 05:30:05 2014
--><config><!--******************************************************************************* Network Configuration *******************************************************************************-->[The remainder of the configuration file is printed to the screen.]
セキュリティを強化するために、アプライアンスの機密データの暗号化を fipsconfigコマンドでイネーブルにしている場合、Plain passwordsオプションは使用できません。
(注)
外部脅威フィードを消費するCiscoEメールセキュリティゲートウェイの設定
• threatfeedconfig(32ページ)
• threatfeedstatus(34ページ)
• threatfeedupdate(35ページ)
threatfeedconfig•説明(33ページ)
•使用法(33ページ)
•例:外部脅威フィードソースの追加(33ページ)
コマンド:参考例
32
コマンド:参考例
例
説明
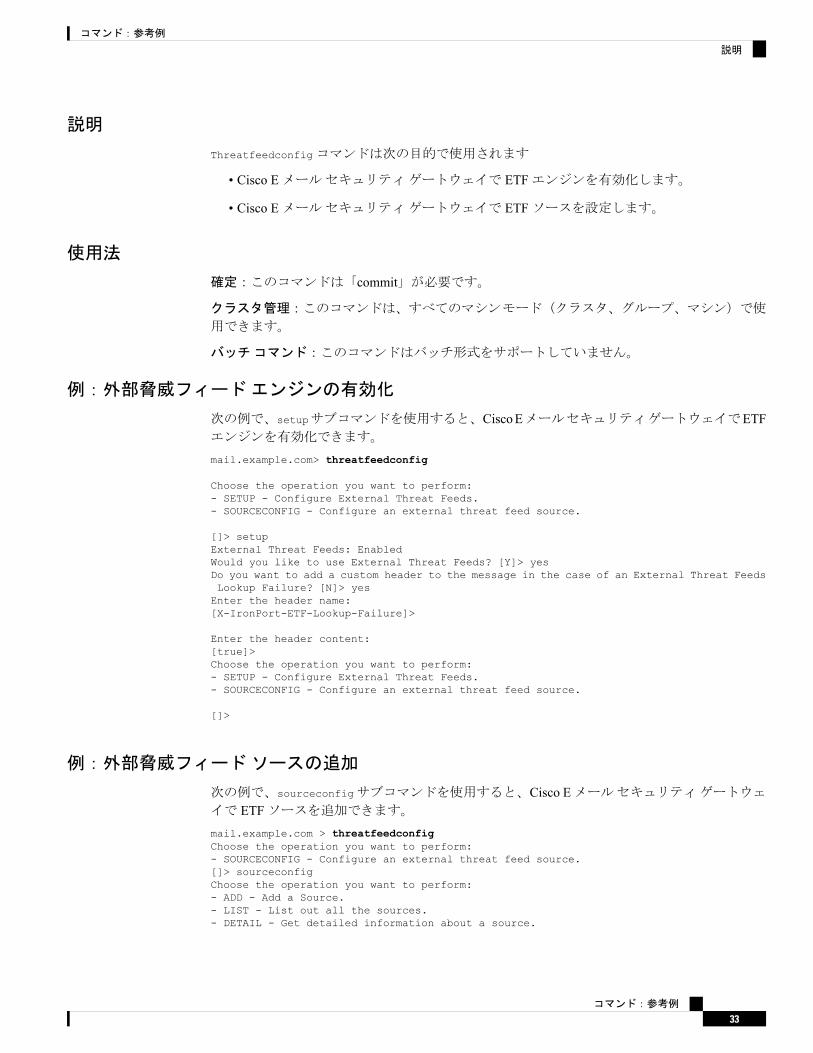
Threatfeedconfigコマンドは次の目的で使用されます
• Cisco Eメールセキュリティゲートウェイで ETFエンジンを有効化します。
• Cisco Eメールセキュリティゲートウェイで ETFソースを設定します。
使用法
確定:このコマンドは「commit」が必要です。
クラスタ管理:このコマンドは、すべてのマシンモード(クラスタ、グループ、マシン)で使
用できます。
バッチコマンド:このコマンドはバッチ形式をサポートしていません。
例:外部脅威フィードエンジンの有効化
次の例で、setupサブコマンドを使用すると、CiscoEメールセキュリティゲートウェイでETFエンジンを有効化できます。
mail.example.com> threatfeedconfig
Choose the operation you want to perform:- SETUP - Configure External Threat Feeds.- SOURCECONFIG - Configure an external threat feed source.
[]> setupExternal Threat Feeds: EnabledWould you like to use External Threat Feeds? [Y]> yesDo you want to add a custom header to the message in the case of an External Threat FeedsLookup Failure? [N]> yesEnter the header name:[X-IronPort-ETF-Lookup-Failure]>
Enter the header content:[true]>Choose the operation you want to perform:- SETUP - Configure External Threat Feeds.- SOURCECONFIG - Configure an external threat feed source.
[]>
例:外部脅威フィードソースの追加
次の例で、sourceconfigサブコマンドを使用すると、Cisco Eメールセキュリティゲートウェイで ETFソースを追加できます。mail.example.com > threatfeedconfigChoose the operation you want to perform:- SOURCECONFIG - Configure an external threat feed source.[]> sourceconfigChoose the operation you want to perform:- ADD - Add a Source.- LIST - List out all the sources.- DETAIL - Get detailed information about a source.
コマンド:参考例
33
コマンド:参考例
説明

- EDIT - Edit a source.- SUSPEND - Suspend a source.- RESUME - Resume a source.- DELETE - Delete a source.[]> addChoose the operation you want to perform:- POLL URL - Add an external threat feed source using the polling path and collectionname.[]> poll urlEnter a name for the external threat feed source:[]> test_sourceEnter a description for the external threat feed source (optional):[]> test_sourceEnter the host name for the external threat feed source:[]> hailataxii.comEnter the polling path for the external threat feed source:[]> /taxii-dataEnter the collection name for the external threat feed source:[]> guest.Abuse_chEnter the polling interval:The polling interval can be an alphanumeric value that consists of a combination ofminutes, hours, or days followed by 'm','h' or 'd' suffixes. The numericvalues that are not entered with a suffix are considered as minutes by default. Theminimum value is 15 minutes.[60m]> 30
Enter the age of the threat feed:The value for the age must be between 1 and 365 days. Enter the age of the threat feedthat you want to fetch from the TAXII server. For example, if the ageis 30 days, the appliance fetches all threat feeds whose age is up to 30 days only.[30]> 20
Enter the time span for each poll segment:The age of threat feeds for a poll can be split into different poll segments basedon the time span entered.The minimum time span for a poll segment is 1 day. The maximum time span for apoll segment is the value entered in the 'Age of Threat Feeds' field.For example, if the age of the threat feeds is 30 days and the TAXII server has a fixedlimit onthe age of threat feeds (for example, '20 days'), enter the fixed limit, which must beless thanthe age of the threat feeds configured on your appliance.[30]> 5
Do you want to use HTTPS? [Y]> yesEnter the polling port:[443]> 443Do you want to use a proxy server for the threat feed source? [N]> noDo you want to configure user credentials for the external threat feed source? [Y]> notest_source successfully added.
threatfeedstatus•説明(35ページ)
•使用法(35ページ)
•例:外部脅威フィードエンジンの現在のバージョンの表示(35ページ)
コマンド:参考例
34
コマンド:参考例
threatfeedstatus
説明
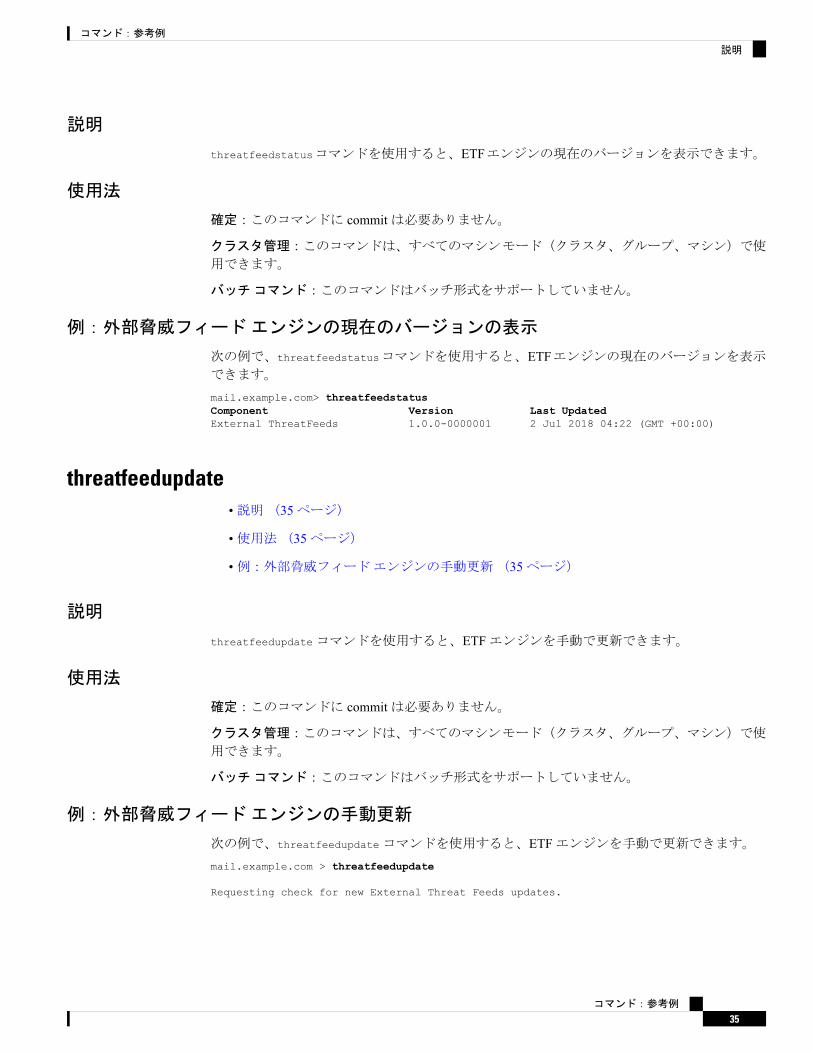
threatfeedstatusコマンドを使用すると、ETFエンジンの現在のバージョンを表示できます。
使用法
確定:このコマンドに commitは必要ありません。
クラスタ管理:このコマンドは、すべてのマシンモード(クラスタ、グループ、マシン)で使
用できます。
バッチコマンド:このコマンドはバッチ形式をサポートしていません。
例:外部脅威フィードエンジンの現在のバージョンの表示
次の例で、threatfeedstatusコマンドを使用すると、ETFエンジンの現在のバージョンを表示できます。
mail.example.com> threatfeedstatusComponent Version Last UpdatedExternal ThreatFeeds 1.0.0-0000001 2 Jul 2018 04:22 (GMT +00:00)
threatfeedupdate•説明(35ページ)
•使用法(35ページ)
•例:外部脅威フィードエンジンの手動更新(35ページ)
説明
threatfeedupdateコマンドを使用すると、ETFエンジンを手動で更新できます。
使用法
確定:このコマンドに commitは必要ありません。
クラスタ管理:このコマンドは、すべてのマシンモード(クラスタ、グループ、マシン)で使
用できます。
バッチコマンド:このコマンドはバッチ形式をサポートしていません。
例:外部脅威フィードエンジンの手動更新
次の例で、threatfeedupdateコマンドを使用すると、ETFエンジンを手動で更新できます。mail.example.com > threatfeedupdate
Requesting check for new External Threat Feeds updates.
コマンド:参考例
35
コマンド:参考例
説明

クラスタの管理ここでは、次の CLIコマンドについて説明します。
• clusterconfig(36ページ)
clusterconfig
説明
clusterconfigコマンドは、クラスタ関連の設定を指定するために使用します。クラスタに属していないマシンで clusterconfigを実行した場合は、既存のクラスタに参加するか、新しいクラスタを作成するかを選択できます。
clusterconfigコマンドには、次のサブコマンドが用意されています。
非クラスタコマンド
次のコマンドは、クラスタに属していない場合に使用できます。
• clusterconfignew<name>:指定された名前で新しいクラスタを作成します。このマシンは、このクラスタおよび「MainGroup」と呼ばれるデフォルトのクラスタグループのメンバになります。
<name>:新しいクラスタの名前。
• clusterconfig join [--port=xx] <ip_of_remote_cluster>[<admin_password>]<groupname>:このマシンをクラスタに追加します。
引数の説明
<ip_of_remote_cluster>:クラスタ内の別のマシンの IPアドレス。
<admin_password >:クラスタの adminパスワード。CCSを使用してクラスタに参加する場合、
このパラメータを指定する必要はありません。
<groupname>:参加するグループの名前。
<port>:接続するリモートマシンのポート(デフォルトは 22)。
• clusterconfig prepjoin print
このマシンを CCSポート経由でクラスタに参加させるための準備に必要な情報を表示します。
クラスタコマンド
次のコマンドは、クラスタに属している場合に使用できます。
コマンド:参考例
36
コマンド:参考例
クラスタの管理
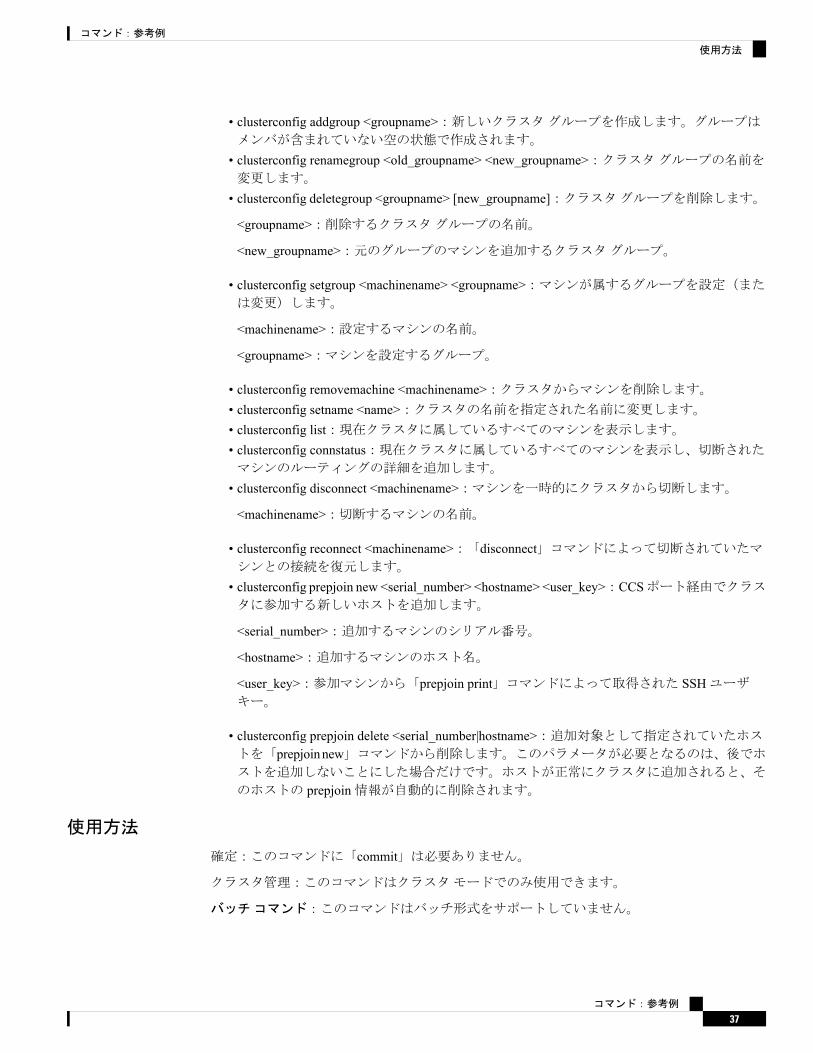
• clusterconfig addgroup <groupname>:新しいクラスタグループを作成します。グループはメンバが含まれていない空の状態で作成されます。
• clusterconfig renamegroup <old_groupname> <new_groupname>:クラスタグループの名前を変更します。
• clusterconfig deletegroup <groupname> [new_groupname]:クラスタグループを削除します。
<groupname>:削除するクラスタグループの名前。
<new_groupname>:元のグループのマシンを追加するクラスタグループ。
• clusterconfig setgroup <machinename> <groupname>:マシンが属するグループを設定(または変更)します。
<machinename>:設定するマシンの名前。
<groupname>:マシンを設定するグループ。
• clusterconfig removemachine <machinename>:クラスタからマシンを削除します。• clusterconfig setname <name>:クラスタの名前を指定された名前に変更します。• clusterconfig list:現在クラスタに属しているすべてのマシンを表示します。• clusterconfig connstatus:現在クラスタに属しているすべてのマシンを表示し、切断されたマシンのルーティングの詳細を追加します。
• clusterconfig disconnect <machinename>:マシンを一時的にクラスタから切断します。
<machinename>:切断するマシンの名前。
• clusterconfig reconnect <machinename>:「disconnect」コマンドによって切断されていたマシンとの接続を復元します。
• clusterconfig prepjoin new <serial_number> <hostname> <user_key>:CCSポート経由でクラスタに参加する新しいホストを追加します。
<serial_number>:追加するマシンのシリアル番号。
<hostname>:追加するマシンのホスト名。
<user_key>:参加マシンから「prepjoin print」コマンドによって取得された SSHユーザキー。
• clusterconfig prepjoin delete <serial_number|hostname>:追加対象として指定されていたホストを「prepjoinnew」コマンドから削除します。このパラメータが必要となるのは、後でホストを追加しないことにした場合だけです。ホストが正常にクラスタに追加されると、そ
のホストの prepjoin情報が自動的に削除されます。
使用方法
確定:このコマンドに「commit」は必要ありません。
クラスタ管理:このコマンドはクラスタモードでのみ使用できます。
バッチコマンド:このコマンドはバッチ形式をサポートしていません。
コマンド:参考例
37
コマンド:参考例
使用方法

例
clusterconfigコマンドとその使用方法の説明については、『UserGuide for AsyncOS forCiscoEmailSecurity Appliances』を参照してください。
データ損失の防止ここでは、次の CLIコマンドについて説明します。
• dlpstatus(38ページ)• dlpupdate(38ページ)
dlpstatusDLPエンジンの要求バージョン情報。
dlpstatusコマンドを使用する前に、GUIの DLP Global Settingsページで DLPを設定しておく必要があります。
(注)
使用方法
確定:このコマンドに「commit」は必要ありません。
クラスタ管理:このコマンドは、クラスタ、グループ、またはマシンの各モードで使用できま
す。
バッチコマンド:このコマンドはバッチ形式をサポートしていません。
例
mail.example.com> dlpstatus
Component Version Last UpdatedDLP Engine 3.0.2.31 Never updated
dlpupdate
説明
DLPエンジンを更新します。
dlpupdateコマンドを使用する前に、GUIの DLP Global Settingsページで DLPを設定しておく必要があります。
(注)
コマンド:参考例
38
コマンド:参考例
例

使用方法
確定:このコマンドに「commit」は必要ありません。
クラスタ管理:このコマンドは、クラスタ、グループ、またはマシンの各モードで使用できま
す。
バッチコマンド:このコマンドはバッチ形式をサポートしています。
バッチ形式
変更が検出されない場合でも dlpupdateコマンドのバッチ形式が DLPエンジンを強制的に更新します。
dlpupdate [force]
例
mail.example.com> dlpupdate
Checking for available updates. This may take a few seconds..
Could not check for available updates. Please check your Network and Service Updatessettings and retry.
Choose the operation you want to perform:
- SETUP - Enable or disable automatic updates for DLP Engine.
[]> setup
Automatic updates for DLP are disabled
Do you wish to enable automatic updates for DLP Engine? [N]> y
Choose the operation you want to perform:
- SETUP - Enable or disable automatic updates for DLP Engine.
[]>
ドメイン例外リストここでは、次の CLIコマンドについて説明します。
• domainrepconfig(40ページ)
コマンド:参考例
39
コマンド:参考例
使用方法

domainrepconfig
説明
domainrepconfigコマンドを使用すると、ドメイン例外リストを作成できます。
使用法
確定:このコマンドは「commit」が必要です。
クラスタ管理:このコマンドは、すべてのマシンモード(クラスタ、グループ、マシン)で使
用できます。
バッチコマンド:このコマンドはバッチ形式をサポートしています。詳細については、help
domainrepconfigコマンドを入力して、インラインヘルプを参照してください。
例
次の例で、domainrepconfigコマンドを使用すると、ドメイン例外リストを作成できます。
mail.example.com> domainrepconfig
Would you like to configure an exception list for Sender Domain Reputation andExternal Threat Feeds functionality? [N]> yes
Select the domain only address list to to be used for Sender Domain Reputationand External Threat Feeds functionality
1. addr_list
[1]> 1
S/MIMEセキュリティサービス
smimeconfig
説明
送信プロファイル、公開キーの設定など、S/MIMEの設定を設定します。
使用方法
確定:このコマンドは「commit」が必要です。
クラスタ管理:このコマンドは、すべてのマシンモード(クラスタ、グループ、マシン)で使
用できます。
バッチコマンド:このコマンドはバッチ形式をサポートしていません。
コマンド:参考例
40
コマンド:参考例
domainrepconfig
例
•署名と暗号化のための送信プロファイルの作成(41ページ)•暗号化の公開キーの追加(42ページ)
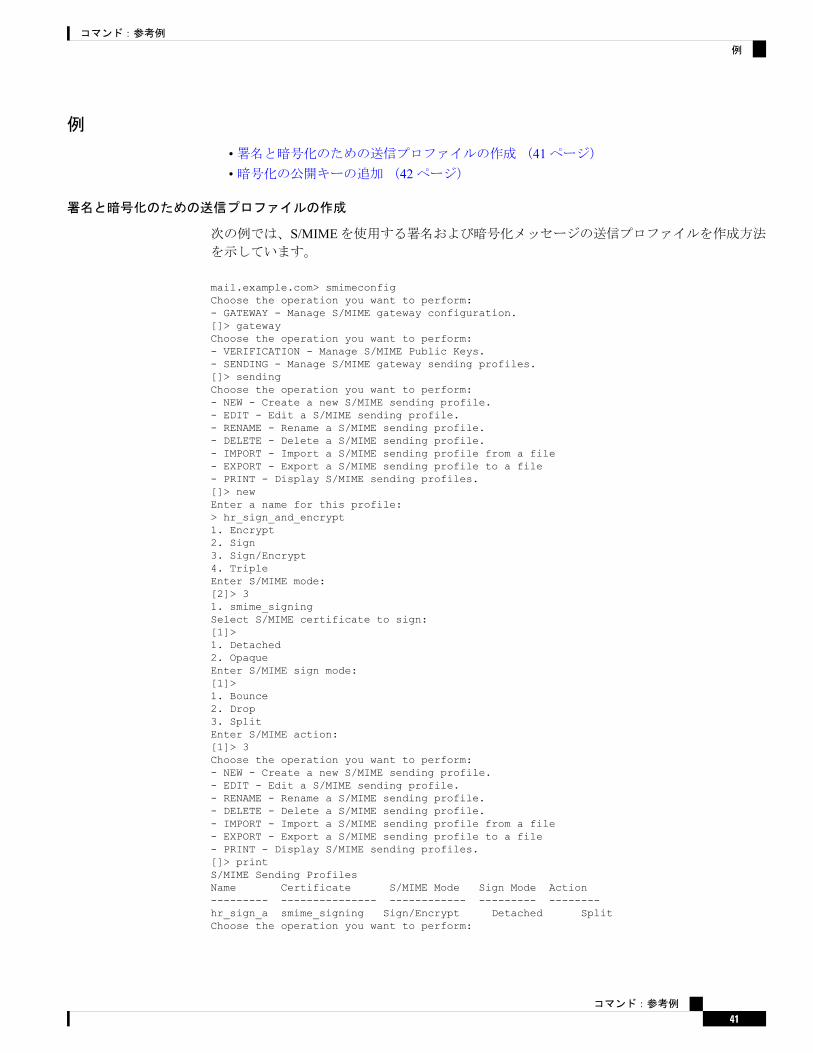
署名と暗号化のための送信プロファイルの作成
次の例では、S/MIMEを使用する署名および暗号化メッセージの送信プロファイルを作成方法を示しています。
mail.example.com> smimeconfigChoose the operation you want to perform:- GATEWAY - Manage S/MIME gateway configuration.[]> gatewayChoose the operation you want to perform:- VERIFICATION - Manage S/MIME Public Keys.- SENDING - Manage S/MIME gateway sending profiles.[]> sendingChoose the operation you want to perform:- NEW - Create a new S/MIME sending profile.- EDIT - Edit a S/MIME sending profile.- RENAME - Rename a S/MIME sending profile.- DELETE - Delete a S/MIME sending profile.- IMPORT - Import a S/MIME sending profile from a file- EXPORT - Export a S/MIME sending profile to a file- PRINT - Display S/MIME sending profiles.[]> newEnter a name for this profile:> hr_sign_and_encrypt1. Encrypt2. Sign3. Sign/Encrypt4. TripleEnter S/MIME mode:[2]> 31. smime_signingSelect S/MIME certificate to sign:[1]>1. Detached2. OpaqueEnter S/MIME sign mode:[1]>1. Bounce2. Drop3. SplitEnter S/MIME action:[1]> 3Choose the operation you want to perform:- NEW - Create a new S/MIME sending profile.- EDIT - Edit a S/MIME sending profile.- RENAME - Rename a S/MIME sending profile.- DELETE - Delete a S/MIME sending profile.- IMPORT - Import a S/MIME sending profile from a file- EXPORT - Export a S/MIME sending profile to a file- PRINT - Display S/MIME sending profiles.[]> printS/MIME Sending ProfilesName Certificate S/MIME Mode Sign Mode Action--------- --------------- ------------ --------- --------hr_sign_a smime_signing Sign/Encrypt Detached SplitChoose the operation you want to perform:
コマンド:参考例
41
コマンド:参考例
例

- NEW - Create a new S/MIME sending profile.- EDIT - Edit a S/MIME sending profile.- RENAME - Rename a S/MIME sending profile.- DELETE - Delete a S/MIME sending profile.- IMPORT - Import a S/MIME sending profile from a file- EXPORT - Export a S/MIME sending profile to a file- PRINT - Display S/MIME sending profiles.[]>
暗号化の公開キーの追加
次に、メッセージの暗号化のために、アプライアンスに受信者のS/MIME証明書の公開キーを追加する例を示します。
mail.example.com> smimeconfigChoose the operation you want to perform:- GATEWAY - Manage S/MIME gateway configuration.[]> gatewayChoose the operation you want to perform:- VERIFICATION - Manage S/MIME Public Keys.- SENDING - Manage S/MIME gateway sending profiles.[]> verificationChoose the operation you want to perform:- NEW - Create a new S/MIME Public Key.- IMPORT - Import the list of S/MIME Public Keys from a file.[]> newEnter a name for this profile:> hr_signing1. Import2. PasteChoose one of the options for the certificate introducing:[2]>Paste public certificate in PEM format (end with '.'):-----BEGIN CERTIFICATE-----MIIDdDCCAlygAwIBAgIBDTANBgkqhkiG9w0BAQUFADCBljELMAkGA1UEBhMCSU4xCzAJBgNVBAg...-----END CERTIFICATE-----.C=IN,ST=KA,L=BN,O=Cisco,OU=stg,CN=cert_for_enc,[email protected] the operation you want to perform:- NEW - Create a new S/MIME Public Key.- EDIT - Edit a S/MIME Public Key.- RENAME - Rename a S/MIME Public Key.- DELETE - Delete a S/MIME Public Key.- IMPORT - Import the list of S/MIME Public Keys from a file.- EXPORT - Export the list of S/MIME Public Keys to a file.- PRINT - Display S/MIME Public Keys.[]> printS/MIME Public KeysName Emails Domains Remaining--------- ------------------------- ------------------------- ---------hr_signin [email protected] dns.vm30bsd0008.ibqa 145 days
ドメインキーここでは、次の CLIコマンドについて説明します。
• domainkeysconfig(43ページ)
コマンド:参考例
42
コマンド:参考例
暗号化の公開キーの追加

domainkeysconfig
説明
DomainKeys/DKIMのサポートを設定します。
使用方法
確定:このコマンドは「commit」が必要です。
クラスタ管理:このコマンドは、すべてのマシンモード(クラスタ、グループ、マシン)で使
用できます。
バッチコマンド:このコマンドはバッチ形式をサポートしています。
セキュリティ強化のため、FIPSモードでのアプライアンスの機密データの暗号化を有効にすると、秘密キーを表示できなくなります。秘密キーを編集する場合は、既存の秘密キーを入力す
るか、または新しい秘密キーを作成できます。
(注)
バッチ形式:署名プロファイル
domainkeysconfigコマンドのバッチ形式は、署名プロファイルの作成、編集、または削除で使用できます。
• DomainKeys/DKIM署名プロファイルの追加
domainkeysconfig profiles signing new <name> <type> <domain> <selector> <user-list>[options]
表 1 : domainkeysconfigの新しい署名プロファイル引数
説明引数
ドメインプロファイルの名前。<name>
ドメインのタイプ。dkまたは dkimです。<type>
ドメインプロファイルのドメインフィールド。これは、DomainKeys署名のdタグを形成します。
<domain>
ドメインプロファイルのセレクタフィールド。これは、DomainKeys署名のsタグを形成します。
<selector>
ドメインプロファイルユーザのカンマ区切りリスト。ユーザは、特定のド
メインプロファイルを使用して電子メールに署名する必要があるかどうかを
判断するために、電子メールアドレスとの照合に使用されます。すべてのド
メインユーザと一致させるには、特別なキーワード allを使用します。
<user-list>
コマンド:参考例
43
コマンド:参考例
domainkeysconfig

説明引数
[options]
署名に使用する秘密キーの名前。--key_name
DKで署名するときに使用する標準化アルゴリズム。現在サポートされているアルゴリズムは simpleと nofwsです。デフォルトは nofwsです。
--canon
DKIMで署名するときに使用する、本文の標準化アルゴリズム。現在サポートされているアルゴリズムは simpleと relaxedです。デフォルトは simpleです。
--body_canon
DKIMで署名するときに使用する、ヘッダーの標準化アルゴリズム。現在サポートされているアルゴリズムは simpleと relaxedです。デフォルトは simpleです。
--header_canon
署名の計算に使用する、標準化した本文のバイト数。DKIMプロファイルでのみ使用します。この値は、使用すると署名の lタグになります。デフォルトでは使用されません。
--body_length
署名のヘッダーを選択する方法を指定します。DKIMプロファイルでのみ使用します。all、standard、standard_and_customのいずれかです。allはすべての非反復ヘッダーに署名することを意味します。standardは、Subject、From、To、Sender、MIMEなどの既知のヘッダーの事前定義のセットに署名することを意味します。standard_and_customは、既知のヘッダーおよびユーザ定義のヘッダーのセットに署名することを意味します。デフォルトは standardです。
--headers_select
署名するヘッダーのユーザ定義セット。headers_selectが standard_and_customの場合に、DKIMプロファイルでのみ使用します。デフォルトは空のセットです。
--custom_headers
署名に iタグを追加するかどうかを指定します。指定できる値は yesまたはnoです。デフォルトは yesです。
--i_tag
ユーザまたはユーザの代わりにこのメッセージに署名する代理人の ID。構文は標準の電子メールアドレスですが、ローカル部分は省略してもかまいま
せん。このアドレスのドメイン部分は、<domain>またはそのサブドメインとする必要があります。このオプションは、--i_tagの値を yesに設定している場合にのみ適用されます。デフォルトは、ローカル部分を空にして、その
後に@と <domain>を続けて記述した値です。
--agent_identity
署名に qタグを追加するかどうかを指定します。指定できる値は yesまたはnoです。デフォルトは yesです。
--q_tag
署名に tタグを追加するかどうかを指定します。指定できる値は yesまたはnoです。デフォルトは yesです。
--t_tag
コマンド:参考例
44
コマンド:参考例
バッチ形式:署名プロファイル
説明引数
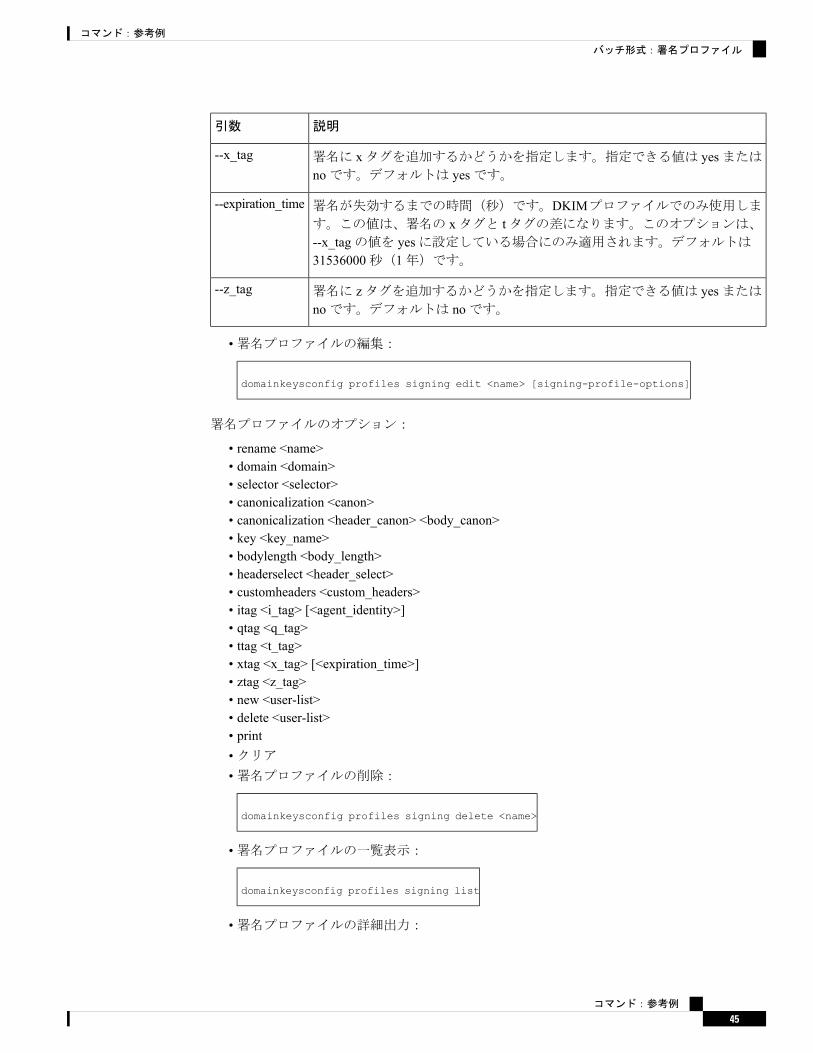
署名に xタグを追加するかどうかを指定します。指定できる値は yesまたはnoです。デフォルトは yesです。
--x_tag
署名が失効するまでの時間(秒)です。DKIMプロファイルでのみ使用します。この値は、署名の xタグと tタグの差になります。このオプションは、--x_tagの値を yesに設定している場合にのみ適用されます。デフォルトは31536000秒(1年)です。
--expiration_time
署名に zタグを追加するかどうかを指定します。指定できる値は yesまたはnoです。デフォルトは noです。
--z_tag
•署名プロファイルの編集:
domainkeysconfig profiles signing edit <name> [signing-profile-options]
署名プロファイルのオプション:
• rename <name>• domain <domain>• selector <selector>• canonicalization <canon>• canonicalization <header_canon> <body_canon>• key <key_name>• bodylength <body_length>• headerselect <header_select>• customheaders <custom_headers>• itag <i_tag> [<agent_identity>]• qtag <q_tag>• ttag <t_tag>• xtag <x_tag> [<expiration_time>]• ztag <z_tag>• new <user-list>• delete <user-list>• print•クリア•署名プロファイルの削除:
domainkeysconfig profiles signing delete <name>
•署名プロファイルの一覧表示:
domainkeysconfig profiles signing list
•署名プロファイルの詳細出力:
コマンド:参考例
45
コマンド:参考例
バッチ形式:署名プロファイル
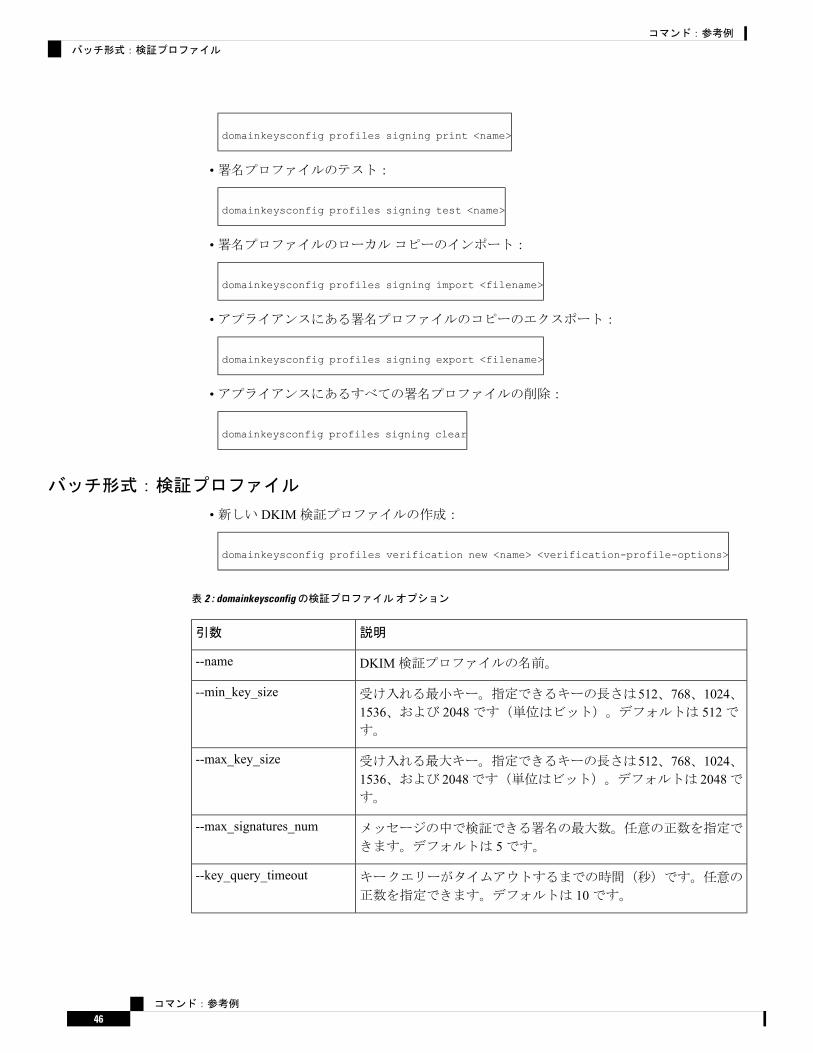
domainkeysconfig profiles signing print <name>
•署名プロファイルのテスト:
domainkeysconfig profiles signing test <name>
•署名プロファイルのローカルコピーのインポート:
domainkeysconfig profiles signing import <filename>
•アプライアンスにある署名プロファイルのコピーのエクスポート:
domainkeysconfig profiles signing export <filename>
•アプライアンスにあるすべての署名プロファイルの削除:
domainkeysconfig profiles signing clear
バッチ形式:検証プロファイル
•新しい DKIM検証プロファイルの作成:
domainkeysconfig profiles verification new <name> <verification-profile-options>
表 2 : domainkeysconfigの検証プロファイルオプション
説明引数
DKIM検証プロファイルの名前。--name
受け入れる最小キー。指定できるキーの長さは512、768、1024、1536、および 2048です(単位はビット)。デフォルトは 512です。
--min_key_size
受け入れる最大キー。指定できるキーの長さは512、768、1024、1536、および 2048です(単位はビット)。デフォルトは 2048です。
--max_key_size
メッセージの中で検証できる署名の最大数。任意の正数を指定で
きます。デフォルトは 5です。--max_signatures_num
キークエリーがタイムアウトするまでの時間(秒)です。任意の
正数を指定できます。デフォルトは 10です。--key_query_timeout
コマンド:参考例
46
コマンド:参考例
バッチ形式:検証プロファイル
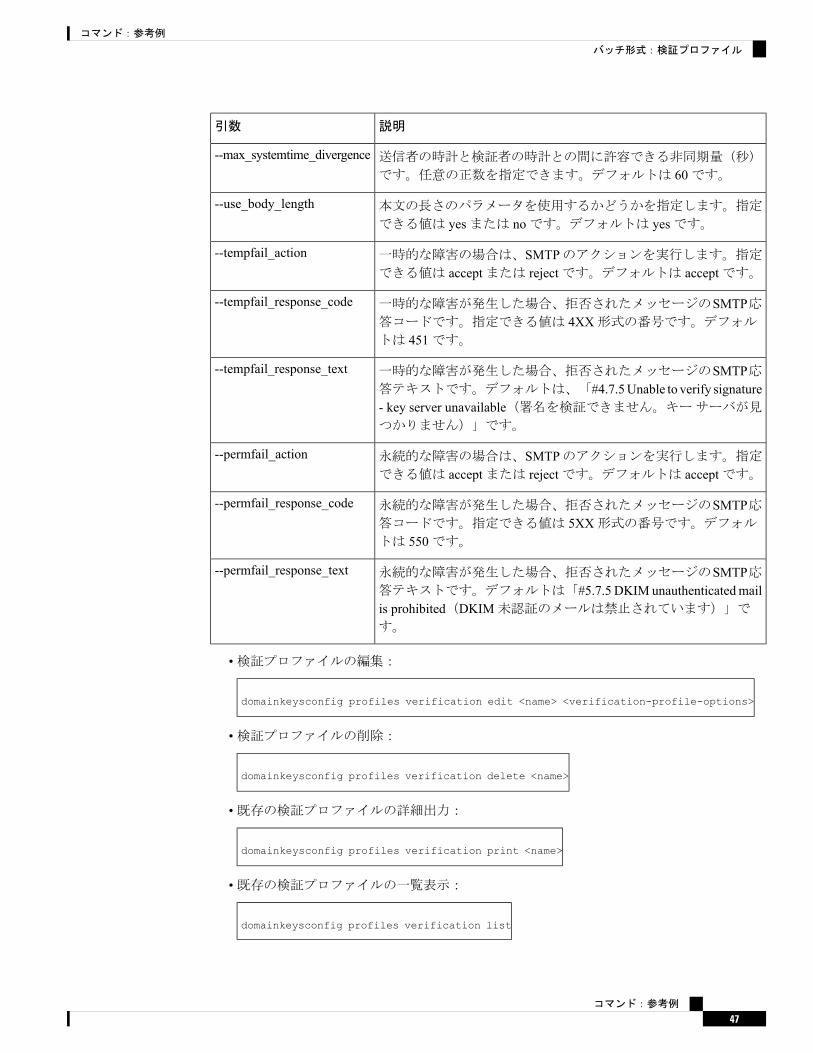
説明引数
送信者の時計と検証者の時計との間に許容できる非同期量(秒)
です。任意の正数を指定できます。デフォルトは 60です。--max_systemtime_divergence
本文の長さのパラメータを使用するかどうかを指定します。指定
できる値は yesまたは noです。デフォルトは yesです。--use_body_length
一時的な障害の場合は、SMTPのアクションを実行します。指定できる値は acceptまたは rejectです。デフォルトは acceptです。
--tempfail_action
一時的な障害が発生した場合、拒否されたメッセージのSMTP応答コードです。指定できる値は 4XX形式の番号です。デフォルトは 451です。
--tempfail_response_code
一時的な障害が発生した場合、拒否されたメッセージのSMTP応答テキストです。デフォルトは、「#4.7.5Unable to verify signature- key server unavailable(署名を検証できません。キーサーバが見つかりません)」です。
--tempfail_response_text
永続的な障害の場合は、SMTPのアクションを実行します。指定できる値は acceptまたは rejectです。デフォルトは acceptです。
--permfail_action
永続的な障害が発生した場合、拒否されたメッセージのSMTP応答コードです。指定できる値は 5XX形式の番号です。デフォルトは 550です。
--permfail_response_code
永続的な障害が発生した場合、拒否されたメッセージのSMTP応答テキストです。デフォルトは「#5.7.5 DKIM unauthenticatedmailis prohibited(DKIM未認証のメールは禁止されています)」です。
--permfail_response_text
•検証プロファイルの編集:
domainkeysconfig profiles verification edit <name> <verification-profile-options>
•検証プロファイルの削除:
domainkeysconfig profiles verification delete <name>
•既存の検証プロファイルの詳細出力:
domainkeysconfig profiles verification print <name>
•既存の検証プロファイルの一覧表示:
domainkeysconfig profiles verification list
コマンド:参考例
47
コマンド:参考例
バッチ形式:検証プロファイル

•ローカルマシンにある検証プロファイルファイルのインポート:
domainkeysconfig profiles verification import <filename>
•アプライアンスにある検証プロファイルのインポート:
domainkeysconfig profiles verification export <filename>
•アプライアンスにあるすべての既存検証プロファイルの削除:
domainkeysconfig profiles verification clear
バッチ形式:署名キー
•新しい署名キーの作成:
domainkeysconfig keys new <key_name> <key-options>
表 3 : domainkeysconfigの署名キーオプション
説明引数
秘密キーを生成します。指定できるキーの長さは512、768、1024、1536、および 2048です(単位はビット)。
--generate_key
指定された秘密キーを使用します。--use_key
指定された秘密キーに一致する公開キーを取得して画面に出力するためのフラ
グ。--generate_keyを先に指定している場合は、まず新しい秘密キーが生成され、続いてそれに一致する公開キーが表示されます。
--public_key
•署名キーの編集:
domainkeysconfig keys edit <key_name> key <key-options>
•既存の署名キーの名前変更:
domainkeysconfig keys edit <key_name> rename <key_name>
•公開キーを指定するには:
domainkeysconfig keys publickey <key_name>
•キーの削除:
コマンド:参考例
48
コマンド:参考例
バッチ形式:署名キー

domainkeysconfig keys delete <key_name>
•すべての署名キーの一覧表示:
domainkeysconfig keys list
•指定の署名キーに関するすべての情報の表示:
domainkeysconfig keys print <key_name>
•ローカルマシンにある署名キーのインポート:
domainkeysconfig keys import <filename>
•アプライアンスにある署名キーのエクスポート:
domainkeysconfig keys export <filename>
•アプライアンスにあるすべての署名キーの削除:
domainkeysconfig keys clear
バッチ形式:キーまたはプロファイルの検索
•プロファイルの署名キーの検索
domainkeysconfig search <search_text>
バッチ形式:グローバル設定
•アプライアンスでの DomainKeys/DKIMのグローバル設定の変更:
domainkeysconfig setup <setup_options>
指定できるオプションは次のとおりです。
• --sign_generated_msgs:システムで生成されたメッセージに署名するかどうかを指定します。指定できる値は yesまたは noです。
例:CLIによるドメインキーの設定
アプライアンス上のドメインキーを設定するには、CLIでdomainkeysconfigコマンドを使用します。
コマンド:参考例
49
コマンド:参考例
バッチ形式:キーまたはプロファイルの検索
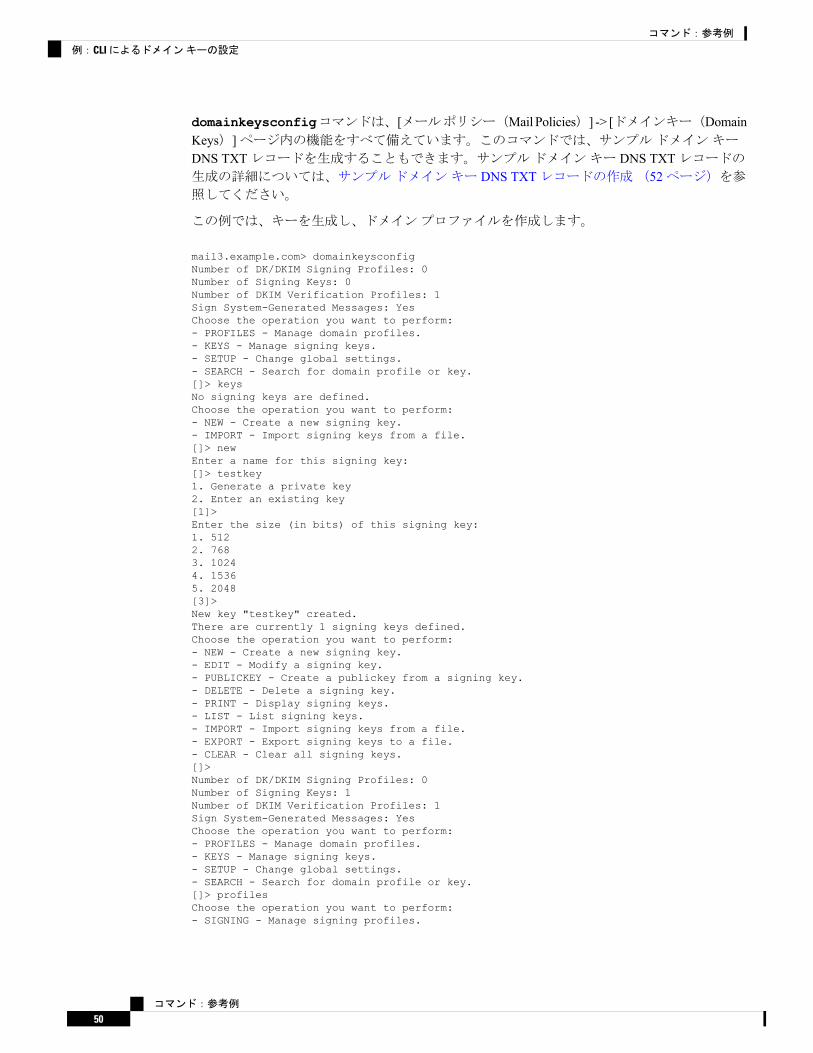
domainkeysconfigコマンドは、[メールポリシー(Mail Policies)] -> [ドメインキー(DomainKeys)]ページ内の機能をすべて備えています。このコマンドでは、サンプルドメインキーDNS TXTレコードを生成することもできます。サンプルドメインキー DNS TXTレコードの生成の詳細については、サンプルドメインキー DNS TXTレコードの作成(52ページ)を参照してください。
この例では、キーを生成し、ドメインプロファイルを作成します。
mail3.example.com> domainkeysconfigNumber of DK/DKIM Signing Profiles: 0Number of Signing Keys: 0Number of DKIM Verification Profiles: 1Sign System-Generated Messages: YesChoose the operation you want to perform:- PROFILES - Manage domain profiles.- KEYS - Manage signing keys.- SETUP - Change global settings.- SEARCH - Search for domain profile or key.[]> keysNo signing keys are defined.Choose the operation you want to perform:- NEW - Create a new signing key.- IMPORT - Import signing keys from a file.[]> newEnter a name for this signing key:[]> testkey1. Generate a private key2. Enter an existing key[1]>Enter the size (in bits) of this signing key:1. 5122. 7683. 10244. 15365. 2048[3]>New key "testkey" created.There are currently 1 signing keys defined.Choose the operation you want to perform:- NEW - Create a new signing key.- EDIT - Modify a signing key.- PUBLICKEY - Create a publickey from a signing key.- DELETE - Delete a signing key.- PRINT - Display signing keys.- LIST - List signing keys.- IMPORT - Import signing keys from a file.- EXPORT - Export signing keys to a file.- CLEAR - Clear all signing keys.[]>Number of DK/DKIM Signing Profiles: 0Number of Signing Keys: 1Number of DKIM Verification Profiles: 1Sign System-Generated Messages: YesChoose the operation you want to perform:- PROFILES - Manage domain profiles.- KEYS - Manage signing keys.- SETUP - Change global settings.- SEARCH - Search for domain profile or key.[]> profilesChoose the operation you want to perform:- SIGNING - Manage signing profiles.
コマンド:参考例
50
コマンド:参考例
例:CLIによるドメインキーの設定

- VERIFICATION - Manage verification profiles.[]> signingNo domain profiles are defined.Choose the operation you want to perform:- NEW - Create a new domain profile.- IMPORT - Import domain profiles from a file.[]> newEnter a name for this domain profile:[]> ExampleEnter type of domain profile:1. dk2. dkim[2]>The domain field forms the basis of the public-key query. The value inthis field MUST match the domain of the sending email address or MUSTbe one of the parent domains of the sending email address. This valuebecomes the "d" tag of the Domain-Keys signature.Enter the domain name of the signing domain:[]> example.comSelectors are arbitrary names below the "_domainkey." namespace. Aselector value and length MUST be legal in the DNS namespace and inemail headers with the additional provision that they cannot contain asemicolon. This value becomes the "s" tag of the DomainKeysSignature.Enter selector:[]> testThe private key which is to be used to sign messages must be entered.A corresponding public key must be published in the DNS following theform described in the DomainKeys documentation. If a key is notimmediately available, a key can be entered at a later time.Select the key-association method:1. Create new key2. Paste in key3. Enter key at later time4. Select existing key[1]> 4Enter the name or number of a signing key.1. testkey[1]>The canonicalization algorithm is the method by which the headers andcontent are prepared for presentation to the signing algorithm.Possible choices are "simple" and "relaxed".Select canonicalization algorithm for body:1. simple2. relaxed[1]> 1How would you like to sign headers:1. Sign all existing, non-repeatable headers (except Return-Path header).2. Sign "well-known" headers (Date, Subject, From, To, Cc, Reply-To, Message-ID, Sender,MIME headers).3. Sign "well-known" headers plus a custom list of headers.[2]>Body length is a number of bytes of the message body to sign.This value becomes the "l" tag of the signature.Which body length option would you like to use?1. Whole body implied. No further message modification is possible.2. Whole body auto-determined. Appending content is possible.3. Specify a body length.[1]>Would you like to fine-tune which tags should be used in theDKIM Signature? (yes/no) [N]>Finish by entering profile users. The following types of entries areallowed:- Email address entries such as "[email protected]".
コマンド:参考例
51
コマンド:参考例
例:CLIによるドメインキーの設定

- Domain entries such as "example.com".- Partial domain entries such as ".example.com". For example, a partialdomain of ".example.com" will match "sales.example.com". Thissort of entry will not match the root domain ("example.com").
- Leave blank to match all domain users.Enter user for this signing profile:[]> sales.example.comDo you want to add another user? [N]>There are currently 1 domain profiles defined.Choose the operation you want to perform:- NEW - Create a new domain profile.- EDIT - Modify a domain profile.- DELETE - Delete a domain profile.- PRINT - Display domain profiles.- LIST - List domain profiles.- TEST - Test if a domain profile is ready to sign.- DNSTXT - Generate a matching DNS TXT record.- IMPORT - Import domain profiles from a file.- EXPORT - Export domain profiles to a file.- CLEAR - Clear all domain profiles.[]>Choose the operation you want to perform:- SIGNING - Manage signing profiles.- VERIFICATION - Manage verification profiles.[]>Number of DK/DKIM Signing Profiles: 1Number of Signing Keys: 1Number of DKIM Verification Profiles: 1Sign System-Generated Messages: YesChoose the operation you want to perform:- PROFILES - Manage domain profiles.- KEYS - Manage signing keys.- SETUP - Change global settings.- SEARCH - Search for domain profile or key.[]>
サンプルドメインキー DNS TXTレコードの作成
mail3.example.com> domainkeysconfigNumber of DK/DKIM Signing Profiles: 1Number of Signing Keys: 1Number of DKIM Verification Profiles: 1Sign System-Generated Messages: YesChoose the operation you want to perform:- PROFILES - Manage domain profiles.- KEYS - Manage signing keys.- SETUP - Change global settings.- SEARCH - Search for domain profile or key.[]> profilesChoose the operation you want to perform:- SIGNING - Manage signing profiles.- VERIFICATION - Manage verification profiles.[]> signingThere are currently 1 domain profiles defined.Choose the operation you want to perform:- NEW - Create a new domain profile.- EDIT - Modify a domain profile.- DELETE - Delete a domain profile.- PRINT - Display domain profiles.- LIST - List domain profiles.- TEST - Test if a domain profile is ready to sign.- DNSTXT - Generate a matching DNS TXT record.- IMPORT - Import domain profiles from a file.
コマンド:参考例
52
コマンド:参考例
サンプルドメインキー DNS TXTレコードの作成

- EXPORT - Export domain profiles to a file.- CLEAR - Clear all domain profiles.[]> dnstxtEnter the name or number of a domain profile.1. Example[1]>The answers to the following questions will be used to construct DKIM textrecord for DNS. It can be used to publish information about this profile.Do you wish to constrain the local part of the signing identities("i=" tag of "DKIM-Signature" header field) associated with thisdomain profile? [N]>Do you wish to include notes that may be of interest to a human (nointerpretation is made by any program)? [N]>The "testing mode" can be set to specify that this domain is testing DKIM andthat unverified email must not be treated differently from verified email.Do you want to indicate the "testing mode"? [N]>Do you wish to disable signing by subdomains of this domain? [N]>The DKIM DNS TXT record is:test._domainkey.example.com. IN TXT "v=DKIM1;p=MIGfMA0GCSqGSIb3DQEBAQUAA4GNADCBiQKBgQDX5dOG9J8rXreA/uPtYr5lrCTCqR+qlS5Gm1f0OplAzSuB2BvOnxZ5Nr+se0T+k7mYDP0FSUHyWaOvO+kCcum7fFRjS3EOF9gLpbIdH5vzOCKp/w7hdjPy3q6PSgJVtqvQ6v9E8k5Ui7C+DF6KvJUiMJSY5sbu2zmm9rKAH5m7FwIDAQAB;"There are currently 1 domain profiles defined.Choose the operation you want to perform:- NEW - Create a new domain profile.- EDIT - Modify a domain profile.- DELETE - Delete a domain profile.- PRINT - Display domain profiles.- LIST - List domain profiles.- TEST - Test if a domain profile is ready to sign.- DNSTXT - Generate a matching DNS TXT record.- IMPORT - Import domain profiles from a file.- EXPORT - Export domain profiles to a file.- CLEAR - Clear all domain profiles.[]>Choose the operation you want to perform:- SIGNING - Manage signing profiles.- VERIFICATION - Manage verification profiles.[]>Number of DK/DKIM Signing Profiles: 1Number of Signing Keys: 1Number of DKIM Verification Profiles: 1Sign System-Generated Messages: YesChoose the operation you want to perform:- PROFILES - Manage domain profiles.- KEYS - Manage signing keys.- SETUP - Change global settings.- SEARCH - Search for domain profile or key.[]>
DMARC検証ここでは、次の CLIコマンドについて説明します。
• dmarcconfig(54ページ)
コマンド:参考例
53
コマンド:参考例
DMARC検証
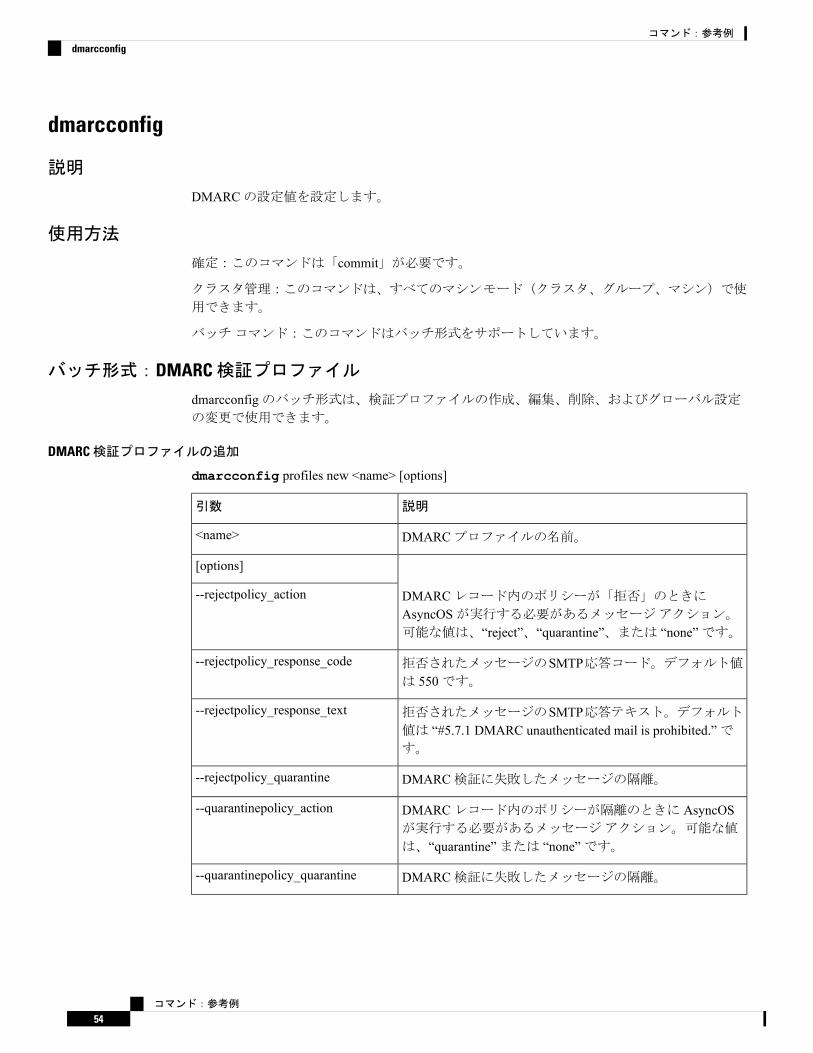
dmarcconfig
説明
DMARCの設定値を設定します。
使用方法
確定:このコマンドは「commit」が必要です。
クラスタ管理:このコマンドは、すべてのマシンモード(クラスタ、グループ、マシン)で使
用できます。
バッチコマンド:このコマンドはバッチ形式をサポートしています。
バッチ形式:DMARC検証プロファイル
dmarcconfigのバッチ形式は、検証プロファイルの作成、編集、削除、およびグローバル設定の変更で使用できます。
DMARC検証プロファイルの追加
dmarcconfig profiles new <name> [options]
説明引数
DMARCプロファイルの名前。<name>
[options]
DMARCレコード内のポリシーが「拒否」のときにAsyncOSが実行する必要があるメッセージアクション。可能な値は、“reject”、“quarantine”、または “none”です。
--rejectpolicy_action
拒否されたメッセージのSMTP応答コード。デフォルト値は 550です。
--rejectpolicy_response_code
拒否されたメッセージのSMTP応答テキスト。デフォルト値は “#5.7.1 DMARC unauthenticated mail is prohibited.”です。
--rejectpolicy_response_text
DMARC検証に失敗したメッセージの隔離。--rejectpolicy_quarantine
DMARCレコード内のポリシーが隔離のときに AsyncOSが実行する必要があるメッセージアクション。可能な値
は、“quarantine”または “none”です。
--quarantinepolicy_action
DMARC検証に失敗したメッセージの隔離。--quarantinepolicy_quarantine
コマンド:参考例
54
コマンド:参考例
dmarcconfig

説明引数
DMARC検証中に一時的な障害が発生したメッセージに対して AsyncOSが実行する必要があるメッセージアクション。指定できる値は “accept”または “reject”です。
--tempfail_action
一時的な障害が発生した場合、拒否されたメッセージの
SMTP応答コードです。デフォルト値は 451です。--tempfail_response_code
一時的な障害が発生した場合、拒否されたメッセージの
SMTP応答テキストです。デフォルト値は “#4.7.1 Unableto perform DMARC verification”です。
--tempfail_response_text
DMARC検証中に永続的な障害が発生したメッセージに対して AsyncOSが実行する必要があるメッセージアクション。指定できる値は “accept”または “reject”です。
--permfail_action
永続的な障害が発生した場合、拒否されたメッセージの
SMTP応答コードです。デフォルト値は 550です。--permfail_response_code
永続的な障害が発生した場合、拒否されたメッセージの
SMTP応答テキストです。デフォルト値は “#5.7.1DMARCverification failed”です。
--permfail_response_text
DMARC検証プロファイルの編集
dmarcconfig profiles edit <name> [options]
DMARC検証プロファイルの削除
dmarcconfig profiles delete <name>
すべての DMARCの検証プロファイルの削除
dmarcconfig profiles clear
DMARC検証プロファイルの詳細の表示
dmarcconfig profiles print <name>
DMARC検証プロファイルのエクスポート
dmarcconfig profiles export <filename>
DMARC検証プロファイルのインポート
dmarcconfig profiles import <filename>
グローバル設定の変更
dmarcconfig setup [options]
コマンド:参考例
55
コマンド:参考例
DMARC検証プロファイルの編集
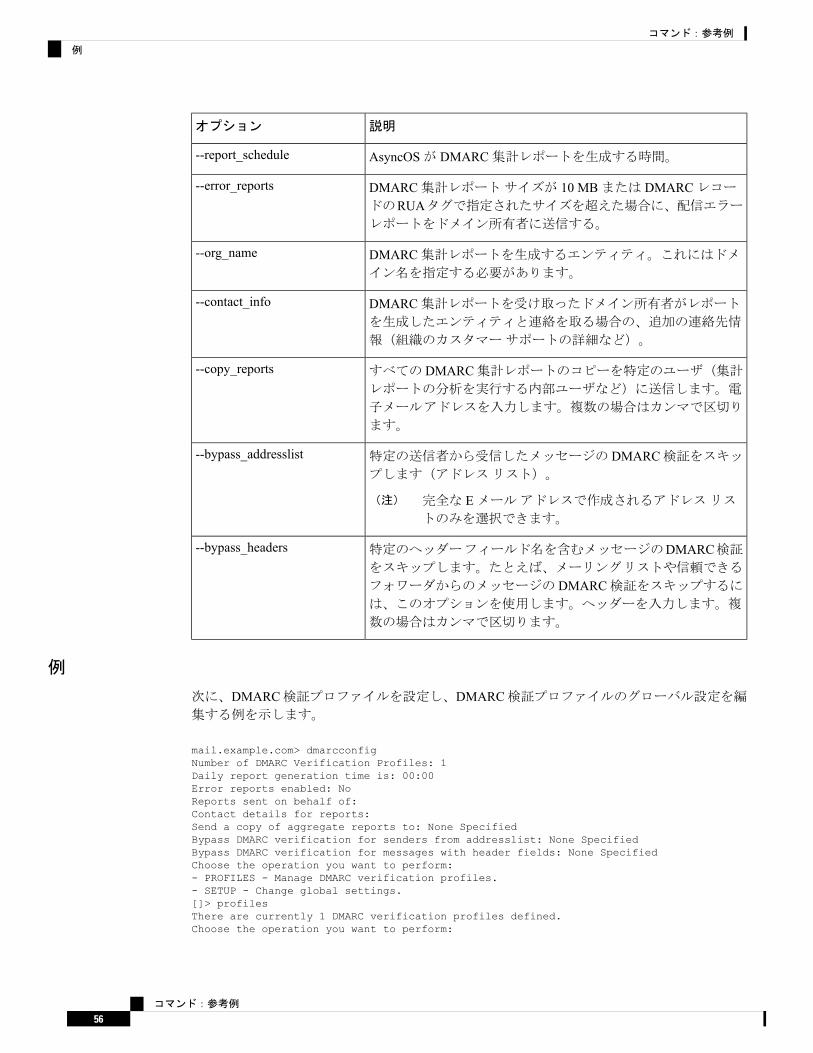
説明オプション
AsyncOSが DMARC集計レポートを生成する時間。--report_schedule
DMARC集計レポートサイズが 10 MBまたは DMARCレコードのRUAタグで指定されたサイズを超えた場合に、配信エラーレポートをドメイン所有者に送信する。
--error_reports
DMARC集計レポートを生成するエンティティ。これにはドメイン名を指定する必要があります。
--org_name
DMARC集計レポートを受け取ったドメイン所有者がレポートを生成したエンティティと連絡を取る場合の、追加の連絡先情
報(組織のカスタマーサポートの詳細など)。
--contact_info
すべての DMARC集計レポートのコピーを特定のユーザ(集計レポートの分析を実行する内部ユーザなど)に送信します。電
子メールアドレスを入力します。複数の場合はカンマで区切り
ます。
--copy_reports
特定の送信者から受信したメッセージの DMARC検証をスキップします(アドレスリスト)。
完全な Eメールアドレスで作成されるアドレスリストのみを選択できます。
(注)
--bypass_addresslist
特定のヘッダーフィールド名を含むメッセージのDMARC検証をスキップします。たとえば、メーリングリストや信頼できる
フォワーダからのメッセージの DMARC検証をスキップするには、このオプションを使用します。ヘッダーを入力します。複
数の場合はカンマで区切ります。
--bypass_headers
例
次に、DMARC検証プロファイルを設定し、DMARC検証プロファイルのグローバル設定を編集する例を示します。
mail.example.com> dmarcconfigNumber of DMARC Verification Profiles: 1Daily report generation time is: 00:00Error reports enabled: NoReports sent on behalf of:Contact details for reports:Send a copy of aggregate reports to: None SpecifiedBypass DMARC verification for senders from addresslist: None SpecifiedBypass DMARC verification for messages with header fields: None SpecifiedChoose the operation you want to perform:- PROFILES - Manage DMARC verification profiles.- SETUP - Change global settings.[]> profilesThere are currently 1 DMARC verification profiles defined.Choose the operation you want to perform:
コマンド:参考例
56
コマンド:参考例
例
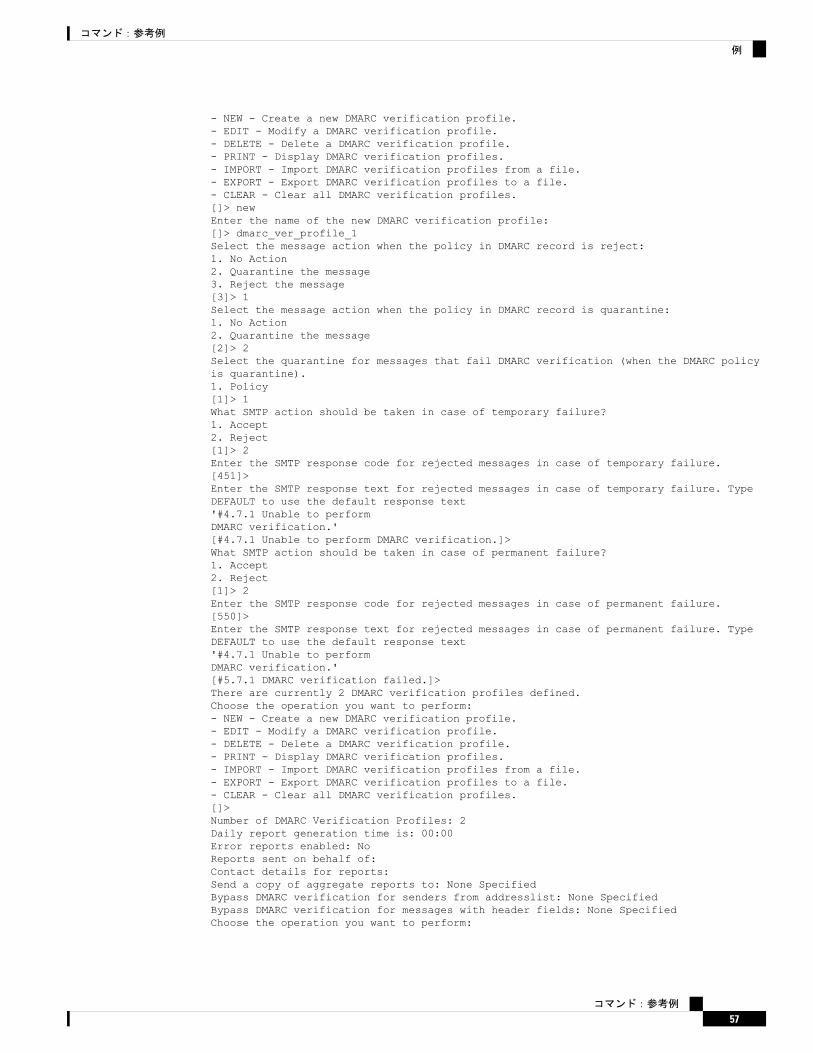
- NEW - Create a new DMARC verification profile.- EDIT - Modify a DMARC verification profile.- DELETE - Delete a DMARC verification profile.- PRINT - Display DMARC verification profiles.- IMPORT - Import DMARC verification profiles from a file.- EXPORT - Export DMARC verification profiles to a file.- CLEAR - Clear all DMARC verification profiles.[]> newEnter the name of the new DMARC verification profile:[]> dmarc_ver_profile_1Select the message action when the policy in DMARC record is reject:1. No Action2. Quarantine the message3. Reject the message[3]> 1Select the message action when the policy in DMARC record is quarantine:1. No Action2. Quarantine the message[2]> 2Select the quarantine for messages that fail DMARC verification (when the DMARC policyis quarantine).1. Policy[1]> 1What SMTP action should be taken in case of temporary failure?1. Accept2. Reject[1]> 2Enter the SMTP response code for rejected messages in case of temporary failure.[451]>Enter the SMTP response text for rejected messages in case of temporary failure. TypeDEFAULT to use the default response text'#4.7.1 Unable to performDMARC verification.'[#4.7.1 Unable to perform DMARC verification.]>What SMTP action should be taken in case of permanent failure?1. Accept2. Reject[1]> 2Enter the SMTP response code for rejected messages in case of permanent failure.[550]>Enter the SMTP response text for rejected messages in case of permanent failure. TypeDEFAULT to use the default response text'#4.7.1 Unable to performDMARC verification.'[#5.7.1 DMARC verification failed.]>There are currently 2 DMARC verification profiles defined.Choose the operation you want to perform:- NEW - Create a new DMARC verification profile.- EDIT - Modify a DMARC verification profile.- DELETE - Delete a DMARC verification profile.- PRINT - Display DMARC verification profiles.- IMPORT - Import DMARC verification profiles from a file.- EXPORT - Export DMARC verification profiles to a file.- CLEAR - Clear all DMARC verification profiles.[]>Number of DMARC Verification Profiles: 2Daily report generation time is: 00:00Error reports enabled: NoReports sent on behalf of:Contact details for reports:Send a copy of aggregate reports to: None SpecifiedBypass DMARC verification for senders from addresslist: None SpecifiedBypass DMARC verification for messages with header fields: None SpecifiedChoose the operation you want to perform:
コマンド:参考例
57
コマンド:参考例
例

- PROFILES - Manage DMARC verification profiles.- SETUP - Change global settings.[]> setupWould you like to modify DMARC report settings? (Yes/No) [N]> yEnter the time of day to generate aggregate feedback reports. Use 24-hour format (HH:MM).[00:00]>Would you like to send DMARC error reports? (Yes/No) [N]> yEnter the entity name responsible for report generation. This is added to the DMARCaggregate reports.[]> example.comEnter additional contact information to be added to DMARC aggregate reports. This couldbe an email address,URL of a website with additional help, a phone number etc.[]> http://dmarc.example.comWould you like to send a copy of all aggregate reports? (Yes/No) [N]>Would you like to bypass DMARC verification for an addresslist? (Yes/No) [N]>Would you like to bypass DMARC verification for specific header fields? (Yes/No) [N]> yChoose the operation you want to perform:- ADD - Add a header field to the verification-bypass list.[]> addEnter the header field name[]> List-UnsubscribeDMARC verification is configured to bypass DMARC verification for messages containingthe following header fields.1. List-UnsubscribeChoose the operation you want to perform:- ADD - Add a header field to the verification-bypass list.- REMOVE - Remove a header field from the list.[]> addEnter the header field name[]> List-IDDMARC verification is configured to bypass DMARC verification for messages containingthe following header fields.1. List-Unsubscribe2. List-IDChoose the operation you want to perform:- ADD - Add a header field to the verification-bypass list.- REMOVE - Remove a header field from the list.[]>Number of DMARC Verification Profiles: 2Daily report generation time is: 00:00Error reports enabled: YesReports sent on behalf of: example.comContact details for reports: http://dmarc.example.comSend a copy of aggregate reports to: None SpecifiedBypass DMARC verification for senders from addresslist: None SpecifiedBypass DMARC verification for messages with header fields: List-Unsubscribe, List-IDChoose the operation you want to perform:- PROFILES - Manage DMARC verification profiles.- SETUP - Change global settings.[]>
DNSここでは、次の CLIコマンドについて説明します。
• dig(59ページ)• dnsconfig(61ページ)• dnsflush(65ページ)
コマンド:参考例
58
コマンド:参考例
DNS

• dnshostprefs(66ページ)• dnslistconfig(66ページ)• dnslisttest(67ページ)• dnsstatus(67ページ)
dig
説明
DNSサーバ上でレコードをルックアップします
使用方法
確定:このコマンドに「commit」は必要ありません。
クラスタ管理:このコマンドは、すべてのマシンモード(クラスタ、グループ、マシン)で使
用できます。
バッチコマンド:このコマンドはバッチ形式をサポートしています。
バッチ形式
digコマンドのバッチ形式を使用すると、従来のCLIコマンドのすべての機能を実行できます。
• DNSサーバ上でレコードをルックアップします
dig [options] [@<dns_ip>] [qtype] <hostname>
• DNSサーバ上で、指定された IPアドレスに対する逆ルックアップを実行します。
dig -x <reverse_ip> [options] [@<dns_ip>]
これらは digコマンドのバッチ形式で利用可能なオプションです。
-s <source_ip> Specify the source IP address.
-t Make query over TCP.
-u Make query over UDP (default).
dns_ip - Query the DNS server at this IP address.
qtype - Query type: A, PTR, CNAME, MX, SOA, NS, TXT.
コマンド:参考例
59
コマンド:参考例
dig
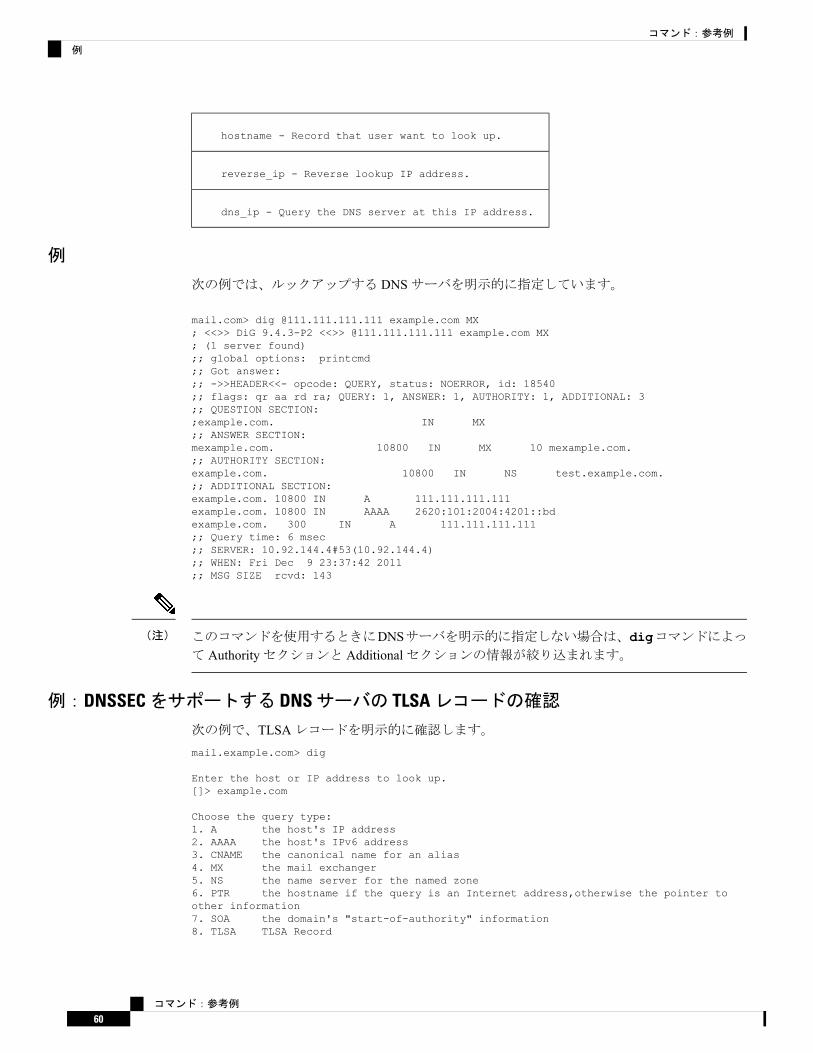
hostname - Record that user want to look up.
reverse_ip - Reverse lookup IP address.
dns_ip - Query the DNS server at this IP address.
例
次の例では、ルックアップする DNSサーバを明示的に指定しています。
mail.com> dig @111.111.111.111 example.com MX; <<>> DiG 9.4.3-P2 <<>> @111.111.111.111 example.com MX; (1 server found);; global options: printcmd;; Got answer:;; ->>HEADER<<- opcode: QUERY, status: NOERROR, id: 18540;; flags: qr aa rd ra; QUERY: 1, ANSWER: 1, AUTHORITY: 1, ADDITIONAL: 3;; QUESTION SECTION:;example.com. IN MX;; ANSWER SECTION:mexample.com. 10800 IN MX 10 mexample.com.;; AUTHORITY SECTION:example.com. 10800 IN NS test.example.com.;; ADDITIONAL SECTION:example.com. 10800 IN A 111.111.111.111example.com. 10800 IN AAAA 2620:101:2004:4201::bdexample.com. 300 IN A 111.111.111.111;; Query time: 6 msec;; SERVER: 10.92.144.4#53(10.92.144.4);; WHEN: Fri Dec 9 23:37:42 2011;; MSG SIZE rcvd: 143
このコマンドを使用するときにDNSサーバを明示的に指定しない場合は、digコマンドによって Authorityセクションと Additionalセクションの情報が絞り込まれます。
(注)
例:DNSSECをサポートする DNSサーバの TLSAレコードの確認
次の例で、TLSAレコードを明示的に確認します。mail.example.com> dig
Enter the host or IP address to look up.[]> example.com
Choose the query type:1. A the host's IP address2. AAAA the host's IPv6 address3. CNAME the canonical name for an alias4. MX the mail exchanger5. NS the name server for the named zone6. PTR the hostname if the query is an Internet address,otherwise the pointer toother information7. SOA the domain's "start-of-authority" information8. TLSA TLSA Record
コマンド:参考例
60
コマンド:参考例
例

9. TXT the text information[1]> 8
Which interface do you want to query from?1. Auto2. Management[1]> 2
Please enter the host or IP address of DNS server.Leave the entry blank to use the default server.Important! To perform DNSSEC queries, enter the host or IP address of the DNS Serversupporting DNSSEC.[]> 8.8.8.8
Do you want to make query over TCP? [N]>
Do you want to make a query over DNSSEC? [N]> Y
Please enter DNS key file path.Leave the entry blank to use the default root keys[]>
;; RRset to chase:dane-esa.com. 3562 IN MX 10 mx1.dane-esa.com.
;; RRSIG of the RRset to chase:dane-esa.com. 3562 IN RRSIG MX 7 2 3600 20181028045140 2018092804514043860 dane-esa.com.K+t0W9aOqDMvxytXfkrms+IEUbK1Ct9XB5mBCCb3bHryvHs0cU6XPxTJXwQ5HUSWuQaC9MLyCA5Zn/AXlbzKA7tGtnab0q3CmVKhhRXnIJ+jJht6nuksUrLKsM6uYmR73DDM/bCC8n08w6nGeGq476mmNgETXAPfqSvHNuPpDSquCG3nNfm8iE9XnG8jCKRPcKhWjROc/vmK6ZzuzFKCtT4QA/L5Ah0wzffZqxR9Qmj3w8WQdz9eFAw5e0LFa5oR57i983ityJrQL4pjFl7bwKNw94xhqFlsWWKAC6wpoT64DOo00ou5TsKxHq5EwEat1OMIM0GHMniCuJcA K3seyQ==
dnsconfig
説明
DNSのセットアップを設定します。
使用方法
確定:このコマンドは「commit」が必要です。
クラスタ管理:このコマンドは、すべてのマシンモード(クラスタ、グループ、マシン)で使
用できます。
バッチコマンド:このコマンドはバッチ形式をサポートしています。
バッチ形式
dnsconfigコマンドのバッチ形式を使用すると、従来の CLIコマンドのすべての機能を実行できます。
•ローカルネームサーバキャッシュを使用するための DNSの設定:
コマンド:参考例
61
コマンド:参考例
dnsconfig
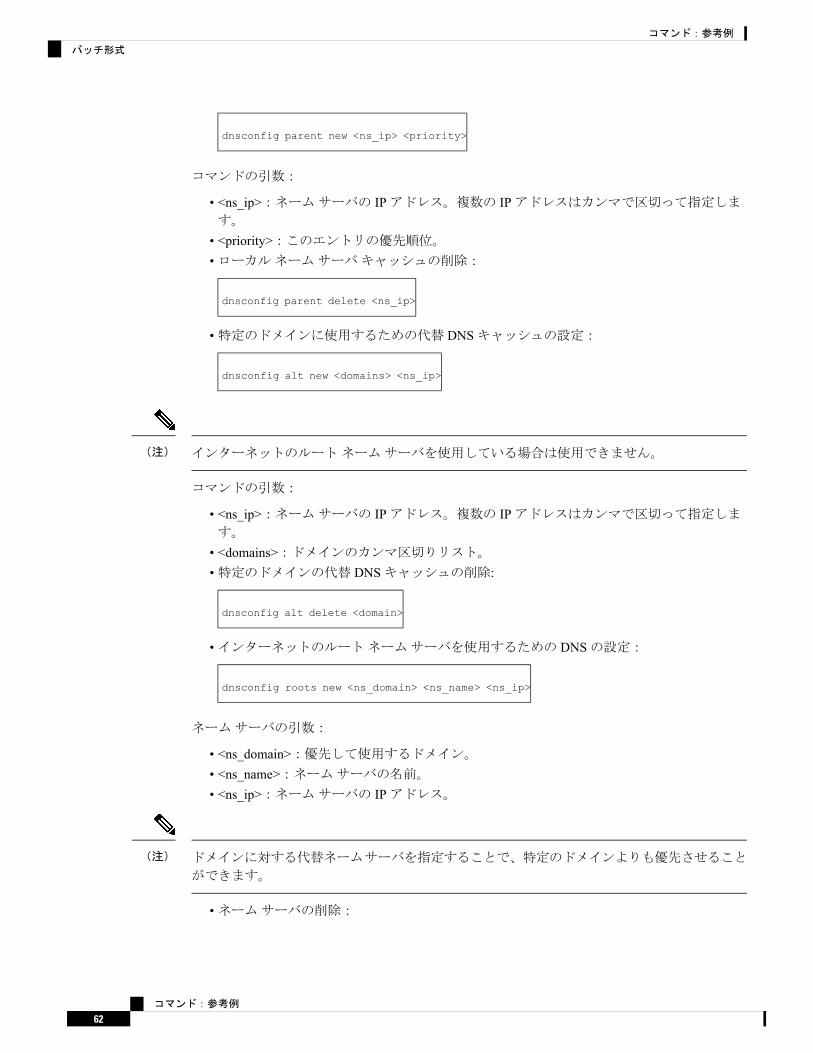
dnsconfig parent new <ns_ip> <priority>
コマンドの引数:
• <ns_ip>:ネームサーバの IPアドレス。複数の IPアドレスはカンマで区切って指定します。
• <priority>:このエントリの優先順位。•ローカルネームサーバキャッシュの削除:
dnsconfig parent delete <ns_ip>
•特定のドメインに使用するための代替 DNSキャッシュの設定:
dnsconfig alt new <domains> <ns_ip>
インターネットのルートネームサーバを使用している場合は使用できません。(注)
コマンドの引数:
• <ns_ip>:ネームサーバの IPアドレス。複数の IPアドレスはカンマで区切って指定します。
• <domains>:ドメインのカンマ区切りリスト。•特定のドメインの代替 DNSキャッシュの削除:
dnsconfig alt delete <domain>
•インターネットのルートネームサーバを使用するための DNSの設定:
dnsconfig roots new <ns_domain> <ns_name> <ns_ip>
ネームサーバの引数:
• <ns_domain>:優先して使用するドメイン。• <ns_name>:ネームサーバの名前。• <ns_ip>:ネームサーバの IPアドレス。
ドメインに対する代替ネームサーバを指定することで、特定のドメインよりも優先させること
ができます。
(注)
•ネームサーバの削除:
コマンド:参考例
62
コマンド:参考例
バッチ形式
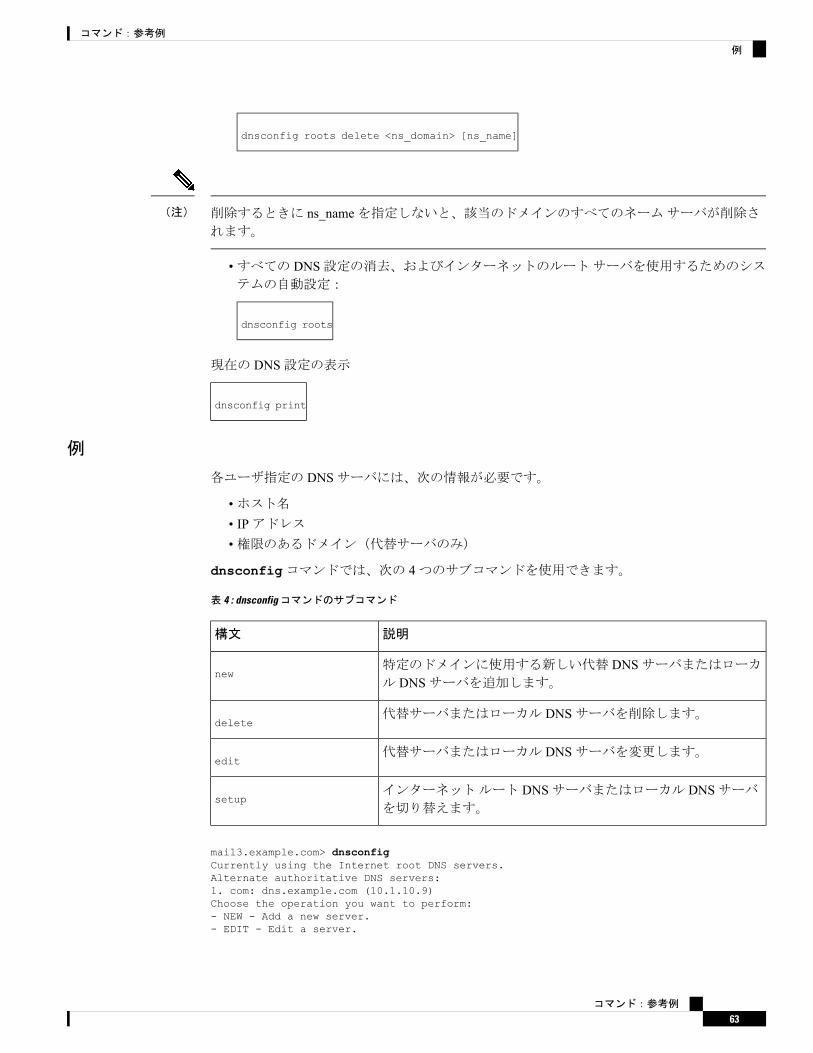
dnsconfig roots delete <ns_domain> [ns_name]
削除するときに ns_nameを指定しないと、該当のドメインのすべてのネームサーバが削除されます。
(注)
•すべての DNS設定の消去、およびインターネットのルートサーバを使用するためのシステムの自動設定:
dnsconfig roots
現在の DNS設定の表示
dnsconfig print
例
各ユーザ指定の DNSサーバには、次の情報が必要です。
•ホスト名• IPアドレス•権限のあるドメイン(代替サーバのみ)
dnsconfigコマンドでは、次の 4つのサブコマンドを使用できます。
表 4 : dnsconfigコマンドのサブコマンド
説明構文
特定のドメインに使用する新しい代替 DNSサーバまたはローカル DNSサーバを追加します。
new
代替サーバまたはローカル DNSサーバを削除します。delete
代替サーバまたはローカル DNSサーバを変更します。edit
インターネットルート DNSサーバまたはローカル DNSサーバを切り替えます。
setup
mail3.example.com> dnsconfigCurrently using the Internet root DNS servers.Alternate authoritative DNS servers:1. com: dns.example.com (10.1.10.9)Choose the operation you want to perform:- NEW - Add a new server.- EDIT - Edit a server.
コマンド:参考例
63
コマンド:参考例
例
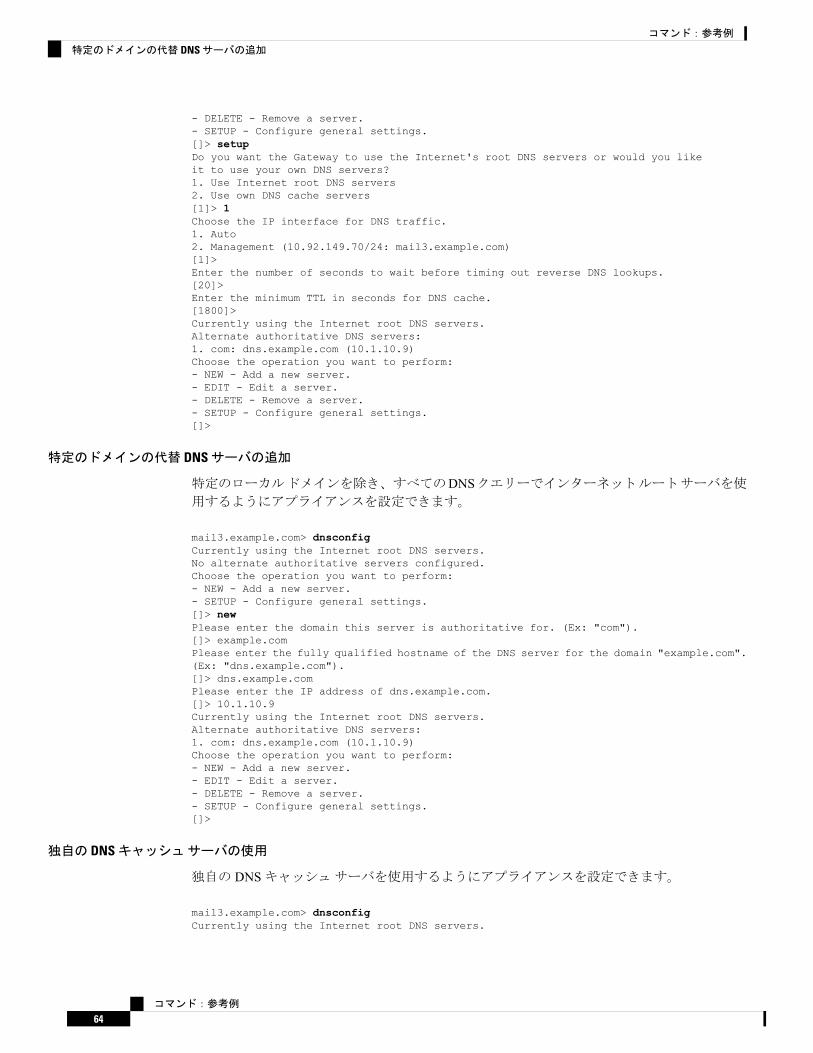
- DELETE - Remove a server.- SETUP - Configure general settings.[]> setupDo you want the Gateway to use the Internet's root DNS servers or would you likeit to use your own DNS servers?1. Use Internet root DNS servers2. Use own DNS cache servers[1]> 1Choose the IP interface for DNS traffic.1. Auto2. Management (10.92.149.70/24: mail3.example.com)[1]>Enter the number of seconds to wait before timing out reverse DNS lookups.[20]>Enter the minimum TTL in seconds for DNS cache.[1800]>Currently using the Internet root DNS servers.Alternate authoritative DNS servers:1. com: dns.example.com (10.1.10.9)Choose the operation you want to perform:- NEW - Add a new server.- EDIT - Edit a server.- DELETE - Remove a server.- SETUP - Configure general settings.[]>
特定のドメインの代替 DNSサーバの追加
特定のローカルドメインを除き、すべてのDNSクエリーでインターネットルートサーバを使用するようにアプライアンスを設定できます。
mail3.example.com> dnsconfigCurrently using the Internet root DNS servers.No alternate authoritative servers configured.Choose the operation you want to perform:- NEW - Add a new server.- SETUP - Configure general settings.[]> newPlease enter the domain this server is authoritative for. (Ex: "com").[]> example.comPlease enter the fully qualified hostname of the DNS server for the domain "example.com".(Ex: "dns.example.com").[]> dns.example.comPlease enter the IP address of dns.example.com.[]> 10.1.10.9Currently using the Internet root DNS servers.Alternate authoritative DNS servers:1. com: dns.example.com (10.1.10.9)Choose the operation you want to perform:- NEW - Add a new server.- EDIT - Edit a server.- DELETE - Remove a server.- SETUP - Configure general settings.[]>
独自の DNSキャッシュサーバの使用
独自の DNSキャッシュサーバを使用するようにアプライアンスを設定できます。
mail3.example.com> dnsconfigCurrently using the Internet root DNS servers.
コマンド:参考例
64
コマンド:参考例
特定のドメインの代替 DNSサーバの追加

Alternate authoritative DNS servers:1. com: dns.example.com (10.1.10.9)Choose the operation you want to perform:- NEW - Add a new server.- EDIT - Edit a server.- DELETE - Remove a server.- SETUP - Configure general settings.[]> setupDo you want the Gateway to use the Internet's root DNS servers or would you likeit to use your own DNS servers?1. Use Internet root DNS servers2. Use own DNS cache servers[1]> 2Please enter the IP address of your DNS server.Separate multiple IPs with commas.[]> 10.10.200.03Please enter the priority for 10.10.200.3.A value of 0 has the highest priority.The IP will be chosen at random if they have the same priority.[0]> 1Choose the IP interface for DNS traffic.1. Auto2. Management (192.168.42.42/24)3. PrivateNet (192.168.1.1/24: mail3.example.com)4. PublicNet (192.168.2.1/24: mail3.example.com)[1]> 1Enter the number of seconds to wait before timing out reverse DNS lookups.[20]>Enter the minimum TTL in seconds for DNS cache.[1800]>Currently using the local DNS cache servers:1. Priority: 1 10.10.200.3Choose the operation you want to perform:- NEW - Add a new server.- EDIT - Edit a server.- DELETE - Remove a server.- SETUP - Configure general settings.[]>
dnsflush
説明
DNSキャッシュからすべてのエントリをクリアします。
使用方法
確定:このコマンドに「commit」は必要ありません。
クラスタ管理:このコマンドはマシンモードでのみ使用できます。
バッチコマンド:このコマンドはバッチ形式をサポートしていません。
例
mail3.example.com> dnsflushAre you sure you want to clear out the DNS cache? [N]> Y
コマンド:参考例
65
コマンド:参考例
dnsflush
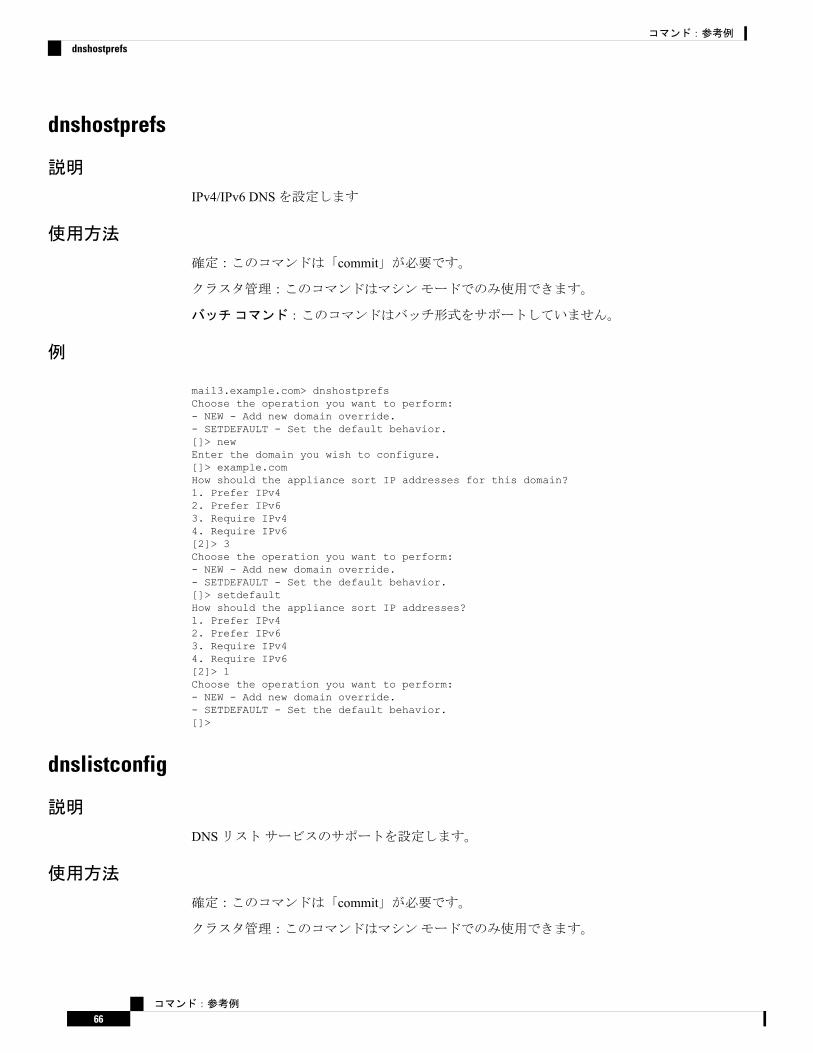
dnshostprefs
説明
IPv4/IPv6 DNSを設定します
使用方法
確定:このコマンドは「commit」が必要です。
クラスタ管理:このコマンドはマシンモードでのみ使用できます。
バッチコマンド:このコマンドはバッチ形式をサポートしていません。
例
mail3.example.com> dnshostprefsChoose the operation you want to perform:- NEW - Add new domain override.- SETDEFAULT - Set the default behavior.[]> newEnter the domain you wish to configure.[]> example.comHow should the appliance sort IP addresses for this domain?1. Prefer IPv42. Prefer IPv63. Require IPv44. Require IPv6[2]> 3Choose the operation you want to perform:- NEW - Add new domain override.- SETDEFAULT - Set the default behavior.[]> setdefaultHow should the appliance sort IP addresses?1. Prefer IPv42. Prefer IPv63. Require IPv44. Require IPv6[2]> 1Choose the operation you want to perform:- NEW - Add new domain override.- SETDEFAULT - Set the default behavior.[]>
dnslistconfig
説明
DNSリストサービスのサポートを設定します。
使用方法
確定:このコマンドは「commit」が必要です。
クラスタ管理:このコマンドはマシンモードでのみ使用できます。
コマンド:参考例
66
コマンド:参考例
dnshostprefs
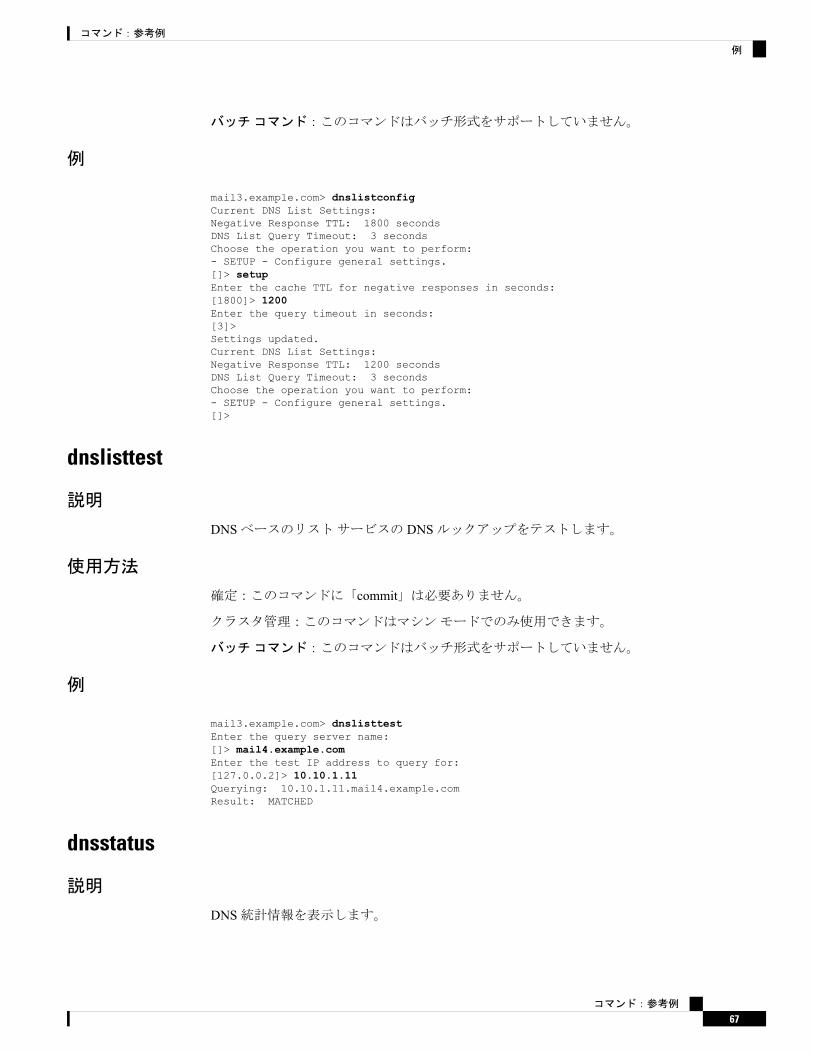
バッチコマンド:このコマンドはバッチ形式をサポートしていません。
例
mail3.example.com> dnslistconfigCurrent DNS List Settings:Negative Response TTL: 1800 secondsDNS List Query Timeout: 3 secondsChoose the operation you want to perform:- SETUP - Configure general settings.[]> setupEnter the cache TTL for negative responses in seconds:[1800]> 1200Enter the query timeout in seconds:[3]>Settings updated.Current DNS List Settings:Negative Response TTL: 1200 secondsDNS List Query Timeout: 3 secondsChoose the operation you want to perform:- SETUP - Configure general settings.[]>
dnslisttest
説明
DNSベースのリストサービスの DNSルックアップをテストします。
使用方法
確定:このコマンドに「commit」は必要ありません。
クラスタ管理:このコマンドはマシンモードでのみ使用できます。
バッチコマンド:このコマンドはバッチ形式をサポートしていません。
例
mail3.example.com> dnslisttestEnter the query server name:[]> mail4.example.comEnter the test IP address to query for:[127.0.0.2]> 10.10.1.11Querying: 10.10.1.11.mail4.example.comResult: MATCHED
dnsstatus
説明
DNS統計情報を表示します。
コマンド:参考例
67
コマンド:参考例
例

使用方法
確定:このコマンドに「commit」は必要ありません。
クラスタ管理:このコマンドはマシンモードでのみ使用できます。
バッチコマンド:このコマンドはバッチ形式をサポートしていません。
例
mail3.example.com> dnsstatusStatus as of: Mon Apr 18 10:58:07 2005 PDTCounters: Reset Uptime LifetimeDNS Requests 1,115 1,115 1,115Network Requests 186 186 186Cache Hits 1,300 1,300 1,300Cache Misses 1 1 1Cache Exceptions 0 0 0Cache Expired 185 185 185
How-Toウィジェットを使用したユーザエクスペリエンスの強化
ここでは、次の CLIコマンドについて説明します。
• howtoupdate(68ページ)
• howtostatus(69ページ)
howtoupdate
説明
howtoupdateコマンドを使用すると、How-Toコンポーネントを手動で更新できます。
使用法
確定:このコマンドに commitは必要ありません。
クラスタ管理:このコマンドは、すべてのマシンモード(クラスタ、グループ、マシン)で使
用できます。
バッチコマンド:このコマンドはバッチ形式をサポートしています。詳細については、help
howtoupdateコマンドを入力して、インラインヘルプを参照してください。
例
次の例で、howtoupdateコマンドを使用すると、How-Toコンポーネントを手動で更新できます。
コマンド:参考例
68
コマンド:参考例
使用方法

mail.example.com > howtoupdate
Requesting update of How-Tos component
howtostatus
説明
howtostatusコマンドを使用すると、How-Toコンポーネントの現在のバージョンを表示できます。
使用法
確定:このコマンドに commitは必要ありません。
クラスタ管理:このコマンドは、すべてのマシンモード(クラスタ、グループ、マシン)で使
用できます。
バッチコマンド:このコマンドはバッチ形式をサポートしています。詳細については、help
howtostatusコマンドを入力して、インラインヘルプを参照してください。
例
次の例で、howtostatusコマンドを使用すると、How-Toコンポーネントの現在のバージョンを表示できます。
mail.example.com > howtostatus
Component Version Last UpdatedHow-Tos 1.0 4 Jul 2018 04:22 (GMT +00:00)
一般的な管理/トラブルシューティングここでは、次の CLIコマンドについて説明します。
• addressconfig(71ページ)• adminaccessconfig(72ページ)• certconfig(77ページ)• date(81ページ)• diagnostic(82ページ)• diskquotaconfig(88ページ)• ecconfig (89ページ)• ecstatus (90ページ)• ecupdate (90ページ)• encryptionconfig(91ページ)• encryptionstatus(94ページ)• encryptionupdate(94ページ)• enginestatus(95ページ)
コマンド:参考例
69
コマンド:参考例
howtostatus
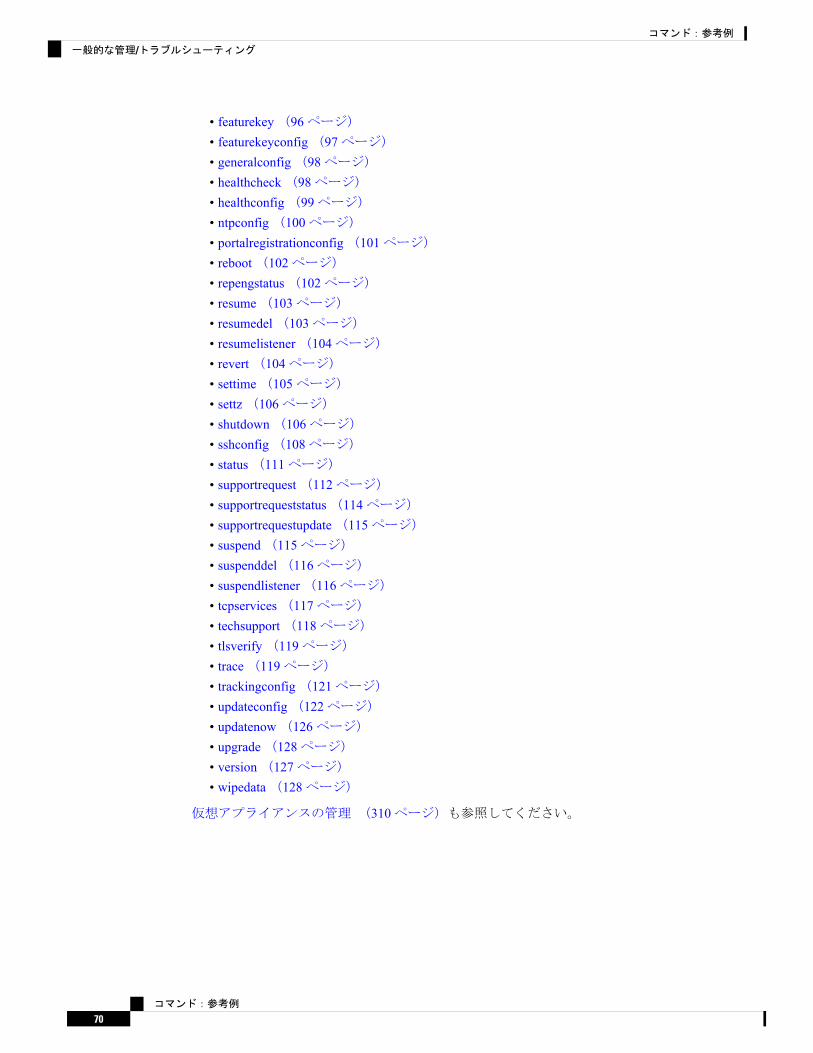
• featurekey(96ページ)• featurekeyconfig(97ページ)• generalconfig(98ページ)• healthcheck(98ページ)• healthconfig(99ページ)• ntpconfig(100ページ)• portalregistrationconfig(101ページ)• reboot(102ページ)• repengstatus(102ページ)• resume(103ページ)• resumedel(103ページ)• resumelistener(104ページ)• revert(104ページ)• settime(105ページ)• settz(106ページ)• shutdown(106ページ)• sshconfig(108ページ)• status(111ページ)• supportrequest(112ページ)• supportrequeststatus(114ページ)• supportrequestupdate(115ページ)• suspend(115ページ)• suspenddel(116ページ)• suspendlistener(116ページ)• tcpservices(117ページ)• techsupport(118ページ)• tlsverify(119ページ)• trace(119ページ)• trackingconfig(121ページ)• updateconfig(122ページ)• updatenow(126ページ)• upgrade(128ページ)• version(127ページ)• wipedata(128ページ)
仮想アプライアンスの管理 (310ページ)も参照してください。
コマンド:参考例
70
コマンド:参考例
一般的な管理/トラブルシューティング

addressconfig
説明
addressconfigコマンドは、From:アドレスヘッダーを設定するために使用します。From:アドレスの表示、ユーザ、およびドメイン名を指定できます。ドメイン名に仮想ゲートウェイ
ドメインの使用を選択することもできます。次の状況では、AsyncOSによって生成されたメールには addressconfigコマンドを使用します。
• Anti-Virus通知•バウンス• DMARCフィードバックレポート(DMARC Feedback Reports)•通知(notify()および notify-copy()フィルタの動作)•隔離メッセージ(および隔離管理機能における「コピー送信」)•レポート•その他のすべてのメッセージ
次の例では、通知の From:アドレスをMail Delivery System [MAILER-DAEMON@domain](デフォルト)から Notifications [[email protected]]に変更します。
使用方法
確定:このコマンドは「commit」が必要です。
クラスタ管理:このコマンドは、すべてのマシンモード(クラスタ、グループ、マシン)で使
用できます。
バッチコマンド:このコマンドはバッチ形式をサポートしていません。
例
mail3.example.com> addressconfigCurrent anti-virus from: "Mail Delivery System" <MAILER-DAEMON@domain>Current bounce from: "Mail Delivery System" <MAILER-DAEMON@domain>Current notify from: "Mail Delivery System" <MAILER-DAEMON@domain>Current quarantine from: "Mail Delivery System" <MAILER-DAEMON@domain>Current DMARC reports from: "DMARC Feedback" <MAILER-DAEMON@domain>Current all other messages from: "Mail Delivery System" <MAILER-DAEMON@domain>Choose the operation you want to perform:- AVFROM - Edit the anti-virus from address.- BOUNCEFROM - Edit the bounce from address.- NOTIFYFROM - Edit the notify from address.- QUARANTINEFROM - Edit the quarantine bcc from address.- DMARCFROM - Edit the DMARC reports from address.- OTHERFROM - Edit the all other messages from address.[]> notifyfromPlease enter the display name portion of the "notify from" address["Mail Delivery System"]> NotificationsPlease enter the user name portion of the "notify from" address[MAILER-DAEMON]> NotificationDo you want the virtual gateway domain used for the domain? [Y]> nPlease enter the domain name portion of the "notify from" address[]> example.com
コマンド:参考例
71
コマンド:参考例
addressconfig

Current anti-virus from: "Mail Delivery System" <MAILER-DAEMON@domain>Current bounce from: "Mail Delivery System" <MAILER-DAEMON@domain>Current notify from: Notifications <[email protected]>Current quarantine from: "Mail Delivery System" <MAILER-DAEMON@domain>Current DMARC reports from: "DMARC Feedback" <MAILER-DAEMON@domain>Current all other messages from: "Mail Delivery System" <MAILER-DAEMON@domain>Choose the operation you want to perform:- AVFROM - Edit the anti-virus from address.- BOUNCEFROM - Edit the bounce from address.- NOTIFYFROM - Edit the notify from address.- QUARANTINEFROM - Edit the quarantine bcc from address.- DMARCFROM - Edit the DMARC reports from address.- OTHERFROM - Edit the all other messages from address.[]>
adminaccessconfig
説明
次を設定する場合に adminaccessconfigコマンドを使用します。
•管理者のログインメッセージ(バナー)。•アプライアンスの管理インターフェイスへの IPベースのアクセス。• Webインターフェイスのクロスサイトリクエスト偽造保護。• HTTP要求でホストヘッダーを使用するオプション。• Webインターフェイスおよび CLIセッションの非アクティブタイムアウト。•最大 HTTPヘッダーサイズ。
使用方法
確定:このコマンドは「commit」が必要です。
クラスタ管理:このコマンドは、すべてのマシンモード(クラスタ、グループ、マシン)で使
用できます。
バッチコマンド:このコマンドはバッチ形式をサポートしています。
バッチ形式
adminaccessconfigコマンドのバッチ形式を使用すると、従来のCLIコマンドのすべての機能を実行できます。
•すべての IPアドレスにアクセスを許可するか、特定の IPアドレス/サブネット/範囲にアクセスを制限するかの選択
adminaccessconfig ipaccess <all/restrict/proxyonly/proxy>
•新しい IPアドレス/サブネット/範囲の追加
adminaccessconfig ipaccess new <address>
コマンド:参考例
72
コマンド:参考例
adminaccessconfig
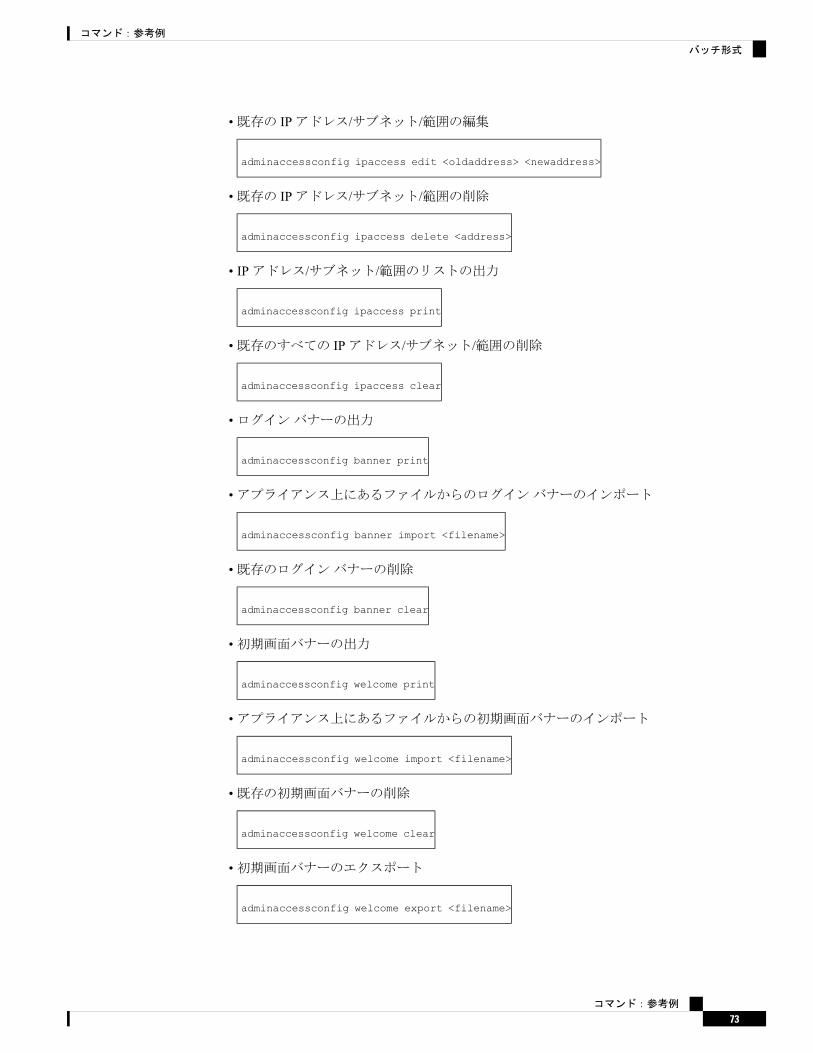
•既存の IPアドレス/サブネット/範囲の編集
adminaccessconfig ipaccess edit <oldaddress> <newaddress>
•既存の IPアドレス/サブネット/範囲の削除
adminaccessconfig ipaccess delete <address>
• IPアドレス/サブネット/範囲のリストの出力
adminaccessconfig ipaccess print
•既存のすべての IPアドレス/サブネット/範囲の削除
adminaccessconfig ipaccess clear
•ログインバナーの出力
adminaccessconfig banner print
•アプライアンス上にあるファイルからのログインバナーのインポート
adminaccessconfig banner import <filename>
•既存のログインバナーの削除
adminaccessconfig banner clear
•初期画面バナーの出力
adminaccessconfig welcome print
•アプライアンス上にあるファイルからの初期画面バナーのインポート
adminaccessconfig welcome import <filename>
•既存の初期画面バナーの削除
adminaccessconfig welcome clear
•初期画面バナーのエクスポート
adminaccessconfig welcome export <filename>
コマンド:参考例
73
コマンド:参考例
バッチ形式

•許可されたプロキシの IPアドレスの追加
adminaccessconfig ipaccess proxylist new <address>
•許可されたプロキシの IPアドレスの編集
adminaccessconfig ipaccess proxylist edit <oldaddress> <newaddress>
•許可されたプロキシの IPアドレスの削除
adminaccessconfig ipaccess proxylist delete <address>
•すべての既存の許可されたプロキシの IPアドレスの削除
adminaccessconfig ipaccess proxylist clear
•送信元 IPアドレスを含むヘッダー名の設定
adminaccessconfig ipaccess proxy-header <header name>
• Webインターフェイスのクロスサイトリクエスト偽造保護の有効化または無効化
adminaccessconfig csrf <enable|disable>
• Webインターフェイスのクロスサイトリクエスト偽造保護が有効かどうかの確認
adminaccessconfig csrf print
• Webインターフェイスのセッションタイムアウトの設定
adminaccessconfig timeout gui <value>
• CLIセッションタイムアウトの設定
adminaccessconfig timeout gui <value>
例:ネットワークアクセスリストの設定
Eメールセキュリティアプライアンスにアクセスするユーザの IPアドレスを制御できます。ユーザは、定義したアクセスリストの IPアドレスを持つすべてのマシンから、アプライアンスにアクセスできます。ネットワークアクセスリストを作成する際は、IPアドレス、サブネット、または CIDRアドレスを指定できます。
コマンド:参考例
74
コマンド:参考例
例:ネットワークアクセスリストの設定

AsyncOSでは、現在のマシンの IPアドレスがネットワークアクセスリストに含まれていない場合に警告を表示します。現在のマシンの IPアドレスがリストにない場合、変更をコミットするとアプライアンスにアクセスできなくなります。
次の例では、アプライアンスへのネットワークアクセスを 2つの IPアドレスセットに制限します。
mail.example.com> adminaccessconfigChoose the operation you want to perform:- BANNER - Configure login message (banner) for appliance administrator login.- WELCOME - Configure welcome message (post login message) for appliance administratorlogin.- IPACCESS - Configure IP-based access for appliance administrative interface.- CSRF - Configure web UI Cross-Site Request Forgeries protection.- HOSTHEADER - Configure option to use host header in HTTP requests.- TIMEOUT - Configure GUI and CLI session inactivity timeout.- MAXHTTPHEADERFIELDSIZE - Configure maximum HTTP header field size.[]> ipaccessCurrent mode: Allow All.Please select the mode:- ALL - All IP addresses will be allowed to access the administrative interface.- RESTRICT - Specify IP addresses/Subnets/Ranges to be allowed access.- PROXYONLY - Specify IP addresses/Subnets/Ranges to be allowed access through proxy.- PROXY - Specify IP addresses/Subnets/Ranges to be allowed access through proxy ordirectly.[]> restrictList of allowed IP addresses/Subnets/Ranges:Choose the operation you want to perform:- NEW - Add a new IP address/subnet/range.[]> newPlease enter IP address, subnet or range.[]> 192.168.1.2-100List of allowed IP addresses/Subnets/Ranges:1. 192.168.1.2-100Choose the operation you want to perform:- NEW - Add a new IP address/subnet/range.- EDIT - Modify an existing entry.- DELETE - Remove an existing entry.- CLEAR - Remove all the entries.[]> newPlease enter IP address, subnet or range.[]> 192.168.255.12List of allowed IP addresses/Subnets/Ranges:1. 192.168.1.2-1002. 192.168.255.12Choose the operation you want to perform:- NEW - Add a new IP address/subnet/range.- EDIT - Modify an existing entry.- DELETE - Remove an existing entry.- CLEAR - Remove all the entries.[]>Warning: The host you are currently using [72.163.202.175] is not included in the UserAccess list. Excluding it will prevent yourhost from connecting to the administrative interface. Are you sure you want to continue?[N]> YCurrent mode: Restrict.Please select the mode:- ALL - All IP addresses will be allowed to access the administrative interface.- RESTRICT - Specify IP addresses/Subnets/Ranges to be allowed access.- PROXYONLY - Specify IP addresses/Subnets/Ranges to be allowed access through proxy.- PROXY - Specify IP addresses/Subnets/Ranges to be allowed access through proxy or
コマンド:参考例
75
コマンド:参考例
例:ネットワークアクセスリストの設定

directly.[]>
例:ログインバナーの設定
ユーザが SSH、Telnet、FTP、またはWeb UIからログインしようとした際に、「ログインバナー」と呼ばれるメッセージを表示するように Eメールセキュリティアプライアンスを設定できます。ログインバナーは、CLIでログインプロンプトの上部に表示され、GUIでログインプロンプトの右側に表示されるカスタマイズ可能なテキストです。ログインバナーを使用
して、内部のセキュリティ情報またはアプライアンスのベストプラクティスに関する説明を表
示できます。たとえば、許可しないアプライアンスの使用を禁止する簡単な注意文言を作成し
たり、ユーザがアプライアンスに対して行った変更を確認する企業の権利に関する詳細な警告
を作成したりできます。
ログインバナーは、80 x 25のコンソールに収まるように最大 2000文字になっています。ログインバナーは、アプライアンスの /data/pub/configurationディレクトリにあるファイルからインポートできます。バナーを作成したら、変更内容を確定します。
次の例では、アプライアンスにログインバナー「Use of this system in an unauthorized manner isprohibited」を追加します。
mail.example.com> adminaccessconfigChoose the operation you want to perform:- BANNER - Configure login message (banner) for appliance administrator login.- WELCOME - Configure welcome message (post login message) for appliance administratorlogin.- IPACCESS - Configure IP-based access for appliance administrative interface.- CSRF - Configure web UI Cross-Site Request Forgeries protection.- HOSTHEADER - Configure option to use host header in HTTP requests.- TIMEOUT - Configure GUI and CLI session inactivity timeout.- MAXHTTPHEADERFIELDSIZE - Configure maximum HTTP header field size.[]> bannerA banner has not been defined.Choose the operation you want to perform:- NEW - Create a banner to display at login.- IMPORT - Import banner text from a file.[]> newEnter or paste the banner text here. Enter CTRL-D on a blank line to end.Use of this system in an unauthorized manner is prohibited.^DChoose the operation you want to perform:- BANNER - Configure login message (banner) for appliance administrator login.- WELCOME - Configure welcome message (post login message) for appliance administratorlogin.- IPACCESS - Configure IP-based access for appliance administrative interface.- CSRF - Configure web UI Cross-Site Request Forgeries protection.- HOSTHEADER - Configure option to use host header in HTTP requests.- TIMEOUT - Configure GUI and CLI session inactivity timeout.[]> bannerBanner: Use of this system in an unauthorized manner is prohibited.Choose the operation you want to perform:- NEW - Create a banner to display at login.- IMPORT - Import banner text from a file.- DELETE - Remove the banner.[]>
コマンド:参考例
76
コマンド:参考例
例:ログインバナーの設定

例:Webインターフェイスおよび CLIセッションタイムアウトの設定
次の例では、Webインターフェイスと CLIセッションタイムアウトを 32分に設定します。
CLIセッションタイムアウトは、セキュアシェル(SSH)、SCP、および直接シリアル接続を使用する接続にだけ適用されます。CLIセッションタイムアウト時に未確定の設定変更は失われます。設定を変更したらすぐに確定してください。
(注)
mail.example.com> adminaccessconfigChoose the operation you want to perform:- BANNER - Configure login message (banner) for appliance administrator login.- WELCOME - Configure welcome message (post login message) for appliance administratorlogin.- IPACCESS - Configure IP-based access for appliance administrative interface.- CSRF - Configure web UI Cross-Site Request Forgeries protection.- HOSTHEADER - Configure option to use host header in HTTP requests.- TIMEOUT - Configure GUI and CLI session inactivity timeout.- MAXHTTPHEADERFIELDSIZE - Configure maximum HTTP header field size.[]> timeoutEnter WebUI inactivity timeout(in minutes):[30]> 32Enter CLI inactivity timeout(in minutes):[30]> 32Choose the operation you want to perform:- BANNER - Configure login message (banner) for appliance administrator login.- WELCOME - Configure welcome message (post login message) for appliance administratorlogin.- IPACCESS - Configure IP-based access for appliance administrative interface.- CSRF - Configure web UI Cross-Site Request Forgeries protection.- HOSTHEADER - Configure option to use host header in HTTP requests.- TIMEOUT - Configure GUI and CLI session inactivity timeout.[]>mail.example.com> commitPlease enter some comments describing your changes:[]> Changed WebUI and CLI session timeout valuesDo you want to save the current configuration for rollback? [Y]>Changes committed: Wed Mar 12 08:03:21 2014 GMT
変更を確定した後、新しい CLIセッションタイムアウトは次回以降のログイン時にだけ反映されます。
(注)
certconfig
説明
セキュリティの証明書とキーを設定します。
使用方法
確定:このコマンドは「commit」が必要です。
コマンド:参考例
77
コマンド:参考例
例:Webインターフェイスおよび CLIセッションタイムアウトの設定
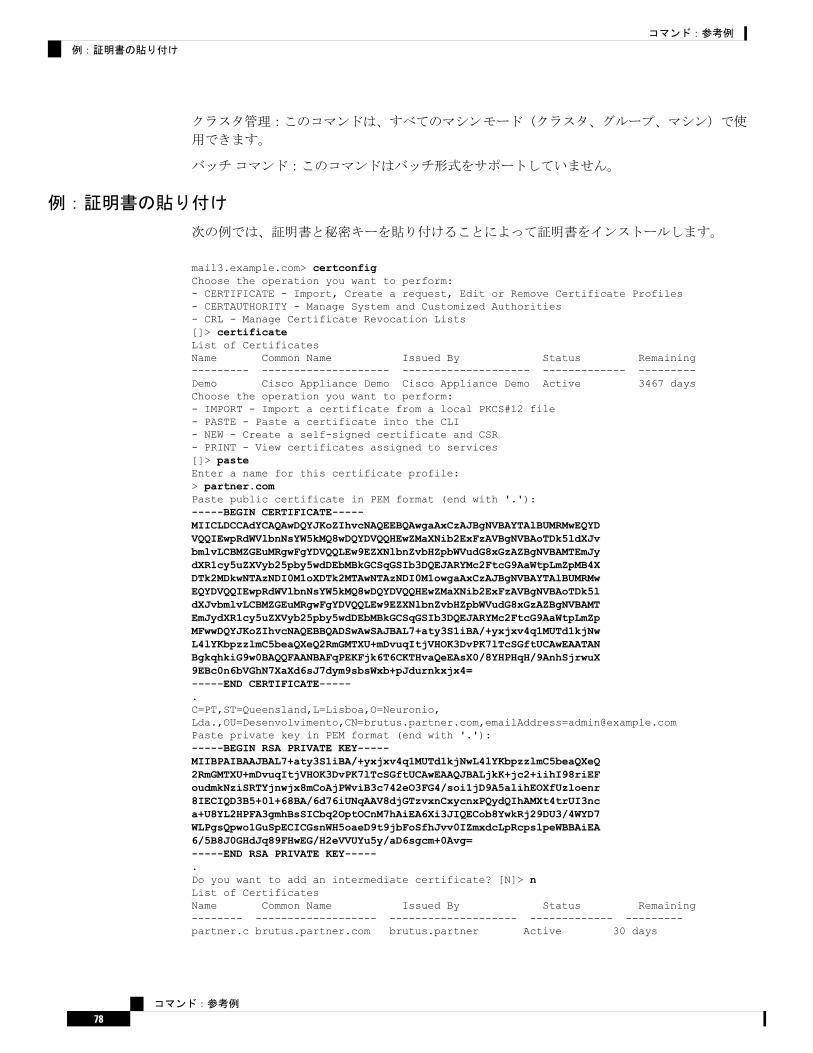
クラスタ管理:このコマンドは、すべてのマシンモード(クラスタ、グループ、マシン)で使
用できます。
バッチコマンド:このコマンドはバッチ形式をサポートしていません。
例:証明書の貼り付け
次の例では、証明書と秘密キーを貼り付けることによって証明書をインストールします。
mail3.example.com> certconfigChoose the operation you want to perform:- CERTIFICATE - Import, Create a request, Edit or Remove Certificate Profiles- CERTAUTHORITY - Manage System and Customized Authorities- CRL - Manage Certificate Revocation Lists[]> certificateList of CertificatesName Common Name Issued By Status Remaining--------- -------------------- -------------------- ------------- ---------Demo Cisco Appliance Demo Cisco Appliance Demo Active 3467 daysChoose the operation you want to perform:- IMPORT - Import a certificate from a local PKCS#12 file- PASTE - Paste a certificate into the CLI- NEW - Create a self-signed certificate and CSR- PRINT - View certificates assigned to services[]> pasteEnter a name for this certificate profile:> partner.comPaste public certificate in PEM format (end with '.'):-----BEGIN CERTIFICATE-----MIICLDCCAdYCAQAwDQYJKoZIhvcNAQEEBQAwgaAxCzAJBgNVBAYTAlBUMRMwEQYDVQQIEwpRdWVlbnNsYW5kMQ8wDQYDVQQHEwZMaXNib2ExFzAVBgNVBAoTDk5ldXJvbmlvLCBMZGEuMRgwFgYDVQQLEw9EZXNlbnZvbHZpbWVudG8xGzAZBgNVBAMTEmJydXR1cy5uZXVyb25pby5wdDEbMBkGCSqGSIb3DQEJARYMc2FtcG9AaWtpLmZpMB4XDTk2MDkwNTAzNDI0M1oXDTk2MTAwNTAzNDI0M1owgaAxCzAJBgNVBAYTAlBUMRMwEQYDVQQIEwpRdWVlbnNsYW5kMQ8wDQYDVQQHEwZMaXNib2ExFzAVBgNVBAoTDk5ldXJvbmlvLCBMZGEuMRgwFgYDVQQLEw9EZXNlbnZvbHZpbWVudG8xGzAZBgNVBAMTEmJydXR1cy5uZXVyb25pby5wdDEbMBkGCSqGSIb3DQEJARYMc2FtcG9AaWtpLmZpMFwwDQYJKoZIhvcNAQEBBQADSwAwSAJBAL7+aty3S1iBA/+yxjxv4q1MUTd1kjNwL4lYKbpzzlmC5beaQXeQ2RmGMTXU+mDvuqItjVHOK3DvPK7lTcSGftUCAwEAATANBgkqhkiG9w0BAQQFAANBAFqPEKFjk6T6CKTHvaQeEAsX0/8YHPHqH/9AnhSjrwuX9EBc0n6bVGhN7XaXd6sJ7dym9sbsWxb+pJdurnkxjx4=-----END CERTIFICATE-----.C=PT,ST=Queensland,L=Lisboa,O=Neuronio,Lda.,OU=Desenvolvimento,CN=brutus.partner.com,[email protected] private key in PEM format (end with '.'):-----BEGIN RSA PRIVATE KEY-----MIIBPAIBAAJBAL7+aty3S1iBA/+yxjxv4q1MUTd1kjNwL4lYKbpzzlmC5beaQXeQ2RmGMTXU+mDvuqItjVHOK3DvPK7lTcSGftUCAwEAAQJBALjkK+jc2+iihI98riEFoudmkNziSRTYjnwjx8mCoAjPWviB3c742eO3FG4/soi1jD9A5alihEOXfUzloenr8IECIQD3B5+0l+68BA/6d76iUNqAAV8djGTzvxnCxycnxPQydQIhAMXt4trUI3nca+U8YL2HPFA3gmhBsSICbq2OptOCnM7hAiEA6Xi3JIQECob8YwkRj29DU3/4WYD7WLPgsQpwo1GuSpECICGsnWH5oaeD9t9jbFoSfhJvv0IZmxdcLpRcpslpeWBBAiEA6/5B8J0GHdJq89FHwEG/H2eVVUYu5y/aD6sgcm+0Avg=-----END RSA PRIVATE KEY-----.Do you want to add an intermediate certificate? [N]> nList of CertificatesName Common Name Issued By Status Remaining-------- ------------------- -------------------- ------------- ---------partner.c brutus.partner.com brutus.partner Active 30 days
コマンド:参考例
78
コマンド:参考例
例:証明書の貼り付け

Demo Cisco Appliance Demo Cisco Appliance Demo Active 3467 daysChoose the operation you want to perform:- IMPORT - Import a certificate from a local PKCS#12 file- PASTE - Paste a certificate into the CLI- NEW - Create a self-signed certificate and CSR- EDIT - Update certificate or view the signing request- EXPORT - Export a certificate- DELETE - Remove a certificate- PRINT - View certificates assigned to services[]>Choose the operation you want to perform:- CERTIFICATE - Import, Create a request, Edit or Remove Certificate Profiles- CERTAUTHORITY - Manage System and Customized Authorities- CRL - Manage Certificate Revocation Lists[]>mail3.example.com> commitPlease enter some comments describing your changes:[]> Installed certificate and key for receiving, delivery, and httpsDo you want to save the current configuration for rollback? [Y]> nChanges committed: Fri May 23 11:42:12 2014 GMT
例:自己署名証明書の作成
次の例では、自己署名証明書を作成します。
mail3.example.com> certconfigChoose the operation you want to perform:- CERTIFICATE - Import, Create a request, Edit or Remove Certificate Profiles- CERTAUTHORITY - Manage System and Customized Authorities- CRL - Manage Certificate Revocation Lists[]> certificateList of CertificatesName Common Name Issued By Status Remaining--------- -------------------- -------------------- ------------- ---------partner.c brutus.neuronio.pt brutus.neuronio.pt Expired -4930daysDemo Cisco Appliance Demo Cisco Appliance Demo Active 3467 daysChoose the operation you want to perform:- IMPORT - Import a certificate from a local PKCS#12 file- PASTE - Paste a certificate into the CLI- NEW - Create a self-signed certificate and CSR- EDIT - Update certificate or view the signing request- EXPORT - Export a certificate- DELETE - Remove a certificate- PRINT - View certificates assigned to services[]> new1. Create a self-signed certificate and CSR2. Create a self-signed SMIME certificate and CSR[1]> 1Enter a name for this certificate profile:> example.comEnter Common Name:> example.comEnter Organization:> ExampleEnter Organizational Unit:> OrgEnter Locality or City:> San FrancisocEnter State or Province:> CAEnter Country (2 letter code):
コマンド:参考例
79
コマンド:参考例
例:自己署名証明書の作成
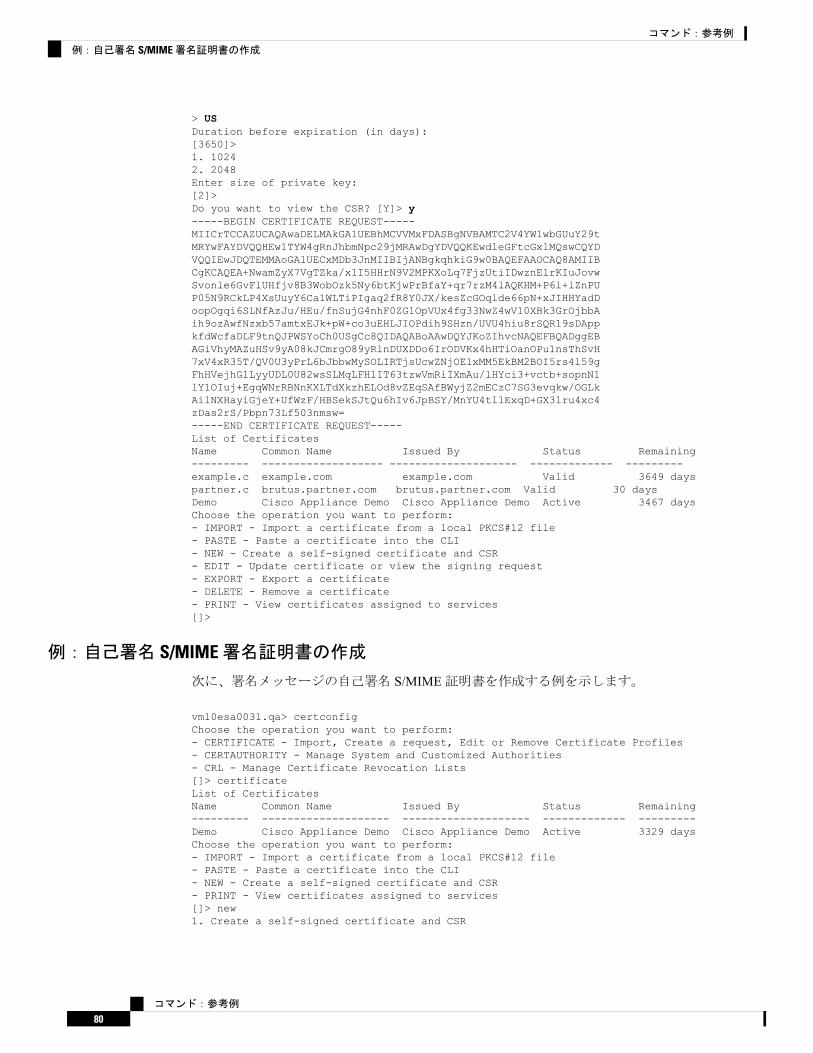
> USDuration before expiration (in days):[3650]>1. 10242. 2048Enter size of private key:[2]>Do you want to view the CSR? [Y]> y-----BEGIN CERTIFICATE REQUEST-----MIICrTCCAZUCAQAwaDELMAkGA1UEBhMCVVMxFDASBgNVBAMTC2V4YW1wbGUuY29tMRYwFAYDVQQHEw1TYW4gRnJhbmNpc29jMRAwDgYDVQQKEwdleGFtcGxlMQswCQYDVQQIEwJDQTEMMAoGA1UECxMDb3JnMIIBIjANBgkqhkiG9w0BAQEFAAOCAQ8AMIIBCgKCAQEA+NwamZyX7VgTZka/x1I5HHrN9V2MPKXoLq7FjzUtiIDwznElrKIuJovwSvonle6GvFlUHfjv8B3WobOzk5Ny6btKjwPrBfaY+qr7rzM4lAQKHM+P6l+lZnPUP05N9RCkLP4XsUuyY6Ca1WLTiPIgaq2fR8Y0JX/kesZcGOqlde66pN+xJIHHYadDoopOgqi6SLNfAzJu/HEu/fnSujG4nhF0ZGlOpVUx4fg33NwZ4wVl0XBk3GrOjbbAih9ozAwfNzxb57amtxEJk+pW+co3uEHLJIOPdih9SHzn/UVU4hiu8rSQR19sDAppkfdWcfaDLF9tnQJPWSYoCh0USgCc8QIDAQABoAAwDQYJKoZIhvcNAQEFBQADggEBAGiVhyMAZuHSv9yA08kJCmrgO89yRlnDUXDDo6IrODVKx4hHTiOanOPu1nsThSvH7xV4xR35T/QV0U3yPrL6bJbbwMySOLIRTjsUcwZNjOE1xMM5EkBM2BOI5rs4l59gFhHVejhG1LyyUDL0U82wsSLMqLFH1IT63tzwVmRiIXmAu/lHYci3+vctb+sopnN1lY1OIuj+EgqWNrRBNnKXLTdXkzhELOd8vZEqSAfBWyjZ2mECzC7SG3evqkw/OGLkAilNXHayiGjeY+UfWzF/HBSekSJtQu6hIv6JpBSY/MnYU4tllExqD+GX3lru4xc4zDas2rS/Pbpn73Lf503nmsw=-----END CERTIFICATE REQUEST-----List of CertificatesName Common Name Issued By Status Remaining--------- ------------------- -------------------- ------------- ---------example.c example.com example.com Valid 3649 dayspartner.c brutus.partner.com brutus.partner.com Valid 30 daysDemo Cisco Appliance Demo Cisco Appliance Demo Active 3467 daysChoose the operation you want to perform:- IMPORT - Import a certificate from a local PKCS#12 file- PASTE - Paste a certificate into the CLI- NEW - Create a self-signed certificate and CSR- EDIT - Update certificate or view the signing request- EXPORT - Export a certificate- DELETE - Remove a certificate- PRINT - View certificates assigned to services[]>
例:自己署名 S/MIME署名証明書の作成
次に、署名メッセージの自己署名 S/MIME証明書を作成する例を示します。
vm10esa0031.qa> certconfigChoose the operation you want to perform:- CERTIFICATE - Import, Create a request, Edit or Remove Certificate Profiles- CERTAUTHORITY - Manage System and Customized Authorities- CRL - Manage Certificate Revocation Lists[]> certificateList of CertificatesName Common Name Issued By Status Remaining--------- -------------------- -------------------- ------------- ---------Demo Cisco Appliance Demo Cisco Appliance Demo Active 3329 daysChoose the operation you want to perform:- IMPORT - Import a certificate from a local PKCS#12 file- PASTE - Paste a certificate into the CLI- NEW - Create a self-signed certificate and CSR- PRINT - View certificates assigned to services[]> new1. Create a self-signed certificate and CSR
コマンド:参考例
80
コマンド:参考例
例:自己署名 S/MIME署名証明書の作成

2. Create a self-signed SMIME certificate and CSR[1]> 2Enter a name for this certificate profile:> smime_signingEnter Common Name:> CNEnter Organization:> ORGEnter Organizational Unit:> OUEnter Locality or City:> BNEnter State or Province:> KAEnter Country (2 letter code):> INDuration before expiration (in days):[3650]>1. 10242. 2048Enter size of private key:[2]>Enter email address for 'subjectAltName' extension:[]> [email protected] another member? [Y]> nBegin entering domain entries for 'subjectAltName'.Enter the DNS you want to add.[]> domain.comAdd another member? [Y]> nDo you want to view the CSR? [Y]> nList of CertificatesName Common Name Issued By Status Remaining--------- -------------------- -------------------- ------------- ---------smime_sig CN CN Valid 3649 daysDemo Cisco Appliance Demo Cisco Appliance Demo Active 3329 daysChoose the operation you want to perform:- IMPORT - Import a certificate from a local PKCS#12 file- PASTE - Paste a certificate into the CLI- NEW - Create a self-signed certificate and CSR- EDIT - Update certificate or view the signing request- EXPORT - Export a certificate- DELETE - Remove a certificate- PRINT - View certificates assigned to services[]>
date
説明
現在の日時を表示します
使用方法
確定:このコマンドに「commit」は必要ありません。
クラスタ管理:このコマンドは、すべてのマシンモード(クラスタ、グループ、マシン)で使
用できます。
バッチコマンド:このコマンドはバッチ形式をサポートしていません。
コマンド:参考例
81
コマンド:参考例
date

例
mail.example.com> dateTue Mar 10 11:30:21 2015 GMT
daneverify•説明(82ページ)
•使用法(82ページ)
•例(82ページ)
説明
指定されたドメインの DANEがサポートされているかどうかを確認します。
使用法
確定:このコマンドに commitは必要ありません。
クラスタ管理:このコマンドはマシンモードでのみ使用できます。
バッチコマンド:このコマンドはバッチ形式をサポートしています。詳細については、help
daneverifyコマンドを入力して、インラインヘルプを参照してください。
例
次の例で、daneverifyコマンドを使用すると、指定されたドメインの DANEサポートを確認できます。
mail3.example.com> daneverifyEnter the DANE domain to verify against: []> example-dane.netTrying DANE MANDATORY for example-dane.netSECURE MX RECORD found for example-dane.netSECURE A record (10.10.1.198) found for MX(mail.example.com.cs2.test-dane.net) inexample-dane.netSECURE TLSA Record found for MX(mail.example.com.cs2.test-dane.net) in example-dane.netTLS connection established: protocol TLSv1.2, cipher DHE-RSA-AES128-SHA256.Certificate verification successful for TLSArecord(030101329aad19cfb5a0bb8d3b99c67dd1282a4dcdf67bd9c4efc08578657065fe7504)TLS connection succeeded example-dane.net.DANE_SUCESS for example-dane.netDANE verification completed.
diagnostic
説明
diagnosticコマンドは次のために使用します。
コマンド:参考例
82
コマンド:参考例
例

•さまざまなユーティリティを使用した、ハードウェアとネットワークの問題のトラブルシューティング
• RAIDの状態のチェック• ARPキャッシュの表示• LDAP、DNS、および ARPキャッシュのクリア• SMTPテストメッセージの送信•アプライアンスで有効になっているサービスエンジンのステータスの再起動と表示
diagnosticコマンドの使用
diagnosticサブメニューでは、次のコマンドを使用できます。
表 5 : diagnosticサブコマンド
アベイラビリティサブコマンドオプション
C30および C60でのみ使用可能。1.ディスク検証の実行RAID
2.実行中のタスクのモニタ
3.ディスク検証結果の表示
このコマンドはすでに廃止されていま
す。代わりに、diskquotaconfigコマンドを使用します。
サブコマンドなしDISK_USAGE(廃止)
C-Series、X-Series、M-SeriesFLUSHNETWORK
ARPSHOW
SMTPPING
TCPDUMP
C-Series、X-Series、M-SeriesDELETEDBREPORTING
DISABLE
C-Series、X-Series、M-SeriesDELETEDBTRACKING
DEBUG
C-Series、X-Series、M-SeriesサブコマンドなしRELOAD
C-Series、X-Series、M-SeriesRESTART
STATUS
SERVICES
使用方法
確定:このコマンドに「commit」は必要ありません。
コマンド:参考例
83
コマンド:参考例
diagnosticコマンドの使用

クラスタ管理:このコマンドはマシンモードでのみ使用できます。さらに、このコマンドはロ
グインホスト(ユーザがログインしたマシン)でのみ使用できます。このコマンドを使用する
には、ローカルファイルシステムにアクセスできる必要があります。
バッチコマンド:このコマンドはバッチ形式をサポートしています。
バッチ形式
diagnosticコマンドのバッチ形式を使用すると、RAIDの状態のチェック、キャッシュのクリア、ARPキャッシュの内容の表示を実行できます。バッチコマンドとして実行するには、次の形式を使用します。
次の操作のためにバッチ形式を使用します。
• RAIDの状態のチェック
diagnostic raid
• ARPキャッシュの内容の表示
diagnostic network arpshow
• NDPキャッシュの内容の表示
diagnostic network ndpshow
• LDAP、DNS、ARP、および NDPキャッシュのクリア
diagnostic network flush
•レポートデータベースのリセットおよび削除
diagnostic reporting deletedb
•レポートデーモンの有効化
diagnostic reporting enable
•レポートデーモンの無効化
diagnostic reporting disable
•トラッキングデータベースのリセットおよび削除
コマンド:参考例
84
コマンド:参考例
バッチ形式
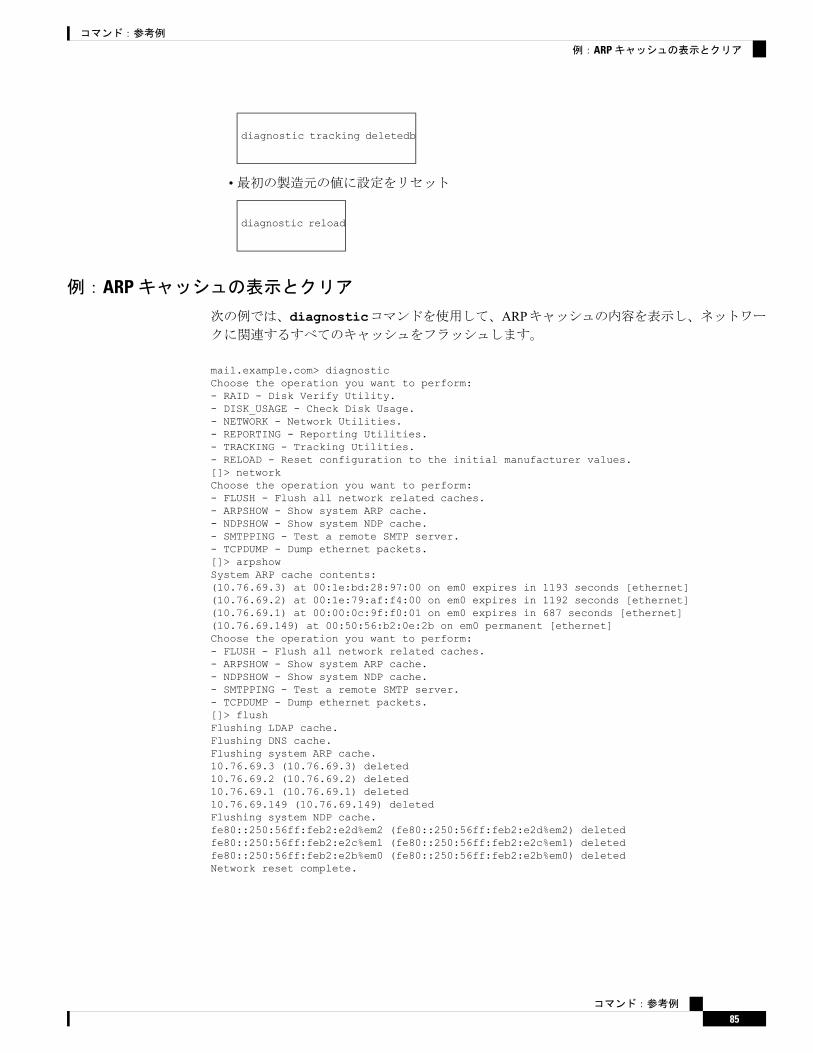
diagnostic tracking deletedb
•最初の製造元の値に設定をリセット
diagnostic reload
例:ARPキャッシュの表示とクリア
次の例では、diagnosticコマンドを使用して、ARPキャッシュの内容を表示し、ネットワークに関連するすべてのキャッシュをフラッシュします。
mail.example.com> diagnosticChoose the operation you want to perform:- RAID - Disk Verify Utility.- DISK_USAGE - Check Disk Usage.- NETWORK - Network Utilities.- REPORTING - Reporting Utilities.- TRACKING - Tracking Utilities.- RELOAD - Reset configuration to the initial manufacturer values.[]> networkChoose the operation you want to perform:- FLUSH - Flush all network related caches.- ARPSHOW - Show system ARP cache.- NDPSHOW - Show system NDP cache.- SMTPPING - Test a remote SMTP server.- TCPDUMP - Dump ethernet packets.[]> arpshowSystem ARP cache contents:(10.76.69.3) at 00:1e:bd:28:97:00 on em0 expires in 1193 seconds [ethernet](10.76.69.2) at 00:1e:79:af:f4:00 on em0 expires in 1192 seconds [ethernet](10.76.69.1) at 00:00:0c:9f:f0:01 on em0 expires in 687 seconds [ethernet](10.76.69.149) at 00:50:56:b2:0e:2b on em0 permanent [ethernet]Choose the operation you want to perform:- FLUSH - Flush all network related caches.- ARPSHOW - Show system ARP cache.- NDPSHOW - Show system NDP cache.- SMTPPING - Test a remote SMTP server.- TCPDUMP - Dump ethernet packets.[]> flushFlushing LDAP cache.Flushing DNS cache.Flushing system ARP cache.10.76.69.3 (10.76.69.3) deleted10.76.69.2 (10.76.69.2) deleted10.76.69.1 (10.76.69.1) deleted10.76.69.149 (10.76.69.149) deletedFlushing system NDP cache.fe80::250:56ff:feb2:e2d%em2 (fe80::250:56ff:feb2:e2d%em2) deletedfe80::250:56ff:feb2:e2c%em1 (fe80::250:56ff:feb2:e2c%em1) deletedfe80::250:56ff:feb2:e2b%em0 (fe80::250:56ff:feb2:e2b%em0) deletedNetwork reset complete.
コマンド:参考例
85
コマンド:参考例
例:ARPキャッシュの表示とクリア

例:別のメールサーバとの接続の検証
次の例では、diagnosticコマンドを使用して別のメールサーバとの接続をチェックします。メールサーバをテストするには、サーバに対してメッセージを送信するか、pingを実行します。
mail.example.com> diagnosticChoose the operation you want to perform:- RAID - Disk Verify Utility.- NETWORK - Network Utilities.- REPORTING - Reporting Utilities.- TRACKING - Tracking Utilities.- RELOAD - Reset configuration to the initial manufacturer values.[]> networkChoose the operation you want to perform:- FLUSH - Flush all network related caches.- ARPSHOW - Show system ARP cache.- NDPSHOW - Show system NDP cache.- SMTPPING - Test a remote SMTP server.- TCPDUMP - Dump ethernet packets.[]> smtppingEnter the hostname or IP address of the SMTP server:[mail.example.com]> mail.comThe domain you entered has MX records.Would you like to select an MX host to test instead? [Y]> ySelect an MX host to test.1. mx00.gmx.com2. mx01.gmx.com[1]>Select a network interface to use for the test.1. Management2. auto[2]> 1Do you want to type in a test message to send? If not, the connection will be testedbut no email will be sent. [N]>Starting SMTP test of host mx00.gmx.com.Resolved 'mx00.gmx.com' to 74.208.5.4.Unable to connect to 74.208.5.4.
例:最初の製造元の値にアプライアンス設定をリセット
次に、最初の製造元の値にアプライアンスの設定をリセットする例を示します。
mail.example.com> diagnosticChoose the operation you want to perform:- RAID - Disk Verify Utility.- NETWORK - Network Utilities.- REPORTING - Reporting Utilities.- TRACKING - Tracking Utilities.- RELOAD - Reset configuration to the initial manufacturer values.[]> reloadThis command will remove all user settings and reset the entire device.If this is a Virtual Appliance, all feature keys will be removed,and the license must be reapplied.Are you sure you want to continue? [N]> YAre you *really* sure you want to continue? [N]> YDo you want to wipe also? [N]> Y
コマンド:参考例
86
コマンド:参考例
例:別のメールサーバとの接続の検証
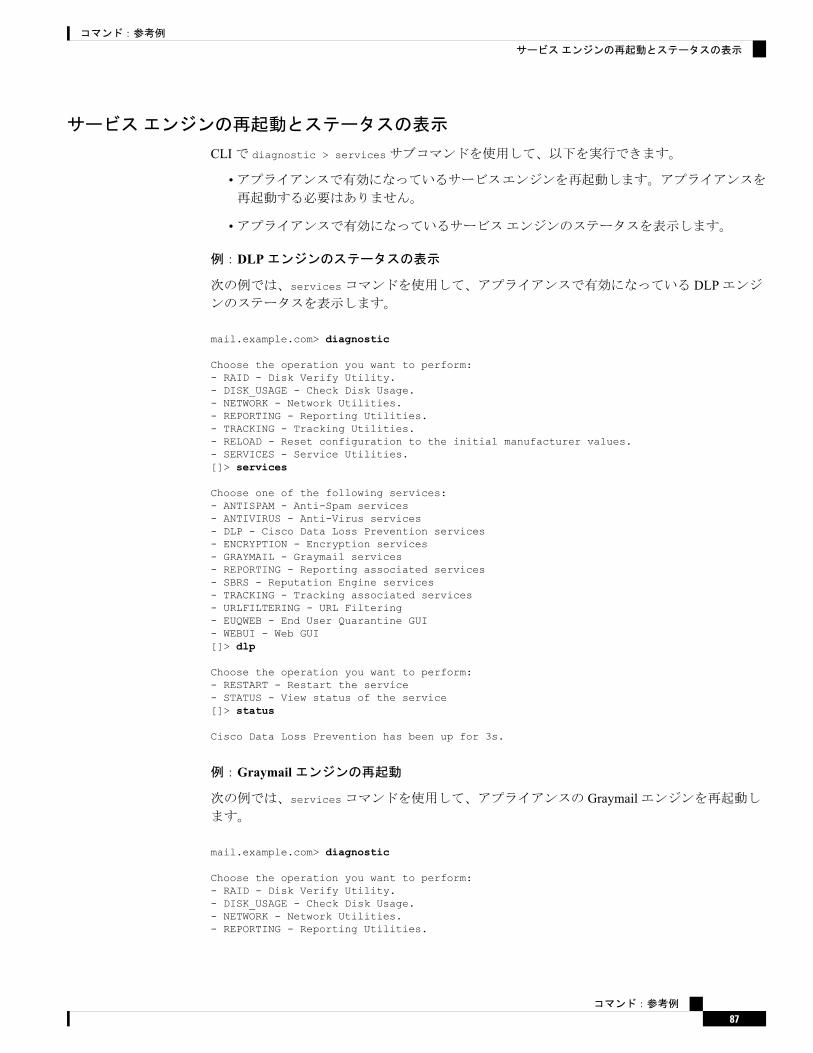
サービスエンジンの再起動とステータスの表示
CLIで diagnostic > servicesサブコマンドを使用して、以下を実行できます。
•アプライアンスで有効になっているサービスエンジンを再起動します。アプライアンスを再起動する必要はありません。
•アプライアンスで有効になっているサービスエンジンのステータスを表示します。
例:DLPエンジンのステータスの表示
次の例では、servicesコマンドを使用して、アプライアンスで有効になっている DLPエンジンのステータスを表示します。
mail.example.com> diagnostic
Choose the operation you want to perform:- RAID - Disk Verify Utility.- DISK_USAGE - Check Disk Usage.- NETWORK - Network Utilities.- REPORTING - Reporting Utilities.- TRACKING - Tracking Utilities.- RELOAD - Reset configuration to the initial manufacturer values.- SERVICES - Service Utilities.[]> services
Choose one of the following services:- ANTISPAM - Anti-Spam services- ANTIVIRUS - Anti-Virus services- DLP - Cisco Data Loss Prevention services- ENCRYPTION - Encryption services- GRAYMAIL - Graymail services- REPORTING - Reporting associated services- SBRS - Reputation Engine services- TRACKING - Tracking associated services- URLFILTERING - URL Filtering- EUQWEB - End User Quarantine GUI- WEBUI - Web GUI[]> dlp
Choose the operation you want to perform:- RESTART - Restart the service- STATUS - View status of the service[]> status
Cisco Data Loss Prevention has been up for 3s.
例:Graymailエンジンの再起動
次の例では、servicesコマンドを使用して、アプライアンスの Graymailエンジンを再起動します。
mail.example.com> diagnostic
Choose the operation you want to perform:- RAID - Disk Verify Utility.- DISK_USAGE - Check Disk Usage.- NETWORK - Network Utilities.- REPORTING - Reporting Utilities.
コマンド:参考例
87
コマンド:参考例
サービスエンジンの再起動とステータスの表示

- TRACKING - Tracking Utilities.- RELOAD - Reset configuration to the initial manufacturer values.- SERVICES - Service Utilities.[]> services
Choose one of the following services:- ANTISPAM - Anti-Spam services- ANTIVIRUS - Anti-Virus services- DLP - Cisco Data Loss Prevention services- ENCRYPTION - Encryption services- GRAYMAIL - Graymail services- REPORTING - Reporting associated services- SBRS - Reputation Engine services- TRACKING - Tracking associated services- URLFILTERING - URL Filtering- EUQWEB - End User Quarantine GUI- WEBUI - Web GUI[]> graymail
Choose the operation you want to perform:- RESTART - Restart the service- STATUS - View status of the service[]> restart
diskquotaconfigレポートと追跡、隔離、ログファイル、パケットキャプチャ、およびコンフィギュレーショ
ンファイル用のディスク領域割り当てを表示または設定します。
この機能の詳細については、『User Guide for AsyncOS for Cisco Email Security Appliances』を参照してください。
使用方法
確定:このコマンドは「commit」が必要です。
クラスタ管理:このコマンドはマシンモードでのみ使用できます。
バッチコマンド:このコマンドはバッチ形式をサポートしています。
バッチ形式
diskquotaconfig <feature> <quota> [<feature> <quota> [<feature> <quota>[<feature> <quota>]]]
<feature>の有効値は、euq、pvo、tracking、reportingです。
<quota>の有効値は整数です。
例
mail.example.com> diskquotaconfigService Disk Usage(GB) Quota(GB)---------------------------------------------------------------------------Spam Quarantine (EUQ) 1 1Policy, Virus & Outbreak Quarantines 1 3Reporting 5 10
コマンド:参考例
88
コマンド:参考例
diskquotaconfig

Tracking 1 10Miscellaneous Files 5 30
System Files Usage : 5 GBUser Files Usage : 0 GB
Total 13 54 of 143Choose the operation you want to perform:- EDIT - Edit disk quotas[]> editEnter the number of the service for which you would like to edit disk quota:1. Spam Quarantine (EUQ)2. Policy, Virus & Outbreak Quarantines3. Reporting4. Tracking5. Miscellaneous Files[1]> 1Enter the new disk quota -[1]> 1Disk quota for Spam Quarantine (EUQ) changed to 1
Service Disk Usage(GB) Quota(GB)---------------------------------------------------------------------------Spam Quarantine (EUQ) 1 1Policy, Virus & Outbreak Quarantines 1 3Reporting 5 10Tracking 1 10Miscellaneous Files 5 30
System Files Usage : 5 GBUser Files Usage : 0 GB
Total 13 54 of 143Choose the operation you want to perform:- EDIT - Edit disk quotas[]>
ecconfigURLフィルタリング機能で使用する証明書の取得に使用する登録クライアントを設定またはクリアします。
シスコのサポートから指示がない場合は、このコマンドを使用しないでください。
エントリは、<hostname:port>または <IPv4 address:port>の形式にする必要があります。ポートはオプションです。
デフォルトサーバを指定するには、ecconfig server defaultと入力します。
使用方法
確定:このコマンドは「commit」が必要です。
クラスタ管理:このコマンドは、クラスタ内のすべてのレベルで使用できます。
バッチコマンド:このコマンドはバッチ形式をサポートしています。
バッチ形式
•デフォルト以外の登録クライアントサーバを指定するには:
> ecconfig server <server_name:port>
コマンド:参考例
89
コマンド:参考例
ecconfig
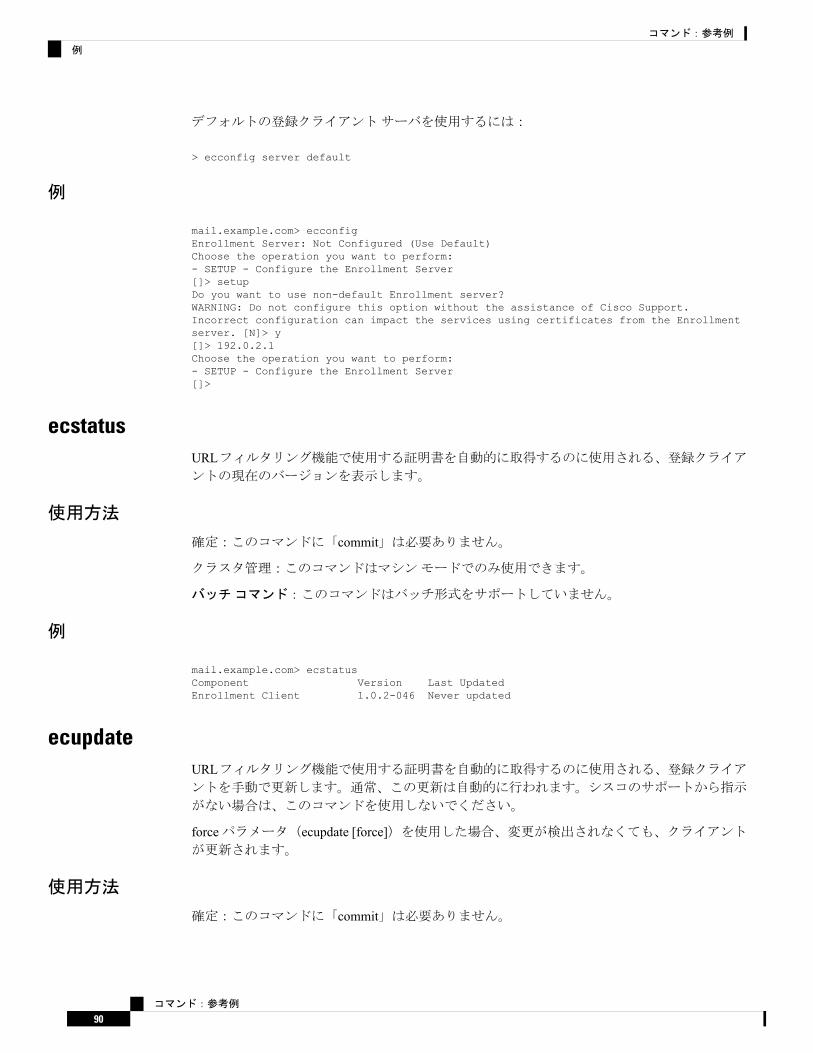
デフォルトの登録クライアントサーバを使用するには:
> ecconfig server default
例
mail.example.com> ecconfigEnrollment Server: Not Configured (Use Default)Choose the operation you want to perform:- SETUP - Configure the Enrollment Server[]> setupDo you want to use non-default Enrollment server?WARNING: Do not configure this option without the assistance of Cisco Support.Incorrect configuration can impact the services using certificates from the Enrollmentserver. [N]> y[]> 192.0.2.1Choose the operation you want to perform:- SETUP - Configure the Enrollment Server[]>
ecstatusURLフィルタリング機能で使用する証明書を自動的に取得するのに使用される、登録クライアントの現在のバージョンを表示します。
使用方法
確定:このコマンドに「commit」は必要ありません。
クラスタ管理:このコマンドはマシンモードでのみ使用できます。
バッチコマンド:このコマンドはバッチ形式をサポートしていません。
例
mail.example.com> ecstatusComponent Version Last UpdatedEnrollment Client 1.0.2-046 Never updated
ecupdateURLフィルタリング機能で使用する証明書を自動的に取得するのに使用される、登録クライアントを手動で更新します。通常、この更新は自動的に行われます。シスコのサポートから指示
がない場合は、このコマンドを使用しないでください。
forceパラメータ(ecupdate [force])を使用した場合、変更が検出されなくても、クライアントが更新されます。
使用方法
確定:このコマンドに「commit」は必要ありません。
コマンド:参考例
90
コマンド:参考例
例
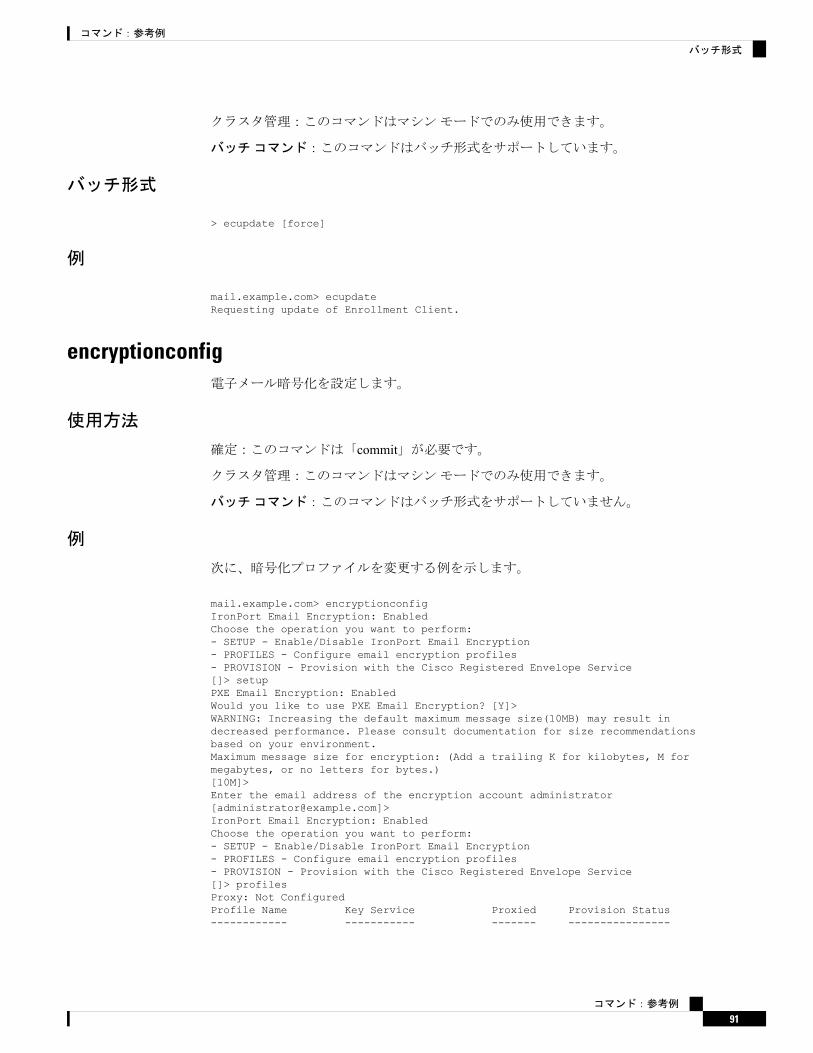
クラスタ管理:このコマンドはマシンモードでのみ使用できます。
バッチコマンド:このコマンドはバッチ形式をサポートしています。
バッチ形式
> ecupdate [force]
例
mail.example.com> ecupdateRequesting update of Enrollment Client.
encryptionconfig電子メール暗号化を設定します。
使用方法
確定:このコマンドは「commit」が必要です。
クラスタ管理:このコマンドはマシンモードでのみ使用できます。
バッチコマンド:このコマンドはバッチ形式をサポートしていません。
例
次に、暗号化プロファイルを変更する例を示します。
mail.example.com> encryptionconfigIronPort Email Encryption: EnabledChoose the operation you want to perform:- SETUP - Enable/Disable IronPort Email Encryption- PROFILES - Configure email encryption profiles- PROVISION - Provision with the Cisco Registered Envelope Service[]> setupPXE Email Encryption: EnabledWould you like to use PXE Email Encryption? [Y]>WARNING: Increasing the default maximum message size(10MB) may result indecreased performance. Please consult documentation for size recommendationsbased on your environment.Maximum message size for encryption: (Add a trailing K for kilobytes, M formegabytes, or no letters for bytes.)[10M]>Enter the email address of the encryption account administrator[[email protected]]>IronPort Email Encryption: EnabledChoose the operation you want to perform:- SETUP - Enable/Disable IronPort Email Encryption- PROFILES - Configure email encryption profiles- PROVISION - Provision with the Cisco Registered Envelope Service[]> profilesProxy: Not ConfiguredProfile Name Key Service Proxied Provision Status------------ ----------- ------- ----------------
コマンド:参考例
91
コマンド:参考例
バッチ形式
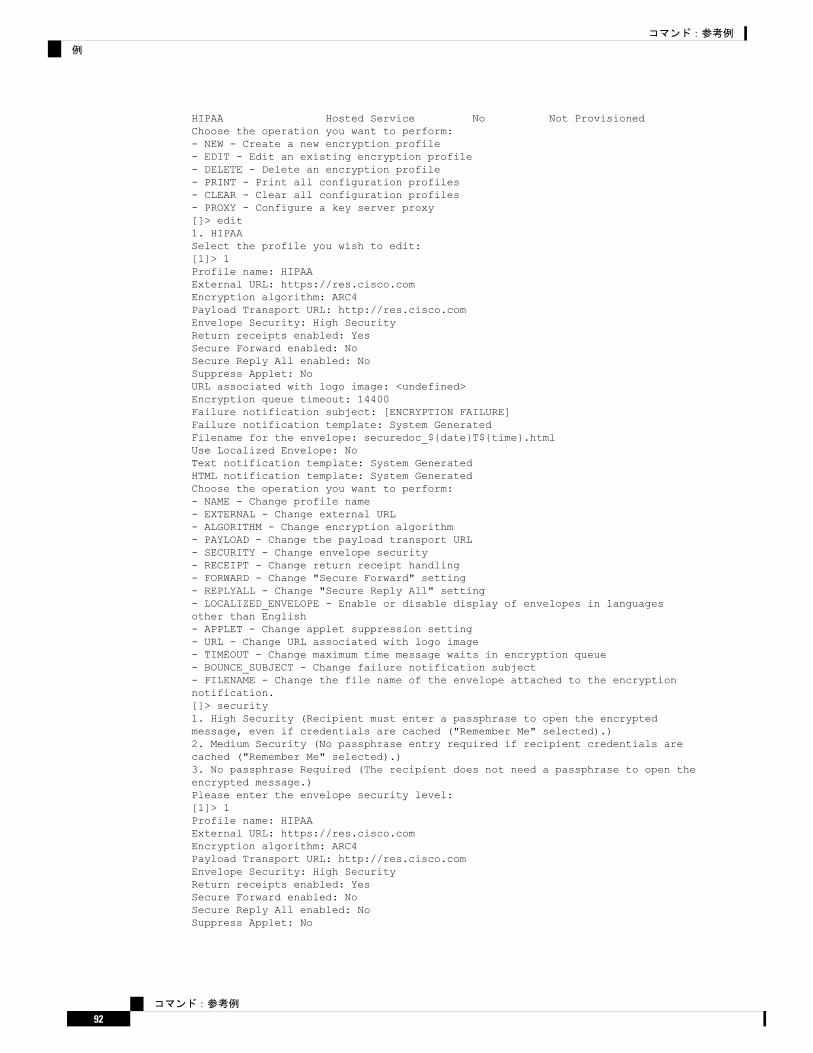
HIPAA Hosted Service No Not ProvisionedChoose the operation you want to perform:- NEW - Create a new encryption profile- EDIT - Edit an existing encryption profile- DELETE - Delete an encryption profile- PRINT - Print all configuration profiles- CLEAR - Clear all configuration profiles- PROXY - Configure a key server proxy[]> edit1. HIPAASelect the profile you wish to edit:[1]> 1Profile name: HIPAAExternal URL: https://res.cisco.comEncryption algorithm: ARC4Payload Transport URL: http://res.cisco.comEnvelope Security: High SecurityReturn receipts enabled: YesSecure Forward enabled: NoSecure Reply All enabled: NoSuppress Applet: NoURL associated with logo image: <undefined>Encryption queue timeout: 14400Failure notification subject: [ENCRYPTION FAILURE]Failure notification template: System GeneratedFilename for the envelope: securedoc_${date}T${time}.htmlUse Localized Envelope: NoText notification template: System GeneratedHTML notification template: System GeneratedChoose the operation you want to perform:- NAME - Change profile name- EXTERNAL - Change external URL- ALGORITHM - Change encryption algorithm- PAYLOAD - Change the payload transport URL- SECURITY - Change envelope security- RECEIPT - Change return receipt handling- FORWARD - Change "Secure Forward" setting- REPLYALL - Change "Secure Reply All" setting- LOCALIZED_ENVELOPE - Enable or disable display of envelopes in languagesother than English- APPLET - Change applet suppression setting- URL - Change URL associated with logo image- TIMEOUT - Change maximum time message waits in encryption queue- BOUNCE_SUBJECT - Change failure notification subject- FILENAME - Change the file name of the envelope attached to the encryptionnotification.[]> security1. High Security (Recipient must enter a passphrase to open the encryptedmessage, even if credentials are cached ("Remember Me" selected).)2. Medium Security (No passphrase entry required if recipient credentials arecached ("Remember Me" selected).)3. No passphrase Required (The recipient does not need a passphrase to open theencrypted message.)Please enter the envelope security level:[1]> 1Profile name: HIPAAExternal URL: https://res.cisco.comEncryption algorithm: ARC4Payload Transport URL: http://res.cisco.comEnvelope Security: High SecurityReturn receipts enabled: YesSecure Forward enabled: NoSecure Reply All enabled: NoSuppress Applet: No
コマンド:参考例
92
コマンド:参考例
例
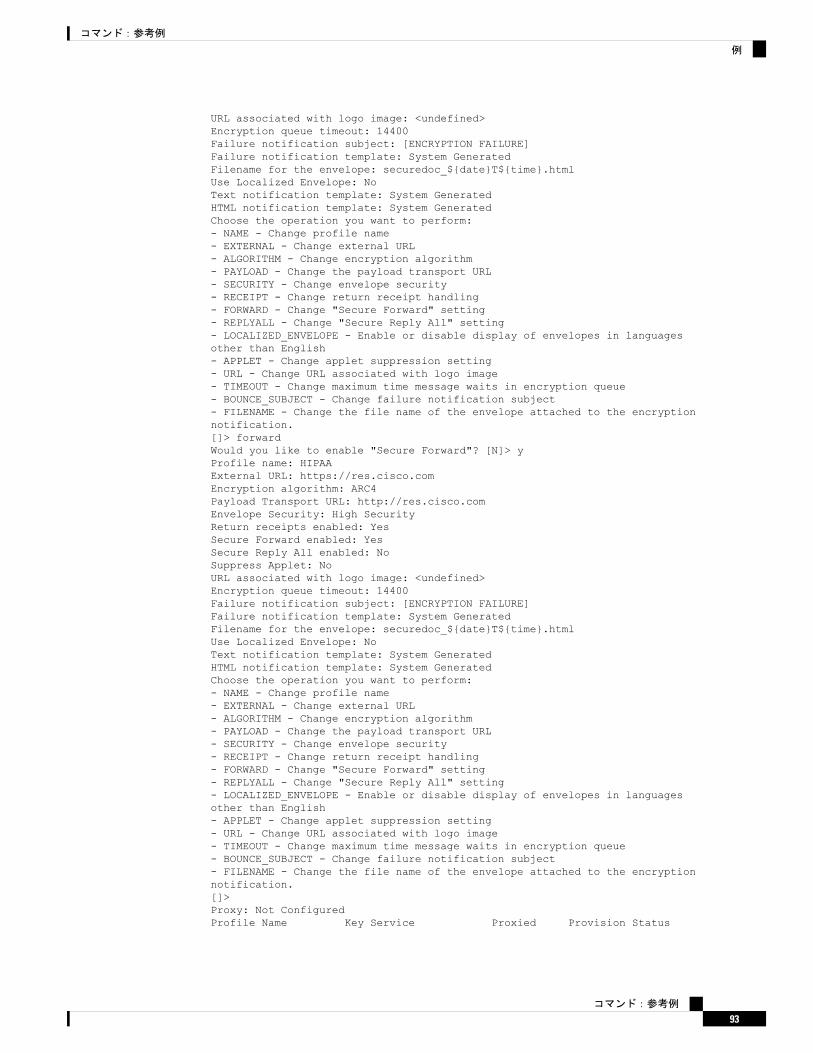
URL associated with logo image: <undefined>Encryption queue timeout: 14400Failure notification subject: [ENCRYPTION FAILURE]Failure notification template: System GeneratedFilename for the envelope: securedoc_${date}T${time}.htmlUse Localized Envelope: NoText notification template: System GeneratedHTML notification template: System GeneratedChoose the operation you want to perform:- NAME - Change profile name- EXTERNAL - Change external URL- ALGORITHM - Change encryption algorithm- PAYLOAD - Change the payload transport URL- SECURITY - Change envelope security- RECEIPT - Change return receipt handling- FORWARD - Change "Secure Forward" setting- REPLYALL - Change "Secure Reply All" setting- LOCALIZED_ENVELOPE - Enable or disable display of envelopes in languagesother than English- APPLET - Change applet suppression setting- URL - Change URL associated with logo image- TIMEOUT - Change maximum time message waits in encryption queue- BOUNCE_SUBJECT - Change failure notification subject- FILENAME - Change the file name of the envelope attached to the encryptionnotification.[]> forwardWould you like to enable "Secure Forward"? [N]> yProfile name: HIPAAExternal URL: https://res.cisco.comEncryption algorithm: ARC4Payload Transport URL: http://res.cisco.comEnvelope Security: High SecurityReturn receipts enabled: YesSecure Forward enabled: YesSecure Reply All enabled: NoSuppress Applet: NoURL associated with logo image: <undefined>Encryption queue timeout: 14400Failure notification subject: [ENCRYPTION FAILURE]Failure notification template: System GeneratedFilename for the envelope: securedoc_${date}T${time}.htmlUse Localized Envelope: NoText notification template: System GeneratedHTML notification template: System GeneratedChoose the operation you want to perform:- NAME - Change profile name- EXTERNAL - Change external URL- ALGORITHM - Change encryption algorithm- PAYLOAD - Change the payload transport URL- SECURITY - Change envelope security- RECEIPT - Change return receipt handling- FORWARD - Change "Secure Forward" setting- REPLYALL - Change "Secure Reply All" setting- LOCALIZED_ENVELOPE - Enable or disable display of envelopes in languagesother than English- APPLET - Change applet suppression setting- URL - Change URL associated with logo image- TIMEOUT - Change maximum time message waits in encryption queue- BOUNCE_SUBJECT - Change failure notification subject- FILENAME - Change the file name of the envelope attached to the encryptionnotification.[]>Proxy: Not ConfiguredProfile Name Key Service Proxied Provision Status
コマンド:参考例
93
コマンド:参考例
例

------------ ----------- ------- ----------------HIPAA Hosted Service No Not ProvisionedChoose the operation you want to perform:- NEW - Create a new encryption profile- EDIT - Edit an existing encryption profile- DELETE - Delete an encryption profile- PRINT - Print all configuration profiles- CLEAR - Clear all configuration profiles- PROXY - Configure a key server proxy[]>IronPort Email Encryption: EnabledChoose the operation you want to perform:- SETUP - Enable/Disable IronPort Email Encryption- PROFILES - Configure email encryption profiles- PROVISION - Provision with the Cisco Registered Envelope Service[]>
encryptionstatus
説明
encryptionstatusコマンドは、Eメールセキュリティアプライアンス上の PXEエンジンとドメインマッピングファイルのバージョンとコンポーネントが最後に更新された日時を表
示します。
使用方法
確定:このコマンドに「commit」は必要ありません。
クラスタ管理:このコマンドはマシンモードでのみ使用できます。
バッチコマンド:このコマンドはバッチ形式をサポートしていません。
例
mail3.example.com> encryptionstatusComponent Version Last UpdatedPXE Engine 6.7.1 17 Nov 2009 00:09 (GMT)Domain Mappings File 1.0.0 Never updated
encryptionupdate
説明
encryptionupdateコマンドは、Eメールセキュリティアプライアンス上の PXEエンジンの更新を要求します。
使用方法
確定:このコマンドに「commit」は必要ありません。
コマンド:参考例
94
コマンド:参考例
encryptionstatus
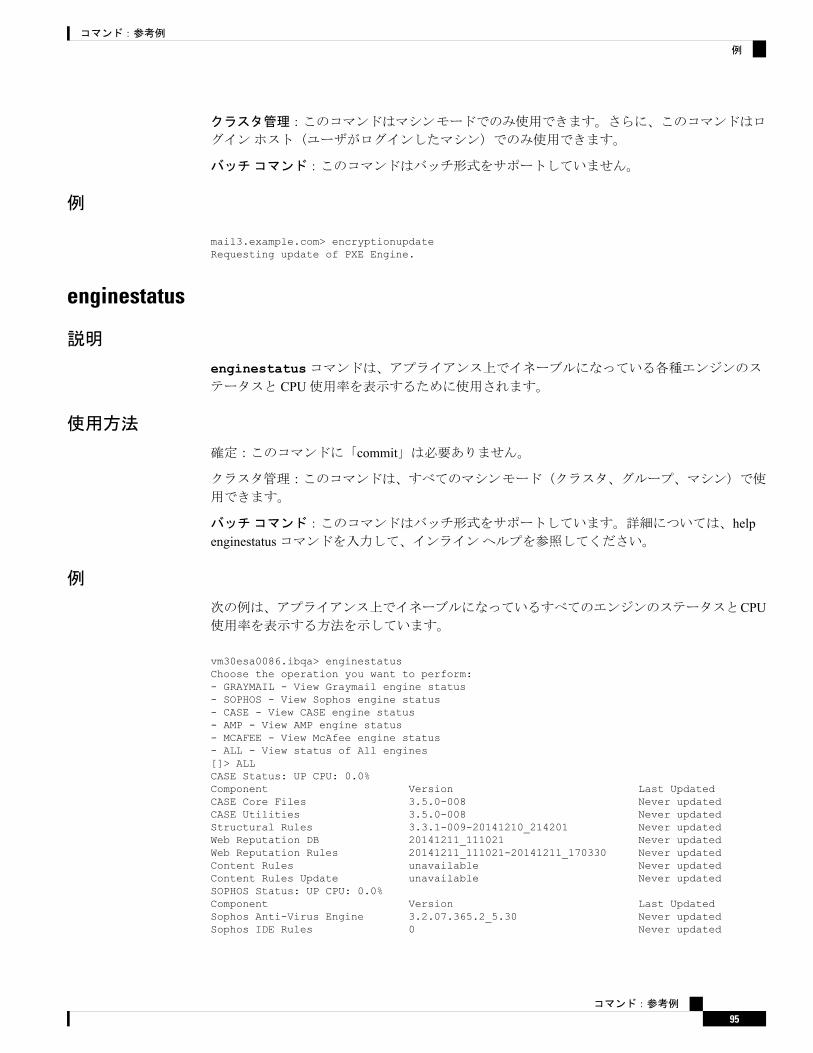
クラスタ管理:このコマンドはマシンモードでのみ使用できます。さらに、このコマンドはロ
グインホスト(ユーザがログインしたマシン)でのみ使用できます。
バッチコマンド:このコマンドはバッチ形式をサポートしていません。
例
mail3.example.com> encryptionupdateRequesting update of PXE Engine.
enginestatus
説明
enginestatusコマンドは、アプライアンス上でイネーブルになっている各種エンジンのステータスと CPU使用率を表示するために使用されます。
使用方法
確定:このコマンドに「commit」は必要ありません。
クラスタ管理:このコマンドは、すべてのマシンモード(クラスタ、グループ、マシン)で使
用できます。
バッチコマンド:このコマンドはバッチ形式をサポートしています。詳細については、helpenginestatusコマンドを入力して、インラインヘルプを参照してください。
例
次の例は、アプライアンス上でイネーブルになっているすべてのエンジンのステータスとCPU使用率を表示する方法を示しています。
vm30esa0086.ibqa> enginestatusChoose the operation you want to perform:- GRAYMAIL - View Graymail engine status- SOPHOS - View Sophos engine status- CASE - View CASE engine status- AMP - View AMP engine status- MCAFEE - View McAfee engine status- ALL - View status of All engines[]> ALLCASE Status: UP CPU: 0.0%Component Version Last UpdatedCASE Core Files 3.5.0-008 Never updatedCASE Utilities 3.5.0-008 Never updatedStructural Rules 3.3.1-009-20141210_214201 Never updatedWeb Reputation DB 20141211_111021 Never updatedWeb Reputation Rules 20141211_111021-20141211_170330 Never updatedContent Rules unavailable Never updatedContent Rules Update unavailable Never updatedSOPHOS Status: UP CPU: 0.0%Component Version Last UpdatedSophos Anti-Virus Engine 3.2.07.365.2_5.30 Never updatedSophos IDE Rules 0 Never updated
コマンド:参考例
95
コマンド:参考例
例

GRAYMAIL Status: UP CPU: 0.0%Component Version Last UpdatedGraymail Engine 01-392.68 N10 Nov 2016 07:08(GMT +00:00) updatedGraymail Rules 01-392.68#121 Never updatedGraymail Tools 1.0.03 Never updatedMCAFEE Status: UP CPU: 0.0%Component Version Last UpdatedMcAfee Engine 5700 Never updatedMcAfee DATs 7437 Never updatedAMP Status: UP CPU: 0.0%Component Version Last UpdatedAMP Client Settings 1.0 Never updatedAMP Client Engine 1.0 Never updated
featurekey
説明
featurekeyコマンドは、システム上でキーによってイネーブルになっているすべての機能とキーに関連する情報を表示します。また、キーを使用して機能を有効にしたり、新しい機能
キーをチェックしたりすることもできます。
仮想アプライアンスについては、loadlicense(310ページ)および showlicense (311ページ)も参照してください。
使用方法
確定:このコマンドは「commit」が必要です。
クラスタ管理:このコマンドはマシンモードでのみ使用できます。
バッチコマンド:このコマンドはバッチ形式をサポートしていません。
例
この例では、featurekeyコマンドを使用して新しい機能キーをチェックします。
mail3.example.com> featurekeyModule Quantity Status Remaining Expiration DateOutbreak Filters 1 Active 28 days Tue Feb 25 06:40:532014IronPort Anti-Spam 1 Dormant 30 days Wed Feb 26 07:56:572014Sophos Anti-Virus 1 Active 26 days Sun Feb 23 02:27:482014Bounce Verification 1 Dormant 30 days Wed Feb 26 07:56:572014Incoming Mail Handling 1 Active 20 days Sun Feb 16 08:55:582014IronPort Email Encryption 1 Dormant 30 days Wed Feb 26 07:56:572014Data Loss Prevention 1 Active 25 days Fri Feb 21 10:07:102014McAfee 1 Dormant 30 days Wed Feb 26 07:56:572014Choose the operation you want to perform:
コマンド:参考例
96
コマンド:参考例
featurekey

- ACTIVATE - Activate a (pending) key.- CHECKNOW - Check now for new feature keys.[]> checknowNo new feature keys are available.
featurekeyconfig
説明
featurekeyconfigコマンドでは、使用可能なキーのダウンロードとマシン上のキーの更新を自動的に行うようにマシンを設定できます。
使用方法
確定:このコマンドは「commit」が必要です。
クラスタ管理:このコマンドは、すべてのマシンモード(クラスタ、グループ、マシン)で使
用できます。
バッチコマンド:このコマンドはバッチ形式をサポートしていません。
例
この例では、featurekeyconfigコマンドを使用して autoactivateおよび autocheck機能をイネーブルにします。
mail3.example.com> featurekeyconfigAutomatic activation of downloaded keys: DisabledAutomatic periodic checking for new feature keys: DisabledChoose the operation you want to perform:- SETUP - Edit feature key configuration.[]> setupAutomatic activation of downloaded keys: DisabledAutomatic periodic checking for new feature keys: DisabledChoose the operation you want to perform:- AUTOACTIVATE - Toggle automatic activation of downloaded keys.- AUTOCHECK - Toggle automatic checking for new feature keys.[]> autoactivateDo you want to automatically apply downloaded feature keys? [N]> yAutomatic activation of downloaded keys: EnabledAutomatic periodic checking for new feature keys: DisabledChoose the operation you want to perform:- AUTOACTIVATE - Toggle automatic activation of downloaded keys.- AUTOCHECK - Toggle automatic checking for new feature keys.[]> autocheckDo you want to periodically query for new feature keys? [N]> yAutomatic activation of downloaded keys: EnabledAutomatic periodic checking for new feature keys: Enabled
コマンド:参考例
97
コマンド:参考例
featurekeyconfig

generalconfig
説明
generalconfigコマンドを使用するとブラウザを設定できます。
使用方法
確定:このコマンドは「commit」が必要です。
クラスタ管理:このコマンドは、すべてのマシンモード(クラスタ、グループ、マシン)で使
用できます。
バッチコマンド:このコマンドはバッチ形式をサポートしています。詳細については、helpgeneralconfigコマンドを入力して、インラインヘルプを参照してください。
例:Internet Explorer互換性モードのオーバーライドの設定
次に、IE互換性モードをオーバーライドする例を示します。
mail.example.com> generalconfigChoose the operation you want to perform:- IEOVERRIDE - Configure Internet Explorer Compatibility Mode Override[]> ieoverride
For better web interface rendering, we recommend that you enable InternetExplorer Compatibility Mode Override. However, if enabling this featureis against your organizational policy, you may disable this feature.Internet Explorer Compatibility Mode Override is currently disabled.
Would you like to enable Internet Explorer Compatibility Mode Override? [N]yChoose the operation you want to perform:- IEOVERRIDE - Configure Internet Explorer Compatibility Mode Override[]>
healthcheck
説明
Eメールセキュリティアプライアンスの状態を確認します。ヘルスチェックにより現在のステータスログの履歴データ(最大 3カ月)が分析され、アプライアンスの状態が判断されます。
使用方法
確定:このコマンドに「commit」は必要ありません。
クラスタ管理:このコマンドは、すべてのマシンモード(クラスタ、グループ、マシン)で使
用できます。
バッチコマンド:このコマンドはバッチ形式をサポートしていません。
コマンド:参考例
98
コマンド:参考例
generalconfig

例
mail.example.com> healthcheckAnalyzing the system to determine current health of the system.The analysis may take a while, depending on the size of the historical data.System analysis is complete.The analysis indicates that the system has experienced the following issue(s)recently:Entered Resource conservation modeDelay in mail processingHigh CPU usageHigh memory usageBased on this analysis,we recommend you to contact Cisco Customer Support before upgrading.
healthconfig
説明
CPU使用率、ワークキューの最大メッセージ数など、アプライアンスのさまざまな健全性パラメータのしきい値を設定します
使用方法
確定:このコマンドは「commit」が必要です。
クラスタ管理:このコマンドは、すべてのマシンモード(クラスタ、グループ、マシン)で使
用できます。
バッチコマンド:このコマンドはバッチ形式をサポートしていません。
例
mail.example.com> healthconfigChoose the operation you want to perform:- WORKQUEUE - View and edit workqueue-health configuration.- CPU - View and edit CPU-health configuration.- SWAP - View and edit swap-health configuration.[]> workqueueNumber of messages in the workqueue : 0Current threshold on the workqueue size : 500Alert when exceeds threshold : DisabledDo you want to edit the settings? [N]> yPlease enter the threshold value for number of messages in work queue.[500]> 550Do you want to receive alerts if the number of messages in work queue exceedsthreshold value? [N]> nChoose the operation you want to perform:- WORKQUEUE - View and edit workqueue-health configuration.- CPU - View and edit CPU-health configuration.- SWAP - View and edit swap-health configuration.[]> cpuOverall CPU usage : 0 %Current threshold on the overall CPU usage: 85 %Alert when exceeds threshold : DisabledDo you want to edit the settings? [N]> yPlease enter the threshold value for overall CPU usage (in percent)
コマンド:参考例
99
コマンド:参考例
例

[85]> 90Do you want to receive alerts if the overall CPU usage exceeds threshold value?[N]> nChoose the operation you want to perform:- WORKQUEUE - View and edit workqueue-health configuration.- CPU - View and edit CPU-health configuration.- SWAP - View and edit swap-health configuration.[]> swapNumber of pages swapped from memory in a minute : 0Current threshold on the number of pages swapped from memory per minute : 5000Alert when exceeds threshold : DisabledDo you want to edit the settings? [N]> yPlease enter the threshold value for number of pages swapped from memory in aminute.[5000]> 5500Do you want to receive alerts if number of pages swapped from memory in aminute exceeds the threshold? [N]> nChoose the operation you want to perform:- WORKQUEUE - View and edit workqueue-health configuration.- CPU - View and edit CPU-health configuration.- SWAP - View and edit swap-health configuration.[]>
ntpconfig
説明
ntpconfigコマンドでは、ネットワークタイムプロトコル(NTP)を使用してシステムクロックを他のコンピュータと同期するように、AsyncOSを設定します。NTPをオフにするには、settimeコマンドを使用します。
使用方法
確定:このコマンドは「commit」が必要です。
クラスタ管理:このコマンドは、すべてのマシンモード(クラスタ、グループ、マシン)で使
用できます。
バッチコマンド:このコマンドはバッチ形式をサポートしていません。
例
mail3.example.com>ntpconfigCurrently configured NTP servers:1. time.ironport.comChoose the operation you want to perform:- NEW - Add a server.- DELETE - Remove a server.- SOURCEINT - Set the interface from whose IP address NTP queries should originate.- AUTH - Configure NTP authentication.[]> newPlease enter the fully qualified hostname or IP address of your NTP server.[]> ntp.example.comCurrently configured NTP servers:1. time.ironport.com2. bitsy.mit.ediChoose the operation you want to perform:
コマンド:参考例
100
コマンド:参考例
ntpconfig

- NEW - Add a server.- DELETE - Remove a server.- SOURCEINT - Set the interface from whose IP address NTP queries shouldoriginate.- AUTH - Configure NTP authentication.[]> sourceint
When initiating a connection to an NTP server, the outbound IP addressused is chosen automatically.If you want to choose a specific outbound IP address,please selectits interface name now.1. Auto2. Management (172.19.0.11/24: elroy.run)3. PrivateNet (172.19.1.11/24: elroy.run)4. PublicNet (172.19.2.11/24: elroy.run)[1]> 1Currently configured NTP servers:1. time.ironport.com2. bitsy.mit.ediChoose the operation you want to perform:- NEW - Add a server.- DELETE - Remove a server.- SOURCEINT - Set the interface from whose IP address NTP queries should originate.- AUTH - Configure NTP authentication.[]> auth
Would you like to enable NTP authentication? [N]>yesCurrently configured NTP servers:1. time.ironport.com2. bitsy.mit.ediAuthentication is onChoose the operation you want to perform:- NEW - Add a server.- DELETE - Remove a server.- SOURCEINT - Set the interface from whose IP address NTP queries shouldoriginate.- AUTH - Configure NTP authentication.
mail3.example.com> commitPlease enter some comments describing your changes:[]> Added new NTP serverDo you want to save the current configuration for rollback? [Y]> nChanges committed: Fri May 23 11:42:12 2014 GMT
portalregistrationconfigCisco Spam Submission Tracking Portalは、電子メール管理者が組織からのスパムの報告を追跡し、間違って分類された新規メッセージをシスコに報告できる、Webベースのツールです。このポータルでは、使用するすべてのアプライアンスが共通登録 IDを持つことが必要です。
登録 IDを設定するには、CLIで portalregistrationconfigコマンドを使用します。アプライアンスがクラスタの一部でない場合、使用するすべてのアプライアンスに共通の登録
IDを設定する必要があります。
ポータルの詳細については、ユーザガイドまたはオンラインヘルプのアンチスパムの章を参
照してください。
コマンド:参考例
101
コマンド:参考例
portalregistrationconfig

使用方法
確定:このコマンドは「commit」が必要です。
クラスタ管理:このコマンドは、すべてのマシンモード(クラスタ、グループ、マシン)で使
用できます。
バッチコマンド:このコマンドはバッチ形式をサポートしていません。
例
mail3.example.com> portalregistrationconfig
Choose the operation you want to perform:
- REGISTRATION_ID - Set up the Registration ID.[]> registration_idEnter the new value of the Registration ID.[]> registrationidexample1234
reboot
説明
アプライアンスを再起動します。
使用方法
確定:このコマンドに「commit」は必要ありません。
クラスタ管理:このコマンドはマシンモードでのみ使用できます。
バッチコマンド:このコマンドはバッチ形式をサポートしていません。
例
mail3.example.com> rebootEnter the number of seconds to wait before abruptly closing connections.[30]>Waiting for listeners to exit...Receiving suspended.Waiting for outgoing deliveries to finish...Mail delivery suspended.
repengstatus
説明
レピュテーションエンジンのバージョン情報を要求します。
コマンド:参考例
102
コマンド:参考例
使用方法

使用方法
確定:このコマンドに「commit」は必要ありません。
クラスタ管理:このコマンドはマシンモードでのみ使用できます。
バッチコマンド:このコマンドはバッチ形式をサポートしていません。
例
mail.example.com> repengstatusComponent Last Update VersionReputation Engine 28 Jan 2014 23:47 (GMT +00:00) 1Reputation Engine Tools 28 Jan 2014 23:47 (GMT +00:00) 1
resume
説明
受信と配信を再開します。
使用方法
確定:このコマンドに「commit」は必要ありません。
クラスタ管理:このコマンドはマシンモードでのみ使用できます。
バッチコマンド:このコマンドはバッチ形式をサポートしていません。
例
mail3.example.com> resumeReceiving resumed for Listener 1.Mail delivery resumed.Mail delivery for individually suspended domains must be resumed individually.
resumedel
説明
配信を再開します。
使用方法
確定:このコマンドに「commit」は必要ありません。
クラスタ管理:このコマンドはマシンモードでのみ使用できます。
バッチコマンド:このコマンドはバッチ形式をサポートしていません。
コマンド:参考例
103
コマンド:参考例
使用方法
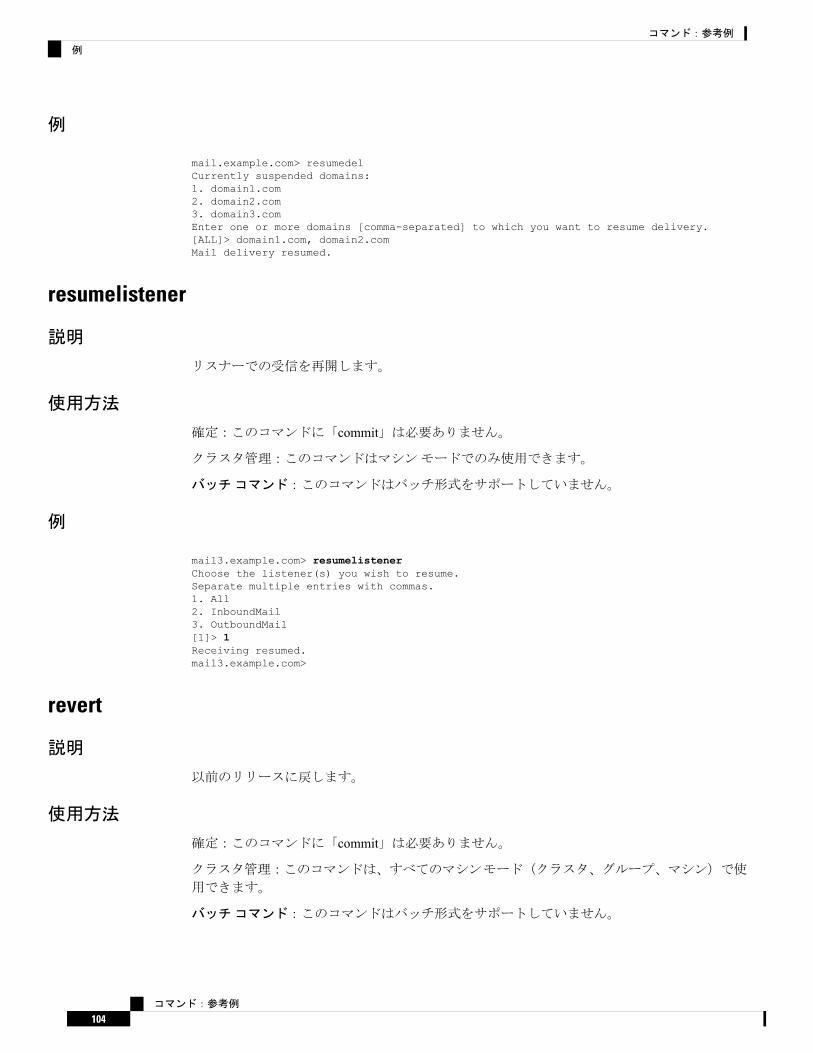
例
mail.example.com> resumedelCurrently suspended domains:1. domain1.com2. domain2.com3. domain3.comEnter one or more domains [comma-separated] to which you want to resume delivery.[ALL]> domain1.com, domain2.comMail delivery resumed.
resumelistener
説明
リスナーでの受信を再開します。
使用方法
確定:このコマンドに「commit」は必要ありません。
クラスタ管理:このコマンドはマシンモードでのみ使用できます。
バッチコマンド:このコマンドはバッチ形式をサポートしていません。
例
mail3.example.com> resumelistenerChoose the listener(s) you wish to resume.Separate multiple entries with commas.1. All2. InboundMail3. OutboundMail[1]> 1Receiving resumed.mail3.example.com>
revert
説明
以前のリリースに戻します。
使用方法
確定:このコマンドに「commit」は必要ありません。
クラスタ管理:このコマンドは、すべてのマシンモード(クラスタ、グループ、マシン)で使
用できます。
バッチコマンド:このコマンドはバッチ形式をサポートしていません。
コマンド:参考例
104
コマンド:参考例
例
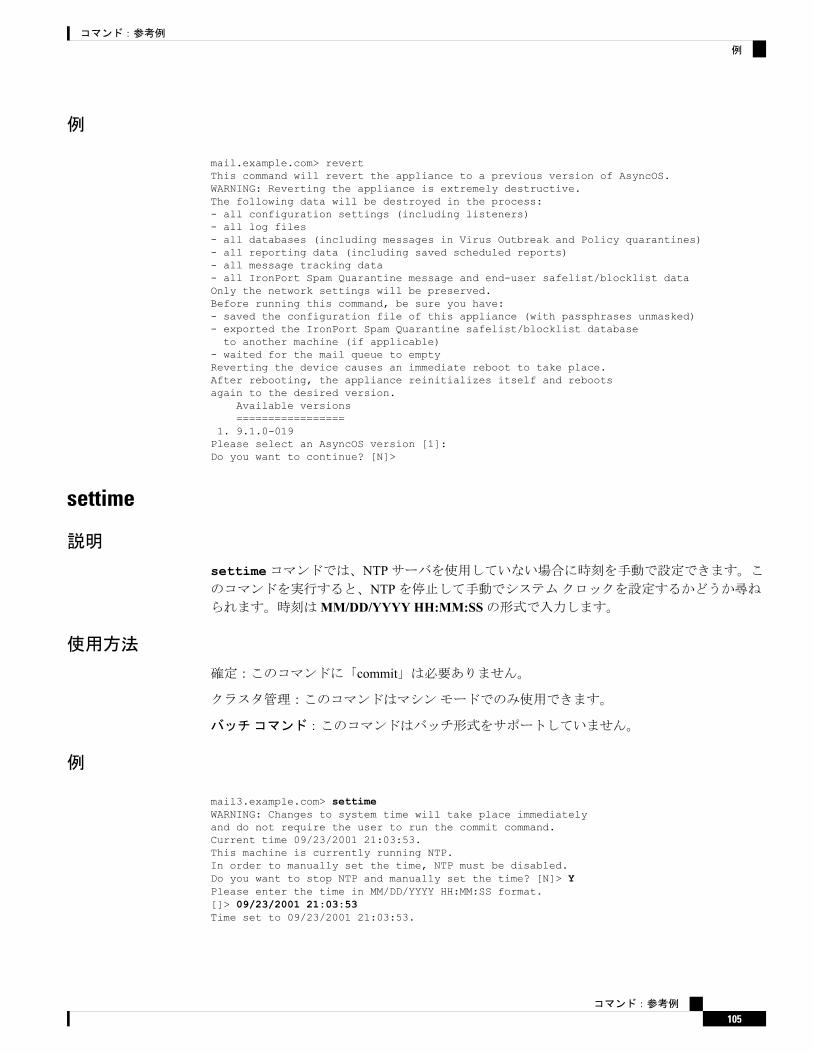
例
mail.example.com> revertThis command will revert the appliance to a previous version of AsyncOS.WARNING: Reverting the appliance is extremely destructive.The following data will be destroyed in the process:- all configuration settings (including listeners)- all log files- all databases (including messages in Virus Outbreak and Policy quarantines)- all reporting data (including saved scheduled reports)- all message tracking data- all IronPort Spam Quarantine message and end-user safelist/blocklist dataOnly the network settings will be preserved.Before running this command, be sure you have:- saved the configuration file of this appliance (with passphrases unmasked)- exported the IronPort Spam Quarantine safelist/blocklist databaseto another machine (if applicable)
- waited for the mail queue to emptyReverting the device causes an immediate reboot to take place.After rebooting, the appliance reinitializes itself and rebootsagain to the desired version.
Available versions=================
1. 9.1.0-019Please select an AsyncOS version [1]:Do you want to continue? [N]>
settime
説明
settimeコマンドでは、NTPサーバを使用していない場合に時刻を手動で設定できます。このコマンドを実行すると、NTPを停止して手動でシステムクロックを設定するかどうか尋ねられます。時刻はMM/DD/YYYY HH:MM:SSの形式で入力します。
使用方法
確定:このコマンドに「commit」は必要ありません。
クラスタ管理:このコマンドはマシンモードでのみ使用できます。
バッチコマンド:このコマンドはバッチ形式をサポートしていません。
例
mail3.example.com> settimeWARNING: Changes to system time will take place immediatelyand do not require the user to run the commit command.Current time 09/23/2001 21:03:53.This machine is currently running NTP.In order to manually set the time, NTP must be disabled.Do you want to stop NTP and manually set the time? [N]> YPlease enter the time in MM/DD/YYYY HH:MM:SS format.[]> 09/23/2001 21:03:53Time set to 09/23/2001 21:03:53.
コマンド:参考例
105
コマンド:参考例
例
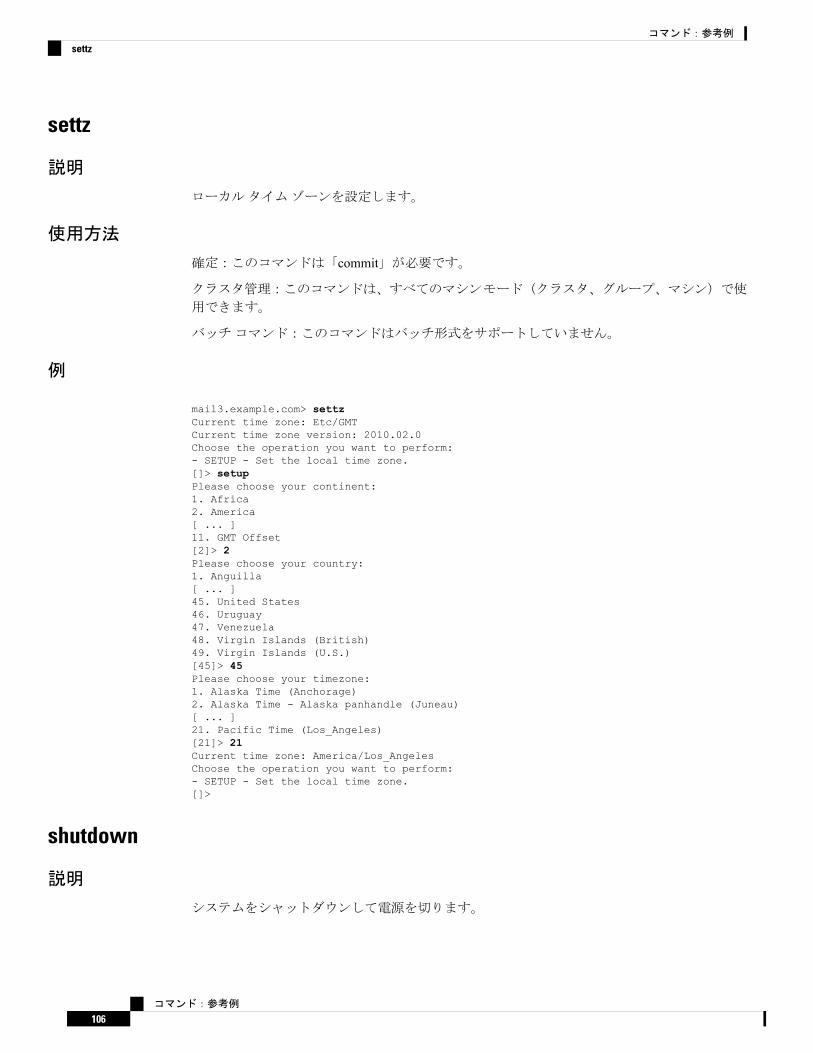
settz
説明
ローカルタイムゾーンを設定します。
使用方法
確定:このコマンドは「commit」が必要です。
クラスタ管理:このコマンドは、すべてのマシンモード(クラスタ、グループ、マシン)で使
用できます。
バッチコマンド:このコマンドはバッチ形式をサポートしていません。
例
mail3.example.com> settzCurrent time zone: Etc/GMTCurrent time zone version: 2010.02.0Choose the operation you want to perform:- SETUP - Set the local time zone.[]> setupPlease choose your continent:1. Africa2. America[ ... ]11. GMT Offset[2]> 2Please choose your country:1. Anguilla[ ... ]45. United States46. Uruguay47. Venezuela48. Virgin Islands (British)49. Virgin Islands (U.S.)[45]> 45Please choose your timezone:1. Alaska Time (Anchorage)2. Alaska Time - Alaska panhandle (Juneau)[ ... ]21. Pacific Time (Los_Angeles)[21]> 21Current time zone: America/Los_AngelesChoose the operation you want to perform:- SETUP - Set the local time zone.[]>
shutdown
説明
システムをシャットダウンして電源を切ります。
コマンド:参考例
106
コマンド:参考例
settz
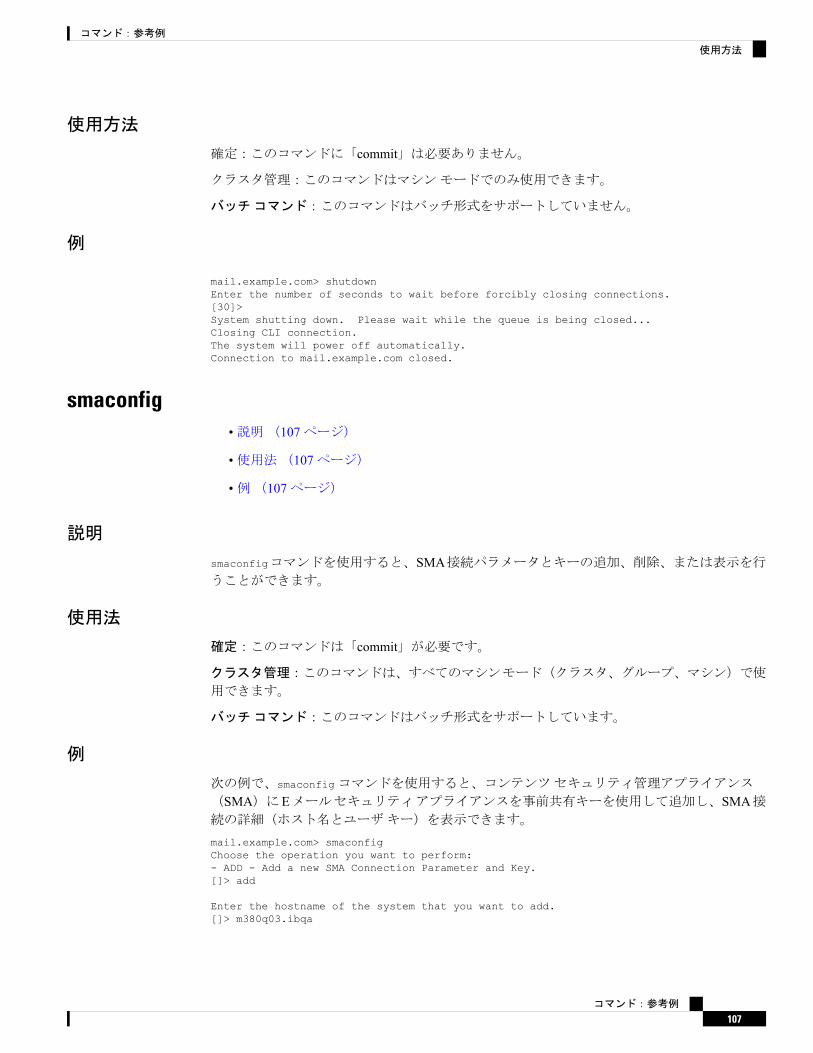
使用方法
確定:このコマンドに「commit」は必要ありません。
クラスタ管理:このコマンドはマシンモードでのみ使用できます。
バッチコマンド:このコマンドはバッチ形式をサポートしていません。
例
mail.example.com> shutdownEnter the number of seconds to wait before forcibly closing connections.[30]>System shutting down. Please wait while the queue is being closed...Closing CLI connection.The system will power off automatically.Connection to mail.example.com closed.
smaconfig•説明(107ページ)
•使用法(107ページ)
•例(107ページ)
説明
smaconfigコマンドを使用すると、SMA接続パラメータとキーの追加、削除、または表示を行うことができます。
使用法
確定:このコマンドは「commit」が必要です。
クラスタ管理:このコマンドは、すべてのマシンモード(クラスタ、グループ、マシン)で使
用できます。
バッチコマンド:このコマンドはバッチ形式をサポートしています。
例
次の例で、smaconfigコマンドを使用すると、コンテンツセキュリティ管理アプライアンス
(SMA)にEメールセキュリティアプライアンスを事前共有キーを使用して追加し、SMA接続の詳細(ホスト名とユーザキー)を表示できます。
mail.example.com> smaconfigChoose the operation you want to perform:- ADD - Add a new SMA Connection Parameter and Key.[]> add
Enter the hostname of the system that you want to add.[]> m380q03.ibqa
コマンド:参考例
107
コマンド:参考例
使用方法

Enter the user key of the host m380q03.ibqa.Press enter on a blank line to finish.
SSH2:dsa10.76.71.107 ssh-dssAAAAB3NzaC1kc3MAAACBAJCRYaVJgwSMTmLbt2xG5LVNKjFXpzW/vMRDQN3xclvJVpgYnQ1GfjL/zAbZC5pYz/jac405R9h+J2jTzAjzZRgaBIalVvi1Li0JkQQNhcRWEDjOhHwMTOkHh1+SVuqoR5xM0Y47jE/9SmEM6OXFSkAeTVXQq65c99FDGnNpvBWFAAAAFQD0dhuWPCD+++xjLZr4yxlWFJ5AdQAAAIBilaS+VDYY38IosX/9czWGIcBl7cqDZUXWkwoKF41OUfnoa42Q0VDBaoPiJ7gBhWVDHTo8rgz9PQRcl020Ok2ud7WASf/rLKbP9i26PWRK1yAAr7FvDol/l//5GtXbMtqWyVeo3oGqGS7dZc7MI/pMC5jGxDmTSM2SlyOEsS1xmQAAAIAY1ZiXC2ZeMhVWKgj8A8JHEPcgT4hu7Mo3Yq+YkGsemK4L+YF4k3t5DbGwirYvfXZCJSPD+E9mcnltIaOMFuB1W8Kiq+Cz/Ikzm9U4MdIz48HOKS2Sl7YVG3xhYJjyyRpLHGDYRagANtjvOLRPF57xUvkdz5DCcJiXbWEhaZBHkg==
SMA host key was added successfully.
Choose the operation you want to perform:- ADD - Add a new SMA Connection Parameter and Key.- DELETE - Remove an existing SMA Connection Parameter and Key.- PRINT - Display all SMA Parameters and Keys.
[]> print1. Hostname: m380q03.ibqa Keys: SSH2:dsa10.76.71.107 ssh-dssAAAAB3NzaC1kc3MAAACBAJCRYaVJgwSMTmLbt2xG5LVNKjFXpzW/vMRDQN3xclvJVpgYnQ1GfjL/zAbZC5pYz/jac405R9h+J2jTzAjzZRgaBIalVvi1Li0JkQQNhcRWEDjOhHwMTOkHh1+SVuqoR5xM0Y47jE/9SmEM6OXFSkAeTVXQq65c99FDGnNpvBWFAAAAFQD0dhuWPCD+++xjLZr4yxlWFJ5AdQAAAIBilaS+VDYY38IosX/9czWGIcBl7cqDZUXWkwoKF41OUfnoa42Q0VDBaoPiJ7gBhWVDHTo8rgz9PQRcl020Ok2ud7WASf/rLKbP9i26PWRK1yAAr7FvDol/l//5GtXbMtqWyVeo3oGqGS7dZc7MI/pMC5jGxDmTSM2SlyOEsS1xmQAAAIAY1ZiXC2ZeMhVWKgj8A8JHEPcgT4hu7Mo3Yq+YkGsemK4L+YF4k3t5DbGwirYvfXZCJSPD+E9mcnltIaOMFuB1W8Kiq+Cz/Ikzm9U4MdIz48HOKS2Sl7YVG3xhYJjyyRpLHGDYRagANtjvOLRPF57xUvkdz5DCcJiXbWEhaZBHkg==Choose the operation you want to perform:- ADD - Add a new SMA Connection Parameter and Key.- DELETE - Remove an existing SMA Connection Parameter and Key.- PRINT - Display all SMA Parameters and Keys.[]>
sshconfig
説明
SSHサーバおよびユーザキー設定を設定します。
使用方法
確定:このコマンドは「commit」が必要です。
クラスタ管理:このコマンドはクラスタモードでのみ使用できます。
バッチコマンド:このコマンドはバッチ形式をサポートしていません。
例
•例:SSHサーバ構成の編集(108ページ)
•例:管理者アカウントの新しい公開キーのインストール(110ページ)
•例:永続的なブラックリストまたはホワイトリストとして IPアドレスを分類(110ページ)
例:SSHサーバ構成の編集
次の例は、SSHサーバ構成を編集する方法の例を示しています。
mail.example.com> sshconfigChoose the operation you want to perform:- SSHD - Edit SSH server settings.
コマンド:参考例
108
コマンド:参考例
sshconfig
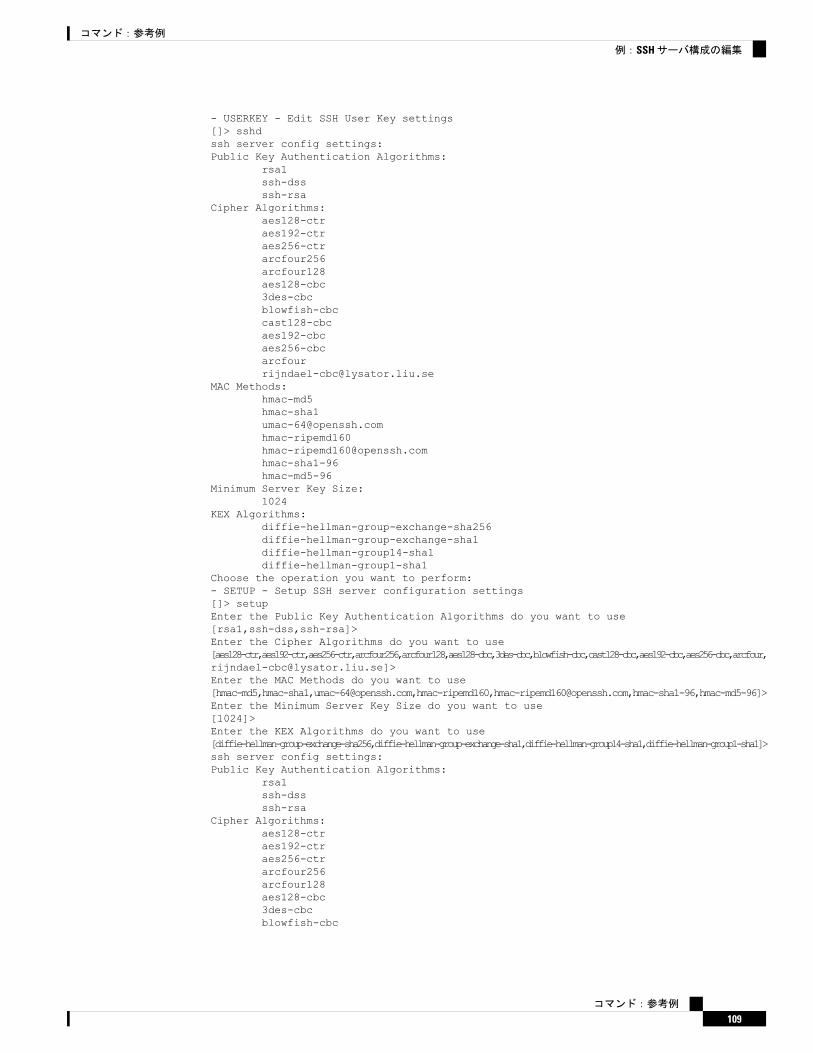
- USERKEY - Edit SSH User Key settings[]> sshdssh server config settings:Public Key Authentication Algorithms:
rsa1ssh-dssssh-rsa
Cipher Algorithms:aes128-ctraes192-ctraes256-ctrarcfour256arcfour128aes128-cbc3des-cbcblowfish-cbccast128-cbcaes192-cbcaes256-cbcarcfourrijndael-cbc@lysator.liu.se
MAC Methods:[email protected]@openssh.comhmac-sha1-96hmac-md5-96
Minimum Server Key Size:1024
KEX Algorithms:diffie-hellman-group-exchange-sha256diffie-hellman-group-exchange-sha1diffie-hellman-group14-sha1diffie-hellman-group1-sha1
Choose the operation you want to perform:- SETUP - Setup SSH server configuration settings[]> setupEnter the Public Key Authentication Algorithms do you want to use[rsa1,ssh-dss,ssh-rsa]>Enter the Cipher Algorithms do you want to use[aes128-ctr,aes192-ctr,aes256-ctr,arcfour256,arcfour128,aes128-cbc,3des-cbc,blowfish-cbc,cast128-cbc,aes192-cbc,aes256-cbc,arcfour,[email protected]]>Enter the MAC Methods do you want to use[hmac-md5,hmac-sha1,[email protected],hmac-ripemd160,[email protected],hmac-sha1-96,hmac-md5-96]>Enter the Minimum Server Key Size do you want to use[1024]>Enter the KEX Algorithms do you want to use[diffie-hellman-group-exchange-sha256,diffie-hellman-group-exchange-sha1,diffie-hellman-group14-sha1,diffie-hellman-group1-sha1]>ssh server config settings:Public Key Authentication Algorithms:
rsa1ssh-dssssh-rsa
Cipher Algorithms:aes128-ctraes192-ctraes256-ctrarcfour256arcfour128aes128-cbc3des-cbcblowfish-cbc
コマンド:参考例
109
コマンド:参考例
例:SSHサーバ構成の編集

cast128-cbcaes192-cbcaes256-cbcarcfourrijndael-cbc@lysator.liu.se
MAC Methods:[email protected]@openssh.comhmac-sha1-96hmac-md5-96
Minimum Server Key Size:1024
KEX Algorithms:diffie-hellman-group-exchange-sha256diffie-hellman-group-exchange-sha1diffie-hellman-group14-sha1diffie-hellman-group1-sha1
Choose the operation you want to perform:- SETUP - Setup SSH server configuration settings[]>Choose the operation you want to perform:- SSHD - Edit SSH server settings.- USERKEY - Edit SSH User Key settings[]>
例:管理者アカウントの新しい公開キーのインストール
次の例では、管理者アカウントの新規公開キーをインストールします。
mail.example.com> sshconfigChoose the operation you want to perform:- SSHD - Edit SSH server settings.- USERKEY - Edit SSH User Key settings[]> userkeyCurrently installed keys for admin:Choose the operation you want to perform:- NEW - Add a new key.- USER - Switch to a different user to edit.[]> newPlease enter the public SSH key for authorization.Press enter on a blank line to finish.[-paste public key for user authentication here-]Choose the operation you want to perform:- SSHD - Edit SSH server settings.- USERKEY - Edit SSH User Key settings[]>
例:永続的なブラックリストまたはホワイトリストとして IPアドレスを分類
アプライアンスまたは ipblockdサービスが再起動されても、永続的なブラックリストまたは
ホワイトリストとして分類された IPアドレスは保持されます。
AsyncOS 11.0.2以降でのみ、IPアドレスを永続的なブラックリストまたはホワイトリストとして分類できます。
(注)
コマンド:参考例
110
コマンド:参考例
例:管理者アカウントの新しい公開キーのインストール

次の例は、IPアドレスを永続的なホワイトリストとして分類する方法を示しています。mail.example.com> sshconfigChoose the operation you want to perform:- SSHD - Edit SSH server settings.- USERKEY - Edit SSH User Key settings- ACCESS CONTROL - Edit SSH whitelist/blacklist[]> access control
Choose the operation you want to perform:- WHITELIST - Manage the persistent whitelist- BLACKLIST - Manage the persistent blacklist[]> whitelist
Choose the operation you want to perform:- ADD - Add address(es)- REMOVE - Remove address(es)- PRINT - Print addresses[]> add
Enter an IP address or a comma-separated list of addresses.Addresses already in the Whitelist will be ignored.[]> 10.8.85.77
The addresses were successfully added to the Whitelist
次の例は、IPアドレスを永続的なブラックリストとして分類する方法を示しています。mail.example.com> sshconfigChoose the operation you want to perform:- SSHD - Edit SSH server settings.- USERKEY - Edit SSH User Key settings- ACCESS CONTROL - Edit SSH whitelist/blacklist[]> access control
Choose the operation you want to perform:- WHITELIST - Manage the persistent whitelist- BLACKLIST - Manage the persistent blacklist[]> blacklist
Choose the operation you want to perform:- ADD - Add address(es)- REMOVE - Remove address(es)- PRINT - Print addresses[]> add
Enter an IP address or a comma-separated list of addresses.Addresses already in the Whitelist will be ignored.[]> 10.8.85.77
The addresses were successfully added to the blacklist
status
説明
システムステータスを表示します。
コマンド:参考例
111
コマンド:参考例
status
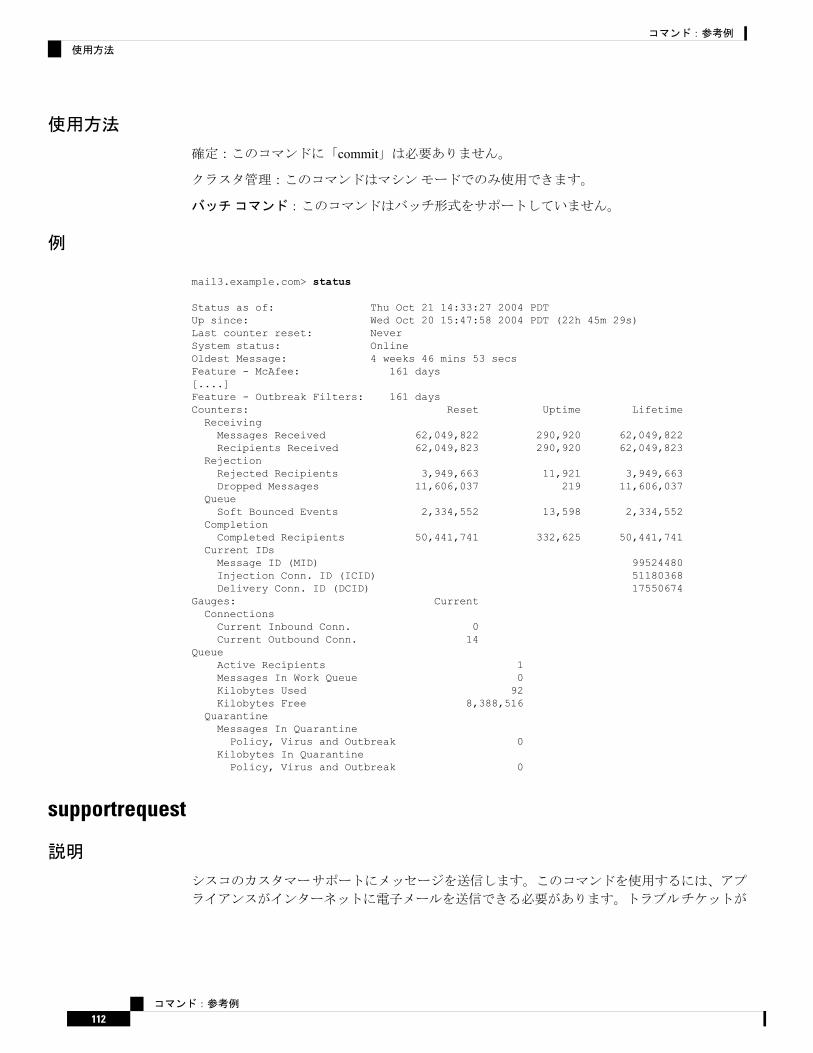
使用方法
確定:このコマンドに「commit」は必要ありません。
クラスタ管理:このコマンドはマシンモードでのみ使用できます。
バッチコマンド:このコマンドはバッチ形式をサポートしていません。
例
mail3.example.com> status
Status as of: Thu Oct 21 14:33:27 2004 PDTUp since: Wed Oct 20 15:47:58 2004 PDT (22h 45m 29s)Last counter reset: NeverSystem status: OnlineOldest Message: 4 weeks 46 mins 53 secsFeature - McAfee: 161 days[....]Feature - Outbreak Filters: 161 daysCounters: Reset Uptime LifetimeReceivingMessages Received 62,049,822 290,920 62,049,822Recipients Received 62,049,823 290,920 62,049,823
RejectionRejected Recipients 3,949,663 11,921 3,949,663Dropped Messages 11,606,037 219 11,606,037
QueueSoft Bounced Events 2,334,552 13,598 2,334,552
CompletionCompleted Recipients 50,441,741 332,625 50,441,741
Current IDsMessage ID (MID) 99524480Injection Conn. ID (ICID) 51180368Delivery Conn. ID (DCID) 17550674
Gauges: CurrentConnectionsCurrent Inbound Conn. 0Current Outbound Conn. 14
QueueActive Recipients 1Messages In Work Queue 0Kilobytes Used 92Kilobytes Free 8,388,516
QuarantineMessages In QuarantinePolicy, Virus and Outbreak 0
Kilobytes In QuarantinePolicy, Virus and Outbreak 0
supportrequest
説明
シスコのカスタマーサポートにメッセージを送信します。このコマンドを使用するには、アプ
ライアンスがインターネットに電子メールを送信できる必要があります。トラブルチケットが
コマンド:参考例
112
コマンド:参考例
使用方法

自動的に作成されます。また、サポート要求を既存のトラブルチケットに関連付けることもで
きます。
アプライアンスからシスコテクニカルサポートに直接アクセスするには、Cisco.comユーザIDがこのアプライアンスのサービス契約に関連付けられている必要があります。Cisco.comプロファイルに現在関連付けられているサービス契約の一覧を参照するには、Cisco.com ProfileManager(https://sso.cisco.com/autho/forms/CDClogin.html)にアクセスしてください。Cisco.comのユーザ IDがない場合は、登録して IDを取得してください。オンラインヘルプのアカウントの登録に関する情報か、お使いのリリースのユーザガイドを参照してください。
使用方法
確定:このコマンドに「commit」は必要ありません。
クラスタ管理:このコマンドはマシンモードでのみ使用できます。さらに、このコマンドはロ
グインホスト(ユーザがログインしたマシン)でのみ使用できます。このコマンドを使用する
には、ローカルファイルシステムにアクセスできる必要があります。
バッチコマンド:このコマンドはバッチ形式をサポートしていません。
例
次に、既存のサポートチケットに関連しないサポート要求の例を示します。
mail.example.com> supportrequestPlease Note:If you have an urgent issue, please call one of our worldwide Support Centers(www.cisco.com/support). Use this command to open a technical support requestfor issues that are not urgent, such as:- Request for information.- Problem for which you have a work-around, but would like an alternativesolution.Do you want to send the support request to [email protected]?[Y]>Do you want to send the support request to additional recipient(s)?[N]>Is this support request associated with an existing support ticket?[N]>Please select a technology related to this support request:1. Security - Email and Web2. Security - Management[1]> 1Please select a subtechnology related to this support request:1. Cisco Email Security Appliance (C1x0,C3x0, C6x0, X10x0) - MisclassifiedMessages2. Cisco Email Security Appliance (C1x0,C3x0, C6x0, X10x0) - SBRS3. Cisco Email Security Appliance (C1x0,C3x0, C6x0, X10x0) - Other4. Email Security Appliance - Virtual[1]> 3Please select the problem category:1. Upgrade2. Operate3. Configure4. Install[1]> 3Please select a problem sub-category:1. Error Messages, Logs, Debugs
コマンド:参考例
113
コマンド:参考例
使用方法
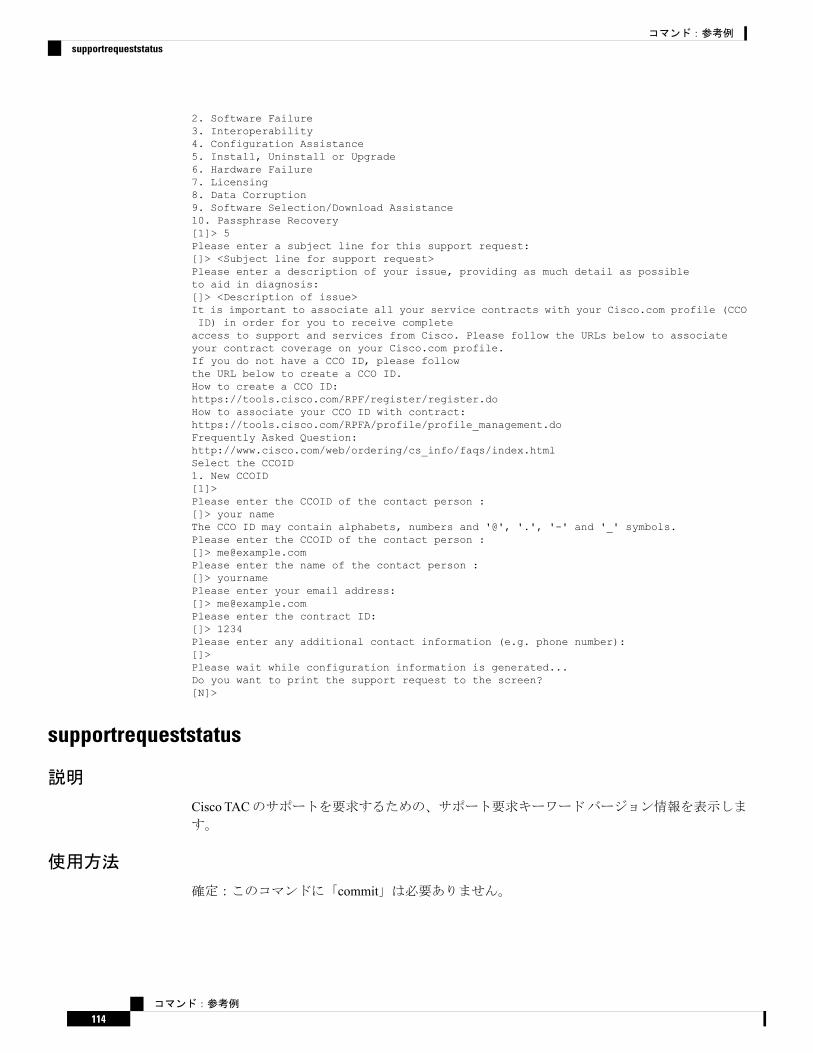
2. Software Failure3. Interoperability4. Configuration Assistance5. Install, Uninstall or Upgrade6. Hardware Failure7. Licensing8. Data Corruption9. Software Selection/Download Assistance10. Passphrase Recovery[1]> 5Please enter a subject line for this support request:[]> <Subject line for support request>Please enter a description of your issue, providing as much detail as possibleto aid in diagnosis:[]> <Description of issue>It is important to associate all your service contracts with your Cisco.com profile (CCOID) in order for you to receive completeaccess to support and services from Cisco. Please follow the URLs below to associateyour contract coverage on your Cisco.com profile.If you do not have a CCO ID, please followthe URL below to create a CCO ID.How to create a CCO ID:https://tools.cisco.com/RPF/register/register.doHow to associate your CCO ID with contract:https://tools.cisco.com/RPFA/profile/profile_management.doFrequently Asked Question:http://www.cisco.com/web/ordering/cs_info/faqs/index.htmlSelect the CCOID1. New CCOID[1]>Please enter the CCOID of the contact person :[]> your nameThe CCO ID may contain alphabets, numbers and '@', '.', '-' and '_' symbols.Please enter the CCOID of the contact person :[]> [email protected] enter the name of the contact person :[]> yournamePlease enter your email address:[]> [email protected] enter the contract ID:[]> 1234Please enter any additional contact information (e.g. phone number):[]>Please wait while configuration information is generated...Do you want to print the support request to the screen?[N]>
supportrequeststatus
説明
Cisco TACのサポートを要求するための、サポート要求キーワードバージョン情報を表示します。
使用方法
確定:このコマンドに「commit」は必要ありません。
コマンド:参考例
114
コマンド:参考例
supportrequeststatus

クラスタ管理:このコマンドは、すべてのマシンモード(クラスタ、グループ、マシン)で使
用できます。
バッチコマンド:このコマンドはバッチ形式をサポートしていません。
例
mail.example.com> supportrequeststatusComponent Version Last UpdatedSupport Request 1.0 Never updated
supportrequestupdate
説明
Cisco TACのサポートを要求するための、サポート要求キーワードの手動アップデートを要求します。
使用方法
確定:このコマンドに「commit」は必要ありません。
クラスタ管理:このコマンドは、すべてのマシンモード(クラスタ、グループ、マシン)で使
用できます。
バッチコマンド:このコマンドはバッチ形式をサポートしていません。
例
mail.example.com> supportrequestupdateRequesting update of Support Request Keywords.
suspend
説明
受信と配信を中断します。
使用方法
確定:このコマンドに「commit」は必要ありません。
クラスタ管理:このコマンドはマシンモードでのみ使用できます。
バッチコマンド:このコマンドはバッチ形式をサポートしていません。
例
mail3.example.com> suspend
コマンド:参考例
115
コマンド:参考例
例

Enter the number of seconds to wait before abruptly closing connections.[30]> 45Waiting for listeners to exit...Receiving suspended for Listener 1.Waiting for outgoing deliveries to finish...Mail delivery suspended.mail3.example.com>
suspenddel
説明
配信を中断します。
使用方法
確定:このコマンドに「commit」は必要ありません。
クラスタ管理:このコマンドはマシンモードでのみ使用できます。
バッチコマンド:このコマンドはバッチ形式をサポートしていません。
例
mail.example.com> suspenddelEnter the number of seconds to wait before abruptly closing connections.[30]>Enter one or more domains [comma-separated] to which you want to suspend delivery.[ALL]> domain1.com, domain2.com, domain3.comWaiting for outgoing deliveries to finish...Mail delivery suspended.
suspendlistener
説明
受信を中断します。
使用方法
確定:このコマンドに「commit」は必要ありません。
クラスタ管理:このコマンドはマシンモードでのみ使用できます。
バッチコマンド:このコマンドはバッチ形式をサポートしていません。
例
mail3.example.com> suspendlistenerChoose the listener(s) you wish to suspend.Separate multiple entries with commas.1. All
コマンド:参考例
116
コマンド:参考例
suspenddel
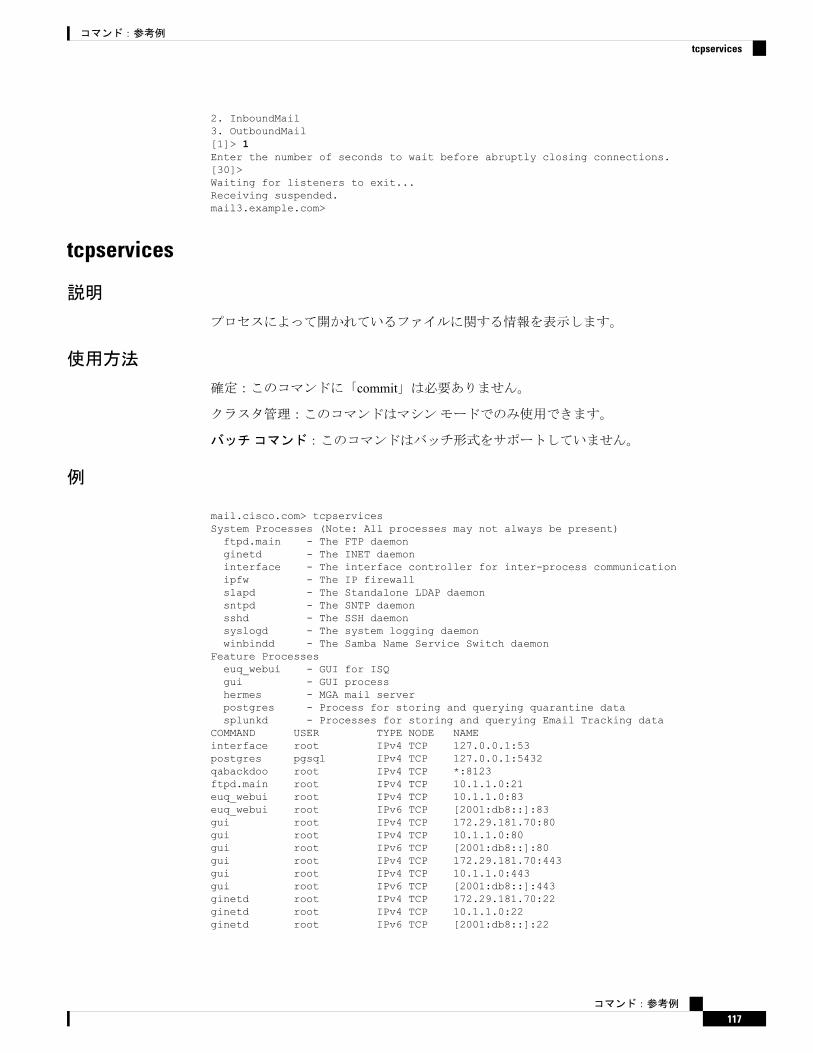
2. InboundMail3. OutboundMail[1]> 1Enter the number of seconds to wait before abruptly closing connections.[30]>Waiting for listeners to exit...Receiving suspended.mail3.example.com>
tcpservices
説明
プロセスによって開かれているファイルに関する情報を表示します。
使用方法
確定:このコマンドに「commit」は必要ありません。
クラスタ管理:このコマンドはマシンモードでのみ使用できます。
バッチコマンド:このコマンドはバッチ形式をサポートしていません。
例
mail.cisco.com> tcpservicesSystem Processes (Note: All processes may not always be present)ftpd.main - The FTP daemonginetd - The INET daemoninterface - The interface controller for inter-process communicationipfw - The IP firewallslapd - The Standalone LDAP daemonsntpd - The SNTP daemonsshd - The SSH daemonsyslogd - The system logging daemonwinbindd - The Samba Name Service Switch daemon
Feature Processeseuq_webui - GUI for ISQgui - GUI processhermes - MGA mail serverpostgres - Process for storing and querying quarantine datasplunkd - Processes for storing and querying Email Tracking data
COMMAND USER TYPE NODE NAMEinterface root IPv4 TCP 127.0.0.1:53postgres pgsql IPv4 TCP 127.0.0.1:5432qabackdoo root IPv4 TCP *:8123ftpd.main root IPv4 TCP 10.1.1.0:21euq_webui root IPv4 TCP 10.1.1.0:83euq_webui root IPv6 TCP [2001:db8::]:83gui root IPv4 TCP 172.29.181.70:80gui root IPv4 TCP 10.1.1.0:80gui root IPv6 TCP [2001:db8::]:80gui root IPv4 TCP 172.29.181.70:443gui root IPv4 TCP 10.1.1.0:443gui root IPv6 TCP [2001:db8::]:443ginetd root IPv4 TCP 172.29.181.70:22ginetd root IPv4 TCP 10.1.1.0:22ginetd root IPv6 TCP [2001:db8::]:22
コマンド:参考例
117
コマンド:参考例
tcpservices

ginetd root IPv4 TCP 10.1.1.0:2222ginetd root IPv6 TCP [2001:db8::]:2222hermes root IPv4 TCP 172.29.181.70:25splunkd root IPv4 TCP 127.0.0.1:8089splunkd root IPv4 TCP 127.0.0.1:9997api_serve root IPv4 TCP 10.1.1.0:6080api_serve root IPv6 TCP [2001:db8::]:6080api_serve root IPv4 TCP 10.1.1.0:6443api_serve root IPv6 TCP [2001:db8::]:6443java root IPv6 TCP [::127.0.0.1]:9999
techsupport
説明
Cisco TACがシステムにアクセスできるようにします。
使用方法
確定:このコマンドに「commit」は必要ありません。
クラスタ管理:このコマンドはマシンモードでのみ使用できます。
バッチコマンド:このコマンドはバッチ形式をサポートしていません。
例
mail3.example.com> techsupportService Access currently disabled.Serial Number: XXXXXXXXXXXX-XXXXXXXChoose the operation you want to perform:- SSHACCESS - Allow a Cisco IronPort Customer Support representative to remotely accessyour system, without establishing a tunnel.- TUNNEL - Allow a Cisco IronPort Customer Support representative to remotely accessyour system, and establish a secure tunnel
for communication.- STATUS - Display the current techsupport status.[]> sshaccessA random seed string is required for this operation1. Generate a random string to initialize secure communication (recommended)2. Enter a random string[1]> 1Are you sure you want to enable service access? [N]> yService access has been ENABLED. Please provide the string:QT22-JQZF-YAQL-TL8L-8@2L-95to your Cisco IronPort Customer Support representative.Service Access currently ENABLED (0 current service logins).Tunnel option is not active.Serial Number: XXXXXXXXXXXX-XXXXXXXChoose the operation you want to perform:- DISABLE - Prevent customer service representatives from remotely accessing your system.- STATUS - Display the current techsupport status.[]>
コマンド:参考例
118
コマンド:参考例
techsupport
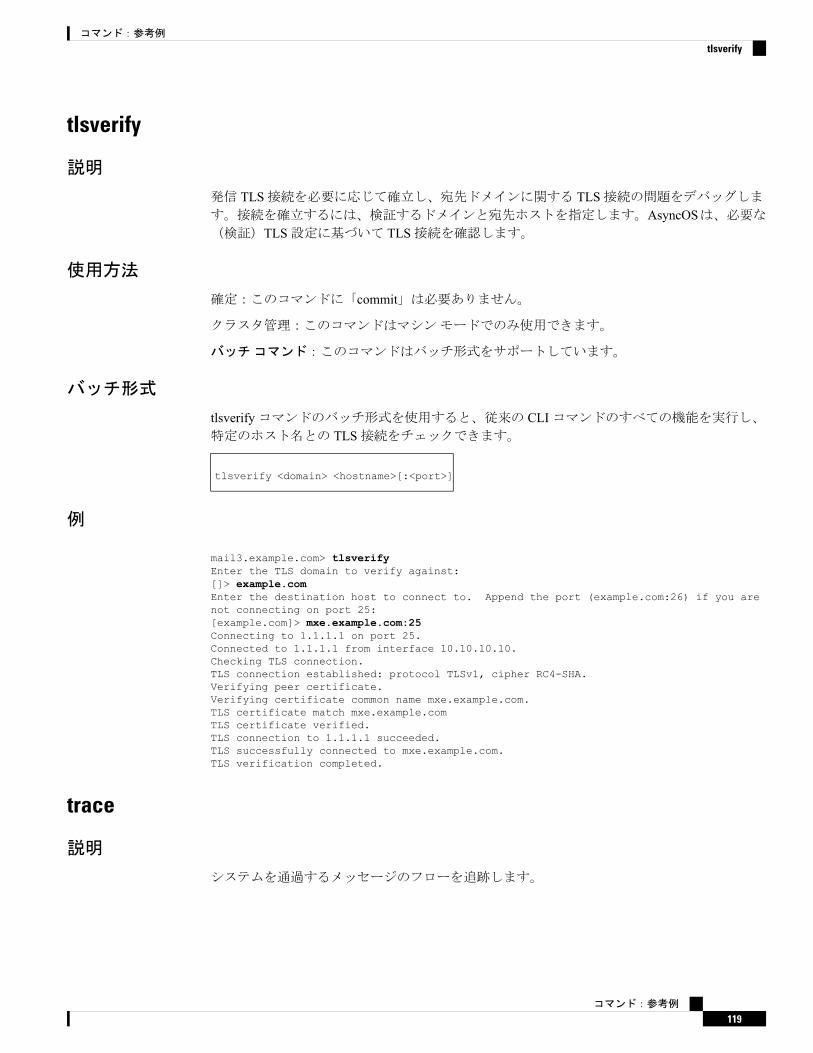
tlsverify
説明
発信 TLS接続を必要に応じて確立し、宛先ドメインに関する TLS接続の問題をデバッグします。接続を確立するには、検証するドメインと宛先ホストを指定します。AsyncOSは、必要な(検証)TLS設定に基づいて TLS接続を確認します。
使用方法
確定:このコマンドに「commit」は必要ありません。
クラスタ管理:このコマンドはマシンモードでのみ使用できます。
バッチコマンド:このコマンドはバッチ形式をサポートしています。
バッチ形式
tlsverifyコマンドのバッチ形式を使用すると、従来の CLIコマンドのすべての機能を実行し、特定のホスト名との TLS接続をチェックできます。
tlsverify <domain> <hostname>[:<port>]
例
mail3.example.com> tlsverifyEnter the TLS domain to verify against:[]> example.comEnter the destination host to connect to. Append the port (example.com:26) if you arenot connecting on port 25:[example.com]> mxe.example.com:25Connecting to 1.1.1.1 on port 25.Connected to 1.1.1.1 from interface 10.10.10.10.Checking TLS connection.TLS connection established: protocol TLSv1, cipher RC4-SHA.Verifying peer certificate.Verifying certificate common name mxe.example.com.TLS certificate match mxe.example.comTLS certificate verified.TLS connection to 1.1.1.1 succeeded.TLS successfully connected to mxe.example.com.TLS verification completed.
trace
説明
システムを通過するメッセージのフローを追跡します。
コマンド:参考例
119
コマンド:参考例
tlsverify
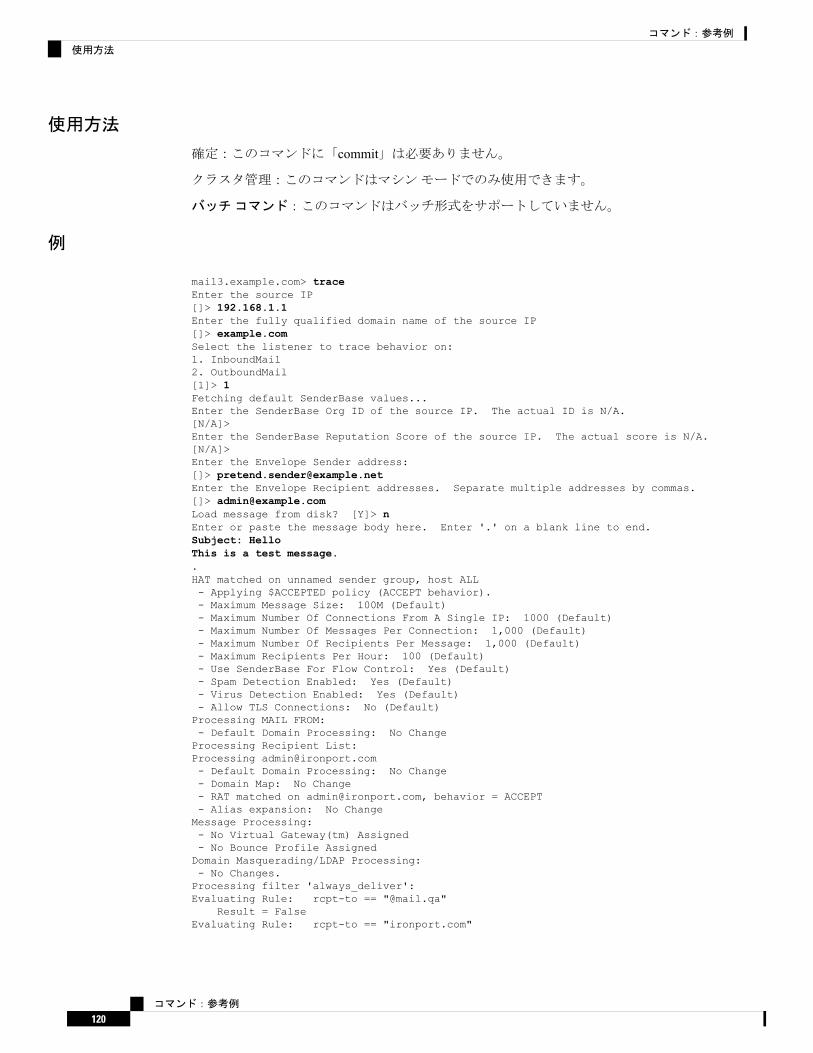
使用方法
確定:このコマンドに「commit」は必要ありません。
クラスタ管理:このコマンドはマシンモードでのみ使用できます。
バッチコマンド:このコマンドはバッチ形式をサポートしていません。
例
mail3.example.com> traceEnter the source IP[]> 192.168.1.1Enter the fully qualified domain name of the source IP[]> example.comSelect the listener to trace behavior on:1. InboundMail2. OutboundMail[1]> 1Fetching default SenderBase values...Enter the SenderBase Org ID of the source IP. The actual ID is N/A.[N/A]>Enter the SenderBase Reputation Score of the source IP. The actual score is N/A.[N/A]>Enter the Envelope Sender address:[]> [email protected] the Envelope Recipient addresses. Separate multiple addresses by commas.[]> [email protected] message from disk? [Y]> nEnter or paste the message body here. Enter '.' on a blank line to end.Subject: HelloThis is a test message..HAT matched on unnamed sender group, host ALL- Applying $ACCEPTED policy (ACCEPT behavior).- Maximum Message Size: 100M (Default)- Maximum Number Of Connections From A Single IP: 1000 (Default)- Maximum Number Of Messages Per Connection: 1,000 (Default)- Maximum Number Of Recipients Per Message: 1,000 (Default)- Maximum Recipients Per Hour: 100 (Default)- Use SenderBase For Flow Control: Yes (Default)- Spam Detection Enabled: Yes (Default)- Virus Detection Enabled: Yes (Default)- Allow TLS Connections: No (Default)Processing MAIL FROM:- Default Domain Processing: No ChangeProcessing Recipient List:Processing [email protected] Default Domain Processing: No Change- Domain Map: No Change- RAT matched on [email protected], behavior = ACCEPT- Alias expansion: No ChangeMessage Processing:- No Virtual Gateway(tm) Assigned- No Bounce Profile AssignedDomain Masquerading/LDAP Processing:- No Changes.Processing filter 'always_deliver':Evaluating Rule: rcpt-to == "@mail.qa"
Result = FalseEvaluating Rule: rcpt-to == "ironport.com"
コマンド:参考例
120
コマンド:参考例
使用方法

Result = TrueEvaluating Rule: OR
Result = TrueExecuting Action: deliver()Footer Stamping:- Not PerformedInbound Recipient Policy Processing: (matched on Management Upgrade policy)Message going to: [email protected] Evaluation:- Not SpamAntiVirus Evaluation:- Message Clean.- Elapsed Time = '0.000 sec'Outbreak Filter Evaluation:- No threat detectedMessage Enqueued for DeliveryWould you like to see the resulting message? [Y]> yFinal text for messages matched on policy Management UpgradeFinal Envelope Sender: [email protected] Recipients:- [email protected] Message Content:Received: from remotehost.example.com (HELO TEST) (1.2.3.4)by stacy.qa with TEST; 19 Oct 2004 00:54:48 -0700
Message-Id: <3i93q9$@Management>X-IronPort-AV: i="3.86,81,1096873200";
d="scan'208"; a="0:sNHT0"Subject: helloThis is a test message.Run through another debug session? [N]>
traceを使用するときには、貼り付けられたメッセージのヘッダーと本文の両方を CLIに含める必要があります。
(注)
trackingconfig
説明
トラッキングシステムを設定します。
使用方法
確定:このコマンドは「commit」が必要です。
クラスタ管理:このコマンドは、すべてのマシンモード(クラスタ、グループ、マシン)で使
用できます。
バッチコマンド:このコマンドはバッチ形式をサポートしていません。
例
mail.example.com> trackingconfigMessage Tracking service status: Message Tracking is enabled.Choose the operation you want to perform:
コマンド:参考例
121
コマンド:参考例
trackingconfig

- SETUP - Enable Message Tracking for this appliance.[]> setupWould you like to use the Message Tracking Service? [Y]>Do you want to use Centralized Message Tracking for this appliance? [N]>Would you like to track rejected connections? [N]>Message Tracking service status: Local Message Tracking is enabled.Rejected connections are currently not being tracked.Choose the operation you want to perform:- SETUP - Enable Message Tracking for this appliance.[]>
tzupdate
説明
タイムゾーンルールを更新します。
使用方法
確定:このコマンドに「commit」は必要ありません。
クラスタ管理:このコマンドはマシンモードでのみ使用できます。さらに、このコマンドはロ
グインホスト(ユーザがログインしたマシン)でのみ使用できます。
バッチコマンド:このコマンドはバッチ形式をサポートしています。
バッチ形式
tzupdateコマンドのバッチ形式を使用すると、変更が検出されない場合でも、すべてのタイムゾーンルールが強制的に更新されます。
tzupdate [force]
例
mail.example.com> tzupdateRequesting update of Timezone Rules
updateconfig
説明
システム更新パラメータを設定します。
使用方法
確定:このコマンドは「commit」が必要です。
クラスタ管理:このコマンドは、すべてのマシンモード(クラスタ、グループ、マシン)で使
用できます。
コマンド:参考例
122
コマンド:参考例
tzupdate

バッチコマンド:このコマンドはバッチ形式をサポートしていません。
例
•アップデータサーバから更新プログラムをダウンロードするようにアプライアンスを設定(123ページ)
•アップデータサーバの証明書の有効性を検証するようにアプライアンスを設定(125ページ)
•プロキシサーバとの通信を信頼するようにアプライアンスを設定(126ページ)
アップデータサーバから更新プログラムをダウンロードするようにアプライアンスを設定
次の例では、updateconfigコマンドを使用して、アプライアンスがシスコサーバからアップデートイメージをダウンロードし、ローカルサーバから使用可能な AsyncOSアップグレードのリストをダウンロードするように設定します。
mail.example.com> updateconfigService (images): Update URL:------------------------------------------------------------------------------------------Feature Key updates http://downloads.ironport.com/asyncosTimezone rules Cisco IronPort ServersEnrollment Client Updates Cisco IronPort ServersSupport Request updates Cisco IronPort ServersCisco IronPort AsyncOS upgrades Cisco IronPort ServersService (list): Update URL:------------------------------------------------------------------------------------------Timezone rules Cisco IronPort ServersEnrollment Client Updates Cisco IronPort ServersSupport Request updates Cisco IronPort ServersService (list): Update URL:------------------------------------------------------------------------------------------Cisco IronPort AsyncOS upgrades Cisco IronPort ServersUpdate interval: 5mAlert Interval for Disabled Automatic Engine Updates: 30dProxy server: not enabledHTTPS Proxy server: not enabledChoose the operation you want to perform:- SETUP - Edit update configuration.- VALIDATE_CERTIFICATES - Validate update server certificates- TRUSTED_CERTIFICATES - Manage trusted certificates for updates[]> setupFor the following services, please select where the system will download updates from:Service (images): Update URL:------------------------------------------------------------------------------------------Feature Key updates http://downloads.ironport.com/asyncos1. Use Cisco IronPort update servers (http://downloads.ironport.com)2. Use own server[1]>For the following services, please select where the system will download updates from(images):Service (images): Update URL:------------------------------------------------------------------------------------------Timezone rules Cisco IronPort ServersEnrollment Client Updates Cisco IronPort ServersSupport Request updates Cisco IronPort Servers1. Use Cisco IronPort update servers2. Use own server[1]>For the following services, please select where the system will download updates from
コマンド:参考例
123
コマンド:参考例
例

(images):Service (images): Update URL:------------------------------------------------------------------------------------------Cisco IronPort AsyncOS upgrades Cisco IronPort Servers1. Use Cisco IronPort update servers2. Use own server[1]>For the following services, please select where the system will download the list ofavailableupdates from:Service (list): Update URL:------------------------------------------------------------------------------------------Timezone rules Cisco IronPort ServersEnrollment Client Updates Cisco IronPort ServersSupport Request updates Cisco IronPort Servers1. Use Cisco IronPort update servers2. Use own update list[1]>For the following services, please select where the system will download the list ofavailableupdates from:Service (list): Update URL:------------------------------------------------------------------------------------------Cisco IronPort AsyncOS upgrades Cisco IronPort Servers1. Use Cisco IronPort update servers2. Use own update list[1]>Enter the time interval between checks for new:
- Timezone rules- Enrollment Client Updates (used to fetch certificates for URL Filtering)- Support Request updates
Use a trailing 's' for seconds, 'm' for minutes or 'h' for hours. The minimumvalid update time is 30s or enter '0' to disable automatic updates (manualupdates will still be available for individual services).[5m]>When initiating a connection to the update server the originating IP interfaceis chosen automatically. If you want to choose a specific interface, pleasespecify it now.1. Auto2. Management (10.76.69.149/24: vm30esa0086.ibqa)[1]>Do you want to set up a proxy server for HTTP updates for ALL of the followingservices:
- Feature Key updates- Timezone rules- Enrollment Client Updates (used to fetch certificates for URL Filtering)- Support Request updates- Cisco IronPort AsyncOS upgrades
[N]>Do you want to set up an HTTPS proxy server for HTTPS updates for ALL of the followingservices:
- Feature Key updates- Timezone rules- Enrollment Client Updates (used to fetch certificates for URL Filtering)- Support Request updates- Cisco IronPort AsyncOS upgrades- SenderBase Network Participation sharing
[N]>Service (images): Update URL:------------------------------------------------------------------------------------------Feature Key updates http://downloads.ironport.com/asyncosTimezone rules Cisco IronPort ServersEnrollment Client Updates Cisco IronPort ServersSupport Request updates Cisco IronPort Servers
コマンド:参考例
124
コマンド:参考例
アップデータサーバから更新プログラムをダウンロードするようにアプライアンスを設定

Cisco IronPort AsyncOS upgrades Cisco IronPort ServersService (list): Update URL:------------------------------------------------------------------------------------------Timezone rules Cisco IronPort ServersEnrollment Client Updates Cisco IronPort ServersSupport Request updates Cisco IronPort ServersService (list): Update URL:------------------------------------------------------------------------------------------Cisco IronPort AsyncOS upgrades Cisco IronPort ServersUpdate interval: 5mProxy server: not enabledHTTPS Proxy server: not enabledChoose the operation you want to perform:- SETUP - Edit update configuration.- VALIDATE_CERTIFICATES - Validate update server certificates- TRUSTED_CERTIFICATES - Manage trusted certificates for updates[]>
アップデータサーバの証明書の有効性を検証するようにアプライアンスを設定
このオプションを設定すると、アプライアンスがシスコのアップデータサーバと通信するたび
に、アップデータサーバの証明書の有効性が確認されます。検証に失敗した場合は、更新プロ
グラムはダウンロードされず、詳細がアップデータのログに記録されます。次に、このオプ
ションを設定する例を示します。
mail.example.com> updateconfigService (images): Update URL:------------------------------------------------------------------------------------------Feature Key updates http://downloads.ironport.com/asyncosTimezone rules Cisco IronPort ServersEnrollment Client Updates Cisco IronPort ServersSupport Request updates Cisco IronPort ServersCisco IronPort AsyncOS upgrades Cisco IronPort ServersService (list): Update URL:------------------------------------------------------------------------------------------Timezone rules Cisco IronPort ServersEnrollment Client Updates Cisco IronPort ServersSupport Request updates Cisco IronPort ServersService (list): Update URL:------------------------------------------------------------------------------------------Cisco IronPort AsyncOS upgrades Cisco IronPort ServersUpdate interval: 5mAlert Interval for Disabled Automatic Engine Updates: 30dProxy server: not enabledHTTPS Proxy server: not enabledChoose the operation you want to perform:- SETUP - Edit update configuration.- VALIDATE_CERTIFICATES - Validate update server certificates- TRUSTED_CERTIFICATES - Manage trusted certificates for updates[]> validate_certificatesShould server certificates from Cisco update servers be validated?[Yes]>Service (images): Update URL:------------------------------------------------------------------------------------------Feature Key updates http://downloads.ironport.com/asyncosTimezone rules Cisco IronPort ServersEnrollment Client Updates Cisco IronPort ServersSupport Request updates Cisco IronPort ServersCisco IronPort AsyncOS upgrades Cisco IronPort ServersService (list): Update URL:------------------------------------------------------------------------------------------Timezone rules Cisco IronPort Servers
コマンド:参考例
125
コマンド:参考例
アップデータサーバの証明書の有効性を検証するようにアプライアンスを設定

Enrollment Client Updates Cisco IronPort ServersSupport Request updates Cisco IronPort ServersService (list): Update URL:------------------------------------------------------------------------------------------Cisco IronPort AsyncOS upgrades Cisco IronPort ServersUpdate interval: 5mProxy server: not enabledHTTPS Proxy server: not enabledChoose the operation you want to perform:- SETUP - Edit update configuration.- VALIDATE_CERTIFICATES - Validate update server certificates- TRUSTED_CERTIFICATES - Manage trusted certificates for updates[]>
プロキシサーバとの通信を信頼するようにアプライアンスを設定
透過的でないプロキシサーバを使用している場合、プロキシ証明書の署名に使用するCA証明書をアプライアンスに追加できます。これにより、アプライアンスはプロキシサーバ通信を信
頼します。次に、このオプションを設定する例を示します。
...Choose the operation you want to perform:- SETUP - Edit update configuration.- VALIDATE_CERTIFICATES - Validate update server certificates- TRUSTED_CERTIFICATES - Manage trusted certificates for updates[]> trusted_certificatesChoose the operation you want to perform:- ADD - Upload a new trusted certificate for updates.[]> addPaste certificates to be trusted for secure updater connections, blank to quitTrusted Certificate for Updater:Paste cert in PEM format (end with '.'):-----BEGIN CERTIFICATE-----MMIICiDCCAfGgAwIBAgIBATANBgkqhkiG9w0BAQUFADCBgDELMAkGA1UEBhMCSU4xDDAKBgNVBAgTA0tBUjENM............................................-----END CERTIFICATE-----.Choose the operation you want to perform:- ADD - Upload a new trusted certificate for updates.- LIST - List trusted certificates for updates.- DELETE - Delete a trusted certificate for updates.[]>
updatenow
説明
すべてのシステムサービスコンポーネントの更新を要求します。
使用方法
確定:このコマンドに「commit」は必要ありません。
クラスタ管理:このコマンドはマシンモードでのみ使用できます。さらに、このコマンドはロ
グインホスト(ユーザがログインしたマシン)でのみ使用できます。
バッチコマンド:このコマンドはバッチ形式をサポートしています。
コマンド:参考例
126
コマンド:参考例
プロキシサーバとの通信を信頼するようにアプライアンスを設定

バッチ形式
updatenowコマンドのバッチ形式を使用すると、変更が検出されない場合でも、アプライアンス上のすべてのコンポーネントを更新できます。
updatenow [force]
例
mail3.example.com> updatenowSuccess - All component updates requested
version
説明
システムのバージョン情報を表示します。
使用方法
確定:このコマンドに「commit」は必要ありません。
クラスタ管理:このコマンドはマシンモードでのみ使用できます。
バッチコマンド:このコマンドはバッチ形式をサポートしていません。
例
mail3.example.com> versionCurrent Version===============Product: Cisco C100V Email Security Virtual ApplianceModel: C100VVersion: 9.1.0-019Build Date: 2015-02-17Install Date: 2015-02-19 05:17:56Serial #: 421C73B18CFB05784A83-B03A99E71ED8BIOS: 6.00CPUs: 2 expected, 2 allocatedMemory: 6144 MB expected, 6144 MB allocatedRAID: NARAID Status: UnknownRAID Type: NABMC: NA
コマンド:参考例
127
コマンド:参考例
バッチ形式

wipedata
説明
ディスクのコアファイルを消去し、最後のコアダンプ操作のステータスを確認するのに
wipedataコマンドを使用します。
データサイズに応じて、消去アクションは、時間がかかることがあり、操作が完了するまで、
システムパフォーマンスに影響を与えることがあります。
(注)
使用方法
確定:このコマンドに「commit」は必要ありません。
クラスタ管理:このコマンドはマシンモードでのみ使用できます。
バッチコマンド:このコマンドはバッチ形式をサポートしていません。
例
mail.example.com> wipedataWiping data may take a while and can affect system performance till it completes.Choose the operation you want to perform:- STATUS - Display status of last command run- COREDUMP - Wipe core files on disk[]> coredumpwipedata: In progressmail.example.com> wipedataWiping data may take a while and can affect system performance till it completes.Choose the operation you want to perform:- STATUS - Display status of last command run- COREDUMP - Wipe core files on disk[]> statusLast wipedata status: Successful
upgrade
説明
upgrade CLIコマンドは、使用可能なアップグレードのリストを表示し、ユーザが指定したバージョンに AsyncOSシステムをアップグレードします。
使用方法
確定:このコマンドに「commit」は必要ありません。
クラスタ管理:このコマンドはマシンモードでのみ使用できます。
バッチコマンド:このコマンドはバッチ形式をサポートしていません。
コマンド:参考例
128
コマンド:参考例
wipedata
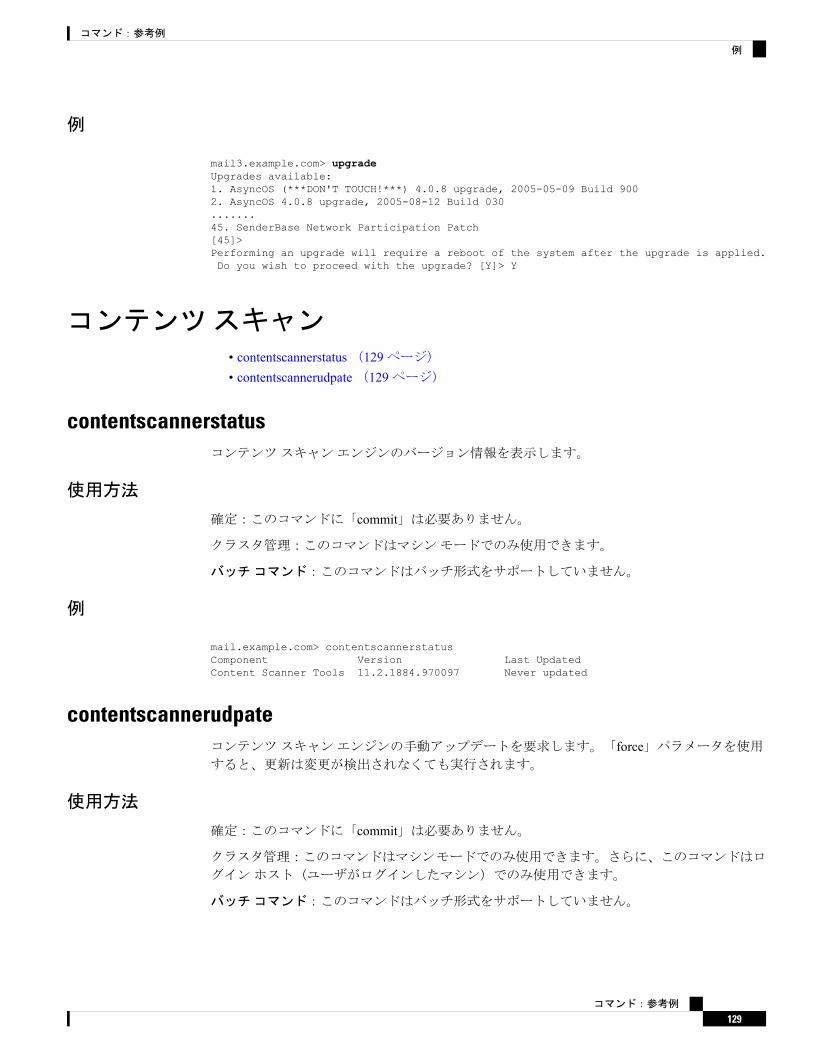
例
mail3.example.com> upgradeUpgrades available:1. AsyncOS (***DON'T TOUCH!***) 4.0.8 upgrade, 2005-05-09 Build 9002. AsyncOS 4.0.8 upgrade, 2005-08-12 Build 030.......45. SenderBase Network Participation Patch[45]>Performing an upgrade will require a reboot of the system after the upgrade is applied.Do you wish to proceed with the upgrade? [Y]> Y
コンテンツスキャン• contentscannerstatus(129ページ)• contentscannerudpate(129ページ)
contentscannerstatusコンテンツスキャンエンジンのバージョン情報を表示します。
使用方法
確定:このコマンドに「commit」は必要ありません。
クラスタ管理:このコマンドはマシンモードでのみ使用できます。
バッチコマンド:このコマンドはバッチ形式をサポートしていません。
例
mail.example.com> contentscannerstatusComponent Version Last UpdatedContent Scanner Tools 11.2.1884.970097 Never updated
contentscannerudpateコンテンツスキャンエンジンの手動アップデートを要求します。「force」パラメータを使用すると、更新は変更が検出されなくても実行されます。
使用方法
確定:このコマンドに「commit」は必要ありません。
クラスタ管理:このコマンドはマシンモードでのみ使用できます。さらに、このコマンドはロ
グインホスト(ユーザがログインしたマシン)でのみ使用できます。
バッチコマンド:このコマンドはバッチ形式をサポートしていません。
コマンド:参考例
129
コマンド:参考例
例
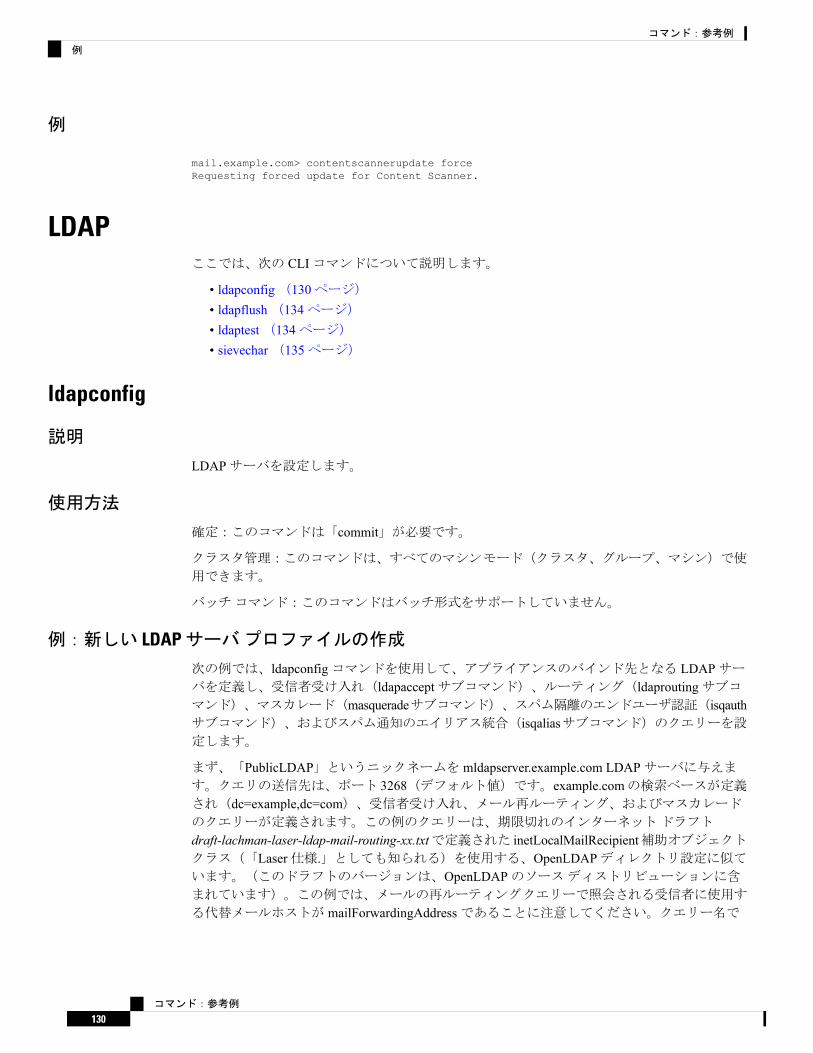
例
mail.example.com> contentscannerupdate forceRequesting forced update for Content Scanner.
LDAPここでは、次の CLIコマンドについて説明します。
• ldapconfig(130ページ)• ldapflush(134ページ)• ldaptest(134ページ)• sievechar(135ページ)
ldapconfig
説明
LDAPサーバを設定します。
使用方法
確定:このコマンドは「commit」が必要です。
クラスタ管理:このコマンドは、すべてのマシンモード(クラスタ、グループ、マシン)で使
用できます。
バッチコマンド:このコマンドはバッチ形式をサポートしていません。
例:新しい LDAPサーバプロファイルの作成
次の例では、ldapconfigコマンドを使用して、アプライアンスのバインド先となる LDAPサーバを定義し、受信者受け入れ(ldapacceptサブコマンド)、ルーティング(ldaproutingサブコマンド)、マスカレード(masqueradeサブコマンド)、スパム隔離のエンドユーザ認証(isqauthサブコマンド)、およびスパム通知のエイリアス統合(isqaliasサブコマンド)のクエリーを設定します。
まず、「PublicLDAP」というニックネームを mldapserver.example.com LDAPサーバに与えます。クエリの送信先は、ポート 3268(デフォルト値)です。example.comの検索ベースが定義され(dc=example,dc=com)、受信者受け入れ、メール再ルーティング、およびマスカレードのクエリーが定義されます。この例のクエリーは、期限切れのインターネットドラフト
draft-lachman-laser-ldap-mail-routing-xx.txtで定義された inetLocalMailRecipient補助オブジェクトクラス(「Laser仕様.」としても知られる)を使用する、OpenLDAPディレクトリ設定に似ています。(このドラフトのバージョンは、OpenLDAPのソースディストリビューションに含まれています)。この例では、メールの再ルーティングクエリーで照会される受信者に使用す
る代替メールホストが mailForwardingAddressであることに注意してください。クエリー名で
コマンド:参考例
130
コマンド:参考例
例

は、大文字と小文字が区別されます。正しい結果が返されるようにするには、正確に一致して
いる必要があります。
mail3.example.com> ldapconfigNo LDAP server configurations.Choose the operation you want to perform:- NEW - Create a new server configuration.- SETUP - Configure LDAP options.[]> newPlease create a name for this server configuration (Ex: "PublicLDAP"):[]> PublicLDAPPlease enter the hostname:[]> myldapserver.example.comUse SSL to connect to the LDAP server? [N]> nSelect the authentication method to use for this server configuration:1. Anonymous2. Passphrase based[1]> 2Please enter the bind username:[cn=Anonymous]>Please enter the bind passphrase:[]>Connect to LDAP server to validate setting? [Y]Connecting to the LDAP server, please wait...Select the server type to use for this server configuration:1. Active Directory2. OpenLDAP3. Unknown or Other[3]> 1
Please enter the port number:[3268]> 3268Please enter the base:[dc=example,dc=com]> dc=example,dc=comName: PublicLDAPHostname: myldapserver.example.com Port 3268Server Type: Active DirectoryAuthentication Type: passphraseBase: dc=example,dc=comChoose the operation you want to perform:- SERVER - Change the server for the query.- TEST - Test the server configuration.- LDAPACCEPT - Configure whether a recipient address should be accepted orbounced/dropped.- LDAPROUTING - Configure message routing.- MASQUERADE - Configure domain masquerading.- LDAPGROUP - Configure whether a sender or recipient is in a specified group.- SMTPAUTH - Configure SMTP authentication.- CERTAUTH - Configure certificate authentication.- EXTERNALAUTH - Configure external authentication queries.- ISQAUTH - Configure Spam Quarantine End-User Authentication Query.- ISQALIAS - Configure Spam Quarantine Alias Consolidation Query.[]> ldapacceptPlease create a name for this query:[PublicLDAP.ldapaccept]> PublicLDAP.ldapacceptEnter the LDAP query string:[(proxyAddresses=smtp:{a})]> (proxyAddresses=smtp:{a})Do you want to test this query? [Y]> nName: PublicLDAPHostname: myldapserver.example.com Port 3268Server Type: Active DirectoryAuthentication Type: passphrase
コマンド:参考例
131
コマンド:参考例
例:新しい LDAPサーバプロファイルの作成
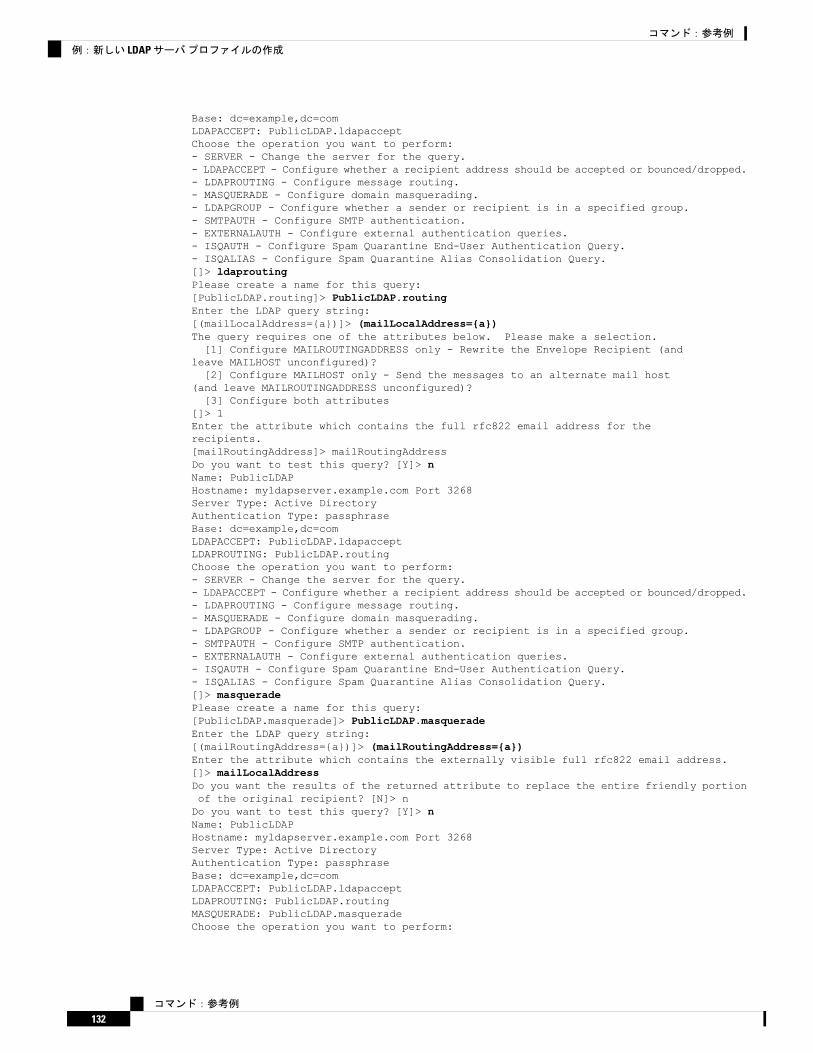
Base: dc=example,dc=comLDAPACCEPT: PublicLDAP.ldapacceptChoose the operation you want to perform:- SERVER - Change the server for the query.- LDAPACCEPT - Configure whether a recipient address should be accepted or bounced/dropped.- LDAPROUTING - Configure message routing.- MASQUERADE - Configure domain masquerading.- LDAPGROUP - Configure whether a sender or recipient is in a specified group.- SMTPAUTH - Configure SMTP authentication.- EXTERNALAUTH - Configure external authentication queries.- ISQAUTH - Configure Spam Quarantine End-User Authentication Query.- ISQALIAS - Configure Spam Quarantine Alias Consolidation Query.[]> ldaproutingPlease create a name for this query:[PublicLDAP.routing]> PublicLDAP.routingEnter the LDAP query string:[(mailLocalAddress={a})]> (mailLocalAddress={a})The query requires one of the attributes below. Please make a selection.[1] Configure MAILROUTINGADDRESS only - Rewrite the Envelope Recipient (and
leave MAILHOST unconfigured)?[2] Configure MAILHOST only - Send the messages to an alternate mail host
(and leave MAILROUTINGADDRESS unconfigured)?[3] Configure both attributes
[]> 1Enter the attribute which contains the full rfc822 email address for therecipients.[mailRoutingAddress]> mailRoutingAddressDo you want to test this query? [Y]> nName: PublicLDAPHostname: myldapserver.example.com Port 3268Server Type: Active DirectoryAuthentication Type: passphraseBase: dc=example,dc=comLDAPACCEPT: PublicLDAP.ldapacceptLDAPROUTING: PublicLDAP.routingChoose the operation you want to perform:- SERVER - Change the server for the query.- LDAPACCEPT - Configure whether a recipient address should be accepted or bounced/dropped.- LDAPROUTING - Configure message routing.- MASQUERADE - Configure domain masquerading.- LDAPGROUP - Configure whether a sender or recipient is in a specified group.- SMTPAUTH - Configure SMTP authentication.- EXTERNALAUTH - Configure external authentication queries.- ISQAUTH - Configure Spam Quarantine End-User Authentication Query.- ISQALIAS - Configure Spam Quarantine Alias Consolidation Query.[]> masqueradePlease create a name for this query:[PublicLDAP.masquerade]> PublicLDAP.masqueradeEnter the LDAP query string:[(mailRoutingAddress={a})]> (mailRoutingAddress={a})Enter the attribute which contains the externally visible full rfc822 email address.[]> mailLocalAddressDo you want the results of the returned attribute to replace the entire friendly portionof the original recipient? [N]> nDo you want to test this query? [Y]> nName: PublicLDAPHostname: myldapserver.example.com Port 3268Server Type: Active DirectoryAuthentication Type: passphraseBase: dc=example,dc=comLDAPACCEPT: PublicLDAP.ldapacceptLDAPROUTING: PublicLDAP.routingMASQUERADE: PublicLDAP.masqueradeChoose the operation you want to perform:
コマンド:参考例
132
コマンド:参考例
例:新しい LDAPサーバプロファイルの作成

- SERVER - Change the server for the query.- LDAPACCEPT - Configure whether a recipient address should be accepted or bounced/dropped.- LDAPROUTING - Configure message routing.- MASQUERADE - Configure domain masquerading.- LDAPGROUP - Configure whether a sender or recipient is in a specified group.- SMTPAUTH - Configure SMTP authentication.- EXTERNALAUTH - Configure external authentication queries.- ISQAUTH - Configure Spam Quarantine End-User Authentication Query.- ISQALIAS - Configure Spam Quarantine Alias Consolidation Query.[]> isqauthPlease create a name for this query:[PublicLDAP.isqauth]> PublicLDAP.isqauthEnter the LDAP query string:[(sAMAccountName={u})]> (sAMAccountName={u})Enter the list of email attributes.[]> mail,proxyAddressesDo you want to activate this query? [Y]> yDo you want to test this query? [Y]> yUser identity to use in query:[]> [email protected] to use in query:[]> passphraseLDAP query test results:LDAP Server: myldapserver.example.comQuery: PublicLDAP.isqauthUser: [email protected]: match positiveLDAP query test finished.Name: PublicLDAPHostname: myldapserver.example.com Port 3268Server Type: Active DirectoryAuthentication Type: passphraseBase: dc=example,dc=comLDAPACCEPT: PublicLDAP.ldapacceptLDAPROUTING: PublicLDAP.routingMASQUERADE: PublicLDAP.masqueradeISQAUTH: PublicLDAP.isqauth [active]Choose the operation you want to perform:- SERVER - Change the server for the query.- LDAPACCEPT - Configure whether a recipient address should be accepted or bounced/dropped.- LDAPROUTING - Configure message routing.- MASQUERADE - Configure domain masquerading.- LDAPGROUP - Configure whether a sender or recipient is in a specified group.- SMTPAUTH - Configure SMTP authentication.- EXTERNALAUTH - Configure external authentication queries.- ISQAUTH - Configure Spam Quarantine End-User Authentication Query.- ISQALIAS - Configure Spam Quarantine Alias Consolidation Query.[]>Current LDAP server configurations:1. PublicLDAP: (myldapserver.example.com:3268)Choose the operation you want to perform:- NEW - Create a new server configuration.- SETUP - Configure LDAP options.- EDIT - Modify a server configuration.- DELETE - Remove a server configuration.[]>
例:グローバル設定の指定
この例では、TLS接続の証明書を含む LDAPグローバル設定を指定します。
mail3.example.com> ldapconfig
コマンド:参考例
133
コマンド:参考例
例:グローバル設定の指定

No LDAP server configurations.Choose the operation you want to perform:- NEW - Create a new server configuration.- SETUP - Configure LDAP options.[]> setupChoose the IP interface for LDAP traffic.1. Auto2. Management (10.92.145.175/24: esx16-esa01.qa)[1]> 1LDAP will determine the interface automatically.Should group queries that fail to complete be silently treated as havingnegative results? [Y]>Validate LDAP server certificate? [Y]>The "Demo" certificate is currently configured. You may use "Demo", but this will notbe secure.1. partner.com2. DemoPlease choose the certificate to apply:[1]> 1No LDAP server configurations.Choose the operation you want to perform:- NEW - Create a new server configuration.- SETUP - Configure LDAP options.[]>
ldapflush
説明
キャッシュされている LDAPの結果をフラッシュします。
使用方法
確定:このコマンドに「commit」は必要ありません。
クラスタ管理:このコマンドはマシンモードでのみ使用できます。
バッチコマンド:このコマンドはバッチ形式をサポートしていません。
例
mail3.example.com> ldapflushAre you sure you want to flush any cached LDAP results? [N]> yFlushing cachemail3.example.com>
ldaptest
説明
1つの LDAPクエリーテストを実行します。
コマンド:参考例
134
コマンド:参考例
ldapflush

使用方法
確定:このコマンドに「commit」は必要ありません。
クラスタ管理:このコマンドはマシンモードでのみ使用できます。
バッチコマンド:このコマンドはバッチ形式をサポートしていません。
例
この例では、ldaptestコマンドを使用して、設定済みの LDAPサーバ設定の受信者受け入れクエリーだけをテストします。受信者アドレス「[email protected]」はこのテストに合格しますが、受信者アドレス「[email protected]」は不合格になります。
mail3.example.com> ldaptestSelect which LDAP query to test:1. PublicLDAP.ldapaccep[1]> 1Address to use in query:[]> [email protected] query test results:
Query: PublicLDAP.ldapacceptArgument: [email protected]: pass
LDAP query test finished.mail3.example.com> ldaptestSelect which LDAP query to test:1. PublicLDAP.ldapaccep[1]> 1Address to use in query:[]> [email protected] query test results:Query: PublicLDAP.ldapacceptArgument: [email protected]: drop or bounce (depending on listener settings)Reason: no matching LDAP record was foundLDAP query test finished.mail3.example.com>
sievechar
説明
RFC3598に規定されているSieve電子メールフィルタリングに使用する文字を設定またはディセーブルにします。Sieve文字は LDAP承認クエリーと LDAP再ルーティングクエリーでのみ認識されることに注意してください。システムの他の部分は、完全な電子メールアドレスを操
作対象とします。
使用できる文字は、-_=+/^#です。
使用方法
確定:このコマンドに「commit」は必要ありません。
コマンド:参考例
135
コマンド:参考例
使用方法
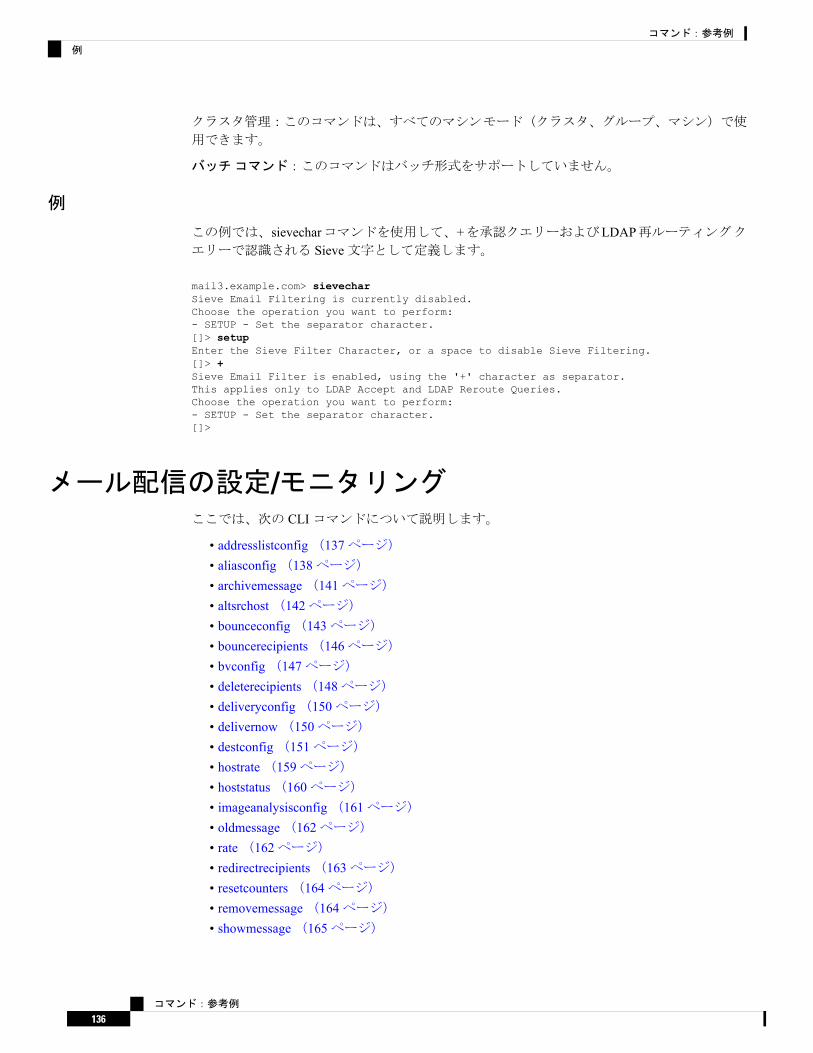
クラスタ管理:このコマンドは、すべてのマシンモード(クラスタ、グループ、マシン)で使
用できます。
バッチコマンド:このコマンドはバッチ形式をサポートしていません。
例
この例では、sievecharコマンドを使用して、+を承認クエリーおよびLDAP再ルーティングクエリーで認識される Sieve文字として定義します。
mail3.example.com> sievecharSieve Email Filtering is currently disabled.Choose the operation you want to perform:- SETUP - Set the separator character.[]> setupEnter the Sieve Filter Character, or a space to disable Sieve Filtering.[]> +Sieve Email Filter is enabled, using the '+' character as separator.This applies only to LDAP Accept and LDAP Reroute Queries.Choose the operation you want to perform:- SETUP - Set the separator character.[]>
メール配信の設定/モニタリングここでは、次の CLIコマンドについて説明します。
• addresslistconfig(137ページ)• aliasconfig(138ページ)• archivemessage(141ページ)• altsrchost(142ページ)• bounceconfig(143ページ)• bouncerecipients(146ページ)• bvconfig(147ページ)• deleterecipients(148ページ)• deliveryconfig(150ページ)• delivernow(150ページ)• destconfig(151ページ)• hostrate(159ページ)• hoststatus(160ページ)• imageanalysisconfig(161ページ)• oldmessage(162ページ)• rate(162ページ)• redirectrecipients(163ページ)• resetcounters(164ページ)• removemessage(164ページ)• showmessage(165ページ)
コマンド:参考例
136
コマンド:参考例
例

• showrecipients(166ページ)• status(111ページ)• tophosts(168ページ)• topin(169ページ)• unsubscribe(169ページ)• workqueue(170ページ)
addresslistconfig
説明
アドレスリストを設定します。
使用方法
確定:このコマンドは「commit」が必要です。
クラスタ管理:このコマンドは、すべてのマシンモード(クラスタ、グループ、マシン)で使
用できます。
バッチコマンド:このコマンドはバッチ形式をサポートしています。
バッチ形式
addresslistconfigコマンドのバッチ形式を使用して、新しいアドレスリストの作成、既存の
アドレスリストの編集、アドレスリストの一覧出力、アドレスリストの削除、アドレスリス
トの中で競合しているアドレスの検出が可能です。
•新しいアドレスリストの追加:
addresslistconfig new <name> --descr=<description> --addresses=<address1,address2,...>
•既存のアドレスリストの編集:
addresslistconfig edit <name> --name=<new-name> --descr=<description>--addresses=<address1,address2,...>
•アドレスリストの削除:
addresslistconfig delete <name>
•アドレスリストの一覧出力:
addresslistconfig print <name>
•アドレスリストの中で競合しているアドレスの検出:
addresslistconfig conflicts <name>
コマンド:参考例
137
コマンド:参考例
addresslistconfig

例
mail1.example.com> addresslistconfig
No address lists configured.
Choose the operation you want to perform:- NEW - Create a new address list.[]> new
Enter a name for the address list:> add-list1
Enter a description for the address list:> This is a sample address list
Enter the type of list:1. Full Email Addresses only2. Domains only3. IP Addresses only4. All of the aboveEnter the type of the address list:[4]> 1
Enter a comma separated list of addresses:(e.g.: [email protected])> [email protected], [email protected]
Address list "add-list1" added.
Choose the operation you want to perform:- NEW - Create a new address list.- EDIT - Modify an address list.- DELETE - Remove an address list.- PRINT - Display the contents of an address list.- CONFLICTS - Find conflicting entries within an address list.[]>
aliasconfig
説明
電子メールエイリアスを設定します。
使用方法
確定:このコマンドは「commit」が必要です。
クラスタ管理:このコマンドは、すべてのマシンモード(クラスタ、グループ、マシン)で使
用できます。
バッチコマンド:このコマンドはバッチ形式をサポートしています。
バッチ形式
aliasconfigのバッチ形式を使用すると、新しいエイリアステーブルの追加、既存のエイリアステーブルの編集、電子メールエイリアスのリストの出力、エイリアステーブルのインポート/
コマンド:参考例
138
コマンド:参考例
例

エクスポートを実行できます。バッチコマンドとして実行するには、aliasconfigコマンドを次の形式で入力し、以下の変数を指定します。
•新しい電子メールエイリアスの追加
aliasconfig new <domain> <alias> [email_address1] [email_address2] ...
存在しないドメインに対して「aliasconfig new」コマンドを実行すると、そのドメインが作成されます。
(注)
•既存の電子メールエイリアスの編集
aliasconfig edit <domain> <alias> <email_address1] [email_address2] ...
•電子メールエイリアスの表示
aliasconfig print
•ローカルエイリアスリストのインポート
aliasconfig import <filename>
•アプライアンスのエイリアスリストのエクスポート
aliasconfig export <filename>
例
mail3.example.com> aliasconfigEnter address(es) for "customercare".Separate multiple addresses with commas.[]> [email protected], [email protected], [email protected] alias customercare: [email protected],[email protected],[email protected] you want to add another alias? [N]> nThere are currently 1 mappings defined.Choose the operation you want to perform:- NEW - Create a new entry.- EDIT - Modify an entry.- DELETE - Remove an entry.- PRINT - Display the table.- IMPORT - Import aliases from a file.- EXPORT - Export table to a file.
コマンド:参考例
139
コマンド:参考例
例

- CLEAR - Clear the table.[]> newHow do you want your aliases to apply?1. Globally2. Add a new domain context3. example.com[1]> 1Enter the alias(es) to match on.Separate multiple aliases with commas.Allowed aliases:
- "user@domain" - This email address.- "user" - This user for any domain- "@domain" - All users in this domain.- "@.partialdomain" - All users in this domain, or any of its sub domains.
[]> adminEnter address(es) for "admin".Separate multiple addresses with commas.[]> [email protected] alias admin: [email protected] you want to add another alias? [N]> nThere are currently 2 mappings defined.Choose the operation you want to perform:- NEW - Create a new entry.- EDIT - Modify an entry.- DELETE - Remove an entry.- PRINT - Display the table.- IMPORT - Import aliases from a file.- EXPORT - Export table to a file.- CLEAR - Clear the table.[]> printadmin: [email protected][ example.com ]customercare: [email protected], [email protected], [email protected] are currently 2 mappings defined.Choose the operation you want to perform:- NEW - Create a new entry.- EDIT - Modify an entry.- DELETE - Remove an entry.- PRINT - Display the table.- IMPORT - Import aliases from a file.- EXPORT - Export table to a file.- CLEAR - Clear the table.[]>
表 6 :エイリアス設定用の引数
説明引数
エイリアスを適用するドメインコンテキスト。「Global」はグローバルドメインコンテキストを指定します。
<domain>
コマンド:参考例
140
コマンド:参考例
例
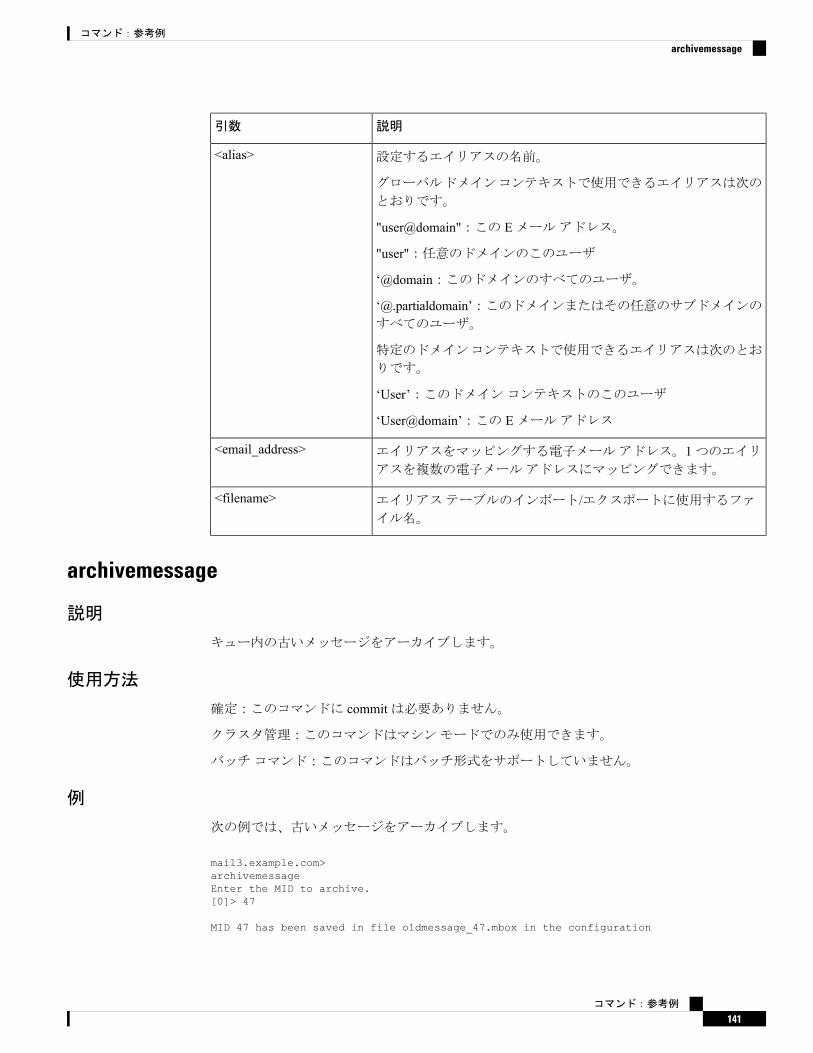
説明引数
設定するエイリアスの名前。
グローバルドメインコンテキストで使用できるエイリアスは次の
とおりです。
"user@domain":この Eメールアドレス。
"user":任意のドメインのこのユーザ
‘@domain:このドメインのすべてのユーザ。
‘@.partialdomain’:このドメインまたはその任意のサブドメインのすべてのユーザ。
特定のドメインコンテキストで使用できるエイリアスは次のとお
りです。
‘User’:このドメインコンテキストのこのユーザ
‘User@domain’:この Eメールアドレス
<alias>
エイリアスをマッピングする電子メールアドレス。1つのエイリアスを複数の電子メールアドレスにマッピングできます。
<email_address>
エイリアステーブルのインポート/エクスポートに使用するファイル名。
<filename>
archivemessage
説明
キュー内の古いメッセージをアーカイブします。
使用方法
確定:このコマンドに commitは必要ありません。
クラスタ管理:このコマンドはマシンモードでのみ使用できます。
バッチコマンド:このコマンドはバッチ形式をサポートしていません。
例
次の例では、古いメッセージをアーカイブします。
mail3.example.com>archivemessageEnter the MID to archive.[0]> 47
MID 47 has been saved in file oldmessage_47.mbox in the configuration
コマンド:参考例
141
コマンド:参考例
archivemessage

altsrchost
説明
Virtual Gateway™のマッピングを設定します。
使用方法
確定:このコマンドは「commit」が必要です。
クラスタ管理:このコマンドは、すべてのマシンモード(クラスタ、グループ、マシン)で使
用できます。
バッチコマンド:このコマンドはバッチ形式をサポートしていません。
例
次の例では、altsrchostテーブルが出力されて、既存のマッピングがないことが示されます。その後、2つのエントリが作成されます。
•グループウェアサーバホスト@exchange.example.comからのメールは、PublicNetインターフェイスにマッピングされます。
•送信者 IPアドレス 192.168.35.35からのメールは、AnotherPublicNetインターフェイスにマッピングされます。
最後に、確認のために altsrchostマッピングが出力されて、変更が確定されます。
mail3.example.com> altsrchostThere are currently no mappings configured.Choose the operation you want to perform:- NEW - Create a new mapping.- IMPORT - Load new mappings from a file.[]> newEnter the Envelope From address or client IP address for which you want to set up aVirtual Gateway mapping.Partial addresses such as "@example.com" or "user@" are allowed.[]> @exchange.example.comWhich interface do you want to send messages for @exchange.example.com from?1. AnotherPublicNet (192.168.2.2/24: mail4.example.com)2. Management (192.168.42.42/24: mail3.example.com)3. PrivateNet (192.168.1.1/24: mail3.example.com)4. PublicNet (192.168.2.1/24: mail4.example.com)[1]> 4Mapping for @exchange.example.com on interface PublicNet created.Choose the operation you want to perform:- NEW - Create a new mapping.- EDIT - Modify a mapping.- DELETE - Remove a mapping.- IMPORT - Load new mappings from a file.- EXPORT - Export all mappings to a file.- PRINT - Display all mappings.- CLEAR - Remove all mappings.[]> newEnter the Envelope From address or client IP address for which you want to set up aVirtual Gateway mapping.Partial addresses such as "@example.com" or "user@" are allowed.
コマンド:参考例
142
コマンド:参考例
altsrchost

[]> 192.168.35.35Which interface do you want to send messages for 192.168.35.35 from?1. AnotherPublicNet (192.168.2.2/24: mail4.example.com)2. Management (192.168.42.42/24: mail3.example.com)3. PrivateNet (192.168.1.1/24: mail3.example.com)4. PublicNet (192.168.2.1/24: mail4.example.com)[1]> 1Mapping for 192.168.35.35 on interface AnotherPublicNet created.Choose the operation you want to perform:- NEW - Create a new mapping.- EDIT - Modify a mapping.- DELETE - Remove a mapping.- IMPORT - Load new mappings from a file.- EXPORT - Export all mappings to a file.- PRINT - Display all mappings.- CLEAR - Remove all mappings.[]> print1. 192.168.35.35 -> AnotherPublicNet2. @exchange.example.com -> PublicNetChoose the operation you want to perform:- NEW - Create a new mapping.- EDIT - Modify a mapping.- DELETE - Remove a mapping.- IMPORT - Load new mappings from a file.- EXPORT - Export all mappings to a file.- PRINT - Display all mappings.- CLEAR - Remove all mappings.[]>mail3.example.com> commitPlease enter some comments describing your changes:[]> Added 2 altsrchost mappingsDo you want to save the current configuration for rollback? [Y]> nChanges committed: Fri May 23 11:42:12 2014 GMT
bounceconfig
説明
バウンスの動作を設定します。
使用方法
確定:このコマンドは「commit」が必要です。
クラスタ管理:このコマンドは、すべてのマシンモード(クラスタ、グループ、マシン)で使
用できます。
バッチコマンド:このコマンドはバッチ形式をサポートしています。詳細については、CLIのインラインヘルプを参照してください。このコマンドのインラインヘルプにアクセスするに
は、helpコマンドを使用します。
例
次の例では、bounceconfigコマンドを使用して、bounceprofileという名前のバウンスプロファイルを作成します。このプロファイルでは、ハードバウンスされたすべてのメッセージが
代替アドレスである[email protected]に送信されます。遅延警告メッセージ
コマンド:参考例
143
コマンド:参考例
bounceconfig
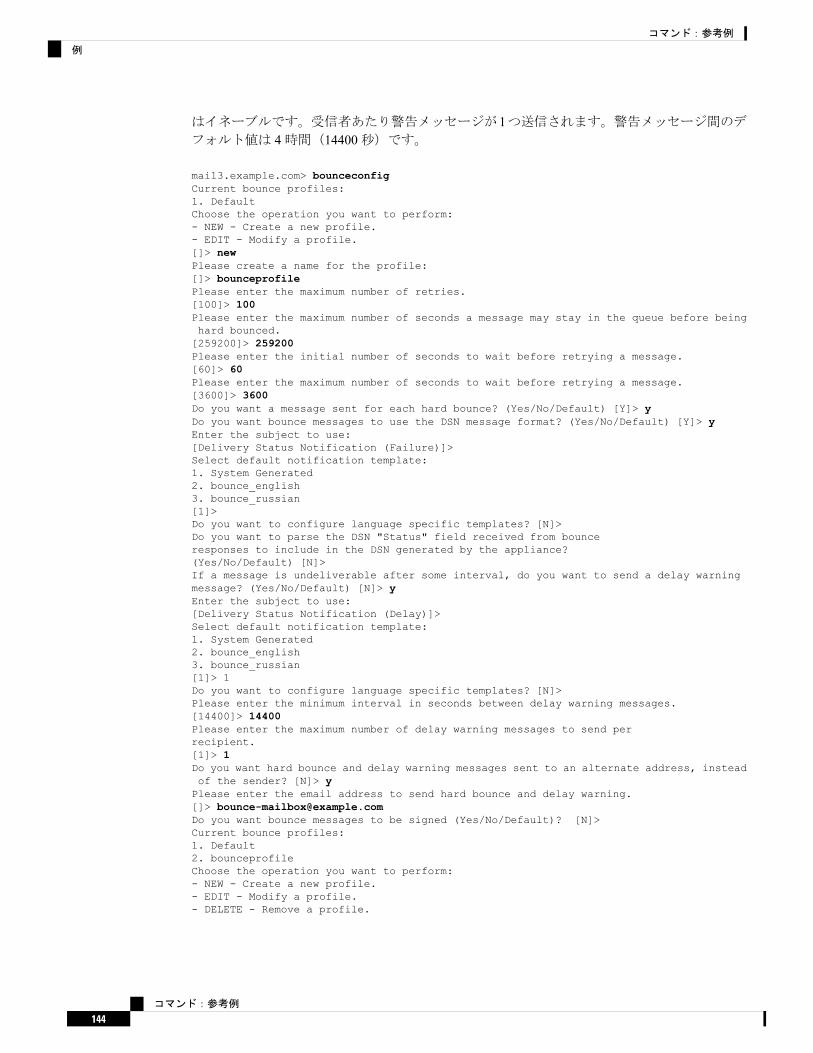
はイネーブルです。受信者あたり警告メッセージが1つ送信されます。警告メッセージ間のデフォルト値は 4時間(14400秒)です。
mail3.example.com> bounceconfigCurrent bounce profiles:1. DefaultChoose the operation you want to perform:- NEW - Create a new profile.- EDIT - Modify a profile.[]> newPlease create a name for the profile:[]> bounceprofilePlease enter the maximum number of retries.[100]> 100Please enter the maximum number of seconds a message may stay in the queue before beinghard bounced.[259200]> 259200Please enter the initial number of seconds to wait before retrying a message.[60]> 60Please enter the maximum number of seconds to wait before retrying a message.[3600]> 3600Do you want a message sent for each hard bounce? (Yes/No/Default) [Y]> yDo you want bounce messages to use the DSN message format? (Yes/No/Default) [Y]> yEnter the subject to use:[Delivery Status Notification (Failure)]>Select default notification template:1. System Generated2. bounce_english3. bounce_russian[1]>Do you want to configure language specific templates? [N]>Do you want to parse the DSN "Status" field received from bounceresponses to include in the DSN generated by the appliance?(Yes/No/Default) [N]>If a message is undeliverable after some interval, do you want to send a delay warningmessage? (Yes/No/Default) [N]> yEnter the subject to use:[Delivery Status Notification (Delay)]>Select default notification template:1. System Generated2. bounce_english3. bounce_russian[1]> 1Do you want to configure language specific templates? [N]>Please enter the minimum interval in seconds between delay warning messages.[14400]> 14400Please enter the maximum number of delay warning messages to send perrecipient.[1]> 1Do you want hard bounce and delay warning messages sent to an alternate address, insteadof the sender? [N]> yPlease enter the email address to send hard bounce and delay warning.[]> [email protected] you want bounce messages to be signed (Yes/No/Default)? [N]>Current bounce profiles:1. Default2. bounceprofileChoose the operation you want to perform:- NEW - Create a new profile.- EDIT - Modify a profile.- DELETE - Remove a profile.
コマンド:参考例
144
コマンド:参考例
例
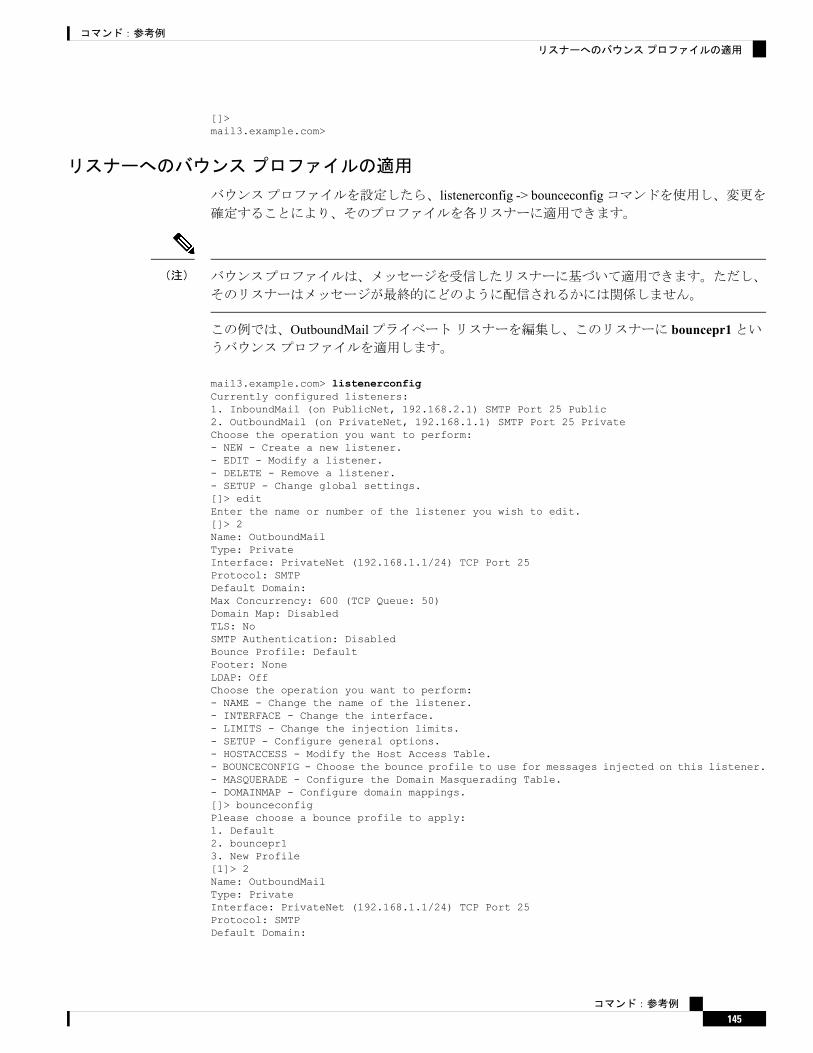
[]>mail3.example.com>
リスナーへのバウンスプロファイルの適用
バウンスプロファイルを設定したら、listenerconfig -> bounceconfigコマンドを使用し、変更を確定することにより、そのプロファイルを各リスナーに適用できます。
バウンスプロファイルは、メッセージを受信したリスナーに基づいて適用できます。ただし、
そのリスナーはメッセージが最終的にどのように配信されるかには関係しません。
(注)
この例では、OutboundMailプライベートリスナーを編集し、このリスナーに bouncepr1というバウンスプロファイルを適用します。
mail3.example.com> listenerconfigCurrently configured listeners:1. InboundMail (on PublicNet, 192.168.2.1) SMTP Port 25 Public2. OutboundMail (on PrivateNet, 192.168.1.1) SMTP Port 25 PrivateChoose the operation you want to perform:- NEW - Create a new listener.- EDIT - Modify a listener.- DELETE - Remove a listener.- SETUP - Change global settings.[]> editEnter the name or number of the listener you wish to edit.[]> 2Name: OutboundMailType: PrivateInterface: PrivateNet (192.168.1.1/24) TCP Port 25Protocol: SMTPDefault Domain:Max Concurrency: 600 (TCP Queue: 50)Domain Map: DisabledTLS: NoSMTP Authentication: DisabledBounce Profile: DefaultFooter: NoneLDAP: OffChoose the operation you want to perform:- NAME - Change the name of the listener.- INTERFACE - Change the interface.- LIMITS - Change the injection limits.- SETUP - Configure general options.- HOSTACCESS - Modify the Host Access Table.- BOUNCECONFIG - Choose the bounce profile to use for messages injected on this listener.- MASQUERADE - Configure the Domain Masquerading Table.- DOMAINMAP - Configure domain mappings.[]> bounceconfigPlease choose a bounce profile to apply:1. Default2. bouncepr13. New Profile[1]> 2Name: OutboundMailType: PrivateInterface: PrivateNet (192.168.1.1/24) TCP Port 25Protocol: SMTPDefault Domain:
コマンド:参考例
145
コマンド:参考例
リスナーへのバウンスプロファイルの適用

Max Concurrency: 600 (TCP Queue: 50)Domain Map: DisabledTLS: NoSMTP Authentication: DisabledBounce Profile: bouncepr1Footer: NoneLDAP: OffChoose the operation you want to perform:- NAME - Change the name of the listener.- INTERFACE - Change the interface.- LIMITS - Change the injection limits.- SETUP - Configure general options.- HOSTACCESS - Modify the Host Access Table.- BOUNCECONFIG - Choose the bounce profile to use for messages injected on this listener.- MASQUERADE - Configure the Domain Masquerading Table.- DOMAINMAP - Configure domain mappings.[]>Currently configured listeners:1. InboundMail (on PublicNet, 192.168.2.1) SMTP Port 25 Public2. OutboundMail (on PrivateNet, 192.168.1.1) SMTP Port 25 PrivateChoose the operation you want to perform:- NEW - Create a new listener.- EDIT - Modify a listener.- DELETE - Remove a listener.- SETUP - Change global settings.[]>mail3.example.com> commitPlease enter some comments describing your changes:[]> Enabled the bouncepr1 profile to the Outbound mail listenerDo you want to save the current configuration for rollback? [Y]> nChanges committed: Fri May 23 11:42:12 2014 GMT
bouncerecipients
説明
キューからメッセージをバウンスします。
使用方法
確定:このコマンドに「commit」は必要ありません。
クラスタ管理:このコマンドはマシンモードでのみ使用できます。
バッチコマンド:このコマンドはバッチ形式をサポートしていません。
例
バウンスされる受信者は、宛先受信者ホストによって、またはメッセージエンベロープの
Envelope From行に指定された特定のアドレスで識別されるメッセージ送信者によって識別されます。または、配信キュー内のすべてのメッセージを一度にバウンスすることもできます。
受信者ホストによるバウンス
mail3.example.com> bouncerecipientsPlease select how you would like to bounce messages:1. By recipient host.
コマンド:参考例
146
コマンド:参考例
bouncerecipients
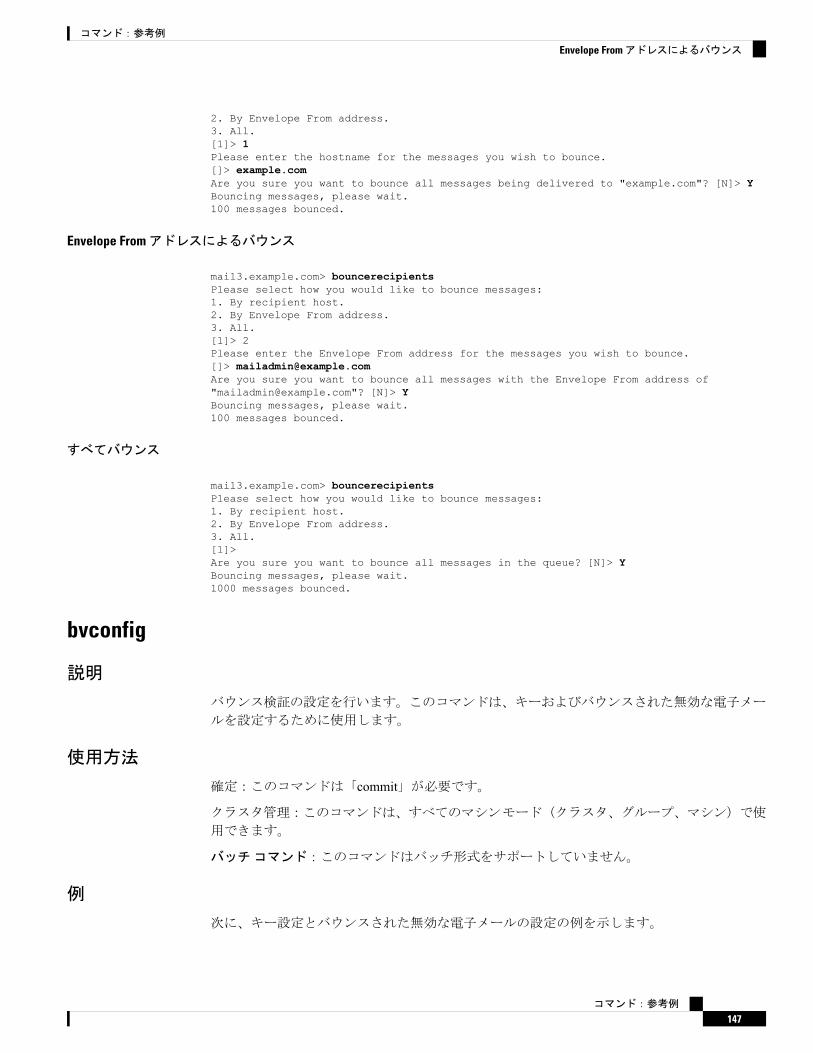
2. By Envelope From address.3. All.[1]> 1Please enter the hostname for the messages you wish to bounce.[]> example.comAre you sure you want to bounce all messages being delivered to "example.com"? [N]> YBouncing messages, please wait.100 messages bounced.
Envelope Fromアドレスによるバウンス
mail3.example.com> bouncerecipientsPlease select how you would like to bounce messages:1. By recipient host.2. By Envelope From address.3. All.[1]> 2Please enter the Envelope From address for the messages you wish to bounce.[]> [email protected] you sure you want to bounce all messages with the Envelope From address of"[email protected]"? [N]> YBouncing messages, please wait.100 messages bounced.
すべてバウンス
mail3.example.com> bouncerecipientsPlease select how you would like to bounce messages:1. By recipient host.2. By Envelope From address.3. All.[1]>Are you sure you want to bounce all messages in the queue? [N]> YBouncing messages, please wait.1000 messages bounced.
bvconfig
説明
バウンス検証の設定を行います。このコマンドは、キーおよびバウンスされた無効な電子メー
ルを設定するために使用します。
使用方法
確定:このコマンドは「commit」が必要です。
クラスタ管理:このコマンドは、すべてのマシンモード(クラスタ、グループ、マシン)で使
用できます。
バッチコマンド:このコマンドはバッチ形式をサポートしていません。
例
次に、キー設定とバウンスされた無効な電子メールの設定の例を示します。
コマンド:参考例
147
コマンド:参考例
Envelope Fromアドレスによるバウンス

mail3.example.com> bvconfigBehavior on invalid bounces: rejectKey for tagging outgoing mail: keyPreviously-used keys for verifying incoming mail:
1. key (current outgoing key)2. goodneighbor (last in use Wed May 31 23:21:01 2006 GMT)
Choose the operation you want to perform:- KEY - Assign a new key for tagging outgoing mail.- PURGE - Purge keys no longer needed for verifying incoming mail.- CLEAR - Clear all keys including current key.- SETUP - Set how invalid bounces will be handled.[]> keyEnter the key to tag outgoing mail with (when tagging is enabled in the GoodNeighbor Table)[]> basic_keyBehavior on invalid bounces: rejectKey for tagging outgoing mail: basic_keyPreviously-used keys for verifying incoming mail:
1. basic_key (current outgoing key)2. key (last in use Wed May 31 23:22:49 2006 GMT)3. goodneighbor (last in use Wed May 31 23:21:01 2006 GMT)
Choose the operation you want to perform:- KEY - Assign a new key for tagging outgoing mail.- PURGE - Purge keys no longer needed for verifying incoming mail.- CLEAR - Clear all keys including current key.- SETUP - Set how invalid bounces will be handled.[]> setupHow do you want bounce messages which are not addressed to a valid taggedrecipient to be handled?1. Reject.2. Add a custom header and deliver.[1]> 1Behavior on invalid bounces: rejectKey for tagging outgoing mail: basic_keyPreviously-used keys for verifying incoming mail:
1. basic_key (current outgoing key)2. key (last in use Wed May 31 23:22:49 2006 GMT)3. goodneighbor (last in use Wed May 31 23:21:01 2006 GMT)
Choose the operation you want to perform:- KEY - Assign a new key for tagging outgoing mail.- PURGE - Purge keys no longer needed for verifying incoming mail.- CLEAR - Clear all keys including current key.- SETUP - Set how invalid bounces will be handled.[]>mail3.example.com> commitPlease enter some comments describing your changes:[]> Configuring a new key and setting reject for invalid email bouncesDo you want to save the current configuration for rollback? [Y]> nChanges committed: Fri May 23 11:42:12 2014 GMT
deleterecipients
説明
キューからメッセージを削除します。
使用方法
確定:このコマンドに「commit」は必要ありません。
コマンド:参考例
148
コマンド:参考例
deleterecipients

クラスタ管理:このコマンドはマシンモードでのみ使用できます。
バッチコマンド:このコマンドはバッチ形式をサポートしていません。
例
アプライアンスには、必要に応じて受信者を削除するための各種のオプションが用意されてい
ます。次に、受信者ホスト別の受信者の削除、Envelope Fromアドレスによる削除、およびキュー内のすべての受信者の削除の例を示します。
受信者ドメインによる削除
mail3.example.com> deleterecipientsPlease select how you would like to delete messages:1. By recipient host.2. By Envelope From address.3. All.[1]> 1Please enter the hostname for the messages you wish to delete.[]> example.comAre you sure you want to delete all messages being delivered to "example.com"? [N]> YDeleting messages, please wait.100 messages deleted.
Envelope Fromアドレスによる削除
mail3.example.com> deleterecipientsPlease select how you would like to delete messages:1. By recipient host.2. By Envelope From address.3. All.[1]> 2Please enter the Envelope From address for the messages you wish to delete.[]> [email protected] you sure you want to delete all messages with the Envelope From address of"[email protected]"? [N]> YDeleting messages, please wait.100 messages deleted.
すべて削除
mail3.example.com> deleterecipientsPlease select how you would like to delete messages:1. By recipient host.2. By Envelope From address.3. All.[1]> 1Are you sure you want to delete all messages in the queue? [N]> YDeleting messages, please wait.1000 messages deleted.
コマンド:参考例
149
コマンド:参考例
例
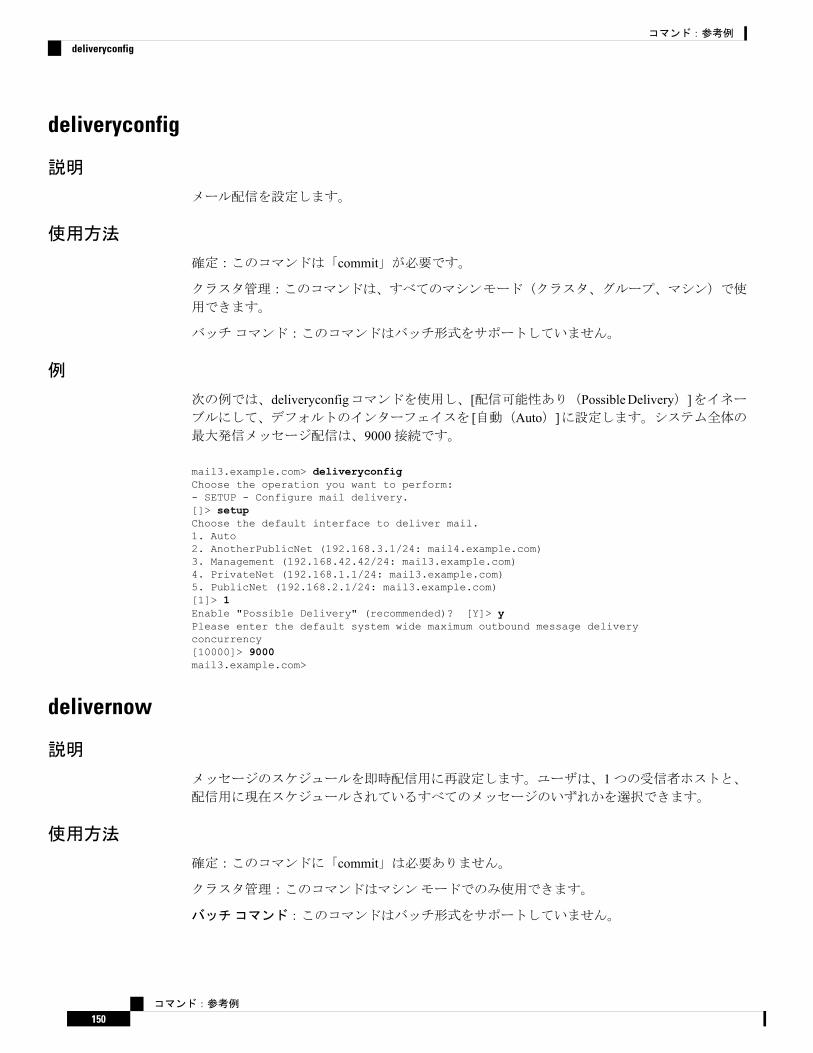
deliveryconfig
説明
メール配信を設定します。
使用方法
確定:このコマンドは「commit」が必要です。
クラスタ管理:このコマンドは、すべてのマシンモード(クラスタ、グループ、マシン)で使
用できます。
バッチコマンド:このコマンドはバッチ形式をサポートしていません。
例
次の例では、deliveryconfigコマンドを使用し、[配信可能性あり(PossibleDelivery)]をイネーブルにして、デフォルトのインターフェイスを [自動(Auto)]に設定します。システム全体の最大発信メッセージ配信は、9000接続です。
mail3.example.com> deliveryconfigChoose the operation you want to perform:- SETUP - Configure mail delivery.[]> setupChoose the default interface to deliver mail.1. Auto2. AnotherPublicNet (192.168.3.1/24: mail4.example.com)3. Management (192.168.42.42/24: mail3.example.com)4. PrivateNet (192.168.1.1/24: mail3.example.com)5. PublicNet (192.168.2.1/24: mail3.example.com)[1]> 1Enable "Possible Delivery" (recommended)? [Y]> yPlease enter the default system wide maximum outbound message deliveryconcurrency[10000]> 9000mail3.example.com>
delivernow
説明
メッセージのスケジュールを即時配信用に再設定します。ユーザは、1つの受信者ホストと、配信用に現在スケジュールされているすべてのメッセージのいずれかを選択できます。
使用方法
確定:このコマンドに「commit」は必要ありません。
クラスタ管理:このコマンドはマシンモードでのみ使用できます。
バッチコマンド:このコマンドはバッチ形式をサポートしていません。
コマンド:参考例
150
コマンド:参考例
deliveryconfig

例
mail3.example.com> delivernowPlease choose an option for scheduling immediate delivery.1. By recipient domain2. All messages[1]> 1Please enter the recipient domain to schedule for delivery.[]>foo.comScheduling all messages to foo.com for delivery.
destconfig以前の setgoodtableコマンドです。テーブルは、現在、宛先制御テーブルと呼ばれています。このテーブルを使用して、指定したドメインの配信制限を設定します。
destconfigコマンドの使用
destconfigサブメニューでは、次のコマンドを使用できます。
表 7 : destconfigサブコマンド
説明構文
グローバル設定を変更します。SETUP
ドメインの新しい制限を追加します。NEW
ドメインの制限を変更します。EDIT
ドメインの制限を削除します。DELETE
指定されていないドメインのデフォルトの制限を変更します。DEFAULT
ドメインとその制限のリストを表示します。LIST
1つの宛先またはすべてのエントリの詳細を表示します。DETAIL
テーブルからすべてのエントリを削除します。CLEAR
.INIコンフィギュレーションファイルから宛先制御エントリのテーブルをインポートします。
IMPORT
宛先制御エントリのテーブルを .INIコンフィギュレーションファイルにエクスポートします。
EXPORT
destconfigコマンドには、宛先制御テーブルの各行を構成する以下の情報を指定する必要があります。
•ドメイン(受信者ホスト)•ドメインへの最大同時接続数
コマンド:参考例
151
コマンド:参考例
例
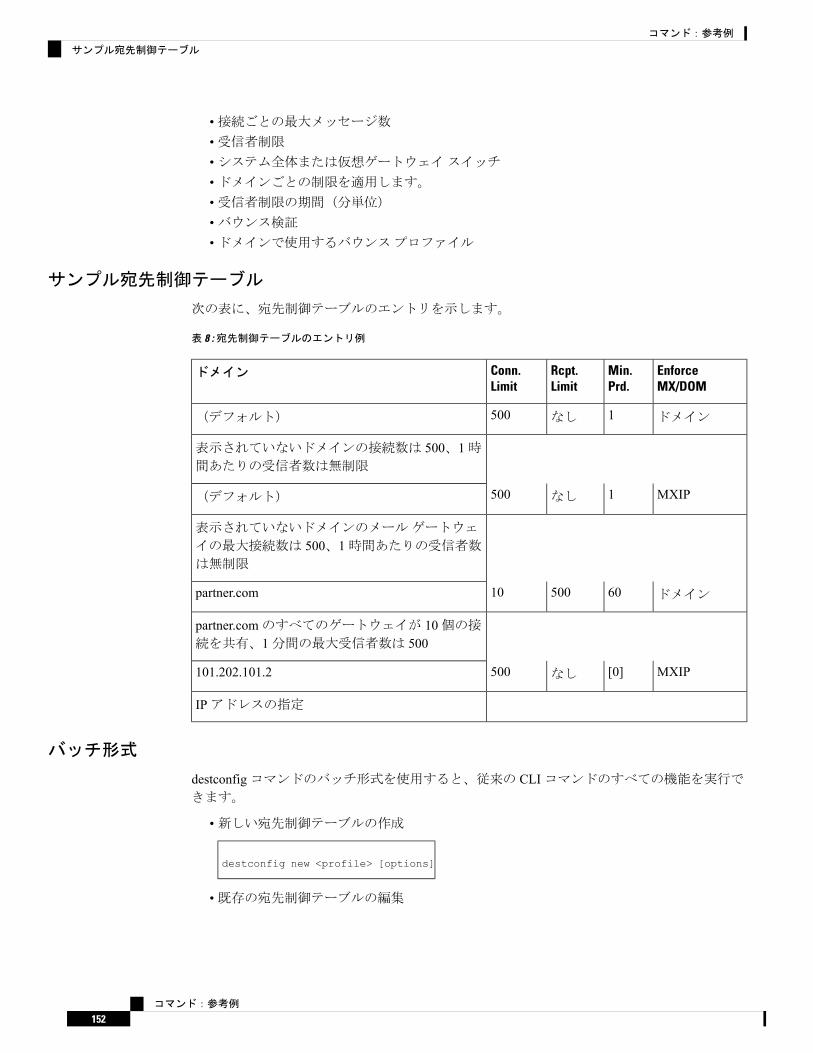
•接続ごとの最大メッセージ数•受信者制限•システム全体または仮想ゲートウェイスイッチ•ドメインごとの制限を適用します。•受信者制限の期間(分単位)•バウンス検証•ドメインで使用するバウンスプロファイル
サンプル宛先制御テーブル
次の表に、宛先制御テーブルのエントリを示します。
表 8 :宛先制御テーブルのエントリ例
EnforceMX/DOM
Min.Prd.
Rcpt.Limit
Conn.Limit
ドメイン
ドメイン1なし500(デフォルト)
表示されていないドメインの接続数は 500、1時間あたりの受信者数は無制限
MXIP1なし500(デフォルト)
表示されていないドメインのメールゲートウェ
イの最大接続数は 500、1時間あたりの受信者数は無制限
ドメイン6050010partner.com
partner.comのすべてのゲートウェイが 10個の接続を共有、1分間の最大受信者数は 500
MXIP[0]なし500101.202.101.2
IPアドレスの指定
バッチ形式
destconfigコマンドのバッチ形式を使用すると、従来の CLIコマンドのすべての機能を実行できます。
•新しい宛先制御テーブルの作成
destconfig new <profile> [options]
•既存の宛先制御テーブルの編集
コマンド:参考例
152
コマンド:参考例
サンプル宛先制御テーブル
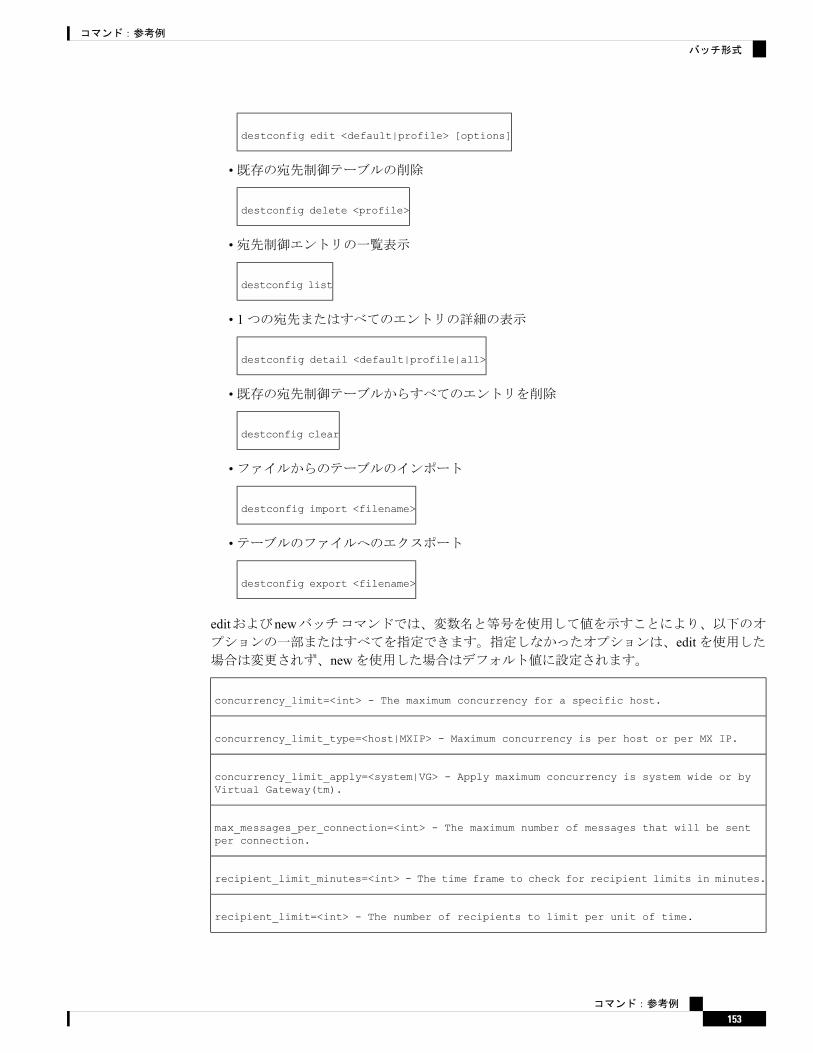
destconfig edit <default|profile> [options]
•既存の宛先制御テーブルの削除
destconfig delete <profile>
•宛先制御エントリの一覧表示
destconfig list
• 1つの宛先またはすべてのエントリの詳細の表示
destconfig detail <default|profile|all>
•既存の宛先制御テーブルからすべてのエントリを削除
destconfig clear
•ファイルからのテーブルのインポート
destconfig import <filename>
•テーブルのファイルへのエクスポート
destconfig export <filename>
editおよびnewバッチコマンドでは、変数名と等号を使用して値を示すことにより、以下のオプションの一部またはすべてを指定できます。指定しなかったオプションは、editを使用した場合は変更されず、newを使用した場合はデフォルト値に設定されます。
concurrency_limit=<int> - The maximum concurrency for a specific host.
concurrency_limit_type=<host|MXIP> - Maximum concurrency is per host or per MX IP.
concurrency_limit_apply=<system|VG> - Apply maximum concurrency is system wide or byVirtual Gateway(tm).
max_messages_per_connection=<int> - The maximum number of messages that will be sentper connection.
recipient_limit_minutes=<int> - The time frame to check for recipient limits in minutes.
recipient_limit=<int> - The number of recipients to limit per unit of time.
コマンド:参考例
153
コマンド:参考例
バッチ形式
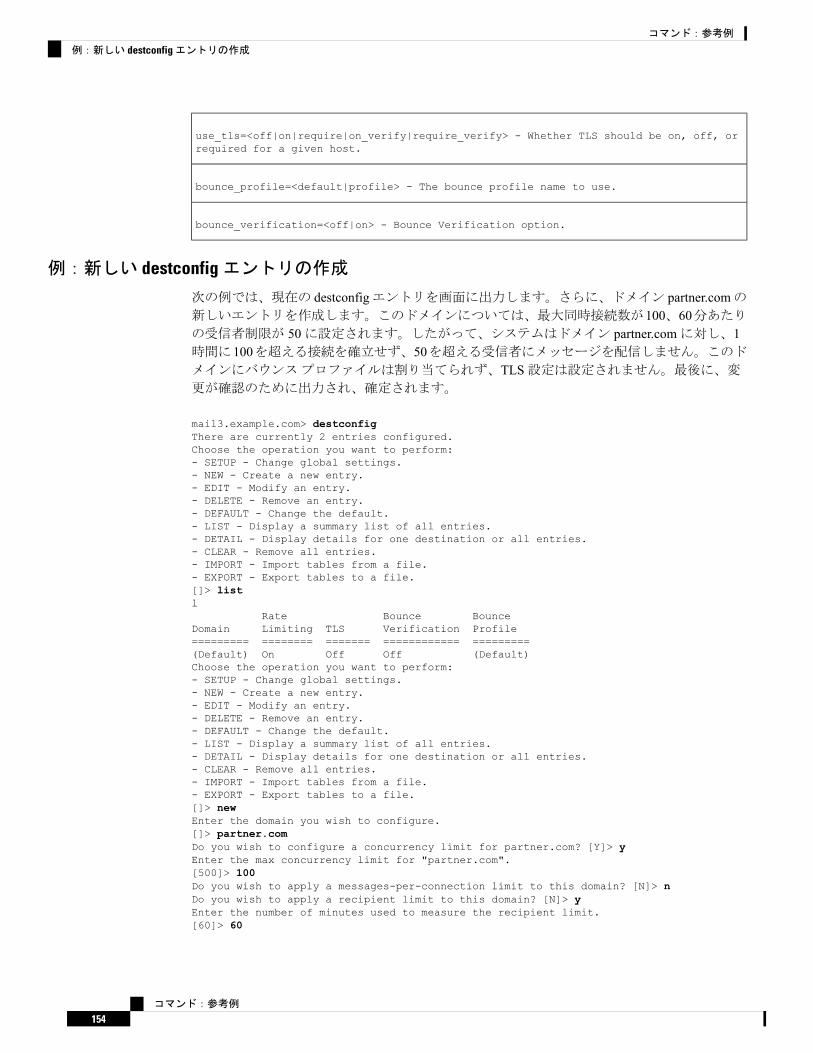
use_tls=<off|on|require|on_verify|require_verify> - Whether TLS should be on, off, orrequired for a given host.
bounce_profile=<default|profile> - The bounce profile name to use.
bounce_verification=<off|on> - Bounce Verification option.
例:新しい destconfigエントリの作成
次の例では、現在の destconfigエントリを画面に出力します。さらに、ドメイン partner.comの新しいエントリを作成します。このドメインについては、最大同時接続数が100、60分あたりの受信者制限が 50に設定されます。したがって、システムはドメイン partner.comに対し、1時間に100を超える接続を確立せず、50を超える受信者にメッセージを配信しません。このドメインにバウンスプロファイルは割り当てられず、TLS設定は設定されません。最後に、変更が確認のために出力され、確定されます。
mail3.example.com> destconfigThere are currently 2 entries configured.Choose the operation you want to perform:- SETUP - Change global settings.- NEW - Create a new entry.- EDIT - Modify an entry.- DELETE - Remove an entry.- DEFAULT - Change the default.- LIST - Display a summary list of all entries.- DETAIL - Display details for one destination or all entries.- CLEAR - Remove all entries.- IMPORT - Import tables from a file.- EXPORT - Export tables to a file.[]> listl
Rate Bounce BounceDomain Limiting TLS Verification Profile========= ======== ======= ============ =========(Default) On Off Off (Default)Choose the operation you want to perform:- SETUP - Change global settings.- NEW - Create a new entry.- EDIT - Modify an entry.- DELETE - Remove an entry.- DEFAULT - Change the default.- LIST - Display a summary list of all entries.- DETAIL - Display details for one destination or all entries.- CLEAR - Remove all entries.- IMPORT - Import tables from a file.- EXPORT - Export tables to a file.[]> newEnter the domain you wish to configure.[]> partner.comDo you wish to configure a concurrency limit for partner.com? [Y]> yEnter the max concurrency limit for "partner.com".[500]> 100Do you wish to apply a messages-per-connection limit to this domain? [N]> nDo you wish to apply a recipient limit to this domain? [N]> yEnter the number of minutes used to measure the recipient limit.[60]> 60
コマンド:参考例
154
コマンド:参考例
例:新しい destconfigエントリの作成

Enter the max number of recipients per 60 minutes for "partner.com".[]> 50Select how you want to apply the limits for partner.com:1. One limit applies to the entire domain for partner.com2. Separate limit for each mail exchanger IP address[1]> 1Select how the limits will be enforced:1. System Wide2. Per Virtual Gateway(tm)[1]> 1Do you wish to apply a specific TLS setting for this domain? [N]> nDo you wish to apply a specific bounce verification address tagging setting forthis domain? [N]> nDo you wish to apply a specific bounce profile to this domain? [N]> nThere are currently 3 entries configured.mail3.example.com> commitPlease enter some comments describing your changes:[]> Throttled delivery to partner.com in the destconfig tableDo you want to save the current configuration for rollback? [Y]> nChanges committed: Fri May 23 11:42:12 2014 GMT
例:バウンスプロファイルと TLS設定
この例では、ドメイン newpartner.comに新しい destconfigエントリを設定します。TLS接続が必要です。また、この例では、ドメイン bouncepr1(リスナーへのバウンスプロファイルの適用(145ページ)を参照)というバウンスプロファイルをドメイン newpartner.comへのすべての電子メール配信に使用されるように設定します。
mail3.example.com> destconfigThere is currently 1 entry configured.Choose the operation you want to perform:- SETUP - Change global settings.- NEW - Create a new entry.- EDIT - Modify an entry.- DELETE - Remove an entry.- DEFAULT - Change the default.- LIST - Display a summary list of all entries.- DETAIL - Display details for one destination or all entries.- CLEAR - Remove all entries.- IMPORT - Import tables from a file.- EXPORT - Export tables to a file.[]> newEnter the domain you wish to configure.[]> newpartner.comDo you wish to configure a concurrency limit for newpartner.com? [Y]> nDo you wish to apply a messages-per-connection limit to this domain? [N]> nDo you wish to apply a recipient limit to this domain? [N]> nDo you wish to apply a specific TLS setting for this domain? [N]> yDo you want to use TLS support?1. No2. Preferred3. Required4. Preferred(Verify)5. Required(Verify)[1]> 3You have chosen to enable TLS. Please use the 'certconfig' command to ensure that thereis a valid certificate configured.Do you wish to apply a specific bounce verification address tagging setting for thisdomain? [N]> yPerform bounce verification address tagging? [N]> yDo you wish to apply a specific bounce profile to this domain? [N]> y
コマンド:参考例
155
コマンド:参考例
例:バウンスプロファイルと TLS設定
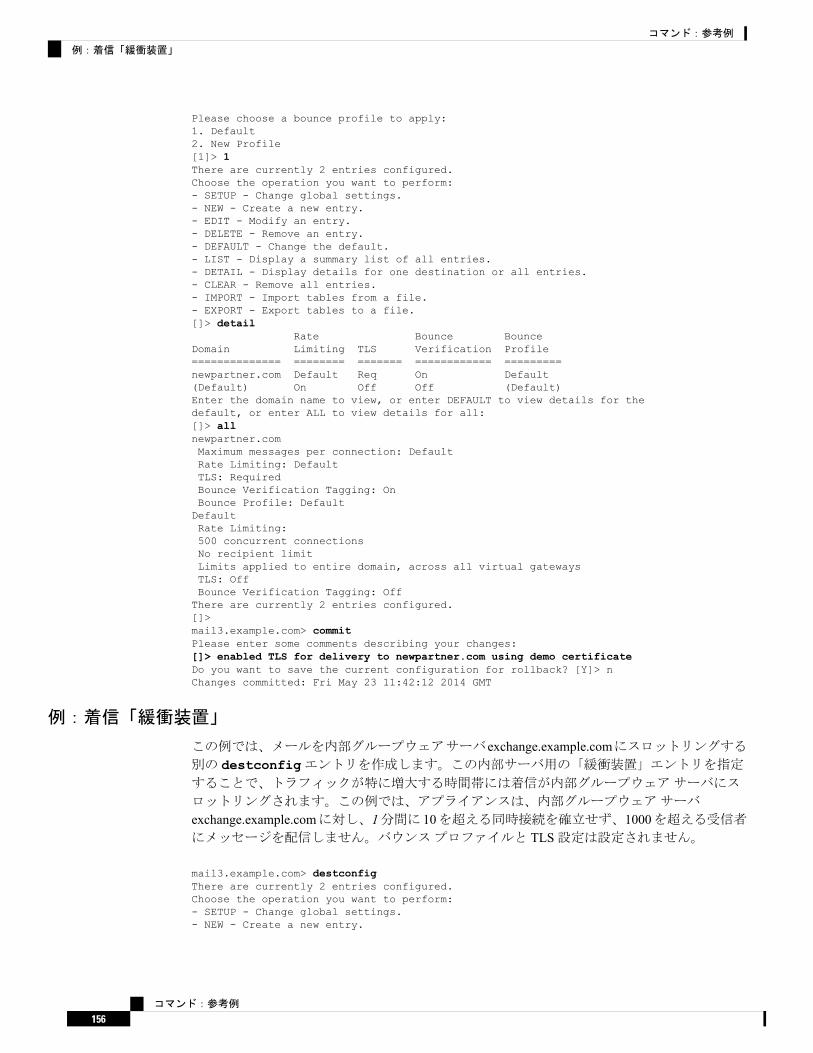
Please choose a bounce profile to apply:1. Default2. New Profile[1]> 1There are currently 2 entries configured.Choose the operation you want to perform:- SETUP - Change global settings.- NEW - Create a new entry.- EDIT - Modify an entry.- DELETE - Remove an entry.- DEFAULT - Change the default.- LIST - Display a summary list of all entries.- DETAIL - Display details for one destination or all entries.- CLEAR - Remove all entries.- IMPORT - Import tables from a file.- EXPORT - Export tables to a file.[]> detail
Rate Bounce BounceDomain Limiting TLS Verification Profile============== ======== ======= ============ =========newpartner.com Default Req On Default(Default) On Off Off (Default)Enter the domain name to view, or enter DEFAULT to view details for thedefault, or enter ALL to view details for all:[]> allnewpartner.comMaximum messages per connection: DefaultRate Limiting: DefaultTLS: RequiredBounce Verification Tagging: OnBounce Profile: DefaultDefaultRate Limiting:500 concurrent connectionsNo recipient limitLimits applied to entire domain, across all virtual gatewaysTLS: OffBounce Verification Tagging: OffThere are currently 2 entries configured.[]>mail3.example.com> commitPlease enter some comments describing your changes:[]> enabled TLS for delivery to newpartner.com using demo certificateDo you want to save the current configuration for rollback? [Y]> nChanges committed: Fri May 23 11:42:12 2014 GMT
例:着信「緩衝装置」
この例では、メールを内部グループウェアサーバexchange.example.comにスロットリングする別の destconfigエントリを作成します。この内部サーバ用の「緩衝装置」エントリを指定することで、トラフィックが特に増大する時間帯には着信が内部グループウェアサーバにス
ロットリングされます。この例では、アプライアンスは、内部グループウェアサーバ
exchange.example.comに対し、1分間に 10を超える同時接続を確立せず、1000を超える受信者にメッセージを配信しません。バウンスプロファイルと TLS設定は設定されません。
mail3.example.com> destconfigThere are currently 2 entries configured.Choose the operation you want to perform:- SETUP - Change global settings.- NEW - Create a new entry.
コマンド:参考例
156
コマンド:参考例
例:着信「緩衝装置」

- EDIT - Modify an entry.- DELETE - Remove an entry.- DEFAULT - Change the default.- LIST - Display a summary list of all entries.- DETAIL - Display details for one destination or all entries.- CLEAR - Remove all entries.- IMPORT - Import tables from a file.- CLEAR - Remove all entries.[]> newEnter the domain you wish to configure.[]> exchange.example.comDo you wish to configure a concurrency limit for exchange.example.com? [Y]> yEnter the max concurrency limit for "exchange.example.com".[500]> 10Do you wish to apply a recipient limit to this domain? [N]> yEnter the number of minutes used to measure the recipient limit.[60]> 1Enter the max number of recipients per 1 minutes for "exchange.example.com".[]> 1000Select how you want to apply the limits for exchange.example.com:1. One limit applies to the entire domain for exchange.example.com2. Separate limit for each mail exchanger IP address[1]> 1Select how the limits will be enforced:1. System Wide2. Per Virtual Gateway(tm)[1]> 1Do you wish to apply a specific TLS setting for this domain? [N]> nDo you wish to apply a specific bounce verification address tagging setting for thisdomain? [N]> nDo you wish to apply a specific bounce profile to this domain? [N]> nThere are currently 3 entries configured.Choose the operation you want to perform:- SETUP - Change global settings.- NEW - Create a new entry.- EDIT - Modify an entry.- DELETE - Remove an entry.- DEFAULT - Change the default.- LIST - Display a summary list of all entries.- DETAIL - Display details for one destination or all entries.- CLEAR - Remove all entries.- IMPORT - Import tables from a file.- CLEAR - Remove all entries.[]>mail3.example.com> commitPlease enter some comments describing your changes:[]> set up shock absorber for inbound mailDo you want to save the current configuration for rollback? [Y]> nChanges committed: Fri May 23 11:42:12 2014 GMT
例:グローバル設定
この例では、TLS接続の TLSアラートおよび証明書を設定します。
mail3.example.com> destconfigChoose the operation you want to perform:- SETUP - Change global settings.- NEW - Create a new entry.- EDIT - Modify an entry.- DELETE - Remove an entry.- DEFAULT - Change the default.- LIST - Display a summary list of all entries.
コマンド:参考例
157
コマンド:参考例
例:グローバル設定

- DETAIL - Display details for one destination or all entries.- CLEAR - Remove all entries.- IMPORT - Import tables from a file.- EXPORT - Export tables to a file.[]> setupThe "Demo" certificate is currently configured. You may use "Demo", but this will notbe secure.1. partner.com2. DemoPlease choose the certificate to apply:[1]> 1Do you want to send an alert when a required TLS connection fails? [N]> n
例:DANEサポートを使用した TLS接続の有効化
次の例では、ドメイン newpartner.comの新しい destconfigエントリが設定されています。こ
こでは、TLS接続が「便宜的」DANEサポートにより有効化されています。
TLSサポートオプションを選択して DANEプロンプトを有効にする必要があります。(注)
mail3.example.com> destconfigThere are currently 1 entries configured. Choose the operation you want to perform:
- SETUP - Change global settings.- NEW - Create a new entry.- EDIT - Modify an entry.- DELETE - Remove an entry.- DEFAULT - Change the default.- LIST - Display a summary list of all entries.- DETAIL - Display details for one destination or all entries.- CLEAR - Remove all entries.- IMPORT - Import tables from a file.- EXPORT - Export tables to a file.
[]> new
Enter the domain you wish to configure.[]> newparter.comDo you want to configure a concurrency limit for newparter.com? [Y]>Enter the max concurrency limit for "newpartner.com".[500]>
Do you want to apply a messages-per-connection limit to this domain? [N]>Do you want to apply a recipient limit to this domain? [N]>Select how the limits will be enforced:1. System Wide2. Per Virtual Gateway(tm)
[1]>Do you wish to apply a specific TLS setting for this domain? [N]> yDo you want to use TLS support?1. No2. Preferred3. Required4. Preferred - Verify5. Required - Verify6. Required - Verify Hosted Domains
[2]> 3You have chosen to enable TLS.
コマンド:参考例
158
コマンド:参考例
例:DANEサポートを使用した TLS接続の有効化
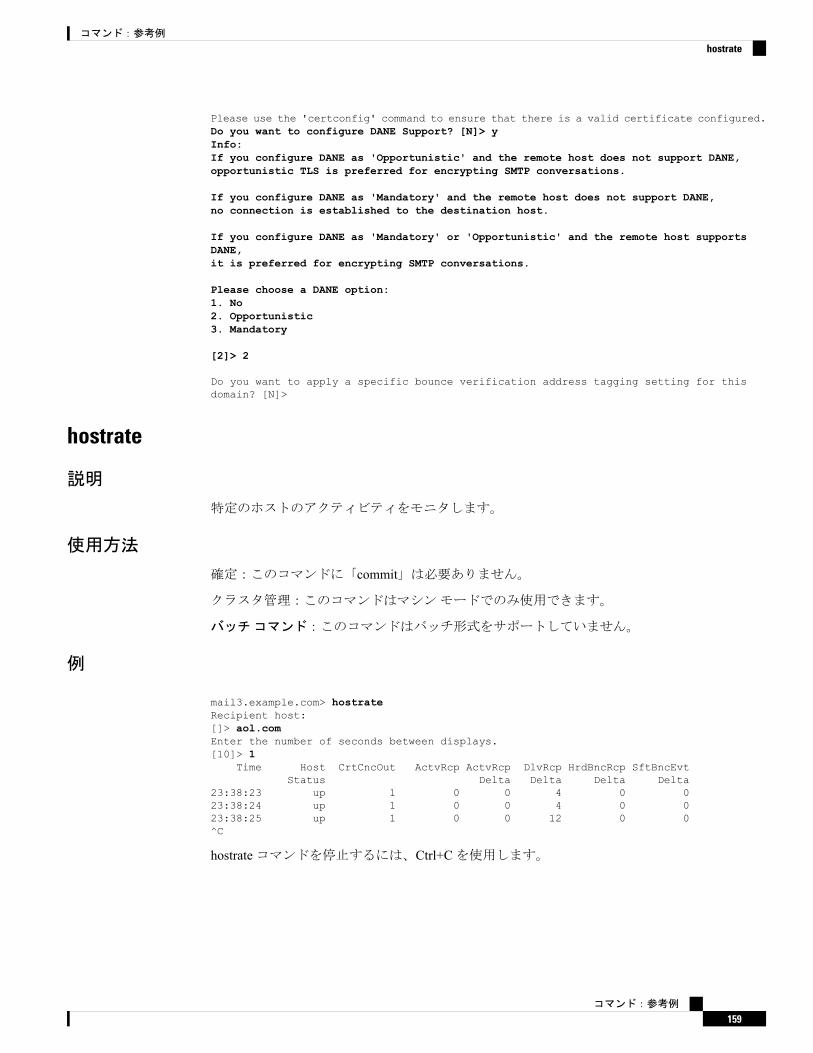
Please use the 'certconfig' command to ensure that there is a valid certificate configured.Do you want to configure DANE Support? [N]> yInfo:If you configure DANE as 'Opportunistic' and the remote host does not support DANE,opportunistic TLS is preferred for encrypting SMTP conversations.
If you configure DANE as 'Mandatory' and the remote host does not support DANE,no connection is established to the destination host.
If you configure DANE as 'Mandatory' or 'Opportunistic' and the remote host supportsDANE,it is preferred for encrypting SMTP conversations.
Please choose a DANE option:1. No2. Opportunistic3. Mandatory
[2]> 2
Do you want to apply a specific bounce verification address tagging setting for thisdomain? [N]>
hostrate
説明
特定のホストのアクティビティをモニタします。
使用方法
確定:このコマンドに「commit」は必要ありません。
クラスタ管理:このコマンドはマシンモードでのみ使用できます。
バッチコマンド:このコマンドはバッチ形式をサポートしていません。
例
mail3.example.com> hostrateRecipient host:[]> aol.comEnter the number of seconds between displays.[10]> 1
Time Host CrtCncOut ActvRcp ActvRcp DlvRcp HrdBncRcp SftBncEvtStatus Delta Delta Delta Delta
23:38:23 up 1 0 0 4 0 023:38:24 up 1 0 0 4 0 023:38:25 up 1 0 0 12 0 0^C
hostrateコマンドを停止するには、Ctrl+Cを使用します。
コマンド:参考例
159
コマンド:参考例
hostrate

hoststatus
説明
特定のホスト名のステータスを取得します。
使用方法
確定:このコマンドに「commit」は必要ありません。
クラスタ管理:このコマンドはマシンモードでのみ使用できます。
バッチコマンド:このコマンドはバッチ形式をサポートしていません。
例
mail3.example.com> hoststatus
Recipient host:[]> aol.comHost mail status for: 'aol.com'Status as of: Fri Aug 8 11:12:00 2003Host up/down: upCounters:QueueSoft Bounced Events 0
CompletionCompleted Recipients 1Hard Bounced Recipients 1DNS Hard Bounces 05XX Hard Bounces 1Filter Hard Bounces 0Expired Hard Bounces 0Other Hard Bounces 0
Delivered Recipients 0Deleted Recipients 0
Gauges:QueueActive Recipients 0Unattempted Recipients 0Attempted Recipients 0
ConnectionsCurrent Outbound Connections 0Pending Outbound Connections 0
Oldest Message No MessagesLast Activity Fri Aug 8 11:04:24 2003Ordered IP addresses: (expiring at Fri Aug 8 11:34:24 2003)
Preference IPs15 64.12.137.121 64.12.138.89 64.12.138.12015 64.12.137.89 64.12.138.152 152.163.224.12215 64.12.137.184 64.12.137.89 64.12.136.5715 64.12.138.57 64.12.136.153 205.188.156.12215 64.12.138.57 64.12.137.152 64.12.136.8915 64.12.138.89 205.188.156.154 64.12.138.15215 64.12.136.121 152.163.224.26 64.12.137.18415 64.12.138.120 64.12.137.152 64.12.137.121
MX Records:Preference TTL Hostname15 52m24s mailin-01.mx.aol.com
コマンド:参考例
160
コマンド:参考例
hoststatus
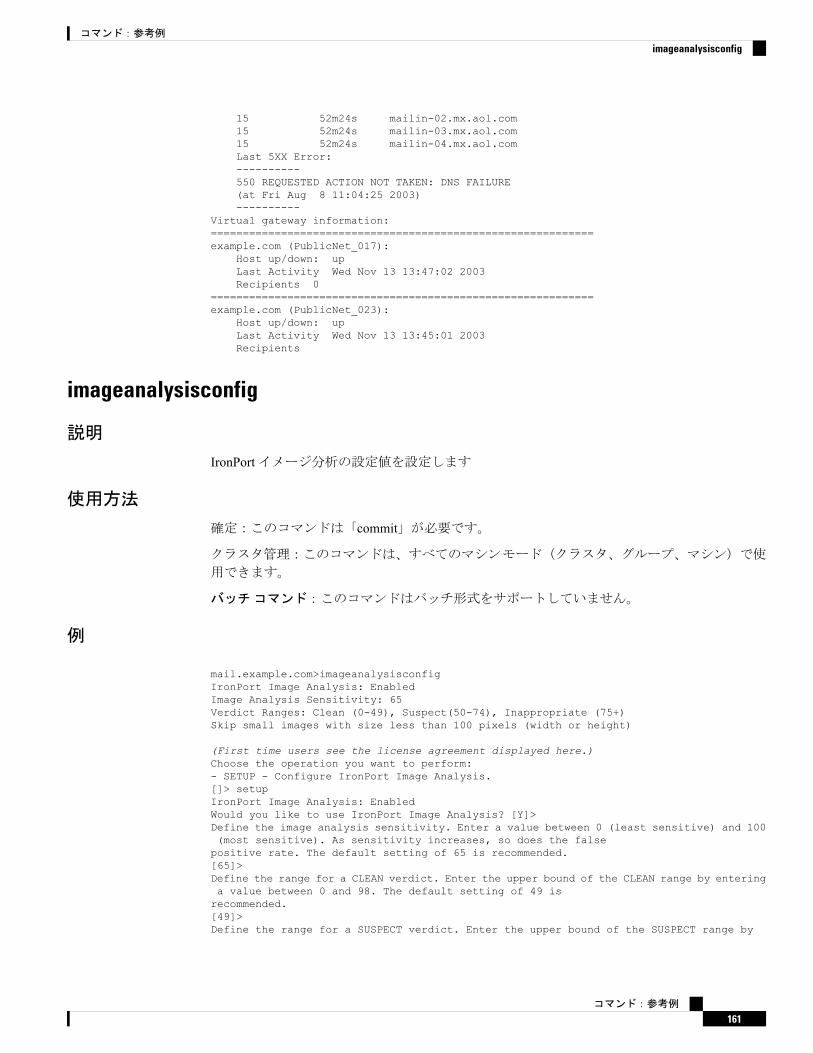
15 52m24s mailin-02.mx.aol.com15 52m24s mailin-03.mx.aol.com15 52m24s mailin-04.mx.aol.comLast 5XX Error:----------550 REQUESTED ACTION NOT TAKEN: DNS FAILURE(at Fri Aug 8 11:04:25 2003)----------
Virtual gateway information:============================================================example.com (PublicNet_017):
Host up/down: upLast Activity Wed Nov 13 13:47:02 2003Recipients 0
============================================================example.com (PublicNet_023):
Host up/down: upLast Activity Wed Nov 13 13:45:01 2003Recipients
imageanalysisconfig
説明
IronPortイメージ分析の設定値を設定します
使用方法
確定:このコマンドは「commit」が必要です。
クラスタ管理:このコマンドは、すべてのマシンモード(クラスタ、グループ、マシン)で使
用できます。
バッチコマンド:このコマンドはバッチ形式をサポートしていません。
例
mail.example.com>imageanalysisconfigIronPort Image Analysis: EnabledImage Analysis Sensitivity: 65Verdict Ranges: Clean (0-49), Suspect(50-74), Inappropriate (75+)Skip small images with size less than 100 pixels (width or height)
(First time users see the license agreement displayed here.)Choose the operation you want to perform:- SETUP - Configure IronPort Image Analysis.[]> setupIronPort Image Analysis: EnabledWould you like to use IronPort Image Analysis? [Y]>Define the image analysis sensitivity. Enter a value between 0 (least sensitive) and 100(most sensitive). As sensitivity increases, so does the falsepositive rate. The default setting of 65 is recommended.[65]>Define the range for a CLEAN verdict. Enter the upper bound of the CLEAN range by enteringa value between 0 and 98. The default setting of 49 isrecommended.[49]>Define the range for a SUSPECT verdict. Enter the upper bound of the SUSPECT range by
コマンド:参考例
161
コマンド:参考例
imageanalysisconfig

entering a value between 50 and 99. The default setting of 74 isrecommended.[74]>Would you like to skip scanning of images smaller than a specific size? [Y]>Please enter minimum image size to scan in pixels, representing either height or widthof a given image.[100]>IronPort Image Analysis: EnabledImage Analysis Sensitivity: 65Verdict Ranges: Clean (0-49), Suspect(50-74), Inappropriate (75+)Skip small images with size less than 100 pixels (width or height)Choose the operation you want to perform:- SETUP - Configure IronPort Image Analysis.[]>
oldmessage
説明
システム上の最も古い非隔離メッセージのMIDとヘッダーを表示します。
使用方法
確定:このコマンドに commitは必要ありません。
クラスタ管理:このコマンドはマシンモードでのみ使用できます。
バッチコマンド:このコマンドはバッチ形式をサポートしていません。
例
次の例では、古いメッセージを表示します。
mail3.example.com>oldmessageMID 9: 1 hour 5 mins 35 secs oldReceived: from test02.com ([172.19.0.109])by test02.com with SMTP; 14 Feb 2007 22:11:37 -0800From: [email protected]: [email protected]: TestingMessage-Id: <[email protected]
rate
説明
メッセージのスループットをモニタします。
使用方法
確定:このコマンドに「commit」は必要ありません。
クラスタ管理:このコマンドはマシンモードでのみ使用できます。
コマンド:参考例
162
コマンド:参考例
oldmessage

バッチコマンド:このコマンドはバッチ形式をサポートしていません。
例
mail3.example.com> rate
Enter the number of seconds between displays.[10]> 1Hit Ctrl-C to return to the main prompt.Time Connections Recipients Recipients Queue
In Out Received Delta Completed Delta K-Used23:37:13 10 2 41708833 0 40842686 0 6423:37:14 8 2 41708841 8 40842692 6 10523:37:15 9 2 41708848 7 40842700 8 7623:37:16 7 3 41708852 4 40842705 5 6423:37:17 5 3 41708858 6 40842711 6 6423:37:18 9 3 41708871 13 40842722 11 6723:37:19 7 3 41708881 10 40842734 12 6423:37:21 11 3 41708893 12 40842744 10 79^C
redirectrecipients
説明
すべてのメッセージを別のリレーホストにリダイレクトします。
メッセージを、/dev/nullを宛先とする受信側ドメインにリダイレクトすると、メッセージが失われます。メールをこのようなドメインにリダイレクトしても、CLIに警告は表示されません。メッセージをリダイレクトする前に、受信側ドメインがあるかどうかSMTPルートを確認してください。
危険
このホストから大量の SMTPメールを受信できるように準備されていないホストまたは IPアドレスに受信者をリダイレクトすると、メッセージがバウンスされ、メールが失われる可能性
があります。
危険
使用方法
確定:このコマンドに「commit」は必要ありません。
クラスタ管理:このコマンドはマシンモードでのみ使用できます。
バッチコマンド:このコマンドはバッチ形式をサポートしています。
コマンド:参考例
163
コマンド:参考例
例

バッチ形式
redirectrecipientsコマンドのバッチ形式を使用すると、従来の CLIコマンドのすべての機能を実行できます。
•すべてのメールを別のホスト名または IPアドレスにリダイレクトします。
redirectrecipients host <hostname>
例
次に、すべてのメールを example2.comホストにリダイレクトする例を示します。
mail3.example.com> redirectrecipientsPlease enter the hostname or IP address of the machine you want to send all mail to.[]> example2.comWARNING: redirecting recipients to a host or IP address that is not prepared to acceptlarge volumes of SMTP mail from this hostwill cause messages to bounce and possibly result in the loss of mail.Are you sure you want to redirect all mail in the queue to "example2.com"? [N]> yRedirecting messages, please wait.246 recipients redirected.
resetcounters
説明
システム内のすべてのカウンタをリセットします。
使用方法
確定:このコマンドに「commit」は必要ありません。
クラスタ管理:このコマンドはマシンモードでのみ使用できます。
バッチコマンド:このコマンドはバッチ形式をサポートしていません。
例
mail3.example.com> resetcountersCounters reset: Mon Jan 01 12:00:01 2003
removemessage
説明
特定のメッセージ IDのメッセージを安全に削除します。
コマンド:参考例
164
コマンド:参考例
バッチ形式

removemessageコマンドでは、作業キュー、再試行キュー、または宛先キュー内のメッセージのみを削除できます。システムの状態によっては、これらのキューに有効でアクティブな
メッセージが含まれていない場合があります。
使用方法
確定:このコマンドに「commit」は必要ありません。
クラスタ管理:このコマンドはマシンモードでのみ使用できます。
バッチコマンド:このコマンドはバッチ形式をサポートしていません。
例
example.com>removemessageEnter the MID to remove.[]> 1MID 1: 19 secs oldReceived: from example2.com ([172.16.0.102])by test02.com with SMTP; 01 Mar 2007 19:50:41 -0800
From: [email protected]: [email protected]: TestingMessage-Id: <[email protected]>Remove this message? [N]> y
showmessage
説明
指定されたメッセージ IDのメッセージとメッセージ本文を表示します。
使用方法
確定:このコマンドに「commit」は必要ありません。
クラスタ管理:このコマンドはマシンモードでのみ使用できます。
バッチコマンド:このコマンドはバッチ形式をサポートしていません。
例
example.com> showmessageMID 9: 1 hour 5 mins 35 secs oldReceived: from example2.com([172.19.0.109])by test02.com with SMTP; 14 Feb 2007 22:11:37 -0800
From: [email protected]: [email protected]: TestingMessage-Id: <[email protected]>This is the message body.
コマンド:参考例
165
コマンド:参考例
使用方法
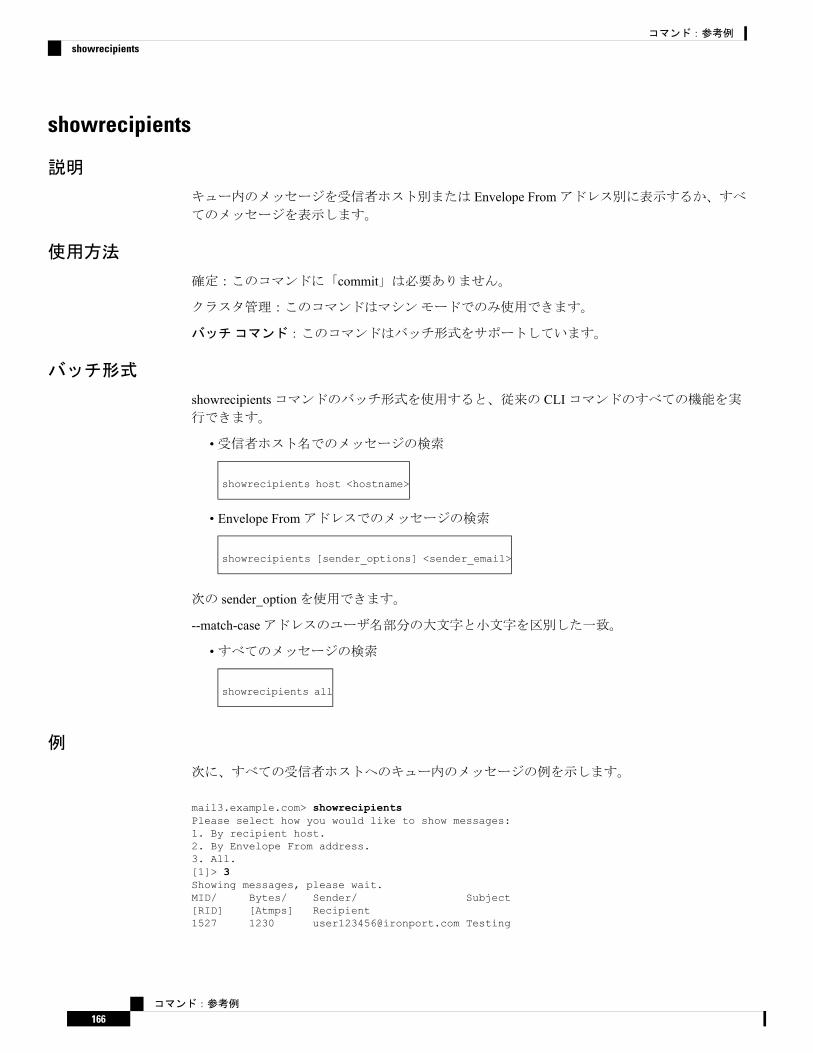
showrecipients
説明
キュー内のメッセージを受信者ホスト別または Envelope Fromアドレス別に表示するか、すべてのメッセージを表示します。
使用方法
確定:このコマンドに「commit」は必要ありません。
クラスタ管理:このコマンドはマシンモードでのみ使用できます。
バッチコマンド:このコマンドはバッチ形式をサポートしています。
バッチ形式
showrecipientsコマンドのバッチ形式を使用すると、従来の CLIコマンドのすべての機能を実行できます。
•受信者ホスト名でのメッセージの検索
showrecipients host <hostname>
• Envelope Fromアドレスでのメッセージの検索
showrecipients [sender_options] <sender_email>
次の sender_optionを使用できます。
--match-caseアドレスのユーザ名部分の大文字と小文字を区別した一致。
•すべてのメッセージの検索
showrecipients all
例
次に、すべての受信者ホストへのキュー内のメッセージの例を示します。
mail3.example.com> showrecipientsPlease select how you would like to show messages:1. By recipient host.2. By Envelope From address.3. All.[1]> 3Showing messages, please wait.MID/ Bytes/ Sender/ Subject[RID] [Atmps] Recipient1527 1230 [email protected] Testing
コマンド:参考例
166
コマンド:参考例
showrecipients

[0] [0] [email protected] 1230 [email protected] Testing[0] [0] [email protected] 1230 [email protected] Testing[0] [0] [email protected] 1230 [email protected] Testing[0] [0] [email protected] 1230 [email protected] Testing[0] [0] [email protected] 1230 [email protected] Testing[0] [0] [email protected] 1230 [email protected] Testing[0] [0] [email protected] 1230 [email protected] Testing[0] [0] [email protected] 1230 [email protected] Testing[0] [0] [email protected] 1230 [email protected] Testing[0] [0] [email protected]
status
使用方法
確定:このコマンドに「commit」は必要ありません。
クラスタ管理:このコマンドは、すべてのマシンモード(クラスタ、グループ、マシン)で使
用できます。
バッチコマンド:このコマンドはバッチ形式をサポートしていません。
例
mail.example.com> status detail
Status as of: Mon Sep 08 00:01:44 2014 GMTUp since: Tue Aug 26 17:24:16 2014 GMT(12d 6h 37m 28s)Last counter reset: NeverSystem status: OnlineOldest Message: No MessagesFeature - IronPort Anti-Spam: 1459 daysFeature - Incoming Mail Handling: PerpetualFeature - Outbreak Filters: 1459 daysCounters: Reset Uptime LifetimeReceivingMessages Received 2 2 2Recipients Received 2 2 2
RejectionRejected Recipients 0 0 0Dropped Messages 0 0 0
QueueSoft Bounced Events 0 0 0
CompletionCompleted Recipients 0 0 0
Current IDsMessage ID (MID) 2Injection Conn. ID (ICID) 0Delivery Conn. ID (DCID) 13
コマンド:参考例
167
コマンド:参考例
status

Gauges: CurrentConnectionsCurrent Inbound Conn. 0Current Outbound Conn. 0
QueueActive Recipients 2Messages In Work Queue 0Kilobytes Used 184Kilobytes Free 8,388,424
QuarantineMessages In QuarantinePolicy, Virus and Outbreak 0
Kilobytes In QuarantinePolicy, Virus and Outbreak 0
tophosts
説明
電子メールキューに関する現在の情報を取得し、特定の受信者ホストに配信の問題(キューの
増大など)があるかどうかを判断するには、tophostsコマンドを使用します。tophostsコマンドは、キュー内の上位 20の受信者のリストを返します。リストは、アクティブ受信者、発信接続、配信済み受信者、ソフトバウンスイベント、およびハードバウンスされた受信者など、
さまざまな統計情報別にソートできます。
使用方法
確定:このコマンドに「commit」は必要ありません。
クラスタ管理:このコマンドはマシンモードでのみ使用できます。
バッチコマンド:このコマンドはバッチ形式をサポートしていません。
例
mail3.example.com> tophostsSort results by:1. Active Recipients2. Connections Out3. Delivered Recipients4. Hard Bounced Recipients5. Soft Bounced Events[1]> 1Status as of: Fri Mar 13 06:09:18 2015 GMTHosts marked with '*' were down as of the last delivery attempt.
Active Conn. Deliv. Soft Hard# Recipient Host Recip. Out Recip. Bounced Bounced1* example.com 2 0 0 0 02 the.encryption.queue 0 0 0 0 03 the.euq.queue 0 0 0 0 04 the.euq.release.queue 0 0 0 0 0
コマンド:参考例
168
コマンド:参考例
tophosts
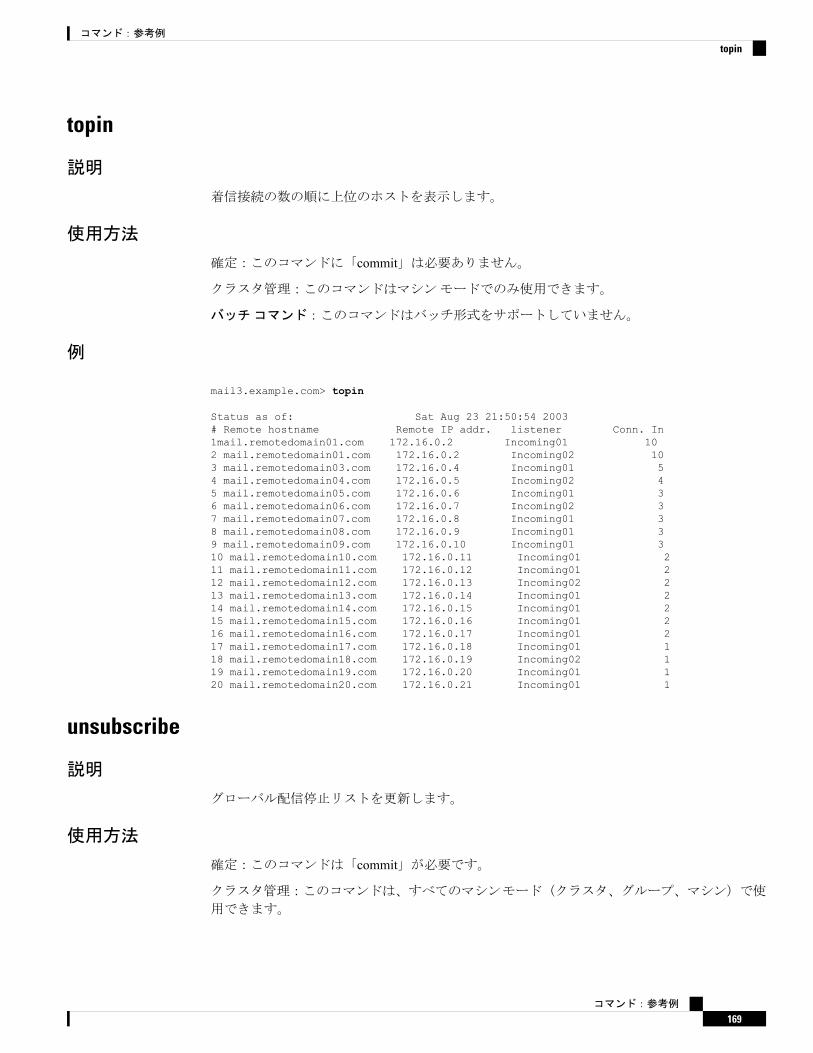
topin
説明
着信接続の数の順に上位のホストを表示します。
使用方法
確定:このコマンドに「commit」は必要ありません。
クラスタ管理:このコマンドはマシンモードでのみ使用できます。
バッチコマンド:このコマンドはバッチ形式をサポートしていません。
例
mail3.example.com> topin
Status as of: Sat Aug 23 21:50:54 2003# Remote hostname Remote IP addr. listener Conn. In1mail.remotedomain01.com 172.16.0.2 Incoming01 102 mail.remotedomain01.com 172.16.0.2 Incoming02 103 mail.remotedomain03.com 172.16.0.4 Incoming01 54 mail.remotedomain04.com 172.16.0.5 Incoming02 45 mail.remotedomain05.com 172.16.0.6 Incoming01 36 mail.remotedomain06.com 172.16.0.7 Incoming02 37 mail.remotedomain07.com 172.16.0.8 Incoming01 38 mail.remotedomain08.com 172.16.0.9 Incoming01 39 mail.remotedomain09.com 172.16.0.10 Incoming01 310 mail.remotedomain10.com 172.16.0.11 Incoming01 211 mail.remotedomain11.com 172.16.0.12 Incoming01 212 mail.remotedomain12.com 172.16.0.13 Incoming02 213 mail.remotedomain13.com 172.16.0.14 Incoming01 214 mail.remotedomain14.com 172.16.0.15 Incoming01 215 mail.remotedomain15.com 172.16.0.16 Incoming01 216 mail.remotedomain16.com 172.16.0.17 Incoming01 217 mail.remotedomain17.com 172.16.0.18 Incoming01 118 mail.remotedomain18.com 172.16.0.19 Incoming02 119 mail.remotedomain19.com 172.16.0.20 Incoming01 120 mail.remotedomain20.com 172.16.0.21 Incoming01 1
unsubscribe
説明
グローバル配信停止リストを更新します。
使用方法
確定:このコマンドは「commit」が必要です。
クラスタ管理:このコマンドは、すべてのマシンモード(クラスタ、グループ、マシン)で使
用できます。
コマンド:参考例
169
コマンド:参考例
topin
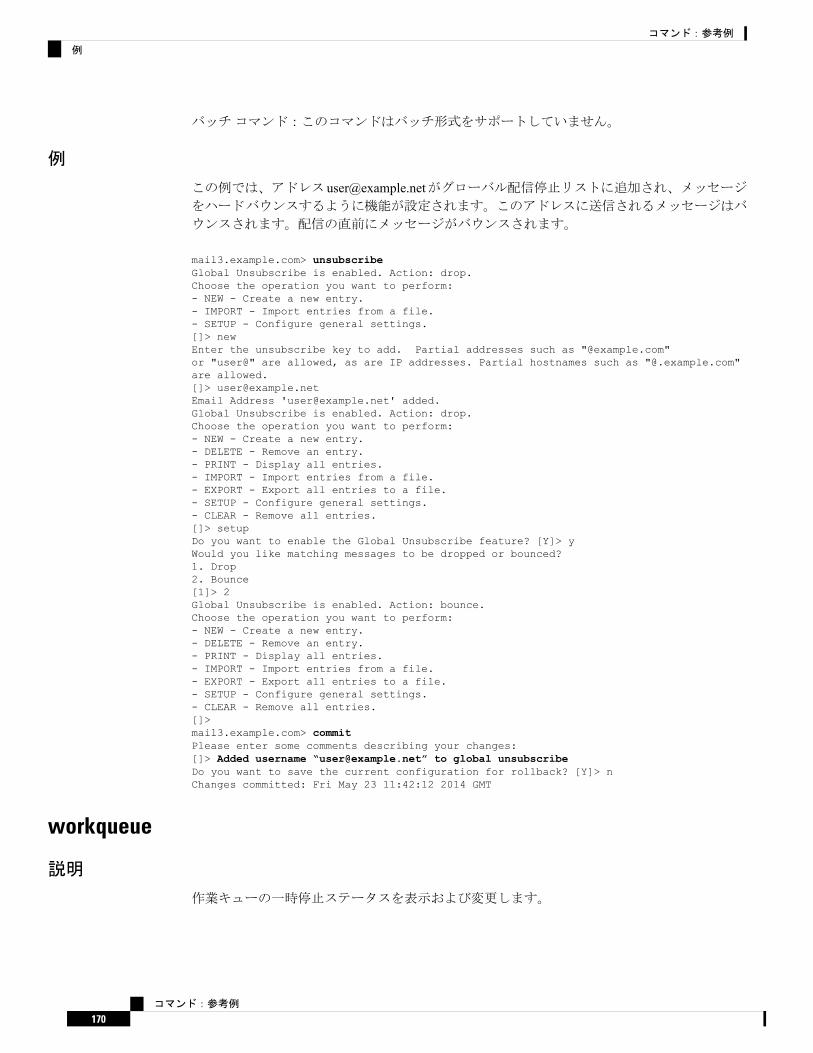
バッチコマンド:このコマンドはバッチ形式をサポートしていません。
例
この例では、アドレス [email protected]がグローバル配信停止リストに追加され、メッセージをハードバウンスするように機能が設定されます。このアドレスに送信されるメッセージはバ
ウンスされます。配信の直前にメッセージがバウンスされます。
mail3.example.com> unsubscribeGlobal Unsubscribe is enabled. Action: drop.Choose the operation you want to perform:- NEW - Create a new entry.- IMPORT - Import entries from a file.- SETUP - Configure general settings.[]> newEnter the unsubscribe key to add. Partial addresses such as "@example.com"or "user@" are allowed, as are IP addresses. Partial hostnames such as "@.example.com"are allowed.[]> [email protected] Address '[email protected]' added.Global Unsubscribe is enabled. Action: drop.Choose the operation you want to perform:- NEW - Create a new entry.- DELETE - Remove an entry.- PRINT - Display all entries.- IMPORT - Import entries from a file.- EXPORT - Export all entries to a file.- SETUP - Configure general settings.- CLEAR - Remove all entries.[]> setupDo you want to enable the Global Unsubscribe feature? [Y]> yWould you like matching messages to be dropped or bounced?1. Drop2. Bounce[1]> 2Global Unsubscribe is enabled. Action: bounce.Choose the operation you want to perform:- NEW - Create a new entry.- DELETE - Remove an entry.- PRINT - Display all entries.- IMPORT - Import entries from a file.- EXPORT - Export all entries to a file.- SETUP - Configure general settings.- CLEAR - Remove all entries.[]>mail3.example.com> commitPlease enter some comments describing your changes:[]> Added username “[email protected]” to global unsubscribeDo you want to save the current configuration for rollback? [Y]> nChanges committed: Fri May 23 11:42:12 2014 GMT
workqueue
説明
作業キューの一時停止ステータスを表示および変更します。
コマンド:参考例
170
コマンド:参考例
例

使用方法
確定:このコマンドに「commit」は必要ありません。
クラスタ管理:このコマンドはマシンモードでのみ使用できます。
バッチコマンド:このコマンドはバッチ形式をサポートしていません。
例
mail3.example.com> workqueueStatus: OperationalMessages: 1243Manually pause work queue? This will only affect unprocessed messages. [N]> yReason for pausing work queue:[]> checking LDAP serverStatus: Paused by admin: checking LDAP serverMessages: 1243
理由の入力は任意です。理由を入力しない場合、理由を「operator paused」としてログが記録されます。
(注)
次の例では、ワークキューが再開されます。
mail3.example.com> workqueueStatus: Paused by admin: checking LDAP serverMessages: 1243Resume the work queue? [Y]> yStatus: OperationalMessages: 1243
ネットワーキング設定とネットワークツールここでは、次の CLIコマンドについて説明します。
• etherconfig(172ページ)• interfaceconfig(173ページ)• nslookup(175ページ)• netstat(176ページ)• packetcapture(177ページ)• ping(179ページ)• ping6(180ページ)• routeconfig(180ページ)• setgateway(183ページ)• sethostname(183ページ)• smtproutes(184ページ)• sslconfig(186ページ)
コマンド:参考例
171
コマンド:参考例
使用方法
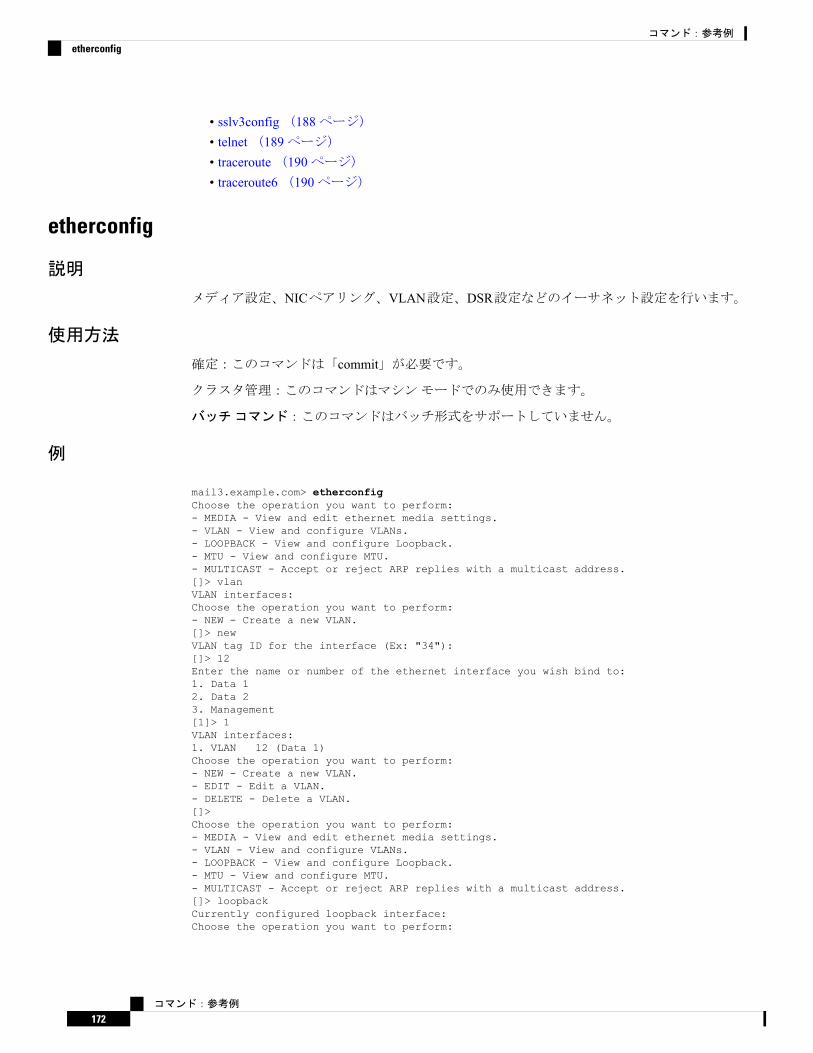
• sslv3config(188ページ)• telnet(189ページ)• traceroute(190ページ)• traceroute6(190ページ)
etherconfig
説明
メディア設定、NICペアリング、VLAN設定、DSR設定などのイーサネット設定を行います。
使用方法
確定:このコマンドは「commit」が必要です。
クラスタ管理:このコマンドはマシンモードでのみ使用できます。
バッチコマンド:このコマンドはバッチ形式をサポートしていません。
例
mail3.example.com> etherconfigChoose the operation you want to perform:- MEDIA - View and edit ethernet media settings.- VLAN - View and configure VLANs.- LOOPBACK - View and configure Loopback.- MTU - View and configure MTU.- MULTICAST - Accept or reject ARP replies with a multicast address.[]> vlanVLAN interfaces:Choose the operation you want to perform:- NEW - Create a new VLAN.[]> newVLAN tag ID for the interface (Ex: "34"):[]> 12Enter the name or number of the ethernet interface you wish bind to:1. Data 12. Data 23. Management[1]> 1VLAN interfaces:1. VLAN 12 (Data 1)Choose the operation you want to perform:- NEW - Create a new VLAN.- EDIT - Edit a VLAN.- DELETE - Delete a VLAN.[]>Choose the operation you want to perform:- MEDIA - View and edit ethernet media settings.- VLAN - View and configure VLANs.- LOOPBACK - View and configure Loopback.- MTU - View and configure MTU.- MULTICAST - Accept or reject ARP replies with a multicast address.[]> loopbackCurrently configured loopback interface:Choose the operation you want to perform:
コマンド:参考例
172
コマンド:参考例
etherconfig

- ENABLE - Enable Loopback Interface.[]>Choose the operation you want to perform:- MEDIA - View and edit ethernet media settings.- VLAN - View and configure VLANs.- LOOPBACK - View and configure Loopback.- MTU - View and configure MTU.- MULTICAST - Accept or reject ARP replies with a multicast address.[]> mtuEthernet interfaces:1. Data 1 default mtu 15002. Data 2 default mtu 15003. Management default mtu 15004. VLAN 12 default mtu 1500Choose the operation you want to perform:- EDIT - Edit an ethernet interface.[]> editEnter the name or number of the ethernet interface you wish to edit.[]> pair1That value is not valid.Enter the name or number of the ethernet interface you wish to edit.[]> 12That value is not valid.Enter the name or number of the ethernet interface you wish to edit.[]> 2Please enter a non-default (1500) MTU value for the Data 2 interface.[]> 1200Ethernet interfaces:1. Data 1 default mtu 15002. Data 2 mtu 12003. Management default mtu 15004. VLAN 12 default mtu 1500Choose the operation you want to perform:- EDIT - Edit an ethernet interface.[]>
interfaceconfig
説明
インターフェイスを設定します。インターフェイスを作成、編集、削除できます。FTPをイネーブルにし、IPアドレスを変更し、イーサネット IPアドレスを設定できます。
使用方法
確定:このコマンドは「commit」が必要です。
クラスタ管理:このコマンドはマシンモードでのみ使用できます。
バッチコマンド:このコマンドはバッチ形式をサポートしています。
バッチ形式
interfaceconfigコマンドのバッチ形式を使用すると、従来の CLIコマンドのすべての機能を実行できます。
•新しいインターフェイスの作成
コマンド:参考例
173
コマンド:参考例
interfaceconfig

interfaceconfig new <name>
<ethernet interface>
<hostname>
--ip=IPv4 Address/Netmask
--ip6=IPv6 Address/Prefix Lenght
[--ftp[=<port>]]
[--telnet[=<port>]]
[--ssh[=<port>]]
[--http][=<port>]
[--https[=<port>]]
[--euq_http[=<port>]]
[--euq_https][=<port>]
[--ccs[=<port>]].
FTP is available only on IPv4.
•インターフェイスの削除
interfaceconfig delete <name>
例:インターフェイスの設定
mail.example.com> interfaceconfigCurrently configured interfaces:1. Management (10.76.69.149/24 on Management: mail.example.com)Choose the operation you want to perform:- NEW - Create a new interface.- EDIT - Modify an interface.- GROUPS - Define interface groups.- DELETE - Remove an interface.[]> editEnter the number of the interface you wish to edit.[]> 1
コマンド:参考例
174
コマンド:参考例
例:インターフェイスの設定

IP interface name (Ex: "InternalNet"):[Management]>Would you like to configure an IPv4 address for this interface (y/n)? [Y]>IPv4 Address (Ex: 192.168.1.2 ):[1.1.1.1]>Netmask (Ex: "24", "255.255.255.0" or "0xffffff00"):[0xffffffff]>Would you like to configure an IPv6 address for this interface (y/n)? [N]> nEthernet interface:1. Data 12. Data 23. Management[3]>Hostname:[mail.example.com]>Do you want to enable SSH on this interface? [Y]>Which port do you want to use for SSH?[22]>Do you want to enable FTP on this interface? [N]>Do you want to enable Cluster Communication Service on this interface? [N]>Do you want to enable HTTP on this interface? [Y]>Which port do you want to use for HTTP?[80]>Do you want to enable HTTPS on this interface? [Y]>Which port do you want to use for HTTPS?[443]>Do you want to enable Spam Quarantine HTTP on this interface? [N]>Do you want to enable Spam Quarantine HTTPS on this interface? [N]>Do you want to enable AsyncOS API (Monitoring) HTTP on this interface? [N]> yWhich port do you want to use for AsyncOS API (Monitoring) HTTP?[6080]>Do you want to enable AsyncOS API (Monitoring) HTTPS on this interface? [N]> yWhich port do you want to use for AsyncOS API (Monitoring) HTTPS?[6443]>The "Demo" certificate is currently configured. You may use "Demo", but this will notbesecure. To assure privacy, run "certconfig" first.Both HTTP and HTTPS are enabled for this interface, should HTTP requests redirect to thesecure service? [Y]>You have edited the interface you are currently logged into. Are you sure you want tochange it? [Y]>Currently configured interfaces:1. Management (10.76.69.149/24 on Management: mail.example.com)Choose the operation you want to perform:- NEW - Create a new interface.- EDIT - Modify an interface.- GROUPS - Define interface groups.- DELETE - Remove an interface.[]>
nslookup
説明
nslookupコマンドを使用すると、DNSの機能を検査できます。
nslookupコマンドでは、アプライアンスが、動作している DNS(ドメインネームサービス)サーバからホスト名と IPアドレスを解決して到達できることを確認できます。
コマンド:参考例
175
コマンド:参考例
nslookup

表 9 : nslookupコマンドのクエリータイプ
説明クエリーのタイプ
ホストのインターネットアドレス
エイリアスの正規の名前CNAME
メールエクスチェンジャMX
指定したゾーンのネームサーバNS
クエリーがインターネットアドレスの場合はホスト名、そうで
ない場合は他の情報に対するポインタ
PTR
ドメインの「権限開始」情報SOA
テキスト情報TXT
使用方法
確定:このコマンドに「commit」は必要ありません。
クラスタ管理:このコマンドは、すべてのマシンモード(クラスタ、グループ、マシン)で使
用できます。
バッチコマンド:このコマンドはバッチ形式をサポートしていません。
例
mail.example.com> nslookupPlease enter the host or IP address to resolve.[]> vm30esa0086.ibqaChoose the query type:1. A the host's IP address2. AAAA the host's IPv6 address3. CNAME the canonical name for an alias4. MX the mail exchanger5. NS the name server for the named zone6. PTR the hostname if the query is an Internet address,otherwise the pointer to other information7. SOA the domain's "start-of-authority" information8. TXT the text information[1]> 2AAAA=2001:420:54ff:ff06::95 TTL=30m
netstat
説明
netstatコマンドを使用すると、ネットワーク接続(着信および発信)、ルーティングテーブル、およびさまざまなネットワークインターフェイス統計情報を表示できます。このバージョ
コマンド:参考例
176
コマンド:参考例
使用方法
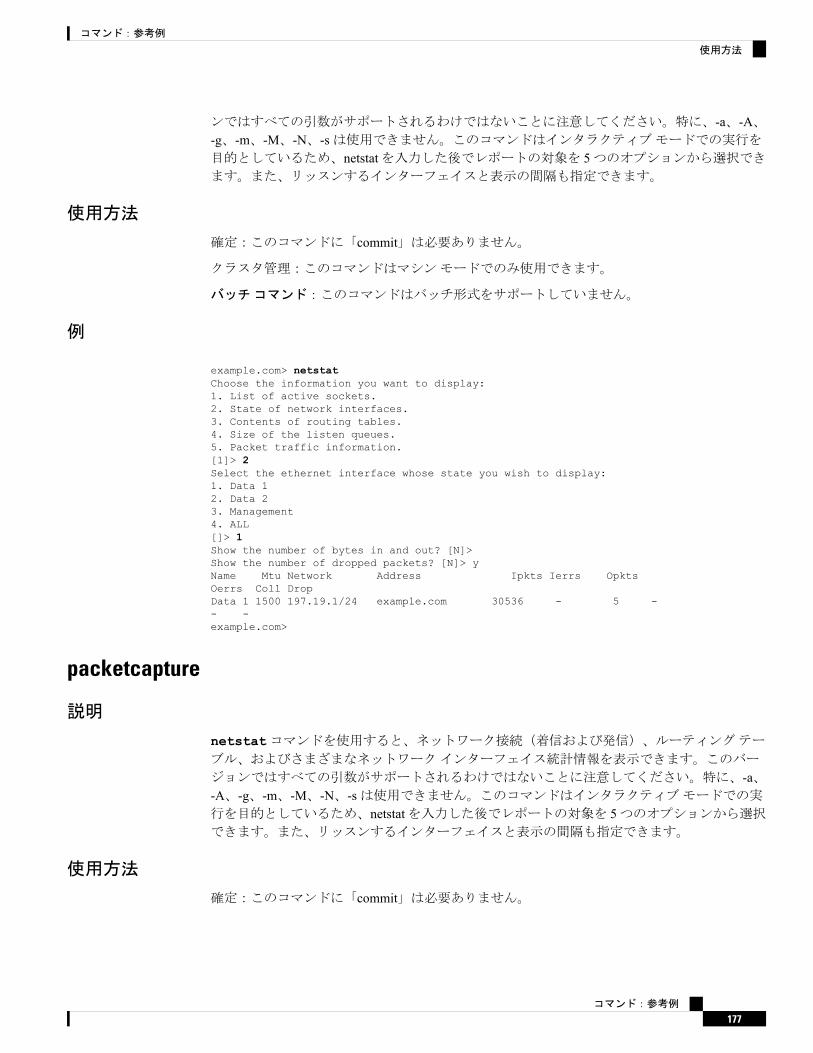
ンではすべての引数がサポートされるわけではないことに注意してください。特に、-a、-A、-g、-m、-M、-N、-sは使用できません。このコマンドはインタラクティブモードでの実行を目的としているため、netstatを入力した後でレポートの対象を 5つのオプションから選択できます。また、リッスンするインターフェイスと表示の間隔も指定できます。
使用方法
確定:このコマンドに「commit」は必要ありません。
クラスタ管理:このコマンドはマシンモードでのみ使用できます。
バッチコマンド:このコマンドはバッチ形式をサポートしていません。
例
example.com> netstatChoose the information you want to display:1. List of active sockets.2. State of network interfaces.3. Contents of routing tables.4. Size of the listen queues.5. Packet traffic information.[1]> 2Select the ethernet interface whose state you wish to display:1. Data 12. Data 23. Management4. ALL[]> 1Show the number of bytes in and out? [N]>Show the number of dropped packets? [N]> yName Mtu Network Address Ipkts Ierrs OpktsOerrs Coll DropData 1 1500 197.19.1/24 example.com 30536 - 5 -- -example.com>
packetcapture
説明
netstatコマンドを使用すると、ネットワーク接続(着信および発信)、ルーティングテーブル、およびさまざまなネットワークインターフェイス統計情報を表示できます。このバー
ジョンではすべての引数がサポートされるわけではないことに注意してください。特に、-a、-A、-g、-m、-M、-N、-sは使用できません。このコマンドはインタラクティブモードでの実行を目的としているため、netstatを入力した後でレポートの対象を 5つのオプションから選択できます。また、リッスンするインターフェイスと表示の間隔も指定できます。
使用方法
確定:このコマンドに「commit」は必要ありません。
コマンド:参考例
177
コマンド:参考例
使用方法
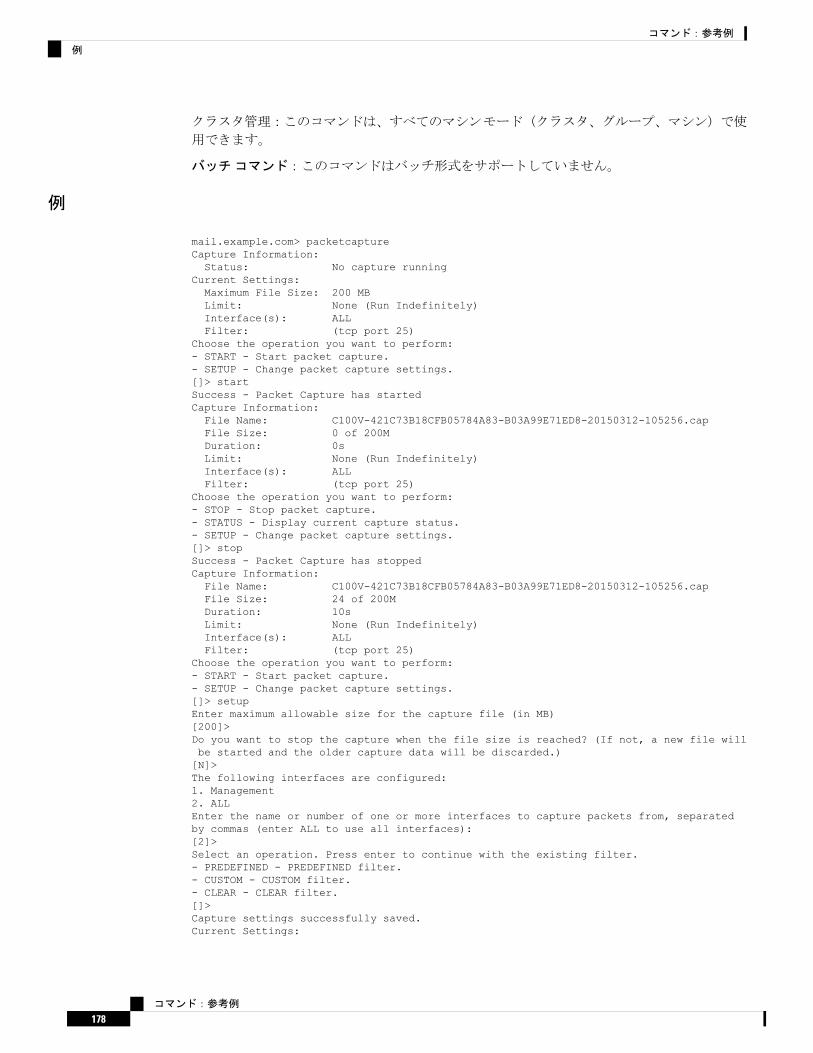
クラスタ管理:このコマンドは、すべてのマシンモード(クラスタ、グループ、マシン)で使
用できます。
バッチコマンド:このコマンドはバッチ形式をサポートしていません。
例
mail.example.com> packetcaptureCapture Information:Status: No capture running
Current Settings:Maximum File Size: 200 MBLimit: None (Run Indefinitely)Interface(s): ALLFilter: (tcp port 25)
Choose the operation you want to perform:- START - Start packet capture.- SETUP - Change packet capture settings.[]> startSuccess - Packet Capture has startedCapture Information:File Name: C100V-421C73B18CFB05784A83-B03A99E71ED8-20150312-105256.capFile Size: 0 of 200MDuration: 0sLimit: None (Run Indefinitely)Interface(s): ALLFilter: (tcp port 25)
Choose the operation you want to perform:- STOP - Stop packet capture.- STATUS - Display current capture status.- SETUP - Change packet capture settings.[]> stopSuccess - Packet Capture has stoppedCapture Information:File Name: C100V-421C73B18CFB05784A83-B03A99E71ED8-20150312-105256.capFile Size: 24 of 200MDuration: 10sLimit: None (Run Indefinitely)Interface(s): ALLFilter: (tcp port 25)
Choose the operation you want to perform:- START - Start packet capture.- SETUP - Change packet capture settings.[]> setupEnter maximum allowable size for the capture file (in MB)[200]>Do you want to stop the capture when the file size is reached? (If not, a new file willbe started and the older capture data will be discarded.)[N]>The following interfaces are configured:1. Management2. ALLEnter the name or number of one or more interfaces to capture packets from, separatedby commas (enter ALL to use all interfaces):[2]>Select an operation. Press enter to continue with the existing filter.- PREDEFINED - PREDEFINED filter.- CUSTOM - CUSTOM filter.- CLEAR - CLEAR filter.[]>Capture settings successfully saved.Current Settings:
コマンド:参考例
178
コマンド:参考例
例

Maximum File Size: 200 MBLimit: None (Run Indefinitely)Interface(s): ALLFilter: (tcp port 25)
Choose the operation you want to perform:- START - Start packet capture.- SETUP - Change packet capture settings.[]>
ping
説明
pingコマンドを使用すると、アプライアンスからネットワークホストへの接続をテストできます。
使用方法
確定:このコマンドに「commit」は必要ありません。
クラスタ管理:このコマンドはマシンモードでのみ使用できます。さらに、このコマンドはロ
グインホスト(ユーザがログインしたマシン)でのみ使用できます。このコマンドを使用する
には、ローカルファイルシステムにアクセスできる必要があります。
バッチコマンド:このコマンドはバッチ形式をサポートしていません。
例
mail3.example.com> pingWhich interface do you want to send the pings from?1. Auto2. Management (192.168.42.42/24: mail3.example.com)3. PrivateNet (192.168.1.1/24: mail3.example.com)4. PublicNet (192.168.2.1/24: mail3.example.com)[1]> 1Please enter the host you wish to ping.[]> anotherhost.example.comPress Ctrl-C to stop.PING anotherhost.example.com (x.x.x.x): 56 data bytes64 bytes from 10.19.0.31: icmp_seq=0 ttl=64 time=1.421 ms64 bytes from 10.19.0.31: icmp_seq=1 ttl=64 time=0.126 ms64 bytes from 10.19.0.31: icmp_seq=2 ttl=64 time=0.118 ms64 bytes from 10.19.0.31: icmp_seq=3 ttl=64 time=0.115 ms64 bytes from 10.19.0.31: icmp_seq=4 ttl=64 time=0.139 ms64 bytes from 10.19.0.31: icmp_seq=5 ttl=64 time=0.125 ms64 bytes from 10.19.0.31: icmp_seq=6 ttl=64 time=0.124 ms64 bytes from 10.19.0.31: icmp_seq=7 ttl=64 time=0.122 ms64 bytes from 10.19.0.31: icmp_seq=8 ttl=64 time=0.126 ms64 bytes from 10.19.0.31: icmp_seq=9 ttl=64 time=0.133 ms64 bytes from 10.19.0.31: icmp_seq=10 ttl=64 time=0.115 ms^C--- anotherhost.example.com ping statistics ---11 packets transmitted, 11 packets received, 0% packet lossround-trip min/avg/max/stddev = 0.115/0.242/1.421/0.373 ms^C
コマンド:参考例
179
コマンド:参考例
ping

pingコマンドを終了するには、Ctrl+Cを使用する必要があります。(注)
ping6
説明
IPv6を使用するネットワークホストに pingを実行します
使用方法
確定:このコマンドに「commit」は必要ありません。
クラスタ管理:このコマンドはマシンモードでのみ使用できます。さらに、このコマンドはロ
グインホスト(ユーザがログインしたマシン)でのみ使用できます。このコマンドを使用する
には、ローカルファイルシステムにアクセスできる必要があります。
バッチコマンド:このコマンドはバッチ形式をサポートしていません。
例
mail.example.com> ping6Which interface do you want to send the pings from?1. Auto2. Management (192.168.42.42/24: mail3.example.com)[1]> 1Please enter the host you wish to ping.[]> anotherhost.example.comPress Ctrl-C to stop.
ping6コマンドを終了するには、Ctrl+Cを使用します。(注)
routeconfig
説明
routeconfigコマンドを使用すると、TCP/IPトラフィックのスタティックルートを作成、編集、削除できます。デフォルトでは、トラフィックは setgatewayコマンドで設定されたデフォルトゲートウェイ経由でルーティングされます。ただし、AsyncOSでは特定の宛先へのルーティングも可能です。
ルートは、ニックネーム(参照用)、宛先、およびゲートウェイで構成されます。ゲートウェ
イ(ネクストホップ)は、10.1.1.2などの IPアドレスです。宛先は次のいずれかになります。
• IPアドレス(192.168.14.32など)
コマンド:参考例
180
コマンド:参考例
ping6

• CIDR表記法によるサブネットたとえば、192.168.5.0/24は 192.168.5.0から 192.168.5.255までのクラス Cネットワーク全体を意味します。
IPv6アドレスの場合は、次の形式を使用できます。
• 2620:101:2004:4202::0-2620:101:2004:4202::ff• 2620:101:2004:4202::• 2620:101:2004:4202::23• 2620:101:2004:4202::/64
このコマンドでは、現在設定されている TCP/IPルートのリストが表示されるので、そこからルートを選択して editおよび deleteサブコマンドを使用できます。
使用方法
確定:このコマンドは「commit」が必要です。
クラスタ管理:このコマンドはマシンモードでのみ使用できます。
バッチコマンド:このコマンドはバッチ形式をサポートしています。
バッチ形式
smtproutesコマンドのバッチ形式を使用すると、従来の CLIコマンドのすべての機能を実行できます。ルートに IPv4アドレスまたは IPv6アドレスのどちらを使用するかを選択できます。
•スタティックルートの作成:
routeconfig new 4|6 <name> <destination_address> <gateway_ip>
表 10 : routeconfigの引数
説明引数
このコマンドを適用する IPのバージョン(IPv4または IPv6)。clearを指定した場合およびprintを指定した場合、このオプションは省略可能で、コマンドは両方のバージョンに適用されます。
4 | 6
ルートの名前。name
発信 IPトラフィックの場合に照合する IPアドレスまたは CIDRアドレス。
destination_address
このトラフィックの送信先とする IPアドレス。gateway_ip
•スタティックルートの編集:
routeconfig edit 4|6 <name> <new_name> <destination_address> <gateway_ip>
•スタティックルートの削除:
コマンド:参考例
181
コマンド:参考例
使用方法
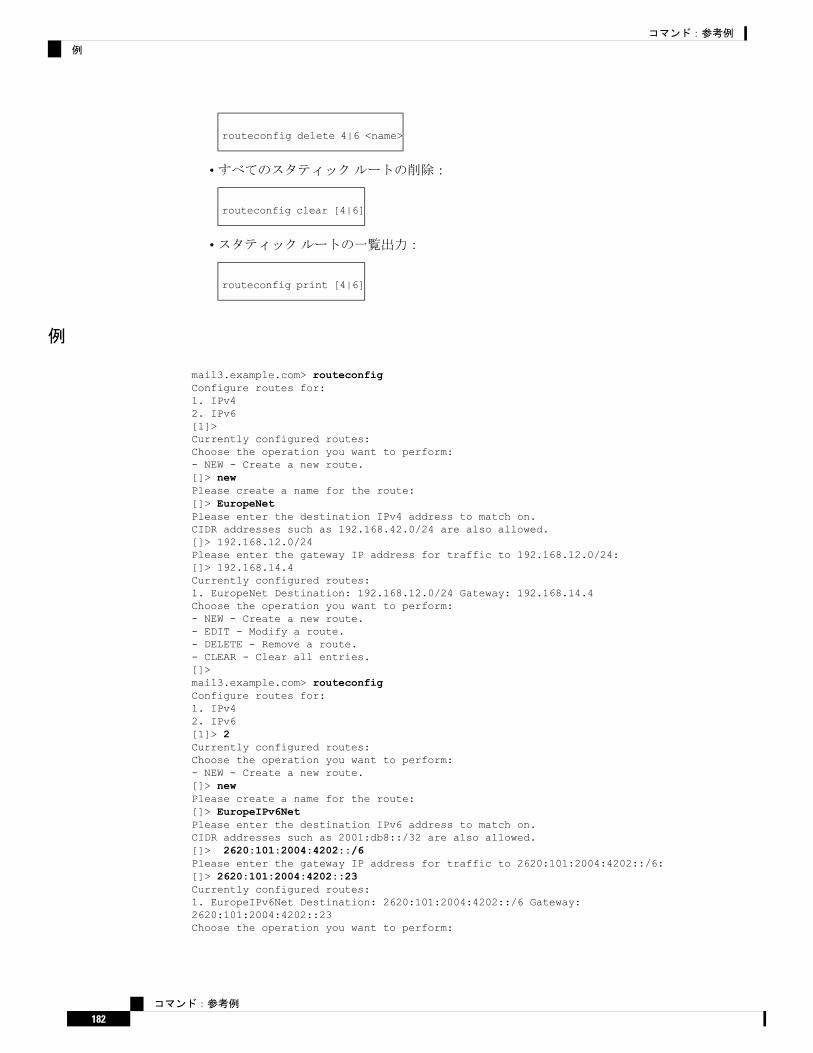
routeconfig delete 4|6 <name>
•すべてのスタティックルートの削除:
routeconfig clear [4|6]
•スタティックルートの一覧出力:
routeconfig print [4|6]
例
mail3.example.com> routeconfigConfigure routes for:1. IPv42. IPv6[1]>Currently configured routes:Choose the operation you want to perform:- NEW - Create a new route.[]> newPlease create a name for the route:[]> EuropeNetPlease enter the destination IPv4 address to match on.CIDR addresses such as 192.168.42.0/24 are also allowed.[]> 192.168.12.0/24Please enter the gateway IP address for traffic to 192.168.12.0/24:[]> 192.168.14.4Currently configured routes:1. EuropeNet Destination: 192.168.12.0/24 Gateway: 192.168.14.4Choose the operation you want to perform:- NEW - Create a new route.- EDIT - Modify a route.- DELETE - Remove a route.- CLEAR - Clear all entries.[]>mail3.example.com> routeconfigConfigure routes for:1. IPv42. IPv6[1]> 2Currently configured routes:Choose the operation you want to perform:- NEW - Create a new route.[]> newPlease create a name for the route:[]> EuropeIPv6NetPlease enter the destination IPv6 address to match on.CIDR addresses such as 2001:db8::/32 are also allowed.[]> 2620:101:2004:4202::/6Please enter the gateway IP address for traffic to 2620:101:2004:4202::/6:[]> 2620:101:2004:4202::23Currently configured routes:1. EuropeIPv6Net Destination: 2620:101:2004:4202::/6 Gateway:2620:101:2004:4202::23Choose the operation you want to perform:
コマンド:参考例
182
コマンド:参考例
例
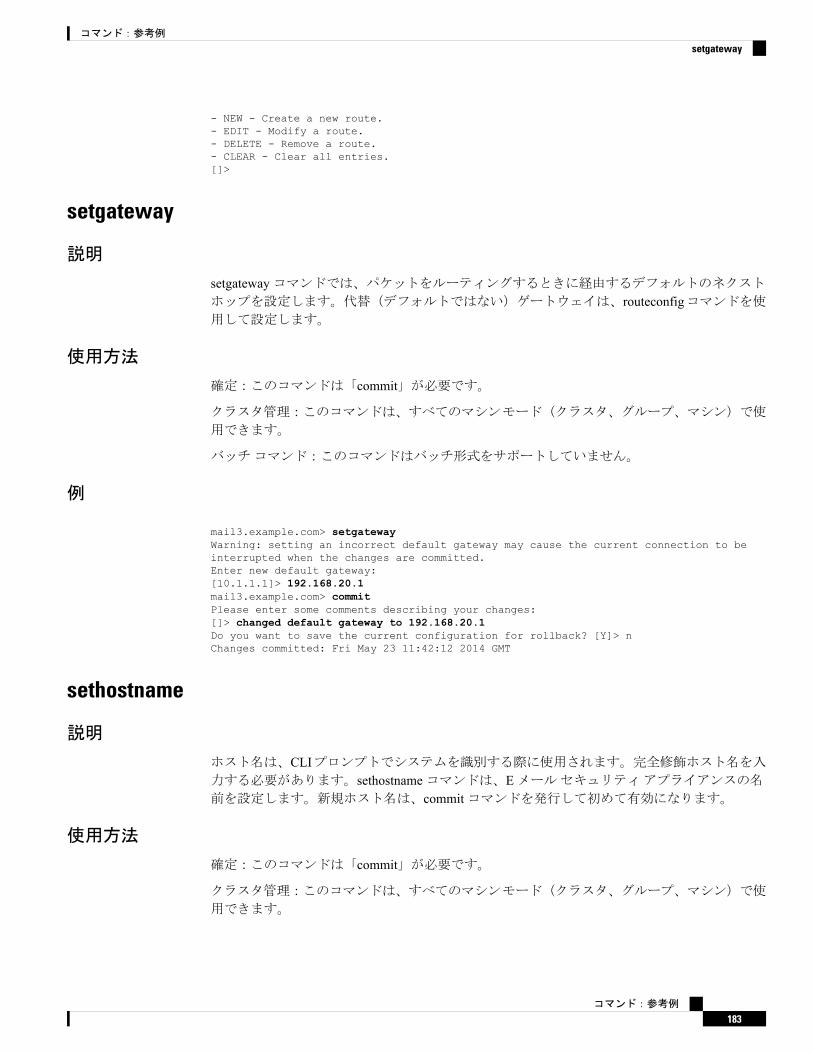
- NEW - Create a new route.- EDIT - Modify a route.- DELETE - Remove a route.- CLEAR - Clear all entries.[]>
setgateway
説明
setgatewayコマンドでは、パケットをルーティングするときに経由するデフォルトのネクストホップを設定します。代替(デフォルトではない)ゲートウェイは、routeconfigコマンドを使用して設定します。
使用方法
確定:このコマンドは「commit」が必要です。
クラスタ管理:このコマンドは、すべてのマシンモード(クラスタ、グループ、マシン)で使
用できます。
バッチコマンド:このコマンドはバッチ形式をサポートしていません。
例
mail3.example.com> setgatewayWarning: setting an incorrect default gateway may cause the current connection to beinterrupted when the changes are committed.Enter new default gateway:[10.1.1.1]> 192.168.20.1mail3.example.com> commitPlease enter some comments describing your changes:[]> changed default gateway to 192.168.20.1Do you want to save the current configuration for rollback? [Y]> nChanges committed: Fri May 23 11:42:12 2014 GMT
sethostname
説明
ホスト名は、CLIプロンプトでシステムを識別する際に使用されます。完全修飾ホスト名を入力する必要があります。sethostnameコマンドは、Eメールセキュリティアプライアンスの名前を設定します。新規ホスト名は、commitコマンドを発行して初めて有効になります。
使用方法
確定:このコマンドは「commit」が必要です。
クラスタ管理:このコマンドは、すべてのマシンモード(クラスタ、グループ、マシン)で使
用できます。
コマンド:参考例
183
コマンド:参考例
setgateway
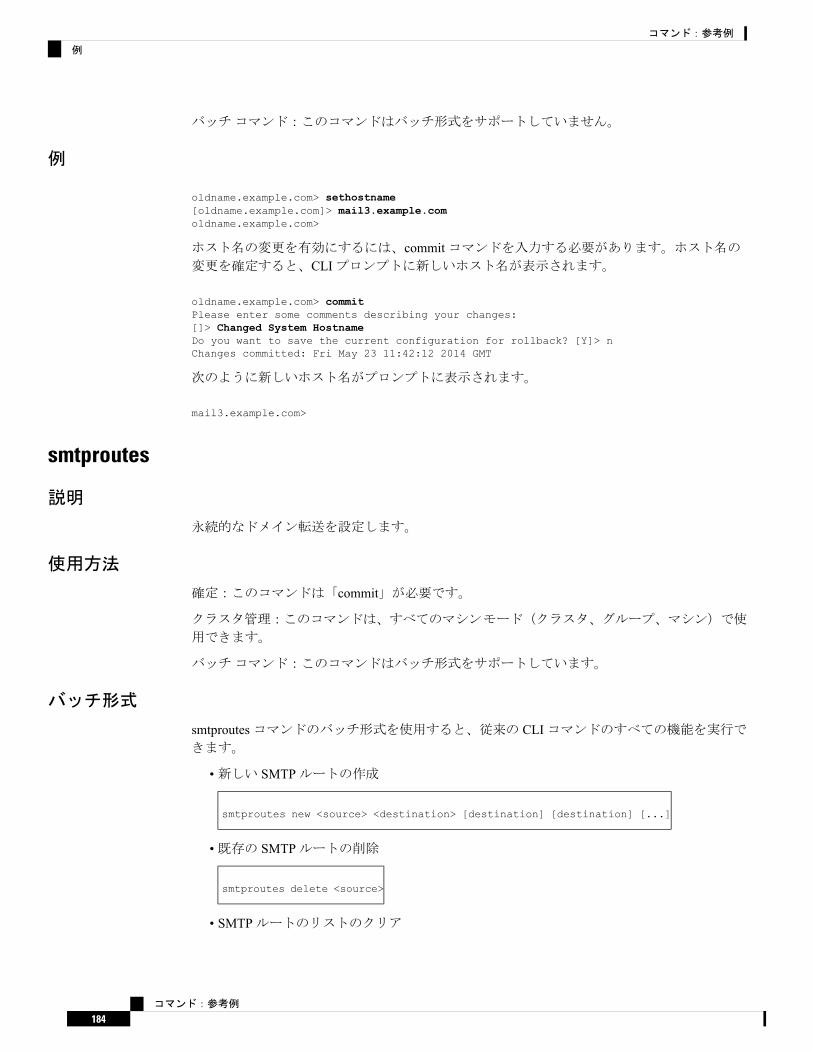
バッチコマンド:このコマンドはバッチ形式をサポートしていません。
例
oldname.example.com> sethostname[oldname.example.com]> mail3.example.comoldname.example.com>
ホスト名の変更を有効にするには、commitコマンドを入力する必要があります。ホスト名の変更を確定すると、CLIプロンプトに新しいホスト名が表示されます。
oldname.example.com> commitPlease enter some comments describing your changes:[]> Changed System HostnameDo you want to save the current configuration for rollback? [Y]> nChanges committed: Fri May 23 11:42:12 2014 GMT
次のように新しいホスト名がプロンプトに表示されます。
mail3.example.com>
smtproutes
説明
永続的なドメイン転送を設定します。
使用方法
確定:このコマンドは「commit」が必要です。
クラスタ管理:このコマンドは、すべてのマシンモード(クラスタ、グループ、マシン)で使
用できます。
バッチコマンド:このコマンドはバッチ形式をサポートしています。
バッチ形式
smtproutesコマンドのバッチ形式を使用すると、従来の CLIコマンドのすべての機能を実行できます。
•新しい SMTPルートの作成
smtproutes new <source> <destination> [destination] [destination] [...]
•既存の SMTPルートの削除
smtproutes delete <source>
• SMTPルートのリストのクリア
コマンド:参考例
184
コマンド:参考例
例

smtproutes clear
• SMTPルートのリストの出力
smtproutes print
• SMTPルートのリストのインポート
smtproutes import <filenames>
• SMTPルートのリストのエクスポート
smtproutes export <filenames>
例
次の例では、smptroutesコマンドを使用して、ドメイン example.comの relay1.example.com、relay2.example.com、および backup-relay.example.comへのルート(マッピング)を作成します。宛先のプライオリティを指定するには、/pri=#を使用します。#には 0~ 65535の値を指定します。値が大きいほどプライオリティは低くなります。プライオリティを指定しない場合、デ
フォルトの 0に設定されます。
(systemsetupコマンドの実行時、InboundMailパブリックリスナーを設定するときに同じマッピングを作成している場合があることに注意してください。)
mail3.example.com> smtproutesThere are no routes configured.Choose the operation you want to perform:- NEW - Create a new route.- IMPORT - Import new routes from a file.[]> newEnter the domain for which you want to set up a permanent route.Partial hostnames such as ".example.com" are allowed.Use "ALL" for the default route.[]> example.comEnter the destination hosts, separated by commas, which you want mailfor example.com to be delivered.Enter USEDNS by itself to use normal DNS resolution for this route.Enter /dev/null by itself if you wish to discard the mail.Enclose in square brackets to force resolution via address (A)records, ignoring any MX records.[]> relay1.example.com/pri=10, relay2.example.com, backup-relay.example.comMapping for example.com to relay1.example.com, relay2.example.com,backup-relay.example.com/pri=10 created.There are currently 1 routes configured.Choose the operation you want to perform:- NEW - Create a new route.- EDIT - Edit destinations of an existing route.- DELETE - Remove a route.- PRINT - Display all routes.- IMPORT - Import new routes from a file.- EXPORT - Export all routes to a file.
コマンド:参考例
185
コマンド:参考例
例

- CLEAR - Remove all routes.[]>
sslconfig
説明
アプライアンスの SSL設定を指定ます。
FIPS 140-2準拠モードでサーバおよびクライアントのメソッドは変更できません。(注)
使用方法
確定:このコマンドは「commit」が必要です。
クラスタ管理:このコマンドは、すべてのマシンモード(クラスタ、グループ、マシン)で使
用できます。
バッチコマンド:このコマンドはバッチ形式をサポートしていません。
例
mail.example.com> sslconfig
sslconfig settings:GUI HTTPS method: tlsv1_1tlsv1_2GUI HTTPS ciphers:
AES128AES256!SRP!AESGCM+DH+aRSA!AESGCM+RSA!aNULL
Inbound SMTP method: tlsv1_1tlsv1_2Inbound SMTP ciphers:
AES128AES256!SRP!AESGCM+DH+aRSA!AESGCM+RSA!aNULL
Outbound SMTP method: tlsv1_1tlsv1_2Outbound SMTP ciphers:
ECDH+aRSAECDH+ECDSADHE+DSS+AESAES128AES256!SRP!AESGCM+DH+aRSA!AESGCM+RSA!aNULL!eNULL
コマンド:参考例
186
コマンド:参考例
sslconfig

Choose the operation you want to perform:- GUI - Edit GUI HTTPS ssl settings.- INBOUND - Edit Inbound SMTP ssl settings.- OUTBOUND - Edit Outbound SMTP ssl settings.- VERIFY - Verify and show ssl cipher list.[]> guiEnter the GUI HTTPS ssl method you want to use.1. TLS v1.02. TLS v1.13. TLS v1.24. SSL v3[2, 3]> 1Enter the GUI HTTPS ssl cipher you want to use.[AES128:AES256:!SRP:!AESGCM+DH+aRSA:!AESGCM+RSA:!aNULL]>sslconfig settings:GUI HTTPS method: tlsv1_0GUI HTTPS ciphers:
AES128AES256!SRP!AESGCM+DH+aRSA!AESGCM+RSA!aNULL
Inbound SMTP method: tlsv1_1tlsv1_2Inbound SMTP ciphers:
AES128AES256!SRP!AESGCM+DH+aRSA!AESGCM+RSA!aNULL
Outbound SMTP method: tlsv1_1tlsv1_2Outbound SMTP ciphers:
ECDH+aRSAECDH+ECDSADHE+DSS+AESAES128AES256!SRP!AESGCM+DH+aRSA!AESGCM+RSA!aNULL!eNULL
Choose the operation you want to perform:- GUI - Edit GUI HTTPS ssl settings.- INBOUND - Edit Inbound SMTP ssl settings.- OUTBOUND - Edit Outbound SMTP ssl settings.- VERIFY - Verify and show ssl cipher list.[]> inboundEnter the inbound SMTP ssl method you want to use.1. TLS v1.02. TLS v1.13. TLS v1.24. SSL v3[2, 3]> 2Enter the inbound SMTP ssl cipher you want to use.[AES128:AES256:!SRP:!AESGCM+DH+aRSA:!AESGCM+RSA:!aNULL]>sslconfig settings:GUI HTTPS method: tlsv1_0GUI HTTPS ciphers:
AES128AES256!SRP
コマンド:参考例
187
コマンド:参考例
例

!AESGCM+DH+aRSA!AESGCM+RSA!aNULL
Inbound SMTP method: tlsv1_1Inbound SMTP ciphers:
AES128AES256!SRP!AESGCM+DH+aRSA!AESGCM+RSA!aNULL
Outbound SMTP method: tlsv1_1tlsv1_2Outbound SMTP ciphers:
ECDH+aRSAECDH+ECDSADHE+DSS+AESAES128AES256!SRP!AESGCM+DH+aRSA!AESGCM+RSA!aNULL!eNULL
Choose the operation you want to perform:- GUI - Edit GUI HTTPS ssl settings.- INBOUND - Edit Inbound SMTP ssl settings.- OUTBOUND - Edit Outbound SMTP ssl settings.- VERIFY - Verify and show ssl cipher list.[]>
[]>
sslv3config
説明
アプライアンスの SSLv3設定を有効または無効にします。
使用方法
確定:このコマンドは「commit」が必要です。
クラスタ管理:このコマンドは、すべてのマシンモード(クラスタ、グループ、マシン)で使
用できます。
バッチコマンド:このコマンドはバッチ形式をサポートしていません。
例
次の例は、エンドユーザ隔離に対して SSLv3を無効にする方法を示しています。
mail.example.com> sslv3configCurrent SSLv3 Settings:--------------------------------------------------
UPDATER : EnabledWEBSECURITY : Enabled
EUQ : Enabled
コマンド:参考例
188
コマンド:参考例
sslv3config

LDAP : Enabled--------------------------------------------------
Choose the operation you want to perform:- SETUP - Toggle SSLv3 settings.[]> setupChoose the service to toggle SSLv3 settings:1. EUQ Service2. LDAP Service3. Updater Service4. Web Security Service[1]>Do you want to enable SSLv3 for EUQ Service ? [Y]>nChoose the operation you want to perform:- SETUP - Toggle SSLv3 settings.[]>
telnet
説明
リモートホストに接続します。
使用方法
確定:このコマンドに「commit」は必要ありません。
クラスタ管理:このコマンドはマシンモードでのみ使用できます。さらに、このコマンドはロ
グインホスト(ユーザがログインしたマシン)でのみ使用できます。このコマンドを使用する
には、ローカルファイルシステムにアクセスできる必要があります。
バッチコマンド:このコマンドはバッチ形式をサポートしていません。
例
mail3.example.com> telnetPlease select which interface you want to telnet from.1. Auto2. Management (192.168.42.42/24: mail3.example.com)3. PrivateNet (192.168.1.1/24: mail3.example.com)4. PublicNet (192.168.2.1/24: mail3.example.com)[1]> 3Enter the remote hostname or IP.[]> 193.168.1.1Enter the remote port.[25]> 25Trying 193.168.1.1...Connected to 193.168.1.1.Escape character is '^]'.
コマンド:参考例
189
コマンド:参考例
telnet

traceroute
説明
tracerouteコマンドを使用すると、アプライアンスから IPV4を使用するネットワークホストへの接続をテストして、ネットワークのホップに関するルーティングの問題をデバッグできま
す。
使用方法
確定:このコマンドに「commit」は必要ありません。
クラスタ管理:このコマンドはマシンモードでのみ使用できます。さらに、このコマンドはロ
グインホスト(ユーザがログインしたマシン)でのみ使用できます。このコマンドを使用する
には、ローカルファイルシステムにアクセスできる必要があります。
バッチコマンド:このコマンドはバッチ形式をサポートしていません。
例
mail3.example.com> tracerouteWhich interface do you want to trace from?1. Auto2. Management (192.168.42.42/24: mail3.example.com)3. PrivateNet (192.168.1.1/24: mail3.example.com)4. PublicNet (192.168.2.1/24: mail3.example.com)[1]> 1Please enter the host to which you want to trace the route.[]> 10.1.1.1Press Ctrl-C to stop.traceroute to 10.1.1.1 (10.1.1.1), 64 hops max, 44 byte packets1 gateway(192.168.0.1) 0.202 ms 0.173 ms 0.161 ms2 hostname(10.1.1.1) 0.298 ms 0.302 ms 0.291 msmail3.example.com>
traceroute6
説明
traceroute6コマンドを使用すると、アプライアンスから IPV6を使用するネットワークホストへの接続をテストして、ネットワークのホップに関するルーティングの問題をデバッグで
きます。
使用方法
確定:このコマンドに「commit」は必要ありません。
コマンド:参考例
190
コマンド:参考例
traceroute

クラスタ管理:このコマンドはマシンモードでのみ使用できます。さらに、このコマンドはロ
グインホスト(ユーザがログインしたマシン)でのみ使用できます。このコマンドを使用する
には、ローカルファイルシステムにアクセスできる必要があります。
バッチコマンド:このコマンドはバッチ形式をサポートしていません。
例
mail.example.com> traceroute6Which interface do you want to trace from?1. Auto2. D1 (2001:db8::/32: example.com)[1]> 1Please enter the host to which you want to trace the route.[]> example.comPress Ctrl-C to stop.connect: No route to hostvm10esa0031.qa> traceroute6Which interface do you want to trace from?1. Auto2. D1 (2001:db8::/32: example.com)[1]> 2Please enter the host to which you want to trace the route.[]> example.comPress Ctrl-C to stop.traceroute6 to example.com (2606:2800:220:1:248:1893:25c8:1946) from 2001:db8::, 64 hopsmax, 12 byte packetssendto: No route to host1 traceroute6: wrote example.com 12 chars, ret=-1*sendto: No route to hosttraceroute6: wrote example.com 12 chars, ret=-1*sendto: No route to hosttraceroute6: wrote example.com 12 chars, ret=-1
アウトブレイクフィルタここでは、次の CLIコマンドについて説明します。
• outbreakconfig(191ページ)• outbreakflush(192ページ)• outbreakstatus(193ページ)• outbreakupdate(194ページ)
outbreakconfig
説明
outbreakconfigコマンドを使用すると、アウトブレイクフィルタ機能を設定できます。このコマンドを使用して次のアクションを実行できます。
•アウトブレイクフィルタをグローバルにイネーブルにします。•アダプティブルールのスキャンをイネーブルにします。
コマンド:参考例
191
コマンド:参考例
例

•スキャンするファイルの最大サイズを設定します(サイズをバイトで入力することに注意してください)。
•アウトブレイクフィルタのアラートをイネーブルにします。• URLのロギングをイネーブルにします。
使用方法
確定:このコマンドは「commit」が必要です。
クラスタ管理:このコマンドは、すべてのマシンモード(クラスタ、グループ、マシン)で使
用できます。
バッチコマンド:このコマンドはバッチ形式をサポートしていません。
例
mail.example.com> outbreakconfigOutbreak Filters: EnabledChoose the operation you want to perform:- SETUP - Change Outbreak Filters settings.[]> setupOutbreak Filters: EnabledWould you like to use Outbreak Filters? [Y]>Outbreak Filters enabled.Outbreak Filter alerts are sent when outbreak rules cross the threshold (go above orback down below), meaning that new messages ofcertain types could be quarantined or will no longer be quarantined, respectively.Would you like to receive Outbreak Filter alerts? [N]>What is the largest size message Outbreak Filters should scan?[524288]>Do you want to use adaptive rules to compute the threat level of messages? [Y]>Logging of URLs is currently disabled.Do you wish to enable logging of URL's? [N]> YLogging of URLs has been enabled.The Outbreak Filters feature is now globally enabled on the system. You must use the'policyconfig' command in the CLI or the EmailSecurity Manager in the GUI to enable Outbreak Filters for the desired Incoming andOutgoing Mail Policies.Choose the operation you want to perform:- SETUP - Change Outbreak Filters settings.[]>
outbreakflush
説明
キャッシュされている発生ルールをクリアします。
使用方法
確定:このコマンドに「commit」は必要ありません。
クラスタ管理:このコマンドはマシンモードでのみ使用できます。
コマンド:参考例
192
コマンド:参考例
使用方法

バッチコマンド:このコマンドはバッチ形式をサポートしていません。
例
mail3.example.com> outbreakflushWarning - This command removes the current set of Outbreak Filter Rules, leaving yournetwork exposed until the next rule download.Run "outbreakupdate force" command to immediately download Outbreak Filter Rules.Are you sure that you want to clear the current rules? [N]> yCleared the current rules.mail3.example.com>
outbreakstatus
説明
outbreakstatusコマンドは、感染フィルタ機能をイネーブルにするかどうか、発生ルール、現在のしきい値など、感染フィルタ機能の現在の設定を表示します。
使用方法
確定:このコマンドに「commit」は必要ありません。
クラスタ管理:このコマンドはマシンモードでのみ使用できます。
バッチコマンド:このコマンドはバッチ形式をサポートしていません。
例
mail3.example.com> outbreakstatusOutbreak Filters: Enabled
Component Last Update VersionCASE Core Files 26 Jan 2014 06:45 (GMT +00:00) 3.3.1-005CASE Utilities 26 Jan 2014 06:45 (GMT +00:00) 3.3.1-005Outbreak Rules 26 Jan 2014 07:00 (GMT +00:00) 20140126_063240
Threat Outbreak OutbreakLevel Rule Name Rule Description---------------------------------------------------------------------5 OUTBREAK_0002187_03 A reported a MyDoom.BB outbreak.5 OUTBREAK_0005678_00 This configuration file was generated by...3 OUTBREAK_0000578_00 This virus is distributed in pictures of...
Outbreak Filter Rules with higher threat levels pose greater risks.(5 = highest threat, 1 = lowest threat)
Last update: Mon Jan 27 04:36:27 2014
mail3.example.com>
コマンド:参考例
193
コマンド:参考例
例
outbreakupdate
説明
CASEルールおよびエンジンコアの即時更新を要求します。
使用方法
確定:このコマンドに「commit」は必要ありません。
クラスタ管理:このコマンドはマシンモードでのみ使用できます。さらに、このコマンドはロ
グインホスト(ユーザがログインしたマシン)でのみ使用できます。
バッチコマンド:このコマンドはバッチ形式をサポートしていません。
例
elroy.run> outbreakupdateRequesting updates for Outbreak Filter Rules.
ポリシーの適用ここでは、次の CLIコマンドについて説明します。
• dictionaryconfig(194ページ)• exceptionconfig(198ページ)• filters(199ページ)• policyconfig(200ページ)• quarantineconfig(223ページ)• scanconfig(224ページ)• stripheaders(228ページ)• textconfig(228ページ)
dictionaryconfig
説明
コンテンツディクショナリを設定します。
使用方法
確定:このコマンドは「commit」が必要です。
クラスタ管理:このコマンドは、すべてのマシンモード(クラスタ、グループ、マシン)で使
用できます。
コマンド:参考例
194
コマンド:参考例
outbreakupdate
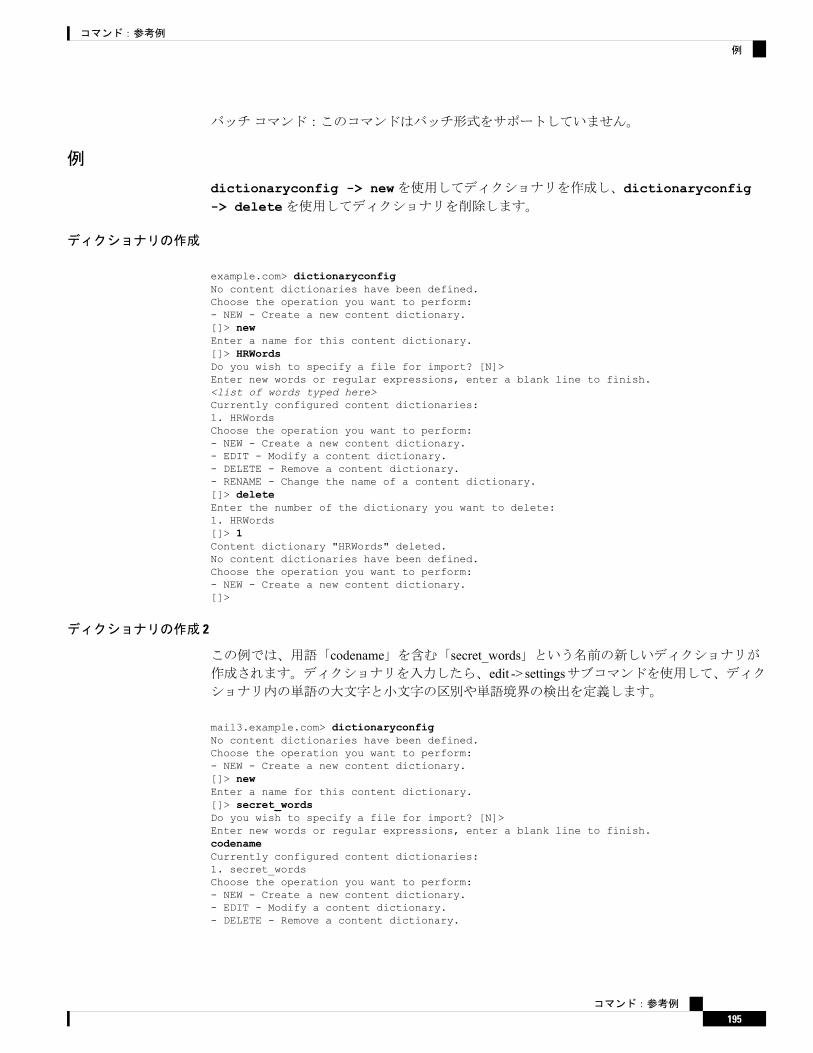
バッチコマンド:このコマンドはバッチ形式をサポートしていません。
例
dictionaryconfig -> newを使用してディクショナリを作成し、dictionaryconfig-> deleteを使用してディクショナリを削除します。
ディクショナリの作成
example.com> dictionaryconfigNo content dictionaries have been defined.Choose the operation you want to perform:- NEW - Create a new content dictionary.[]> newEnter a name for this content dictionary.[]> HRWordsDo you wish to specify a file for import? [N]>Enter new words or regular expressions, enter a blank line to finish.<list of words typed here>Currently configured content dictionaries:1. HRWordsChoose the operation you want to perform:- NEW - Create a new content dictionary.- EDIT - Modify a content dictionary.- DELETE - Remove a content dictionary.- RENAME - Change the name of a content dictionary.[]> deleteEnter the number of the dictionary you want to delete:1. HRWords[]> 1Content dictionary "HRWords" deleted.No content dictionaries have been defined.Choose the operation you want to perform:- NEW - Create a new content dictionary.[]>
ディクショナリの作成 2
この例では、用語「codename」を含む「secret_words」という名前の新しいディクショナリが作成されます。ディクショナリを入力したら、edit -> settingsサブコマンドを使用して、ディクショナリ内の単語の大文字と小文字の区別や単語境界の検出を定義します。
mail3.example.com> dictionaryconfigNo content dictionaries have been defined.Choose the operation you want to perform:- NEW - Create a new content dictionary.[]> newEnter a name for this content dictionary.[]> secret_wordsDo you wish to specify a file for import? [N]>Enter new words or regular expressions, enter a blank line to finish.codenameCurrently configured content dictionaries:1. secret_wordsChoose the operation you want to perform:- NEW - Create a new content dictionary.- EDIT - Modify a content dictionary.- DELETE - Remove a content dictionary.
コマンド:参考例
195
コマンド:参考例
例

- RENAME - Change the name of a content dictionary.[]> editEnter the number of the dictionary you want to edit:1. secret_words[]> 1Choose the operation you want to perform on dictionary 'secret_words':- NEW - Create new entries in this dictionary.- IMPORT - Replace all of the words in this dictionary.- EXPORT - Export the words in this dictionary.- DELETE - Remove an entry in this dictionary.- PRINT - List the entries in this dictionary.- SETTINGS - Change settings for this dictionary.[]> settingsDo you want to ignore case when matching using this dictionary? [Y]>Do you want strings in this dictionary to only match complete words? [Y]>Enter the default encoding to be used for exporting this dictionary:1. US-ASCII2. Unicode (UTF-8)3. Unicode (UTF-16)4. Western European/Latin-1 (ISO 8859-1)5. Western European/Latin-1 (Windows CP1252)6. Traditional Chinese (Big 5)7. Simplified Chinese (GB 2312)8. Simplified Chinese (HZ GB 2312)9. Korean (ISO 2022-KR)10. Korean (KS-C-5601/EUC-KR)11. Japanese (Shift-JIS (X0123))12. Japanese (ISO-2022-JP)13. Japanese (EUC)[2]>Choose the operation you want to perform on dictionary 'secret_words':- NEW - Create new entries in this dictionary.- IMPORT - Replace all of the words in this dictionary.- EXPORT - Export the words in this dictionary.- DELETE - Remove an entry in this dictionary.- PRINT - List the entries in this dictionary.- SETTINGS - Change settings for this dictionary.[]>Currently configured content dictionaries:1. secret_wordsChoose the operation you want to perform:- NEW - Create a new content dictionary.- EDIT - Modify a content dictionary.- DELETE - Remove a content dictionary.- RENAME - Change the name of a content dictionary.[]>mail3.example.com> commitPlease enter some comments describing your changes:[]> Added new dictionary: secret_wordsDo you want to save the current configuration for rollback? [Y]> nChanges committed: Fri May 23 11:42:12 2014 GMT
ディクショナリのインポート
次の例では、dictionaryconfigコマンドを使用して、profanity.txtテキストファイル内の84個の用語を Unicode(UTF-8)としてディクショナリ profanityにインポートします。
mail3.example.com> dictionaryconfigNo content dictionaries have been defined.Choose the operation you want to perform:- NEW - Create a new content dictionary.[]> new
コマンド:参考例
196
コマンド:参考例
ディクショナリのインポート
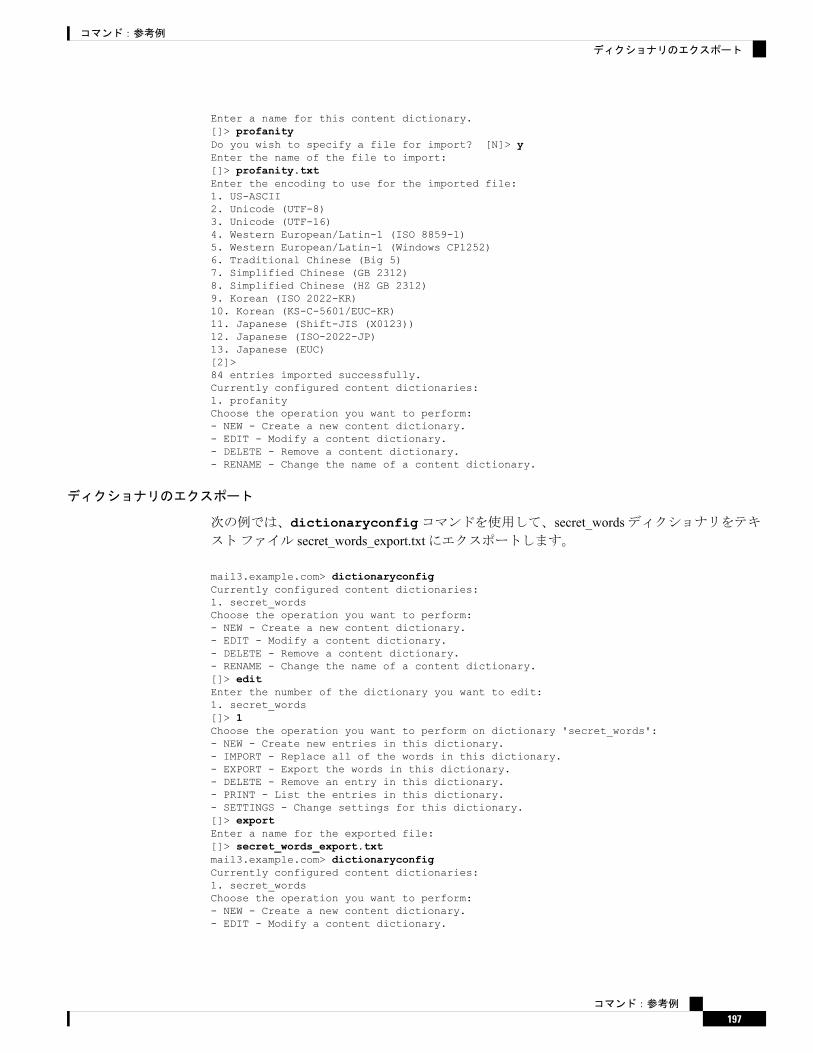
Enter a name for this content dictionary.[]> profanityDo you wish to specify a file for import? [N]> yEnter the name of the file to import:[]> profanity.txtEnter the encoding to use for the imported file:1. US-ASCII2. Unicode (UTF-8)3. Unicode (UTF-16)4. Western European/Latin-1 (ISO 8859-1)5. Western European/Latin-1 (Windows CP1252)6. Traditional Chinese (Big 5)7. Simplified Chinese (GB 2312)8. Simplified Chinese (HZ GB 2312)9. Korean (ISO 2022-KR)10. Korean (KS-C-5601/EUC-KR)11. Japanese (Shift-JIS (X0123))12. Japanese (ISO-2022-JP)13. Japanese (EUC)[2]>84 entries imported successfully.Currently configured content dictionaries:1. profanityChoose the operation you want to perform:- NEW - Create a new content dictionary.- EDIT - Modify a content dictionary.- DELETE - Remove a content dictionary.- RENAME - Change the name of a content dictionary.
ディクショナリのエクスポート
次の例では、dictionaryconfigコマンドを使用して、secret_wordsディクショナリをテキストファイル secret_words_export.txtにエクスポートします。
mail3.example.com> dictionaryconfigCurrently configured content dictionaries:1. secret_wordsChoose the operation you want to perform:- NEW - Create a new content dictionary.- EDIT - Modify a content dictionary.- DELETE - Remove a content dictionary.- RENAME - Change the name of a content dictionary.[]> editEnter the number of the dictionary you want to edit:1. secret_words[]> 1Choose the operation you want to perform on dictionary 'secret_words':- NEW - Create new entries in this dictionary.- IMPORT - Replace all of the words in this dictionary.- EXPORT - Export the words in this dictionary.- DELETE - Remove an entry in this dictionary.- PRINT - List the entries in this dictionary.- SETTINGS - Change settings for this dictionary.[]> exportEnter a name for the exported file:[]> secret_words_export.txtmail3.example.com> dictionaryconfigCurrently configured content dictionaries:1. secret_wordsChoose the operation you want to perform:- NEW - Create a new content dictionary.- EDIT - Modify a content dictionary.
コマンド:参考例
197
コマンド:参考例
ディクショナリのエクスポート

- DELETE - Remove a content dictionary.- RENAME - Change the name of a content dictionary.[]> editEnter the number of the dictionary you want to edit:1. secret_words[]> 1Choose the operation you want to perform on dictionary 'secret_words':- NEW - Create new entries in this dictionary.- IMPORT - Replace all of the words in this dictionary.- EXPORT - Export the words in this dictionary.- DELETE - Remove an entry in this dictionary.- PRINT - List the entries in this dictionary.- SETTINGS - Change settings for this dictionary.[]> exportEnter a name for the exported file:[]> secret_words_export.txt
exceptionconfig
説明
exceptionconfigコマンドを CLIで使用することにより、ドメイン例外テーブルを作成できます。この例では、Eメールアドレス「[email protected]」をドメイン例外テーブルに追加し、ポリシーを「Allow」に設定します。
使用方法
確定:このコマンドは「commit」が必要です。
クラスタ管理:このコマンドは、すべてのマシンモード(クラスタ、グループ、マシン)で使
用できます。
バッチコマンド:このコマンドはバッチ形式をサポートしていません。
例
mail3.example.com> exceptionconfigChoose the operation you want to perform:- NEW - Create a new domain exception table entry[]> newEnter a domain, sub-domain, user, or email address for which you wish toprovide an exception:[]> mail.partner.comAny of the following passes:- @[IP address]Matches any email address with this IP address.
- @domainMatches any email address with this domain.
- @.partial.domainMatches any email address domain ending in this domain.
- user@Matches any email address beginning with user@.
- user@domainMatches entire email address.
Enter a domain, sub-domain, user, or email address for which you wish toprovide an exception:[]> [email protected]
コマンド:参考例
198
コマンド:参考例
exceptionconfig
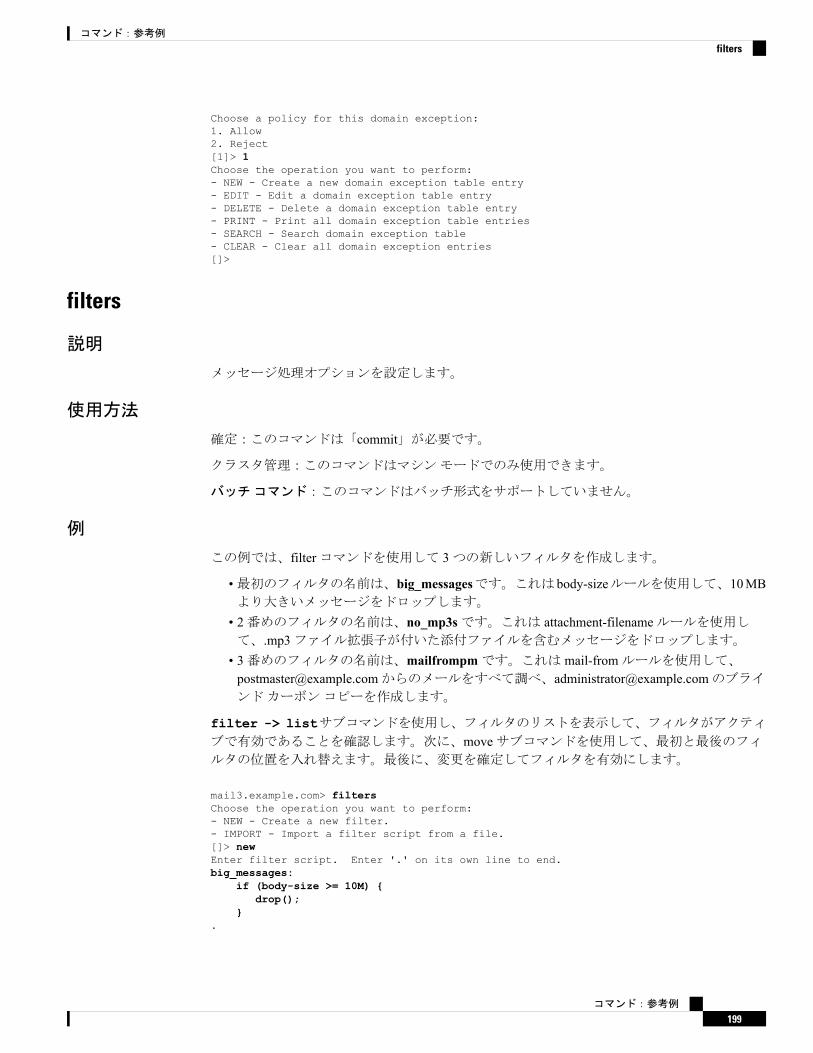
Choose a policy for this domain exception:1. Allow2. Reject[1]> 1Choose the operation you want to perform:- NEW - Create a new domain exception table entry- EDIT - Edit a domain exception table entry- DELETE - Delete a domain exception table entry- PRINT - Print all domain exception table entries- SEARCH - Search domain exception table- CLEAR - Clear all domain exception entries[]>
filters
説明
メッセージ処理オプションを設定します。
使用方法
確定:このコマンドは「commit」が必要です。
クラスタ管理:このコマンドはマシンモードでのみ使用できます。
バッチコマンド:このコマンドはバッチ形式をサポートしていません。
例
この例では、filterコマンドを使用して 3つの新しいフィルタを作成します。
•最初のフィルタの名前は、big_messagesです。これは body-sizeルールを使用して、10MBより大きいメッセージをドロップします。
• 2番めのフィルタの名前は、no_mp3sです。これは attachment-filenameルールを使用して、.mp3ファイル拡張子が付いた添付ファイルを含むメッセージをドロップします。
• 3番めのフィルタの名前は、mailfrompmです。これは mail-fromルールを使用して、[email protected]からのメールをすべて調べ、[email protected]のブラインドカーボンコピーを作成します。
filter -> listサブコマンドを使用し、フィルタのリストを表示して、フィルタがアクティブで有効であることを確認します。次に、moveサブコマンドを使用して、最初と最後のフィルタの位置を入れ替えます。最後に、変更を確定してフィルタを有効にします。
mail3.example.com> filtersChoose the operation you want to perform:- NEW - Create a new filter.- IMPORT - Import a filter script from a file.[]> newEnter filter script. Enter '.' on its own line to end.big_messages:
if (body-size >= 10M) {drop();
}.
コマンド:参考例
199
コマンド:参考例
filters
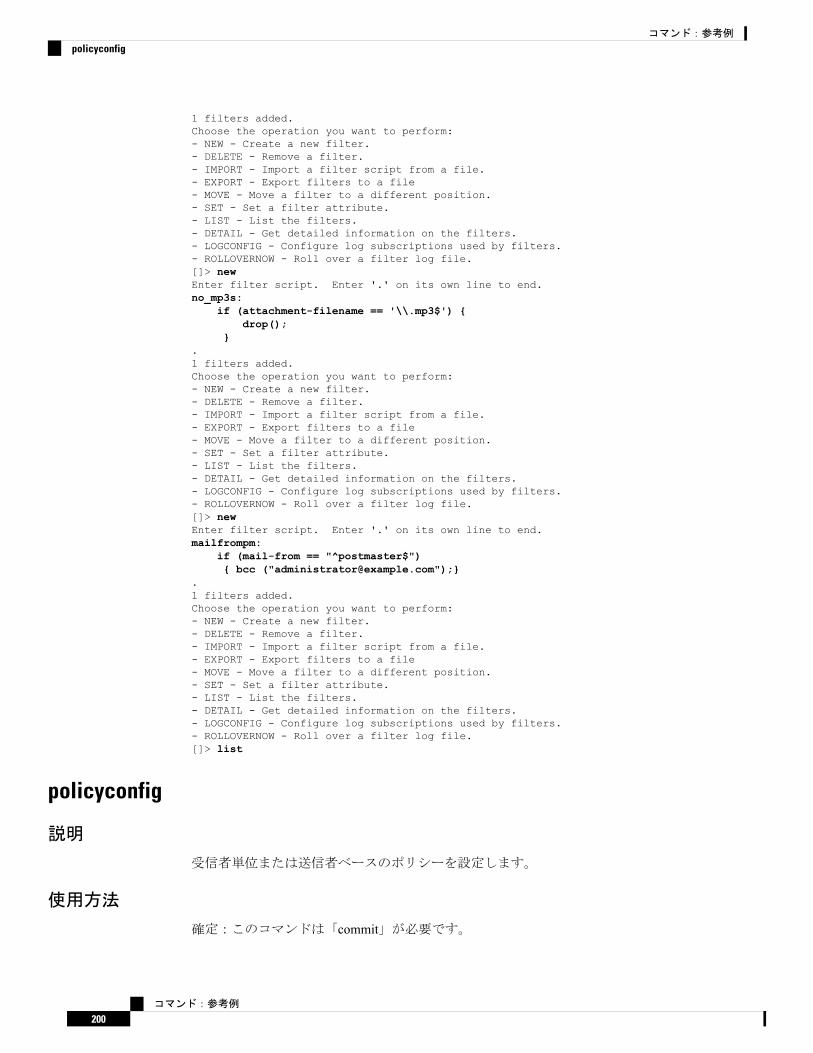
1 filters added.Choose the operation you want to perform:- NEW - Create a new filter.- DELETE - Remove a filter.- IMPORT - Import a filter script from a file.- EXPORT - Export filters to a file- MOVE - Move a filter to a different position.- SET - Set a filter attribute.- LIST - List the filters.- DETAIL - Get detailed information on the filters.- LOGCONFIG - Configure log subscriptions used by filters.- ROLLOVERNOW - Roll over a filter log file.[]> newEnter filter script. Enter '.' on its own line to end.no_mp3s:
if (attachment-filename == '\\.mp3$') {drop();
}.1 filters added.Choose the operation you want to perform:- NEW - Create a new filter.- DELETE - Remove a filter.- IMPORT - Import a filter script from a file.- EXPORT - Export filters to a file- MOVE - Move a filter to a different position.- SET - Set a filter attribute.- LIST - List the filters.- DETAIL - Get detailed information on the filters.- LOGCONFIG - Configure log subscriptions used by filters.- ROLLOVERNOW - Roll over a filter log file.[]> newEnter filter script. Enter '.' on its own line to end.mailfrompm:
if (mail-from == "^postmaster$"){ bcc ("[email protected]");}
.1 filters added.Choose the operation you want to perform:- NEW - Create a new filter.- DELETE - Remove a filter.- IMPORT - Import a filter script from a file.- EXPORT - Export filters to a file- MOVE - Move a filter to a different position.- SET - Set a filter attribute.- LIST - List the filters.- DETAIL - Get detailed information on the filters.- LOGCONFIG - Configure log subscriptions used by filters.- ROLLOVERNOW - Roll over a filter log file.[]> list
policyconfig
説明
受信者単位または送信者ベースのポリシーを設定します。
使用方法
確定:このコマンドは「commit」が必要です。
コマンド:参考例
200
コマンド:参考例
policyconfig

クラスタ管理:このコマンドは、すべてのマシンモード(クラスタ、グループ、マシン)で使
用できます。
バッチコマンド:このコマンドはバッチ形式をサポートしていません。
例
•一括 Eメールまたはソーシャルネットワークの Eメールであると識別されたメッセージをドロップする着信ポリシーの作成(219ページ)
•販売チームのポリシーの作成(203ページ)•エンジニアリングチームのポリシーの作成 (205ページ)• scan_for_confidentialコンテンツフィルタの作成(207ページ)• no_mp3sおよび ex_employeeコンテンツフィルタの作成(210ページ)•特定のポリシーに対するコンテンツフィルタのイネーブル化(214ページ)•デフォルトの発信ポリシーの DLPポリシー(218ページ)•スパムメッセージをドロップし、陽性と疑わしいスパムメッセージをアーカイブする着信メールポリシーの作成(201ページ)
• AMPエンジンによってスキャン不能としてマークされたメッセージを処理する着信ポリシーの設定(221ページ)
スパムメッセージをドロップし、陽性と疑わしいスパムメッセージをアーカイブする着信メールポリシーの作成
この例では、policyconfig -> edit -> antispamサブコマンドを使用して、デフォルトの着信メールポリシーのスパム対策設定を編集します(これと同じ設定が電子メールセキュリティマネー
ジャ機能の GUIにもあります)。
•まず、スパムとして陽性判定されたメッセージはアーカイブの対象から除外され、ドロップされます。
•スパムの疑いがあるメッセージはアーカイブ対象となります。このようなメッセージは、quarantine.example.comというサーバにインストールされたスパム隔離にも送信されます。件名行の先頭にテキスト [quarantined: possible spam]が追加され、このような疑わしいメッセージにはX-quarantined: trueという特別なヘッダーが追加されます。このシナリオでは、管理者およびエンドユーザは隔離でないかどうかを確認でき、管理者は必要に応じて疑わ
しいスパムのしきい値を調整できます。
最後に、変更を確定します。
mail3.example.com> policyconfigWould you like to configure Incoming or Outgoing Mail Policies?1. Incoming2. Outgoing[1]> 1Incoming Mail Policy Configuration
OutbreakFilters:-----------
ContentFilter:----------
Graymail:----------
Advanced MalwareProtection:----------
Anti-Virus:----------
Anti-Spam:----------
Name:-----
EnabledOffOffN/AMcafeeIronportDEFAULT
コマンド:参考例
201
コマンド:参考例
例
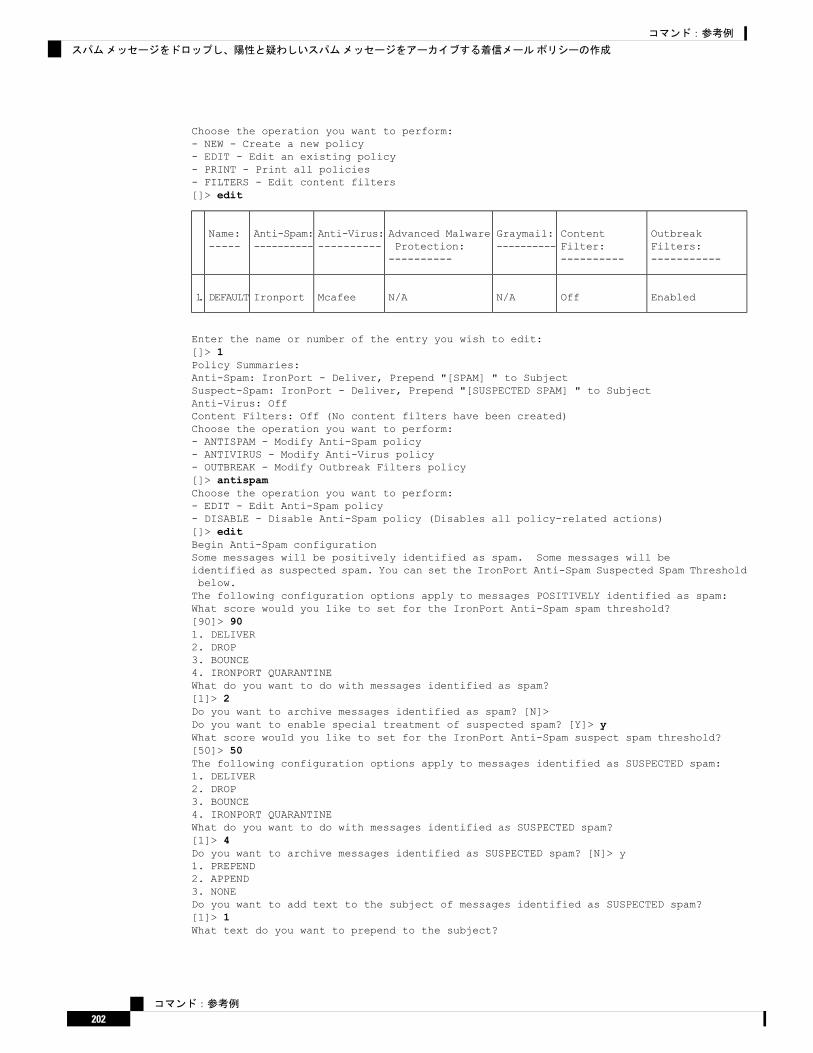
Choose the operation you want to perform:- NEW - Create a new policy- EDIT - Edit an existing policy- PRINT - Print all policies- FILTERS - Edit content filters[]> edit
OutbreakFilters:-----------
ContentFilter:----------
Graymail:----------
Advanced MalwareProtection:----------
Anti-Virus:----------
Anti-Spam:----------
Name:-----
EnabledOffN/AN/AMcafeeIronportDEFAULT1.
Enter the name or number of the entry you wish to edit:[]> 1Policy Summaries:Anti-Spam: IronPort - Deliver, Prepend "[SPAM] " to SubjectSuspect-Spam: IronPort - Deliver, Prepend "[SUSPECTED SPAM] " to SubjectAnti-Virus: OffContent Filters: Off (No content filters have been created)Choose the operation you want to perform:- ANTISPAM - Modify Anti-Spam policy- ANTIVIRUS - Modify Anti-Virus policy- OUTBREAK - Modify Outbreak Filters policy[]> antispamChoose the operation you want to perform:- EDIT - Edit Anti-Spam policy- DISABLE - Disable Anti-Spam policy (Disables all policy-related actions)[]> editBegin Anti-Spam configurationSome messages will be positively identified as spam. Some messages will beidentified as suspected spam. You can set the IronPort Anti-Spam Suspected Spam Thresholdbelow.The following configuration options apply to messages POSITIVELY identified as spam:What score would you like to set for the IronPort Anti-Spam spam threshold?[90]> 901. DELIVER2. DROP3. BOUNCE4. IRONPORT QUARANTINEWhat do you want to do with messages identified as spam?[1]> 2Do you want to archive messages identified as spam? [N]>Do you want to enable special treatment of suspected spam? [Y]> yWhat score would you like to set for the IronPort Anti-Spam suspect spam threshold?[50]> 50The following configuration options apply to messages identified as SUSPECTED spam:1. DELIVER2. DROP3. BOUNCE4. IRONPORT QUARANTINEWhat do you want to do with messages identified as SUSPECTED spam?[1]> 4Do you want to archive messages identified as SUSPECTED spam? [N]> y1. PREPEND2. APPEND3. NONEDo you want to add text to the subject of messages identified as SUSPECTED spam?[1]> 1What text do you want to prepend to the subject?
コマンド:参考例
202
コマンド:参考例
スパムメッセージをドロップし、陽性と疑わしいスパムメッセージをアーカイブする着信メールポリシーの作成

[[SUSPECTED SPAM] ]> [quarantined: possible spam]Do you want to add a custom header to messages identified as SUSPECTED spam? [N]> yEnter the name of the header:[]> X-quarantinedEnter the text for the content of the header:[]> trueAnti-Spam configuration completePolicy Summaries:Anti-Spam: IronPort - DropSuspect-Spam: IronPort - Quarantine - Archiving copies of the original message.Anti-Virus: McAfee - Scan and CleanContent Filters: Off (No content filters have been created)Outbreak Filters: Enabled. No bypass extensions.Choose the operation you want to perform:- ANTISPAM - Modify Anti-Spam policy- ANTIVIRUS - Modify Anti-Virus policy- OUTBREAK - Modify Outbreak Filters policy[]>
OutbreakFilters:-----------
ContentFilter:----------
Graymail:----------
Advanced MalwareProtection:----------
Anti-Virus:----------
Anti-Spam:----------
Name:-----
EnabledOffN/AN/AMcafeeIronportDEFAULT
Choose the operation you want to perform:- NEW - Create a new policy- EDIT - Edit an existing policy- PRINT - Print all policies- FILTERS - Edit content filters[]>mail3.example.com> commitPlease enter some comments describing your changes:[]> configured anti-spam for Incoming Default PolicyDo you want to save the current configuration for rollback? [Y]> nChanges committed: Fri May 23 11:42:12 2014 GMT
販売チームのポリシーの作成
Incoming Mail Policy Configuration
OutbreakFilters:-----------
ContentFilter:----------
Graymail:----------
Advanced MalwareProtection:----------
Anti-Virus:----------
Anti-Spam:----------
Name:-----
EnabledOffN/AN/AMcafeeIronportDEFAULT
Choose the operation you want to perform:- NEW - Create a new policy- EDIT - Edit an existing policy- PRINT - Print all policies- FILTERS - Edit content filters[]> newEnter the name for this policy:[]> sales_teamBegin entering policy members. The following types of entries are allowed:
コマンド:参考例
203
コマンド:参考例
販売チームのポリシーの作成

Username entries such as joe@, domain entries such as @example.com, sub-domainentries such as @.example.com, LDAP group memberships such as ldap(Engineers)Enter a member for this policy:[]> ldap(sales)Please select an LDAP group query:1. PublicLDAP.ldapgroup[1]> 1Is this entry a recipient or a sender?1. Recipient2. Sender[1]> 1Add another member? [Y]> nWould you like to enable Anti-Spam support? [Y]> yUse the policy table default? [Y]> nBegin Anti-Spam configurationSome messages will be positively identified as spam. Some messages will beidentified as suspected spam. You can set the IronPort Anti-Spam Suspected Spam Thresholdbelow.The following configuration options apply to messages POSITIVELY identified as spam:What score would you like to set for the IronPort Anti-Spam spam threshold?[90]> 901. DELIVER2. DROP3. BOUNCE4. IRONPORT QUARANTINEWhat do you want to do with messages identified as spam?[1]> 2Do you want to archive messages identified as spam? [N]> nDo you want to enable special treatment of suspected spam? [Y]> yWhat score would you like to set for the IronPort Anti-Spam suspect spamthreshold?[50]> 50The following configuration options apply to messages identified as SUSPECTEDspam:1. DELIVER2. DROP3. BOUNCE4. IRONPORT QUARANTINEWhat do you want to do with messages identified as SUSPECTED spam?[1]> 4Do you want to archive messages identified as SUSPECTED spam? [N]> n1. PREPEND2. APPEND3. NONEDo you want to add text to the subject of messages identified as SUSPECTEDspam?[1]> 3Do you want to add a custom header to messages identified as SUSPECTED spam? [N]> nAnti-Spam configuration completeWould you like to enable Anti-Virus support? [Y]> yUse the policy table default? [Y]> yWould you like to enable Outbreak Filters for this policy? [Y]> yUse the policy table default? [Y]> yIncoming Mail Policy Configuration
OutbreakFilters:-----------
ContentFilter:----------
Graymail:----------
Advanced MalwareProtection:----------
Anti-Virus:----------
Anti-Spam:----------
Name:-----
DefaultDefaultDefaultDefaultDefaultIronPortsales_team
コマンド:参考例
204
コマンド:参考例
販売チームのポリシーの作成
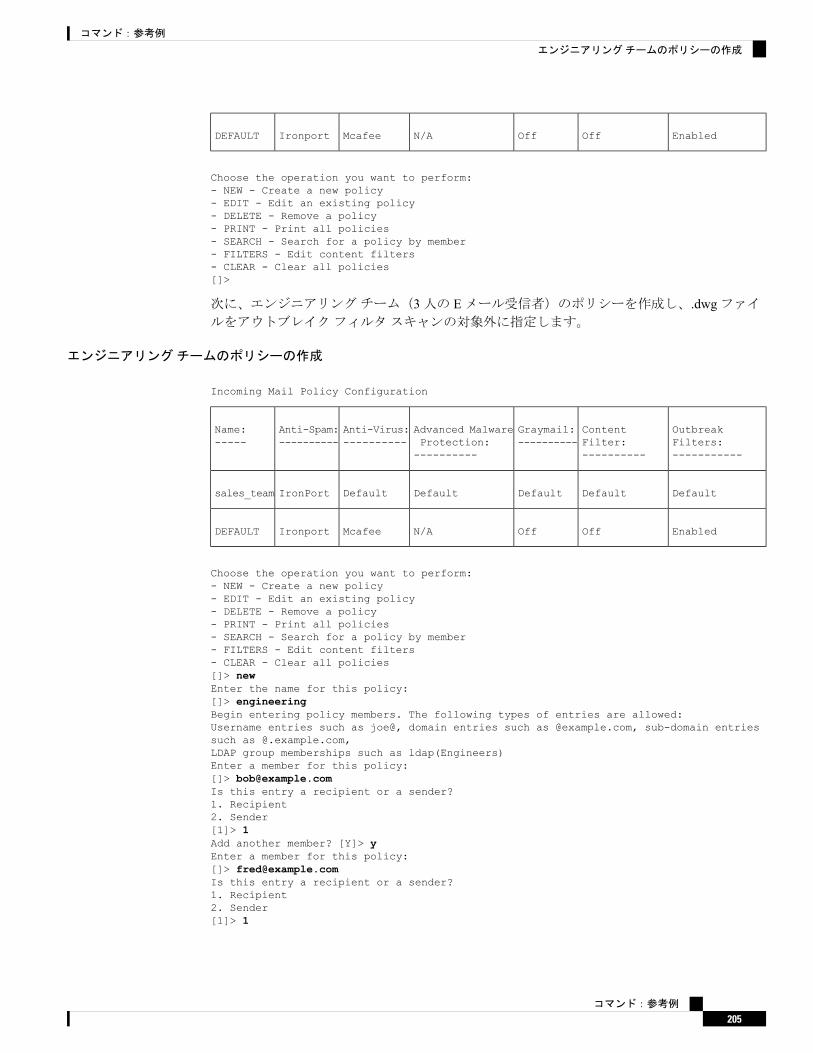
EnabledOffOffN/AMcafeeIronportDEFAULT
Choose the operation you want to perform:- NEW - Create a new policy- EDIT - Edit an existing policy- DELETE - Remove a policy- PRINT - Print all policies- SEARCH - Search for a policy by member- FILTERS - Edit content filters- CLEAR - Clear all policies[]>
次に、エンジニアリングチーム(3人の Eメール受信者)のポリシーを作成し、.dwgファイルをアウトブレイクフィルタスキャンの対象外に指定します。
エンジニアリングチームのポリシーの作成
Incoming Mail Policy Configuration
OutbreakFilters:-----------
ContentFilter:----------
Graymail:----------
Advanced MalwareProtection:----------
Anti-Virus:----------
Anti-Spam:----------
Name:-----
DefaultDefaultDefaultDefaultDefaultIronPortsales_team
EnabledOffOffN/AMcafeeIronportDEFAULT
Choose the operation you want to perform:- NEW - Create a new policy- EDIT - Edit an existing policy- DELETE - Remove a policy- PRINT - Print all policies- SEARCH - Search for a policy by member- FILTERS - Edit content filters- CLEAR - Clear all policies[]> newEnter the name for this policy:[]> engineeringBegin entering policy members. The following types of entries are allowed:Username entries such as joe@, domain entries such as @example.com, sub-domain entriessuch as @.example.com,LDAP group memberships such as ldap(Engineers)Enter a member for this policy:[]> [email protected] this entry a recipient or a sender?1. Recipient2. Sender[1]> 1Add another member? [Y]> yEnter a member for this policy:[]> [email protected] this entry a recipient or a sender?1. Recipient2. Sender[1]> 1
コマンド:参考例
205
コマンド:参考例
エンジニアリングチームのポリシーの作成

Add another member? [Y]> yEnter a member for this policy:[]> [email protected] this entry a recipient or a sender?1. Recipient2. Sender[1]> 1Add another member? [Y]> nWould you like to enable Anti-Spam support? [Y]> yUse the policy table default? [Y]> yWould you like to enable Anti-Virus support? [Y]> yUse the policy table default? [Y]> yWould you like to enable Outbreak Filters for this policy? [Y]> yUse the policy table default? [Y]> nWould you like to modify the list of file extensions that bypassOutbreak Filters? [N]> yChoose the operation you want to perform:- NEW - Add a file extension[]> newEnter a file extension:[]> dwgChoose the operation you want to perform:- NEW - Add a file extension- DELETE - Delete a file extension- PRINT - Display all file extensions- CLEAR - Clear all file extensions[]> printThe following file extensions will bypass Outbreak Filter processing:dwgChoose the operation you want to perform:- NEW - Add a file extension- DELETE - Delete a file extension- PRINT - Display all file extensions- CLEAR - Clear all file extensions[]>Incoming Mail Policy Configuration
OutbreakFilters:-----------
ContentFilter:----------
Graymail:----------
AdvancedMalwareProtection:----------
Anti-Virus:----------
Anti-Spam:----------
Name:-----
DefaultDefaultDefaultDefaultDefaultIronPortsales_team
EnabledDefaultDefaultDefaultDefaultDefaultengineering
EnabledOffOffN/AMcafeeIronportDEFAULT
Choose the operation you want to perform:- NEW - Create a new policy- EDIT - Edit an existing policy- DELETE - Remove a policy- PRINT - Print all policies- SEARCH - Search for a policy by member- MOVE - Move the position of a policy- FILTERS - Edit content filters- CLEAR - Clear all policies[]>
コマンド:参考例
206
コマンド:参考例
エンジニアリングチームのポリシーの作成

次に、[受信メール概要ポリシー(Incoming Mail Overview policy)]テーブルで使用する 3つの新しいコンテンツフィルタを作成します。
CLIでは、policyconfigコマンドの filtersサブコマンドは [受信コンテンツフィルタ(IncomingContent Filters)] GUIページと同じ機能を持ちます。CLIでコンテンツフィルタを作成するときには、saveサブコマンドを使用してフィルタを保存し、policyconfigコマンドに戻る必要があります。
まず、scan_for_confidentialコンテンツフィルタを作成します。
scan_for_confidentialコンテンツフィルタの作成
Incoming Mail Policy Configuration
OutbreakFilters:-----------
ContentFilter:----------
Graymail:----------
AdvancedMalwareProtection:----------
Anti-Virus:----------
Anti-Spam:----------
Name:-----
DefaultDefaultDefaultDefaultDefaultIronPortsales_team
EnabledDefaultDefaultDefaultDefaultDefaultengineering
EnabledOffOffN/AMcafeeIronportDEFAULT
Choose the operation you want to perform:- NEW - Create a new policy- EDIT - Edit an existing policy- DELETE - Remove a policy- PRINT - Print all policies- SEARCH - Search for a policy by member- MOVE - Move the position of a policy- FILTERS - Edit content filters- CLEAR - Clear all policies[]> filtersNo filters defined.Choose the operation you want to perform:- NEW - Create a new filter[]> newEnter a name for this filter:[]> scan_for_confidentialEnter a description or comment for this filter (optional):[]> scan all incoming mail for the string 'confidential'Filter Name: scan_for_confidentialConditions:Always RunActions:No actions defined yet.Description:scan all incoming mail for the string 'confidential'Choose the operation you want to perform:- RENAME - Rename this filter- DESC - Edit filter description- ADD - Add condition or action[]> add
コマンド:参考例
207
コマンド:参考例
scan_for_confidentialコンテンツフィルタの作成

1. Condition2. Action[1]> 11. Message Body Contains2. Only Body Contains (Attachments are not scanned)3. Message Body Size4. Subject Header5. Other Header6. Attachment Contains7. Attachment File Type8. Attachment Name9. Attachment MIME Type10. Attachment Protected11. Attachment Unprotected12. Attachment Corrupt13. Envelope Recipient Address14. Envelope Recipient in LDAP Group15. Envelope Sender Address16. Envelope Sender in LDAP Group17. Reputation Score18. Remote IP19. DKIM authentication result20. SPF verification result[1]> 1Enter regular expression or smart identifier to search message contents for:[]> confidentialThreshold required for match:[1]> 1Filter Name: scan_for_confidentialConditions:body-contains("confidential", 1)Actions:No actions defined yet.Description:scan all incoming mail for the string 'confidential'Choose the operation you want to perform:- RENAME - Rename this filter- DESC - Edit filter description- ADD - Add condition or action- DELETE - Delete condition or action[]> add1. Condition2. Action[1]> 21. Bcc2. Notify3. Redirect To Alternate Email Address4. Redirect To Alternate Host5. Insert A Custom Header6. Insert A Message Tag7. Strip A Header8. Send From Specific IP Interface9. Drop Attachments By Content10. Drop Attachments By Name11. Drop Attachments By MIME Type12. Drop Attachments By File Type13. Drop Attachments By Size14. Send To System Quarantine15. Duplicate And Send To System Quarantine16. Add Log Entry17. Drop (Final Action)18. Bounce (Final Action)19. Skip Remaining Content Filters (Final Action)20. Encrypt (Final Action)
コマンド:参考例
208
コマンド:参考例
scan_for_confidentialコンテンツフィルタの作成

21. Encrypt on Delivery22. Skip Outbreak Filters check[1]> 1Enter the email address(es) to send the Bcc message to:[]> [email protected] you want to edit the subject line used on the Bcc message? [N]> yEnter the subject to use:[$Subject]> [message matched confidential filter]Do you want to edit the return path of the Bcc message? [N]> nFilter Name: scan_for_confidentialConditions:body-contains("confidential", 1)Actions:bcc ("[email protected]", "[message matched confidential filter]")Description:scan all incoming mail for the string 'confidential'Choose the operation you want to perform:- RENAME - Rename this filter- DESC - Edit filter description- ADD - Add condition or action- DELETE - Delete condition or action- SAVE - Save filter[]> add1. Condition2. Action[1]> 21. Bcc2. Notify3. Redirect To Alternate Email Address4. Redirect To Alternate Host5. Insert A Custom Header6. Insert A Message Tag7. Strip A Header8. Send From Specific IP Interface9. Drop Attachments By Content10. Drop Attachments By Name11. Drop Attachments By MIME Type12. Drop Attachments By File Type13. Drop Attachments By Size14. Send To System Quarantine15. Duplicate And Send To System Quarantine16. Add Log Entry17. Drop (Final Action)18. Bounce (Final Action)19. Skip Remaining Content Filters (Final Action)20. Encrypt (Final Action)21. Encrypt on Delivery22. Skip Outbreak Filters check[1]> 141. Policy[1]> 1Filter Name: scan_for_confidentialConditions:body-contains("confidential", 1)Actions:bcc ("[email protected]", "[message matched confidential filter]")quarantine ("Policy")Description:scan all incoming mail for the string 'confidential'Choose the operation you want to perform:- RENAME - Rename this filter- DESC - Edit filter description- ADD - Add condition or action- DELETE - Delete condition or action
コマンド:参考例
209
コマンド:参考例
scan_for_confidentialコンテンツフィルタの作成
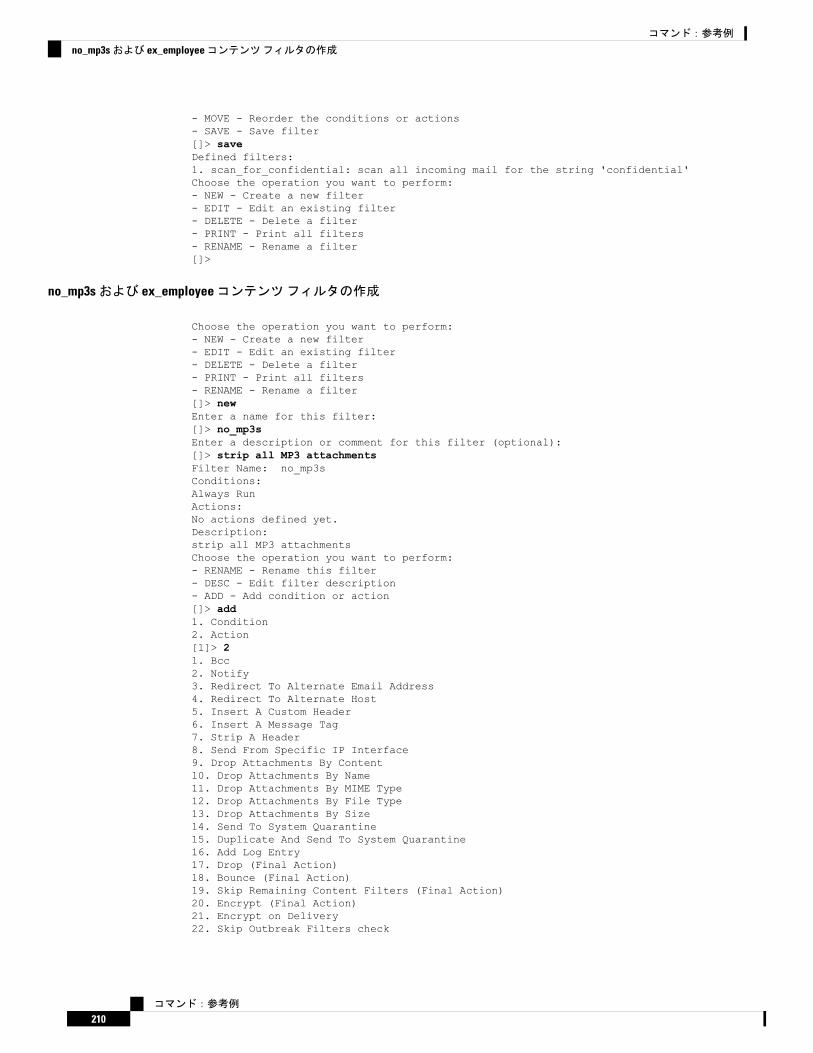
- MOVE - Reorder the conditions or actions- SAVE - Save filter[]> saveDefined filters:1. scan_for_confidential: scan all incoming mail for the string 'confidential'Choose the operation you want to perform:- NEW - Create a new filter- EDIT - Edit an existing filter- DELETE - Delete a filter- PRINT - Print all filters- RENAME - Rename a filter[]>
no_mp3sおよび ex_employeeコンテンツフィルタの作成
Choose the operation you want to perform:- NEW - Create a new filter- EDIT - Edit an existing filter- DELETE - Delete a filter- PRINT - Print all filters- RENAME - Rename a filter[]> newEnter a name for this filter:[]> no_mp3sEnter a description or comment for this filter (optional):[]> strip all MP3 attachmentsFilter Name: no_mp3sConditions:Always RunActions:No actions defined yet.Description:strip all MP3 attachmentsChoose the operation you want to perform:- RENAME - Rename this filter- DESC - Edit filter description- ADD - Add condition or action[]> add1. Condition2. Action[1]> 21. Bcc2. Notify3. Redirect To Alternate Email Address4. Redirect To Alternate Host5. Insert A Custom Header6. Insert A Message Tag7. Strip A Header8. Send From Specific IP Interface9. Drop Attachments By Content10. Drop Attachments By Name11. Drop Attachments By MIME Type12. Drop Attachments By File Type13. Drop Attachments By Size14. Send To System Quarantine15. Duplicate And Send To System Quarantine16. Add Log Entry17. Drop (Final Action)18. Bounce (Final Action)19. Skip Remaining Content Filters (Final Action)20. Encrypt (Final Action)21. Encrypt on Delivery22. Skip Outbreak Filters check
コマンド:参考例
210
コマンド:参考例
no_mp3sおよび ex_employeeコンテンツフィルタの作成

[1]> 12Enter the file type to strip:[]> mp3Do you want to enter specific text to use in place of any stripped attachments?[N]> nFilter Name: no_mp3sConditions:Always RunActions:drop-attachments-by-filetype("mp3")Description:strip all MP3 attachmentsChoose the operation you want to perform:- RENAME - Rename this filter- DESC - Edit filter description- ADD - Add condition or action- SAVE - Save filter[]> saveDefined filters:1. scan_for_confidential: scan all incoming mail for the string 'confidential'2. no_mp3s: strip all MP3 attachmentsChoose the operation you want to perform:- NEW - Create a new filter- EDIT - Edit an existing filter- DELETE - Delete a filter- PRINT - Print all filters- MOVE - Reorder a filter- RENAME - Rename a filter[]> newEnter a name for this filter:[]> ex_employeeEnter a description or comment for this filter (optional):[]> bounce messages intended for DougFilter Name: ex_employeeConditions:Always RunActions:No actions defined yet.Description:bounce messages intended for DougChoose the operation you want to perform:- RENAME - Rename this filter- DESC - Edit filter description- ADD - Add condition or action[]> add1. Condition2. Action[1]> 11. Message Body Contains2. Only Body Contains (Attachments are not scanned)3. Message Body Size4. Subject Header5. Other Header6. Attachment Contains7. Attachment File Type8. Attachment Name9. Attachment MIME Type10. Attachment Protected11. Attachment Unprotected12. Attachment Corrupt13. Envelope Recipient Address14. Envelope Recipient in LDAP Group15. Envelope Sender Address16. Envelope Sender in LDAP Group17. Reputation Score
コマンド:参考例
211
コマンド:参考例
no_mp3sおよび ex_employeeコンテンツフィルタの作成

18. Remote IP19. DKIM authentication result20. SPF verification result[1]> 13Enter regular expression to search Recipient address for:[]> dougFilter Name: ex_employeeConditions:rcpt-to == "doug"Actions:No actions defined yet.Description:bounce messages intended for DougChoose the operation you want to perform:- RENAME - Rename this filter- DESC - Edit filter description- ADD - Add condition or action- DELETE - Delete condition or action[]> add1. Condition2. Action[1]> 21. Bcc2. Notify3. Redirect To Alternate Email Address4. Redirect To Alternate Host5. Insert A Custom Header6. Insert A Message Tag7. Strip A Header8. Send From Specific IP Interface9. Drop Attachments By Content10. Drop Attachments By Name11. Drop Attachments By MIME Type12. Drop Attachments By File Type13. Drop Attachments By Size14. Send To System Quarantine15. Duplicate And Send To System Quarantine16. Add Log Entry17. Drop (Final Action)18. Bounce (Final Action)19. Skip Remaining Content Filters (Final Action)20. Encrypt (Final Action)21. Encrypt on Delivery22. Skip Outbreak Filters check[1]> 2Enter the email address(es) to send the notification to:[]> [email protected] you want to edit the subject line used on the notification? [N]> yEnter the subject to use:[]> message bounced for ex-employee of example.comDo you want to edit the return path of the notification? [N]> nDo you want to include a copy of the original message as an attachment to thenotification? [N]> yFilter Name: ex_employeeConditions:rcpt-to == "doug"Actions:notify-copy ("[email protected]", "message bounced for ex-employee ofexample.com")Description:bounce messages intended for DougChoose the operation you want to perform:- RENAME - Rename this filter- DESC - Edit filter description
コマンド:参考例
212
コマンド:参考例
no_mp3sおよび ex_employeeコンテンツフィルタの作成

- ADD - Add condition or action- DELETE - Delete condition or action- SAVE - Save filter[]> add1. Condition2. Action[1]> 21. Bcc2. Notify3. Redirect To Alternate Email Address4. Redirect To Alternate Host5. Insert A Custom Header6. Insert A Message Tag7. Strip A Header8. Send From Specific IP Interface9. Drop Attachments By Content10. Drop Attachments By Name11. Drop Attachments By MIME Type12. Drop Attachments By File Type13. Drop Attachments By Size14. Send To System Quarantine15. Duplicate And Send To System Quarantine16. Add Log Entry17. Drop (Final Action)18. Bounce (Final Action)19. Skip Remaining Content Filters (Final Action)20. Encrypt (Final Action)21. Encrypt on Delivery22. Skip Outbreak Filters check[1]> 18Filter Name: ex_employeeConditions:rcpt-to == "doug"Actions:notify-copy ("[email protected]", "message bounced for ex-employee ofexample.com")bounce()Description:bounce messages intended for DougChoose the operation you want to perform:- RENAME - Rename this filter- DESC - Edit filter description- ADD - Add condition or action- DELETE - Delete condition or action- SAVE - Save filter[]> saveDefined filters:1. scan_for_confidential: scan all incoming mail for the string 'confidential'2. no_mp3s: strip all MP3 attachments3. ex_employee: bounce messages intended for DougChoose the operation you want to perform:- NEW - Create a new filter- EDIT - Edit an existing filter- DELETE - Delete a filter- PRINT - Print all filters- MOVE - Reorder a filter- RENAME - Rename a filter[]>Incoming Mail Policy Configuration
コマンド:参考例
213
コマンド:参考例
no_mp3sおよび ex_employeeコンテンツフィルタの作成
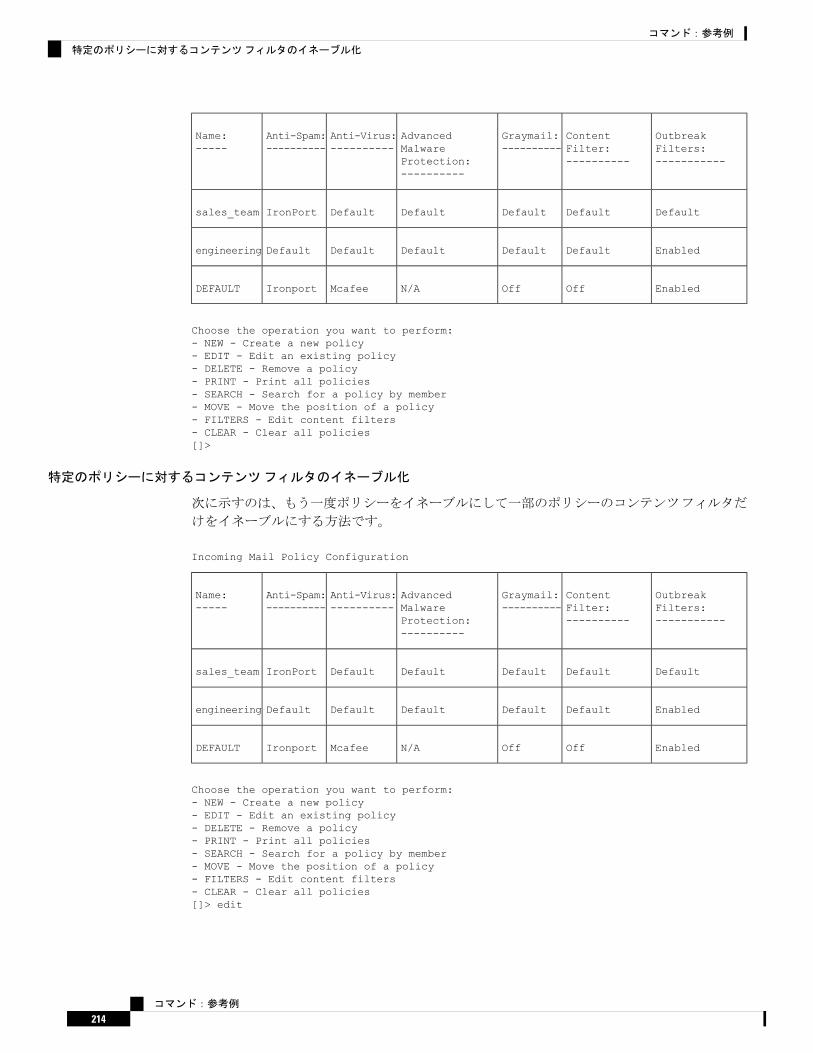
OutbreakFilters:-----------
ContentFilter:----------
Graymail:----------
AdvancedMalwareProtection:----------
Anti-Virus:----------
Anti-Spam:----------
Name:-----
DefaultDefaultDefaultDefaultDefaultIronPortsales_team
EnabledDefaultDefaultDefaultDefaultDefaultengineering
EnabledOffOffN/AMcafeeIronportDEFAULT
Choose the operation you want to perform:- NEW - Create a new policy- EDIT - Edit an existing policy- DELETE - Remove a policy- PRINT - Print all policies- SEARCH - Search for a policy by member- MOVE - Move the position of a policy- FILTERS - Edit content filters- CLEAR - Clear all policies[]>
特定のポリシーに対するコンテンツフィルタのイネーブル化
次に示すのは、もう一度ポリシーをイネーブルにして一部のポリシーのコンテンツフィルタだ
けをイネーブルにする方法です。
Incoming Mail Policy Configuration
OutbreakFilters:-----------
ContentFilter:----------
Graymail:----------
AdvancedMalwareProtection:----------
Anti-Virus:----------
Anti-Spam:----------
Name:-----
DefaultDefaultDefaultDefaultDefaultIronPortsales_team
EnabledDefaultDefaultDefaultDefaultDefaultengineering
EnabledOffOffN/AMcafeeIronportDEFAULT
Choose the operation you want to perform:- NEW - Create a new policy- EDIT - Edit an existing policy- DELETE - Remove a policy- PRINT - Print all policies- SEARCH - Search for a policy by member- MOVE - Move the position of a policy- FILTERS - Edit content filters- CLEAR - Clear all policies[]> edit
コマンド:参考例
214
コマンド:参考例
特定のポリシーに対するコンテンツフィルタのイネーブル化
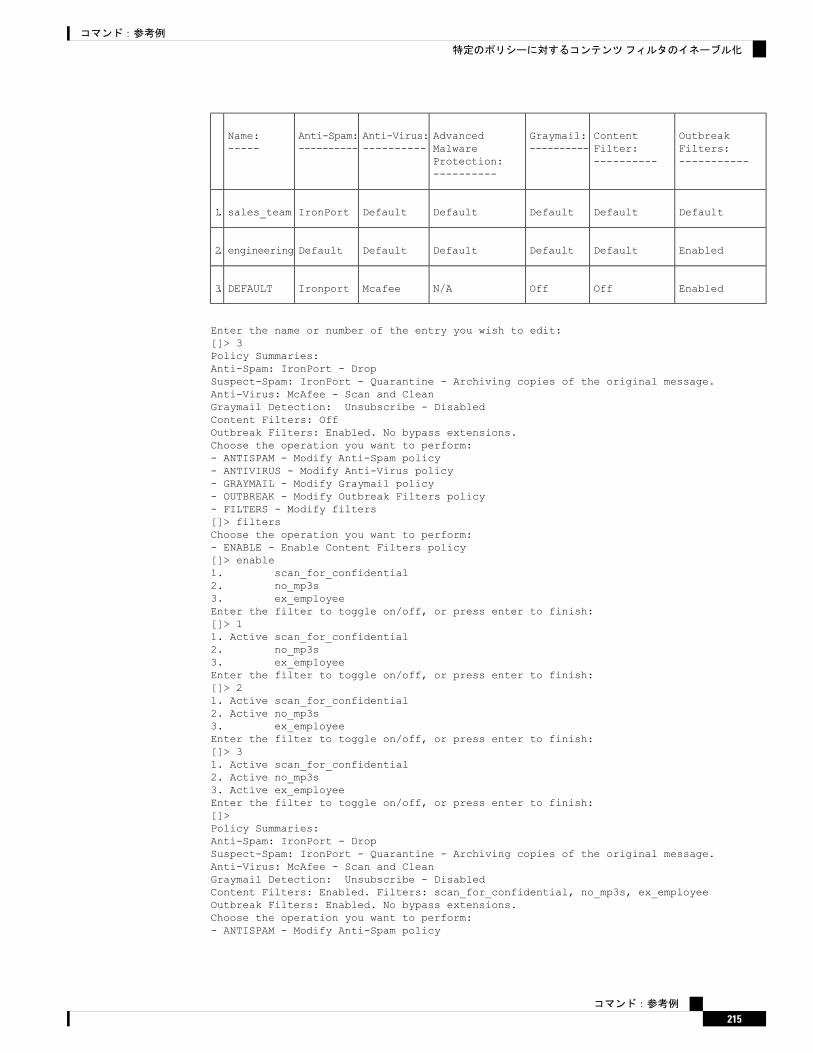
OutbreakFilters:-----------
ContentFilter:----------
Graymail:----------
AdvancedMalwareProtection:----------
Anti-Virus:----------
Anti-Spam:----------
Name:-----
DefaultDefaultDefaultDefaultDefaultIronPortsales_team1.
EnabledDefaultDefaultDefaultDefaultDefaultengineering2.
EnabledOffOffN/AMcafeeIronportDEFAULT3.
Enter the name or number of the entry you wish to edit:[]> 3Policy Summaries:Anti-Spam: IronPort - DropSuspect-Spam: IronPort - Quarantine - Archiving copies of the original message.Anti-Virus: McAfee - Scan and CleanGraymail Detection: Unsubscribe - DisabledContent Filters: OffOutbreak Filters: Enabled. No bypass extensions.Choose the operation you want to perform:- ANTISPAM - Modify Anti-Spam policy- ANTIVIRUS - Modify Anti-Virus policy- GRAYMAIL - Modify Graymail policy- OUTBREAK - Modify Outbreak Filters policy- FILTERS - Modify filters[]> filtersChoose the operation you want to perform:- ENABLE - Enable Content Filters policy[]> enable1. scan_for_confidential2. no_mp3s3. ex_employeeEnter the filter to toggle on/off, or press enter to finish:[]> 11. Active scan_for_confidential2. no_mp3s3. ex_employeeEnter the filter to toggle on/off, or press enter to finish:[]> 21. Active scan_for_confidential2. Active no_mp3s3. ex_employeeEnter the filter to toggle on/off, or press enter to finish:[]> 31. Active scan_for_confidential2. Active no_mp3s3. Active ex_employeeEnter the filter to toggle on/off, or press enter to finish:[]>Policy Summaries:Anti-Spam: IronPort - DropSuspect-Spam: IronPort - Quarantine - Archiving copies of the original message.Anti-Virus: McAfee - Scan and CleanGraymail Detection: Unsubscribe - DisabledContent Filters: Enabled. Filters: scan_for_confidential, no_mp3s, ex_employeeOutbreak Filters: Enabled. No bypass extensions.Choose the operation you want to perform:- ANTISPAM - Modify Anti-Spam policy
コマンド:参考例
215
コマンド:参考例
特定のポリシーに対するコンテンツフィルタのイネーブル化
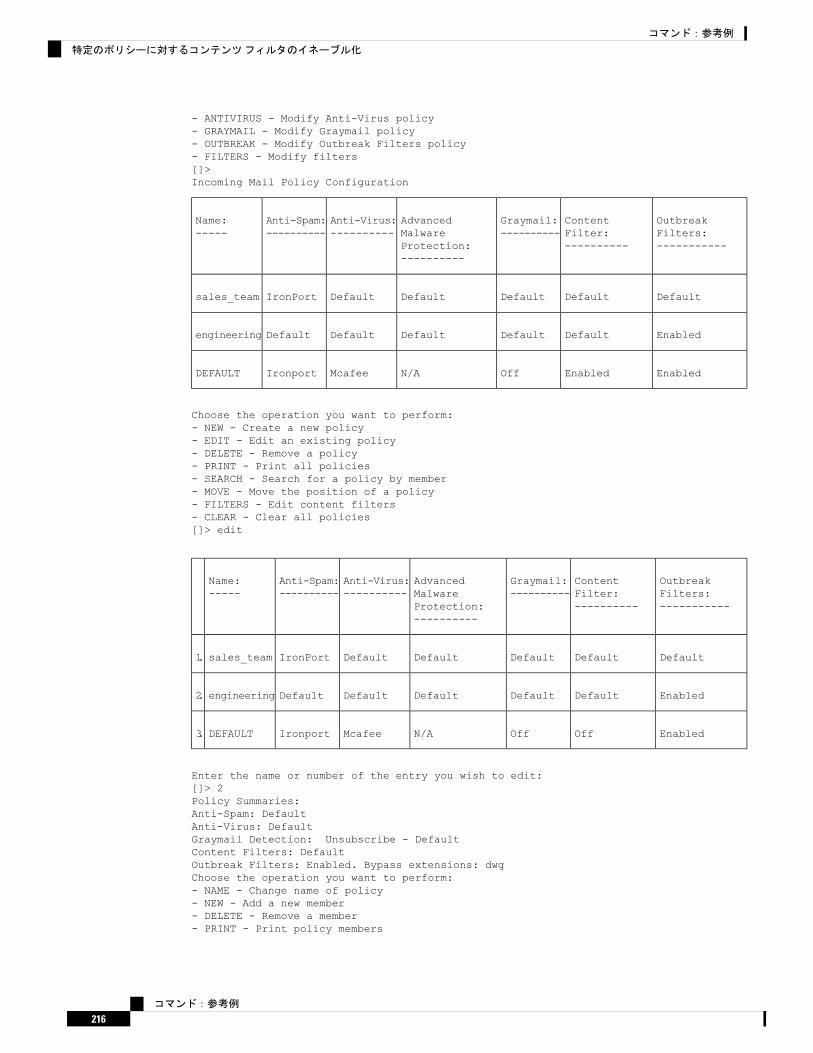
- ANTIVIRUS - Modify Anti-Virus policy- GRAYMAIL - Modify Graymail policy- OUTBREAK - Modify Outbreak Filters policy- FILTERS - Modify filters[]>Incoming Mail Policy Configuration
OutbreakFilters:-----------
ContentFilter:----------
Graymail:----------
AdvancedMalwareProtection:----------
Anti-Virus:----------
Anti-Spam:----------
Name:-----
DefaultDefaultDefaultDefaultDefaultIronPortsales_team
EnabledDefaultDefaultDefaultDefaultDefaultengineering
EnabledEnabledOffN/AMcafeeIronportDEFAULT
Choose the operation you want to perform:- NEW - Create a new policy- EDIT - Edit an existing policy- DELETE - Remove a policy- PRINT - Print all policies- SEARCH - Search for a policy by member- MOVE - Move the position of a policy- FILTERS - Edit content filters- CLEAR - Clear all policies[]> edit
OutbreakFilters:-----------
ContentFilter:----------
Graymail:----------
AdvancedMalwareProtection:----------
Anti-Virus:----------
Anti-Spam:----------
Name:-----
DefaultDefaultDefaultDefaultDefaultIronPortsales_team1.
EnabledDefaultDefaultDefaultDefaultDefaultengineering2.
EnabledOffOffN/AMcafeeIronportDEFAULT3.
Enter the name or number of the entry you wish to edit:[]> 2Policy Summaries:Anti-Spam: DefaultAnti-Virus: DefaultGraymail Detection: Unsubscribe - DefaultContent Filters: DefaultOutbreak Filters: Enabled. Bypass extensions: dwgChoose the operation you want to perform:- NAME - Change name of policy- NEW - Add a new member- DELETE - Remove a member- PRINT - Print policy members
コマンド:参考例
216
コマンド:参考例
特定のポリシーに対するコンテンツフィルタのイネーブル化
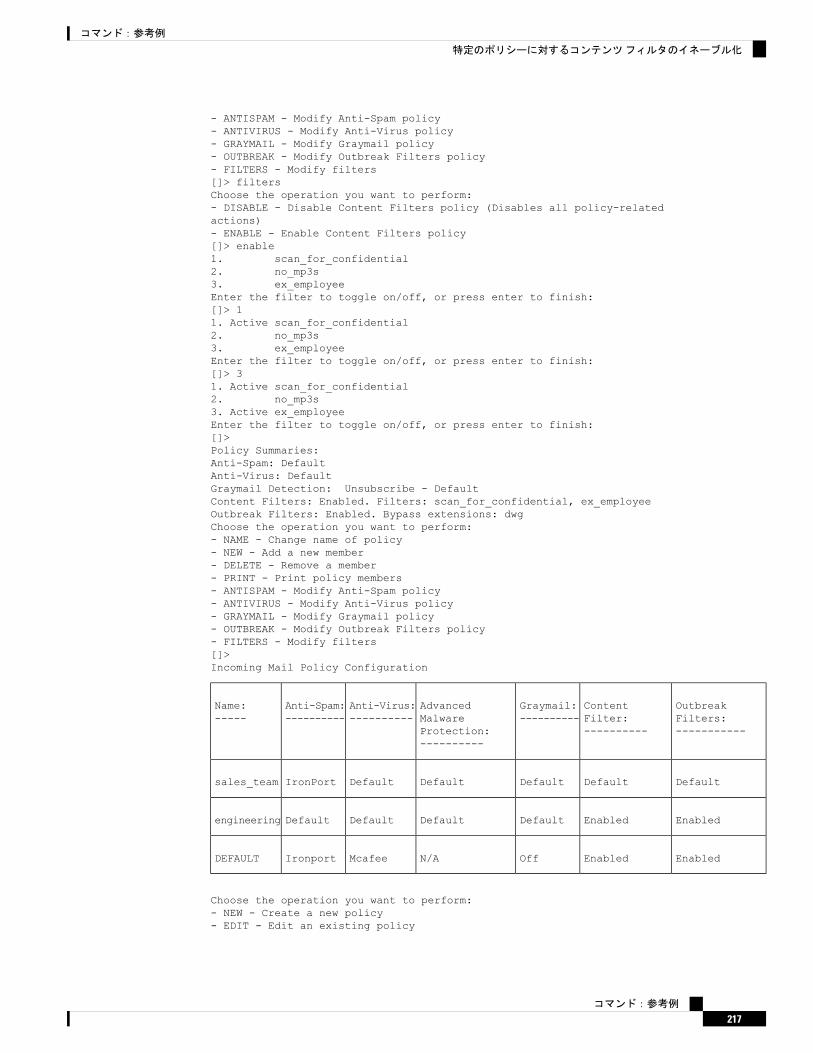
- ANTISPAM - Modify Anti-Spam policy- ANTIVIRUS - Modify Anti-Virus policy- GRAYMAIL - Modify Graymail policy- OUTBREAK - Modify Outbreak Filters policy- FILTERS - Modify filters[]> filtersChoose the operation you want to perform:- DISABLE - Disable Content Filters policy (Disables all policy-relatedactions)- ENABLE - Enable Content Filters policy[]> enable1. scan_for_confidential2. no_mp3s3. ex_employeeEnter the filter to toggle on/off, or press enter to finish:[]> 11. Active scan_for_confidential2. no_mp3s3. ex_employeeEnter the filter to toggle on/off, or press enter to finish:[]> 31. Active scan_for_confidential2. no_mp3s3. Active ex_employeeEnter the filter to toggle on/off, or press enter to finish:[]>Policy Summaries:Anti-Spam: DefaultAnti-Virus: DefaultGraymail Detection: Unsubscribe - DefaultContent Filters: Enabled. Filters: scan_for_confidential, ex_employeeOutbreak Filters: Enabled. Bypass extensions: dwgChoose the operation you want to perform:- NAME - Change name of policy- NEW - Add a new member- DELETE - Remove a member- PRINT - Print policy members- ANTISPAM - Modify Anti-Spam policy- ANTIVIRUS - Modify Anti-Virus policy- GRAYMAIL - Modify Graymail policy- OUTBREAK - Modify Outbreak Filters policy- FILTERS - Modify filters[]>Incoming Mail Policy Configuration
OutbreakFilters:-----------
ContentFilter:----------
Graymail:----------
AdvancedMalwareProtection:----------
Anti-Virus:----------
Anti-Spam:----------
Name:-----
DefaultDefaultDefaultDefaultDefaultIronPortsales_team
EnabledEnabledDefaultDefaultDefaultDefaultengineering
EnabledEnabledOffN/AMcafeeIronportDEFAULT
Choose the operation you want to perform:- NEW - Create a new policy- EDIT - Edit an existing policy
コマンド:参考例
217
コマンド:参考例
特定のポリシーに対するコンテンツフィルタのイネーブル化
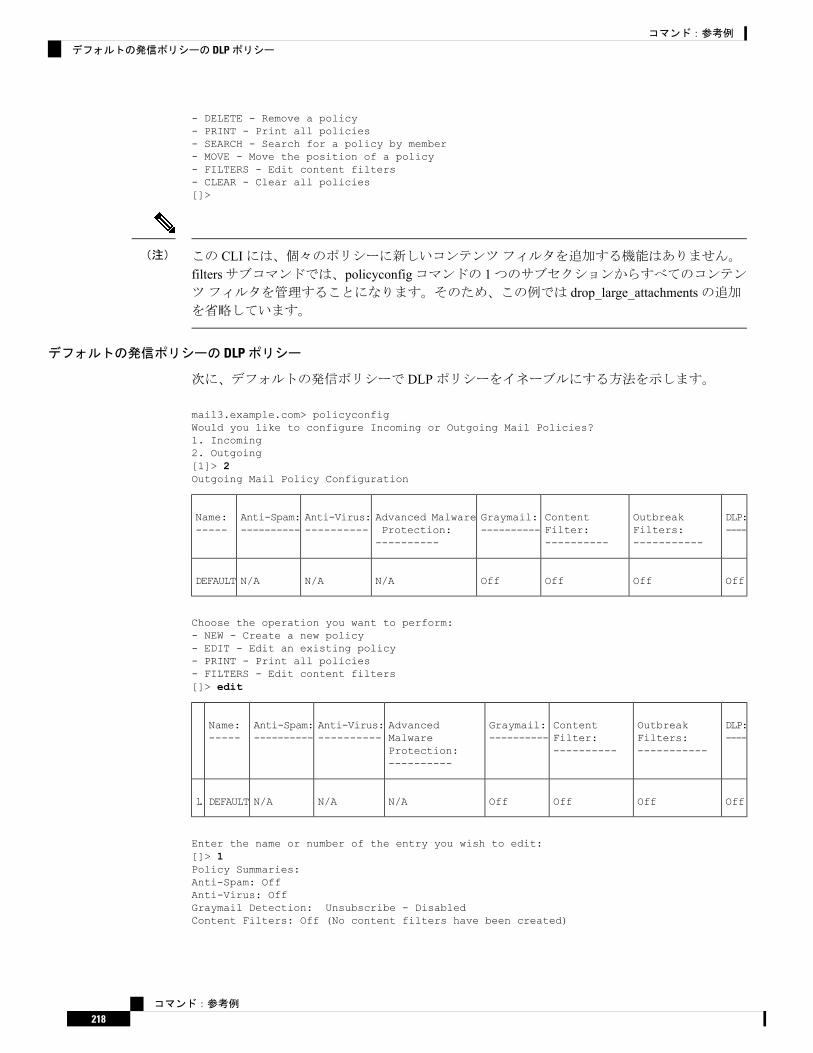
- DELETE - Remove a policy- PRINT - Print all policies- SEARCH - Search for a policy by member- MOVE - Move the position of a policy- FILTERS - Edit content filters- CLEAR - Clear all policies[]>
この CLIには、個々のポリシーに新しいコンテンツフィルタを追加する機能はありません。filtersサブコマンドでは、policyconfigコマンドの 1つのサブセクションからすべてのコンテンツフィルタを管理することになります。そのため、この例では drop_large_attachmentsの追加を省略しています。
(注)
デフォルトの発信ポリシーの DLPポリシー
次に、デフォルトの発信ポリシーで DLPポリシーをイネーブルにする方法を示します。
mail3.example.com> policyconfigWould you like to configure Incoming or Outgoing Mail Policies?1. Incoming2. Outgoing[1]> 2Outgoing Mail Policy Configuration
DLP:----
OutbreakFilters:-----------
ContentFilter:----------
Graymail:----------
Advanced MalwareProtection:----------
Anti-Virus:----------
Anti-Spam:----------
Name:-----
OffOffOffOffN/AN/AN/ADEFAULT
Choose the operation you want to perform:- NEW - Create a new policy- EDIT - Edit an existing policy- PRINT - Print all policies- FILTERS - Edit content filters[]> edit
DLP:----
OutbreakFilters:-----------
ContentFilter:----------
Graymail:----------
AdvancedMalwareProtection:----------
Anti-Virus:----------
Anti-Spam:----------
Name:-----
OffOffOffOffN/AN/AN/ADEFAULT1.
Enter the name or number of the entry you wish to edit:[]> 1Policy Summaries:Anti-Spam: OffAnti-Virus: OffGraymail Detection: Unsubscribe - DisabledContent Filters: Off (No content filters have been created)
コマンド:参考例
218
コマンド:参考例
デフォルトの発信ポリシーの DLPポリシー

Outbreak Filters: OffDLP: OffChoose the operation you want to perform:- ANTISPAM - Modify Anti-Spam policy- ANTIVIRUS - Modify Anti-Virus policy- GRAYMAIL - Modify Graymail policy- OUTBREAK - Modify Outbreak Filters policy- DLP - Modify DLP policy[]> dlpChoose the operation you want to perform:- ENABLE - Enable DLP policy[]> enable1. California AB-12982. Suspicious Transmission - Zip Files3. Restricted FilesEnter the policy to toggle on/off, or press enter to finish:[]> 11. Active California AB-12982. Suspicious Transmission - Zip Files3. Restricted FilesEnter the policy to toggle on/off, or press enter to finish:[]> 21. Active California AB-12982. Active Suspicious Transmission - Zip Files3. Restricted FilesEnter the policy to toggle on/off, or press enter to finish:[]> 31. Active California AB-12982. Active Suspicious Transmission - Zip Files3. Active Restricted FilesEnter the policy to toggle on/off, or press enter to finish:[]>Policy Summaries:Anti-Spam: OffAnti-Virus: OffGraymail Detection: Unsubscribe - DisabledContent Filters: Off (No content filters have been created)Outbreak Filters: OffDLP: Enabled. Policies: California AB-1298, Suspicious Transmission - ZipFiles, Restricted FilesChoose the operation you want to perform:- ANTISPAM - Modify Anti-Spam policy- ANTIVIRUS - Modify Anti-Virus policy- GRAYMAIL - Modify Graymail policy- OUTBREAK - Modify Outbreak Filters policy- DLP - Modify DLP policy[]>
一括 Eメールまたはソーシャルネットワークの Eメールであると識別されたメッセージをドロップする着信ポリシーの作成
mail.example.com> policyconfigWould you like to configure Incoming or Outgoing Mail Policies?1. Incoming2. Outgoing[1]> 1Incoming Mail Policy Configuration
OutbreakFilters:-----------
Content Filter:----------
Graymail:----------
Advanced MalwareProtection:----------
Anti-Virus:----------
Anti-Spam:----------
Name:-----
コマンド:参考例
219
コマンド:参考例
一括 Eメールまたはソーシャルネットワークの Eメールであると識別されたメッセージをドロップする着信ポリシーの作成
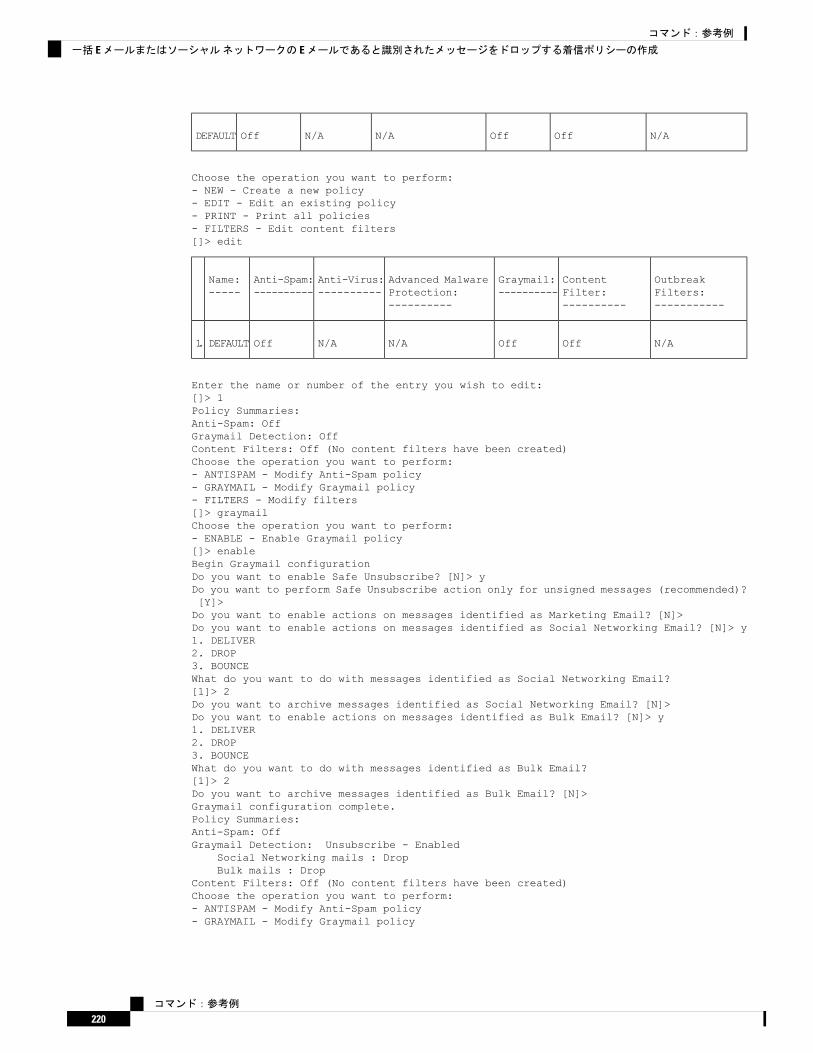
N/AOffOffN/AN/AOffDEFAULT
Choose the operation you want to perform:- NEW - Create a new policy- EDIT - Edit an existing policy- PRINT - Print all policies- FILTERS - Edit content filters[]> edit
OutbreakFilters:-----------
ContentFilter:----------
Graymail:----------
Advanced MalwareProtection:----------
Anti-Virus:----------
Anti-Spam:----------
Name:-----
N/AOffOffN/AN/AOffDEFAULT1.
Enter the name or number of the entry you wish to edit:[]> 1Policy Summaries:Anti-Spam: OffGraymail Detection: OffContent Filters: Off (No content filters have been created)Choose the operation you want to perform:- ANTISPAM - Modify Anti-Spam policy- GRAYMAIL - Modify Graymail policy- FILTERS - Modify filters[]> graymailChoose the operation you want to perform:- ENABLE - Enable Graymail policy[]> enableBegin Graymail configurationDo you want to enable Safe Unsubscribe? [N]> yDo you want to perform Safe Unsubscribe action only for unsigned messages (recommended)?[Y]>Do you want to enable actions on messages identified as Marketing Email? [N]>Do you want to enable actions on messages identified as Social Networking Email? [N]> y1. DELIVER2. DROP3. BOUNCEWhat do you want to do with messages identified as Social Networking Email?[1]> 2Do you want to archive messages identified as Social Networking Email? [N]>Do you want to enable actions on messages identified as Bulk Email? [N]> y1. DELIVER2. DROP3. BOUNCEWhat do you want to do with messages identified as Bulk Email?[1]> 2Do you want to archive messages identified as Bulk Email? [N]>Graymail configuration complete.Policy Summaries:Anti-Spam: OffGraymail Detection: Unsubscribe - Enabled
Social Networking mails : DropBulk mails : Drop
Content Filters: Off (No content filters have been created)Choose the operation you want to perform:- ANTISPAM - Modify Anti-Spam policy- GRAYMAIL - Modify Graymail policy
コマンド:参考例
220
コマンド:参考例
一括 Eメールまたはソーシャルネットワークの Eメールであると識別されたメッセージをドロップする着信ポリシーの作成

- FILTERS - Modify filters[]>
AMPエンジンによってスキャン不能としてマークされたメッセージを処理する着信ポリシーの設定
mail.example.com> policyconfigWould you like to configure Incoming or Outgoing Mail Policies?1. Incoming2. Outgoing[1]> 1Incoming Mail Policy Configuration
OutbreakFilters:-----------
Content Filter:----------
Graymail:----------
Advanced MalwareProtection:----------
Anti-Virus:----------
Anti-Spam:----------
Name:-----
N/AOffOffN/AN/AOffDEFAULT
Choose the operation you want to perform:- NEW - Create a new policy- EDIT - Edit an existing policy- PRINT - Print all policies- FILTERS - Edit content filters[]> edit
OutbreakFilters:-----------
ContentFilter:----------
Graymail:----------
Advanced MalwareProtection:----------
Anti-Virus:----------
Anti-Spam:----------
Name:-----
N/AOffOffN/AN/AOffDEFAULT1.
Enter the name or number of the entry you wish to edit:[]> 1Policy Summaries:Advanced Malware Protection: Malware Action - drop , Message Error Unscannable Action -deliver , Rate Limit Unscannable Action - deliver , AMP Service NotAvailable Unscannable Action - deliver , File Analysis Action - Deliver , Mailbox AutoRemediation (MAR) - DisabledContent Filters: OffOutbreak Filters: Off
Choose the operation you want to perform:- OUTBREAK - Modify Outbreak Filters policy- ADVANCEDMALWARE - Modify Advanced Malware Protection policy- FILTERS - Modify filters[]> advancedmalware
Choose the operation you want to perform:- EDIT - Edit Advanced-Malware protection policy- DISABLE - Disable Advanced-Malware protection policy (Disables all policy-relatedactions)[]> edit
Begin AMP configuration
Do you want to enable File Analysis? [Y]>
コマンド:参考例
221
コマンド:参考例
AMPエンジンによってスキャン不能としてマークされたメッセージを処理する着信ポリシーの設定

Do you like the system to automatically insert an X-header with the anti-malware scanningresults? (Recommended for trouble-shooting) [Y]>
Unscannable Message Handling
Current actions to take if any of the attachments could not be scanned due to messageerrors:- WARNING: Delivering Unscannable due to Message Errors messages normally- Prepending subjects with "[WARNING: ATTACHMENT UNSCANNED]"- Archiving copies of the original message.Do you want to edit the actions for Unscannable Message due to message errors? [N]> yes
Current actions to take if any of the attachments could not be scanned due to rate limithit:- WARNING: Delivering Unscannable due to Rate Limit messages normally- Prepending subjects with "[WARNING: ATTACHMENT UNSCANNED]"- Archiving copies of the original message.Do you want to edit the actions for Unscannable Message due to rate limit hit? [N]> yes
Current actions to take if any of the attachments could not be scanned due to AMP Servicenot available:- WARNING: Delivering Unscannable due to AMP Service Not Available messages normally- Prepending subjects with "[WARNING: ATTACHMENT UNSCANNED]"- Archiving copies of the original message.Do you want to edit the actions for Unscannable Message due to AMP Service not available?[N]> yes
例:[差出人(From)]ヘッダーの優先度の設定
次の例では、policyconfig > match headers優先順位サブコマンドを使用して、アプライアン
スで着信および発信メッセージを照合するための、[差出人(From)]メッセージヘッダーの優先順位を設定します。
mail1.example.com > policyconfig
Would you like to configure Incoming Mail Policy or Outgoing Mail Policies orMatch Headers Priority?
1. Incoming Mail Policies2. Outgoing Mail Policies3. Match Headers Priority[1]> 3
Match Headers Priority ConfigurationPriority: Headers:--------- ---------P1 Envelope Sender
Choose the operation you want to perform:- ADD - Add match priority for headers- EDIT - Edit an existing match priority for headers- REMOVE - Remove an existing match priority for headers[]> add
Choose headers for priority 2Add header "From" Header:1. Yes2. No[1]> 1
Add header "Reply-To" Header:
コマンド:参考例
222
コマンド:参考例
例:[差出人(From)]ヘッダーの優先度の設定

1. Yes2. No[1]> 2
Add header "Sender" Header:1. Yes2. No[1]> 2
Match Headers Priority ConfigurationPriority: Headers:--------- ---------P1 Envelope SenderP2 "From" Header
quarantineconfig
説明
システムの隔離を設定します。
使用方法
確定:このコマンドは「commit」が必要です。
クラスタ管理:このコマンドはマシンモードでのみ使用できます。
バッチコマンド:このコマンドはバッチ形式をサポートしていません。
例
mail3.example.com> quarantineconfigCurrently configured quarantines:# Quarantine Name Size (MB) % full Messages Retention Policy1 Outbreak 3,072 0.0 1 12h Release2 Policy 1,024 0.1 497 10d Delete3 Virus 2,048 empty 0 30d Delete2,048 MB available for quarantine allocation.Choose the operation you want to perform:- NEW - Create a new quarantine.- EDIT - Modify a quarantine.- DELETE - Remove a quarantine.- OUTBREAKMANAGE - Manage the Outbreak Filters quarantine.[]> newPlease enter the name for this quarantine:[]> HRQuarantineRetention period for this quarantine. (Use 'd' for days or 'h' for hours or 'm' for'minutes'.):[]> 15d1. Delete2. ReleaseEnter default action for quarantine:[1]> 2Do you want to modify the subject of messages that are released because"HRQuarantine" overflows? [N]>Do you want add a custom header to messages that are released because"HRQuarantine" overflows? [N]>
コマンド:参考例
223
コマンド:参考例
quarantineconfig
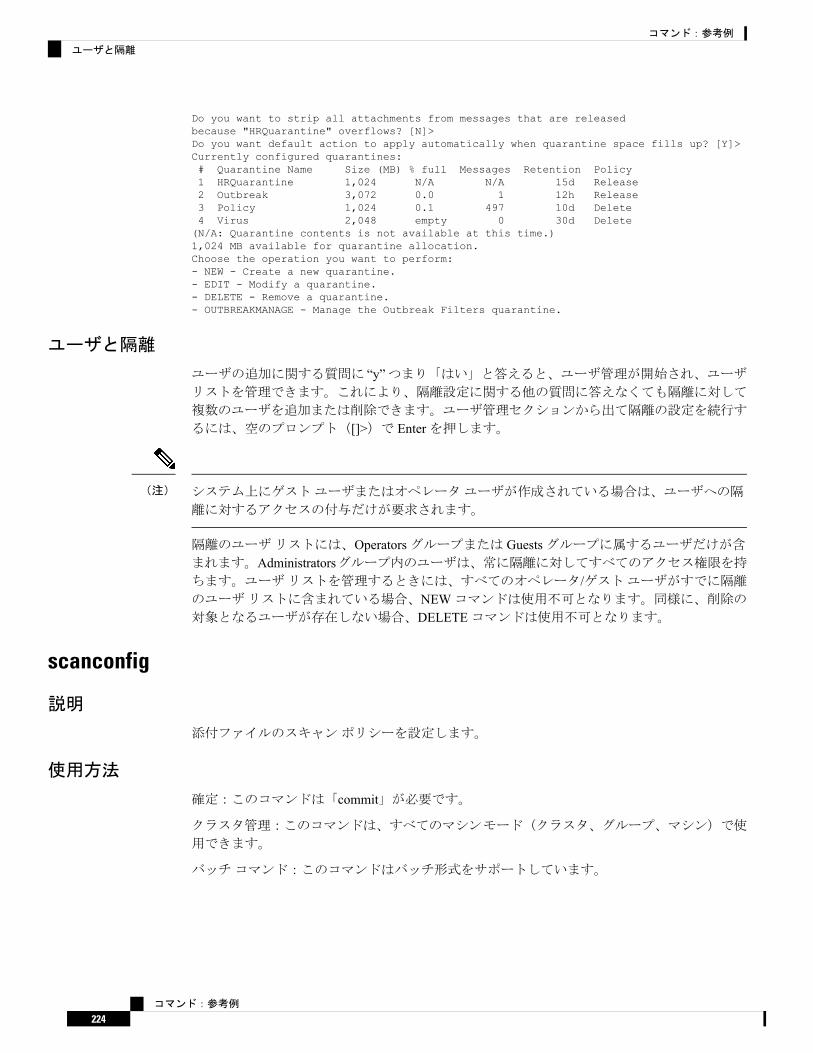
Do you want to strip all attachments from messages that are releasedbecause "HRQuarantine" overflows? [N]>Do you want default action to apply automatically when quarantine space fills up? [Y]>Currently configured quarantines:# Quarantine Name Size (MB) % full Messages Retention Policy1 HRQuarantine 1,024 N/A N/A 15d Release2 Outbreak 3,072 0.0 1 12h Release3 Policy 1,024 0.1 497 10d Delete4 Virus 2,048 empty 0 30d Delete(N/A: Quarantine contents is not available at this time.)1,024 MB available for quarantine allocation.Choose the operation you want to perform:- NEW - Create a new quarantine.- EDIT - Modify a quarantine.- DELETE - Remove a quarantine.- OUTBREAKMANAGE - Manage the Outbreak Filters quarantine.
ユーザと隔離
ユーザの追加に関する質問に “y”つまり「はい」と答えると、ユーザ管理が開始され、ユーザリストを管理できます。これにより、隔離設定に関する他の質問に答えなくても隔離に対して
複数のユーザを追加または削除できます。ユーザ管理セクションから出て隔離の設定を続行す
るには、空のプロンプト([]>)で Enterを押します。
システム上にゲストユーザまたはオペレータユーザが作成されている場合は、ユーザへの隔
離に対するアクセスの付与だけが要求されます。
(注)
隔離のユーザリストには、Operatorsグループまたは Guestsグループに属するユーザだけが含まれます。Administratorsグループ内のユーザは、常に隔離に対してすべてのアクセス権限を持ちます。ユーザリストを管理するときには、すべてのオペレータ/ゲストユーザがすでに隔離のユーザリストに含まれている場合、NEWコマンドは使用不可となります。同様に、削除の対象となるユーザが存在しない場合、DELETEコマンドは使用不可となります。
scanconfig
説明
添付ファイルのスキャンポリシーを設定します。
使用方法
確定:このコマンドは「commit」が必要です。
クラスタ管理:このコマンドは、すべてのマシンモード(クラスタ、グループ、マシン)で使
用できます。
バッチコマンド:このコマンドはバッチ形式をサポートしています。
コマンド:参考例
224
コマンド:参考例
ユーザと隔離
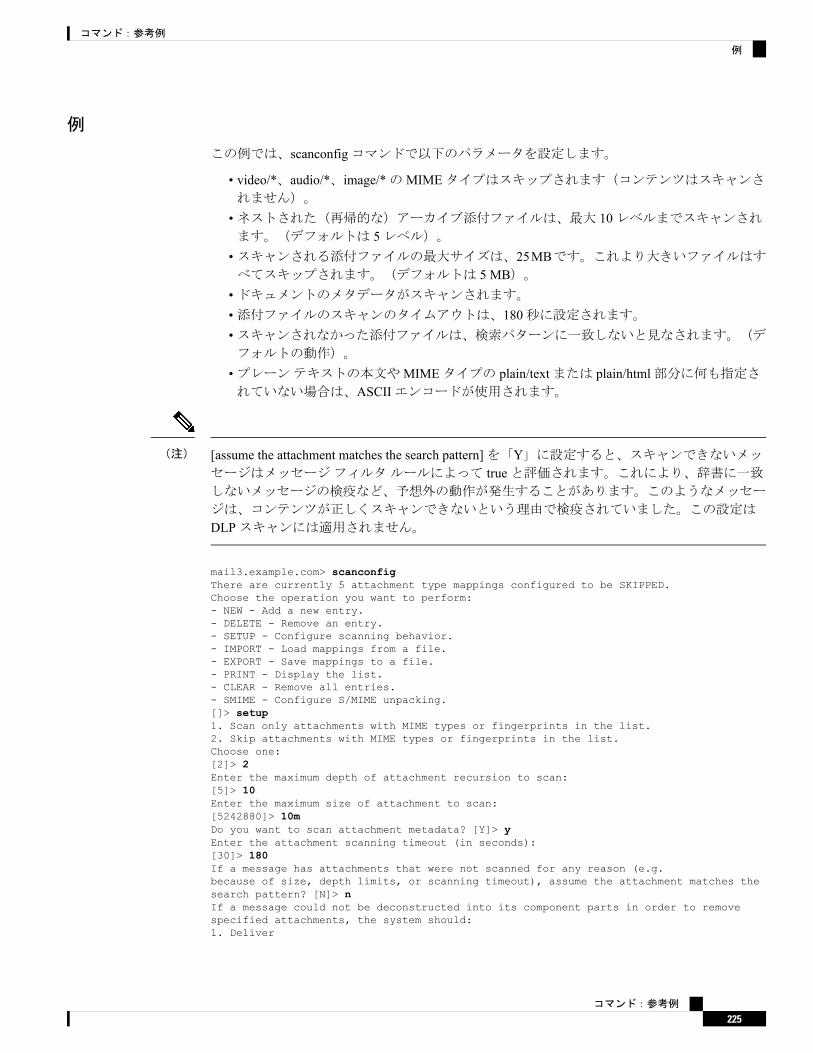
例
この例では、scanconfigコマンドで以下のパラメータを設定します。
• video/*、audio/*、image/*のMIMEタイプはスキップされます(コンテンツはスキャンされません)。
•ネストされた(再帰的な)アーカイブ添付ファイルは、最大 10レベルまでスキャンされます。(デフォルトは 5レベル)。
•スキャンされる添付ファイルの最大サイズは、25MBです。これより大きいファイルはすべてスキップされます。(デフォルトは 5 MB)。
•ドキュメントのメタデータがスキャンされます。•添付ファイルのスキャンのタイムアウトは、180秒に設定されます。•スキャンされなかった添付ファイルは、検索パターンに一致しないと見なされます。(デフォルトの動作)。
•プレーンテキストの本文やMIMEタイプの plain/textまたは plain/html部分に何も指定されていない場合は、ASCIIエンコードが使用されます。
[assume the attachment matches the search pattern]を「Y」に設定すると、スキャンできないメッセージはメッセージフィルタルールによって trueと評価されます。これにより、辞書に一致しないメッセージの検疫など、予想外の動作が発生することがあります。このようなメッセー
ジは、コンテンツが正しくスキャンできないという理由で検疫されていました。この設定は
DLPスキャンには適用されません。
(注)
mail3.example.com> scanconfigThere are currently 5 attachment type mappings configured to be SKIPPED.Choose the operation you want to perform:- NEW - Add a new entry.- DELETE - Remove an entry.- SETUP - Configure scanning behavior.- IMPORT - Load mappings from a file.- EXPORT - Save mappings to a file.- PRINT - Display the list.- CLEAR - Remove all entries.- SMIME - Configure S/MIME unpacking.[]> setup1. Scan only attachments with MIME types or fingerprints in the list.2. Skip attachments with MIME types or fingerprints in the list.Choose one:[2]> 2Enter the maximum depth of attachment recursion to scan:[5]> 10Enter the maximum size of attachment to scan:[5242880]> 10mDo you want to scan attachment metadata? [Y]> yEnter the attachment scanning timeout (in seconds):[30]> 180If a message has attachments that were not scanned for any reason (e.g.because of size, depth limits, or scanning timeout), assume the attachment matches thesearch pattern? [N]> nIf a message could not be deconstructed into its component parts in order to removespecified attachments, the system should:1. Deliver
コマンド:参考例
225
コマンド:参考例
例
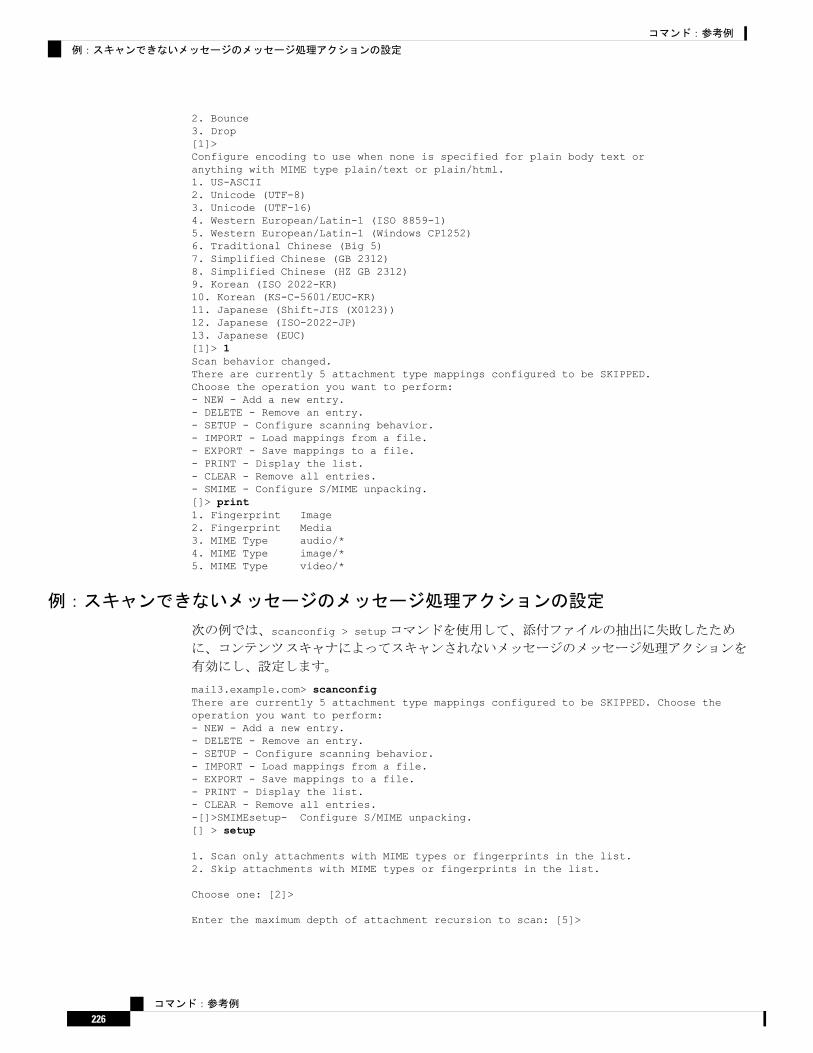
2. Bounce3. Drop[1]>Configure encoding to use when none is specified for plain body text oranything with MIME type plain/text or plain/html.1. US-ASCII2. Unicode (UTF-8)3. Unicode (UTF-16)4. Western European/Latin-1 (ISO 8859-1)5. Western European/Latin-1 (Windows CP1252)6. Traditional Chinese (Big 5)7. Simplified Chinese (GB 2312)8. Simplified Chinese (HZ GB 2312)9. Korean (ISO 2022-KR)10. Korean (KS-C-5601/EUC-KR)11. Japanese (Shift-JIS (X0123))12. Japanese (ISO-2022-JP)13. Japanese (EUC)[1]> 1Scan behavior changed.There are currently 5 attachment type mappings configured to be SKIPPED.Choose the operation you want to perform:- NEW - Add a new entry.- DELETE - Remove an entry.- SETUP - Configure scanning behavior.- IMPORT - Load mappings from a file.- EXPORT - Save mappings to a file.- PRINT - Display the list.- CLEAR - Remove all entries.- SMIME - Configure S/MIME unpacking.[]> print1. Fingerprint Image2. Fingerprint Media3. MIME Type audio/*4. MIME Type image/*5. MIME Type video/*
例:スキャンできないメッセージのメッセージ処理アクションの設定
次の例では、scanconfig > setupコマンドを使用して、添付ファイルの抽出に失敗したため
に、コンテンツスキャナによってスキャンされないメッセージのメッセージ処理アクションを
有効にし、設定します。
mail3.example.com> scanconfigThere are currently 5 attachment type mappings configured to be SKIPPED. Choose theoperation you want to perform:- NEW - Add a new entry.- DELETE - Remove an entry.- SETUP - Configure scanning behavior.- IMPORT - Load mappings from a file.- EXPORT - Save mappings to a file.- PRINT - Display the list.- CLEAR - Remove all entries.-[]>SMIMEsetup- Configure S/MIME unpacking.[] > setup
1. Scan only attachments with MIME types or fingerprints in the list.2. Skip attachments with MIME types or fingerprints in the list.
Choose one: [2]>
Enter the maximum depth of attachment recursion to scan: [5]>
コマンド:参考例
226
コマンド:参考例
例:スキャンできないメッセージのメッセージ処理アクションの設定
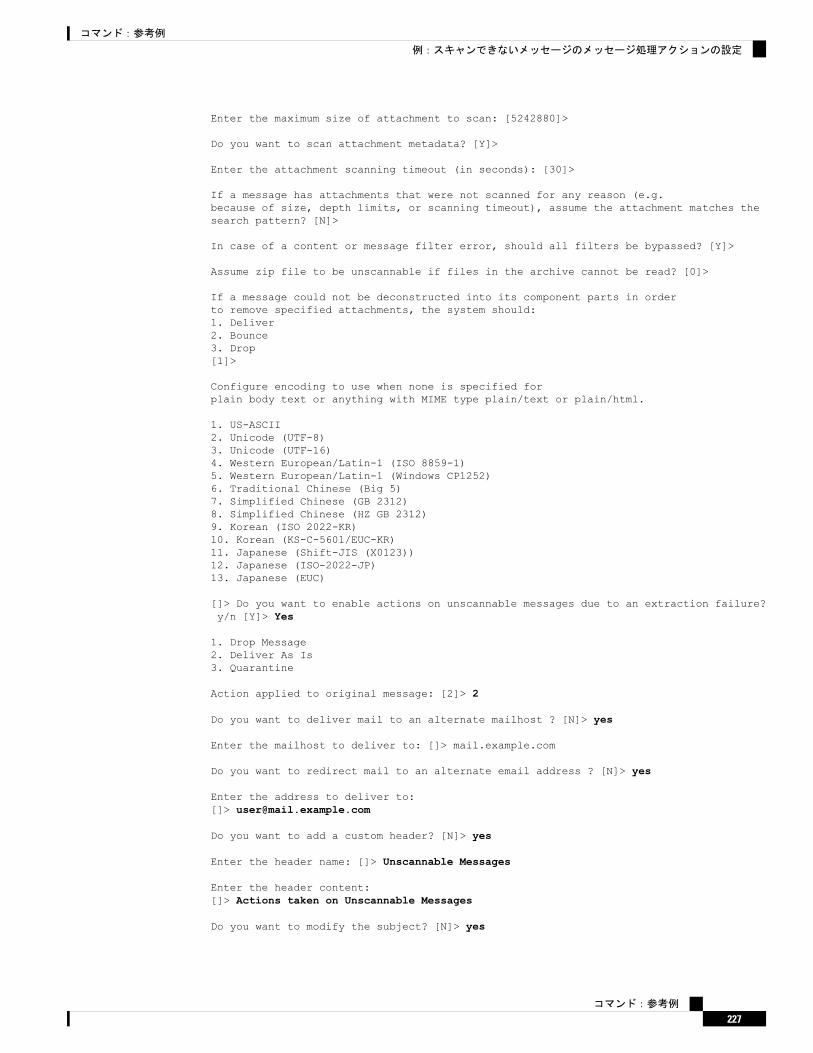
Enter the maximum size of attachment to scan: [5242880]>
Do you want to scan attachment metadata? [Y]>
Enter the attachment scanning timeout (in seconds): [30]>
If a message has attachments that were not scanned for any reason (e.g.because of size, depth limits, or scanning timeout), assume the attachment matches thesearch pattern? [N]>
In case of a content or message filter error, should all filters be bypassed? [Y]>
Assume zip file to be unscannable if files in the archive cannot be read? [0]>
If a message could not be deconstructed into its component parts in orderto remove specified attachments, the system should:1. Deliver2. Bounce3. Drop[1]>
Configure encoding to use when none is specified forplain body text or anything with MIME type plain/text or plain/html.
1. US-ASCII2. Unicode (UTF-8)3. Unicode (UTF-16)4. Western European/Latin-1 (ISO 8859-1)5. Western European/Latin-1 (Windows CP1252)6. Traditional Chinese (Big 5)7. Simplified Chinese (GB 2312)8. Simplified Chinese (HZ GB 2312)9. Korean (ISO 2022-KR)10. Korean (KS-C-5601/EUC-KR)11. Japanese (Shift-JIS (X0123))12. Japanese (ISO-2022-JP)13. Japanese (EUC)
[]> Do you want to enable actions on unscannable messages due to an extraction failure?y/n [Y]> Yes
1. Drop Message2. Deliver As Is3. Quarantine
Action applied to original message: [2]> 2
Do you want to deliver mail to an alternate mailhost ? [N]> yes
Enter the mailhost to deliver to: []> mail.example.com
Do you want to redirect mail to an alternate email address ? [N]> yes
Enter the address to deliver to:[]> [email protected]
Do you want to add a custom header? [N]> yes
Enter the header name: []> Unscannable Messages
Enter the header content:[]> Actions taken on Unscannable Messages
Do you want to modify the subject? [N]> yes
コマンド:参考例
227
コマンド:参考例
例:スキャンできないメッセージのメッセージ処理アクションの設定
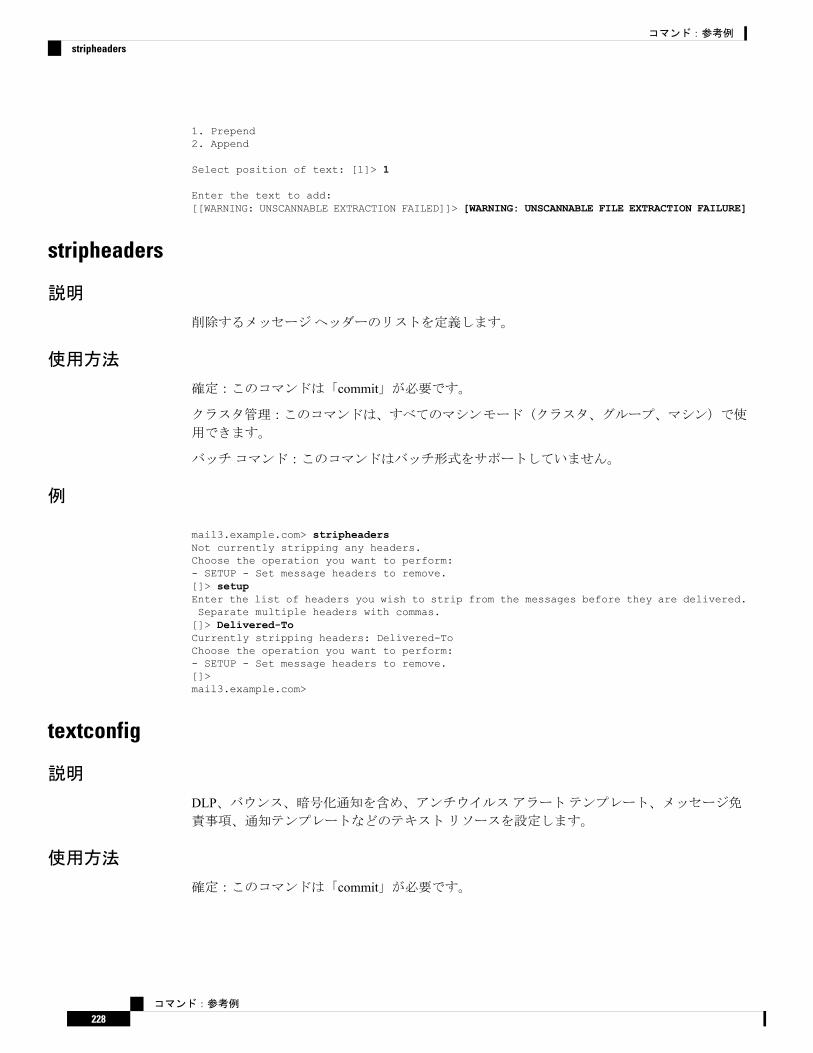
1. Prepend2. Append
Select position of text: [1]> 1
Enter the text to add:[[WARNING: UNSCANNABLE EXTRACTION FAILED]]> [WARNING: UNSCANNABLE FILE EXTRACTION FAILURE]
stripheaders
説明
削除するメッセージヘッダーのリストを定義します。
使用方法
確定:このコマンドは「commit」が必要です。
クラスタ管理:このコマンドは、すべてのマシンモード(クラスタ、グループ、マシン)で使
用できます。
バッチコマンド:このコマンドはバッチ形式をサポートしていません。
例
mail3.example.com> stripheadersNot currently stripping any headers.Choose the operation you want to perform:- SETUP - Set message headers to remove.[]> setupEnter the list of headers you wish to strip from the messages before they are delivered.Separate multiple headers with commas.[]> Delivered-ToCurrently stripping headers: Delivered-ToChoose the operation you want to perform:- SETUP - Set message headers to remove.[]>mail3.example.com>
textconfig
説明
DLP、バウンス、暗号化通知を含め、アンチウイルスアラートテンプレート、メッセージ免責事項、通知テンプレートなどのテキストリソースを設定します。
使用方法
確定:このコマンドは「commit」が必要です。
コマンド:参考例
228
コマンド:参考例
stripheaders
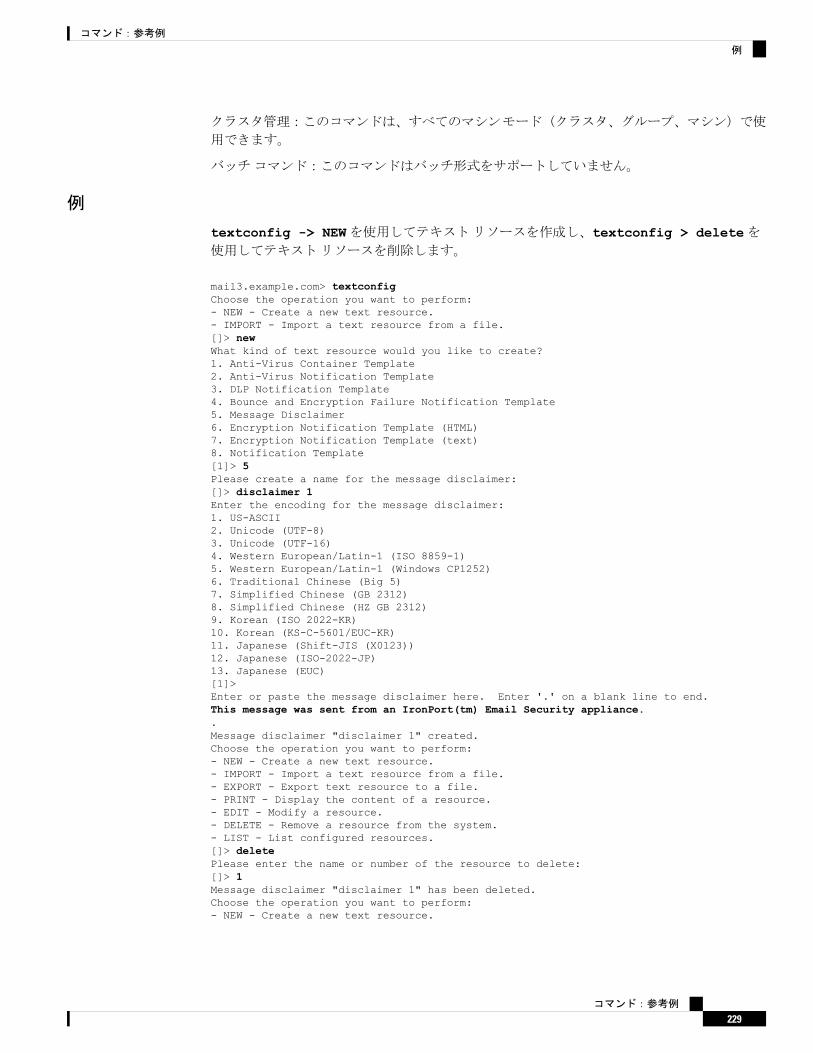
クラスタ管理:このコマンドは、すべてのマシンモード(クラスタ、グループ、マシン)で使
用できます。
バッチコマンド:このコマンドはバッチ形式をサポートしていません。
例
textconfig -> NEWを使用してテキストリソースを作成し、textconfig > deleteを使用してテキストリソースを削除します。
mail3.example.com> textconfigChoose the operation you want to perform:- NEW - Create a new text resource.- IMPORT - Import a text resource from a file.[]> newWhat kind of text resource would you like to create?1. Anti-Virus Container Template2. Anti-Virus Notification Template3. DLP Notification Template4. Bounce and Encryption Failure Notification Template5. Message Disclaimer6. Encryption Notification Template (HTML)7. Encryption Notification Template (text)8. Notification Template[1]> 5Please create a name for the message disclaimer:[]> disclaimer 1Enter the encoding for the message disclaimer:1. US-ASCII2. Unicode (UTF-8)3. Unicode (UTF-16)4. Western European/Latin-1 (ISO 8859-1)5. Western European/Latin-1 (Windows CP1252)6. Traditional Chinese (Big 5)7. Simplified Chinese (GB 2312)8. Simplified Chinese (HZ GB 2312)9. Korean (ISO 2022-KR)10. Korean (KS-C-5601/EUC-KR)11. Japanese (Shift-JIS (X0123))12. Japanese (ISO-2022-JP)13. Japanese (EUC)[1]>Enter or paste the message disclaimer here. Enter '.' on a blank line to end.This message was sent from an IronPort(tm) Email Security appliance..Message disclaimer "disclaimer 1" created.Choose the operation you want to perform:- NEW - Create a new text resource.- IMPORT - Import a text resource from a file.- EXPORT - Export text resource to a file.- PRINT - Display the content of a resource.- EDIT - Modify a resource.- DELETE - Remove a resource from the system.- LIST - List configured resources.[]> deletePlease enter the name or number of the resource to delete:[]> 1Message disclaimer "disclaimer 1" has been deleted.Choose the operation you want to perform:- NEW - Create a new text resource.
コマンド:参考例
229
コマンド:参考例
例
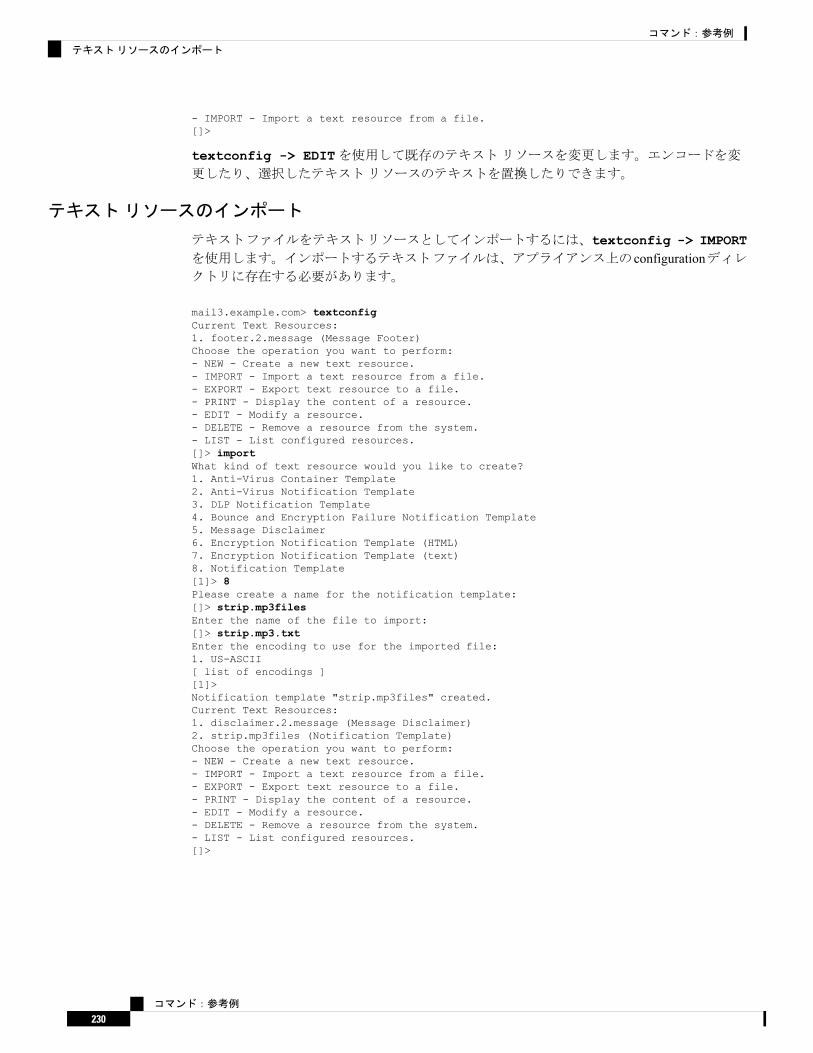
- IMPORT - Import a text resource from a file.[]>
textconfig -> EDITを使用して既存のテキストリソースを変更します。エンコードを変更したり、選択したテキストリソースのテキストを置換したりできます。
テキストリソースのインポート
テキストファイルをテキストリソースとしてインポートするには、textconfig -> IMPORTを使用します。インポートするテキストファイルは、アプライアンス上のconfigurationディレクトリに存在する必要があります。
mail3.example.com> textconfigCurrent Text Resources:1. footer.2.message (Message Footer)Choose the operation you want to perform:- NEW - Create a new text resource.- IMPORT - Import a text resource from a file.- EXPORT - Export text resource to a file.- PRINT - Display the content of a resource.- EDIT - Modify a resource.- DELETE - Remove a resource from the system.- LIST - List configured resources.[]> importWhat kind of text resource would you like to create?1. Anti-Virus Container Template2. Anti-Virus Notification Template3. DLP Notification Template4. Bounce and Encryption Failure Notification Template5. Message Disclaimer6. Encryption Notification Template (HTML)7. Encryption Notification Template (text)8. Notification Template[1]> 8Please create a name for the notification template:[]> strip.mp3filesEnter the name of the file to import:[]> strip.mp3.txtEnter the encoding to use for the imported file:1. US-ASCII[ list of encodings ][1]>Notification template "strip.mp3files" created.Current Text Resources:1. disclaimer.2.message (Message Disclaimer)2. strip.mp3files (Notification Template)Choose the operation you want to perform:- NEW - Create a new text resource.- IMPORT - Import a text resource from a file.- EXPORT - Export text resource to a file.- PRINT - Display the content of a resource.- EDIT - Modify a resource.- DELETE - Remove a resource from the system.- LIST - List configured resources.[]>
コマンド:参考例
230
コマンド:参考例
テキストリソースのインポート

テキストリソースのエクスポート
テキストリソースをテキストファイルとしてエクスポートするには、textconfig -> EXPORTを使用します。テキストファイルは、アプライアンス上のconfigurationディレクトリに作成されます。
mail3.example.com> textconfigCurrent Text Resources:1. footer.2.message (Message Footer)2. strip.mp3 (Notification Template)Choose the operation you want to perform:- NEW - Create a new text resource.- IMPORT - Import a text resource from a file.- EXPORT - Export text resource to a file.- PRINT - Display the content of a resource.- EDIT - Modify a resource.- DELETE - Remove a resource from the system.- LIST - List configured resources.[]> exportPlease enter the name or number of the resource to export:[]> 2Enter the name of the file to export:[strip.mp3]> strip.mp3.txtEnter the encoding to use for the exported file:1. US-ASCII[ list of encoding types ][1]>File written on machine "mail3.example.com" using us-ascii encoding.Current Text Resources:1. footer.2.message (Message Footer)2. strip.mp3 (Notification Template)Choose the operation you want to perform:- NEW - Create a new text resource.- IMPORT - Import a text resource from a file.- EXPORT - Export text resource to a file.- PRINT - Display the content of a resource.- EDIT - Modify a resource.- DELETE - Remove a resource from the system.- LIST - List configured resources.[]>
ロギングとアラートここでは、次の CLIコマンドについて説明します。
• alertconfig(232ページ)• displayalerts(233ページ)• findevent(233ページ)• grep(235ページ)• logconfig(237ページ)• rollovernow(243ページ)• snmpconfig(244ページ)• tail(246ページ)
コマンド:参考例
231
コマンド:参考例
テキストリソースのエクスポート
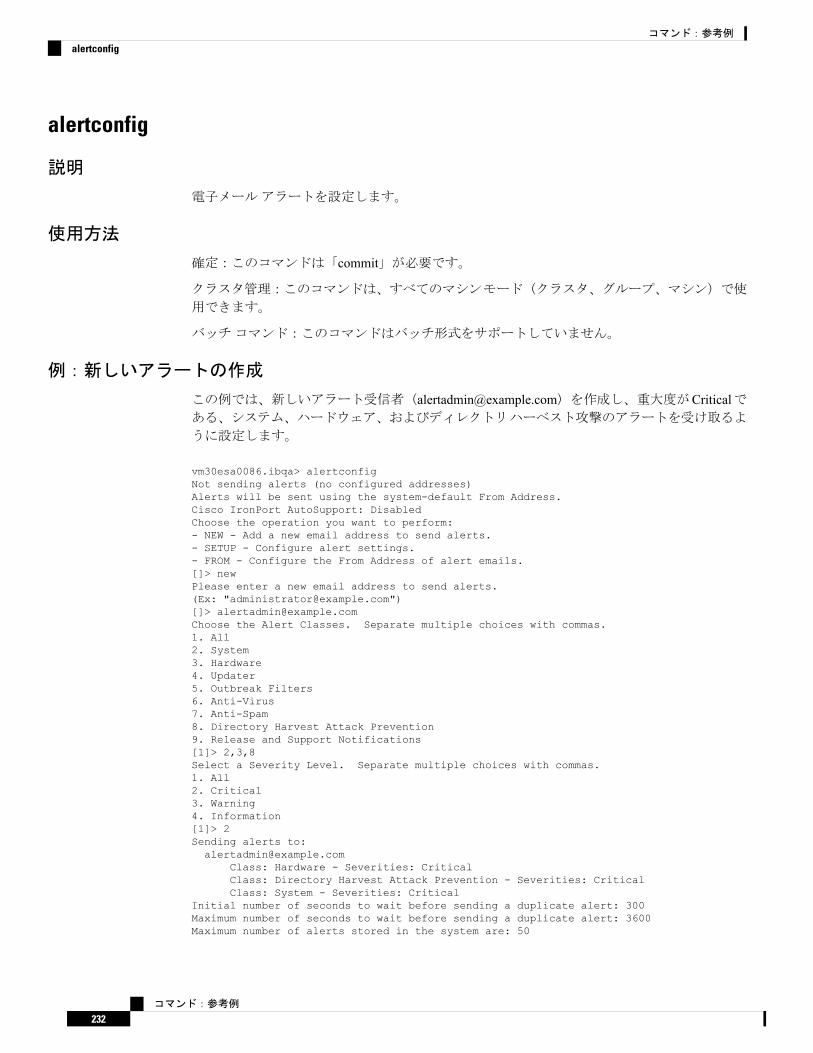
alertconfig
説明
電子メールアラートを設定します。
使用方法
確定:このコマンドは「commit」が必要です。
クラスタ管理:このコマンドは、すべてのマシンモード(クラスタ、グループ、マシン)で使
用できます。
バッチコマンド:このコマンドはバッチ形式をサポートしていません。
例:新しいアラートの作成
この例では、新しいアラート受信者([email protected])を作成し、重大度がCriticalである、システム、ハードウェア、およびディレクトリハーベスト攻撃のアラートを受け取るよ
うに設定します。
vm30esa0086.ibqa> alertconfigNot sending alerts (no configured addresses)Alerts will be sent using the system-default From Address.Cisco IronPort AutoSupport: DisabledChoose the operation you want to perform:- NEW - Add a new email address to send alerts.- SETUP - Configure alert settings.- FROM - Configure the From Address of alert emails.[]> newPlease enter a new email address to send alerts.(Ex: "[email protected]")[]> [email protected] the Alert Classes. Separate multiple choices with commas.1. All2. System3. Hardware4. Updater5. Outbreak Filters6. Anti-Virus7. Anti-Spam8. Directory Harvest Attack Prevention9. Release and Support Notifications[1]> 2,3,8Select a Severity Level. Separate multiple choices with commas.1. All2. Critical3. Warning4. Information[1]> 2Sending alerts to:[email protected]
Class: Hardware - Severities: CriticalClass: Directory Harvest Attack Prevention - Severities: CriticalClass: System - Severities: Critical
Initial number of seconds to wait before sending a duplicate alert: 300Maximum number of seconds to wait before sending a duplicate alert: 3600Maximum number of alerts stored in the system are: 50
コマンド:参考例
232
コマンド:参考例
alertconfig

Alerts will be sent using the system-default From Address.Cisco IronPort AutoSupport: DisabledChoose the operation you want to perform:- NEW - Add a new email address to send alerts.- EDIT - Modify alert subscription for an email address.- DELETE - Remove an email address.- CLEAR - Remove all email addresses (disable alerts).- SETUP - Configure alert settings.- FROM - Configure the From Address of alert emails.[]>
displayalerts
説明
アプライアンスから送信された最後の n個のアラートを表示します
使用方法
確定:このコマンドに「commit」は必要ありません。
クラスタ管理:このコマンドは、すべてのマシンモード(クラスタ、グループ、マシン)で使
用できます。
バッチコマンド:このコマンドはバッチ形式をサポートしていません。
例
> displayalertsDate and Time Stamp Description--------------------------------------------------------------------------------10 Mar 2015 11:33:36 +0000 The updater could not validate the server certificate.Server certificate not validated - unable to get local issuercertificateLast message occurred 28 times between Tue Mar 10 10:34:57 2015 and Tue Mar 10 11:32:242015.10 Mar 2015 11:23:39 +0000 The updater has been unable to communicate with the updateserver for at least 1h.Last message occurred 8 times between Tue Mar 10 10:29:57 2015 and Tue Mar 10 11:18:242015.10 Mar 2015 10:33:36 +0000 The updater could not validate the server certificate.Server certificate not validated - unable to get local issuercertificateLast message occurred 26 times between Tue Mar 10 09:33:55 2015 and Tue Mar 10 10:29:572015.10 Mar 2015 10:23:39 +0000 The updater has been unable to communicate with the updateserver for at least 1h.Last message occurred 9 times between Tue Mar 10 09:26:54 2015 and Tue Mar 10 10:22:562015.
findevent
説明
メールログファイルのイベントを検索します
コマンド:参考例
233
コマンド:参考例
displayalerts

使用方法
確定:このコマンドに「commit」は必要ありません。
クラスタ管理:このコマンドは、すべてのマシンモード(クラスタ、グループ、マシン)で使
用できます。
バッチコマンド:このコマンドはバッチ形式をサポートしていません。
例:エンベロープ送信者による検索
mail.example.com> findeventPlease choose which type of search you want to perform:1. Search by envelope FROM2. Search by Message ID3. Search by Subject4. Search by envelope TO[1]> 1Enter the regular expression to search for.[]> "Currently configured logs:
Log Name Log Type Retrieval Interval---------------------------------------------------------------------------------1. mail_logs IronPort Text Mail Logs Manual Download NoneEnter the number of the log you wish to use for message tracking.[1]> 1Please choose which set of logs to search:1. All available log files2. Select log files by date list3. Current log file[3]> 3No matching message IDs were found
例:メッセージ IDによる検索
mail.example.com> findeventPlease choose which type of search you want to perform:1. Search by envelope FROM2. Search by Message ID3. Search by Subject4. Search by envelope TO[1]> 2Enter the Message ID (MID) to search for.[]> 1Currently configured logs:
Log Name Log Type Retrieval Interval---------------------------------------------------------------------------------1. mail_logs IronPort Text Mail Logs Manual Download NoneEnter the number of the log you wish to use for message tracking.[1]> 1Please choose which set of logs to search:1. All available log files2. Select log files by date list3. Current log file[3]> 1
コマンド:参考例
234
コマンド:参考例
使用方法

例:件名による検索
mail.example.com> findeventPlease choose which type of search you want to perform:1. Search by envelope FROM2. Search by Message ID3. Search by Subject4. Search by envelope TO[1]> 3Enter the regular expression to search for.[]> "Currently configured logs:
Log Name Log Type Retrieval Interval---------------------------------------------------------------------------------1. mail_logs IronPort Text Mail Logs Manual Download NoneEnter the number of the log you wish to use for message tracking.[1]> 1Please choose which set of logs to search:1. All available log files2. Select log files by date list3. Current log file[3]> 2Available mail log files, listed by log file start time.Specify multiple log files by separating with commas or specify a range with a dash:1. Thu Feb 19 05:18:02 2015[1]>No matching message IDs were found
例:エンベロープ受信者による検索
mail.example.com> findeventPlease choose which type of search you want to perform:1. Search by envelope FROM2. Search by Message ID3. Search by Subject4. Search by envelope TO[1]> 4Enter the regular expression to search for.[]> 'Currently configured logs:
Log Name Log Type Retrieval Interval---------------------------------------------------------------------------------1. mail_logs IronPort Text Mail Logs Manual Download NoneEnter the number of the log you wish to use for message tracking.[1]> 1Please choose which set of logs to search:1. All available log files2. Select log files by date list3. Current log file[3]> 3No matching message IDs were found
grep
説明
ログファイル内のテキストを検索します。
コマンド:参考例
235
コマンド:参考例
例:件名による検索

使用方法
確定:このコマンドに「commit」は必要ありません。
クラスタ管理:このコマンドはマシンモードでのみ使用できます。さらに、このコマンドはロ
グインホスト(ユーザがログインしたマシン)でのみ使用できます。このコマンドを使用する
には、ローカルファイルシステムにアクセスできる必要があります。
バッチコマンド:このコマンドはバッチ形式をサポートしていません。
grepコマンドを使用すると、ログ内の文字列を検索できます。grepコマンドを実行するときには、次の構文を使用します。
grep [-C count] [-e regex] [-i] [-p] [-t] [regex] log_name
結果を返すには、-e regexまたは regexを入力する必要があります。(注)
grepコマンドを実行するときには、次のオプションを使用します。
表 11 : grepコマンドのオプション
説明オプション
見つかった grepパターンのコンテキストを示す周辺の行を表示します。表示する行数を入力します。
-C
正規表現を入力します。-e
大文字と小文字の区別を無視します。-i
出力に改ページを追加します。-p
grepコマンドをログファイルの末尾まで実行します。-t
正規表現を入力します。regex
grepの例
次に、アンチウイルスログの中で文字列「clean」または「viral」を検索する例を示します。この grepコマンドには regex表現が含まれています。
mail3.example.com> grep "CLEAN\\|VIRAL" antivirusFri Jun 9 21:50:25 2006 Info: sophos antivirus - MID 1 - Result 'CLEAN' ()Fri Jun 9 21:53:15 2006 Info: sophos antivirus - MID 2 - Result 'CLEAN' ()Fri Jun 9 22:47:41 2006 Info: sophos antivirus - MID 3 - Result 'CLEAN' ()Fri Jun 9 22:47:41 2006 Info: sophos antivirus - MID 4 - Result 'CLEAN' ()Fri Jun 9 22:47:41 2006 Info: sophos antivirus - MID 5 - Result 'CLEAN' ()
コマンド:参考例
236
コマンド:参考例
使用方法

Fri Jun 9 22:47:41 2006 Info: sophos antivirus - MID 6 - Result 'CLEAN' ()Fri Jun 9 22:47:42 2006 Info: sophos antivirus - MID 12 - Result 'CLEAN' ()Fri Jun 9 22:53:04 2006 Info: sophos antivirus - MID 18 - Result 'VIRAL' ()Fri Jun 9 22:53:05 2006 Info: sophos antivirus - MID 16 - Result 'VIRAL' ()Fri Jun 9 22:53:06 2006 Info: sophos antivirus - MID 19 - Result 'VIRAL' ()Fri Jun 9 22:53:07 2006 Info: sophos antivirus - MID 21 - Result 'VIRAL' ()Fri Jun 9 22:53:08 2006 Info: sophos antivirus - MID 20 - Result 'VIRAL' ()Fri Jun 9 22:53:08 2006 Info: sophos antivirus - MID 22 - Result 'VIRAL' ()mail3.example.com>
logconfig
説明
ログファイルへのアクセスを設定します。
使用方法
確定:このコマンドは「commit」が必要です。
クラスタ管理:このコマンドは、すべてのマシンモード(クラスタ、グループ、マシン)で使
用できます。
バッチコマンド:このコマンドはバッチ形式をサポートしていません。
FTPプッシュログサブスクリプションの例
次の例では、logconfigコマンドを使用して、myDeliveryLogsと呼ばれる新しい配信ログを設定します。次に、ログがFTPによってリモートホストにプッシュされるように設定します。
mail3.example.com> logconfigCurrently configured logs:1. "antispam" Type: "Anti-Spam Logs" Retrieval: FTP Poll2. "antivirus" Type: "Anti-Virus Logs" Retrieval: FTP Poll3. "asarchive" Type: "Anti-Spam Archive" Retrieval: FTP Poll4. "authentication" Type: "Authentication Logs" Retrieval: FTP Poll5. "avarchive" Type: "Anti-Virus Archive" Retrieval: FTP Poll6. "bounces" Type: "Bounce Logs" Retrieval: FTP Poll7. "cli_logs" Type: "CLI Audit Logs" Retrieval: FTP Poll8. "encryption" Type: "Encryption Logs" Retrieval: FTP Poll9. "error_logs" Type: "IronPort Text Mail Logs" Retrieval: FTP Poll10. "euq_logs" Type: "IronPort Spam Quarantine Logs" Retrieval: FTP Poll11. "euqgui_logs" Type: "IronPort Spam Quarantine GUI Logs" Retrieval: FTP Poll12. "ftpd_logs" Type: "FTP Server Logs" Retrieval: FTP Poll13. "gui_logs" Type: "HTTP Logs" Retrieval: FTP Poll14. "mail_logs" Type: "IronPort Text Mail Logs" Retrieval: FTP Poll15. "reportd_logs" Type: "Reporting Logs" Retrieval: FTP Poll16. "reportqueryd_logs" Type: "Reporting Query Logs" Retrieval: FTP Poll17. "scanning" Type: "Scanning Logs" Retrieval: FTP Poll18. "slbld_logs" Type: "Safe/Block Lists Logs" Retrieval: FTP Poll19. "sntpd_logs" Type: "NTP logs" Retrieval: FTP Poll20. "status" Type: "Status Logs" Retrieval: FTP Poll21. "system_logs" Type: "System Logs" Retrieval: FTP Poll22. "trackerd_logs" Type: "Tracking Logs" Retrieval: FTP Poll23. "updater_logs" Type: "Updater Logs" Retrieval: FTP PollChoose the operation you want to perform:- NEW - Create a new log.
コマンド:参考例
237
コマンド:参考例
logconfig

- EDIT - Modify a log subscription.- DELETE - Remove a log subscription.- SETUP - General settings.- LOGHEADERS - Configure headers to log.- HOSTKEYCONFIG - Configure SSH host keys.[]> newChoose the log file type for this subscription:1. IronPort Text Mail Logs2. qmail Format Mail Logs3. Delivery Logs4. Bounce Logs5. Status Logs6. Domain Debug Logs7. Injection Debug Logs8. SMTP Conversation Logs9. System Logs10. CLI Audit Logs11. FTP Server Logs12. HTTP Logs13. NTP logs14. LDAP Debug Logs15. Anti-Spam Logs16. Anti-Spam Archive17. Anti-Virus Logs18. Anti-Virus Archive19. Scanning Logs20. IronPort Spam Quarantine Logs21. IronPort Spam Quarantine GUI Logs22. Reporting Logs23. Reporting Query Logs24. Updater Logs25. Tracking Logs26. Safe/Block Lists Logs27. Authentication Logs[1]> 8Please enter the name for the log:[]> myDeliveryLogsChoose the method to retrieve the logs.1. FTP Poll2. FTP Push3. SCP Push4. Syslog Push[1]> 2Hostname to deliver the logs:[]> yourhost.example.comUsername on the remote host:[]> yourusernamePassphrase for your user:[]> thepassphraseDirectory on remote host to place logs:[]> /logsFilename to use for log files:[conversation.text]>Maximum time to wait before transferring:[3600]>Maximum filesize before transferring:[10485760]>Currently configured logs:1. "antispam" Type: "Anti-Spam Logs" Retrieval: FTP Poll2. "antivirus" Type: "Anti-Virus Logs" Retrieval: FTP Poll3. "asarchive" Type: "Anti-Spam Archive" Retrieval: FTP Poll4. "authentication" Type: "Authentication Logs" Retrieval: FTP Poll5. "avarchive" Type: "Anti-Virus Archive" Retrieval: FTP Poll6. "bounces" Type: "Bounce Logs" Retrieval: FTP Poll
コマンド:参考例
238
コマンド:参考例
FTPプッシュログサブスクリプションの例
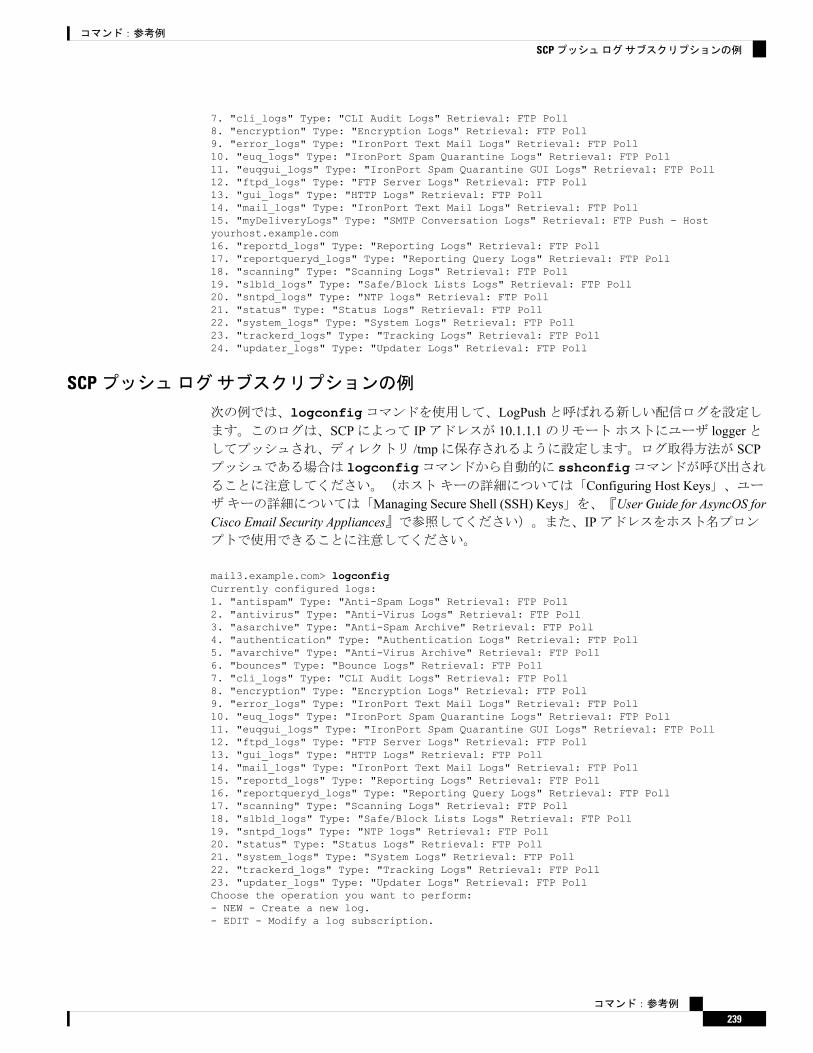
7. "cli_logs" Type: "CLI Audit Logs" Retrieval: FTP Poll8. "encryption" Type: "Encryption Logs" Retrieval: FTP Poll9. "error_logs" Type: "IronPort Text Mail Logs" Retrieval: FTP Poll10. "euq_logs" Type: "IronPort Spam Quarantine Logs" Retrieval: FTP Poll11. "euqgui_logs" Type: "IronPort Spam Quarantine GUI Logs" Retrieval: FTP Poll12. "ftpd_logs" Type: "FTP Server Logs" Retrieval: FTP Poll13. "gui_logs" Type: "HTTP Logs" Retrieval: FTP Poll14. "mail_logs" Type: "IronPort Text Mail Logs" Retrieval: FTP Poll15. "myDeliveryLogs" Type: "SMTP Conversation Logs" Retrieval: FTP Push - Hostyourhost.example.com16. "reportd_logs" Type: "Reporting Logs" Retrieval: FTP Poll17. "reportqueryd_logs" Type: "Reporting Query Logs" Retrieval: FTP Poll18. "scanning" Type: "Scanning Logs" Retrieval: FTP Poll19. "slbld_logs" Type: "Safe/Block Lists Logs" Retrieval: FTP Poll20. "sntpd_logs" Type: "NTP logs" Retrieval: FTP Poll21. "status" Type: "Status Logs" Retrieval: FTP Poll22. "system_logs" Type: "System Logs" Retrieval: FTP Poll23. "trackerd_logs" Type: "Tracking Logs" Retrieval: FTP Poll24. "updater_logs" Type: "Updater Logs" Retrieval: FTP Poll
SCPプッシュログサブスクリプションの例
次の例では、logconfigコマンドを使用して、LogPushと呼ばれる新しい配信ログを設定します。このログは、SCPによって IPアドレスが 10.1.1.1のリモートホストにユーザ loggerとしてプッシュされ、ディレクトリ /tmpに保存されるように設定します。ログ取得方法が SCPプッシュである場合は logconfigコマンドから自動的に sshconfigコマンドが呼び出されることに注意してください。(ホストキーの詳細については「Configuring Host Keys」、ユーザキーの詳細については「Managing Secure Shell (SSH) Keys」を、『User Guide for AsyncOS forCisco Email Security Appliances』で参照してください)。また、IPアドレスをホスト名プロンプトで使用できることに注意してください。
mail3.example.com> logconfigCurrently configured logs:1. "antispam" Type: "Anti-Spam Logs" Retrieval: FTP Poll2. "antivirus" Type: "Anti-Virus Logs" Retrieval: FTP Poll3. "asarchive" Type: "Anti-Spam Archive" Retrieval: FTP Poll4. "authentication" Type: "Authentication Logs" Retrieval: FTP Poll5. "avarchive" Type: "Anti-Virus Archive" Retrieval: FTP Poll6. "bounces" Type: "Bounce Logs" Retrieval: FTP Poll7. "cli_logs" Type: "CLI Audit Logs" Retrieval: FTP Poll8. "encryption" Type: "Encryption Logs" Retrieval: FTP Poll9. "error_logs" Type: "IronPort Text Mail Logs" Retrieval: FTP Poll10. "euq_logs" Type: "IronPort Spam Quarantine Logs" Retrieval: FTP Poll11. "euqgui_logs" Type: "IronPort Spam Quarantine GUI Logs" Retrieval: FTP Poll12. "ftpd_logs" Type: "FTP Server Logs" Retrieval: FTP Poll13. "gui_logs" Type: "HTTP Logs" Retrieval: FTP Poll14. "mail_logs" Type: "IronPort Text Mail Logs" Retrieval: FTP Poll15. "reportd_logs" Type: "Reporting Logs" Retrieval: FTP Poll16. "reportqueryd_logs" Type: "Reporting Query Logs" Retrieval: FTP Poll17. "scanning" Type: "Scanning Logs" Retrieval: FTP Poll18. "slbld_logs" Type: "Safe/Block Lists Logs" Retrieval: FTP Poll19. "sntpd_logs" Type: "NTP logs" Retrieval: FTP Poll20. "status" Type: "Status Logs" Retrieval: FTP Poll21. "system_logs" Type: "System Logs" Retrieval: FTP Poll22. "trackerd_logs" Type: "Tracking Logs" Retrieval: FTP Poll23. "updater_logs" Type: "Updater Logs" Retrieval: FTP PollChoose the operation you want to perform:- NEW - Create a new log.- EDIT - Modify a log subscription.
コマンド:参考例
239
コマンド:参考例
SCPプッシュログサブスクリプションの例

- DELETE - Remove a log subscription.- SETUP - General settings.- LOGHEADERS - Configure headers to log.- HOSTKEYCONFIG - Configure SSH host keys.[]> newChoose the log file type for this subscription:1. IronPort Text Mail Logs2. qmail Format Mail Logs3. Delivery Logs4. Bounce Logs5. Status Logs6. Domain Debug Logs7. Injection Debug Logs8. SMTP Conversation Logs9. System Logs10. CLI Audit Logs11. FTP Server Logs12. HTTP Logs13. NTP logs14. LDAP Debug Logs15. Anti-Spam Logs16. Anti-Spam Archive17. Anti-Virus Logs18. Anti-Virus Archive19. Scanning Logs20. IronPort Spam Quarantine Logs21. IronPort Spam Quarantine GUI Logs22. Reporting Logs23. Reporting Query Logs24. Updater Logs25. Tracking Logs26. Safe/Block Lists Logs27. Authentication Logs[1]> 3Please enter the name for the log:[]> LogPushChoose the method to retrieve the logs.1. FTP Poll2. FTP Push3. SCP Push[1]> 3Hostname to deliver the logs:[]> 10.1.1.1Port to connect to on the remote host:[22]>Username on the remote host:[]> loggerDirectory on remote host to place logs:[]> /tmpFilename to use for log files:[delivery.log]>Maximum time to wait before transferring:[3600]>Maximum filesize before transferring:[10485760]>Protocol:1. SSH12. SSH2[2]> 2Do you want to enable host key checking? [N]> yDo you want to automatically scan the host for its SSH key, or enter itmanually?1. Automatically scan.2. Enter manually.
コマンド:参考例
240
コマンド:参考例
SCPプッシュログサブスクリプションの例

[1]> 1SSH2:dsa10.1.1.1 ssh-dssAAAAB3NzaC1kc3MAAACBALwGi4IlWLDVndbIwEsArt9LVE2ts5yE9JBTSdUwLvoq0G3FRqifrce92zgyHtc/ZWyXavUTIM3Xd1bpiEcscMp2XKpSnPPx21y8bqkpJsSCQcM8zZMDjnOPm8ghiwHXYh7oNEUJCCPnPxAy44rlJ5Yz4x9eIoALp0dHU0GR+j1NAAAAFQDQi5GY/X9PlDM3fPMvEx7wc0edlwAAAIB9cgMTEFP1WTAGrlRtbowZP5zWZtVDTxLhdXzjlo4+bB4hBR7DKuc80+naAFnThyH/J8R3WlJVF79M5geKJbXzuJGDK3Zwl3UYefPqBqXp2O1zLRQSJYx1WhwYz/rooopN1BnF4sh12mtq3tde1176bQgtwaQA4wKO15k3zOWsPwAAAIAicRYat3y+Blv/V6wdE6BBk+oULv3eK38gafuip4WMBxkG9GO6EQi8nss82oznwWBy/pITRQfh4MBmlxTF4VEY00sARrlZtuUJC1QGQvCgh7Nd3YNais2CSbEKBEaIOTF6+SX2RNpcUF3Wg5ygw92xtqQPKMcZeLtK2ZJRkhC+Vw==Add the preceding host key(s) for 10.1.1.1? [Y]> yCurrently installed host keys:1. 10.1.1.1 1024 35 12260642076447444117847407996206675325...35205656072. 10.1.1.1 ssh-dss AAAAB3NzaC1kc3MAAACBALwGi4IlWLDVndbIwE...JRkhC+Vw==Choose the operation you want to perform:- NEW - Add a new key.- EDIT - Modify a key.- DELETE - Remove a key.- SCAN - Automatically download a host key.- PRINT - Display a key.- HOST - Display this machine's host keys.[]>Maximum filesize before transferring:[10485760]>Protocol:1. SSH12. SSH2[2]> 2Do you want to enable host key checking? [N]> yCurrently installed host keys:Choose the operation you want to perform:- NEW - Add a new key.- SCAN - Automatically download a host key.- HOST - Display this machine's host keys.[]> scanChoose the ssh protocol type:1. SSH1:rsa2. SSH2:rsa3. SSH2:dsa4. All[4]> 4SSH1:rsa10.1.1.1 1024 35122606420764474441178474079962066753259278682648965870690129496065430424463013457294798980627829828033793152226448694514316218272814453986931612508282328008815740072109975632356478532128816187806830746328234327778100131128176672666244511191783747965898000855947022484692079466697707373948871554575173520565607
Syslogプッシュログサブスクリプションの例
次の例では、logconfigコマンドを使用して、MailLog SyslogPushと呼ばれる新しい配信ログを設定します。このログは、UPDを使用して IPアドレスが 10.1.1.2のリモート syslogサーバに「メール」ファシリティでプッシュされ、所定のディレクトリに保存されるように設定し
ます。
mail3.example.com> logconfigCurrently configured logs:1. "antispam" Type: "Anti-Spam Logs" Retrieval: FTP Poll2. "antivirus" Type: "Anti-Virus Logs" Retrieval: FTP Poll3. "asarchive" Type: "Anti-Spam Archive" Retrieval: FTP Poll4. "authentication" Type: "Authentication Logs" Retrieval: FTP Poll5. "avarchive" Type: "Anti-Virus Archive" Retrieval: FTP Poll6. "bounces" Type: "Bounce Logs" Retrieval: FTP Poll
コマンド:参考例
241
コマンド:参考例
Syslogプッシュログサブスクリプションの例

7. "cli_logs" Type: "CLI Audit Logs" Retrieval: FTP Poll8. "encryption" Type: "Encryption Logs" Retrieval: FTP Poll9. "error_logs" Type: "IronPort Text Mail Logs" Retrieval: FTP Poll10. "euq_logs" Type: "IronPort Spam Quarantine Logs" Retrieval: FTP Poll11. "euqgui_logs" Type: "IronPort Spam Quarantine GUI Logs" Retrieval: FTP Poll12. "ftpd_logs" Type: "FTP Server Logs" Retrieval: FTP Poll13. "gui_logs" Type: "HTTP Logs" Retrieval: FTP Poll14. "mail_logs" Type: "IronPort Text Mail Logs" Retrieval: FTP Poll15. "reportd_logs" Type: "Reporting Logs" Retrieval: FTP Poll16. "reportqueryd_logs" Type: "Reporting Query Logs" Retrieval: FTP Poll17. "scanning" Type: "Scanning Logs" Retrieval: FTP Poll18. "slbld_logs" Type: "Safe/Block Lists Logs" Retrieval: FTP Poll19. "sntpd_logs" Type: "NTP logs" Retrieval: FTP Poll20. "status" Type: "Status Logs" Retrieval: FTP Poll21. "system_logs" Type: "System Logs" Retrieval: FTP Poll22. "trackerd_logs" Type: "Tracking Logs" Retrieval: FTP Poll23. "updater_logs" Type: "Updater Logs" Retrieval: FTP PollChoose the operation you want to perform:- NEW - Create a new log.- EDIT - Modify a log subscription.- DELETE - Remove a log subscription.- SETUP - General settings.- LOGHEADERS - Configure headers to log.- HOSTKEYCONFIG - Configure SSH host keys.[]> newChoose the log file type for this subscription:1. IronPort Text Mail Logs2. qmail Format Mail Logs3. Delivery Logs4. Bounce Logs5. Status Logs6. Domain Debug Logs7. Injection Debug Logs8. SMTP Conversation Logs9. System Logs10. CLI Audit Logs11. FTP Server Logs12. HTTP Logs13. NTP logs14. LDAP Debug Logs15. Anti-Spam Logs16. Anti-Spam Archive17. Anti-Virus Logs18. Anti-Virus Archive19. Scanning Logs20. IronPort Spam Quarantine Logs21. IronPort Spam Quarantine GUI Logs22. Reporting Logs23. Reporting Query Logs24. Updater Logs25. Tracking Logs26. Safe/Block Lists Logs27. Authentication Logs[1]> 1Please enter the name for the log:[]> MailLogSyslogPushLog level:1. Critical2. Warning3. Information4. Debug5. Trace[3]> 2Choose the method to retrieve the logs.
コマンド:参考例
242
コマンド:参考例
Syslogプッシュログサブスクリプションの例
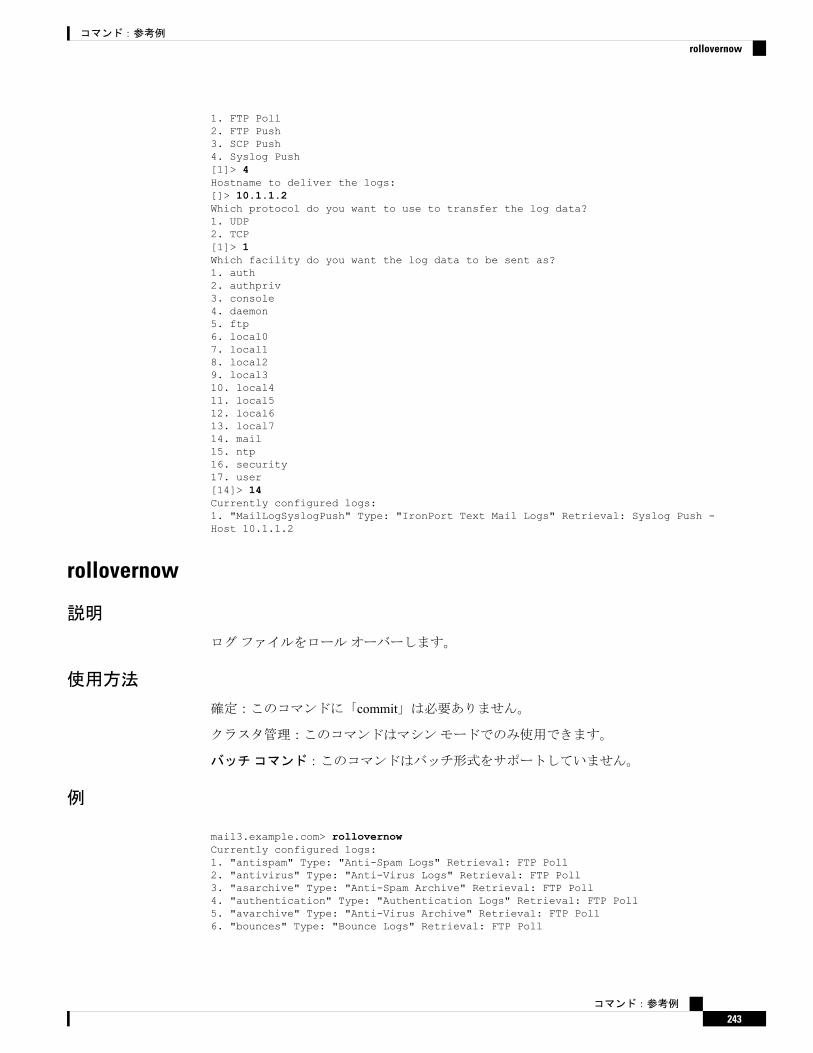
1. FTP Poll2. FTP Push3. SCP Push4. Syslog Push[1]> 4Hostname to deliver the logs:[]> 10.1.1.2Which protocol do you want to use to transfer the log data?1. UDP2. TCP[1]> 1Which facility do you want the log data to be sent as?1. auth2. authpriv3. console4. daemon5. ftp6. local07. local18. local29. local310. local411. local512. local613. local714. mail15. ntp16. security17. user[14]> 14Currently configured logs:1. "MailLogSyslogPush" Type: "IronPort Text Mail Logs" Retrieval: Syslog Push -Host 10.1.1.2
rollovernow
説明
ログファイルをロールオーバーします。
使用方法
確定:このコマンドに「commit」は必要ありません。
クラスタ管理:このコマンドはマシンモードでのみ使用できます。
バッチコマンド:このコマンドはバッチ形式をサポートしていません。
例
mail3.example.com> rollovernowCurrently configured logs:1. "antispam" Type: "Anti-Spam Logs" Retrieval: FTP Poll2. "antivirus" Type: "Anti-Virus Logs" Retrieval: FTP Poll3. "asarchive" Type: "Anti-Spam Archive" Retrieval: FTP Poll4. "authentication" Type: "Authentication Logs" Retrieval: FTP Poll5. "avarchive" Type: "Anti-Virus Archive" Retrieval: FTP Poll6. "bounces" Type: "Bounce Logs" Retrieval: FTP Poll
コマンド:参考例
243
コマンド:参考例
rollovernow

7. "cli_logs" Type: "CLI Audit Logs" Retrieval: FTP Poll8. "encryption" Type: "Encryption Logs" Retrieval: FTP Poll9. "error_logs" Type: "IronPort Text Mail Logs" Retrieval: FTP Poll10. "euq_logs" Type: "IronPort Spam Quarantine Logs" Retrieval: FTP Poll11. "euqgui_logs" Type: "IronPort Spam Quarantine GUI Logs" Retrieval: FTP Poll12. "ftpd_logs" Type: "FTP Server Logs" Retrieval: FTP Poll13. "gui_logs" Type: "HTTP Logs" Retrieval: FTP Poll14. "mail_logs" Type: "IronPort Text Mail Logs" Retrieval: FTP Poll15. "reportd_logs" Type: "Reporting Logs" Retrieval: FTP Poll16. "reportqueryd_logs" Type: "Reporting Query Logs" Retrieval: FTP Poll17. "scanning" Type: "Scanning Logs" Retrieval: FTP Poll18. "slbld_logs" Type: "Safe/Block Lists Logs" Retrieval: FTP Poll19. "sntpd_logs" Type: "NTP logs" Retrieval: FTP Poll20. "status" Type: "Status Logs" Retrieval: FTP Poll21. "system_logs" Type: "System Logs" Retrieval: FTP Poll22. "trackerd_logs" Type: "Tracking Logs" Retrieval: FTP Poll23. "updater_logs" Type: "Updater Logs" Retrieval: FTP Poll24. All LogsWhich log would you like to roll over?[]> 2Log files successfully rolled over.mail3.example.com>
snmpconfig
説明
SNMPを設定します。
使用方法
確定:このコマンドは「commit」が必要です。
クラスタ管理:このコマンドは、すべてのマシンモード(クラスタ、グループ、マシン)で使
用できます。
バッチコマンド:このコマンドはバッチ形式をサポートしていません。
例
次の例では、snmpconfigコマンドを使用して、ポート 161の「PublicNet」インターフェイスでSNMPをイネーブルにしています。バージョン 3のパスフレーズが入力され、確認のために再入力されています。システムは、バージョン 1および 2要求を処理するように設定されており、これらのバージョン 1および 2からの GET要求に対してコミュニティストリング publicが入力されています。トラップターゲット snmp-monitor.example.comが入力されています。最後に、システムの場所と連絡先情報が入力されています。
mail3.example.com> snmpconfigCurrent SNMP settings:SNMP Disabled.Choose the operation you want to perform:- SETUP - Configure SNMP.[]> setupDo you want to enable SNMP? [N]> yPlease choose an IP interface for SNMP requests.
コマンド:参考例
244
コマンド:参考例
snmpconfig
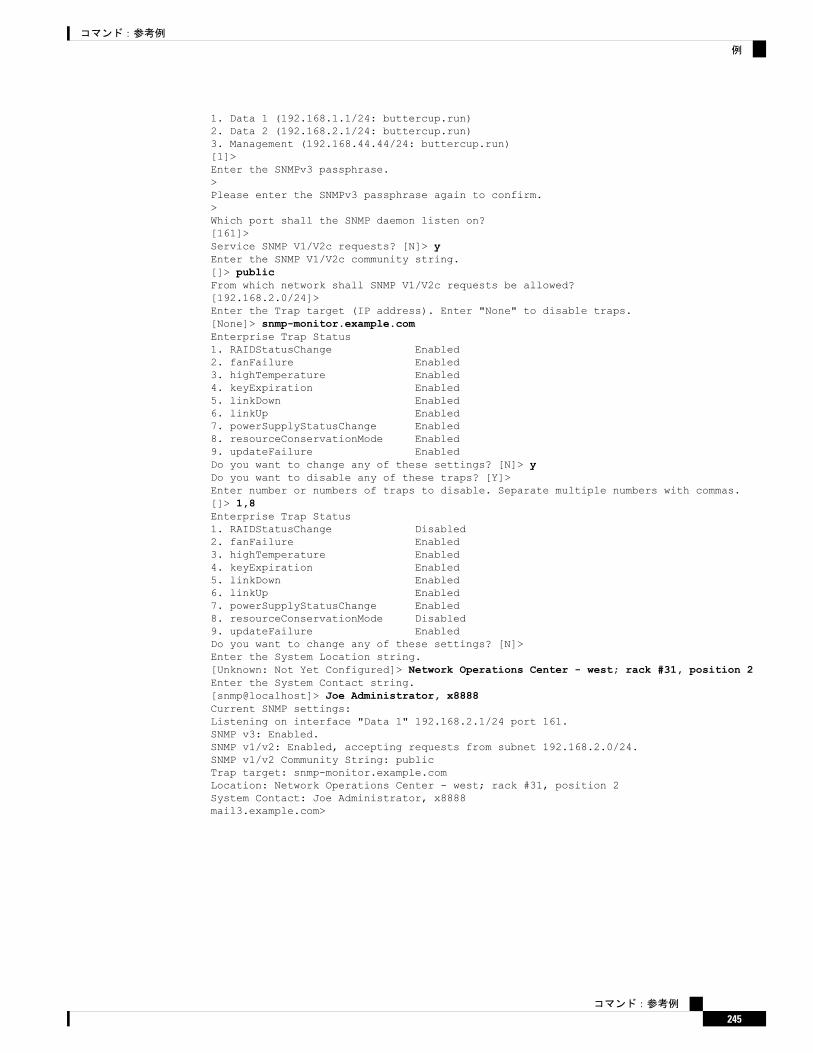
1. Data 1 (192.168.1.1/24: buttercup.run)2. Data 2 (192.168.2.1/24: buttercup.run)3. Management (192.168.44.44/24: buttercup.run)[1]>Enter the SNMPv3 passphrase.>Please enter the SNMPv3 passphrase again to confirm.>Which port shall the SNMP daemon listen on?[161]>Service SNMP V1/V2c requests? [N]> yEnter the SNMP V1/V2c community string.[]> publicFrom which network shall SNMP V1/V2c requests be allowed?[192.168.2.0/24]>Enter the Trap target (IP address). Enter "None" to disable traps.[None]> snmp-monitor.example.comEnterprise Trap Status1. RAIDStatusChange Enabled2. fanFailure Enabled3. highTemperature Enabled4. keyExpiration Enabled5. linkDown Enabled6. linkUp Enabled7. powerSupplyStatusChange Enabled8. resourceConservationMode Enabled9. updateFailure EnabledDo you want to change any of these settings? [N]> yDo you want to disable any of these traps? [Y]>Enter number or numbers of traps to disable. Separate multiple numbers with commas.[]> 1,8Enterprise Trap Status1. RAIDStatusChange Disabled2. fanFailure Enabled3. highTemperature Enabled4. keyExpiration Enabled5. linkDown Enabled6. linkUp Enabled7. powerSupplyStatusChange Enabled8. resourceConservationMode Disabled9. updateFailure EnabledDo you want to change any of these settings? [N]>Enter the System Location string.[Unknown: Not Yet Configured]> Network Operations Center - west; rack #31, position 2Enter the System Contact string.[snmp@localhost]> Joe Administrator, x8888Current SNMP settings:Listening on interface "Data 1" 192.168.2.1/24 port 161.SNMP v3: Enabled.SNMP v1/v2: Enabled, accepting requests from subnet 192.168.2.0/24.SNMP v1/v2 Community String: publicTrap target: snmp-monitor.example.comLocation: Network Operations Center - west; rack #31, position 2System Contact: Joe Administrator, x8888mail3.example.com>
コマンド:参考例
245
コマンド:参考例
例

tail
説明
ログファイルの最新部分を継続的に表示します。tailコマンドには、表示するログの名前または番号をパラメータ tail 9または tail mail_logsとして指定することもできます。
使用方法
確定:このコマンドに「commit」は必要ありません。
クラスタ管理:このコマンドはマシンモードでのみ使用できます。さらに、このコマンドはロ
グインホスト(ユーザがログインしたマシン)でのみ使用できます。このコマンドを使用する
には、ローカルファイルシステムにアクセスできる必要があります。
バッチコマンド:このコマンドはバッチ形式をサポートしていません。
例
mail3.example.com> tailCurrently configured logs:1. "antispam" Type: "Anti-Spam Logs" Retrieval: FTP Poll2. "antivirus" Type: "Anti-Virus Logs" Retrieval: FTP Poll3. "asarchive" Type: "Anti-Spam Archive" Retrieval: FTP Poll4. "authentication" Type: "Authentication Logs" Retrieval: FTP Poll5. "avarchive" Type: "Anti-Virus Archive" Retrieval: FTP Poll6. "bounces" Type: "Bounce Logs" Retrieval: FTP Poll7. "cli_logs" Type: "CLI Audit Logs" Retrieval: FTP Poll8. "encryption" Type: "Encryption Logs" Retrieval: FTP Poll9. "error_logs" Type: "IronPort Text Mail Logs" Retrieval: FTP Poll10. "euq_logs" Type: "IronPort Spam Quarantine Logs" Retrieval: FTP Poll11. "euqgui_logs" Type: "IronPort Spam Quarantine GUI Logs" Retrieval: FTP Poll12. "ftpd_logs" Type: "FTP Server Logs" Retrieval: FTP Poll13. "gui_logs" Type: "HTTP Logs" Retrieval: FTP Poll14. "mail_logs" Type: "IronPort Text Mail Logs" Retrieval: FTP Poll15. "reportd_logs" Type: "Reporting Logs" Retrieval: FTP Poll16. "reportqueryd_logs" Type: "Reporting Query Logs" Retrieval: FTP Poll17. "scanning" Type: "Scanning Logs" Retrieval: FTP Poll18. "slbld_logs" Type: "Safe/Block Lists Logs" Retrieval: FTP Poll19. "sntpd_logs" Type: "NTP logs" Retrieval: FTP Poll20. "status" Type: "Status Logs" Retrieval: FTP Poll21. "system_logs" Type: "System Logs" Retrieval: FTP Poll22. "trackerd_logs" Type: "Tracking Logs" Retrieval: FTP Poll23. "updater_logs" Type: "Updater Logs" Retrieval: FTP PollEnter the number of the log you wish to tail.[]> 19Press Ctrl-C to stop.Sat May 15 12:25:10 2008 Info: PID 274: User system commit changes: Automated Update forQuarantine Delivery HostSat May 15 23:18:10 2008 Info: PID 19626: User admin commit changes:Sat May 15 23:18:10 2008 Info: PID 274: User system commit changes: Updated filter logsconfigSat May 15 23:46:06 2008 Info: PID 25696: User admin commit changes: Receiving suspended.Sat May 15 23:46:06 2008 Info: PID 25696: User admin commit changes: Suspended receiving.Sat May 15 23:46:35 2008 Info: PID 25696: User admin commit changes: Receiving resumed.Sat May 15 23:46:35 2008 Info: PID 25696: User admin commit changes: Receiving resumed.Sat May 15 23:48:17 2008 Info: PID 25696: User admin commit changes:Sun May 16 00:00:00 2008 Info: Generated report: name b, start time Sun May 16 00:00:00
コマンド:参考例
246
コマンド:参考例
tail

2004, size 2154 bytes^Cmail3.example.com>
レポートここでは、次の CLIコマンドについて説明します。
• reportingconfig(247ページ)
reportingconfig
reportingconfigコマンドの使用
reportingconfigサブメニューでは、以下のサブコマンドを使用できます。
表 12 : reportingconfigサブコマンド
アベイラビリティ説明構文
M-Seriesのみセキュリティ管理アプライアンスのフィ
ルタを設定します。
filters
M-Seriesのみレポートデータを取得できなかった場
合にアラートを受け取るまでの時間を
設定します。
alert_timeout
M-Seriesのみドメインレポート設定を指定します。domain
C-Series、M-Seriesセキュリティ管理アプライアンスで中
央集中型レポーティングをイネーブル
にします。Eメールセキュリティアプライアンスの中央集中型またはローカ
ルレポーティングをイネーブルにしま
す。
mode
C-SeriesのみEメールセキュリティアプライアンスのレポーティングを設定します。
mailsetup
使用方法
確定:このコマンドは「commit」が必要です。
例:レポーティングフィルタのイネーブル化(M-Seriesのみ)
mail3.example.com> reportingconfigChoose the operation you want to perform:
コマンド:参考例
247
コマンド:参考例
レポート

- FILTERS - Configure filtering for the SMA.- ALERT_TIMEOUT - Configure when you will be alerted due to failing to get reportingdata- DOMAIN - Configure domain report settings.- MODE - Enable/disable centralized reporting.[]> filtersFilters remove specific sets of centralized reporting data from the "last year" reports.
Data from the reporting groups selected below will not be recorded.All filtering has been disabled.1. No Filtering enabled2. IP Connection Level Detail.3. User Detail.4. Mail Traffic Detail.Choose which groups to filter, you can specify multiple filters by entering a commaseparated list:[]> 2, 3Choose the operation you want to perform:- FILTERS - Configure filtering for the SMA.- ALERT_TIMEOUT - Configure when you will be alerted due to failing to getreporting data- DOMAIN - Configure domain report settings.- MODE - Enable/disable centralized reporting.[]>
ドメインレポートの HAT REJECT情報のイネーブル化(M-Seriesのみ)
mail3.example.com> reportingconfigChoose the operation you want to perform:- FILTERS - Configure filtering for the SMA.- ALERT_TIMEOUT - Configure when you will be alerted due to failing to get reportingdata- DOMAIN - Configure domain report settings.- MODE - Enable/disable centralized reporting.[]> domainIf you have configured HAT REJECT policy on all remote appliances providing reportingdata to this appliance to occur at the messagerecipient level then of domain reports.Use message recipient HAT REJECT information for domain reports? [N]> yChoose the operation you want to perform:- FILTERS - Configure filtering for the SMA.- ALERT_TIMEOUT - Configure when you will be alerted due to failing to get reportingdata- DOMAIN - Configure domain report settings.- MODE - Enable/disable centralized reporting.[]>
タイムアウトアラートのイネーブル化(M-Seriesのみ)
mail3.example.com> reportingconfigChoose the operation you want to perform:- FILTERS - Configure filtering for the SMA.- ALERT_TIMEOUT - Configure when you will be alerted due to failing to get reportingdata- DOMAIN - Configure domain report settings.- MODE - Enable/disable centralized reporting.[]> alert_timeoutAn alert will be sent if reporting data has not been fetched from an appliance after 360minutes.Would you like timeout alerts to be enabled? [Y]> yAfter how many minutes should an alert be sent?
コマンド:参考例
248
コマンド:参考例
ドメインレポートの HAT REJECT情報のイネーブル化(M-Seriesのみ)
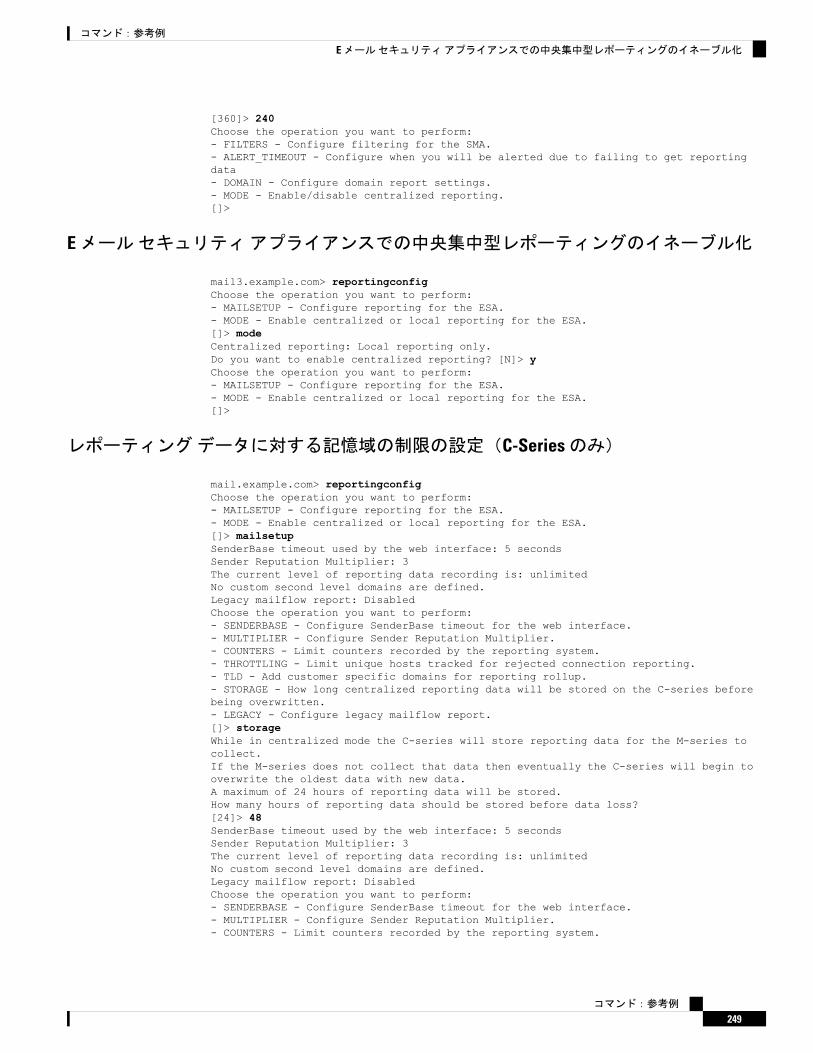
[360]> 240Choose the operation you want to perform:- FILTERS - Configure filtering for the SMA.- ALERT_TIMEOUT - Configure when you will be alerted due to failing to get reportingdata- DOMAIN - Configure domain report settings.- MODE - Enable/disable centralized reporting.[]>
Eメールセキュリティアプライアンスでの中央集中型レポーティングのイネーブル化
mail3.example.com> reportingconfigChoose the operation you want to perform:- MAILSETUP - Configure reporting for the ESA.- MODE - Enable centralized or local reporting for the ESA.[]> modeCentralized reporting: Local reporting only.Do you want to enable centralized reporting? [N]> yChoose the operation you want to perform:- MAILSETUP - Configure reporting for the ESA.- MODE - Enable centralized or local reporting for the ESA.[]>
レポーティングデータに対する記憶域の制限の設定(C-Seriesのみ)
mail.example.com> reportingconfigChoose the operation you want to perform:- MAILSETUP - Configure reporting for the ESA.- MODE - Enable centralized or local reporting for the ESA.[]> mailsetupSenderBase timeout used by the web interface: 5 secondsSender Reputation Multiplier: 3The current level of reporting data recording is: unlimitedNo custom second level domains are defined.Legacy mailflow report: DisabledChoose the operation you want to perform:- SENDERBASE - Configure SenderBase timeout for the web interface.- MULTIPLIER - Configure Sender Reputation Multiplier.- COUNTERS - Limit counters recorded by the reporting system.- THROTTLING - Limit unique hosts tracked for rejected connection reporting.- TLD - Add customer specific domains for reporting rollup.- STORAGE - How long centralized reporting data will be stored on the C-series beforebeing overwritten.- LEGACY - Configure legacy mailflow report.[]> storageWhile in centralized mode the C-series will store reporting data for the M-series tocollect.If the M-series does not collect that data then eventually the C-series will begin tooverwrite the oldest data with new data.A maximum of 24 hours of reporting data will be stored.How many hours of reporting data should be stored before data loss?[24]> 48SenderBase timeout used by the web interface: 5 secondsSender Reputation Multiplier: 3The current level of reporting data recording is: unlimitedNo custom second level domains are defined.Legacy mailflow report: DisabledChoose the operation you want to perform:- SENDERBASE - Configure SenderBase timeout for the web interface.- MULTIPLIER - Configure Sender Reputation Multiplier.- COUNTERS - Limit counters recorded by the reporting system.
コマンド:参考例
249
コマンド:参考例
Eメールセキュリティアプライアンスでの中央集中型レポーティングのイネーブル化

- THROTTLING - Limit unique hosts tracked for rejected connection reporting.- TLD - Add customer specific domains for reporting rollup.- STORAGE - How long centralized reporting data will be stored on the C-seriesbefore being overwritten.- LEGACY - Configure legacy mailflow report.[]>
Senderbaseここでは、次の CLIコマンドについて説明します。
• sbstatus(250ページ)• senderbaseconfig(250ページ)
sbstatus
説明
SenderBaseクエリーのステータスを表示します。
使用方法
確定:このコマンドは「commit」が必要です。
クラスタ管理:このコマンドは、すべてのマシンモード(クラスタ、グループ、マシン)で使
用できます。
バッチコマンド:このコマンドはバッチ形式をサポートしていません。
例
mail3.example.com> sbstatusSenderBase host statusStatus as of: Tue Oct 21 10:55:04 2003Host up/down: up
アプライアンスがSenderBase評価サービスに接続できない場合、つまりこのサービスへの接続が成功しなかった場合は、次のように表示されます。
mail3.example.com> sbstatusSenderBase host statusHost up/down: Unknown (never contacted)
senderbaseconfig
説明
SenderBaseの接続設定を指定します。
コマンド:参考例
250
コマンド:参考例
Senderbase
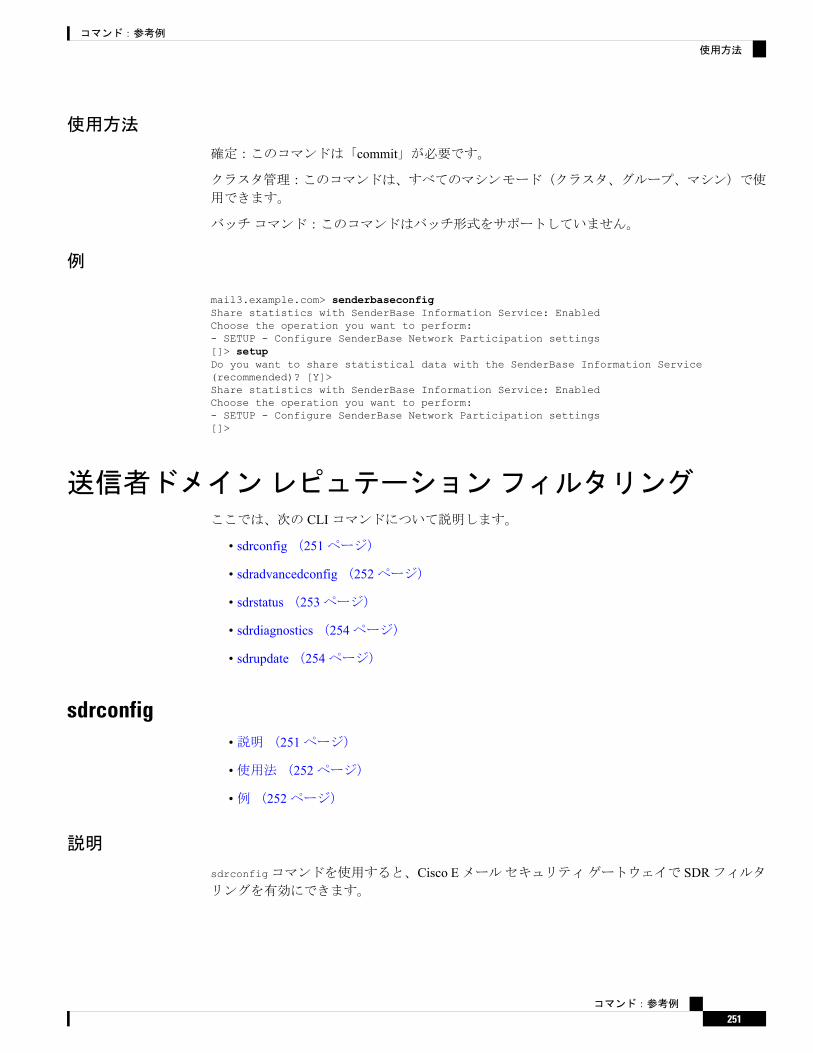
使用方法
確定:このコマンドは「commit」が必要です。
クラスタ管理:このコマンドは、すべてのマシンモード(クラスタ、グループ、マシン)で使
用できます。
バッチコマンド:このコマンドはバッチ形式をサポートしていません。
例
mail3.example.com> senderbaseconfigShare statistics with SenderBase Information Service: EnabledChoose the operation you want to perform:- SETUP - Configure SenderBase Network Participation settings[]> setupDo you want to share statistical data with the SenderBase Information Service(recommended)? [Y]>Share statistics with SenderBase Information Service: EnabledChoose the operation you want to perform:- SETUP - Configure SenderBase Network Participation settings[]>
送信者ドメインレピュテーションフィルタリングここでは、次の CLIコマンドについて説明します。
• sdrconfig(251ページ)
• sdradvancedconfig(252ページ)
• sdrstatus(253ページ)
• sdrdiagnostics(254ページ)
• sdrupdate(254ページ)
sdrconfig•説明(251ページ)
•使用法(252ページ)
•例(252ページ)
説明
sdrconfigコマンドを使用すると、Cisco Eメールセキュリティゲートウェイで SDRフィルタリングを有効にできます。
コマンド:参考例
251
コマンド:参考例
使用方法

使用法
確定:このコマンドは「commit」が必要です。
クラスタ管理:このコマンドは、すべてのマシンモード(クラスタ、グループ、マシン)で使
用できます。
バッチコマンド:このコマンドはバッチ形式をサポートしています。詳細については、help
sdrconfigコマンドを入力して、インラインヘルプを参照してください。
例
次の例で、sdrconfigコマンドを使用すると、CiscoEメールセキュリティゲートウェイでSDRフィルタリングを有効にできます
mail.example.com > sdrconfig
Would you like to enable sender domain reputation check? [N]> yes
SDR uses headers such as 'Envelope-From:', 'From:' and 'Reply-to' to determine thereputation of the message.In addition, it also uses the results of the email authentication mechanisms such asSPF, DKIM, and DMARCto decide the reputation.The following additional attributes of the message can also be included in the SenderDomain Reputationcheck to improve the efficacy:
- Username part of the email address present in the 'Envelope-From:', 'From:' and'Reply-To:' headers.- Display name in the 'From:' and 'Reply-To:' headers.
Do you want to include these additional attributes of the message for the Sender DomainReputation check? [N]> yes
Sender Domain Reputation (SDR) is a new feature in AsyncOS 12.0 that sends certaintelemetry data to Cisco.If you choose to enable the 'Additional Attributes' function in SDR, that telemetry datawill includethe processing of personal data as described in the Cisco ESA Privacy Data Sheet(https://www.cisco.com/c/en/us/about/trust-center/solutions-privacy-data-sheets.html)and theCisco Online Privacy Statement(https://www.cisco.com/c/en_in/about/legal/privacy-full.html).To enable the "Additional Attributes" feature in SDR, you must agree to the Cisco ContentSecurity SupplementalEnd User License Agreement(https://www.cisco.com/c/en/us/about/legal/cloud-and-software/software-terms.html).By selecting Yes, you agree to be bound to the Cisco Content Security Supplemental EndUser License Agreement(https://www.cisco.com/c/en/us/about/legal/cloud-and-software/software-terms.html).
I accept the Cisco Content Security Supplemental End User License Agreement. [N]> yes
sdradvancedconfig•説明(253ページ)
コマンド:参考例
252
コマンド:参考例
使用法
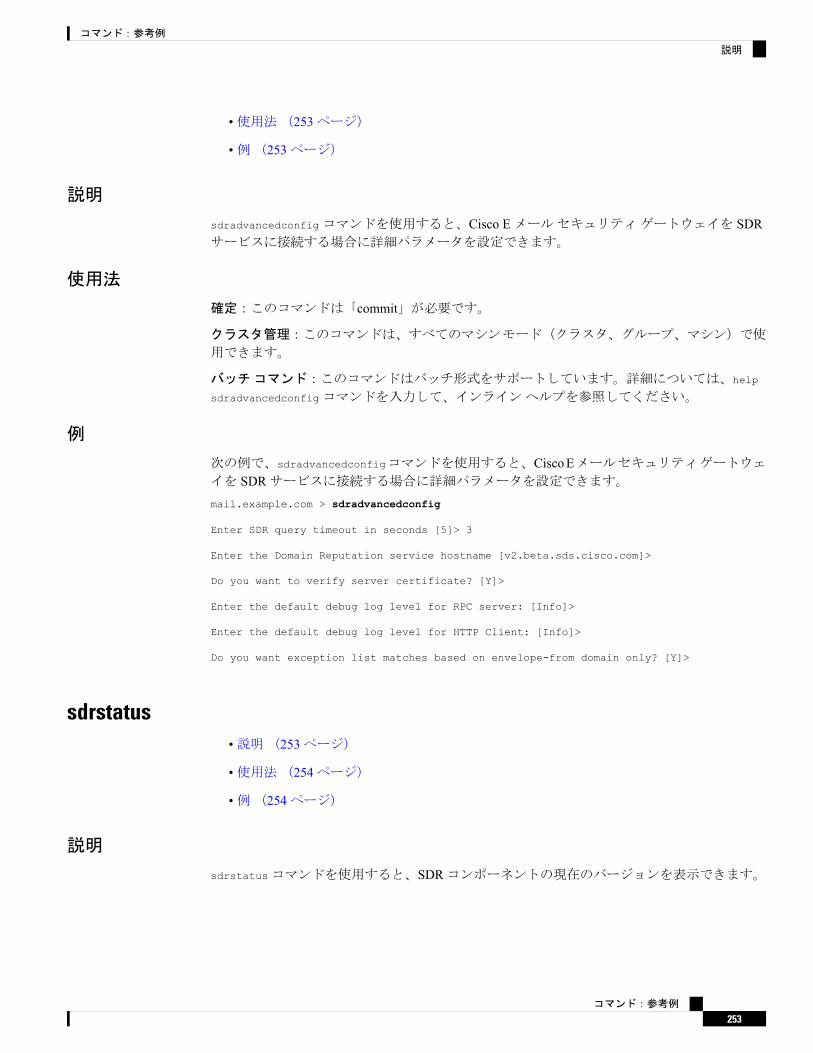
•使用法(253ページ)
•例(253ページ)
説明
sdradvancedconfigコマンドを使用すると、Cisco Eメールセキュリティゲートウェイを SDRサービスに接続する場合に詳細パラメータを設定できます。
使用法
確定:このコマンドは「commit」が必要です。
クラスタ管理:このコマンドは、すべてのマシンモード(クラスタ、グループ、マシン)で使
用できます。
バッチコマンド:このコマンドはバッチ形式をサポートしています。詳細については、help
sdradvancedconfigコマンドを入力して、インラインヘルプを参照してください。
例
次の例で、sdradvancedconfigコマンドを使用すると、CiscoEメールセキュリティゲートウェイを SDRサービスに接続する場合に詳細パラメータを設定できます。mail.example.com > sdradvancedconfig
Enter SDR query timeout in seconds [5]> 3
Enter the Domain Reputation service hostname [v2.beta.sds.cisco.com]>
Do you want to verify server certificate? [Y]>
Enter the default debug log level for RPC server: [Info]>
Enter the default debug log level for HTTP Client: [Info]>
Do you want exception list matches based on envelope-from domain only? [Y]>
sdrstatus•説明(253ページ)
•使用法(254ページ)
•例(254ページ)
説明
sdrstatusコマンドを使用すると、SDRコンポーネントの現在のバージョンを表示できます。
コマンド:参考例
253
コマンド:参考例
説明

使用法
確定:このコマンドに commitは必要ありません。
クラスタ管理:このコマンドはマシンモードでのみ使用できます。
バッチコマンド:このコマンドはバッチ形式をサポートしていません。
例
次の例で、sdrstatusコマンドを使用すると、SDRコンポーネントの現在のバージョンを表示できます。
mail.example.com> sdrstatus
Component Version Last UpdatedSDR Client 1.0 2 Jul 2018 04:22 (GMT +00:00)
sdrupdate•説明(254ページ)
•使用法(254ページ)
•例(254ページ)
説明
sdrupdateコマンドを使用すると、SDRコンポーネントを手動で更新できます。
使用法
確定:このコマンドに commitは必要ありません。
クラスタ管理:このコマンドはマシンモードでのみ使用できます。
バッチコマンド:このコマンドはバッチ形式をサポートしていません。
例
次の例で、sdrupdateコマンドを使用すると、SDRコンポーネントを手動で更新できます。mail.example.com > sdrupdate
Requesting update of Sender Domain Reputation component.
sdrdiagnostics•説明(255ページ)
•使用法(255ページ)
•例(255ページ)
コマンド:参考例
254
コマンド:参考例
使用法

説明
sdrdiagnosticsコマンドを使用すると、Cisco Eメールセキュリティゲートウェイが SDRサービスに接続されているかどうかを確認できます。
使用法
確定:このコマンドに commitは必要ありません。
クラスタ管理:このコマンドはマシンモードでのみ使用できます。
バッチコマンド:このコマンドはバッチ形式をサポートしていません。
例
次の例で、sdrdiagnosticsコマンドを使用すると、Cisco Eメールセキュリティゲートウェイが SDRサービスに接続されているかどうかを確認できます。mail.example.com > sdrdiagnostics
1. Show status of the domain reputation service[1]> 1Connection Status: Connected
スマートソフトウェアライセンシングここでは、次の CLIコマンドについて説明します。
• license_smart(255ページ)
license_smart•説明(256ページ)
•使用法(256ページ)
•例:スマートエージェントサービス用ポートの設定(256ページ)
•例:Smart Licensingの有効化(256ページ)
•例:Smart Software Managerでのアプライアンスの登録(256ページ)
•例:スマートライセンスのステータス(257ページ)
•例:スマートライセンスのステータスの概要(257ページ)
•例:スマートトランスポート URLの設定(257ページ)
•例:ライセンスの要求(258ページ)
•例:ライセンスのリリース(258ページ)
コマンド:参考例
255
コマンド:参考例
説明
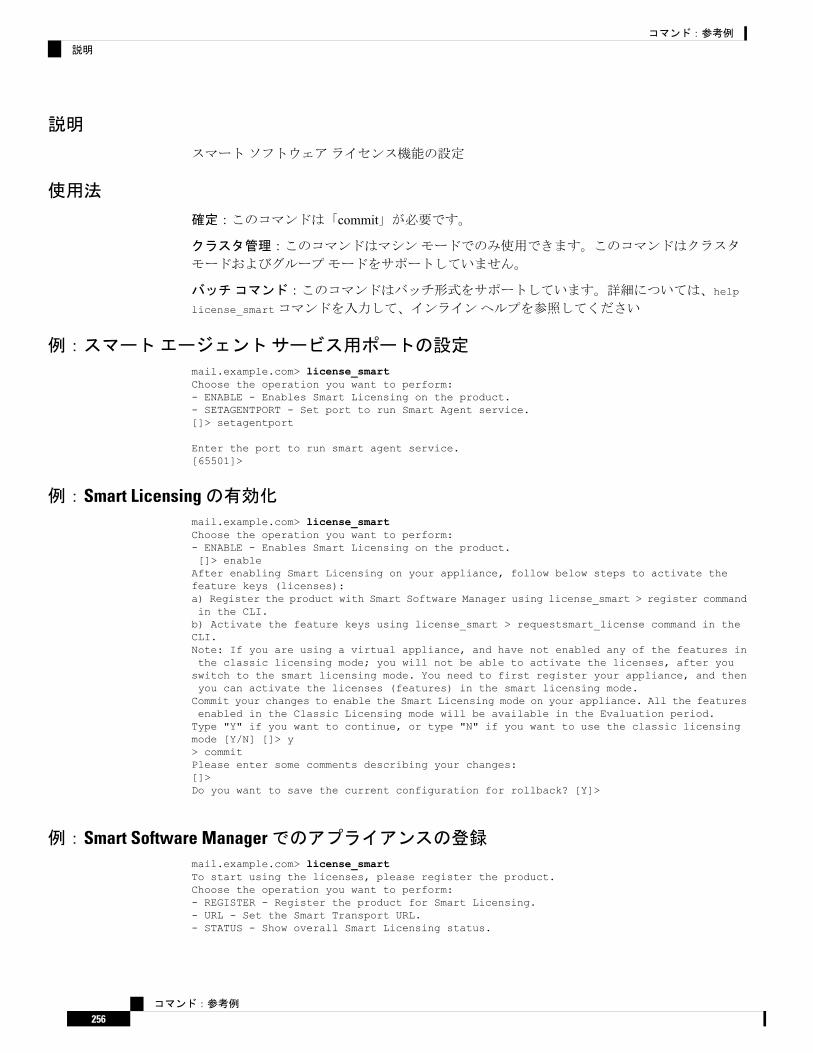
説明
スマートソフトウェアライセンス機能の設定
使用法
確定:このコマンドは「commit」が必要です。
クラスタ管理:このコマンドはマシンモードでのみ使用できます。このコマンドはクラスタ
モードおよびグループモードをサポートしていません。
バッチコマンド:このコマンドはバッチ形式をサポートしています。詳細については、help
license_smartコマンドを入力して、インラインヘルプを参照してください
例:スマートエージェントサービス用ポートの設定
mail.example.com> license_smartChoose the operation you want to perform:- ENABLE - Enables Smart Licensing on the product.- SETAGENTPORT - Set port to run Smart Agent service.[]> setagentport
Enter the port to run smart agent service.[65501]>
例:Smart Licensingの有効化mail.example.com> license_smartChoose the operation you want to perform:- ENABLE - Enables Smart Licensing on the product.[]> enableAfter enabling Smart Licensing on your appliance, follow below steps to activate thefeature keys (licenses):a) Register the product with Smart Software Manager using license_smart > register commandin the CLI.b) Activate the feature keys using license_smart > requestsmart_license command in theCLI.Note: If you are using a virtual appliance, and have not enabled any of the features inthe classic licensing mode; you will not be able to activate the licenses, after youswitch to the smart licensing mode. You need to first register your appliance, and thenyou can activate the licenses (features) in the smart licensing mode.Commit your changes to enable the Smart Licensing mode on your appliance. All the featuresenabled in the Classic Licensing mode will be available in the Evaluation period.Type "Y" if you want to continue, or type "N" if you want to use the classic licensingmode [Y/N] []> y> commitPlease enter some comments describing your changes:[]>Do you want to save the current configuration for rollback? [Y]>
例:Smart Software Managerでのアプライアンスの登録mail.example.com> license_smartTo start using the licenses, please register the product.Choose the operation you want to perform:- REGISTER - Register the product for Smart Licensing.- URL - Set the Smart Transport URL.- STATUS - Show overall Smart Licensing status.
コマンド:参考例
256
コマンド:参考例
説明
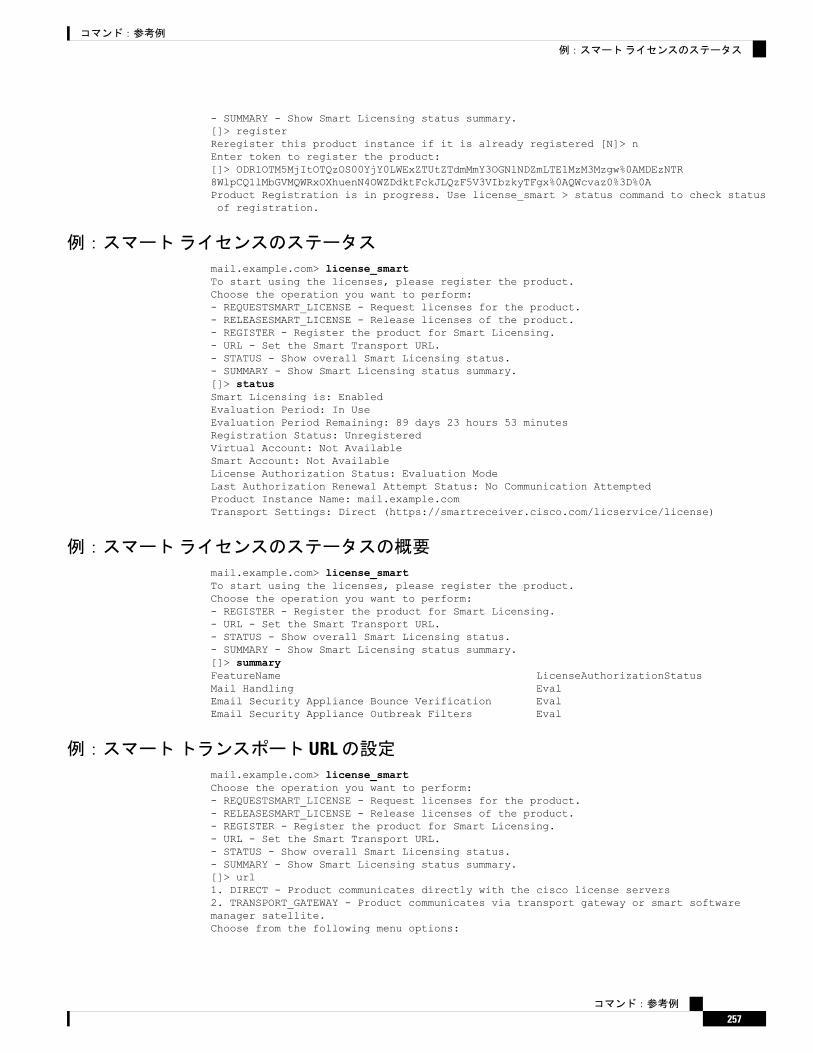
- SUMMARY - Show Smart Licensing status summary.[]> registerReregister this product instance if it is already registered [N]> nEnter token to register the product:[]> ODRlOTM5MjItOTQzOS00YjY0LWExZTUtZTdmMmY3OGNlNDZmLTE1MzM3Mzgw%0AMDEzNTR8WlpCQ1lMbGVMQWRxOXhuenN4OWZDdktFckJLQzF5V3VIbzkyTFgx%0AQWcvaz0%3D%0AProduct Registration is in progress. Use license_smart > status command to check statusof registration.
例:スマートライセンスのステータス
mail.example.com> license_smartTo start using the licenses, please register the product.Choose the operation you want to perform:- REQUESTSMART_LICENSE - Request licenses for the product.- RELEASESMART_LICENSE - Release licenses of the product.- REGISTER - Register the product for Smart Licensing.- URL - Set the Smart Transport URL.- STATUS - Show overall Smart Licensing status.- SUMMARY - Show Smart Licensing status summary.[]> statusSmart Licensing is: EnabledEvaluation Period: In UseEvaluation Period Remaining: 89 days 23 hours 53 minutesRegistration Status: UnregisteredVirtual Account: Not AvailableSmart Account: Not AvailableLicense Authorization Status: Evaluation ModeLast Authorization Renewal Attempt Status: No Communication AttemptedProduct Instance Name: mail.example.comTransport Settings: Direct (https://smartreceiver.cisco.com/licservice/license)
例:スマートライセンスのステータスの概要
mail.example.com> license_smartTo start using the licenses, please register the product.Choose the operation you want to perform:- REGISTER - Register the product for Smart Licensing.- URL - Set the Smart Transport URL.- STATUS - Show overall Smart Licensing status.- SUMMARY - Show Smart Licensing status summary.[]> summaryFeatureName LicenseAuthorizationStatusMail Handling EvalEmail Security Appliance Bounce Verification EvalEmail Security Appliance Outbreak Filters Eval
例:スマートトランスポート URLの設定mail.example.com> license_smartChoose the operation you want to perform:- REQUESTSMART_LICENSE - Request licenses for the product.- RELEASESMART_LICENSE - Release licenses of the product.- REGISTER - Register the product for Smart Licensing.- URL - Set the Smart Transport URL.- STATUS - Show overall Smart Licensing status.- SUMMARY - Show Smart Licensing status summary.[]> url1. DIRECT - Product communicates directly with the cisco license servers2. TRANSPORT_GATEWAY - Product communicates via transport gateway or smart softwaremanager satellite.Choose from the following menu options:
コマンド:参考例
257
コマンド:参考例
例:スマートライセンスのステータス

[1]> directYou must enter a value from 1 to 2.1. DIRECT - Product communicates directly with the cisco license servers2. TRANSPORT_GATEWAY - Product communicates via transport gateway or smart softwaremanager satellite.Choose from the following menu options:[1]> 1Note: The appliance uses the Direct URL(https://smartreceiver.cisco.com/licservice/license) to communicate with CiscoSmart Software Manager (CSSM) via the proxy server configured using the updateconfigcommand.Transport settings will be updated after commit.
例:ライセンスの要求
仮想アプライアンスのユーザは、ライセンスを要求またはリリースする場合、そのアプライア
ンスを登録する必要があります。
(注)
mail.example.com> license_smartChoose the operation you want to perform:- REQUESTSMART_LICENSE - Request licenses for the product.- RELEASESMART_LICENSE - Release licenses of the product.- REGISTER - Register the product for Smart Licensing.- URL - Set the Smart Transport URL.- STATUS - Show overall Smart Licensing status.- SUMMARY - Show Smart Licensing status summary.[]> requestsmart_licenseFeature Name License Authorization Status1. Email Security Appliance Sophos Anti-Malware Not Requested2. Email Security Appliance PXE Encryption Not requested
Enter the appropriate license number(s) for activation.Separate multiple license with comma or enter range:[]> 1Activation is in progress for following features:Email Security Appliance Sophos Anti-MalwareUse license_smart > summary command to check status of licenses.
例:ライセンスのリリース
mail.example.com> license_smartChoose the operation you want to perform:- REQUESTSMART_LICENSE - Request licenses for the product.- RELEASESMART_LICENSE - Release licenses of the product.- REGISTER - Register the product for Smart Licensing.- URL - Set the Smart Transport URL.- STATUS - Show overall Smart Licensing status.- SUMMARY - Show Smart Licensing status summary.[]> releasesmart_licenseFeature Name License Authorization Status1. Email Security Appliance Anti-Spam License Eval2. Email Security Appliance Outbreak Filters Eval3. Email Security Appliance Graymail Safe-unsubscribe Eval
5. Mail Handling Eval6. Email Security Appliance Sophos Anti-Malware Eval7. Email Security Appliance PXE Encryption Eval8. Email Security Appliance Advanced Malware Protection Eval
コマンド:参考例
258
コマンド:参考例
例:ライセンスの要求
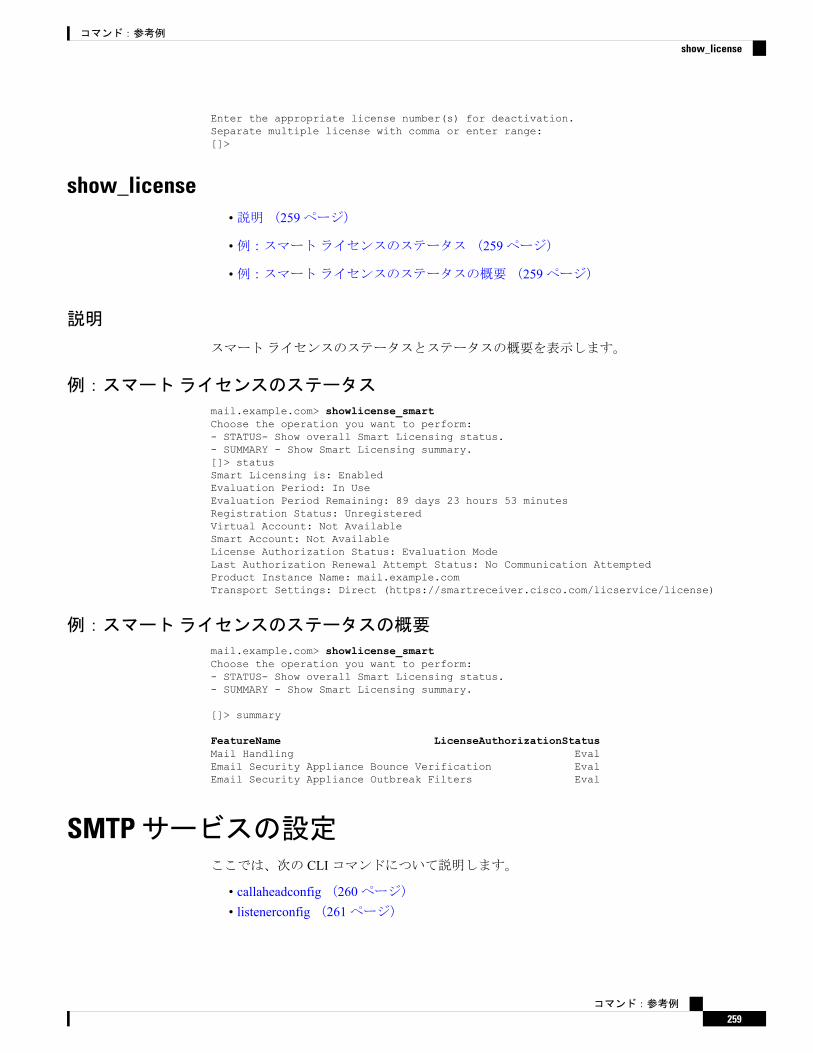
Enter the appropriate license number(s) for deactivation.Separate multiple license with comma or enter range:[]>
show_license•説明(259ページ)
•例:スマートライセンスのステータス(259ページ)
•例:スマートライセンスのステータスの概要(259ページ)
説明
スマートライセンスのステータスとステータスの概要を表示します。
例:スマートライセンスのステータス
mail.example.com> showlicense_smartChoose the operation you want to perform:- STATUS- Show overall Smart Licensing status.- SUMMARY - Show Smart Licensing summary.[]> statusSmart Licensing is: EnabledEvaluation Period: In UseEvaluation Period Remaining: 89 days 23 hours 53 minutesRegistration Status: UnregisteredVirtual Account: Not AvailableSmart Account: Not AvailableLicense Authorization Status: Evaluation ModeLast Authorization Renewal Attempt Status: No Communication AttemptedProduct Instance Name: mail.example.comTransport Settings: Direct (https://smartreceiver.cisco.com/licservice/license)
例:スマートライセンスのステータスの概要
mail.example.com> showlicense_smartChoose the operation you want to perform:- STATUS- Show overall Smart Licensing status.- SUMMARY - Show Smart Licensing summary.
[]> summary
FeatureName LicenseAuthorizationStatusMail Handling EvalEmail Security Appliance Bounce Verification EvalEmail Security Appliance Outbreak Filters Eval
SMTPサービスの設定ここでは、次の CLIコマンドについて説明します。
• callaheadconfig(260ページ)• listenerconfig(261ページ)
コマンド:参考例
259
コマンド:参考例
show_license

• localeconfig(292ページ)• smtpauthconfig(293ページ)
callaheadconfig
説明
SMTPコールアヘッドプロファイルを追加、編集、または削除します
使用方法
確定:このコマンドは「commit」が必要です。
クラスタ管理:このコマンドは、すべてのマシンモード(クラスタ、グループ、マシン)で使
用できます。
バッチコマンド:このコマンドはバッチ形式をサポートしていません。
例
次に、配信ホストの新しい SMTPコールアヘッドプロファイルを作成する例を示します。
> callaheadconfigNo SMTP Call-Ahead profiles are configured on the system.Choose the operation you want to perform:- NEW - Create a new profile.[]> newSelect the type of profile you want to create:1. Delivery Host2. Static Call-Ahead Servers[1]> 1Please enter a name for the profile:[]> delhost01Advanced Settings:MAIL FROM Address: <>Interface: AutoTimeout Value: 30Validation Failure Action: ACCEPTTemporary Failure Action: REJECT with same codeMaximum number of connections: 5Maximum number of validation queries: 1000Cache size: 10000Cache TTL: 900
Do you want to change advanced settings? [N]> nCurrently configured SMTP Call-Ahead profiles:1. delhost01 (Delivery Host)Choose the operation you want to perform:- NEW - Create a new profile.- EDIT - Modify a profile.- DELETE - Delete a profile.- PRINT - Display profile information.- TEST - Test profile.- FLUSHCACHE - Flush SMTP Call-Ahead cache.[]>
コマンド:参考例
260
コマンド:参考例
callaheadconfig

次に、コールアヘッドサーバの新しい SMTPコールアヘッドプロファイルを作成する例を示します。
> callaheadconfigCurrently configured SMTP Call-Ahead profiles:1. delhost01 (Delivery Host)Choose the operation you want to perform:- NEW - Create a new profile.- EDIT - Modify a profile.- DELETE - Delete a profile.- PRINT - Display profile information.- TEST - Test profile.- FLUSHCACHE - Flush SMTP Call-Ahead cache.[]> newSelect the type of profile you want to create:1. Delivery Host2. Static Call-Ahead Servers[1]> 2Please enter a name for the profile:[]> StaticEnter one or more Call-Ahead servers hostname separated by commas.[]> 192.168.1.2Advanced Settings:MAIL FROM Address: <>Interface: AutoTimeout Value: 30Validation Failure Action: ACCEPTTemporary Failure Action: REJECT with same codeMaximum number of connections: 5Maximum number of validation queries: 1000Cache size: 10000Cache TTL: 900
Do you want to change advanced settings? [N]> nCurrently configured SMTP Call-Ahead profiles:1. Static (Static Call-Ahead Servers)2. delhost01 (Delivery Host)Choose the operation you want to perform:- NEW - Create a new profile.- EDIT - Modify a profile.- DELETE - Delete a profile.- PRINT - Display profile information.- TEST - Test profile.- FLUSHCACHE - Flush SMTP Call-Ahead cache.[]> printSelect the profile you want to print:1. Static (Static Call-Ahead Servers)2. delhost01 (Delivery Host)[1]>
listenerconfig
説明
listenerconfigコマンドでは、リスナーを作成、編集、削除できます。AsyncOSでは、メッセージを受信し、受信ホストやネットワークの内部またはインターネット上の外部の受信者の
いずれかにリレーするための条件を指定する必要があります。
コマンド:参考例
261
コマンド:参考例
listenerconfig
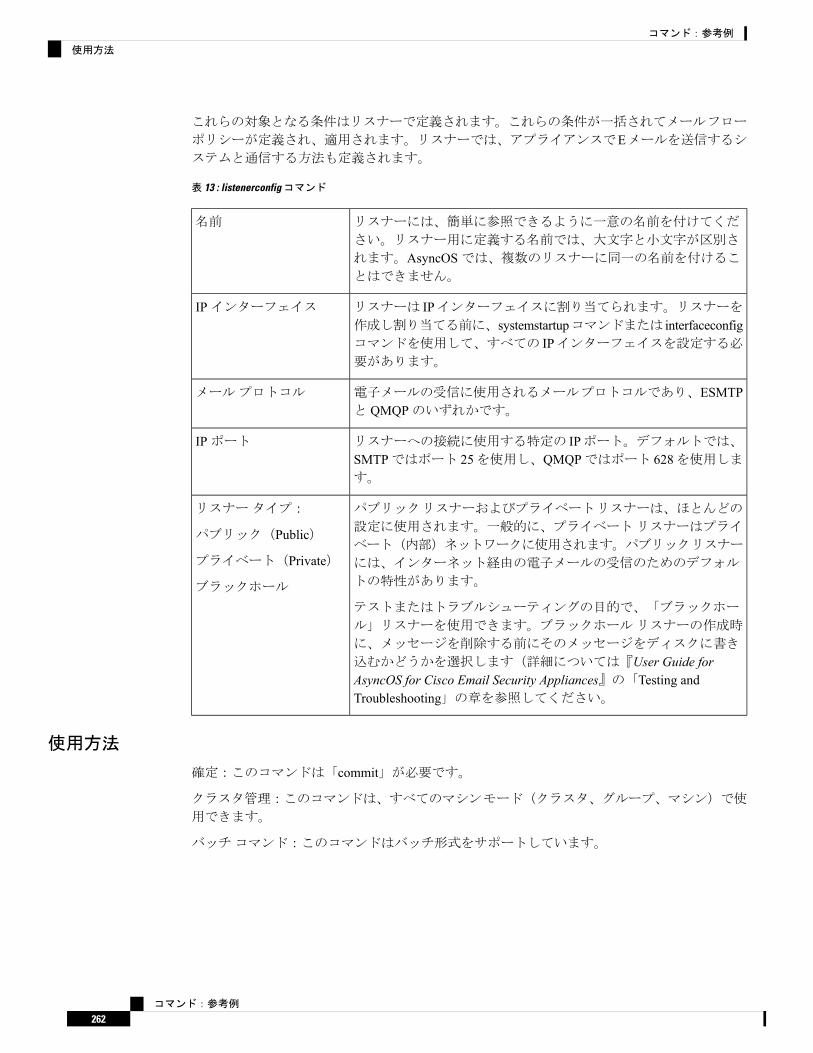
これらの対象となる条件はリスナーで定義されます。これらの条件が一括されてメールフロー
ポリシーが定義され、適用されます。リスナーでは、アプライアンスでEメールを送信するシステムと通信する方法も定義されます。
表 13 : listenerconfigコマンド
リスナーには、簡単に参照できるように一意の名前を付けてくだ
さい。リスナー用に定義する名前では、大文字と小文字が区別さ
れます。AsyncOSでは、複数のリスナーに同一の名前を付けることはできません。
名前
リスナーは IPインターフェイスに割り当てられます。リスナーを作成し割り当てる前に、systemstartupコマンドまたは interfaceconfigコマンドを使用して、すべての IPインターフェイスを設定する必要があります。
IPインターフェイス
電子メールの受信に使用されるメールプロトコルであり、ESMTPと QMQPのいずれかです。
メールプロトコル
リスナーへの接続に使用する特定の IPポート。デフォルトでは、SMTPではポート 25を使用し、QMQPではポート 628を使用します。
IPポート
パブリックリスナーおよびプライベートリスナーは、ほとんどの
設定に使用されます。一般的に、プライベートリスナーはプライ
ベート(内部)ネットワークに使用されます。パブリックリスナー
には、インターネット経由の電子メールの受信のためのデフォル
トの特性があります。
テストまたはトラブルシューティングの目的で、「ブラックホー
ル」リスナーを使用できます。ブラックホールリスナーの作成時
に、メッセージを削除する前にそのメッセージをディスクに書き
込むかどうかを選択します(詳細については『User Guide forAsyncOS for Cisco Email Security Appliances』の「Testing andTroubleshooting」の章を参照してください。
リスナータイプ:
パブリック(Public)
プライベート(Private)
ブラックホール
使用方法
確定:このコマンドは「commit」が必要です。
クラスタ管理:このコマンドは、すべてのマシンモード(クラスタ、グループ、マシン)で使
用できます。
バッチコマンド:このコマンドはバッチ形式をサポートしています。
コマンド:参考例
262
コマンド:参考例
使用方法
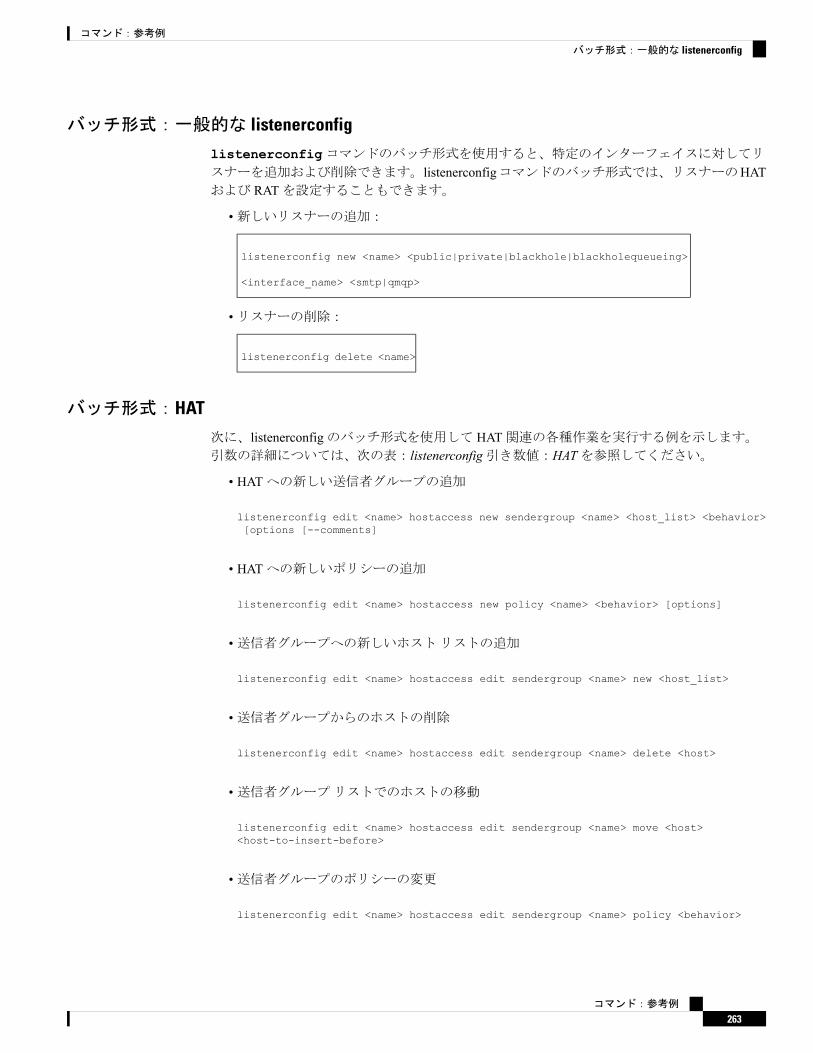
バッチ形式:一般的な listenerconfig
listenerconfigコマンドのバッチ形式を使用すると、特定のインターフェイスに対してリスナーを追加および削除できます。listenerconfigコマンドのバッチ形式では、リスナーのHATおよび RATを設定することもできます。
•新しいリスナーの追加:
listenerconfig new <name> <public|private|blackhole|blackholequeueing>
<interface_name> <smtp|qmqp>
•リスナーの削除:
listenerconfig delete <name>
バッチ形式:HAT
次に、listenerconfigのバッチ形式を使用して HAT関連の各種作業を実行する例を示します。引数の詳細については、次の表:listenerconfig引き数値:HATを参照してください。
• HATへの新しい送信者グループの追加
listenerconfig edit <name> hostaccess new sendergroup <name> <host_list> <behavior>[options [--comments]
• HATへの新しいポリシーの追加
listenerconfig edit <name> hostaccess new policy <name> <behavior> [options]
•送信者グループへの新しいホストリストの追加
listenerconfig edit <name> hostaccess edit sendergroup <name> new <host_list>
•送信者グループからのホストの削除
listenerconfig edit <name> hostaccess edit sendergroup <name> delete <host>
•送信者グループリストでのホストの移動
listenerconfig edit <name> hostaccess edit sendergroup <name> move <host><host-to-insert-before>
•送信者グループのポリシーの変更
listenerconfig edit <name> hostaccess edit sendergroup <name> policy <behavior>
コマンド:参考例
263
コマンド:参考例
バッチ形式:一般的な listenerconfig

[options]
•送信者グループリストの出力
listenerconfig edit <name> hostaccess edit sendergroup <name> print
•送信者グループ名の変更
listenerconfig edit <name> hostaccess edit sendergroup <name> rename <name>
• HATポリシーの編集
listenerconfig edit <name> hostaccess edit policy <name> <behavior> [options]
• HATからの送信者グループの削除
listenerconfig edit <name> hostaccess delete sendergroup <name>
•ポリシーの削除
listenerconfig edit <name> hostaccess delete policy <name>
• HATでの送信者グループの移動
listenerconfig edit <name> hostaccess move <group> <group-to-insert-before>
• HATデフォルトオプションの変更
listenerconfig edit <name> hostaccess default [options]
•ホストアクセステーブルの出力
listenerconfig edit <name> hostaccess print
• HATのローカルコピーのインポート
listenerconfig edit <name> hostaccess import <filename>
•アプライアンスからの HATのコピーのエクスポート
listenerconfig edit <name> hostaccess export <filename>
• HATからユーザ定義のすべての送信者グループおよびポリシーを削除
コマンド:参考例
264
コマンド:参考例
バッチ形式:HAT

listenerconfig edit <name> hostaccess clear
•特定の送信者グループについて、送信者の出身国を追加します。listenerconfig edit incoming hostaccess edit sendergroup WHITELISTcountry add India Nepal Cyprus
•特定の送信者グループについて、送信者の出身国を削除します。listenerconfig edit incoming hostaccess edit sendergroup WHITELISTcountry delete Cyprus
•特定の送信者グループについて、送信者の出身国を印刷します。listenerconfig edit incoming hostaccess edit sendergroup WHITELISTcountry print
表 14 : listenerconfig引数値:HAT
説明引数
“Accept”、“Relay”、“Reject”、“TCP Refuse”、または “Continue”。送信者グループで使用する動作を選択するときは、“Policy: FOO”(“FOO”はポリシー名)という形式で追加の動作も選択できます。
<behavior>
ホストアクセステーブルのインポートおよびエクスポートで使用す
るファイル名。
<filename>
送信者グループの <name>。<group>
<host_list>の 1つのエンティティ。<host>
追加するホストを入力します。ホストは次のようなフォーマットにで
きます。
CIDRアドレス(10.1.1.0/24)
IPアドレス範囲(10.1.1.10~ 20)
IPサブネット(10.2.3)
ホスト名(crm.example.com)
部分ホスト名(.example.com)
SenderBase評価スコア範囲(7.5:10.0)
SenderBaseネットワークオーナー IDS(SBO:12345)
リモートブラックリストクエリー(dnslist[query.blacklist.example])
複数のホストを指定する場合は、カンマで区切ります。(注)
<host_list>
コマンド:参考例
265
コマンド:参考例
バッチ形式:HAT

説明引数
送信者グループまたはポリシーの名前。HATラベルは、文字または下線で開始する必要があり、その後に任意の数の文字、数字、下線、
またはハイフンを追加します。
<name>
[options]
最大メッセージサイズ。最後に、単位がキロバイトの場合はk、メガバイトの場合はMを追加します。単位がバイトの場合、末尾の文字は不要です。
--max_size
1つのホストから確立できる接続の最大数。--max_conn
接続あたりの最大メッセージ数。--max_msgs
メッセージあたりの最大受信者数。--max_rcpt
SMTPバナーのホスト名を上書きします。“No”または SMTPバナー文字列。
--override
カスタム SMTP受け入れ応答を指定します。“No”または SMTP受け入れ応答文字列。
--cust_acc
カスタム SMTP受け入れ応答コード。デフォルトは 220です。--acc_code
カスタム SMTP拒否応答を指定します。“No”または SMTP拒否応答文字列。
--cust_rej
カスタム SMTP拒否応答コード。デフォルトは 554です。--rej_code
ホスト単位のレート制限をイネーブルにします。“No”、“default”、またはホストごとの受信者の 1時間あたり最大数を指定します。
--rate_lim
カスタム SMTP制限超過応答メッセージを指定します。“No”またはSMTP拒否応答文字列。デフォルトは “No”です。
--cust_lim
カスタム SMTP制限超過応答コード。デフォルトは 452です。--lim_code
デフォルトでフロー制御に SenderBaseを使用します。“Yes”、“No”、または “default”。
--use_sb
anti-spamスキャンをイネーブルにします。“Yes”、“No”、“Default”。--as_scan
アンチウイルススキャンをイネーブルにします。“Yes”、“No”、“Default”。
--av_scan
ディレクトリハーベスト攻撃防止“No”、“default”、またはリモートホストからの無効な受信者の 1時間あたり最大数を指定します。
--dhap
コマンド:参考例
266
コマンド:参考例
バッチ形式:HAT
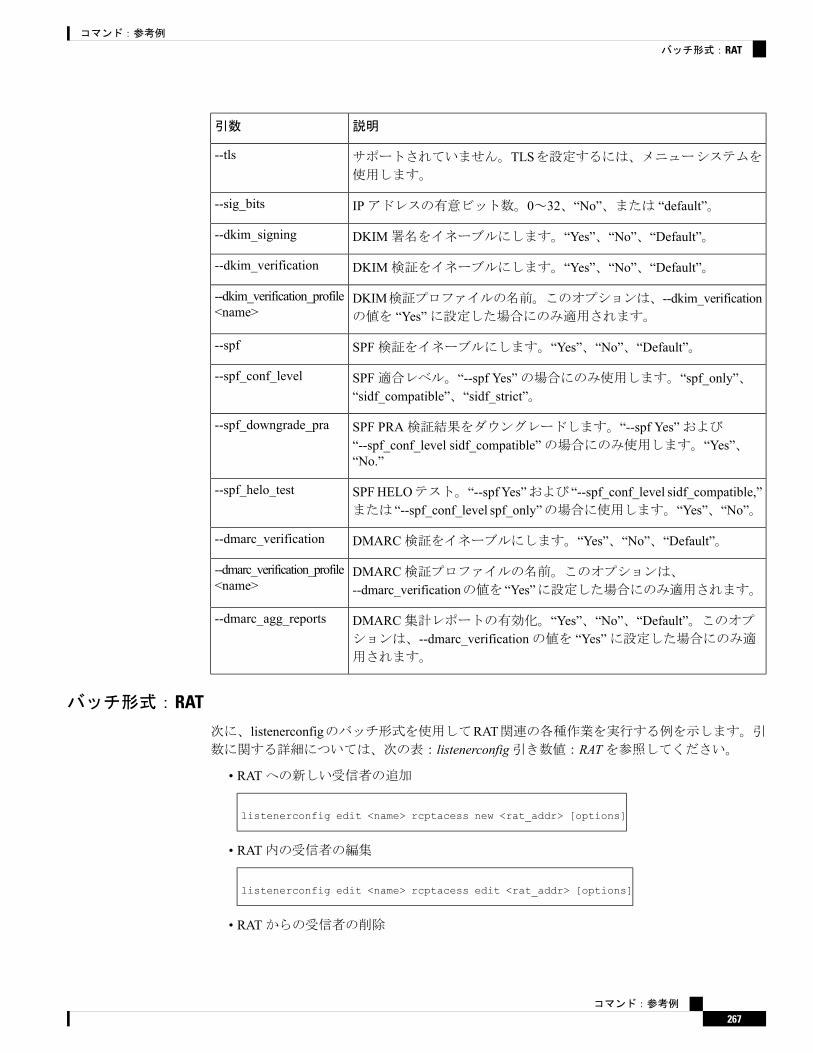
説明引数
サポートされていません。TLSを設定するには、メニューシステムを使用します。
--tls
IPアドレスの有意ビット数。0~32、“No”、または “default”。--sig_bits
DKIM署名をイネーブルにします。“Yes”、“No”、“Default”。--dkim_signing
DKIM検証をイネーブルにします。“Yes”、“No”、“Default”。--dkim_verification
DKIM検証プロファイルの名前。このオプションは、--dkim_verificationの値を “Yes”に設定した場合にのみ適用されます。
--dkim_verification_profile<name>
SPF検証をイネーブルにします。“Yes”、“No”、“Default”。--spf
SPF適合レベル。“--spf Yes”の場合にのみ使用します。“spf_only”、“sidf_compatible”、“sidf_strict”。
--spf_conf_level
SPF PRA検証結果をダウングレードします。“--spf Yes”および“--spf_conf_level sidf_compatible”の場合にのみ使用します。“Yes”、“No.”
--spf_downgrade_pra
SPFHELOテスト。“--spf Yes”および “--spf_conf_level sidf_compatible,”または “--spf_conf_level spf_only”の場合に使用します。“Yes”、“No”。
--spf_helo_test
DMARC検証をイネーブルにします。“Yes”、“No”、“Default”。--dmarc_verification
DMARC検証プロファイルの名前。このオプションは、--dmarc_verificationの値を “Yes”に設定した場合にのみ適用されます。
--dmarc_verification_profile<name>
DMARC集計レポートの有効化。“Yes”、“No”、“Default”。このオプションは、--dmarc_verificationの値を “Yes”に設定した場合にのみ適用されます。
--dmarc_agg_reports
バッチ形式:RAT
次に、listenerconfigのバッチ形式を使用してRAT関連の各種作業を実行する例を示します。引数に関する詳細については、次の表:listenerconfig引き数値:RATを参照してください。
• RATへの新しい受信者の追加
listenerconfig edit <name> rcptacess new <rat_addr> [options]
• RAT内の受信者の編集
listenerconfig edit <name> rcptacess edit <rat_addr> [options]
• RATからの受信者の削除
コマンド:参考例
267
コマンド:参考例
バッチ形式:RAT
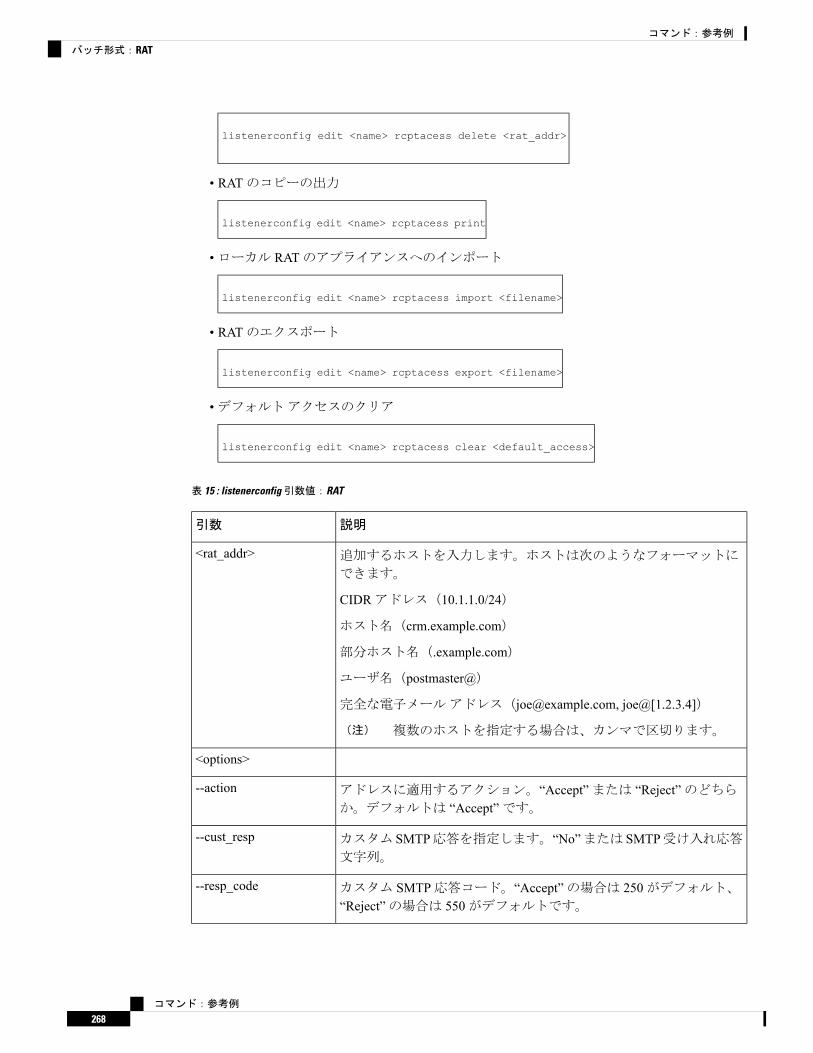
listenerconfig edit <name> rcptacess delete <rat_addr>
• RATのコピーの出力
listenerconfig edit <name> rcptacess print
•ローカル RATのアプライアンスへのインポート
listenerconfig edit <name> rcptacess import <filename>
• RATのエクスポート
listenerconfig edit <name> rcptacess export <filename>
•デフォルトアクセスのクリア
listenerconfig edit <name> rcptacess clear <default_access>
表 15 : listenerconfig引数値:RAT
説明引数
追加するホストを入力します。ホストは次のようなフォーマットに
できます。
CIDRアドレス(10.1.1.0/24)
ホスト名(crm.example.com)
部分ホスト名(.example.com)
ユーザ名(postmaster@)
完全な電子メールアドレス([email protected], joe@[1.2.3.4])
複数のホストを指定する場合は、カンマで区切ります。(注)
<rat_addr>
<options>
アドレスに適用するアクション。“Accept”または “Reject”のどちらか。デフォルトは “Accept”です。
--action
カスタム SMTP応答を指定します。“No”または SMTP受け入れ応答文字列。
--cust_resp
カスタム SMTP応答コード。“Accept”の場合は 250がデフォルト、“Reject”の場合は 550がデフォルトです。
--resp_code
コマンド:参考例
268
コマンド:参考例
バッチ形式:RAT

説明引数
受信制御をバイパスします。デフォルトは “No”です。--bypass_rc
LDAP承認クエリーをバイパスします。“Yes”または “No”のどちらか。
--bypass_la
SMTPコールアヘッドをバイパスします。デフォルトは [いいえ(No)]です。
--bypass_ca
例:リスナーの追加
次の例では、listenerconfigコマンドを使用して、エンタープライズゲートウェイ構成に必要なBリスナーに使用できる、OutboundMailと呼ばれる新しいプライベートリスナーを作成します。(注:このプライベートリスナーは、GUIの System Setup Wizardまたは CLIのsystemsetupコマンドを実行するときに追加することもできます)。
プライベートリスナータイプを選択し、名前を OutboundMailに設定します。このリスナーは、PrivateNet IPインターフェイス上でポート 25の SMTPプロトコルを使用して動作するように指定します。このリスナーのホストアクセスポリシーのデフォルト値が受け入れられま
す。
mail3.example.com> listenerconfigCurrently configured listeners:1. InboundMail (on PublicNet, 192.168.2.1) SMTP TCP Port 25 PublicChoose the operation you want to perform:- NEW - Create a new listener.- EDIT - Modify a listener.- DELETE - Remove a listener.- SETUP - Change global settings.[]> newPlease select the type of listener you want to create.1. Private2. Public3. Blackhole[2]> 1Please create a name for this listener (Ex: "OutboundMail"):[]> OutboundMailPlease choose an IP interface for this Listener.1. Management (192.168.42.42/24: mail3.example.com)2. PrivateNet (192.168.1.1/24: mail3.example.com)3. PublicNet (192.168.2.1/24: mail3.example.com)[1]> 2Choose a protocol.1. SMTP2. QMQP[1]> 1Please enter the TCP port for this listener.[25]> 25Please specify the systems allowed to relay email through the IronPort C60.Hostnames such as "example.com" are allowed.Partial hostnames such as ".example.com" are allowed.IP addresses, IP address ranges, and partial IP addresses are allowed.Separate multiple entries with commas.[]> .example.comDo you want to enable rate limiting for this listener? (Rate limiting defines the maximum
コマンド:参考例
269
コマンド:参考例
例:リスナーの追加

number of recipients per hour you arewilling to receive from a remote domain.) [N]> nDefault Policy Parameters==========================Maximum Message Size: 100MMaximum Number Of Connections From A Single IP: 600Maximum Number Of Messages Per Connection: 10,000Maximum Number Of Recipients Per Message: 100,000Maximum Number Of Recipients Per Hour: DisabledUse SenderBase for Flow Control: NoSpam Detection Enabled: NoVirus Detection Enabled: YesAllow TLS Connections: NoAllow SMTP Authentication: NoRequire TLS To Offer SMTP authentication: NoWould you like to change the default host access policy? [N]> nListener OutboundMail created.Defaults have been set for a Private listener.Use the listenerconfig->EDIT command to customize the listener.Currently configured listeners:1. InboundMail (on PublicNet, 192.168.2.1) SMTP TCP Port 25 Public2. OutboundMail (on PrivateNet, 192.168.1.1) SMTP TCP Port 25 PrivateChoose the operation you want to perform:- NEW - Create a new listener.- EDIT - Modify a listener.- DELETE - Remove a listener.- SETUP - Change global settings.[]>
例:送信者の出身国を送信者グループに追加します
次の例では、listenerconfigコマンドを使用してリスナーを変更します。このリスナーは、特定の送信者グループについて送信者の出身国を追加します。
mail3.example.com> listenerconfig
Currently configured listeners:
1. InboundMail (on PublicNet, 192.168.2.1) SMTP TCP Port 25 Public
2. OutboundMail (on PrivateNet, 192.168.1.1) SMTP TCP Port 25 Private
Choose the operation you want to perform:
- NEW - Create a new listener.
- EDIT - Modify a listener.
- DELETE - Remove a listener.
- SETUP - Change global settings.
[]> edit
Enter the name or number of the listener you wish to edit.
[]> 1
Name: InboundMailhostacce
Type: Public
コマンド:参考例
270
コマンド:参考例
例:送信者の出身国を送信者グループに追加します

Interface: PublicNet (192.168.2.1/24) TCP Port 25
Protocol: SMTP
Default Domain:
Max Concurrency: 1000 (TCP Queue: 50)
Domain map: disabled
TLS: No
SMTP Authentication: Disabled
Bounce Profile: Default
Use SenderBase For Reputation Filters and IP Profiling: Yes
Footer: None
LDAP: off
Choose the operation you want to perform:
- NAME - Change the name of the listener.
- INTERFACE - Change the interface.
- LIMITS - Change the injection limits.
- SETUP - Configure general options.
- HOSTACCESS - Modify the Host Access Table.
- RCPTACCESS - Modify the Recipient Access Table.
- BOUNCECONFIG - Choose the bounce profile to use for messages injected on this listener.
- MASQUERADE - Configure the Domain Masquerading Table.
- DOMAINMAP - Configure domain mappings.
[]> hostaccess
Default Policy Parameters
=================
Maximum Message Size: 10M
Maximum Number Of Concurrent Connections From A Single IP: 10
Maximum Number Of Messages Per Connection: 10
Maximum Number Of Recipients Per Message: 50
Directory Harvest Attack Prevention: Enabled
Maximum Number Of Invalid Recipients Per Hour: 25
Maximum Number Of Recipients Per Hour: Disabled
Use SenderBase for Flow Control: Yes
コマンド:参考例
271
コマンド:参考例
例:送信者の出身国を送信者グループに追加します
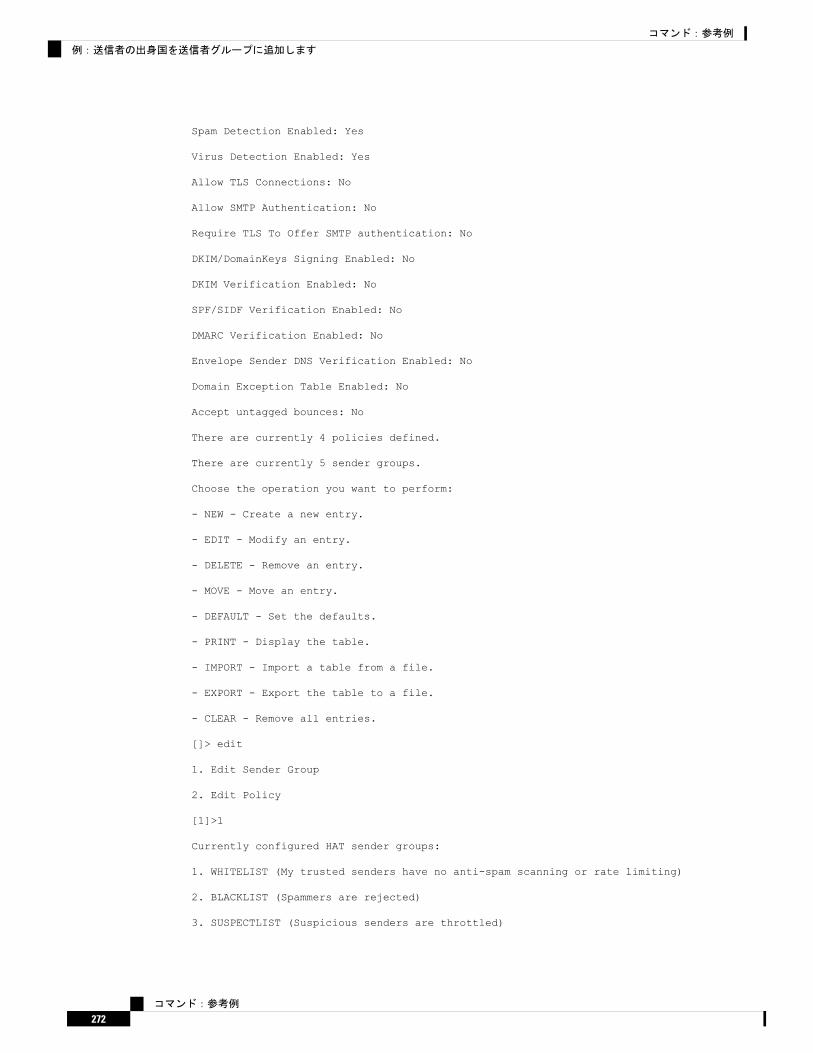
Spam Detection Enabled: Yes
Virus Detection Enabled: Yes
Allow TLS Connections: No
Allow SMTP Authentication: No
Require TLS To Offer SMTP authentication: No
DKIM/DomainKeys Signing Enabled: No
DKIM Verification Enabled: No
SPF/SIDF Verification Enabled: No
DMARC Verification Enabled: No
Envelope Sender DNS Verification Enabled: No
Domain Exception Table Enabled: No
Accept untagged bounces: No
There are currently 4 policies defined.
There are currently 5 sender groups.
Choose the operation you want to perform:
- NEW - Create a new entry.
- EDIT - Modify an entry.
- DELETE - Remove an entry.
- MOVE - Move an entry.
- DEFAULT - Set the defaults.
- PRINT - Display the table.
- IMPORT - Import a table from a file.
- EXPORT - Export the table to a file.
- CLEAR - Remove all entries.
[]> edit
1. Edit Sender Group
2. Edit Policy
[1]>1
Currently configured HAT sender groups:
1. WHITELIST (My trusted senders have no anti-spam scanning or rate limiting)
2. BLACKLIST (Spammers are rejected)
3. SUSPECTLIST (Suspicious senders are throttled)
コマンド:参考例
272
コマンド:参考例
例:送信者の出身国を送信者グループに追加します

4. UNKNOWNLIST (Reviewed but undecided, continue normal acceptance)
5. MyList
6. (no name, first host = ALL) (Everyone else)
Enter the sender group number or name you wish to edit.
[]> 1
Choose the operation you want to perform:
- NEW - Add a new host.
- DELETE - Remove a host.
- COUNTRY - Add and delete countries.
- POLICY - Change the policy settings and options.
- PRINT - Display the current definition.
- RENAME - Rename this sender group.
[]> country
Choose the operation you want to perform:
- ADD - Add countries
[]>ADD
1. Afghanistan [af]
2. Aland Islands [ax]
3. Albania [al]
4. Algeria [dz]
5. American Samoa [as]
6. Andorra [ad]
7. Angola [ao]
8. Anguilla [ai]
9. ...
Enter the indices separated by commas or specify the range.
[]>1,4,8
Choose the operation you want to perform:
- NEW - Add a new host.
- DELETE - Remove a host.
- MOVE - Reorder the hosts.
- COUNTRY - Add and delete countries.
コマンド:参考例
273
コマンド:参考例
例:送信者の出身国を送信者グループに追加します
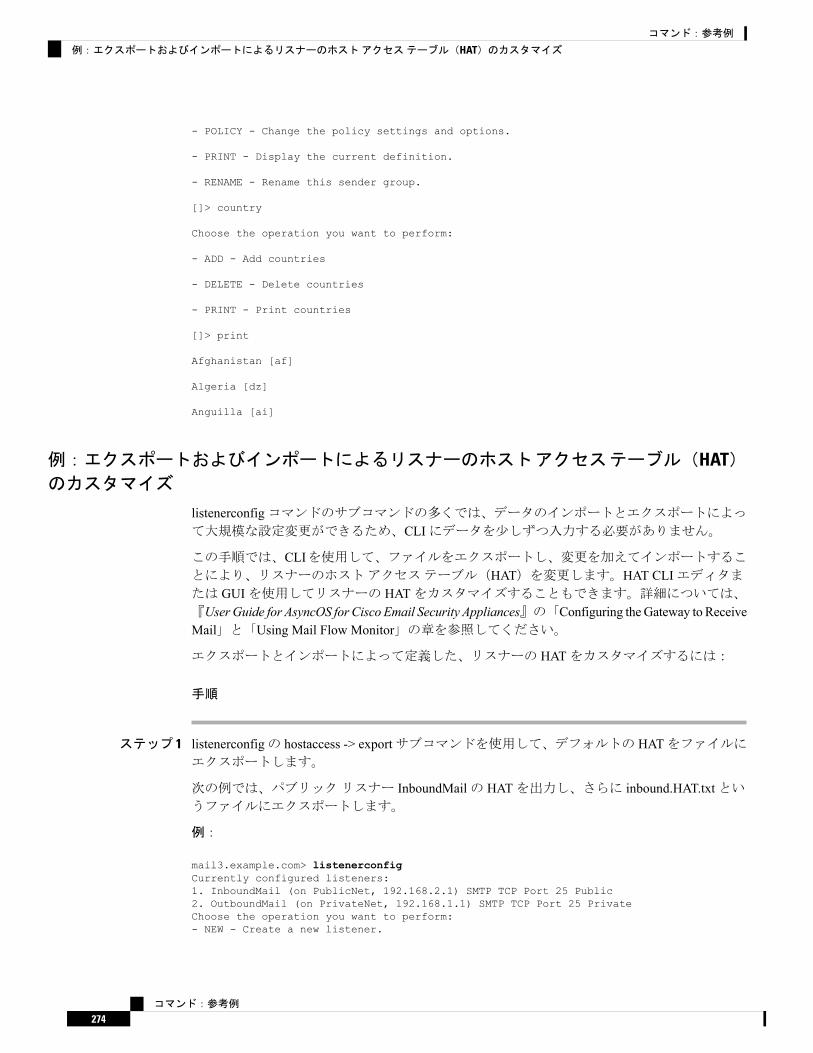
- POLICY - Change the policy settings and options.
- PRINT - Display the current definition.
- RENAME - Rename this sender group.
[]> country
Choose the operation you want to perform:
- ADD - Add countries
- DELETE - Delete countries
- PRINT - Print countries
Afghanistan [af]
Algeria [dz]
Anguilla [ai]
例:エクスポートおよびインポートによるリスナーのホストアクセステーブル(HAT)のカスタマイズ
listenerconfigコマンドのサブコマンドの多くでは、データのインポートとエクスポートによって大規模な設定変更ができるため、CLIにデータを少しずつ入力する必要がありません。
この手順では、CLIを使用して、ファイルをエクスポートし、変更を加えてインポートすることにより、リスナーのホストアクセステーブル(HAT)を変更します。HAT CLIエディタまたは GUIを使用してリスナーの HATをカスタマイズすることもできます。詳細については、『UserGuide for AsyncOS for Cisco Email Security Appliances』の「Configuring theGateway to ReceiveMail」と「Using Mail Flow Monitor」の章を参照してください。
エクスポートとインポートによって定義した、リスナーの HATをカスタマイズするには:
手順
ステップ 1 listenerconfigの hostaccess -> exportサブコマンドを使用して、デフォルトの HATをファイルにエクスポートします。
次の例では、パブリックリスナー InboundMailの HATを出力し、さらに inbound.HAT.txtというファイルにエクスポートします。
例:
mail3.example.com> listenerconfigCurrently configured listeners:1. InboundMail (on PublicNet, 192.168.2.1) SMTP TCP Port 25 Public2. OutboundMail (on PrivateNet, 192.168.1.1) SMTP TCP Port 25 PrivateChoose the operation you want to perform:- NEW - Create a new listener.
コマンド:参考例
274
コマンド:参考例
例:エクスポートおよびインポートによるリスナーのホストアクセステーブル(HAT)のカスタマイズ
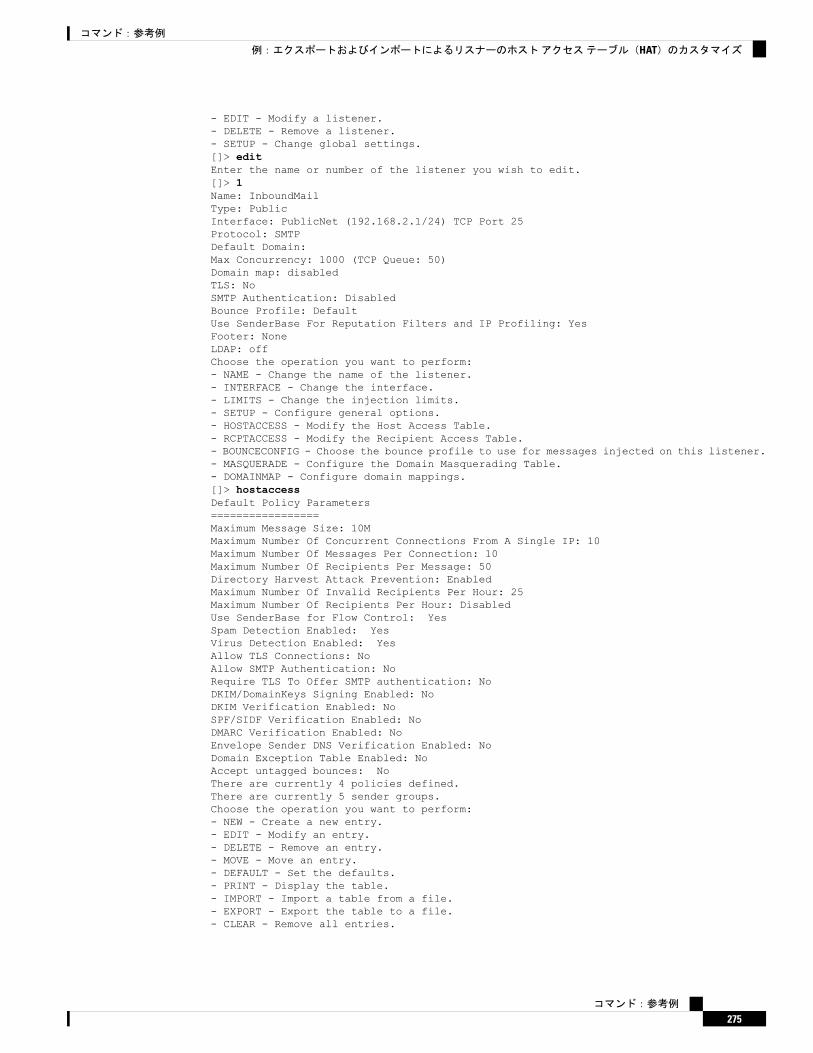
- EDIT - Modify a listener.- DELETE - Remove a listener.- SETUP - Change global settings.[]> editEnter the name or number of the listener you wish to edit.[]> 1Name: InboundMailType: PublicInterface: PublicNet (192.168.2.1/24) TCP Port 25Protocol: SMTPDefault Domain:Max Concurrency: 1000 (TCP Queue: 50)Domain map: disabledTLS: NoSMTP Authentication: DisabledBounce Profile: DefaultUse SenderBase For Reputation Filters and IP Profiling: YesFooter: NoneLDAP: offChoose the operation you want to perform:- NAME - Change the name of the listener.- INTERFACE - Change the interface.- LIMITS - Change the injection limits.- SETUP - Configure general options.- HOSTACCESS - Modify the Host Access Table.- RCPTACCESS - Modify the Recipient Access Table.- BOUNCECONFIG - Choose the bounce profile to use for messages injected on this listener.- MASQUERADE - Configure the Domain Masquerading Table.- DOMAINMAP - Configure domain mappings.[]> hostaccessDefault Policy Parameters=================Maximum Message Size: 10MMaximum Number Of Concurrent Connections From A Single IP: 10Maximum Number Of Messages Per Connection: 10Maximum Number Of Recipients Per Message: 50Directory Harvest Attack Prevention: EnabledMaximum Number Of Invalid Recipients Per Hour: 25Maximum Number Of Recipients Per Hour: DisabledUse SenderBase for Flow Control: YesSpam Detection Enabled: YesVirus Detection Enabled: YesAllow TLS Connections: NoAllow SMTP Authentication: NoRequire TLS To Offer SMTP authentication: NoDKIM/DomainKeys Signing Enabled: NoDKIM Verification Enabled: NoSPF/SIDF Verification Enabled: NoDMARC Verification Enabled: NoEnvelope Sender DNS Verification Enabled: NoDomain Exception Table Enabled: NoAccept untagged bounces: NoThere are currently 4 policies defined.There are currently 5 sender groups.Choose the operation you want to perform:- NEW - Create a new entry.- EDIT - Modify an entry.- DELETE - Remove an entry.- MOVE - Move an entry.- DEFAULT - Set the defaults.- PRINT - Display the table.- IMPORT - Import a table from a file.- EXPORT - Export the table to a file.- CLEAR - Remove all entries.
コマンド:参考例
275
コマンド:参考例
例:エクスポートおよびインポートによるリスナーのホストアクセステーブル(HAT)のカスタマイズ
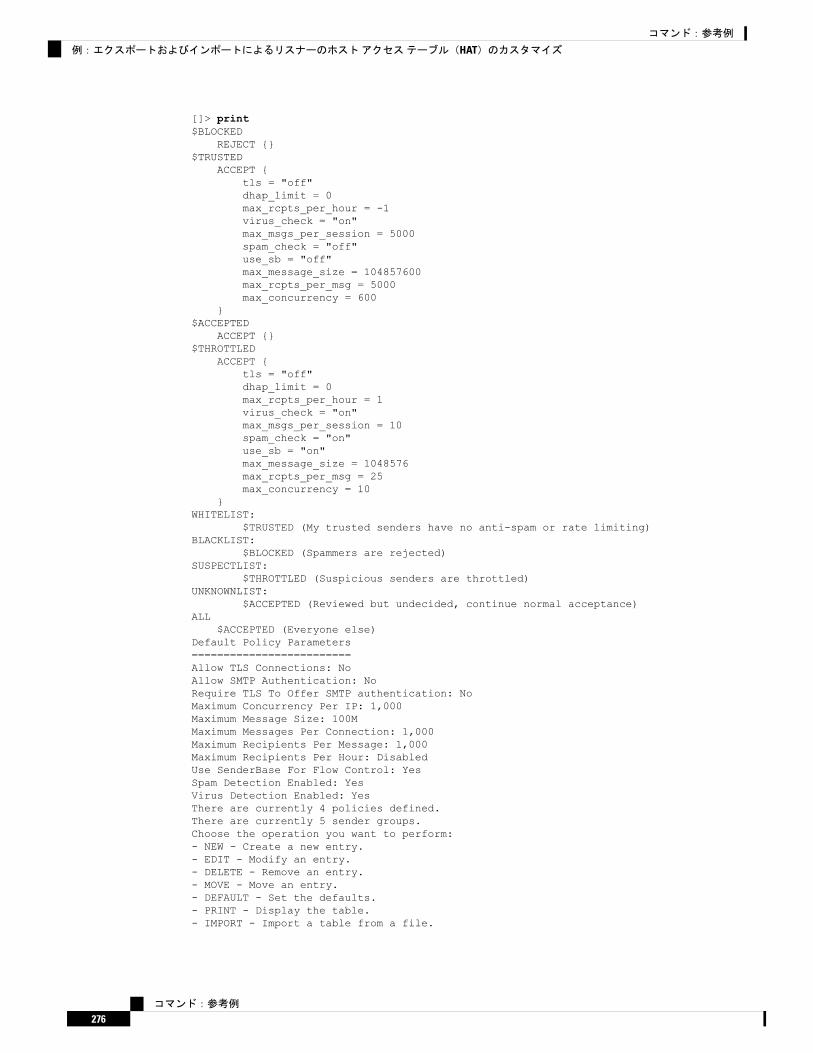
[]> print$BLOCKED
REJECT {}$TRUSTED
ACCEPT {tls = "off"dhap_limit = 0max_rcpts_per_hour = -1virus_check = "on"max_msgs_per_session = 5000spam_check = "off"use_sb = "off"max_message_size = 104857600max_rcpts_per_msg = 5000max_concurrency = 600
}$ACCEPTED
ACCEPT {}$THROTTLED
ACCEPT {tls = "off"dhap_limit = 0max_rcpts_per_hour = 1virus_check = "on"max_msgs_per_session = 10spam_check = "on"use_sb = "on"max_message_size = 1048576max_rcpts_per_msg = 25max_concurrency = 10
}WHITELIST:
$TRUSTED (My trusted senders have no anti-spam or rate limiting)BLACKLIST:
$BLOCKED (Spammers are rejected)SUSPECTLIST:
$THROTTLED (Suspicious senders are throttled)UNKNOWNLIST:
$ACCEPTED (Reviewed but undecided, continue normal acceptance)ALL
$ACCEPTED (Everyone else)Default Policy Parameters=========================Allow TLS Connections: NoAllow SMTP Authentication: NoRequire TLS To Offer SMTP authentication: NoMaximum Concurrency Per IP: 1,000Maximum Message Size: 100MMaximum Messages Per Connection: 1,000Maximum Recipients Per Message: 1,000Maximum Recipients Per Hour: DisabledUse SenderBase For Flow Control: YesSpam Detection Enabled: YesVirus Detection Enabled: YesThere are currently 4 policies defined.There are currently 5 sender groups.Choose the operation you want to perform:- NEW - Create a new entry.- EDIT - Modify an entry.- DELETE - Remove an entry.- MOVE - Move an entry.- DEFAULT - Set the defaults.- PRINT - Display the table.- IMPORT - Import a table from a file.
コマンド:参考例
276
コマンド:参考例
例:エクスポートおよびインポートによるリスナーのホストアクセステーブル(HAT)のカスタマイズ

- EXPORT - Export the table to a file.- CLEAR - Remove all entries.[]> exportEnter a name for the exported file:[]> inbound.HAT.txtFile written on machine "mail3.example.com".
例:
ステップ 2 コマンドラインインターフェイス(CLI)の外部で、ファイル inbound.HAT.txtを取得します。
ステップ 3 テキストエディタを使用して、このファイルに新しい HATエントリを作成します。
この例では、HAT内の ALLエントリの上に以下のエントリを追加します。
spamdomain.com REJECT.spamdomain.com REJECT251.192.1. TCPREFUSE169.254.10.10 RELAY
•最初の 2つのエントリは、ドメイン spamdomain.comおよび spamdomain.comのサブドメイン内のリモートホストからの接続をすべて拒否します。
• 3つ目のエントリは、IPアドレスが 251.192.1.xであるホストからの接続を拒否します。• 4つ目のエントリによって、IPアドレスが 169.254.10.10であるリモートホストは、インターネットへのすべての発信電子メールについて、Eメールセキュリティアプライアンスを SMTPリレーとして使用できます。
HAT内でのルールの順序は重要な意味を持ちます。リスナーに接続しようとするホストごとに、HATは上から下へ順番に読み込まれます。接続元ホストにルールが一致する場合、その接続に対してすぐにアクションが実行されます。HATでは、すべてのカスタムエントリを ALLホスト定義より上に配置する必要があります。HAT CLIエディタまたは GUIを使用してリスナーの HATをカスタマイズすることもできます。詳細については、『UserGuide for AsyncOS for Cisco EmailSecurity Appliances』の「Configuring the Gateway to Receive Mail」と「Using MailFlow Monitor」の章を参照してください。
(注)
ステップ 4 ファイルを保存してインターフェイスの configurationディレクトリに配置し、インポートできるようにします。(詳細については、付録B「Accessing theAppliance」を参照してください)。
ステップ 5 listenerconfigの hostaccess -> importサブコマンドを使用して、編集済みのホストアクセステーブルファイルをインポートします。
次の例では、編集済みのファイル inbound.HAT.txtを InboundMailリスナーの HATにインポートします。printサブコマンドを使用して新しいエントリを出力します。
例:
mail3.example.com> listenerconfigCurrently configured listeners:1. InboundMail (on PublicNet, 192.168.2.1) SMTP TCP Port 25 Public2. OutboundMail (on PrivateNet, 192.168.1.1) SMTP TCP Port 25 PrivateChoose the operation you want to perform:- NEW - Create a new listener.
コマンド:参考例
277
コマンド:参考例
例:エクスポートおよびインポートによるリスナーのホストアクセステーブル(HAT)のカスタマイズ

- EDIT - Modify a listener.- DELETE - Remove a listener.- SETUP - Change global settings.[]> editEnter the name or number of the listener you wish to edit.[]> 1Name: InboundMailType: PublicInterface: PublicNet (192.168.2.1/24) TCP Port 25Protocol: SMTPDefault Domain:Max Concurrency: 1000 (TCP Queue: 50)Domain Map: DisabledTLS: NoSMTP Authentication: DisabledBounce Profile: DefaultUse SenderBase For Reputation Filters and IP Profiling: YesFooter: NoneLDAP: OffChoose the operation you want to perform:- NAME - Change the name of the listener.- INTERFACE - Change the interface.- LIMITS - Change the injection limits.- SETUP - Configure general options.- HOSTACCESS - Modify the Host Access Table.- RCPTACCESS - Modify the Recipient Access Table.- BOUNCECONFIG - Choose the bounce profile to use for messages injected on this listener.- MASQUERADE - Configure the Domain Masquerading Table.- DOMAINMAP - Configure domain mappings.[]> hostaccessDefault Policy Parameters=========================Allow TLS Connections: NoAllow SMTP Authentication: NoRequire TLS To Offer SMTP authentication: NoMaximum Concurrency Per IP: 1,000Maximum Message Size: 100MMaximum Messages Per Connection: 1,000Maximum Recipients Per Message: 1,000Maximum Recipients Per Hour: DisabledUse SenderBase For Flow Control: YesSpam Detection Enabled: YesVirus Detection Enabled: YesThere are currently 4 policies defined.There are currently 5 sender groups.Choose the operation you want to perform:- NEW - Create a new entry.- EDIT - Modify an entry.- DELETE - Remove an entry.- MOVE - Move an entry.- DEFAULT - Set the defaults.- PRINT - Display the table.- IMPORT - Import a table from a file.- EXPORT - Export the table to a file.- CLEAR - Remove all entries.[]> importEnter the name of the file to import:[]> inbound.HAT.txt9 entries imported successfully.Default Policy Parameters=========================Allow TLS Connections: NoAllow SMTP Authentication: NoRequire TLS To Offer SMTP authentication: No
コマンド:参考例
278
コマンド:参考例
例:エクスポートおよびインポートによるリスナーのホストアクセステーブル(HAT)のカスタマイズ

Maximum Concurrency Per IP: 1,000Maximum Message Size: 100MMaximum Messages Per Connection: 1,000Maximum Recipients Per Message: 1,000Maximum Recipients Per Hour: DisabledUse SenderBase For Flow Control: YesSpam Detection Enabled: YesVirus Detection Enabled: YesThere are currently 4 policies defined.There are currently 5 sender groups.Choose the operation you want to perform:- NEW - Create a new entry.- EDIT - Modify an entry.- DELETE - Remove an entry.- MOVE - Move an entry.- DEFAULT - Set the defaults.- PRINT - Display the table.- IMPORT - Import a table from a file.- EXPORT - Export the table to a file.- CLEAR - Remove all entries.[]> print$ACCEPTED
ACCEPT$THROTTLED
ACCEPT {spam_check = "on"max_msgs_per_session = 10max_concurrency = 10max_rcpts_per_msg = 25max_rcpts_per_hour = 1dhap_limit = 0virus_check = "on"max_message_size = 1048576use_sb = "on"tls = "off"
}$TRUSTED
ACCEPT {spam_check = "off"max_msgs_per_session = 5000max_concurrency = 600max_rcpts_per_msg = 5000max_rcpts_per_hour = -1dhap_limit = 0virus_check = "on"max_message_size = 104857600use_sb = "off"tls = "off"
}$BLOCKED
REJECTWHITELIST:
$TRUSTED (My trusted senders have no anti-spam scanning or rate limiting)BLACKLIST:
$BLOCKED (Spammers are rejected)SUSPECTLIST:
$THROTTLED (Suspicious senders are throttled)UNKNOWNLIST:
$ACCEPTED (Reviewed but undecided, continue normal acceptance)spamdomain.com
REJECT (reject the domain "spamdomain.com").spamdomain.com
REJECT (reject all subdomains of ".spamdomain.com")251.192.1.
コマンド:参考例
279
コマンド:参考例
例:エクスポートおよびインポートによるリスナーのホストアクセステーブル(HAT)のカスタマイズ
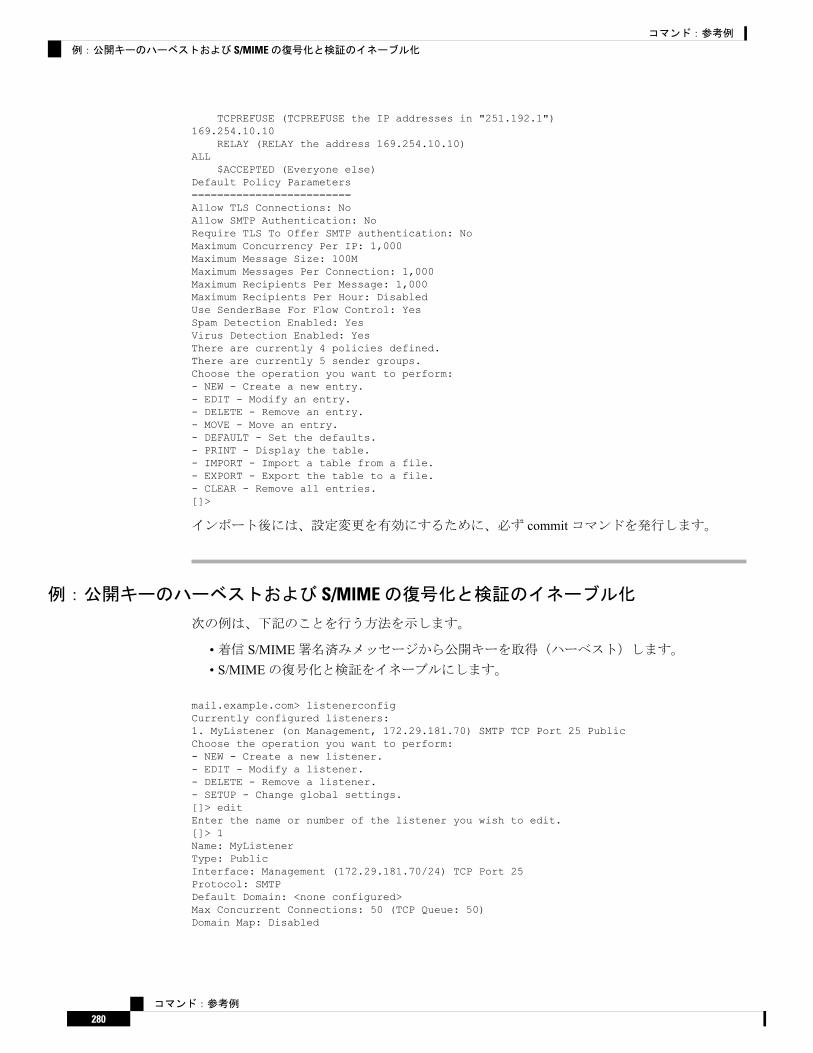
TCPREFUSE (TCPREFUSE the IP addresses in "251.192.1")169.254.10.10
RELAY (RELAY the address 169.254.10.10)ALL
$ACCEPTED (Everyone else)Default Policy Parameters=========================Allow TLS Connections: NoAllow SMTP Authentication: NoRequire TLS To Offer SMTP authentication: NoMaximum Concurrency Per IP: 1,000Maximum Message Size: 100MMaximum Messages Per Connection: 1,000Maximum Recipients Per Message: 1,000Maximum Recipients Per Hour: DisabledUse SenderBase For Flow Control: YesSpam Detection Enabled: YesVirus Detection Enabled: YesThere are currently 4 policies defined.There are currently 5 sender groups.Choose the operation you want to perform:- NEW - Create a new entry.- EDIT - Modify an entry.- DELETE - Remove an entry.- MOVE - Move an entry.- DEFAULT - Set the defaults.- PRINT - Display the table.- IMPORT - Import a table from a file.- EXPORT - Export the table to a file.- CLEAR - Remove all entries.[]>
インポート後には、設定変更を有効にするために、必ず commitコマンドを発行します。
例:公開キーのハーベストおよび S/MIMEの復号化と検証のイネーブル化
次の例は、下記のことを行う方法を示します。
•着信 S/MIME署名済みメッセージから公開キーを取得(ハーベスト)します。• S/MIMEの復号化と検証をイネーブルにします。
mail.example.com> listenerconfigCurrently configured listeners:1. MyListener (on Management, 172.29.181.70) SMTP TCP Port 25 PublicChoose the operation you want to perform:- NEW - Create a new listener.- EDIT - Modify a listener.- DELETE - Remove a listener.- SETUP - Change global settings.[]> editEnter the name or number of the listener you wish to edit.[]> 1Name: MyListenerType: PublicInterface: Management (172.29.181.70/24) TCP Port 25Protocol: SMTPDefault Domain: <none configured>Max Concurrent Connections: 50 (TCP Queue: 50)Domain Map: Disabled
コマンド:参考例
280
コマンド:参考例
例:公開キーのハーベストおよび S/MIMEの復号化と検証のイネーブル化
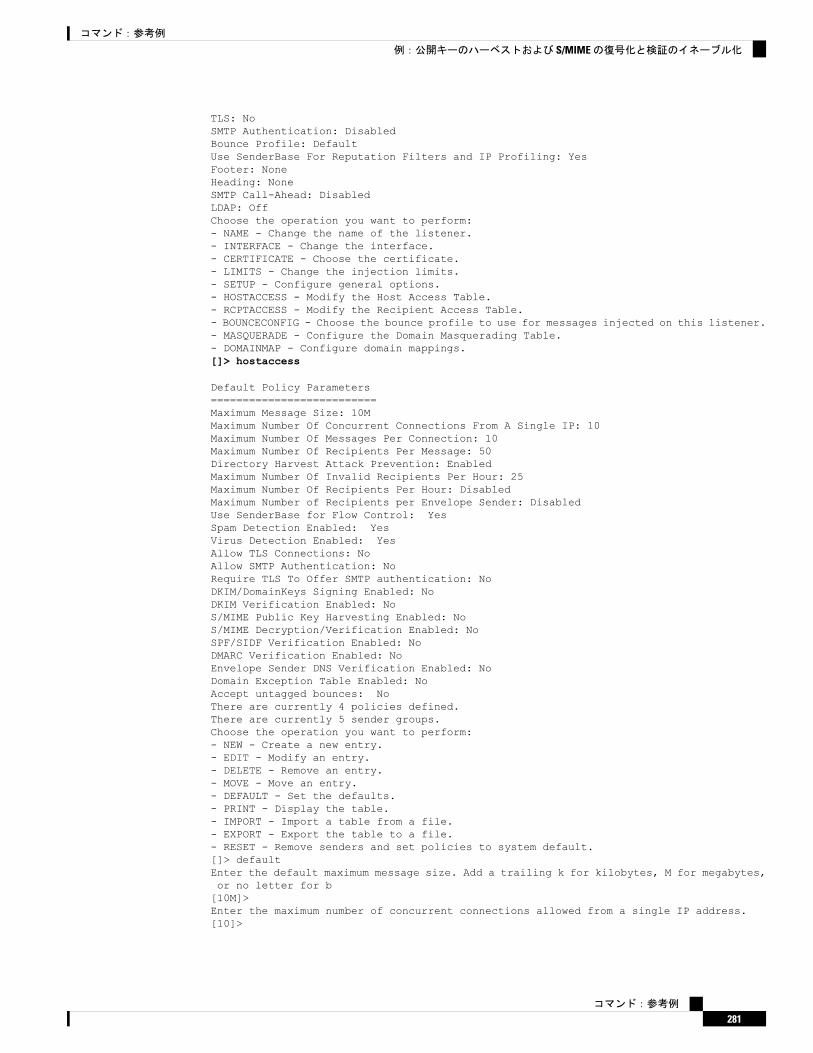
TLS: NoSMTP Authentication: DisabledBounce Profile: DefaultUse SenderBase For Reputation Filters and IP Profiling: YesFooter: NoneHeading: NoneSMTP Call-Ahead: DisabledLDAP: OffChoose the operation you want to perform:- NAME - Change the name of the listener.- INTERFACE - Change the interface.- CERTIFICATE - Choose the certificate.- LIMITS - Change the injection limits.- SETUP - Configure general options.- HOSTACCESS - Modify the Host Access Table.- RCPTACCESS - Modify the Recipient Access Table.- BOUNCECONFIG - Choose the bounce profile to use for messages injected on this listener.- MASQUERADE - Configure the Domain Masquerading Table.- DOMAINMAP - Configure domain mappings.[]> hostaccess
Default Policy Parameters==========================Maximum Message Size: 10MMaximum Number Of Concurrent Connections From A Single IP: 10Maximum Number Of Messages Per Connection: 10Maximum Number Of Recipients Per Message: 50Directory Harvest Attack Prevention: EnabledMaximum Number Of Invalid Recipients Per Hour: 25Maximum Number Of Recipients Per Hour: DisabledMaximum Number of Recipients per Envelope Sender: DisabledUse SenderBase for Flow Control: YesSpam Detection Enabled: YesVirus Detection Enabled: YesAllow TLS Connections: NoAllow SMTP Authentication: NoRequire TLS To Offer SMTP authentication: NoDKIM/DomainKeys Signing Enabled: NoDKIM Verification Enabled: NoS/MIME Public Key Harvesting Enabled: NoS/MIME Decryption/Verification Enabled: NoSPF/SIDF Verification Enabled: NoDMARC Verification Enabled: NoEnvelope Sender DNS Verification Enabled: NoDomain Exception Table Enabled: NoAccept untagged bounces: NoThere are currently 4 policies defined.There are currently 5 sender groups.Choose the operation you want to perform:- NEW - Create a new entry.- EDIT - Modify an entry.- DELETE - Remove an entry.- MOVE - Move an entry.- DEFAULT - Set the defaults.- PRINT - Display the table.- IMPORT - Import a table from a file.- EXPORT - Export the table to a file.- RESET - Remove senders and set policies to system default.[]> defaultEnter the default maximum message size. Add a trailing k for kilobytes, M for megabytes,or no letter for b[10M]>Enter the maximum number of concurrent connections allowed from a single IP address.[10]>
コマンド:参考例
281
コマンド:参考例
例:公開キーのハーベストおよび S/MIMEの復号化と検証のイネーブル化

Enter the maximum number of messages per connection.[10]>Enter the maximum number of recipients per message.[50]>Do you want to override the hostname in the SMTP banner? [N]>Would you like to specify a custom SMTP acceptance response? [N]>Would you like to specify a custom SMTP rejection response? [N]>Do you want to enable rate limiting per host? [N]>Do you want to enable rate limiting per envelope sender? [N]>Do you want to enable Directory Harvest Attack Prevention per host? [Y]>Enter the maximum number of invalid recipients per hour from a remote host.[25]>Select an action to apply when a recipient is rejected due to DHAP:1. Drop2. Code[1]>Would you like to specify a custom SMTP DHAP response? [Y]>Enter the SMTP code to use in the response. 550 is the standard code.[550]>Enter your custom SMTP response. Press Enter on a blank line to finish.custom_responseWould you like to use SenderBase for flow control by default? [Y]>Would you like to enable anti-spam scanning? [Y]>Would you like to enable anti-virus scanning? [Y]>Do you want to allow encrypted TLS connections?1. No2. Preferred3. Required4. Preferred - Verify5. Required - Verify[1]>Would you like to enable DKIM/DomainKeys signing? [N]>Would you like to enable DKIM verification? [N]>Would you like to enable S/MIME Public Key Harvesting? [N]> y
Would you like to harvest certificate on verification failure? [N]>
Would you like to harvest updated certificate? [Y]>
Would you like to enable S/MIME gateway decryption/verification? [N]> y
Select the appropriate operation for the S/MIME signature processing:1. Preserve2. Remove[1]>Would you like to change SPF/SIDF settings? [N]>Would you like to enable DMARC verification? [N]>Would you like to enable envelope sender verification? [N]>Would you like to enable use of the domain exception table? [N]>Do you wish to accept untagged bounces? [N]>Default Policy Parameters==========================Maximum Message Size: 10MMaximum Number Of Concurrent Connections From A Single IP: 10Maximum Number Of Messages Per Connection: 10Maximum Number Of Recipients Per Message: 50Directory Harvest Attack Prevention: EnabledMaximum Number Of Invalid Recipients Per Hour: 25Maximum Number Of Recipients Per Hour: DisabledMaximum Number of Recipients per Envelope Sender: DisabledUse SenderBase for Flow Control: YesSpam Detection Enabled: YesVirus Detection Enabled: YesAllow TLS Connections: No
コマンド:参考例
282
コマンド:参考例
例:公開キーのハーベストおよび S/MIMEの復号化と検証のイネーブル化

Allow SMTP Authentication: NoRequire TLS To Offer SMTP authentication: NoDKIM/DomainKeys Signing Enabled: NoDKIM Verification Enabled: NoS/MIME Public Key Harvesting Enabled: YesS/MIME Decryption/Verification Enabled: YesSPF/SIDF Verification Enabled: NoDMARC Verification Enabled: NoEnvelope Sender DNS Verification Enabled: NoDomain Exception Table Enabled: NoAccept untagged bounces: NoThere are currently 4 policies defined.There are currently 5 sender groups.Choose the operation you want to perform:- NEW - Create a new entry.- EDIT - Modify an entry.- DELETE - Remove an entry.- MOVE - Move an entry.- DEFAULT - Set the defaults.- PRINT - Display the table.- IMPORT - Import a table from a file.- EXPORT - Export the table to a file.- RESET - Remove senders and set policies to system default.[]>
例:HATの詳細パラメータ
次の表では、HAT詳細パラメータの構文を定義しています。次の値は数値であり、後に kを追加してキロバイトで表すか、後にMを追加してメガバイトで表すことができます。文字のない値はバイトと見なされます。アスタリスクが付いたパラメータは、次の表に示す変数構文
をサポートしています。
表 16 : HAT詳細パラメータの構文
値の例値構文パラメータ
1000番号
max_msgs_per_session接続あたりの最大メッセージ数
100001k
番号max_rcpts_per_msg
メッセージあたりの最大受信者数
104857620M
番号max_message_size
最大メッセージサイズ(Maximummessage size)
1000番号
max_concurrencyこのリスナーに許可された最大同時
接続数
220番号
smtp_banner_codeSMTPバナーコード
Accepted文字列
smtp_banner_textSMTPバナーテキスト(*)
550番号
smtp_banner_codeSMTP拒否バナーコード
コマンド:参考例
283
コマンド:参考例
例:HATの詳細パラメータ

値の例値構文パラメータ
Rejected文字列
smtp_banner_textSMTP拒否バナーテキスト(*)
defaulton | off | default
use_override_hostnameSMTPバナーホスト名を上書き
newhostname文字列
override_hostname
onon | off |requiredtls
TLSを使用
offon | off
spam_checkスパム対策スキャンの使用
offon | off
virus_checkSophosウイルススキャンの使用
5k番号
max_rcpts_per_hour1時間あたりの最大受信者数
452番号
max_rcpts_per_hour_code1時間あたりのエラーコードの最大受信者数
Toomanyrecipients
文字列max_rcpts_per_hour_text
1時間あたりのテキストの最大受信者数(*)
onon | off
use_sbSenderBaseの使用
sbrs[-10:-7.5]-10.0~ 10.0
sbrs[value1:value2]
SenderBaseレピュテーションスコアの定義
150番号
dhap_limitディレクトリ獲得攻撃防止:1時間あたりの最大無効受信大数
listenerconfigへの bypass_ca引数の追加
次の例では、listenerconfigへの bypass_ca引数の追加を示しています。
esa.example.com (SERVICE)> help listenerconfig.
rcptaccess_options are the following:new <rat_addr> [options]edit <rat_addr> [options]delete <rat_addr>printimport <filename>export <filename>clear <default_access>
default_access - Default access for empty RAT. Either "ACCEPT"or "REJECT".
rat_addr - Hostnames such as "example.com" and "[1.2.3.4]" are
コマンド:参考例
284
コマンド:参考例
listenerconfigへの bypass_ca引数の追加
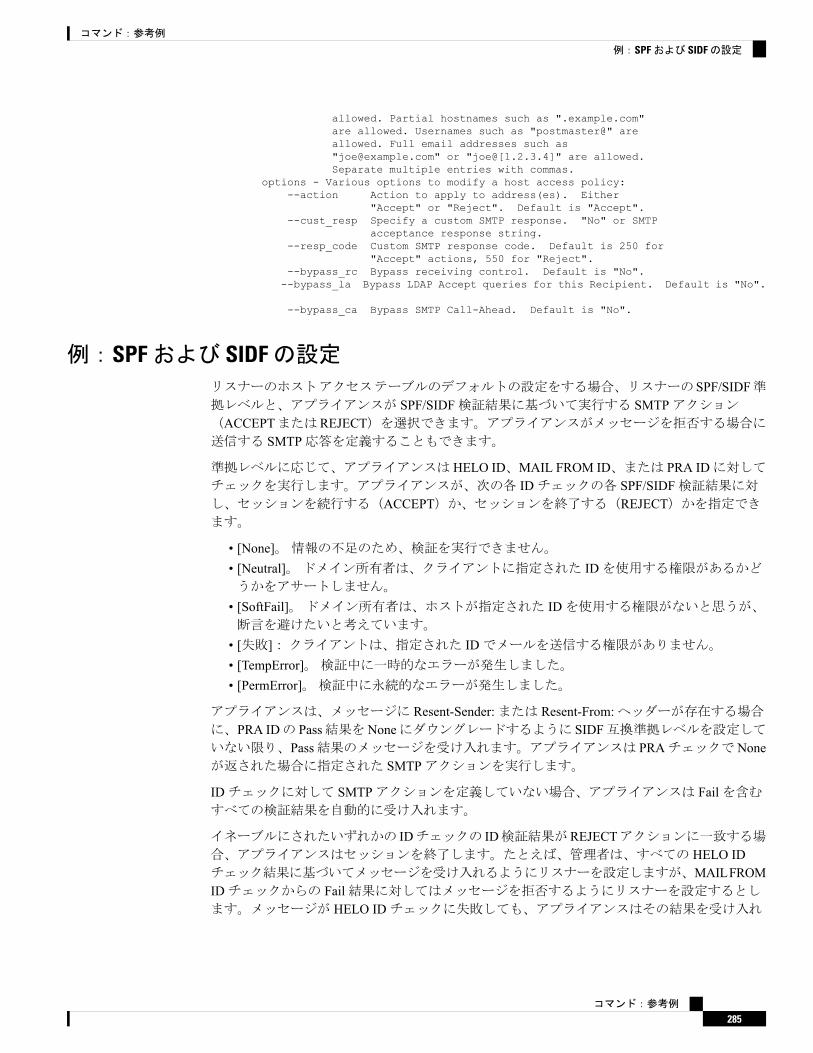
allowed. Partial hostnames such as ".example.com"are allowed. Usernames such as "postmaster@" areallowed. Full email addresses such as"[email protected]" or "joe@[1.2.3.4]" are allowed.Separate multiple entries with commas.
options - Various options to modify a host access policy:--action Action to apply to address(es). Either
"Accept" or "Reject". Default is "Accept".--cust_resp Specify a custom SMTP response. "No" or SMTP
acceptance response string.--resp_code Custom SMTP response code. Default is 250 for
"Accept" actions, 550 for "Reject".--bypass_rc Bypass receiving control. Default is "No".--bypass_la Bypass LDAP Accept queries for this Recipient. Default is "No".
--bypass_ca Bypass SMTP Call-Ahead. Default is "No".
例:SPFおよび SIDFの設定リスナーのホストアクセステーブルのデフォルトの設定をする場合、リスナーのSPF/SIDF準拠レベルと、アプライアンスが SPF/SIDF検証結果に基づいて実行する SMTPアクション(ACCEPTまたはREJECT)を選択できます。アプライアンスがメッセージを拒否する場合に送信する SMTP応答を定義することもできます。
準拠レベルに応じて、アプライアンスは HELO ID、MAIL FROM ID、または PRA IDに対してチェックを実行します。アプライアンスが、次の各 IDチェックの各 SPF/SIDF検証結果に対し、セッションを続行する(ACCEPT)か、セッションを終了する(REJECT)かを指定できます。
• [None]。情報の不足のため、検証を実行できません。• [Neutral]。ドメイン所有者は、クライアントに指定された IDを使用する権限があるかどうかをアサートしません。
• [SoftFail]。ドメイン所有者は、ホストが指定された IDを使用する権限がないと思うが、断言を避けたいと考えています。
• [失敗]:クライアントは、指定された IDでメールを送信する権限がありません。• [TempError]。検証中に一時的なエラーが発生しました。• [PermError]。検証中に永続的なエラーが発生しました。
アプライアンスは、メッセージに Resent-Sender:または Resent-From:ヘッダーが存在する場合に、PRA IDの Pass結果をNoneにダウングレードするように SIDF互換準拠レベルを設定していない限り、Pass結果のメッセージを受け入れます。アプライアンスは PRAチェックで Noneが返された場合に指定された SMTPアクションを実行します。
IDチェックに対して SMTPアクションを定義していない場合、アプライアンスは Failを含むすべての検証結果を自動的に受け入れます。
イネーブルにされたいずれかの IDチェックの ID検証結果がREJECTアクションに一致する場合、アプライアンスはセッションを終了します。たとえば、管理者は、すべての HELO IDチェック結果に基づいてメッセージを受け入れるようにリスナーを設定しますが、MAILFROMIDチェックからの Fail結果に対してはメッセージを拒否するようにリスナーを設定するとします。メッセージが HELO IDチェックに失敗しても、アプライアンスはその結果を受け入れ
コマンド:参考例
285
コマンド:参考例
例:SPFおよび SIDFの設定

るため、セッションが続行します。次に、メッセージがMAIL FROM IDチェックで失敗した場合、リスナーはセッションを終了し、REJECTアクションの STMP応答を返します。
SMTP応答は、アプライアンスが SPF/SIDF検証結果に基づいてメッセージを拒否する場合に返すコード番号とメッセージです。TempError結果は、他の検証結果と異なる SMTP応答を返します。TempErrorの場合、デフォルトの応答コードは 451で、デフォルトのメッセージテキストは「#4.4.3 Temporary error occurred during SPF verification」です。他のすべての検証結果では、デフォルトの応答コードは 550で、デフォルトのメッセージテキストは「#5.7.1 SPFunauthorizedmail is prohibited」です。TempErrorや他の検証結果に独自の応答コードとメッセージテキストを指定できます。
任意で、Neutral、SoftFail、または Fail検証結果に対して REJECTアクションが実行された場合に、SPFパブリッシャドメインから、サードパーティの応答を返すように、アプライアンスを設定することができます。デフォルトで、アプライアンスは次の応答を返します。
550-#5.7.1 SPF unauthorized mail is prohibited.
550-The domain example.com explains:
550 <Response text from SPF domain publisher>
これらのSPF/SIDF設定をイネーブルにするには、listenerconfig -> editサブコマンドを使用し、リスナーを選択します。次に、hostaccess -> defaultサブコマンドを使用して、ホストアクセステーブルのデフォルトの設定を編集します。次のプロンプトに yesと答えて、SPF制御を設定します。
Would you like to change SPF/SIDF settings? [N]> yes
Would you like to perform SPF/SIDF Verification? [Y]> yes
ホストアクセステーブルでは、次の SPF制御設定を使用できます。
表 17 : SPF制御設定
使用可能な SPF制御設定準拠レベル
• HELO IDチェックを実行するかどうか•次の IDチェックの結果に基づいて実行される SMTPアクション• HELO ID(イネーブルの場合)• MAIL FROM ID• REJECTアクションに対して返される SMTP応答コードとテキスト
•秒単位の検証タイムアウト
SPFのみ(SPFOnly)
コマンド:参考例
286
コマンド:参考例
例:SPFおよび SIDFの設定

使用可能な SPF制御設定準拠レベル
• HELO IDチェックを実行するかどうか•メッセージに Resent-Sender:または Resent-From:ヘッダーが存在する場合に、検証で PRA IDの Pass結果を Noneにダウングレードするかどうか
•次の IDチェックの結果に基づいて実行される SMTPアクション• HELO ID(イネーブルの場合)• MAIL FROM ID• PRA Identity• REJECTアクションに対して返される SMTP応答コードとテキスト
•秒単位の検証タイムアウト
SIDF互換(SIDFCompatible)
•次の IDチェックの結果に基づいて実行される SMTPアクション• MAIL FROM ID• PRA Identity• SPF REJECTアクションの場合に返される SMTP応答コードとテキスト
•秒単位の検証タイムアウト
SIDF厳格(SIDFStrict)
次に、ユーザが SPF Only準拠レベルを使用して、SPF/SIDF検証を設定する例を示します。アプライアンスは HELO IDチェックを実行し、Noneおよび Neutral検証結果を受け入れ、その他の結果を拒否します。SMTPアクションのCLIプロンプトはすべての IDタイプで同じです。ユーザはMAIL FROM IDの SMTPアクションを定義しません。アプライアンスは、その IDのすべての検証結果を自動的に受け入れます。アプライアンスはすべての REJECT結果に対して、デフォルトの拒否コードとテキストを使用します。
例:SPF/SIDF設定
Would you like to change SPF/SIDF settings? [N]> yesWould you like to perform SPF/SIDF Verification? [N]> yesWhat Conformance Level would you like to use?1. SPF only2. SIDF compatible3. SIDF strict[2]> 1Would you like to have the HELO check performed? [Y]> yWould you like to change SMTP actions taken as result of the SPF verification? [N]> yWould you like to change SMTP actions taken for the HELO identity? [N]> yWhat SMTP action should be taken if HELO check returns None?1. Accept2. Reject[1]> 1What SMTP action should be taken if HELO check returns Neutral?1. Accept2. Reject[1]> 1What SMTP action should be taken if HELO check returns SoftFail?1. Accept
コマンド:参考例
287
コマンド:参考例
例:SPF/SIDF設定
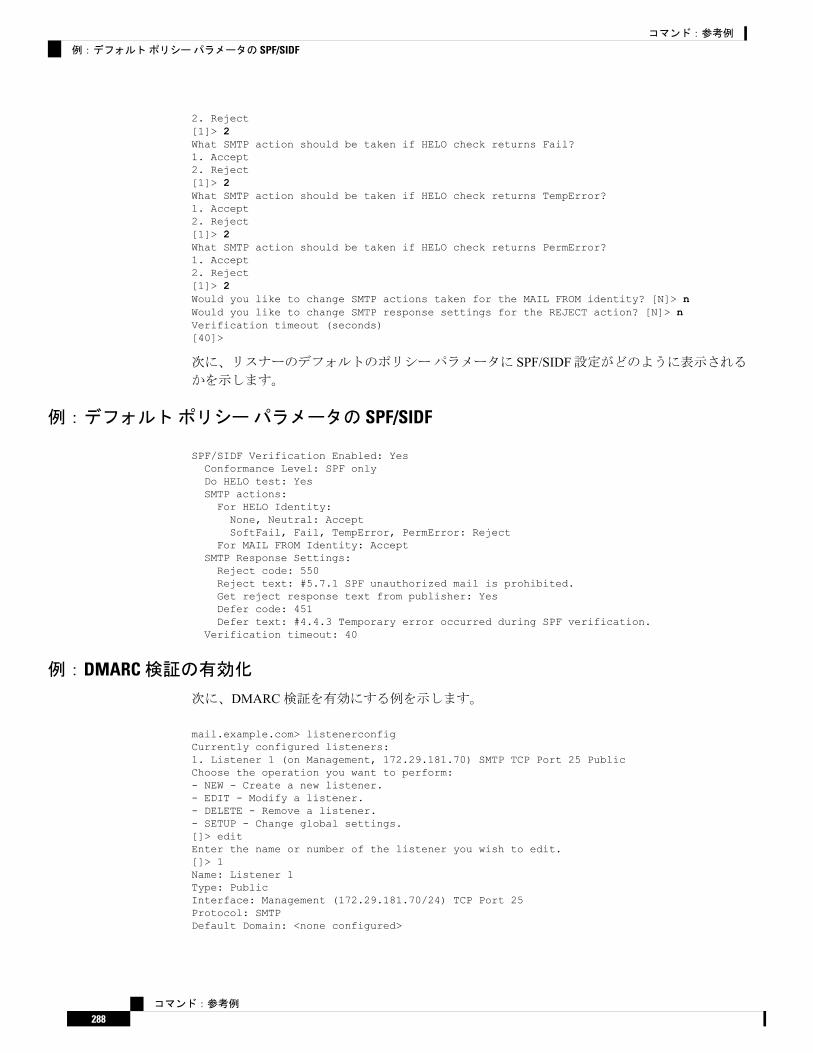
2. Reject[1]> 2What SMTP action should be taken if HELO check returns Fail?1. Accept2. Reject[1]> 2What SMTP action should be taken if HELO check returns TempError?1. Accept2. Reject[1]> 2What SMTP action should be taken if HELO check returns PermError?1. Accept2. Reject[1]> 2Would you like to change SMTP actions taken for the MAIL FROM identity? [N]> nWould you like to change SMTP response settings for the REJECT action? [N]> nVerification timeout (seconds)[40]>
次に、リスナーのデフォルトのポリシーパラメータに SPF/SIDF設定がどのように表示されるかを示します。
例:デフォルトポリシーパラメータの SPF/SIDF
SPF/SIDF Verification Enabled: YesConformance Level: SPF onlyDo HELO test: YesSMTP actions:For HELO Identity:None, Neutral: AcceptSoftFail, Fail, TempError, PermError: Reject
For MAIL FROM Identity: AcceptSMTP Response Settings:Reject code: 550Reject text: #5.7.1 SPF unauthorized mail is prohibited.Get reject response text from publisher: YesDefer code: 451Defer text: #4.4.3 Temporary error occurred during SPF verification.
Verification timeout: 40
例:DMARC検証の有効化
次に、DMARC検証を有効にする例を示します。
mail.example.com> listenerconfigCurrently configured listeners:1. Listener 1 (on Management, 172.29.181.70) SMTP TCP Port 25 PublicChoose the operation you want to perform:- NEW - Create a new listener.- EDIT - Modify a listener.- DELETE - Remove a listener.- SETUP - Change global settings.[]> editEnter the name or number of the listener you wish to edit.[]> 1Name: Listener 1Type: PublicInterface: Management (172.29.181.70/24) TCP Port 25Protocol: SMTPDefault Domain: <none configured>
コマンド:参考例
288
コマンド:参考例
例:デフォルトポリシーパラメータの SPF/SIDF
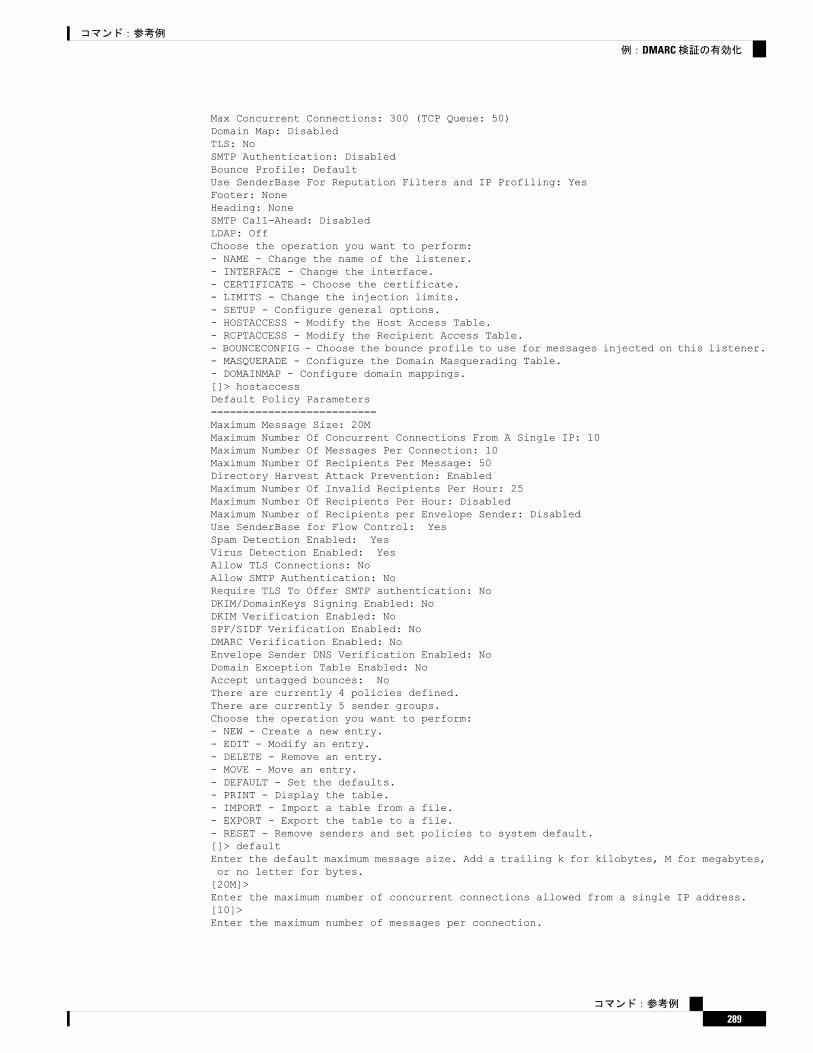
Max Concurrent Connections: 300 (TCP Queue: 50)Domain Map: DisabledTLS: NoSMTP Authentication: DisabledBounce Profile: DefaultUse SenderBase For Reputation Filters and IP Profiling: YesFooter: NoneHeading: NoneSMTP Call-Ahead: DisabledLDAP: OffChoose the operation you want to perform:- NAME - Change the name of the listener.- INTERFACE - Change the interface.- CERTIFICATE - Choose the certificate.- LIMITS - Change the injection limits.- SETUP - Configure general options.- HOSTACCESS - Modify the Host Access Table.- RCPTACCESS - Modify the Recipient Access Table.- BOUNCECONFIG - Choose the bounce profile to use for messages injected on this listener.- MASQUERADE - Configure the Domain Masquerading Table.- DOMAINMAP - Configure domain mappings.[]> hostaccessDefault Policy Parameters==========================Maximum Message Size: 20MMaximum Number Of Concurrent Connections From A Single IP: 10Maximum Number Of Messages Per Connection: 10Maximum Number Of Recipients Per Message: 50Directory Harvest Attack Prevention: EnabledMaximum Number Of Invalid Recipients Per Hour: 25Maximum Number Of Recipients Per Hour: DisabledMaximum Number of Recipients per Envelope Sender: DisabledUse SenderBase for Flow Control: YesSpam Detection Enabled: YesVirus Detection Enabled: YesAllow TLS Connections: NoAllow SMTP Authentication: NoRequire TLS To Offer SMTP authentication: NoDKIM/DomainKeys Signing Enabled: NoDKIM Verification Enabled: NoSPF/SIDF Verification Enabled: NoDMARC Verification Enabled: NoEnvelope Sender DNS Verification Enabled: NoDomain Exception Table Enabled: NoAccept untagged bounces: NoThere are currently 4 policies defined.There are currently 5 sender groups.Choose the operation you want to perform:- NEW - Create a new entry.- EDIT - Modify an entry.- DELETE - Remove an entry.- MOVE - Move an entry.- DEFAULT - Set the defaults.- PRINT - Display the table.- IMPORT - Import a table from a file.- EXPORT - Export the table to a file.- RESET - Remove senders and set policies to system default.[]> defaultEnter the default maximum message size. Add a trailing k for kilobytes, M for megabytes,or no letter for bytes.[20M]>Enter the maximum number of concurrent connections allowed from a single IP address.[10]>Enter the maximum number of messages per connection.
コマンド:参考例
289
コマンド:参考例
例:DMARC検証の有効化
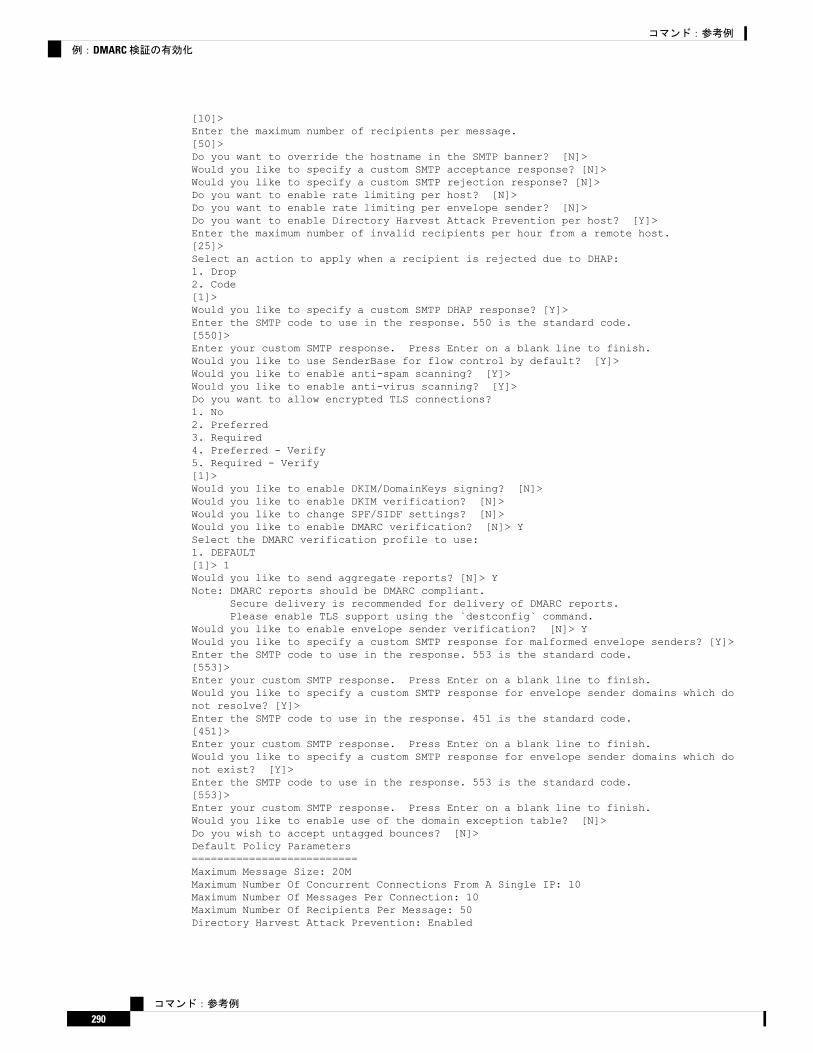
[10]>Enter the maximum number of recipients per message.[50]>Do you want to override the hostname in the SMTP banner? [N]>Would you like to specify a custom SMTP acceptance response? [N]>Would you like to specify a custom SMTP rejection response? [N]>Do you want to enable rate limiting per host? [N]>Do you want to enable rate limiting per envelope sender? [N]>Do you want to enable Directory Harvest Attack Prevention per host? [Y]>Enter the maximum number of invalid recipients per hour from a remote host.[25]>Select an action to apply when a recipient is rejected due to DHAP:1. Drop2. Code[1]>Would you like to specify a custom SMTP DHAP response? [Y]>Enter the SMTP code to use in the response. 550 is the standard code.[550]>Enter your custom SMTP response. Press Enter on a blank line to finish.Would you like to use SenderBase for flow control by default? [Y]>Would you like to enable anti-spam scanning? [Y]>Would you like to enable anti-virus scanning? [Y]>Do you want to allow encrypted TLS connections?1. No2. Preferred3. Required4. Preferred - Verify5. Required - Verify[1]>Would you like to enable DKIM/DomainKeys signing? [N]>Would you like to enable DKIM verification? [N]>Would you like to change SPF/SIDF settings? [N]>Would you like to enable DMARC verification? [N]> YSelect the DMARC verification profile to use:1. DEFAULT[1]> 1Would you like to send aggregate reports? [N]> YNote: DMARC reports should be DMARC compliant.
Secure delivery is recommended for delivery of DMARC reports.Please enable TLS support using the `destconfig` command.
Would you like to enable envelope sender verification? [N]> YWould you like to specify a custom SMTP response for malformed envelope senders? [Y]>Enter the SMTP code to use in the response. 553 is the standard code.[553]>Enter your custom SMTP response. Press Enter on a blank line to finish.Would you like to specify a custom SMTP response for envelope sender domains which donot resolve? [Y]>Enter the SMTP code to use in the response. 451 is the standard code.[451]>Enter your custom SMTP response. Press Enter on a blank line to finish.Would you like to specify a custom SMTP response for envelope sender domains which donot exist? [Y]>Enter the SMTP code to use in the response. 553 is the standard code.[553]>Enter your custom SMTP response. Press Enter on a blank line to finish.Would you like to enable use of the domain exception table? [N]>Do you wish to accept untagged bounces? [N]>Default Policy Parameters==========================Maximum Message Size: 20MMaximum Number Of Concurrent Connections From A Single IP: 10Maximum Number Of Messages Per Connection: 10Maximum Number Of Recipients Per Message: 50Directory Harvest Attack Prevention: Enabled
コマンド:参考例
290
コマンド:参考例
例:DMARC検証の有効化

Maximum Number Of Invalid Recipients Per Hour: 25Maximum Number Of Recipients Per Hour: DisabledMaximum Number of Recipients per Envelope Sender: DisabledUse SenderBase for Flow Control: YesSpam Detection Enabled: YesVirus Detection Enabled: YesAllow TLS Connections: NoAllow SMTP Authentication: NoRequire TLS To Offer SMTP authentication: NoDKIM/DomainKeys Signing Enabled: NoDKIM Verification Enabled: NoSPF/SIDF Verification Enabled: NoDMARC Verification Enabled: YesDMARC Verification Profile: DEFAULTAggregate reports: Yes
Envelope Sender DNS Verification Enabled: YesDomain Exception Table Enabled: NoAccept untagged bounces: NoThere are currently 4 policies defined.There are currently 5 sender groups.Choose the operation you want to perform:- NEW - Create a new entry.- EDIT - Modify an entry.- DELETE - Remove an entry.- MOVE - Move an entry.- DEFAULT - Set the defaults.- PRINT - Display the table.- IMPORT - Import a table from a file.- EXPORT - Export the table to a file.- RESET - Remove senders and set policies to system default.[]>Name: Listener 1Type: PublicInterface: Management (172.29.181.70/24) TCP Port 25Protocol: SMTPDefault Domain: <none configured>Max Concurrent Connections: 300 (TCP Queue: 50)Domain Map: DisabledTLS: NoSMTP Authentication: DisabledBounce Profile: DefaultUse SenderBase For Reputation Filters and IP Profiling: YesFooter: NoneHeading: NoneSMTP Call-Ahead: DisabledLDAP: OffChoose the operation you want to perform:- NAME - Change the name of the listener.- INTERFACE - Change the interface.- CERTIFICATE - Choose the certificate.- LIMITS - Change the injection limits.- SETUP - Configure general options.- HOSTACCESS - Modify the Host Access Table.- RCPTACCESS - Modify the Recipient Access Table.- BOUNCECONFIG - Choose the bounce profile to use for messages injected on this listener.- MASQUERADE - Configure the Domain Masquerading Table.- DOMAINMAP - Configure domain mappings.[]>Currently configured listeners:1. Listener 1 (on Management, 172.29.181.70) SMTP TCP Port 25 PublicChoose the operation you want to perform:- NEW - Create a new listener.- EDIT - Modify a listener.- DELETE - Remove a listener.
コマンド:参考例
291
コマンド:参考例
例:DMARC検証の有効化

- SETUP - Change global settings.[]>mail.example.com>
localeconfig
説明
多言語対応の設定値を設定します。
使用方法
確定:このコマンドは「commit」が必要です。
クラスタ管理:このコマンドは、すべてのマシンモード(クラスタ、グループ、マシン)で使
用できます。
バッチコマンド:このコマンドはバッチ形式をサポートしていません。
例
mail3.example.com> localeconfig
Behavior when modifying headers: Use encoding of message bodyBehavior for untagged non-ASCII headers: Impose encoding of message bodyBehavior for mismatched footer or heading encoding: Try both body and footer or headingencodingsBehavior when decoding errors found: Disclaimer is displayed as inline content and themessage body is added as an attachment.
Choose the operation you want to perform:- SETUP - Configure multi-lingual settings.[]> setup
If a header is modified, encode the new header in the same encoding as the message body?
(Some MUAs incorrectly handle headers encoded in a different encoding than the body.However, encoding a modified header in the same encoding as the message body may causecertaincharacters in the modified header to be lost.) [Y]>
If a non-ASCII header is not properly tagged with a character set and is being used ormodified,impose the encoding of the body on the header during processing and final representationof the message?(Many MUAs create non-RFC-compliant headers that are then handled in an undefined way.Some MUAs handle headers encoded in character sets that differ from that of the mainbody in an incorrect way.Imposing the encoding of the body on the header may encode the header more precisely.This will be used to interpret the content of headers for processing, it will not modifyor rewrite theheader unless that is done explicitly as part of the processing.) [Y]>
Disclaimers (as either footers or headings) are added in-line with the message bodywhenever possible.However, if the disclaimer is encoded differently than the message body, and if imposinga single encodingwill cause loss of characters, it will be added as an attachment. The system will always
コマンド:参考例
292
コマンド:参考例
localeconfig
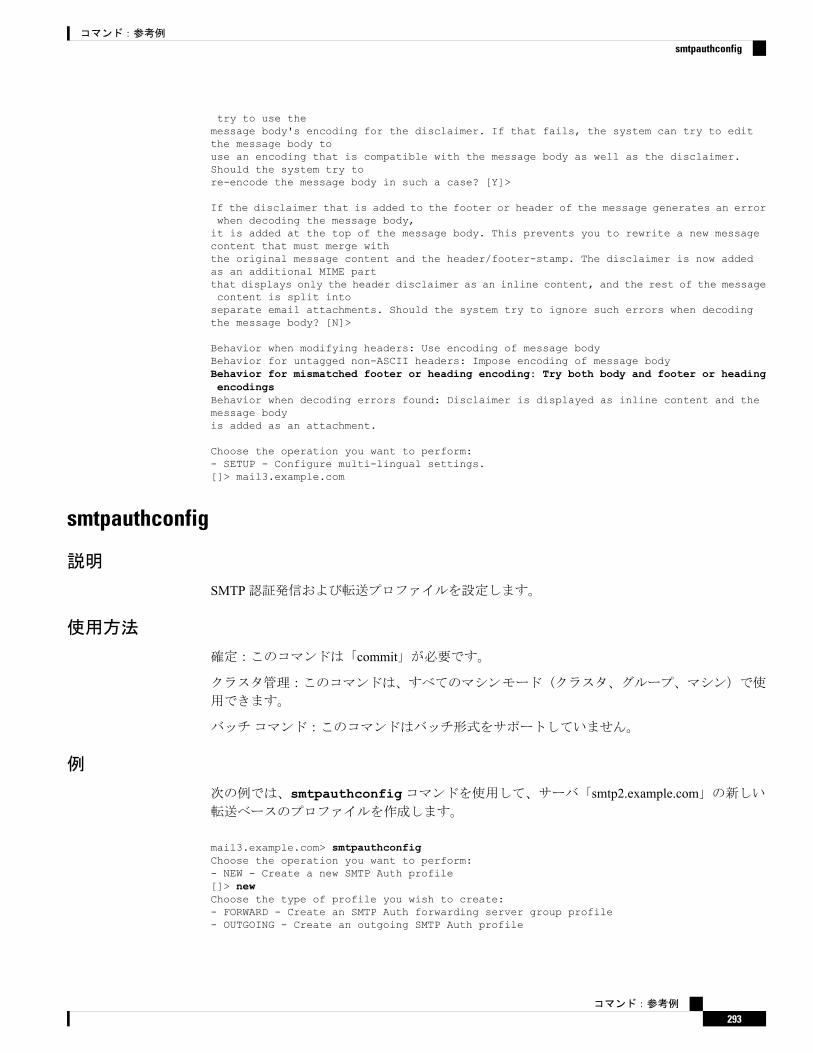
try to use themessage body's encoding for the disclaimer. If that fails, the system can try to editthe message body touse an encoding that is compatible with the message body as well as the disclaimer.Should the system try tore-encode the message body in such a case? [Y]>
If the disclaimer that is added to the footer or header of the message generates an errorwhen decoding the message body,it is added at the top of the message body. This prevents you to rewrite a new messagecontent that must merge withthe original message content and the header/footer-stamp. The disclaimer is now addedas an additional MIME partthat displays only the header disclaimer as an inline content, and the rest of the messagecontent is split intoseparate email attachments. Should the system try to ignore such errors when decodingthe message body? [N]>
Behavior when modifying headers: Use encoding of message bodyBehavior for untagged non-ASCII headers: Impose encoding of message bodyBehavior for mismatched footer or heading encoding: Try both body and footer or headingencodingsBehavior when decoding errors found: Disclaimer is displayed as inline content and themessage bodyis added as an attachment.
Choose the operation you want to perform:- SETUP - Configure multi-lingual settings.[]> mail3.example.com
smtpauthconfig
説明
SMTP認証発信および転送プロファイルを設定します。
使用方法
確定:このコマンドは「commit」が必要です。
クラスタ管理:このコマンドは、すべてのマシンモード(クラスタ、グループ、マシン)で使
用できます。
バッチコマンド:このコマンドはバッチ形式をサポートしていません。
例
次の例では、smtpauthconfigコマンドを使用して、サーバ「smtp2.example.com」の新しい転送ベースのプロファイルを作成します。
mail3.example.com> smtpauthconfigChoose the operation you want to perform:- NEW - Create a new SMTP Auth profile[]> newChoose the type of profile you wish to create:- FORWARD - Create an SMTP Auth forwarding server group profile- OUTGOING - Create an outgoing SMTP Auth profile
コマンド:参考例
293
コマンド:参考例
smtpauthconfig
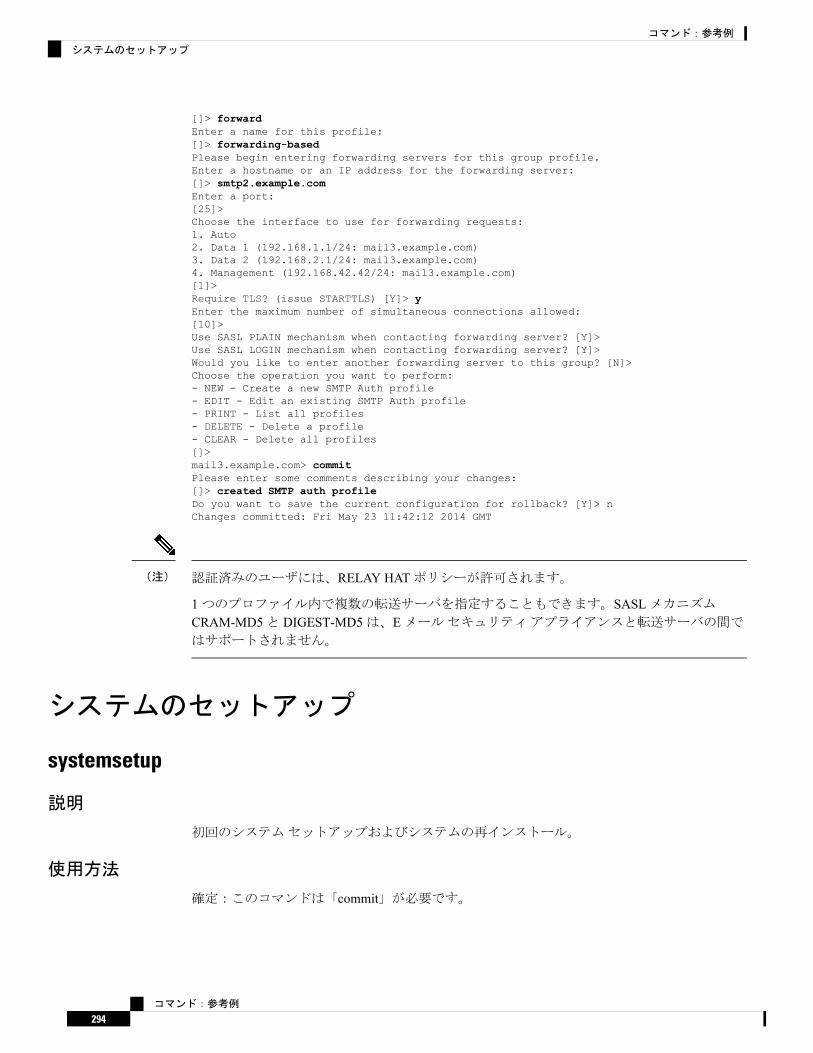
[]> forwardEnter a name for this profile:[]> forwarding-basedPlease begin entering forwarding servers for this group profile.Enter a hostname or an IP address for the forwarding server:[]> smtp2.example.comEnter a port:[25]>Choose the interface to use for forwarding requests:1. Auto2. Data 1 (192.168.1.1/24: mail3.example.com)3. Data 2 (192.168.2.1/24: mail3.example.com)4. Management (192.168.42.42/24: mail3.example.com)[1]>Require TLS? (issue STARTTLS) [Y]> yEnter the maximum number of simultaneous connections allowed:[10]>Use SASL PLAIN mechanism when contacting forwarding server? [Y]>Use SASL LOGIN mechanism when contacting forwarding server? [Y]>Would you like to enter another forwarding server to this group? [N]>Choose the operation you want to perform:- NEW - Create a new SMTP Auth profile- EDIT - Edit an existing SMTP Auth profile- PRINT - List all profiles- DELETE - Delete a profile- CLEAR - Delete all profiles[]>mail3.example.com> commitPlease enter some comments describing your changes:[]> created SMTP auth profileDo you want to save the current configuration for rollback? [Y]> nChanges committed: Fri May 23 11:42:12 2014 GMT
認証済みのユーザには、RELAY HATポリシーが許可されます。
1つのプロファイル内で複数の転送サーバを指定することもできます。SASLメカニズムCRAM-MD5と DIGEST-MD5は、Eメールセキュリティアプライアンスと転送サーバの間ではサポートされません。
(注)
システムのセットアップ
systemsetup
説明
初回のシステムセットアップおよびシステムの再インストール。
使用方法
確定:このコマンドは「commit」が必要です。
コマンド:参考例
294
コマンド:参考例
システムのセットアップ

クラスタ管理:このコマンドは、すべてのマシンモード(クラスタ、グループ、マシン)で使
用できます。
バッチコマンド:このコマンドはバッチ形式をサポートしていません。
例
mail3.example.com> systemsetupWARNING: The system setup wizard will completely delete any existing'listeners' and all associated settings including the 'Host Access Table' -mail operations may be interrupted.Are you sure you wish to continue? [Y]> yBefore you begin, please reset the administrator passphrase to a new value.Old passphrase:New passphrase:Retype new passphrase:*****You will now configure the network settings for the IronPort C100.Please create a fully qualified hostname for the IronPort C100 appliance(Ex: "ironport-C100.example.com"):[]> ironport-C100.example.com*****You will now assign an IP address for the "Data 1" interface.Please create a nickname for the "Data 1" interface (Ex: "Data 1"):[]> Data 1Enter the static IP address for "Data 1" on the "Data 1" interface? (Ex:"192.168.1.1"):[]> 192.168.1.1What is the netmask for this IP address? (Ex: "255.255.255.0" or "0xffffff00"):[255.255.255.0]>You have successfully configured IP Interface "Data 1".*****Would you like to assign a second IP address for the "Data 1" interface? [Y]> nWhat is the IP address of the default router (gateway) on your network?:[192.168.1.1]> 192.168.2.1*****Do you want to enable the web interface on the Data 1 interface? [Y]> yDo you want to use secure HTTPS? [Y]> yNote: The system will use a demo certificate for HTTPS.Use the "certconfig" command to upload your own certificate.*****Do you want the IronPort C100 to use the Internet's root DNS servers or wouldyou like it to use your own DNS servers?1. Use Internet root DNS servers2. Use my own DNS servers[1]> 2Please enter the IP address of your DNS server.[]> 192.168.0.3Do you want to enter another DNS server? [N]>You have successfully configured the DNS settings.*****You are now going to configure how the IronPort C100 accepts mail by creating a"Listener".Please create a name for this listener (Ex: "MailInterface"):[]> InboundMailPlease choose an IP interface for this Listener.1. Data 1 (192.168.1.1/24: ironport-C100.example.com)[1]> 1Enter the domain names or specific email addresses you want to accept mail for.Hostnames such as "example.com" are allowed.Partial hostnames such as ".example.com" are allowed.
コマンド:参考例
295
コマンド:参考例
例

Usernames such as "postmaster@" are allowed.Full email addresses such as "[email protected]" or "joe@[1.2.3.4]" are allowed.Separate multiple addresses with commas.[]> example.com, .example.comWould you like to configure SMTP routes for example.com, .example.com? [Y]> nPlease specify the systems allowed to relay email through the IronPort C100.Hostnames such as "example.com" are allowed.Partial hostnames such as ".example.com" are allowed.IP addresses, IP address ranges, and partial IP addresses are allowed.Separate multiple entries with commas.[]> example.com, .example.comDo you want to enable filtering based on SenderBase Reputation Service (SBRS)Scores for this listener? (Your selection will be used to filter all incomingmail based on its SBRS Score.) [Y]> yDo you want to enable rate limiting for this listener? (Rate limiting definesthe maximum number of recipients per hour you are willing to receive from aremote domain.) [Y]> yEnter the maximum number of recipients per hour to accept from a remote domain.[]> 1000Default Policy Parameters==========================Maximum Message Size: 10MMaximum Number Of Concurrent Connections From A Single IP: 10Maximum Number Of Messages Per Connection: 10Maximum Number Of Recipients Per Message: 50Directory Harvest Attack Prevention: EnabledMaximum Number Of Invalid Recipients Per Hour: 25Maximum Number Of Recipients Per Hour: 1,000Maximum Recipients Per Hour SMTP Response:
452 Too many recipients received this hourUse SenderBase for Flow Control: YesSpam Detection Enabled: YesVirus Detection Enabled: YesAllow TLS Connections: NoAllow SMTP Authentication: NoRequire TLS To Offer SMTP authentication: NoDKIM/DomainKeys Signing Enabled: NoDKIM Verification Enabled: NoSPF/SIDF Verification Enabled: NoDMARC Verification Enabled: NoEnvelope Sender DNS Verification Enabled: NoDomain Exception Table Enabled: NoAccept untagged bounces: NoWould you like to change the default host access policy? [N]> nListener InboundMail created.Defaults have been set for a Public listener.Use the listenerconfig->EDIT command to customize the listener.*****Do you want to use Anti-Spam scanning in the default Incoming Mail policy? [Y]> yWould you like to enable IronPort Spam Quarantine? [Y]> yIronPort Anti-Spam configured globally for the IronPort C100 appliance. Use thepolicyconfig command (CLI) or Mail Policies (GUI) to customize the IronPortsettings for each listener.IronPort selected for DEFAULT policy*****Do you want to use Anti-Virus scanning in the default Incoming and OutgoingMail policies? [Y]> y1. McAfee Anti-Virus2. Sophos Anti-VirusEnter the number of the Anti-Virus engine you would like to use on the defaultIncoming and Outgoing Mail policies.[]> 2Sophos selected for DEFAULT policy*****
コマンド:参考例
296
コマンド:参考例
例

Do you want to enable Outbreak Filters? [Y]> yOutbreak Filters enabled.Outbreak Filter alerts are sent when outbreak rules cross the threshold (go above orback down below),meaning that new messages of certain types could be quarantined or will no longer bequarantined, respectively.Allow the sharing of limited data with SenderBase? [Y]> yYou have successfully configured Outbreak Filters and SenderBase.*****You will now configure system alerts.Please enter the email address(es) to send alerts.(Ex: "[email protected]")Separate multiple addresses with commas.[]> [email protected] you like to enable IronPort AutoSupport, which automatically emailssystem alerts and weekly status reports directly to IronPort Customer Support?You will receive a complete copy of each message sent to IronPort.(Recommended) [Y]> y*****You will now configure scheduled reporting.Please enter the email address(es) to deliver scheduled reports to.(Leave blank to only archive reports on-box.)Separate multiple addresses with commas.[]> [email protected]*****You will now configure system time settings.Please choose your continent:1. Africa2. America...11. GMT Offset[11]> 2Please choose your country:1. Anguilla...47. United States48. Uruguay49. Venezuela50. Virgin Islands (British)51. Virgin Islands (U.S.)[]> 47Please choose your timezone:1. Alaska Time (Anchorage)...26. Pacific Time (Los_Angeles)[]> 26Do you wish to use NTP to set system time? [Y]> yPlease enter the fully qualified hostname or IP address of your NTP server, orpress Enter to use time.ironport.com:[time.ironport.com]>*****Would you like to commit these changes at this time? [Y]> yCongratulations! System setup is complete.For advanced configuration, please refer to the User Guide.
URLフィルタリングここでは、次の CLIコマンドについて説明します。
• aggregatorconfig(298ページ)
コマンド:参考例
297
コマンド:参考例
URLフィルタリング

• urllistconfig(298ページ)• webcacheflush(299ページ)• websecurityadvancedconfig(300ページ)• websecurityconfig(302ページ)• websecuritydiagnostics (303ページ)
aggregatorconfig
説明
Eメールセキュリティアプライアンスでシスコのアグリゲータサーバのアドレスを設定します。このサーバは、リライトされた URLと、各ユーザのクリックに関連付けられたアクション(許可、ブロック、または不明)をクリックしたエンドユーザの詳細を提供します。
使用方法
確定:このコマンドは「commit」が必要です。
クラスタ管理:このコマンドは、すべてのマシンモード(クラスタ、グループ、マシン)で使
用できます。
バッチコマンド:このコマンドはバッチ形式をサポートしていません。
例
mail.example.com> aggregatorconfigChoose the operation you want to perform:- EDIT - Edit aggregator configuration[]> editEdit aggregator address:[aggregator.organization.com]> org-aggregator.comSuccessfully changed aggregator address to : org-aggregator.com
urllistconfig
説明
URLフィルタリング機能によって評価されない URLのホワイトリストを設定またはインポートします。このリストは、アウトブレイクフィルタ機能には使用されません。
使用方法
確定:このコマンドは「commit」が必要です。
クラスタ管理:このコマンドは、すべてのマシンモード(クラスタ、グループ、マシン)で使
用できます。
バッチコマンド:このコマンドはバッチ形式をサポートしています。
コマンド:参考例
298
コマンド:参考例
aggregatorconfig

例
> urllistconfigNo URL lists configured.Choose the operation you want to perform:NEW - Create a new URL list-[]> newDo you want to import a URL list?[N]>Enter a name for the URL list[]> sampleEnter the URL domains that need to be skipped from scanning for URL Filtering.Enter one URL domain per line and '.' to finish.cisco.comironport.com/**.example.com10.2.4.5/24[2001:DB8::1]URL list sample added.There are currently 4 URL lists configured.Choose the operation you want to perform:- NEW - Create a new URL whitelist.- EDIT - Modify an existing URL whitelist.- DELETE - Delete an existing URL whitelist.[]>EDITChoose the operation to edit the URL whitelist:- IMPORT – Import a file into an existing URL whitelist- EXPORT – Export an existing URL whitelist into a file- RENAME – Rename an existing URL whitelist[]>IMPORTAssign new name to the imported list? (By default, name stored in thefile will be applied to the list)[N] > YEnter name of the list > new_listEnter filename to import from > URLfileNOTE: These files will be stored in /pub/configurationURL list “new_list” added.
webcacheflush
説明
URLフィルタリング機能で使用されるキャッシュをフラッシュします。シスコのWebセキュリティサービスとの通信に使用される証明書を変更した場合は、このコマンドを使用します。
通常、シスコサポートから指示された場合にのみ、このコマンドを使用します。
使用方法
確定:このコマンドに「commit」は必要ありません。
クラスタ管理:このコマンドはマシンモードでのみ使用できます。
バッチコマンド:このコマンドはバッチ形式をサポートしていません。
コマンド:参考例
299
コマンド:参考例
例
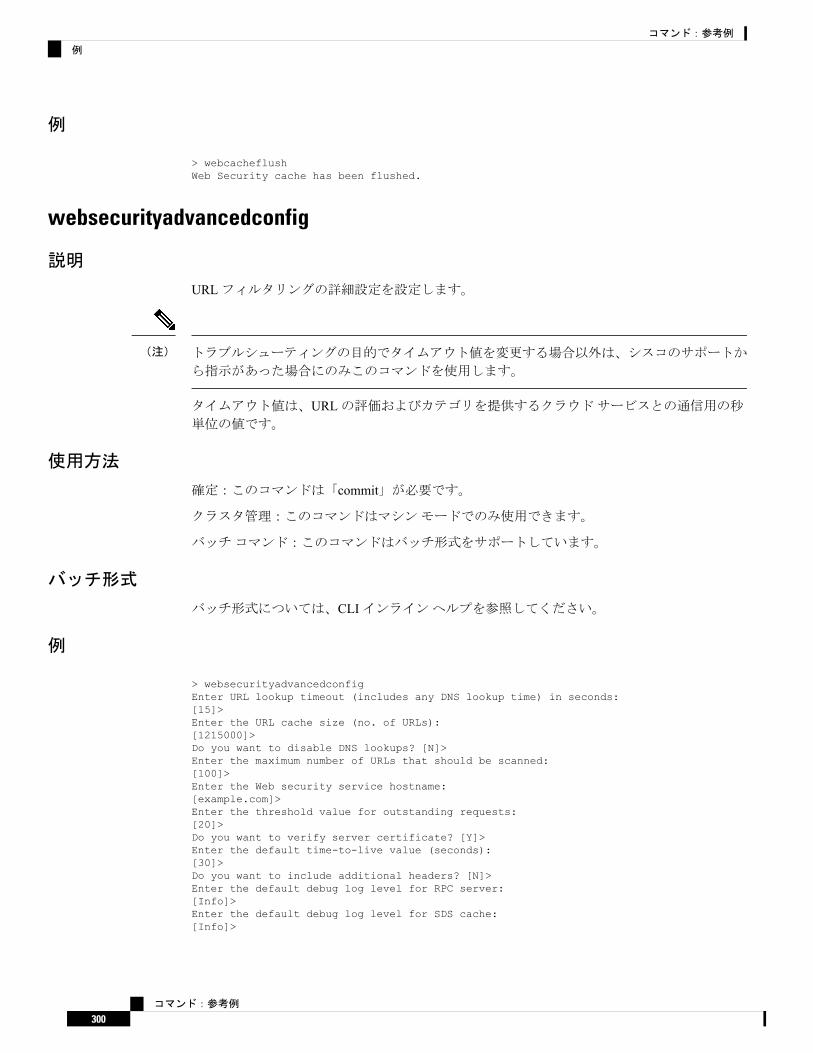
例
> webcacheflushWeb Security cache has been flushed.
websecurityadvancedconfig
説明
URLフィルタリングの詳細設定を設定します。
トラブルシューティングの目的でタイムアウト値を変更する場合以外は、シスコのサポートか
ら指示があった場合にのみこのコマンドを使用します。
(注)
タイムアウト値は、URLの評価およびカテゴリを提供するクラウドサービスとの通信用の秒単位の値です。
使用方法
確定:このコマンドは「commit」が必要です。
クラスタ管理:このコマンドはマシンモードでのみ使用できます。
バッチコマンド:このコマンドはバッチ形式をサポートしています。
バッチ形式
バッチ形式については、CLIインラインヘルプを参照してください。
例
> websecurityadvancedconfigEnter URL lookup timeout (includes any DNS lookup time) in seconds:[15]>Enter the URL cache size (no. of URLs):[1215000]>Do you want to disable DNS lookups? [N]>Enter the maximum number of URLs that should be scanned:[100]>Enter the Web security service hostname:[example.com]>Enter the threshold value for outstanding requests:[20]>Do you want to verify server certificate? [Y]>Enter the default time-to-live value (seconds):[30]>Do you want to include additional headers? [N]>Enter the default debug log level for RPC server:[Info]>Enter the default debug log level for SDS cache:[Info]>
コマンド:参考例
300
コマンド:参考例
例
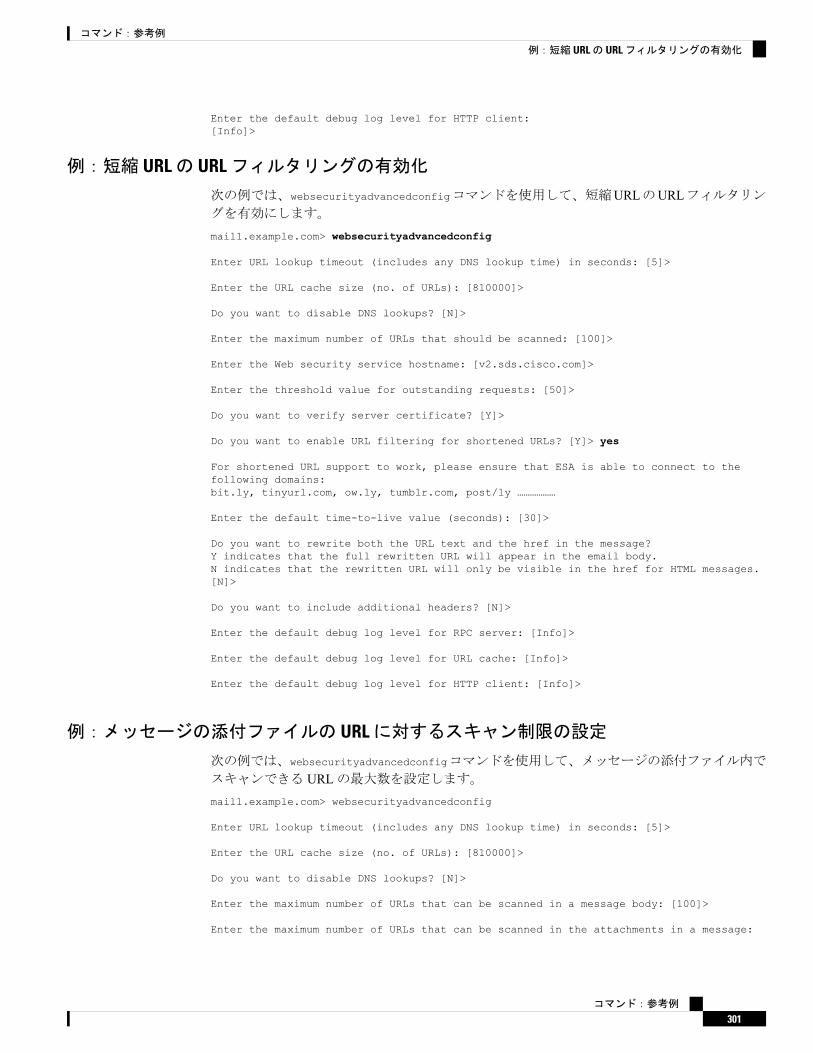
Enter the default debug log level for HTTP client:[Info]>
例:短縮 URLの URLフィルタリングの有効化
次の例では、websecurityadvancedconfigコマンドを使用して、短縮URLのURLフィルタリングを有効にします。
mail1.example.com> websecurityadvancedconfig
Enter URL lookup timeout (includes any DNS lookup time) in seconds: [5]>
Enter the URL cache size (no. of URLs): [810000]>
Do you want to disable DNS lookups? [N]>
Enter the maximum number of URLs that should be scanned: [100]>
Enter the Web security service hostname: [v2.sds.cisco.com]>
Enter the threshold value for outstanding requests: [50]>
Do you want to verify server certificate? [Y]>
Do you want to enable URL filtering for shortened URLs? [Y]> yes
For shortened URL support to work, please ensure that ESA is able to connect to thefollowing domains:bit.ly, tinyurl.com, ow.ly, tumblr.com, post/ly ………………
Enter the default time-to-live value (seconds): [30]>
Do you want to rewrite both the URL text and the href in the message?Y indicates that the full rewritten URL will appear in the email body.N indicates that the rewritten URL will only be visible in the href for HTML messages.[N]>
Do you want to include additional headers? [N]>
Enter the default debug log level for RPC server: [Info]>
Enter the default debug log level for URL cache: [Info]>
Enter the default debug log level for HTTP client: [Info]>
例:メッセージの添付ファイルの URLに対するスキャン制限の設定
次の例では、websecurityadvancedconfigコマンドを使用して、メッセージの添付ファイル内で
スキャンできる URLの最大数を設定します。mail1.example.com> websecurityadvancedconfig
Enter URL lookup timeout (includes any DNS lookup time) in seconds: [5]>
Enter the URL cache size (no. of URLs): [810000]>
Do you want to disable DNS lookups? [N]>
Enter the maximum number of URLs that can be scanned in a message body: [100]>
Enter the maximum number of URLs that can be scanned in the attachments in a message:
コマンド:参考例
301
コマンド:参考例
例:短縮 URLの URLフィルタリングの有効化

[25]>
Enter the Web security service hostname: [v2.sds.cisco.com]>
Enter the threshold value for outstanding requests: [50]>
Do you want to verify server certificate? [Y]>
Do you want to enable URL filtering for shortened URLs? [Y]>
Enter the default time-to-live value (seconds): [30]>
Do you want to rewrite both the URL text and the href in the message?Y indicates that the full rewritten URL will appear in the email body.N indicates that the rewritten URL will only be visible in the href for HTML messages.[N]>
Do you want to include additional headers? [N]>
Enter the default debug log level for RPC server: [Info]>
Enter the default debug log level for URL cache: [Info]>
Enter the default debug log level for HTTP client: [Info]>
websecurityconfig
説明
URLフィルタリングの基本設定(URLレピュテーションおよびURLカテゴリ機能)を設定します。
通常、証明書管理は自動です。Cisco TACから Yesにすることを指示されていない限り、証明書の設定を要求されたときに Noを選択してください。
使用方法
確定:このコマンドは「commit」が必要です。
クラスタ管理:このコマンドは、すべてのマシンモード(クラスタ、グループ、マシン)で使
用できます。
バッチコマンド:このコマンドはバッチ形式をサポートしています。詳細については、CLIのインラインヘルプを参照してください。このコマンドのインラインヘルプにアクセスするに
は、helpコマンドを使用します。
例
mail.example.com> websecurityconfigEnable URL Filtering? [N]> yDo you wish to enable Web Interaction Tracking? [N]> yWeb Interaction Tracking is enabled.Do you want to whitelist URLs using a URL list? [N]> y1. urllist12. urllist2
コマンド:参考例
302
コマンド:参考例
websecurityconfig
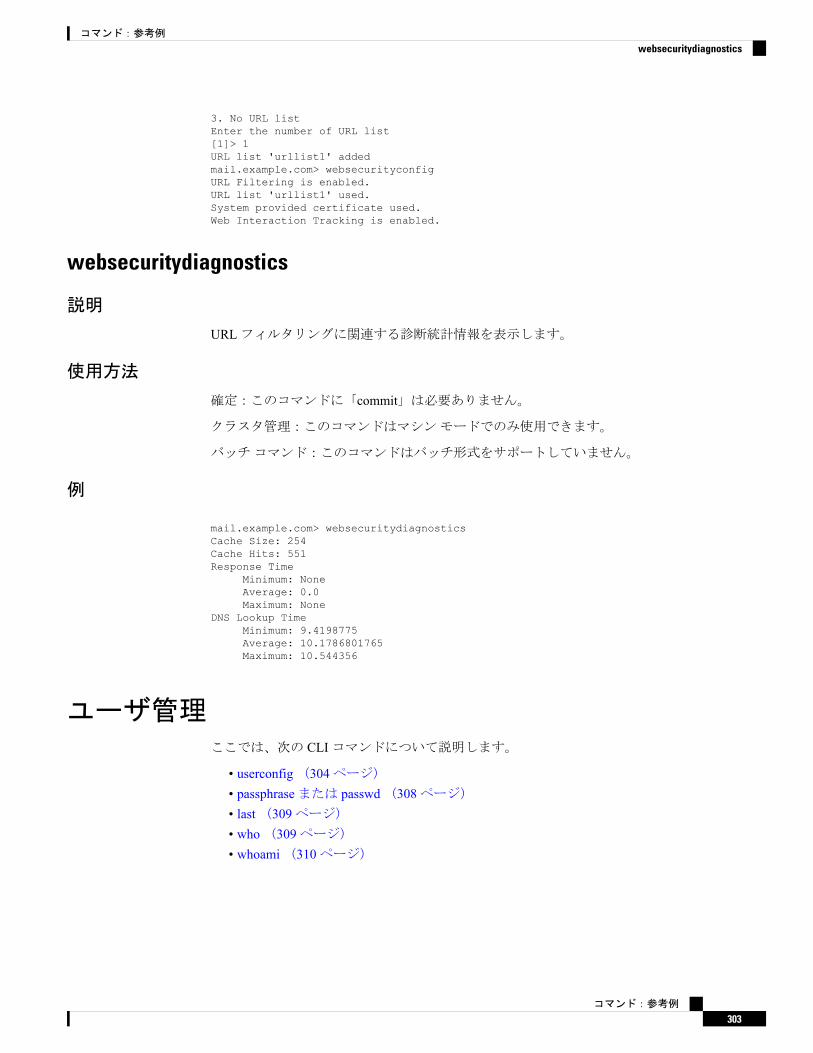
3. No URL listEnter the number of URL list[1]> 1URL list 'urllist1' addedmail.example.com> websecurityconfigURL Filtering is enabled.URL list 'urllist1' used.System provided certificate used.Web Interaction Tracking is enabled.
websecuritydiagnostics
説明
URLフィルタリングに関連する診断統計情報を表示します。
使用方法
確定:このコマンドに「commit」は必要ありません。
クラスタ管理:このコマンドはマシンモードでのみ使用できます。
バッチコマンド:このコマンドはバッチ形式をサポートしていません。
例
mail.example.com> websecuritydiagnosticsCache Size: 254Cache Hits: 551Response Time
Minimum: NoneAverage: 0.0Maximum: None
DNS Lookup TimeMinimum: 9.4198775Average: 10.1786801765Maximum: 10.544356
ユーザ管理ここでは、次の CLIコマンドについて説明します。
• userconfig(304ページ)• passphraseまたは passwd(308ページ)• last(309ページ)• who(309ページ)• whoami(310ページ)
コマンド:参考例
303
コマンド:参考例
websecuritydiagnostics
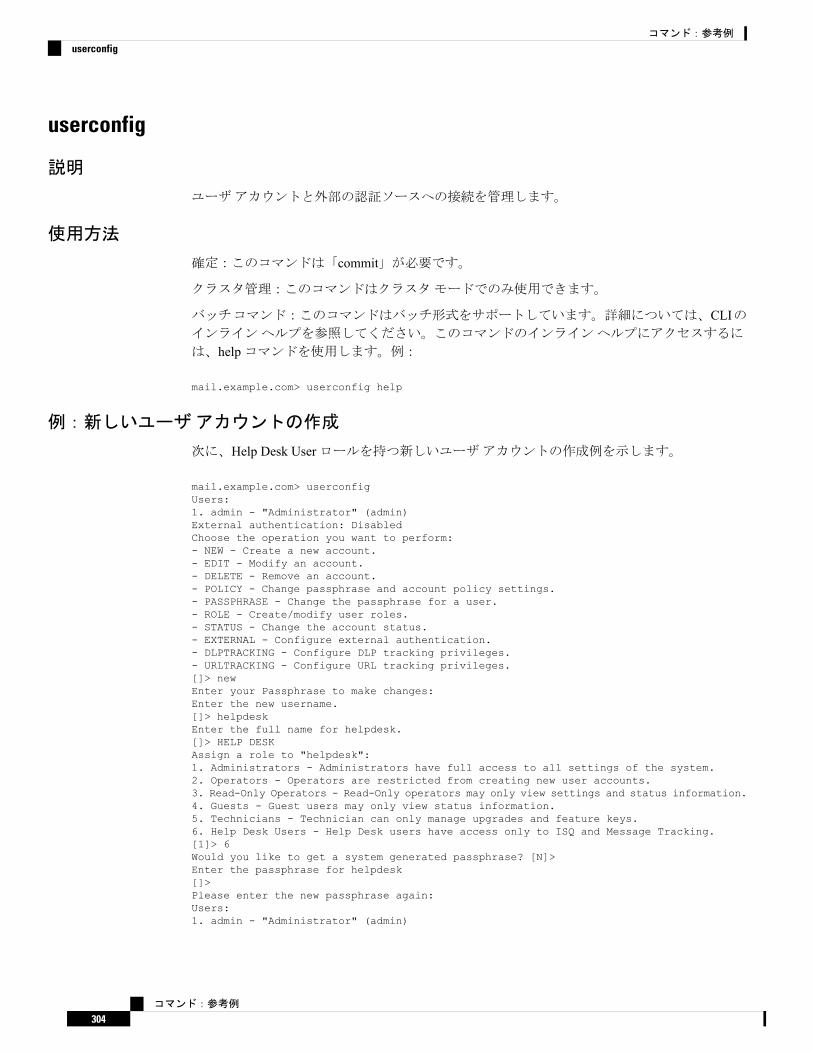
userconfig
説明
ユーザアカウントと外部の認証ソースへの接続を管理します。
使用方法
確定:このコマンドは「commit」が必要です。
クラスタ管理:このコマンドはクラスタモードでのみ使用できます。
バッチコマンド:このコマンドはバッチ形式をサポートしています。詳細については、CLIのインラインヘルプを参照してください。このコマンドのインラインヘルプにアクセスするに
は、helpコマンドを使用します。例:
mail.example.com> userconfig help
例:新しいユーザアカウントの作成
次に、Help Desk Userロールを持つ新しいユーザアカウントの作成例を示します。
mail.example.com> userconfigUsers:1. admin - "Administrator" (admin)External authentication: DisabledChoose the operation you want to perform:- NEW - Create a new account.- EDIT - Modify an account.- DELETE - Remove an account.- POLICY - Change passphrase and account policy settings.- PASSPHRASE - Change the passphrase for a user.- ROLE - Create/modify user roles.- STATUS - Change the account status.- EXTERNAL - Configure external authentication.- DLPTRACKING - Configure DLP tracking privileges.- URLTRACKING - Configure URL tracking privileges.[]> newEnter your Passphrase to make changes:Enter the new username.[]> helpdeskEnter the full name for helpdesk.[]> HELP DESKAssign a role to "helpdesk":1. Administrators - Administrators have full access to all settings of the system.2. Operators - Operators are restricted from creating new user accounts.3. Read-Only Operators - Read-Only operators may only view settings and status information.4. Guests - Guest users may only view status information.5. Technicians - Technician can only manage upgrades and feature keys.6. Help Desk Users - Help Desk users have access only to ISQ and Message Tracking.[1]> 6Would you like to get a system generated passphrase? [N]>Enter the passphrase for helpdesk[]>Please enter the new passphrase again:Users:1. admin - "Administrator" (admin)
コマンド:参考例
304
コマンド:参考例
userconfig
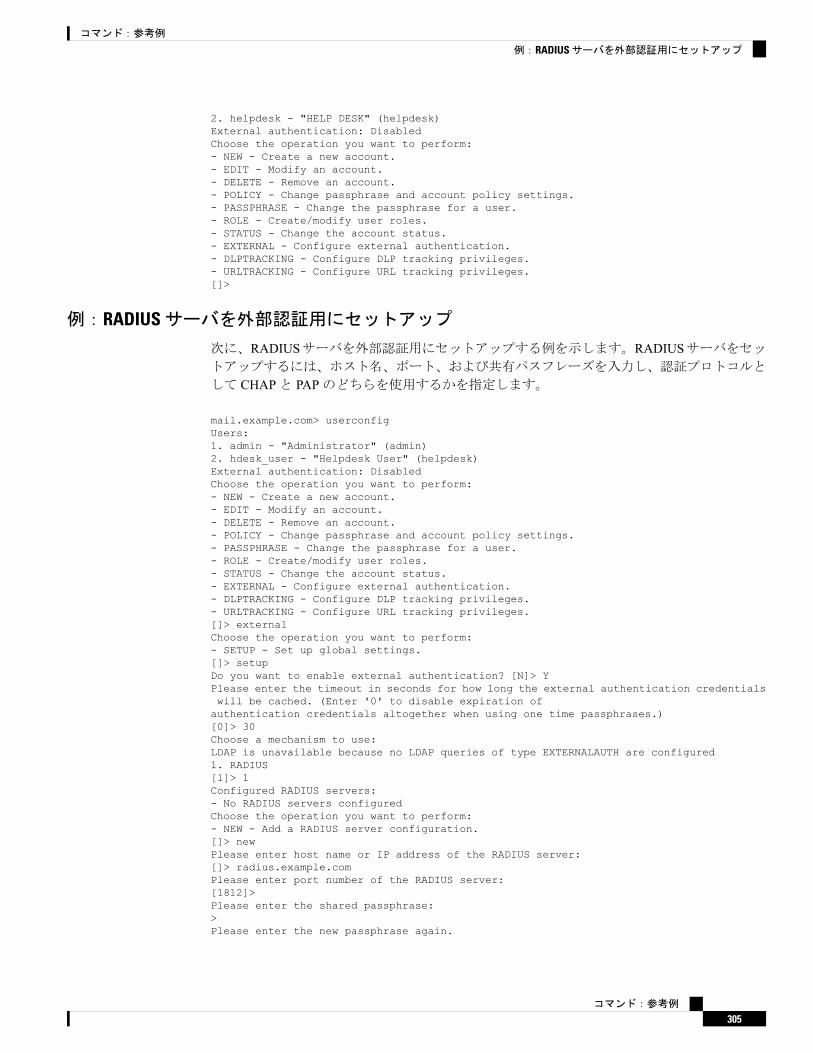
2. helpdesk - "HELP DESK" (helpdesk)External authentication: DisabledChoose the operation you want to perform:- NEW - Create a new account.- EDIT - Modify an account.- DELETE - Remove an account.- POLICY - Change passphrase and account policy settings.- PASSPHRASE - Change the passphrase for a user.- ROLE - Create/modify user roles.- STATUS - Change the account status.- EXTERNAL - Configure external authentication.- DLPTRACKING - Configure DLP tracking privileges.- URLTRACKING - Configure URL tracking privileges.[]>
例:RADIUSサーバを外部認証用にセットアップ
次に、RADIUSサーバを外部認証用にセットアップする例を示します。RADIUSサーバをセットアップするには、ホスト名、ポート、および共有パスフレーズを入力し、認証プロトコルと
して CHAPと PAPのどちらを使用するかを指定します。
mail.example.com> userconfigUsers:1. admin - "Administrator" (admin)2. hdesk_user - "Helpdesk User" (helpdesk)External authentication: DisabledChoose the operation you want to perform:- NEW - Create a new account.- EDIT - Modify an account.- DELETE - Remove an account.- POLICY - Change passphrase and account policy settings.- PASSPHRASE - Change the passphrase for a user.- ROLE - Create/modify user roles.- STATUS - Change the account status.- EXTERNAL - Configure external authentication.- DLPTRACKING - Configure DLP tracking privileges.- URLTRACKING - Configure URL tracking privileges.[]> externalChoose the operation you want to perform:- SETUP - Set up global settings.[]> setupDo you want to enable external authentication? [N]> YPlease enter the timeout in seconds for how long the external authentication credentialswill be cached. (Enter '0' to disable expiration ofauthentication credentials altogether when using one time passphrases.)[0]> 30Choose a mechanism to use:LDAP is unavailable because no LDAP queries of type EXTERNALAUTH are configured1. RADIUS[1]> 1Configured RADIUS servers:- No RADIUS servers configuredChoose the operation you want to perform:- NEW - Add a RADIUS server configuration.[]> newPlease enter host name or IP address of the RADIUS server:[]> radius.example.comPlease enter port number of the RADIUS server:[1812]>Please enter the shared passphrase:>Please enter the new passphrase again.
コマンド:参考例
305
コマンド:参考例
例:RADIUSサーバを外部認証用にセットアップ
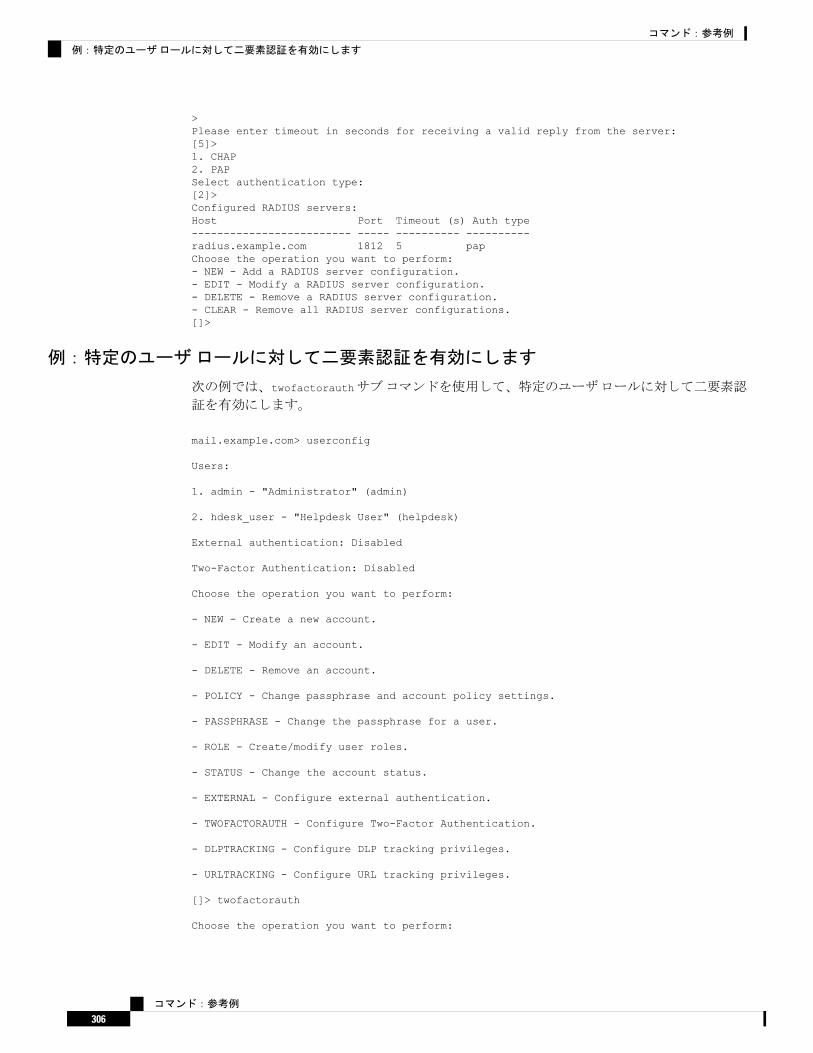
>Please enter timeout in seconds for receiving a valid reply from the server:[5]>1. CHAP2. PAPSelect authentication type:[2]>Configured RADIUS servers:Host Port Timeout (s) Auth type------------------------- ----- ---------- ----------radius.example.com 1812 5 papChoose the operation you want to perform:- NEW - Add a RADIUS server configuration.- EDIT - Modify a RADIUS server configuration.- DELETE - Remove a RADIUS server configuration.- CLEAR - Remove all RADIUS server configurations.[]>
例:特定のユーザロールに対して二要素認証を有効にします
次の例では、twofactorauthサブコマンドを使用して、特定のユーザロールに対して二要素認
証を有効にします。
mail.example.com> userconfig
Users:
1. admin - "Administrator" (admin)
2. hdesk_user - "Helpdesk User" (helpdesk)
External authentication: Disabled
Two-Factor Authentication: Disabled
Choose the operation you want to perform:
- NEW - Create a new account.
- EDIT - Modify an account.
- DELETE - Remove an account.
- POLICY - Change passphrase and account policy settings.
- PASSPHRASE - Change the passphrase for a user.
- ROLE - Create/modify user roles.
- STATUS - Change the account status.
- EXTERNAL - Configure external authentication.
- TWOFACTORAUTH - Configure Two-Factor Authentication.
- DLPTRACKING - Configure DLP tracking privileges.
- URLTRACKING - Configure URL tracking privileges.
[]> twofactorauth
Choose the operation you want to perform:
コマンド:参考例
306
コマンド:参考例
例:特定のユーザロールに対して二要素認証を有効にします

- SETUP - Set up global settings.
- PRIVILEGES - Configure Two-Factor Authentication based on User Role Privileges.
[]> setup
Do you want to enable external authentication? [N]> y
Choose the operation you want to perform:
- NEW - Add a two-factor authentication server configuration.
- EDIT - Modify two-factor authentication server configuration.
- DELETE - Remove a two-factor authentication server configuration.
- CLEAR - Remove all two-factor authentication server configurations.
[]> new
Please enter host name or IP address of the RADIUS server:
[]> radius.example.com
Please enter port number of the RADIUS server:
[1812]> 1800
Please enter the shared passphrase:
>
Please enter the new passphrase again.
>
Please enter timeout in seconds for receiving a valid reply from the server:
[5]> 10
1. CHAP
2. PAP
Select authentication type:
[2]> 2
Choose the operation you want to perform:
- SETUP - Set up global settings.
- PRIVILEGES - Configure Two-Factor Authentication based on Role Privileges.
[]> privileges
Role Privileges:
Choose the operation you want to perform:
1. Add
[]> 1
コマンド:参考例
307
コマンド:参考例
例:特定のユーザロールに対して二要素認証を有効にします

Select Predefined Roles to allow the privileges
1. Administrators
2. Guests
3. Help Desk Users
4. Operators
5. Read-Only Operators
6. Technicians
Enter the numbers (comma separated) to add privilege.
[]> 1
Role Privileges:
Predefined:
Administrators
Choose the operation you want to perform:
1. Add
2. Delete
[]>
passphraseまたは passwd
説明
パスフレーズを変更します。
使用方法
確定:このコマンドは「commit」が必要です。
クラスタ管理:このコマンドはクラスタモードでのみ使用できます。
passwdコマンドは、マシンモードしか使用できないゲストユーザが使用できるようにするための特例です。ゲストユーザがクラスタ内のマシン上で passwdコマンドを実行すると、警告メッセージは表示されず、ユーザのモードを変更せずにクラスタレベルのデータに対して操作
が行われます。他のすべてのユーザに対しては、上記の(他の制限されるコンフィギュレー
ションコマンドと同じ)動作が行われます。
(注)
バッチコマンド:このコマンドはバッチ形式をサポートしていません。
コマンド:参考例
308
コマンド:参考例
passphraseまたは passwd
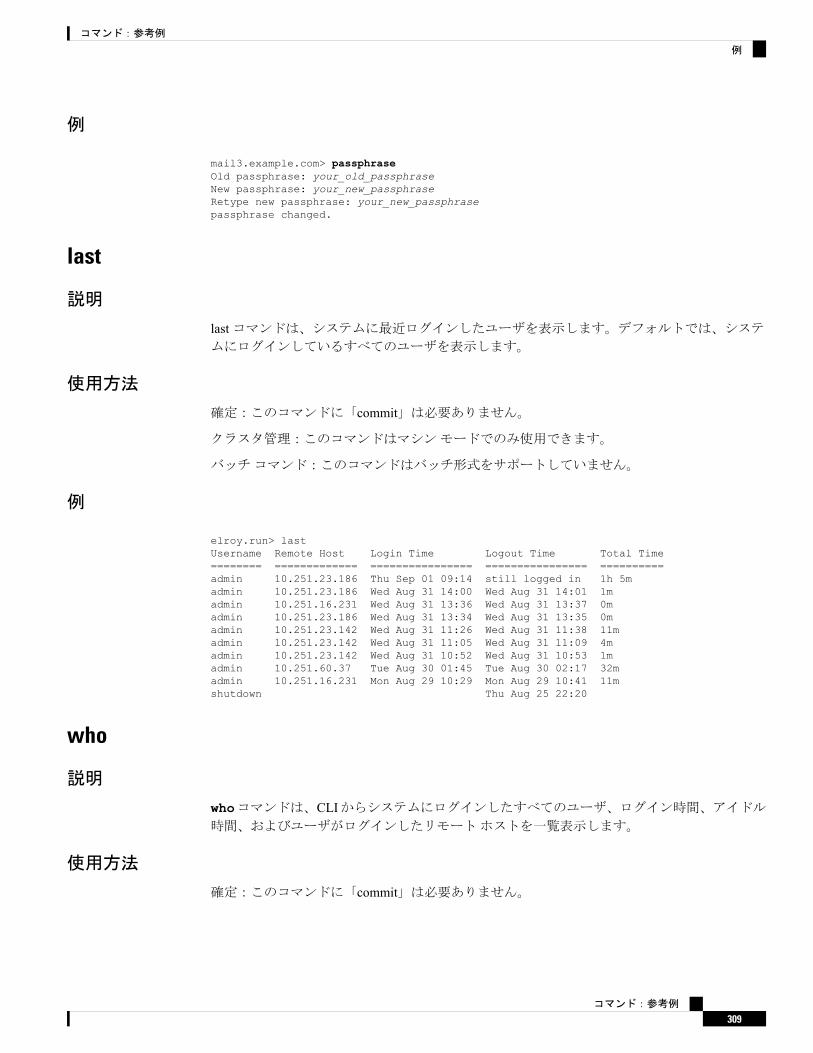
例
mail3.example.com> passphraseOld passphrase: your_old_passphraseNew passphrase: your_new_passphraseRetype new passphrase: your_new_passphrasepassphrase changed.
last
説明
lastコマンドは、システムに最近ログインしたユーザを表示します。デフォルトでは、システムにログインしているすべてのユーザを表示します。
使用方法
確定:このコマンドに「commit」は必要ありません。
クラスタ管理:このコマンドはマシンモードでのみ使用できます。
バッチコマンド:このコマンドはバッチ形式をサポートしていません。
例
elroy.run> lastUsername Remote Host Login Time Logout Time Total Time======== ============= ================ ================ ==========admin 10.251.23.186 Thu Sep 01 09:14 still logged in 1h 5madmin 10.251.23.186 Wed Aug 31 14:00 Wed Aug 31 14:01 1madmin 10.251.16.231 Wed Aug 31 13:36 Wed Aug 31 13:37 0madmin 10.251.23.186 Wed Aug 31 13:34 Wed Aug 31 13:35 0madmin 10.251.23.142 Wed Aug 31 11:26 Wed Aug 31 11:38 11madmin 10.251.23.142 Wed Aug 31 11:05 Wed Aug 31 11:09 4madmin 10.251.23.142 Wed Aug 31 10:52 Wed Aug 31 10:53 1madmin 10.251.60.37 Tue Aug 30 01:45 Tue Aug 30 02:17 32madmin 10.251.16.231 Mon Aug 29 10:29 Mon Aug 29 10:41 11mshutdown Thu Aug 25 22:20
who
説明
whoコマンドは、CLIからシステムにログインしたすべてのユーザ、ログイン時間、アイドル時間、およびユーザがログインしたリモートホストを一覧表示します。
使用方法
確定:このコマンドに「commit」は必要ありません。
コマンド:参考例
309
コマンド:参考例
例

クラスタ管理:このコマンドはマシンモードでのみ使用できます。さらに、このコマンドはロ
グインホスト(ユーザがログインしたマシン)でのみ使用できます。このコマンドを使用する
には、ローカルファイルシステムにアクセスできる必要があります。
バッチコマンド:このコマンドはバッチ形式をサポートしていません。
例
mail3.example.com> whoUsername Login Time Idle Time Remote Host What======== ========== ========= =========== ====admin 03:27PM 0s 10.1.3.201 cli
whoami
説明
whoamiコマンドは、現在ログインしているユーザのユーザ名および氏名と、ユーザが属しているグループを表示します。
使用方法
確定:このコマンドは「commit」が必要です。
クラスタ管理:このコマンドは、すべてのマシンモード(クラスタ、グループ、マシン)で使
用できます。
バッチコマンド:このコマンドはバッチ形式をサポートしていません。
例
mail3.example.com> whoamiUsername: adminFull Name: AdministratorGroups: admin, operators, config, log, guest
仮想アプライアンスの管理• loadlicense(310ページ)• showlicense (311ページ)
loadlicense
説明
仮想アプライアンスの XMLライセンスをロードします。ファイルからロードするか、コピーアンドペーストできます。詳細については、『CiscoContent Security Virtual Appliance Installation
コマンド:参考例
310
コマンド:参考例
例

Guide』を参照してください。このドキュメントは、http://www.cisco.com/c/en/us/support/security/email-security-appliance/products-installation-guides-list.htmlから入手できます。
このコマンドは、管理者またはオペレータ権限を持つユーザが使用できます。
使用方法
確定:このコマンドに「commit」は必要ありません。
クラスタ管理:このコマンドはマシンモードでのみ使用できます。さらに、このコマンドはロ
グインホスト(ユーザがログインしたマシン)でのみ使用できます。
バッチコマンド:このコマンドはバッチ形式をサポートしていません。
例
mail.example.com> loadlicense1 Paste via CLI2 Load from fileHow would you like to load a license file?[1]> 2Enter the name of the file in /configurations to import:[]> <filename>TERMS AND CONDITIONS OF USE<Terms and conditions>Do you accept the above license agreement?[]> yThe license agreement was accepted.The following feature key have been added:<feature keys>
エラーやハードウェアの設定ミスが表示されることもあります。
showlicense
説明
現在の仮想アプライアンスライセンスに関する情報を表示します。詳細については、featurekeyコマンドを使用すると分かります。
このコマンドは、管理者またはオペレータ権限を持つユーザが使用できます。
使用方法
確定:このコマンドに「commit」は必要ありません。
クラスタ管理:このコマンドはマシンモードでのみ使用できます。さらに、このコマンドはロ
グインホスト(ユーザがログインしたマシン)でのみ使用できます。
バッチコマンド:このコマンドはバッチ形式をサポートしています。
コマンド:参考例
311
コマンド:参考例
使用方法

バッチ形式
このコマンドの構文:showlicense
例
mail.example.com> showlicensecompany: Example Inc.org: Widget Divisionunit: Portland Data Centerseats: 1000city: Portlandstate: Oregoncountry: USemail: [email protected]_date: Tue Dec 6 17:45:19 2011end_date: Mon Sep 1 17:45:19 2014vln: ABC-123423123serial: 1003385
位置情報ここでは、次の CLIコマンドについて説明します。
• geolocationupdate(312ページ)
• geolocationstatus(313ページ)
geolocationupdate
説明
地理位置情報リストを手動で更新します。
使用方法
確定:このコマンドに「commit」は必要ありません。
クラスタ管理:このコマンドはマシンモードでのみ使用できます。
バッチコマンド:このコマンドはバッチ形式をサポートしています。詳細については、help
generalconfigコマンドを入力して、インラインヘルプを参照してください。
例
mail3.example.com> geolocationupdate
Requesting update of Geo Countries List.
コマンド:参考例
312
コマンド:参考例
バッチ形式
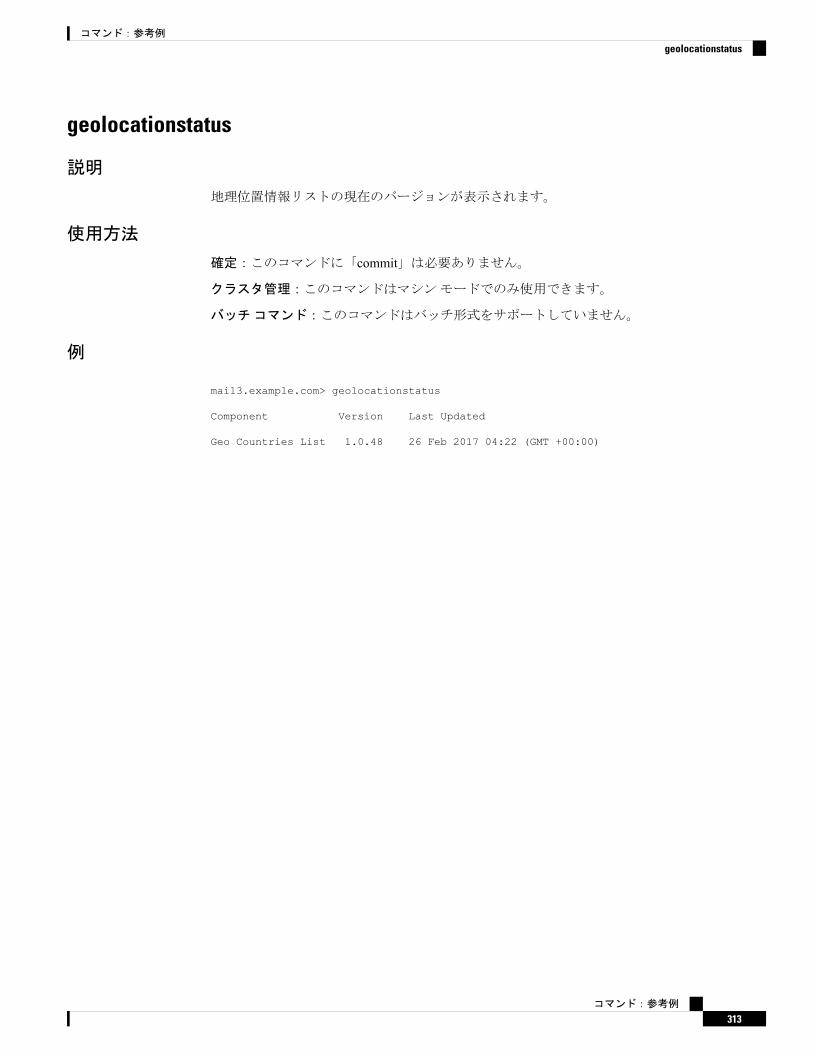
geolocationstatus
説明
地理位置情報リストの現在のバージョンが表示されます。
使用方法
確定:このコマンドに「commit」は必要ありません。
クラスタ管理:このコマンドはマシンモードでのみ使用できます。
バッチコマンド:このコマンドはバッチ形式をサポートしていません。
例
mail3.example.com> geolocationstatus
Component Version Last Updated
Geo Countries List 1.0.48 26 Feb 2017 04:22 (GMT +00:00)
コマンド:参考例
313
コマンド:参考例
geolocationstatus

コマンド:参考例
314
コマンド:参考例
例