life support procedures
TRANSCRIPT

Life support procedures
Paleerat Jariyakanjana, MD
Faculty of Medicine
Naresuan University
Learning contents
1. Surgical cricothyroidotomy
2. Needle cricothyroidotomy
3. Interosseous puncture / infusion
4. Needle decompression
5. Chest tube insertion
6. FAST
SURGICAL
CRICOTHYROIDOTOMY

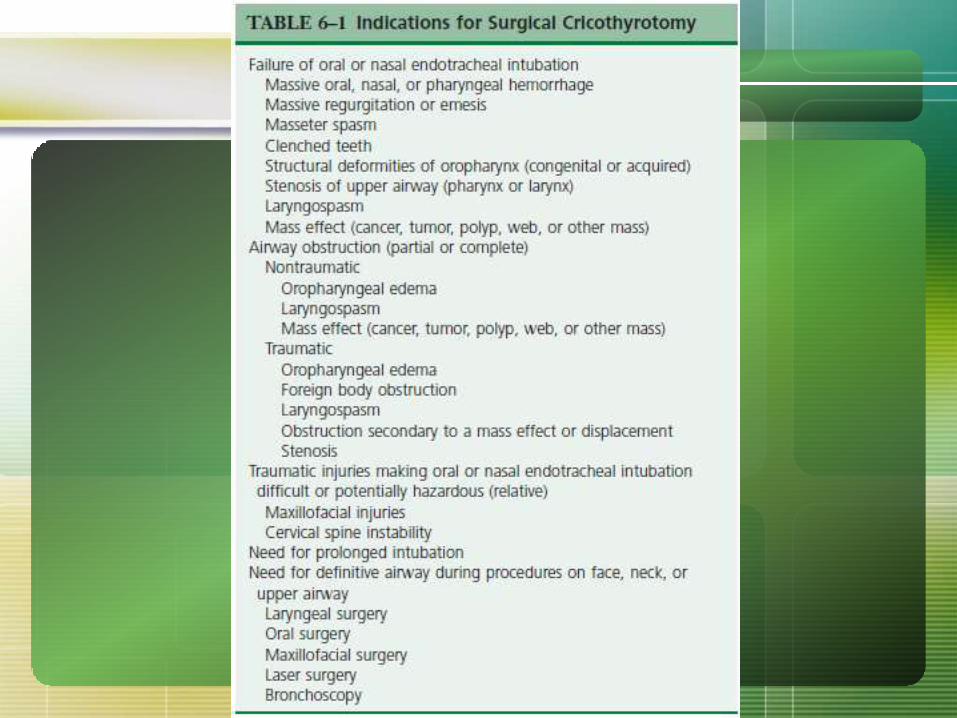
Indications
Failure of oral or nasal endotracheal intubation
Airway obstruction
Traumatic injuries making oral or nasal
endotracheal intubation difficult or potentially
hazardous
Contraindications
infants and young children <12 yr
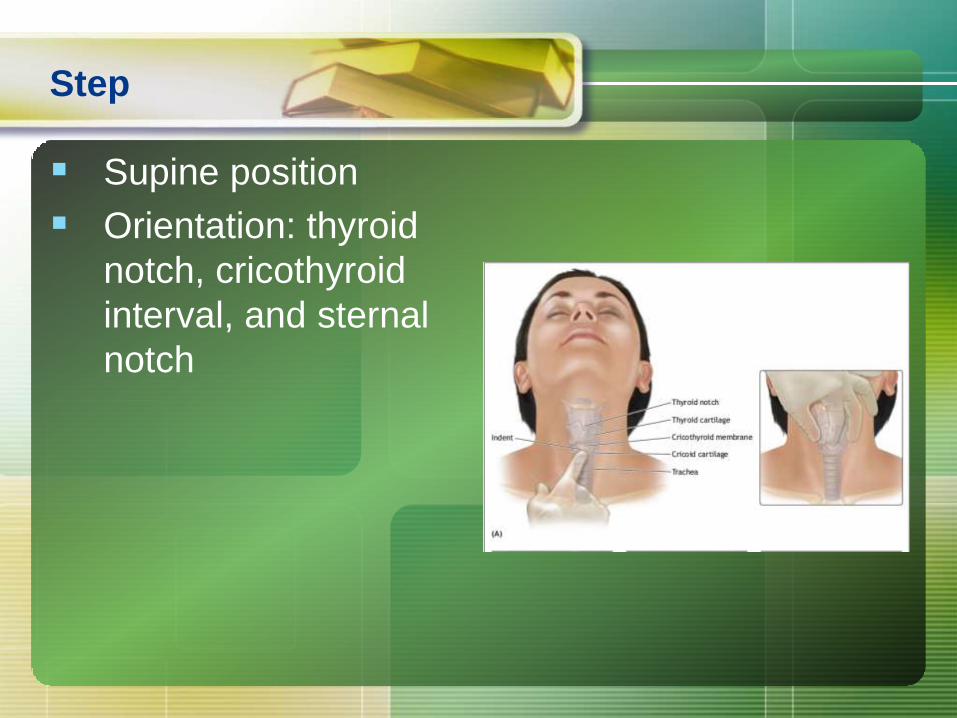
Step
Supine position
Orientation: thyroid
notch, cricothyroid
interval, and sternal
notch

Step
Assemble the necessary equipment.
Sterile technique and local anesthesia
Stabilize the thyroid cartilage with the left
hand
Make a transverse skin incision over the
cricothyroid membrane and carefully
incise through the membrane transversely

Step

Step
Insert hemostat or
tracheal spreader into
the incision and rotate
it 90 degrees

Step
Insert a proper-size,
cuffed endotracheal
tube or tracheostomy
tube (No. 5-6)

Step
Inflate the cuff and apply ventilation.
Observe lung inflation and auscultate the
chest for adequate ventilation.
Secure the endotracheal or tracheostomy
tube
Complications
Aspiration (blood)
Creation of a false passage into the tissues
Subglottic stenosis/edema
Laryngeal stenosis
Hemorrhage or hematoma formation
Laceration of the esophagus
Laceration of the trachea
Mediastinal emphysema
Vocal cord paralysis, hoarseness
NEEDLE
CRICOTHYROIDOTOMY
Indications
preferred method of securing the airway in
crash airway situations in infants and
young children
Contraindications
Transection of the distal trachea
Complete upper airway (oropharyngeal)
obstruction

Step
prepare oxygen
tubing
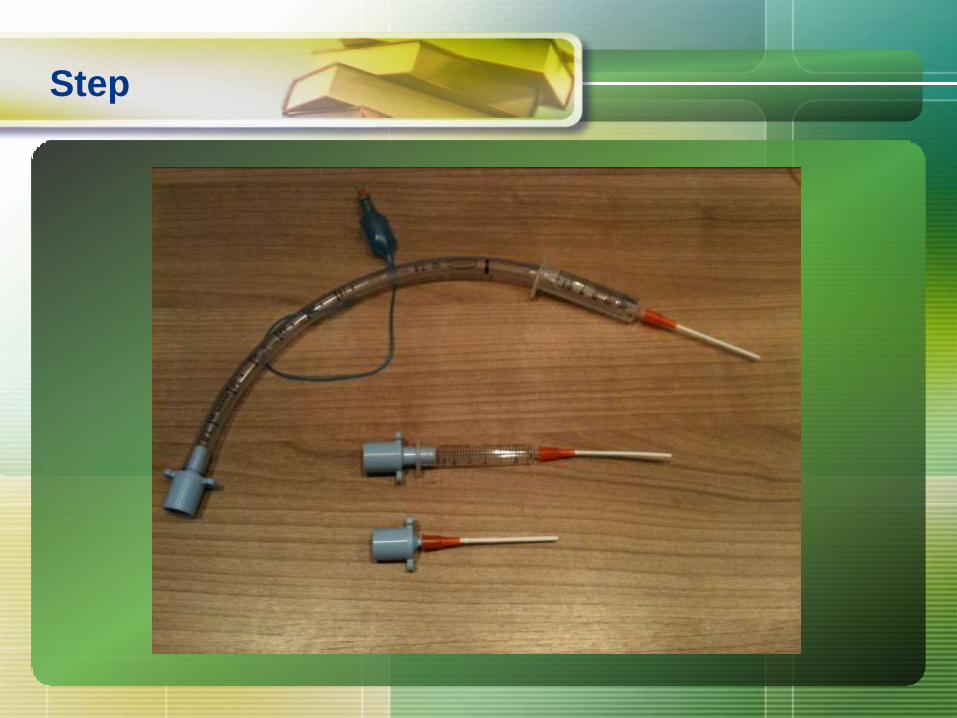
Step

Step
Supine position
Assemble a 12- or 14-gauge, 8.5-cm,
over-the-needle catheter to a 6- to 12-mL
syringe.
Sterile technique
Palpate the cricothyroid membrane
Stabilize the trachea with the thumb and
forefinger of one hand

Step
Puncture the skin in
the midline directly
over the cricothyroid
membrane
45º angle caudally
with negative
pressure

Step
aspiration of air
entry into the tracheal
lumen
advancing the
catheter
Continue to observe
lung inflation and
auscultate the chest
for adequate
ventilation.
Complications
Inadequate ventilation
Aspiration (blood)
Esophageal laceration
Hematoma
Perforation of the posterior tracheal wall
Subcutaneous and/or mediastinal
emphysema
Thyroid perforation
Pneumothorax

INTRAOSSEOUS
PUNCTURE/INFUSION:
PROXIMAL TIBIAL ROUTE
Indications
patients in whom attempts at peripheral or
central venous access has been
unsuccessful

Contraindications
osteoporosis and osteogenesis imperfecta
fractured bone
recent prior use of the same bone for IO
infusion
cellulitis, infection, or burns
Step
supine position
Select an uninjured lower extremity
Padding, 30-degree flexion of the knee
Identify the puncture site
anteromedial surface of the proximal tibia,
approximately 1FB (1-3 cm) below the
tubercle
Sterile technique and local anesthesia

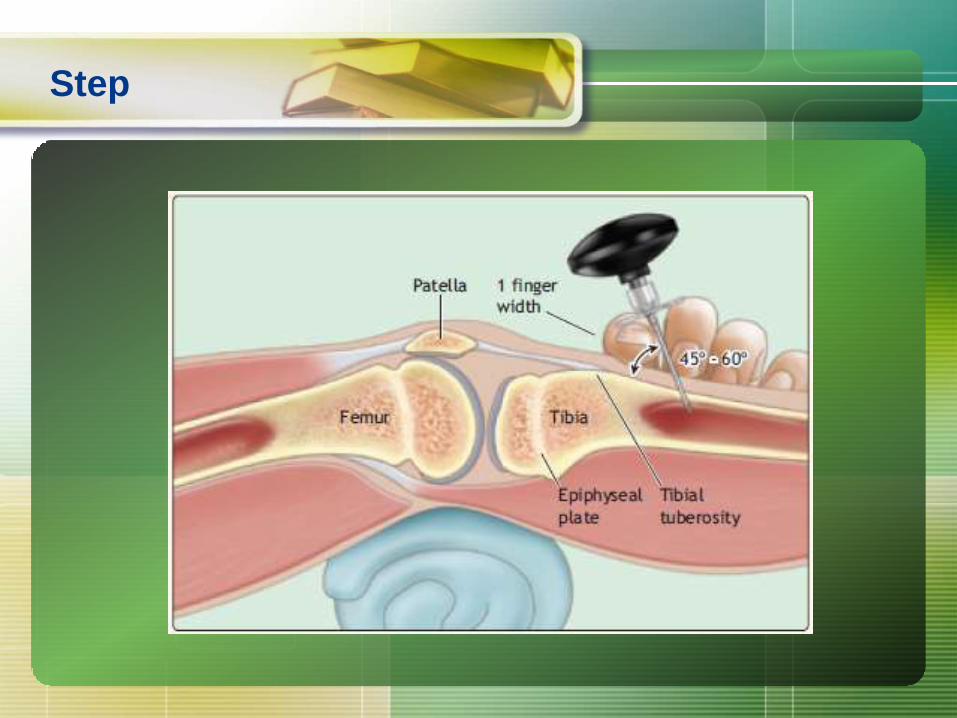
Step
Initially at a 90-degree angle, introduce a
short, large-caliber, bone-marrow
aspiration needle (or a short, 18-gauge
spinal needle with stylet) into the skin and
periosteum, with the needle bevel directed
toward the foot and away from the
epiphyseal plate.
After gaining purchase in the bone, direct
the needle 45-60 degrees away from the
epiphyseal plate.
Step
Step
Confirmation of placement
Aspiration of bone marrow
saline flushes through the needle easily and
there is no evidence of swelling
needle remains upright without support
Secure the needle and tubing in place.
intraosseous infusion should be limited to
emergency resuscitation of the patient
and discontinued as soon as other venous
access has been obtained
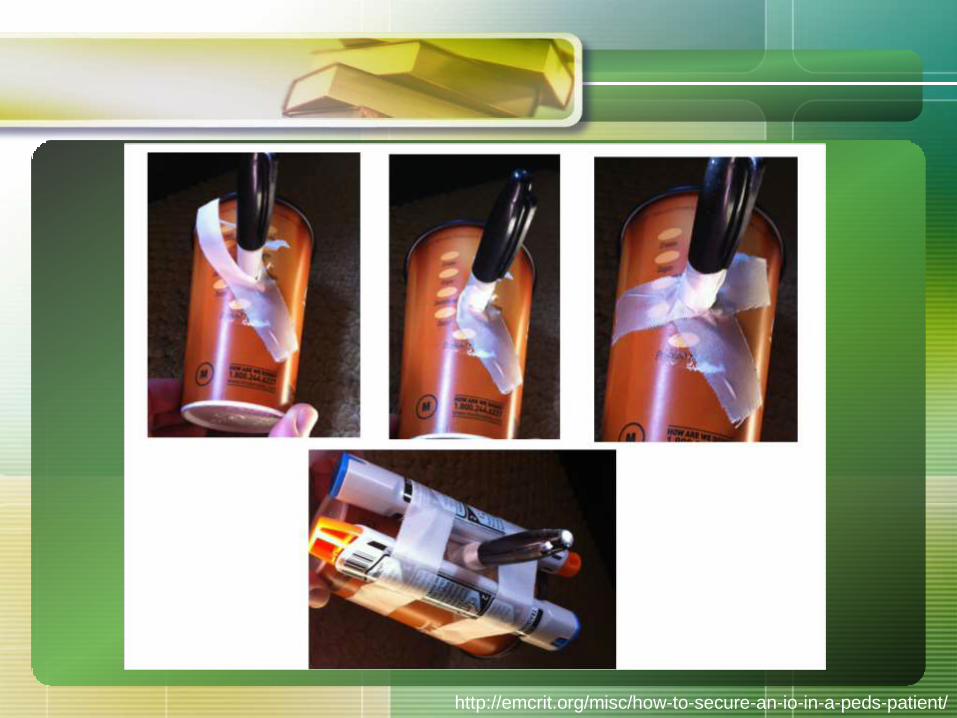
http://emcrit.org/misc/how-to-secure-an-io-in-a-peds-patient/


Complications
Infection
Through-and-through penetration of the
bone
Subcutaneous or subperiosteal infiltration
Pressure necrosis of the skin
Physeal plate injury
Hematoma

NEEDLE THORACENTESIS
Indications
Tension pneumothorax
Contraindications
no absolute contraindications

Step
Identify the 2nd ICS, in the midclavicular
line on the side of the tension
pneumothorax.
Sterile technique and local anesthesia
Place the patient in an upright position if a
cervical spine injury has been excluded.
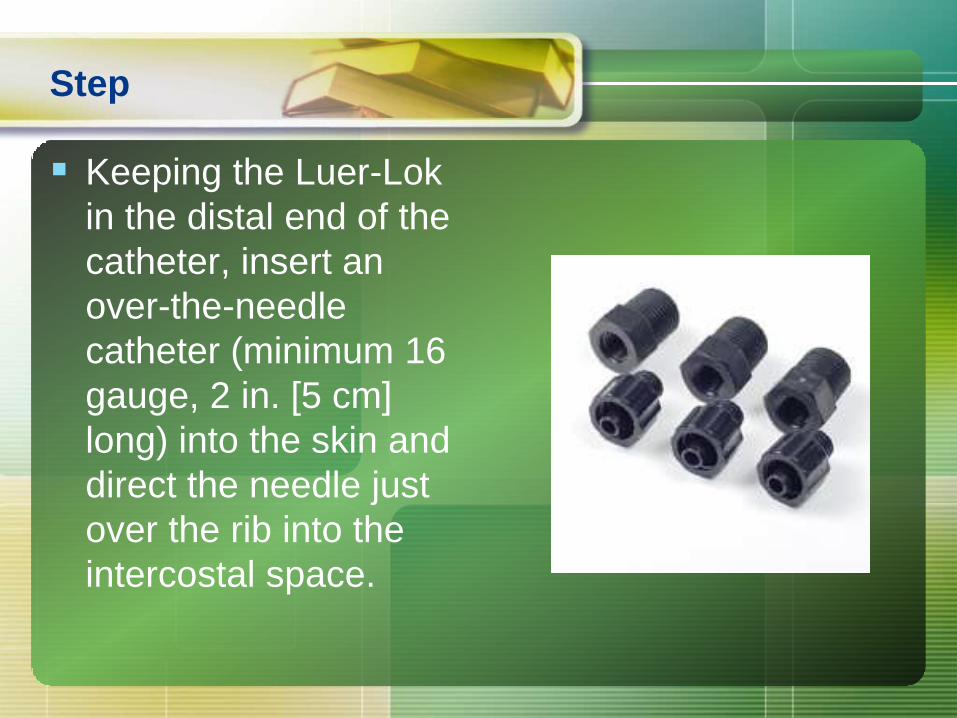
Step
Keeping the Luer-Lok
in the distal end of the
catheter, insert an
over-the-needle
catheter (minimum 16
gauge, 2 in. [5 cm]
long) into the skin and
direct the needle just
over the rib into the
intercostal space.

Step
Remove the Luer-Lok from the catheter and
listen for the sudden escape of air when the
needle enters the parietal pleura, indicating that
the tension pneumothorax has been relieved.
Remove the needle and replace the Luer-Lok in
the distal end of the catheter.
Leave the plastic catheter in place and apply a
bandage or small dressing over the insertion
site.
Prepare for a chest tube insertion.

Complications
Local hematoma
Pneumothorax
Lung laceration
CHEST TUBE INSERTION
Indications
Pneumothorax
Hemothorax
Empyema

Contraindications
Unstable injured patients: no absolute
contraindications
stable patient
anatomic problems: presence of multiple
pleural adhesions, emphysematous blebs, or
scarring
Coagulopathic patients

Step
Determine the insertion site, usually at the
nipple level (5th ICS), just anterior to the
midaxillary line on the affected side.
Sterile technique and local anesthesia
Step
Make a 2- to 3-cm transverse (horizontal)
incision at the predetermined site and
bluntly dissect through the subcutaneous
tissues, just over the top of the rib.
Puncture the parietal pleura with the tip of
a clamp
Digital assessment

Step
Clamp the proximal end of the
thoracostomy tube and advance it into the
pleural space to the desired length.
The tube should be directed posteriorly,
medially, and superiorly along the inside
of the chest wall.
Look for “fogging” of the chest tube with
expiration or listen for air movement.
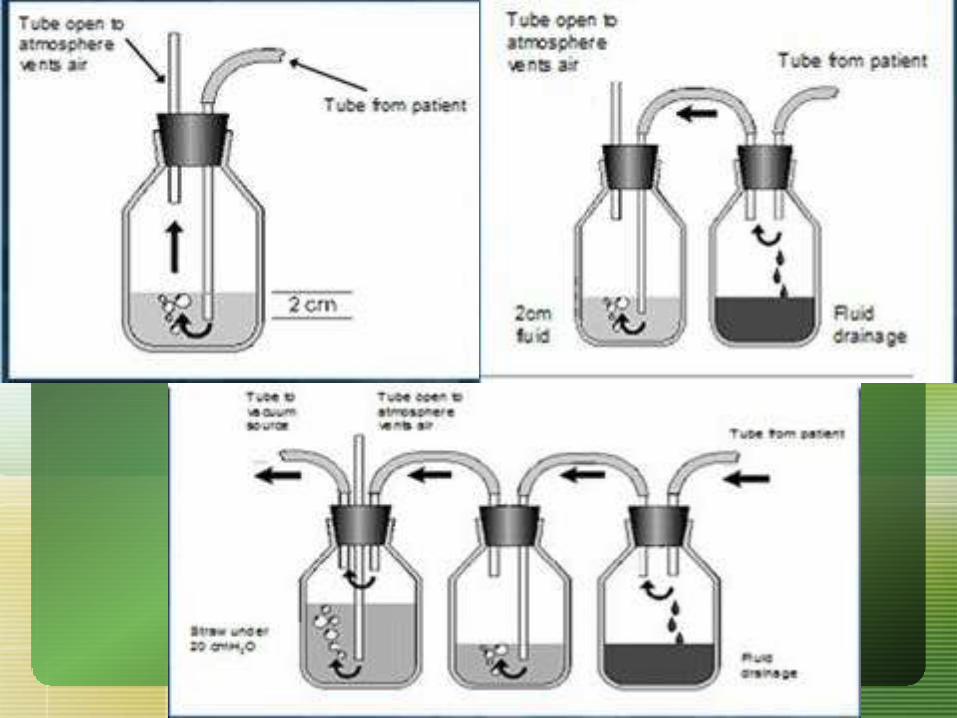
Connect the end of the thoracostomy tube
to an underwater-seal apparatus.

Step
Suture the tube in place.
Apply an occlusive dressing and tape the
tube to the chest.
Obtain a chest x-ray film.

Complications
Laceration or puncture of intrathoracic
and/or abdominal organs
Introduction of pleural infection
Damage to the intercostal nerve, artery, or
vein
Incorrect tube position
Chest tube kinking, clogging, or dislodging
from the chest wall, or disconnection from
the underwater-seal apparatus

Complications
Persistent pneumothorax
Subcutaneous emphysema
Recurrence of pneumothorax
Lung fails to expand

FOCUSED ASSESSMENT
SONOGRAPHY IN TRAUMA
(FAST)
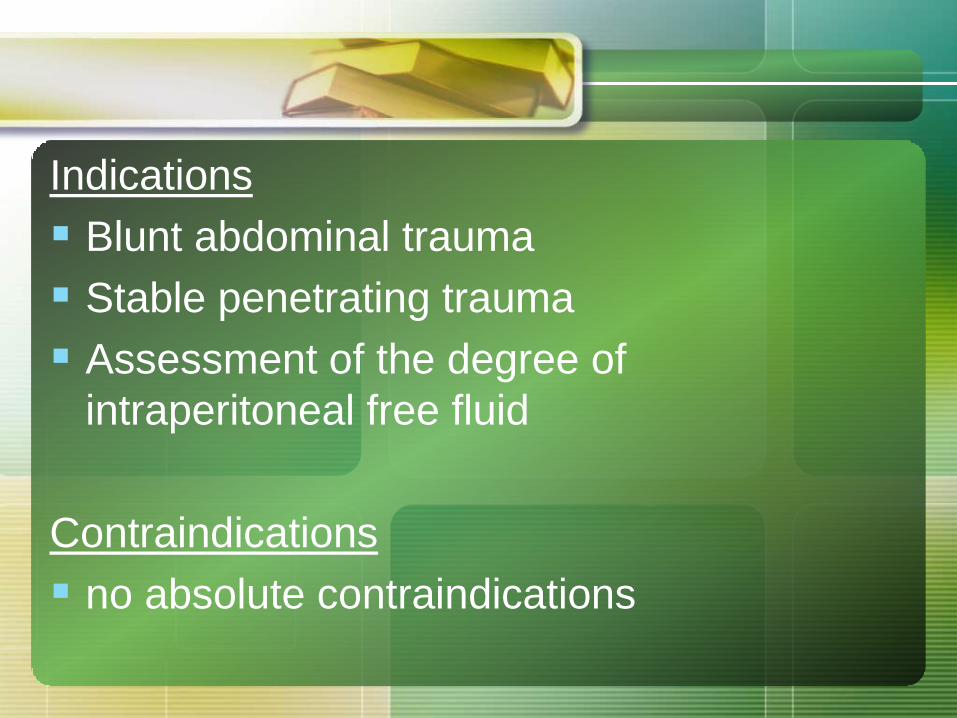
Indications
Blunt abdominal trauma
Stable penetrating trauma
Assessment of the degree of
intraperitoneal free fluid
Contraindications
no absolute contraindications

Step
Start with the
subxiphoid or the
parasternal view
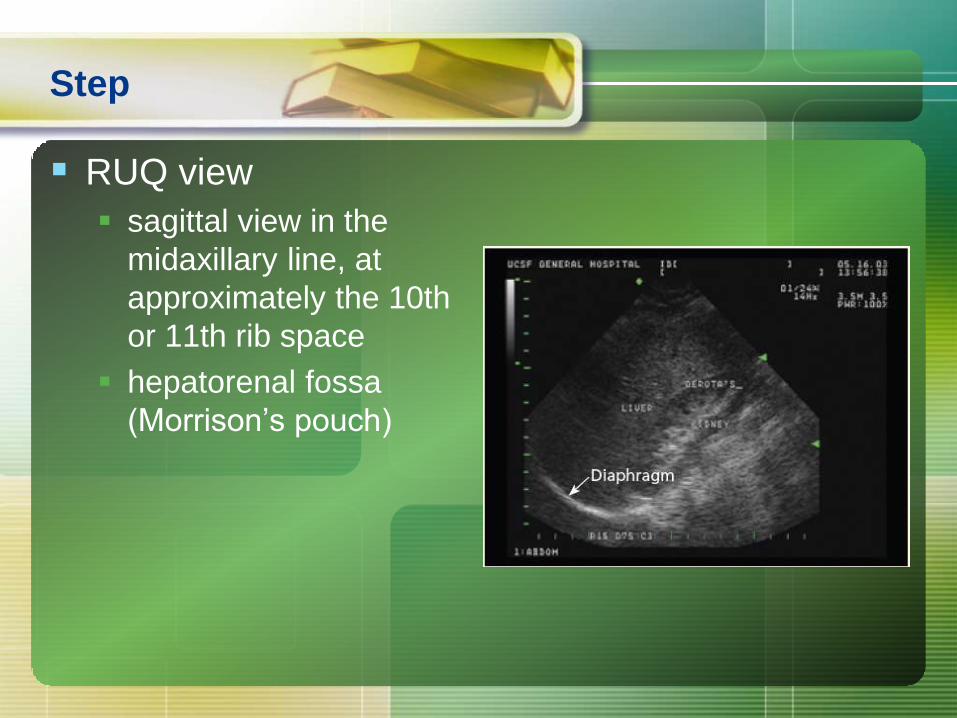
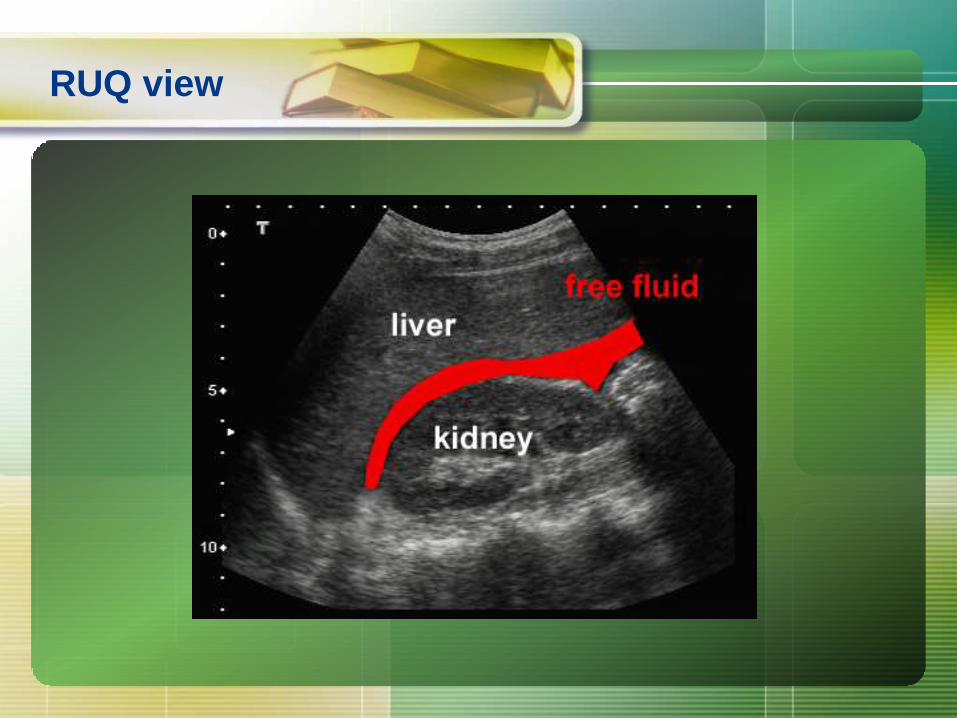
Step
RUQ view
sagittal view in the
midaxillary line, at
approximately the 10th
or 11th rib space
hepatorenal fossa
(Morrison’s pouch)

Step
LUQ view
sagittal view in the
midaxillary line, at
approximately the 8th
or 9th rib space
splenorenal fossa

Step
suprapubic view
transverse view optimally obtained prior to
placement of a Foley catheter

Subxiphoid view

RUQ view
RUQ view

LUQ view

LUQ view

Suprapubic view
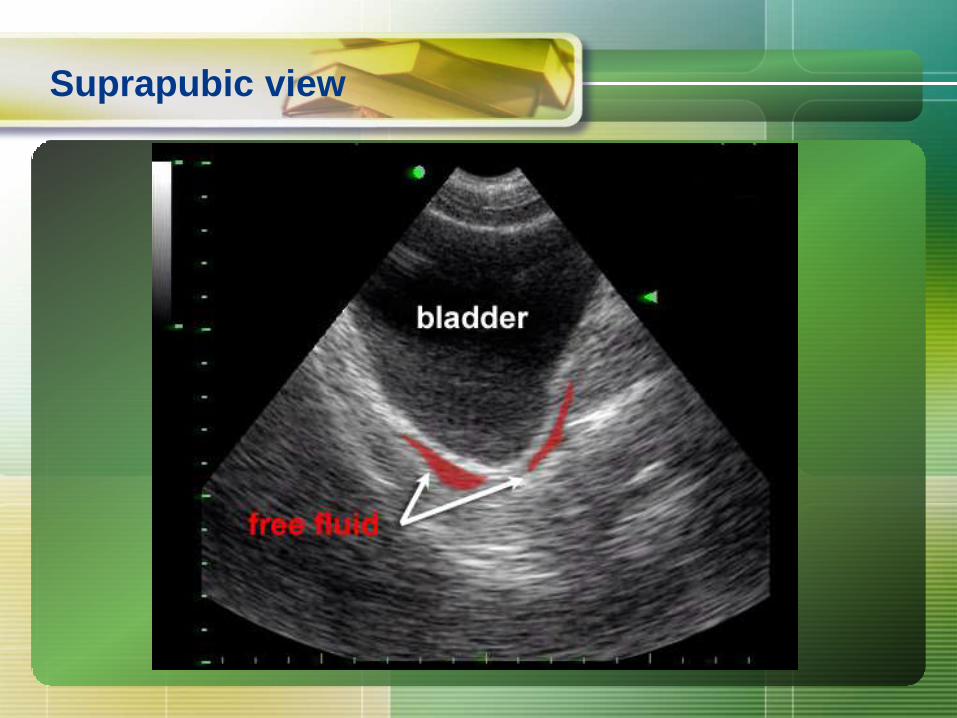
Suprapubic view
Reference
ATLS 9th Student Manual
Clinical procedures in emergency medicine

ANY QUESTIONS?