opentrons python api v2 documentationopentrons python api v2 documentation release 3.17.0 opentrons...
TRANSCRIPT
Opentrons Python API V2Documentation
Release 3.19.0
Opentrons Labworks
Jun 29, 2020
Contents
1 Getting Started 2
2 Troubleshooting 2
3 Overview 23.1 How it Looks . . . . . . . . . . . . . . . . . . . . . . . . . . . . . . . . . . . . . . . . . . . . . . . 23.2 How it’s Organized . . . . . . . . . . . . . . . . . . . . . . . . . . . . . . . . . . . . . . . . . . . . 3
4 Feature Requests 5
5 Developer’s guide 55.1 Using Python For Protocols . . . . . . . . . . . . . . . . . . . . . . . . . . . . . . . . . . . . . . . . 65.2 Versioning . . . . . . . . . . . . . . . . . . . . . . . . . . . . . . . . . . . . . . . . . . . . . . . . . 95.3 Labware . . . . . . . . . . . . . . . . . . . . . . . . . . . . . . . . . . . . . . . . . . . . . . . . . . 125.4 Hardware Modules . . . . . . . . . . . . . . . . . . . . . . . . . . . . . . . . . . . . . . . . . . . . 175.5 Pipettes . . . . . . . . . . . . . . . . . . . . . . . . . . . . . . . . . . . . . . . . . . . . . . . . . . 275.6 Building Block Commands . . . . . . . . . . . . . . . . . . . . . . . . . . . . . . . . . . . . . . . . 345.7 Complex Commands . . . . . . . . . . . . . . . . . . . . . . . . . . . . . . . . . . . . . . . . . . . 435.8 API Version 2 Reference . . . . . . . . . . . . . . . . . . . . . . . . . . . . . . . . . . . . . . . . . 575.9 Examples . . . . . . . . . . . . . . . . . . . . . . . . . . . . . . . . . . . . . . . . . . . . . . . . . 925.10 Advanced Control . . . . . . . . . . . . . . . . . . . . . . . . . . . . . . . . . . . . . . . . . . . . . 95
Python Module Index 97
Index 98
1

The OT-2 Python Protocol API is a simple Python framework designed to make writing automated biology lab proto-cols easy.
We’ve designed it in a way we hope is accessible to anyone with basic Python and wetlab skills. As a bench scientist,you should be able to code your automated protocols in a way that reads like a lab notebook.
Version 2 of the API is a new way to write Python protocols. It is more reliable, simpler, and better able to besupported. Unlike version 1, it has support for new modules like the Thermocycler. While version 1 will still recievebug fixes, new features and improvements will land in version 2. For a guide on transitioning your protocols fromversion 1 to version 2 of the API, see this article on migration1. For a more in-depth discussion of why version 2 ofthe API was developed and what is different about it compared to version 1, see this article on why we wrote API V22.
1 Getting Started
New to Python? Check out our Using Python For Protocols (page 6) page first before continuing. To get a sense ofthe typical structure of our scripts, take a look at our Examples (page 92) page.
To simulate protocols on your laptop, check out Simulating Your Scripts (page 8). When you’re ready to run yourscript on a robot, download our latest desktop app3.
2 Troubleshooting
If you encounter problems using our products please take a look at our support docs4 or contact our team via intercomon our website at opentrons.com5.
3 Overview
3.1 How it Looks
The design goal of this API is to make code readable and easy to understand. For example, below is a short set ofinstructions to transfer from well 'A1' to well 'B1' that even a computer could understand:
This protocol is by me; it’s called Opentrons Protocol Tutorial and is used for demonstrating the OT-2Python Protocol API. It uses version 2.0 of this API.
Begin the protocol
Add a 96 well plate, and place it in slot ‘2’ of the robot deck
Add a 300 µL tip rack, and place it in slot ‘1’ of the robot deck
Add a single-channel 300 µL pipette to the left mount, and tell it to use that tip rack
Transfer 100 µL from the plate’s ‘A1’ well to its ‘B2’ well
If we were to rewrite this with the Python Protocol API, it would look like the following:1 http://support.opentrons.com/en/articles/3425727-switching-your-protocols-from-api-version-1-to-version-22 http://support.opentrons.com/en/articles/3418212-opentrons-protocol-api-version-23 https://www.opentrons.com/ot-app4 https://support.opentrons.com/en/5 https://opentrons.com
2

from opentrons import protocol_api
# metadatametadata = {
'protocolName': 'My Protocol','author': 'Name <[email protected]>','description': 'Simple protocol to get started using OT2','apiLevel': '2.2'
}
# protocol run function. the part after the colon lets your editor know# where to look for autocomplete suggestionsdef run(protocol: protocol_api.ProtocolContext):
# labwareplate = protocol.load_labware('corning_96_wellplate_360ul_flat', '2')tiprack = protocol.load_labware('opentrons_96_tiprack_300ul', '1')
# pipettesleft_pipette = protocol.load_instrument(
'p300_single', 'left', tip_racks=[tiprack])
# commandsleft_pipette.pick_up_tip()left_pipette.aspirate(100, plate['A1'])left_pipette.dispense(100, plate['B2'])left_pipette.drop_tip()
3.2 How it’s Organized
When writing protocols using the Python Protocol API, there are generally five sections:
1) Metadata and Version Selection
2) Run function
3) Labware
4) Pipettes
5) Commands
Metadata and Version Selection
Metadata is a dictionary of data that is read by the server and returned to client applications (such as the OpentronsApp). Most metadata is not needed to run a protocol, but if present can help the Opentrons App display additionaldata about the protocol currently being executed. These optional (but recommended) fields are ("protocolName","author", and "description").
The required element of the metadata is "apiLevel". This must contain a string specifying the major and minorversion of the Python Protocol API that your protocol is designed for. For instance, a protocol written for version2.0 of the Python Protocol API (only launch version of the Protocol API should have in its metadata "apiLevel":"2.0".
For more information on Python Protocol API versioning, see Versioning (page 9).
3

The Run Function and the Protocol Context
Protocols are structured around a function called run(protocol), defined in code like this:
from opentrons import protocol_api
metadata = {'apiLevel': '2.2'}
def run(protocol: protocol_api.ProtocolContext):pass
This function must be named exactly run and must take exactly one mandatory argument (its name doesn’t matter,but we recommend protocol since this argument represents the protocol that the robot will execute).
The function run is the container for the code that defines your protocol.
The object protocol is the protocol context, which represents the robot and its capabilities. It is always an in-stance of the opentrons.protocol_api.contexts.ProtocolContext (page 57) class (though you’llnever have to instantiate one yourself - it is always passed in to run()), and it is tagged as such in the exampleprotocol to allow most editors to give you autocomplete.
The protocol context has two responsibilities:
1) Remember, track, and check the robot’s state
2) Expose the functions that make the robot execute actions
The protocol context plays the same role as the robot, labware, instruments, and modules objects in pastversions of the API, with one important difference: it is only one object; and because it is passed in to your protocolrather than imported, it is possible for the API to be much more rigorous about separating simulation from reality.
The key point is that there is no longer any need to import opentrons at the top of every protocol, since the robotnow runs the protocol, rather than the protocol running the robot. The example protocol imports the definition of theprotocol context to provide editors with autocomplete sources.
Labware
The next step is defining the labware required for your protocol. You must tell the protocol context about what shouldbe present on the deck, and where. You tell the protocol context about labware by calling the method protocol.load_labware(name, slot) and saving the result.
The name of a labware is a string that is different for each kind of labware. You can look up labware to add to yourprotocol on the Opentrons Labware Library6.
The slot is the labelled location on the deck in which you’ve placed the labware. The available slots are numberedfrom 1-11.
Our example protocol above loads
• a Corning 96 Well Plate7 in slot 2:
plate = protocol.load_labware('corning_96_wellplate_360ul_flat', 2)
• an Opentrons 300µL Tiprack8 in slot 1:
tiprack = protocol.load_labware('opentrons_96_tiprack_300ul', 1)
6 https://labware.opentrons.com7 https://labware.opentrons.com/corning_96_wellplate_360ul_flat8 https://labware.opentrons.com/opentrons_96_tiprack_300ul
4

These labware can be referenced later in the protocol as plate and tiprack respectively. Check out the Pythondocs9 for further clarification on using variables effectively in your code.
You can find more information about handling labware in the Labware (page 12) section.
Pipettes
After defining labware, you define the instruments required for your protocol. You tell the protocol context aboutwhich pipettes should be attached, and which slot they should be attached to, by calling the method protocol.load_instrument(model, mount, tip_racks) and saving the result.
The model of the pipette is the kind of pipette that should be attached; the mount is either "left" or "right";and tip_racks is a list of the objects representing tip racks that this instrument should use. Specifying tip_racksis optional, but if you don’t then you’ll have to manually specify where the instrument should pick up tips from everytime you try and pick up a tip.
See Pipettes (page 27) for more information on creating and working with pipettes.
Our example protocol above loads a P300 Single-channel pipette ('p300_single') in the left mount ('left'),and uses the Opentrons 300 µL tiprack we loaded previously as a source of tips (tip_racks=[tiprack]).
Commands
Once the instruments and labware required for the protocol are defined, the next step is to define the commandsthat make up the protocol. The most common commands are aspirate(), dispense(), pick_up_tip(),and drop_tip(). These and many others are described in the Building Block Commands (page 34) and ComplexCommands (page 43) sections, which go into more detail about the commands and how they work. These commandstypically specify which wells of which labware to interact with, using the labware you defined earlier, and are methodsof the instruments you created in the pipette section. For instance, in our example protocol, you use the pipette youdefined to:
1) Pick up a tip (implicitly from the tiprack you specified in slot 1 and assigned to the pipette): pipette.pick_up_tip()
2) Aspirate 100 µL from well A1 of the 96 well plate you specified in slot 2: pipette.aspirate(100,plate['A1'])
3) Dispense 100 µL into well A2 of the 96 well plate you specified in slot 2: pipette.dispense(100,plate['A2'])
4) Drop the tip (implicitly into the trash at the back right of the robot’s deck): pipette.drop_tip()
4 Feature Requests
Have an interesting idea or improvement for our software? Create a ticket on GitHub by following these guidelines.10
5 Developer’s guide
Do you want to contribute to our open-source API? You can find more information on how to be involved here.11
9 https://docs.python.org/3/index.html10 https://github.com/Opentrons/opentrons/blob/edge/CONTRIBUTING.md#opening-issues11 https://github.com/Opentrons/opentrons/blob/edge/CONTRIBUTING.md
5
5.1 Using Python For Protocols
Writing protocols in Python requires some up-front design before seeing your liquid handling automation in action.At a high-level, writing protocols with the OT-2 Python Protocol API looks like:
1) Write a Python protocol
2) Test the code for errors
3) Repeat steps 1 & 2
4) Calibrate labware on your OT-2
5) Run your protocol
These sets of documents aim to help you get the most out of steps 1 & 2, the “design” stage.
Python for Beginners
If Python is new to you, we suggest going through a few simple tutorials to acquire a base understanding to build upon.The following tutorials are a great starting point for working with the Protocol API (from learnpython.org12):
1) Hello World13
2) Variables and Types14
3) Lists15
4) Basic Operators16
5) Conditions17
6) Loops18
7) Functions19
8) Dictionaries20
After going through the above tutorials, you should have enough of an understanding of Python to work with theProtocol API and start designing your experiments! More detailed information on Python can always be found at thePython docs21
Working with Python
Using a popular and free code editor, like Visual Studio Code22, is a common method for writing Python protocols.Download onto your computer, and you can now write Python scripts.
12 http://www.learnpython.org/13 http://www.learnpython.org/en/Hello%2C_World%2114 http://www.learnpython.org/en/Variables_and_Types15 http://www.learnpython.org/en/Lists16 http://www.learnpython.org/en/Basic_Operators17 http://www.learnpython.org/en/Conditions18 http://www.learnpython.org/en/Loops19 http://www.learnpython.org/en/Functions20 http://www.learnpython.org/en/Dictionaries21 https://docs.python.org/3/index.html22 https://code.visualstudio.com/
6

Note: Make sure that when saving a protocol file, it ends with the .py file extension. This will ensure the OpentronsApp and other programs are able to properly read it.
For example, my_protocol.py
Simulating Python Protocols
In general, the best way to simulate a protocol is to simply upload it to your OT-2 through the Opentrons App. Whenyou upload a protocol via the app, the OT-2 simulates the protocol and the app displays any errors. However, if youwant to simulate protocols without being connected to an OT-2, you can download the Opentrons Python package.
Installing
To install the Opentrons package, you must install it from Python’s package manager, pip. The exact method ofinstallation is slightly different depending on whether you use Jupyter on your computer (note: you do not need to dothis if you want to use the Robot’s Jupyter Notebook (page 9), ONLY for your locally-installed notebook) or not.
Non-Jupyter Installation
First, install Python 3.7.6 (Windows x6423, Windows x8624, OS X25) or higher on your local computer.
Once the installer is done, make sure that Python is properly installed by opening a terminal and doing python--version. If this is not higher than 3.7.6, you have another version of Python installed; this happens frequentlyon OS X and sometimes on Windows. We recommend using a tool like pyenv26 to manage multiple Python versions.This is particularly useful on OS X, which has a built-in install of Python 2.7 that should not be removed.
Once Python is installed, install the opentrons package27 using pip:
pip install opentrons
You should see some output that ends with Successfully installed opentrons-3.13.1 (the versionnumber may be different).
Jupyter Installation
You must make sure that you install the opentrons package for whichever kernel and virtual environment thenotebook is using. A generally good way to do this is
import sys!{sys.executable} -m pip install opentrons
23 https://www.python.org/ftp/python/3.7.6/python-3.7.6-amd64.exe24 https://www.python.org/ftp/python/3.7.6/python-3.7.6.exe25 https://www.python.org/ftp/python/3.7.6/python-3.7.6-macosx10.6.pkg26 https://github.com/pyenv/pyenv27 https://pypi.org/project/opentrons/
7

Simulating Your Scripts
From the Command Line
Once the Opentrons Python package is installed, you can simulate protocols in your terminal using theopentrons_simulate command:
opentrons_simulate.exe my_protocol.py
or, on OS X or Linux,
opentrons_simulate my_protocol.py
The simulator will print out a log of the actions the protocol will cause, similar to the Opentrons App; it will also printout any log messages caused by a given command next to that list of actions. If there is a problem with the protocol,the simulation will stop and the error will be printed.
The simulation script can also be invoked through python:
python -m opentrons.simulate /path/to/protocol
opentrons_simulate has several command line options that might be useful. Most options are explained below,but to see all options you can run
opentrons_simulate --help
Using Custom Labware
By default, opentrons_simulate will load custom labware definitions from the directory in which yourun it. You can change the directory opentrons_simulate searches for custom labware with the--custom-labware-path option:
python.exe -m opentrons.simulate --custom-labware-path="C:\Custom Labware"
In the Python Shell
The Opentrons Python package also provides an entrypoint to use the Opentrons simulation package from other Pythoncontexts such as an interactive prompt or Jupyter. To simulate a protocol in Python, open a file containing a protocoland pass it to opentrons.simulate.simulate() (page 90):
from opentrons.simulate import simulate, format_runlog# read the fileprotocol_file = open('/path/to/protocol.py')# simulate() the protocol, keeping the runlogrunlog, _bundle = simulate(protocol_file)# print the runlogprint(format_runlog(runlog))
The opentrons.simulate.simulate() (page 90) method does the work of simulating the protocol and returnsthe run log, which is a list of structured dictionaries. opentrons.simulate.format_runlog() (page 89)turns that list of dictionaries into a human readable string, which is then printed out. For more information on theprotocol simulator, see Simulating Your Scripts (page 8).
8

Using Jupyter
In your Jupyter notebook, you can use the Python Protocol API simulator by doing
from opentrons import simulateprotocol = simulate.get_protocol_api('2.0')p300 = protocol.load_instrument('p300_single', 'right')...
The protocol object, which is an instance of ProtocolContext (page 57), is the same thing that gets passed toyour protocol’s run function, but set to simulate rather than control an OT-2. You can call all your protocol’s functionson that object.
If you have a full protocol, wrapped inside a run function, defined in a Jupyter cell you can also use opentrons.simulate.simulate() (page 90) as described above to simulate the protocol.
These instructions also work on the OT-2’s Jupyter notebook. This can also be used in the Python interactive shell.
Configuration and Local Storage
The Opentrons Python package uses a folder in your user directory as a place to store and read configuration andchanges to its internal data. This location is ~/.opentrons on Linux or OSX and C:\Users\%USERNAME%\.opentrons on Windows.
Robot’s Jupyter Notebook
Your OT-2 also has a Jupyter notebook, which you can use to develop and execute protocols. For more informationon how to execute protocols using the OT-2’s Jupyter notebook, please see Advanced Control (page 95). To simulateprotocols on the OT-2’s Jupyter notebook, use the instructions above.
5.2 Versioning
The OT-2 Python Protocol API has its own versioning system, which is separated from the version of the OT-2 softwareor of the Opentrons App. This separation allows you to specify the Protocol Api version your protocol requires withoutbeing concerned with what OT-2 software versions it will work with, and allows Opentrons to version the PythonProtocol API based only on changes that affect protocols.
The API is versioned with a major and minor version, expressed like this: major.minor. For instance, majorversion 2 and minor version 0 is written as 2.0. Versions are not decimal numbers. Major version 2 and minorversion 10 is written as 2.10, while 2.1 means major version 2 and minor version 1.
Major and Minor Version
The major version of the API is increased whenever there are signficant structural or behavioral changes to protocols.For instance, major version 2 of the API was introduced because protocols must now have a run function that takesa protocol argument rather than importing the robot, instruments, and labware modules. A similar levelof structural change would require a major version 3. Another major version bump would be if all of the default unitsswitched to nanoliters instead of microliters (we won’t do this, it’s just an example). This major behavioral changewould also require a major version 3.
The minor version of the API is increased whenever we add new functionality that might change the way a protocol iswritten, or when we want to make a behavior change to an aspect of the API but not the whole thing. For instance, ifwe added support for a new module, added an option for specifying volume units in the aspirate and dispensefunctions, or added a way to queue up actions from multiple different modules and execute them at the same time,
9
we would increase the minor version of the API. Another minor version bump would be if we added automatic liquidlevel tracking, and the position at which the OT-2 aspirated from wells was now dynamic - some people might notwant that change appearing suddenly in their well-tested protocol, so we would increase the minor version.
Expressing Versions
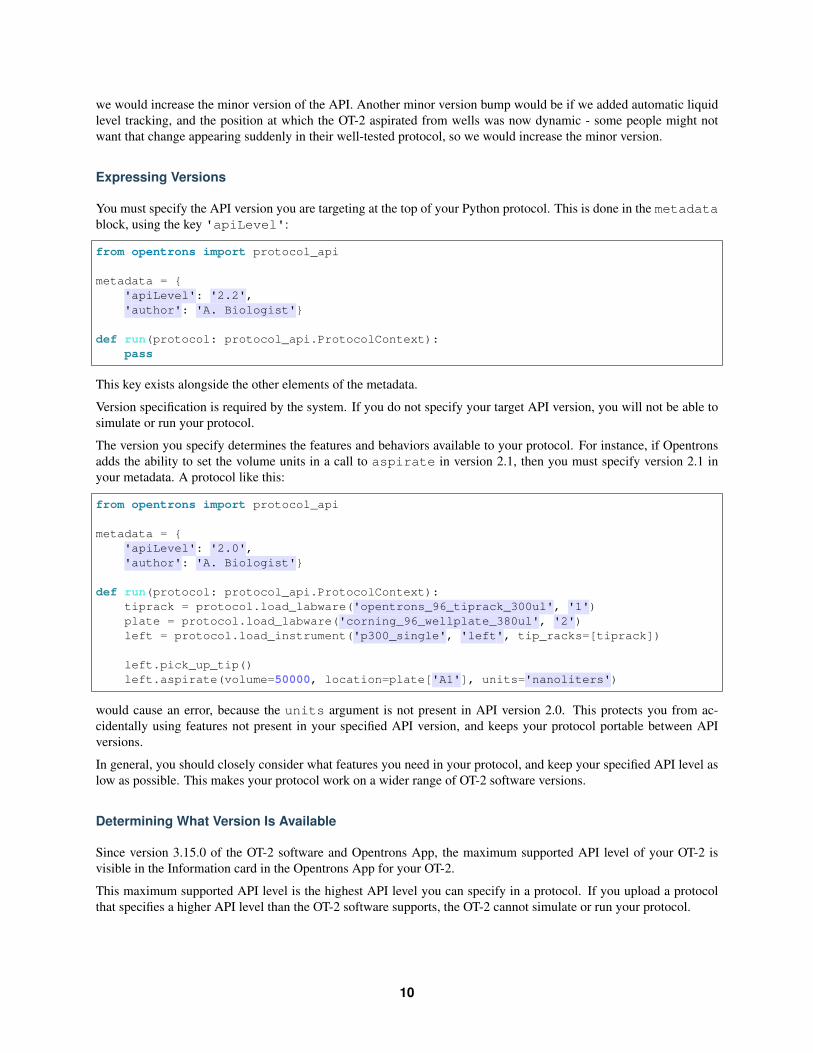
You must specify the API version you are targeting at the top of your Python protocol. This is done in the metadatablock, using the key 'apiLevel':
from opentrons import protocol_api
metadata = {'apiLevel': '2.2','author': 'A. Biologist'}
def run(protocol: protocol_api.ProtocolContext):pass
This key exists alongside the other elements of the metadata.
Version specification is required by the system. If you do not specify your target API version, you will not be able tosimulate or run your protocol.
The version you specify determines the features and behaviors available to your protocol. For instance, if Opentronsadds the ability to set the volume units in a call to aspirate in version 2.1, then you must specify version 2.1 inyour metadata. A protocol like this:
from opentrons import protocol_api
metadata = {'apiLevel': '2.0','author': 'A. Biologist'}
def run(protocol: protocol_api.ProtocolContext):tiprack = protocol.load_labware('opentrons_96_tiprack_300ul', '1')plate = protocol.load_labware('corning_96_wellplate_380ul', '2')left = protocol.load_instrument('p300_single', 'left', tip_racks=[tiprack])
left.pick_up_tip()left.aspirate(volume=50000, location=plate['A1'], units='nanoliters')
would cause an error, because the units argument is not present in API version 2.0. This protects you from ac-cidentally using features not present in your specified API version, and keeps your protocol portable between APIversions.
In general, you should closely consider what features you need in your protocol, and keep your specified API level aslow as possible. This makes your protocol work on a wider range of OT-2 software versions.
Determining What Version Is Available
Since version 3.15.0 of the OT-2 software and Opentrons App, the maximum supported API level of your OT-2 isvisible in the Information card in the Opentrons App for your OT-2.
This maximum supported API level is the highest API level you can specify in a protocol. If you upload a protocolthat specifies a higher API level than the OT-2 software supports, the OT-2 cannot simulate or run your protocol.
10
Determining What Features Are In What Version
As you read the documentation on this site, you will notice that all documentation on features, function calls, availableproperties, and everything else about the Python Protocol API notes which API version it was introduced in. Keep thisinformation in mind when specifying your protocol’s API version. The version statement will look like this:
New in version 2.0.
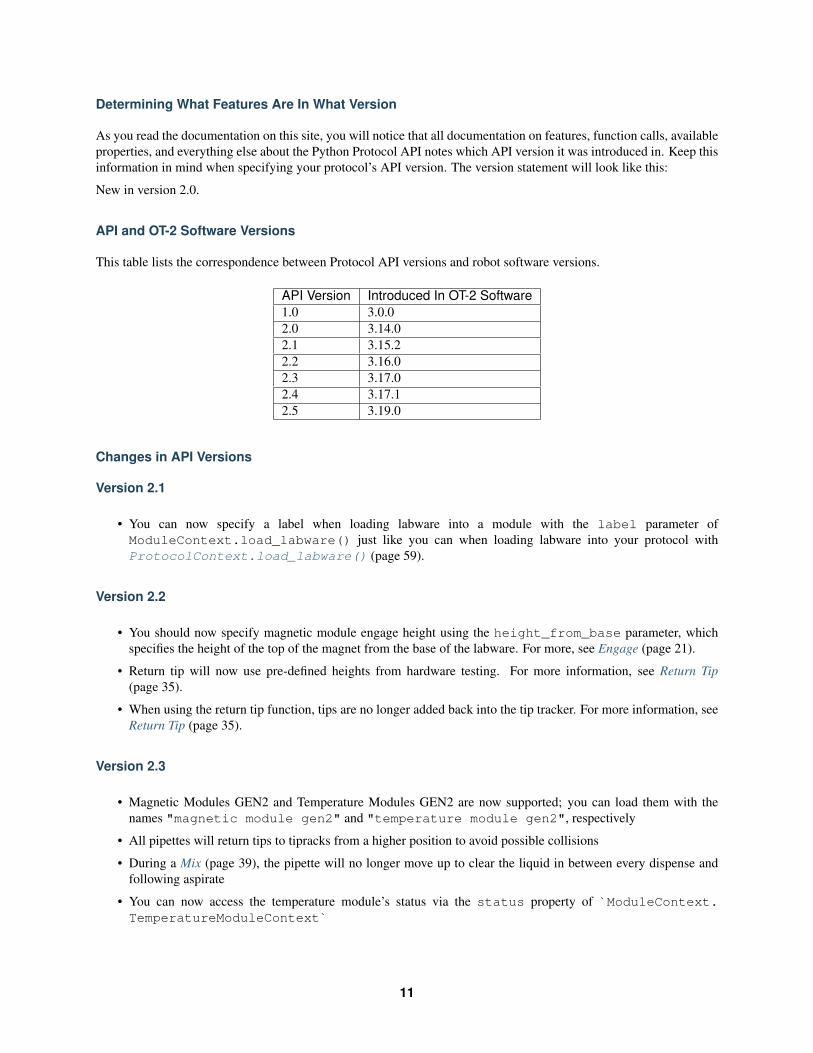
API and OT-2 Software Versions
This table lists the correspondence between Protocol API versions and robot software versions.
API Version Introduced In OT-2 Software1.0 3.0.02.0 3.14.02.1 3.15.22.2 3.16.02.3 3.17.02.4 3.17.12.5 3.19.0
Changes in API Versions
Version 2.1
• You can now specify a label when loading labware into a module with the label parameter ofModuleContext.load_labware() just like you can when loading labware into your protocol withProtocolContext.load_labware() (page 59).
Version 2.2
• You should now specify magnetic module engage height using the height_from_base parameter, whichspecifies the height of the top of the magnet from the base of the labware. For more, see Engage (page 21).
• Return tip will now use pre-defined heights from hardware testing. For more information, see Return Tip(page 35).
• When using the return tip function, tips are no longer added back into the tip tracker. For more information, seeReturn Tip (page 35).
Version 2.3
• Magnetic Modules GEN2 and Temperature Modules GEN2 are now supported; you can load them with thenames "magnetic module gen2" and "temperature module gen2", respectively
• All pipettes will return tips to tipracks from a higher position to avoid possible collisions
• During a Mix (page 39), the pipette will no longer move up to clear the liquid in between every dispense andfollowing aspirate
• You can now access the temperature module’s status via the status property of `ModuleContext.TemperatureModuleContext`
11
Version 2.4
• The following improvements were made to the touch_tip command:
– The speed for touch_tip can now be lowered down to 1 mm/s
– touch_tip no longer moves diagonally from the X direction -> Y direction
– Takes into account geometry of the deck and modules
Version 2.5
• New Utility Commands (page 40) were added:
– ProtocolContext.set_rail_lights() (page 62): turns robot rail lights on or off
– ProtocolContext.rail_lights_on (page 62): describes whether or not the rail lights are on
– ProtocolContext.door_closed (page 59): describes whether the robot door is closed
5.3 Labware
When writing a protocol, you must inform the Protocol API about the labware you will be placing on the OT-2’s deck.
When you load labware, you specify the name of the labware (e.g. 'corning_96_wellplate_360ul_flat'),and the slot on the OT-2’s deck in which it will be placed (e.g. '2'). The first place to look for thenames of labware should always be the Opentrons Labware Library28, where Opentrons maintains a databaseof labware, their names in the API, what they look like, manufacturer part numbers, and more. In thisexample, we’ll use 'corning_96_wellplate_360ul_flat' (an ANSI standard 96-well plate29) and'opentrons_96_tiprack_300ul' (the Opentrons standard 300 µL tiprack30).
In the example given in the Overview (page 2) section, we loaded labware like this:
plate = protocol.load_labware('corning_96_wellplate_360ul_flat', '2')tiprack = protocol.load_labware('opentrons_96_tiprack_300ul', '1')
which informed the protocol context that the deck contains a 300 µL tiprack in slot 1 and a 96 well plate in slot 2.
A third optional argument can be used to give the labware a nickname to be displayed in the Opentrons App.
plate = protocol.load_labware('corning_96_wellplate_360ul_flat',slot='2',label='any-name-you-want')
Labware is loaded into a protocol using ProtocolContext.load_labware() (page 59), which returnsopentrons.protocol_api.labware.Labware (page 72) object.
Finding Labware
Default Labware
The OT-2 has a set of labware well-supported by Opentrons defined internally. This set of labware is always availableto protocols. This labware can be found on the Opentrons Labware Library31. You can copy the load names thatshould be passed to protocol.load_labware statements to get the correct definitions.
28 https://labware.opentrons.com29 https://labware.opentrons.com/corning_96_wellplate_360ul_flat30 https://labware.opentrons.com/opentrons_96_tiprack_300ul31 https://labware.opentrons.com
12

Custom Labware
If you have a piece of labware that is not in the Labware Library, you can create your own definition using theOpentrons Labware Creator32. Before using the Labware Creator, you should read the introduction article here33.
Once you have created your labware and saved it as a .json file, you can add it to the Opentrons App by clicking“More” and then “Labware”. Once you have added your labware to the Opentrons App, it will be available to allPython Protocol API version 2 protocols uploaded to your robot through that Opentrons App. If other people will beusing this custom labware definition, they must also add it to their Opentrons App. You can find a support article aboutthis custom labware process here34.
Accessing Wells in Labware
Well Ordering
When writing a protocol, you will need to select which wells to transfer liquids to and from.
Rows of wells (see image below) on a labware are typically labeled with capital letters starting with 'A'; for instance,an 8x12 96 well plate will have rows 'A' through 'H'.
Columns of wells (see image below) on a labware are typically labeled with numerical indices starting with '1'; forinstance, an 8x12 96 well plate will have columns '1' through '12'.
For all well accessing functions, the starting well will always be at the top left corner of the labware. The ending wellwill be in the bottom right, see the diagram below for further explanation.
'''Examples in this section expect the following'''metadata = {'apiLevel': '2.2'}
def run(protocol):
plate = protocol.load_labware('corning_24_wellplate_3.4ml_flat', slot='1')
New in version 2.0.
Accessor Methods
There are many different ways to access wells inside labware. Different methods are useful in different contexts. Thetable below lists out the methods available to access wells and their differences.
32 https://labware.opentrons.com/create/33 https://support.opentrons.com/en/articles/3136504-creating-custom-labware-definitions34 https://support.opentrons.com/en/articles/3136506-using-labware-in-your-protocols
13
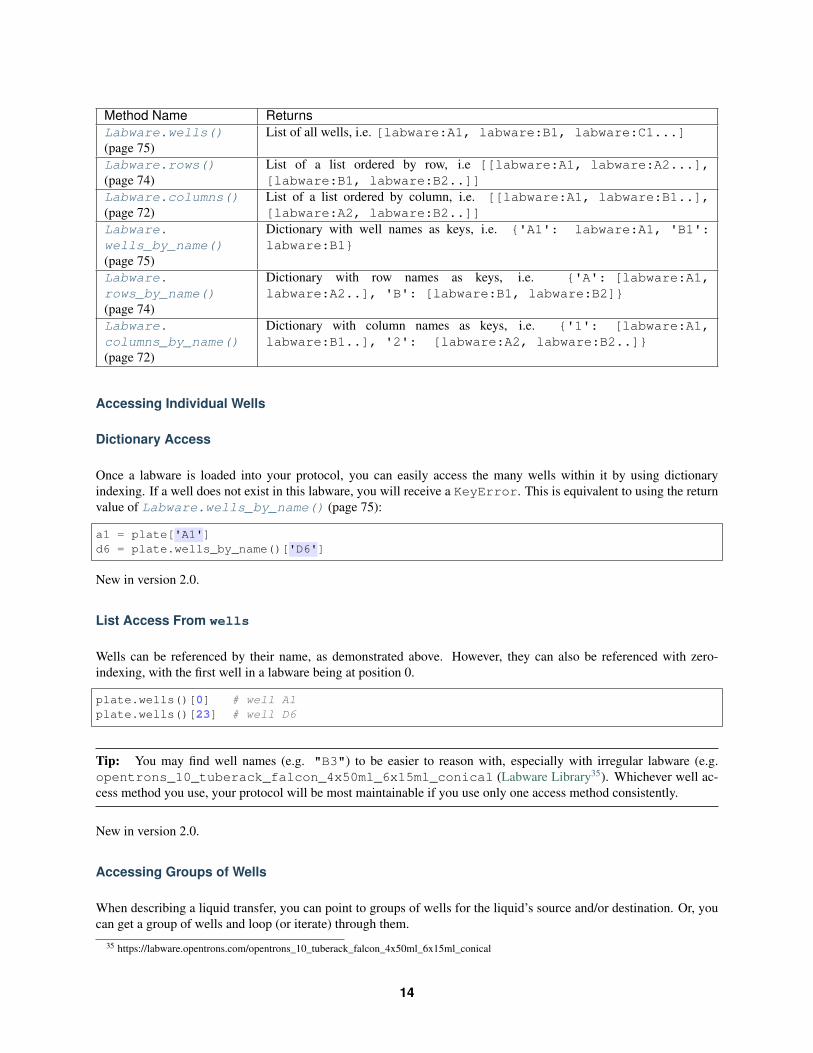
Method Name ReturnsLabware.wells()(page 75)
List of all wells, i.e. [labware:A1, labware:B1, labware:C1...]
Labware.rows()(page 74)
List of a list ordered by row, i.e [[labware:A1, labware:A2...],[labware:B1, labware:B2..]]
Labware.columns()(page 72)
List of a list ordered by column, i.e. [[labware:A1, labware:B1..],[labware:A2, labware:B2..]]
Labware.wells_by_name()(page 75)
Dictionary with well names as keys, i.e. {'A1': labware:A1, 'B1':labware:B1}
Labware.rows_by_name()(page 74)
Dictionary with row names as keys, i.e. {'A': [labware:A1,labware:A2..], 'B': [labware:B1, labware:B2]}
Labware.columns_by_name()(page 72)
Dictionary with column names as keys, i.e. {'1': [labware:A1,labware:B1..], '2': [labware:A2, labware:B2..]}
Accessing Individual Wells
Dictionary Access
Once a labware is loaded into your protocol, you can easily access the many wells within it by using dictionaryindexing. If a well does not exist in this labware, you will receive a KeyError. This is equivalent to using the returnvalue of Labware.wells_by_name() (page 75):
a1 = plate['A1']d6 = plate.wells_by_name()['D6']
New in version 2.0.
List Access From wells
Wells can be referenced by their name, as demonstrated above. However, they can also be referenced with zero-indexing, with the first well in a labware being at position 0.
plate.wells()[0] # well A1plate.wells()[23] # well D6
Tip: You may find well names (e.g. "B3") to be easier to reason with, especially with irregular labware (e.g.opentrons_10_tuberack_falcon_4x50ml_6x15ml_conical (Labware Library35). Whichever well ac-cess method you use, your protocol will be most maintainable if you use only one access method consistently.
New in version 2.0.
Accessing Groups of Wells
When describing a liquid transfer, you can point to groups of wells for the liquid’s source and/or destination. Or, youcan get a group of wells and loop (or iterate) through them.
35 https://labware.opentrons.com/opentrons_10_tuberack_falcon_4x50ml_6x15ml_conical
14

You can access a specific row or column of wells by using the Labware.rows_by_name() (page 74) andLabware.columns_by_name() (page 72) methods on a labware. These methods both return a dictionary withthe row or column name as the keys:
row_dict = plate.rows_by_name()['A']row_list = plate.rows()[0] # equivalent to the line abovecolumn_dict = plate.columns_by_name()['1']column_list = plate.columns()[0] # equivalent to the line above
print('Column "1" has', len(column_dict), 'wells')print('Row "A" has', len(row_dict), 'wells')
will print out. . .
Column "1" has 4 wellsRow "A" has 6 wells
Since these methods return either lists or dictionaries, you can iterate through them as you would regular Python datastructures.
For example, to access the individual wells of row 'A' in a well plate, you can do:
for well in plate.rows()[0]:print(well)
or,
for well_obj in plate.rows_by_name()['A'].values():print(well_obj)
and it will return the individual well objects in row A.
New in version 2.0.
Specifying Position Within Wells
The functions listed above (in the Accessing Wells in Labware (page 13) section) return objects (or lists, lists oflists, dictionaries, or dictionaries of lists of objects) representing wells. These are opentrons.protocol_api.labware.Well (page 75) objects. Well (page 75) objects have some useful methods on them, which allow you tomore closely specify the location to which the OT-2 should move inside a given well.
Each of these methods returns an object called a opentrons.types.Location (page 86), which encapsulatesa position in deck coordinates (see Deck Coordinates (page 91)) and a well with which it is associated. This letsyou further manipulate the positions returned by these methods. All InstrumentContext (page 62) methods thatinvolve positions accept these Location (page 86) objects.
Position Modifiers
Top
The method Well.top() (page 76) returns a position at the top center of the well. This is a good position to usefor Blow Out (page 39) or any other operation where you don’t want to be contacting the liquid. In addition, Well.top() (page 76) takes an optional argument z, which is a distance in mm to move relative to the top vertically(positive numbers move up, and negative numbers move down):
15

plate['A1'].top() # This is the top center of the wellplate['A1'].top(z=1) # This is 1mm above the top center of the wellplate['A1'].top(z=-1) # This is 1mm below the top center of the well
New in version 2.0.
Bottom
The method Well.bottom() (page 75) returns a position at the bottom center of the well. This is a good positionto start when considering where to aspirate, or any other operation where you want to be contacting the liquid. Inaddition, Well.bottom() (page 75) takes an optional argument z, which is a distance in mm to move relative tothe bottom vertically (positive numbers move up, and negative numbers move down):
plate['A1'].bottom() # This is the bottom center of the wellplate['A1'].bottom(z=1) # This is 1mm above the bottom center of the wellplate['A1'].bottom(z=-1) # This is 1mm below the bottom center of the well.
# this may be dangerous!
Warning: Negative z arguments to Well.bottom() (page 75) may cause the tip to collide with the bottom ofthe well. The OT-2 has no sensors to detect this, and if it happens, the pipette that collided will be too high in zuntil the next time it picks up a tip.
Note: If you are using this to change the position at which the robot does Aspirate (page 37) or Dispense (page 38)throughout the protocol, consider setting the default aspirate or dispense offset with InstrumentContext.well_bottom_clearance (page 71) (see Default Positions Within Wells (page 30)).
New in version 2.0.
Center
The method Well.center() (page 75) returns a position centered in the well both vertically and horizontally. Thiscan be a good place to start for precise control of positions within the well for unusual or custom labware.
plate['A1'].center() # This is the vertical and horizontal center of the well
New in version 2.0.
Manipulating Positions
The objects returned by the position modifier functions are all instances of opentrons.types.Location(page 86), which are named tuples36 representing the combination of a point in space (another named tuple) and areference to the associated Well (page 75) (or Labware (page 72), or slot name, depending on context).
To adjust the position within a well, you can use Location.move() (page 86). Pass it a opentrons.types.Point (page 86) representing a 3-dimensional offset. It will return a new location, representing the original locationwith that offset applied.
For example:36 https://docs.python.org/3/library/collections.html#collections.namedtuple
16
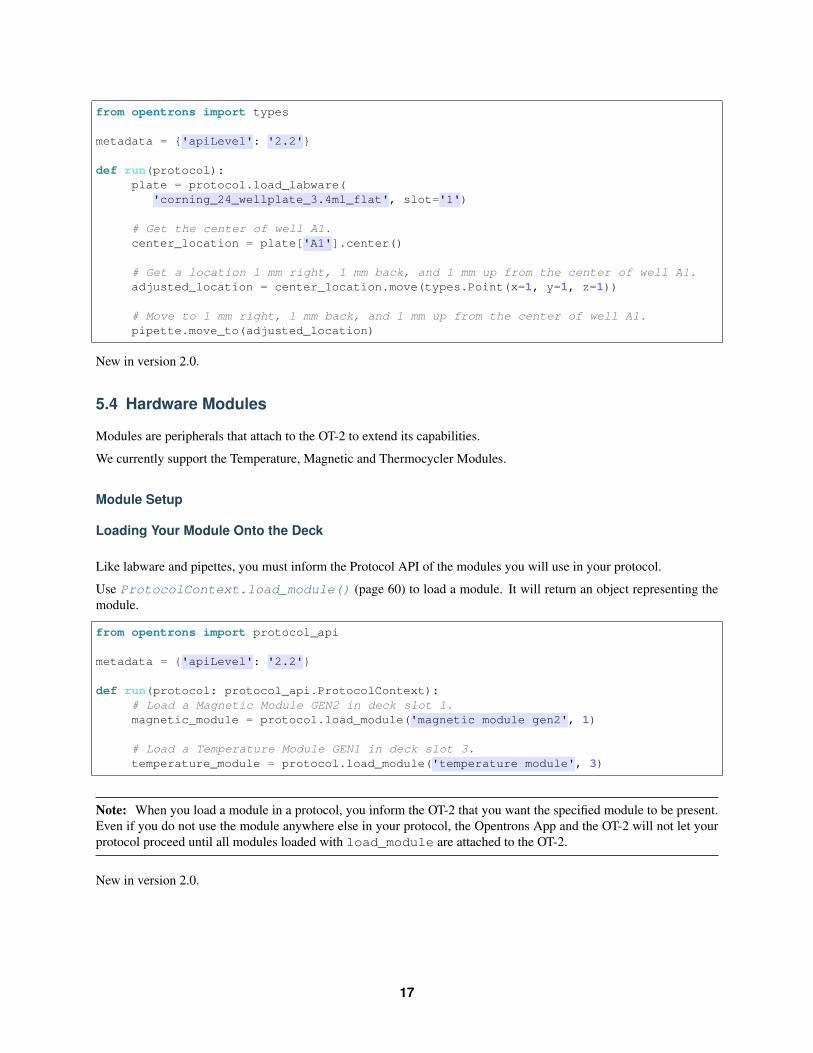
from opentrons import types
metadata = {'apiLevel': '2.2'}
def run(protocol):plate = protocol.load_labware(
'corning_24_wellplate_3.4ml_flat', slot='1')
# Get the center of well A1.center_location = plate['A1'].center()
# Get a location 1 mm right, 1 mm back, and 1 mm up from the center of well A1.adjusted_location = center_location.move(types.Point(x=1, y=1, z=1))
# Move to 1 mm right, 1 mm back, and 1 mm up from the center of well A1.pipette.move_to(adjusted_location)
New in version 2.0.
5.4 Hardware Modules
Modules are peripherals that attach to the OT-2 to extend its capabilities.
We currently support the Temperature, Magnetic and Thermocycler Modules.
Module Setup
Loading Your Module Onto the Deck
Like labware and pipettes, you must inform the Protocol API of the modules you will use in your protocol.
Use ProtocolContext.load_module() (page 60) to load a module. It will return an object representing themodule.
from opentrons import protocol_api
metadata = {'apiLevel': '2.2'}
def run(protocol: protocol_api.ProtocolContext):# Load a Magnetic Module GEN2 in deck slot 1.magnetic_module = protocol.load_module('magnetic module gen2', 1)
# Load a Temperature Module GEN1 in deck slot 3.temperature_module = protocol.load_module('temperature module', 3)
Note: When you load a module in a protocol, you inform the OT-2 that you want the specified module to be present.Even if you do not use the module anywhere else in your protocol, the Opentrons App and the OT-2 will not let yourprotocol proceed until all modules loaded with load_module are attached to the OT-2.
New in version 2.0.
17

Available Modules
The first parameter to ProtocolContext.load_module() (page 60), the module’s load name, specifies thekind of module to load. Check the table below for the proper load name to use for each kind of module.
Some modules were added to the Protocol API later than others. Make sure you use a Protocol API version (page 9)high enough to support all the modules you want to use.
Module Load name Minimum API version (page 9)Temperature Module GEN1 'temperature module' or
'tempdeck'2.0
GEN2 'temperature modulegen2'
2.3
Magnetic Module GEN1 'magnetic module' or'magdeck'
2.0
GEN2 'magnetic module gen2' 2.3Thermocycler Module 'thermocycler module' or
'thermocycler'2.0
GEN1 vs. GEN2 Modules
GEN2 modules are newer. They have improvements that make them more reliable and easier to use.
Identifying a GEN2 Module
You can determine if your module is a GEN2 model by inspecting the sides of the device for a label that specifiesGEN2.
Changes with the GEN2 Temperature Module
The GEN2 Temperature Module has a plastic insulating rim around the plate, and plastic insulating shrouds designedto fit over our aluminum blocks. This mitigates an issue where the GEN1 Temperature Module would have troublecooling to very low temperatures, especially if it shared the deck with a running Thermocycler.
Changes with the GEN2 Magnetic Module
The GEN2 Magnetic Module uses smaller magnets than the GEN1 version. This mitigates an issue where beads wouldbe attracted even when the magnets were retracted.
This means it will take longer for the GEN2 module to attract beads.
Recommended Magnetic Module GEN2 bead attraction time:
• Total liquid volume <= 50 uL: 5 minutes
• Total liquid volume > 50 uL: 7 minutes
Loading Labware Onto Your Module
Like specifying labware that will be present on the deck of the OT-2, you must specify labware that will be present onthe module you have just loaded. You do this using ModuleContext.load_labware(). For instance, to load a
18

Temperature Module and specify an aluminum block for 2 mL tubes37, you would do:
from opentrons import protocol_api
metadata = {'apiLevel': '2.2'}
def run(protocol: protocol_api.ProtocolContext):module = protocol.load_module('Temperature Module', slot)my_labware = module.load_
→˓labware('opentrons_24_aluminumblock_generic_2ml_screwcap',label='Temperature-Controlled Tubes')
Notice that when you load labware on a module, you don’t specify the labware’s deck slot. The labware is loaded onthe module, on whichever deck slot the module occupies.
New in version 2.0.
Module and Labware Compatibility
It’s up to you to make sure that the labware and module you chose make sense together. The Protocol API won’t stopyou from making nonsensical combinations, like a tube rack on a Thermocycler.
See: What labware can I use with my modules?38
Loading Custom Labware Into Your Module
Any custom labware added to your Opentrons App (see Custom Labware (page 13)) is accessible when loadinglabware onto a module.
New in version 2.1.
Note: In API version 2.0, ModuleContext.load_labware() only took a load_name argument. In API ver-sion 2.1 (introduced in Robot Software version 3.15.2) or higher you can now specify a label, version, and namespace(though most of the time you won’t have to).
Using a Temperature Module
The Temperature Module acts as both a cooling and heating device. It can control the temperature of its deck between4 °C and 95 °C with a resolution of 1 °C.
Temperature Modules are represented in code by TemperatureModuleContext (page 79) objects.
The Temperature Module has the following methods that can be accessed during a protocol. For the purposes of thissection, assume we have the following already:
from opentrons import protocol_api
metadata = {'apiLevel': '2.2'}
def run(protocol: protocol_api.ProtocolContext):temp_mod = protocol.load_module('temperature module', '1')plate = temp_mod.load_labware('corning_96_wellplate_360ul_flat')# The code from the rest of the examples in this section goes here
37 https://labware.opentrons.com/opentrons_24_aluminumblock_generic_2ml_screwcap?category=aluminumBlock38 https://support.opentrons.com/en/articles/3540964-what-labware-can-i-use-with-my-modules
19
New in version 2.0.
Set Temperature
To set the Temperature Module to 4 °C do the following:
temp_mod.set_temperature(4)
This function will pause your protocol until your target temperature is reached.
Note: This is unlike version 1 of the Python API, in which you would have to use the separate functionwait_for_temperature to block protocol execution until the Temperature Module was ready.
New in version 2.0.
Read the Current Temperature
You can read the current real-time temperature of the Temperature Module using theTemperatureModuleContext.temperature (page 81) property:
temp_mod.temperature
New in version 2.0.
Read the Target Temperature
You can read the current target temperature of the Temperature Module using the TemperatureModuleContext.target (page 81) property:
temp_mod.target
New in version 2.0.
Check the Status
The TemperatureModuleContext.status (page 80) property is a string that is one of 'heating','cooling', 'holding at target' or 'idle'.
temp_mod.status
Deactivate
This function will stop heating or cooling and will turn off the fan on the Temperature Module.
temp_mod.deactivate()
Note: You can also deactivate your temperature module through the Opentrons App by clicking on the Pipettes& Modules tab. Your Temperature Module will automatically deactivate if another protocol is uploaded to the app.Your Temperature Module will not deactivate automatically when the protocol ends, is cancelled, or is reset.
20
After deactivating your Temperature module, you can later call TemperatureModuleContext.set_temperature() (page 80) to heat or cool phase again.
New in version 2.0.
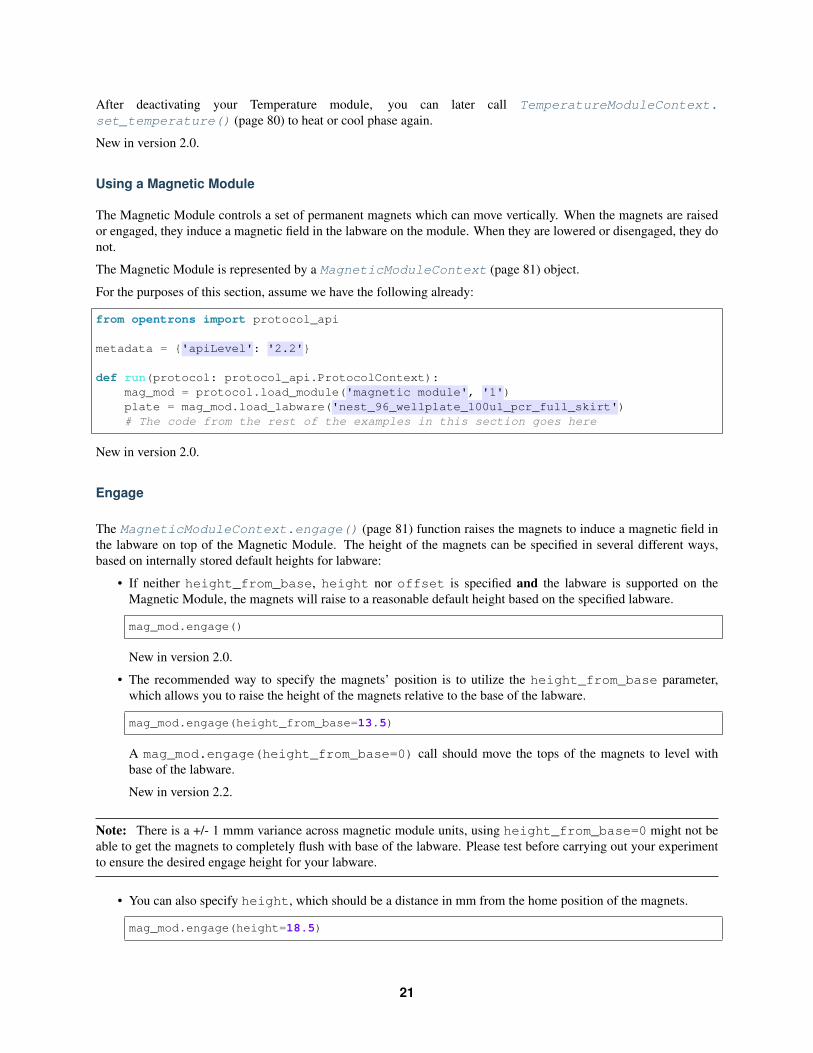
Using a Magnetic Module
The Magnetic Module controls a set of permanent magnets which can move vertically. When the magnets are raisedor engaged, they induce a magnetic field in the labware on the module. When they are lowered or disengaged, they donot.
The Magnetic Module is represented by a MagneticModuleContext (page 81) object.
For the purposes of this section, assume we have the following already:
from opentrons import protocol_api
metadata = {'apiLevel': '2.2'}
def run(protocol: protocol_api.ProtocolContext):mag_mod = protocol.load_module('magnetic module', '1')plate = mag_mod.load_labware('nest_96_wellplate_100ul_pcr_full_skirt')# The code from the rest of the examples in this section goes here
New in version 2.0.
Engage
The MagneticModuleContext.engage() (page 81) function raises the magnets to induce a magnetic field inthe labware on top of the Magnetic Module. The height of the magnets can be specified in several different ways,based on internally stored default heights for labware:
• If neither height_from_base, height nor offset is specified and the labware is supported on theMagnetic Module, the magnets will raise to a reasonable default height based on the specified labware.
mag_mod.engage()
New in version 2.0.
• The recommended way to specify the magnets’ position is to utilize the height_from_base parameter,which allows you to raise the height of the magnets relative to the base of the labware.
mag_mod.engage(height_from_base=13.5)
A mag_mod.engage(height_from_base=0) call should move the tops of the magnets to level withbase of the labware.
New in version 2.2.
Note: There is a +/- 1 mmm variance across magnetic module units, using height_from_base=0 might not beable to get the magnets to completely flush with base of the labware. Please test before carrying out your experimentto ensure the desired engage height for your labware.
• You can also specify height, which should be a distance in mm from the home position of the magnets.
mag_mod.engage(height=18.5)
21

New in version 2.0.
• An offset can be applied to move the magnets relatively from the default engage height of the labware, if thelabware is supported on the Magnetic Module.
mag_mod.engage(offset=-2)
New in version 2.0.
Note: Only certain labwares have defined engage heights for the Magnetic Module. If a labware that does not have adefined engage height is loaded on the Magnetic Module (or if no labware is loaded), then height_from_labware(since version 2.2) or height, must be specified.
New in version 2.0.
Disengage
mag_mod.disengage()
The Magnetic Module will disengage when the device is turned on. It will not auto-disengage otherwise unless youcall MagneticModuleContext.disengage() (page 81) in your protocol.
New in version 2.0.
Check the Status
The MagneticModuleContext.status (page 83) property is a string that is one of 'engaged' or'disengaged'.
mag_mod.status
Using a Thermocycler Module
The Thermocycler Module allows users to perform complete experiments that require temperature sensitive reactionssuch as PCR.
There are two heating mechanisms in the Thermocycler. One is the block in which samples are located; the other isthe lid heating pad.
The block can control its temperature between 4 °C and 99 °C to the nearest 1 °C.
The lid can control its temperature between 37 °C to 110 °C. Please see our support article39 on controlling theThermocycler in the Opentrons App.
For the purposes of this section, assume we have the following already:
from opentrons import protocol_api
metadata = {'apiLevel': '2.2'}
def run(protocol: protocol_api.ProtocolContext):tc_mod = protocol.load_module('Thermocycler Module')plate = tc_mod.load_labware('nest_96_wellplate_100ul_pcr_full_skirt')
39 https://support.opentrons.com/en/articles/3469797-thermocycler-module
22
Note: When loading the Thermocycler, it is not necessary to specify a slot. This is because the Thermocycler has adefault position that covers Slots 7, 8, 10, and 11. This is the only valid location for the Thermocycler on the OT-2deck.
New in version 2.0.
Lid Motor Control
The Thermocycler can control its temperature with the lid open or closed. When the lid of the Thermocycler is open,the pipettes can access the loaded labware. You can control the lid position with the methods below.
Open Lid
tc_mod.open_lid()
New in version 2.0.
Close Lid
tc_mod.close_lid()
New in version 2.0.
Lid Temperature Control
You can control when a lid temperature is set. It is recommended that you set the lid temperature before executing aThermocycler profile (see Thermocycler Profiles (page 24)). The range of the Thermocycler lid is 37 °C to 110 °C.
Set Lid Temperature
ThermocyclerContext.set_lid_temperature() (page 86) takes one parameter: the temperature youwish the lid to be set to. The protocol will only proceed once the lid temperature has been reached.
tc_mod.set_lid_temperature(temperature)
New in version 2.0.
Block Temperature Control
To set the block temperature inside the Thermocycler, you can use the method ThermocyclerContext.set_block_temperature() (page 85). It takes five parameters: temperature, hold_time_seconds,hold_time_minutes, ramp_rate and block_max_volume. Only temperature is required; the twohold_time parameters, ramp_rate, and block_max_volume are optional.
23
Temperature
If you only specify a temperature in °C, the Thermocycler will hold this temperature indefinitely until poweredoff.
tc_mod.set_block_temperature(4)
New in version 2.0.
Hold Time
If you set a temperature and a hold_time, the Thermocycler will hold the temperature for the specified amountof time. Time can be passed in as minutes or seconds.
With a hold time, it is important to also include the block_max_volume parameter. This is to ensure that thesample reaches the target temperature before the hold time counts down.
In the example below, the Thermocycler will hold the 50 µl samples at the specified temperature for 45 minutes and15 seconds.
If you do not specify a hold time the protocol will proceed once the temperature specified is reached.
tc_mod.set_block_temperature(4, hold_time_seconds=15, hold_time_minutes=45, block_max_→˓volume=50)
New in version 2.0.
Block Max Volume
The Thermocycler’s block temperature controller varies its behavior based on the amount of liquid in the wells of itslabware. Specifying an accurate volume allows the Thermocycler to precisely track the temperature of the samples.The block_max_volume parameter is specified in µL and is the volume of the most-full well in the labware that isloaded on the Thermocycler’s block. If not specified, it defaults to 25 µL.
tc_mod.set_block_temperature(4, hold_time_seconds=20, block_max_volume=80)
New in version 2.0.
Ramp Rate
Lastly, you can modify the ramp_rate in °C/sec for a given temperature.
tc_mod.set_block_temperature(4, hold_time_seconds=60, ramp_rate=0.5)
Warning: Do not modify the ramp_rate unless you know what you’re doing.
New in version 2.0.
Thermocycler Profiles
The Thermocycler can rapidly cycle through temperatures to execute heat-sensitive reactions. These cycles are definedas profiles.
24
Thermocycler profiles are defined for the Protocol API as lists of dicts. Each dict should have a temperaturekey, which specifies the temperature of a profile step, and either or both of hold_time_seconds orhold_time_minutes, which specify the duration of the step. For instance, this profile commands the Thermocy-cler to drive its temperature to 10 °C for 30 seconds, and then 60 °C for 45 seconds:
profile = [{'temperature': 10, 'hold_time_seconds': 30},{'temperature': 60, 'hold_time_seconds': 45}]
Once you have written your profile, you command the Thermocycler to execute it using ThermocyclerContext.execute_profile() (page 84). This function executes your profile steps multiple times depending on therepetitions parameter. It also takes a block_max_volume parameter, which is the same as that of theThermocyclerContext.set_block_temperature() (page 85) function.
For instance, you can execute the profile defined above 100 times for a 30 µL-per-well volume like this:
profile = [{'temperature': 10, 'hold_time_seconds': 30},{'temperature': 60, 'hold_time_seconds': 30}]
tc_mod.execute_profile(steps=profile, repetitions=100, block_max_volume=30)
Note: Temperature profiles only control the temperature of the block in the Thermocycler. You should set a lid tem-perature before executing the profile using ThermocyclerContext.set_lid_temperature() (page 86).
New in version 2.0.
Thermocycler Status
Throughout your protocol, you may want particular information on the current status of your Thermocycler. Beloware a few methods that allow you to do that.
Basic Status
The ThermocyclerContext.status property is one of the strings ‘holding at target’, ‘cooling’,‘heating’, or ‘idle’.
tc_mod.status
New in version 2.0.
Lid Position
The current status of the lid position. It can be one of the strings 'open', 'closed' or 'in_between'.
tc_mod.lid_position
New in version 2.0.
25

Heated Lid Temperature Status
The current status of the heated lid temperature controller. It can be one of the strings 'holding at target','heating', 'idle', or 'error'.
tc_mod.lid_temperature_status
New in version 2.0.
Block Temperature Status
The current status of the well block temperature controller. It can be one of the strings 'holding at target','cooling', 'heating', 'idle', or 'error'.
tc_mod.block_temperature_status
New in version 2.0.
Thermocycler Deactivate
At some points in your protocol, you may want to deactivate specific temperature controllers of yourThermocycler. This can be done with three methods, ThermocyclerContext.deactivate()(page 83), ThermocyclerContext.deactivate_lid() (page 83), ThermocyclerContext.deactivate_block() (page 83).
Deactivate
This deactivates both the well block and the heated lid of the Thermocycler.
tc_mod.deactivate()
Deactivate Lid
This deactivates only the heated lid of the Thermocycler.
tc_mod.deactivate_lid()
New in version 2.0.
Deactivate Block
This deactivates only the well block of the Thermocycler.
tc_mod.deactivate_block()
New in version 2.0.
26

5.5 Pipettes
When writing a protocol, you must inform the Protocol API about the pipettes you will be using on your OT-2. TheProtocol API then creates software objects called InstrumentContext (page 62), that represent the attachedpipettes.
Pipettes are loaded into a specific mount ('left' or 'right') on the OT-2 using the functionProtocolContext.load_instrument() (page 59) from the ProtocolContext (page 57) class. Thiswill return an InstrumentContext (page 62) object. See Building Block Commands (page 34) and ComplexCommands (page 43) for liquid handling commands from the InstrumentContext (page 62) class.
Loading A Pipette
Pipettes are specified in a protocol using the method ProtocolContext.load_instrument() (page 59). Thismethod requires the model of the instrument to load, the mount to load it in, and (optionally) a list of associatedtipracks:
from opentrons import protocol_api
metadata = {'apiLevel': '2.2'}
def run(protocol: protocol_api.ProtocolContext):# Load a P50 multi on the left slotleft = protocol.load_instrument('p50_multi', 'left')# Load a P1000 Single on the right slot, with two racks of tipstiprack1 = protocol.load_labware('opentrons_96_tiprack_1000ul', 1)tiprack2 = protocol.load_labware('opentrons_96_tiprack_1000ul', 2)right = protocol.load_instrument('p1000_single', 'right',
tip_racks=[tiprack1, tiprack2])
New in version 2.0.
Note: When you load a pipette in a protocol, you inform the OT-2 that you want the specified pipette to be present.Even if you do not use the pipette anywhere else in your protocol, the Opentrons App and the OT-2 will not let yourprotocol proceed until all pipettes loaded with load_instrument are attached to the OT-2.
Pipette Models
This table lists the model names, which are passed to ProtocolContext.load_instrument() (page 59), foreach model of pipette sold by Opentrons.
27
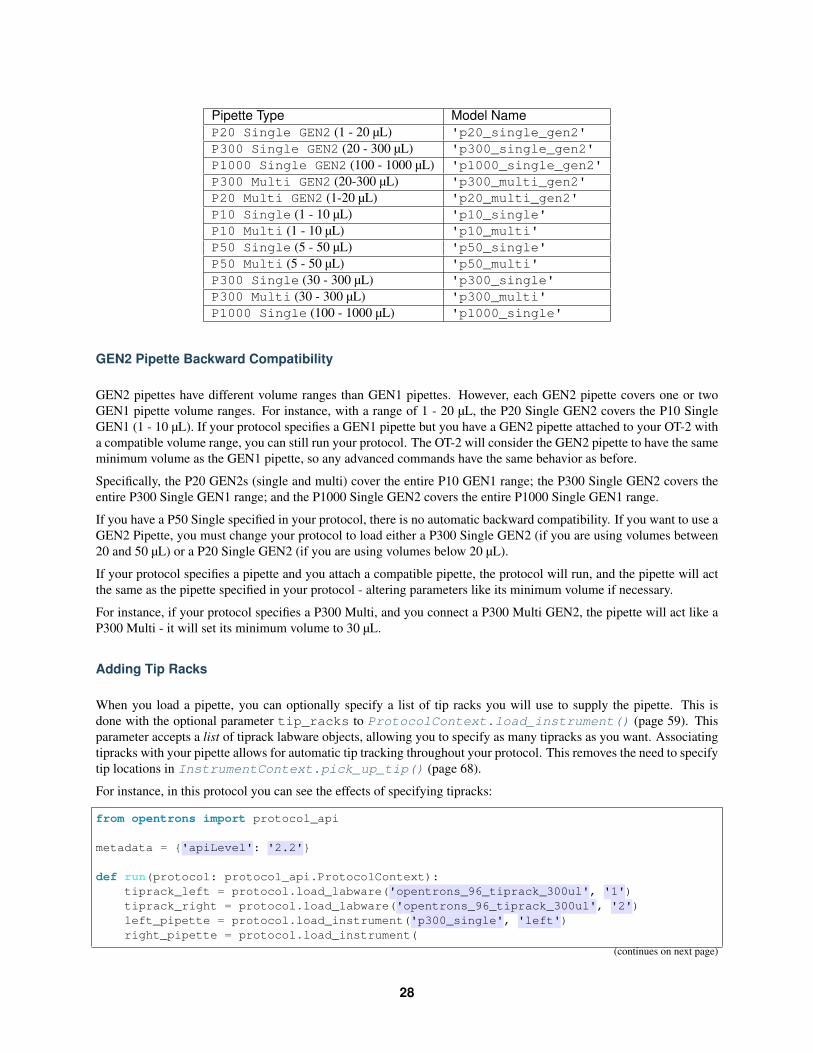
Pipette Type Model NameP20 Single GEN2 (1 - 20 µL) 'p20_single_gen2'P300 Single GEN2 (20 - 300 µL) 'p300_single_gen2'P1000 Single GEN2 (100 - 1000 µL) 'p1000_single_gen2'P300 Multi GEN2 (20-300 µL) 'p300_multi_gen2'P20 Multi GEN2 (1-20 µL) 'p20_multi_gen2'P10 Single (1 - 10 µL) 'p10_single'P10 Multi (1 - 10 µL) 'p10_multi'P50 Single (5 - 50 µL) 'p50_single'P50 Multi (5 - 50 µL) 'p50_multi'P300 Single (30 - 300 µL) 'p300_single'P300 Multi (30 - 300 µL) 'p300_multi'P1000 Single (100 - 1000 µL) 'p1000_single'
GEN2 Pipette Backward Compatibility
GEN2 pipettes have different volume ranges than GEN1 pipettes. However, each GEN2 pipette covers one or twoGEN1 pipette volume ranges. For instance, with a range of 1 - 20 µL, the P20 Single GEN2 covers the P10 SingleGEN1 (1 - 10 µL). If your protocol specifies a GEN1 pipette but you have a GEN2 pipette attached to your OT-2 witha compatible volume range, you can still run your protocol. The OT-2 will consider the GEN2 pipette to have the sameminimum volume as the GEN1 pipette, so any advanced commands have the same behavior as before.
Specifically, the P20 GEN2s (single and multi) cover the entire P10 GEN1 range; the P300 Single GEN2 covers theentire P300 Single GEN1 range; and the P1000 Single GEN2 covers the entire P1000 Single GEN1 range.
If you have a P50 Single specified in your protocol, there is no automatic backward compatibility. If you want to use aGEN2 Pipette, you must change your protocol to load either a P300 Single GEN2 (if you are using volumes between20 and 50 µL) or a P20 Single GEN2 (if you are using volumes below 20 µL).
If your protocol specifies a pipette and you attach a compatible pipette, the protocol will run, and the pipette will actthe same as the pipette specified in your protocol - altering parameters like its minimum volume if necessary.
For instance, if your protocol specifies a P300 Multi, and you connect a P300 Multi GEN2, the pipette will act like aP300 Multi - it will set its minimum volume to 30 µL.
Adding Tip Racks
When you load a pipette, you can optionally specify a list of tip racks you will use to supply the pipette. This isdone with the optional parameter tip_racks to ProtocolContext.load_instrument() (page 59). Thisparameter accepts a list of tiprack labware objects, allowing you to specify as many tipracks as you want. Associatingtipracks with your pipette allows for automatic tip tracking throughout your protocol. This removes the need to specifytip locations in InstrumentContext.pick_up_tip() (page 68).
For instance, in this protocol you can see the effects of specifying tipracks:
from opentrons import protocol_api
metadata = {'apiLevel': '2.2'}
def run(protocol: protocol_api.ProtocolContext):tiprack_left = protocol.load_labware('opentrons_96_tiprack_300ul', '1')tiprack_right = protocol.load_labware('opentrons_96_tiprack_300ul', '2')left_pipette = protocol.load_instrument('p300_single', 'left')right_pipette = protocol.load_instrument(
(continues on next page)
28

(continued from previous page)
'p300_multi', 'right', tip_racks=[tiprack_right])
# You must specify the tip location for the left pipette, which was# loaded without specifying tip_racksleft_pipette.pick_up_tip(tiprack['A1'])left_pipette.drop_tip()
# And you have to do it every time you call pick_up_tip, doing all# your own tip trackingleft_pipette.pick_up_tip(tiprack['A2'])left_pipette.drop_tip()left_pipette.pick_up_tip(tiprack['A3'])left_pipette.drop_tip()
# Since you specified tip_racks when loading the right pipette, it will# automatically pick up from A1 of its associated tiprackright_pipette.pick_up_tip()right_pipette.drop_tip()
# And further calls to pick_up_tip will automatically progress through# the tips in the rackright_pipette.pick_up_tip()right_pipette.drop_tip()right_pipette.pick_up_tip()right_pipette.drop_tip()
This is further discussed in Building Block Commands (page 34) and Complex Commands (page 43).
New in version 2.0.
Modifying Pipette Behaviors
The OT-2 has many default behaviors that are occasionally appropriate to change for a particular experiment. Thissection details those behaviors.
Plunger Flow Rates
Opentrons pipettes aspirate or dispense at different rates. These flow rates can be changed on a loadedInstrumentContext (page 62) at any time, in units of µL/sec by altering InstrumentContext.flow_rate(page 66). This has the following attributes:
• InstrumentContext.flow_rate.aspirate: The aspirate flow rate, in µL/s
• InstrumentContext.flow_rate.dispense: The dispense flow rate, in µL/s
• InstrumentContext.flow_rate.blow_out: The blow out flow rate, in µL/s
Each of these attributes can be altered without affecting the others.
from opentrons import protocol_api
metadata = {'apiLevel': '2.2'}
def run(protocol: protocol_api.ProtocolContext):tiprack = protocol.load_labware('opentrons_96_tiprack_300ul', '1')pipette = protocol.load_instrument(
(continues on next page)
29
(continued from previous page)
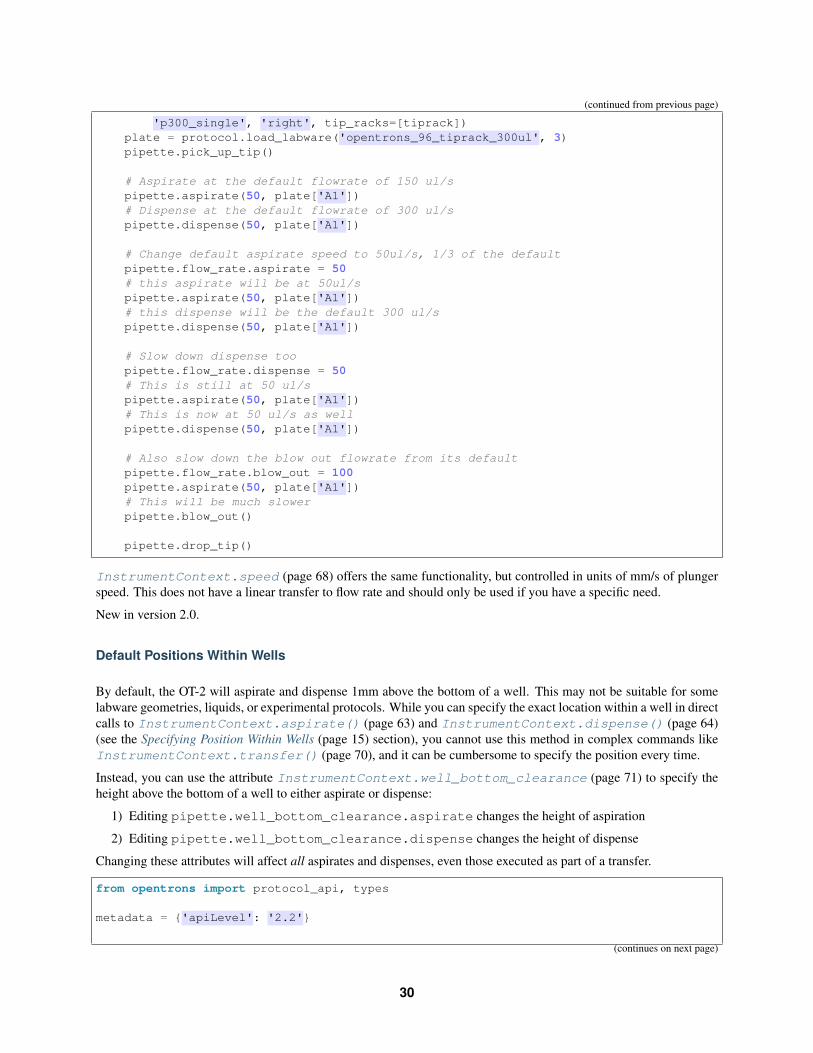
'p300_single', 'right', tip_racks=[tiprack])plate = protocol.load_labware('opentrons_96_tiprack_300ul', 3)pipette.pick_up_tip()
# Aspirate at the default flowrate of 150 ul/spipette.aspirate(50, plate['A1'])# Dispense at the default flowrate of 300 ul/spipette.dispense(50, plate['A1'])
# Change default aspirate speed to 50ul/s, 1/3 of the defaultpipette.flow_rate.aspirate = 50# this aspirate will be at 50ul/spipette.aspirate(50, plate['A1'])# this dispense will be the default 300 ul/spipette.dispense(50, plate['A1'])
# Slow down dispense toopipette.flow_rate.dispense = 50# This is still at 50 ul/spipette.aspirate(50, plate['A1'])# This is now at 50 ul/s as wellpipette.dispense(50, plate['A1'])
# Also slow down the blow out flowrate from its defaultpipette.flow_rate.blow_out = 100pipette.aspirate(50, plate['A1'])# This will be much slowerpipette.blow_out()
pipette.drop_tip()
InstrumentContext.speed (page 68) offers the same functionality, but controlled in units of mm/s of plungerspeed. This does not have a linear transfer to flow rate and should only be used if you have a specific need.
New in version 2.0.
Default Positions Within Wells
By default, the OT-2 will aspirate and dispense 1mm above the bottom of a well. This may not be suitable for somelabware geometries, liquids, or experimental protocols. While you can specify the exact location within a well in directcalls to InstrumentContext.aspirate() (page 63) and InstrumentContext.dispense() (page 64)(see the Specifying Position Within Wells (page 15) section), you cannot use this method in complex commands likeInstrumentContext.transfer() (page 70), and it can be cumbersome to specify the position every time.
Instead, you can use the attribute InstrumentContext.well_bottom_clearance (page 71) to specify theheight above the bottom of a well to either aspirate or dispense:
1) Editing pipette.well_bottom_clearance.aspirate changes the height of aspiration
2) Editing pipette.well_bottom_clearance.dispense changes the height of dispense
Changing these attributes will affect all aspirates and dispenses, even those executed as part of a transfer.
from opentrons import protocol_api, types
metadata = {'apiLevel': '2.2'}
(continues on next page)
30

(continued from previous page)
def run(protocol: protocol_api.ProtocolContext):tiprack = protocol.load_labware('opentrons_96_tiprack_300ul', '1')pipette = protocol.load_instrument('p300_single', 'right')plate = protocol.load_labware('opentrons_96_tiprack_300ul', 3)pipette.pick_up_tip()
# Aspirate 1mm above the bottom of the wellpipette.aspirate(50, plate['A1'])# Dispense 1mm above the bottom of the wellpipette.dispense(50, plate['A1'])
# Aspirate 2mm above the bottom of the wellpipette.well_bottom_clearance.aspirate = 2pipette.aspirate(50, plate['A1'])# Still dispensing 1mm above the bottompipette.dispense(50, plate['A1'])pipette.aspirate(50, plate['A1'])
# Dispense high above the wellpipette.well_bottom_clearance.dispense = 10pipette.dispense(50, plate['A1'])
New in version 2.0.
Gantry Speed
The OT-2’s gantry usually moves as fast as it can given its construction; this makes protocol execution faster and savestime. However, some experiments or liquids may require slower, gentler movements over protocol execution time. Inthis case, you can alter the OT-2 gantry’s speed when a specific pipette is moving by setting InstrumentContext.default_speed (page 64). This is a value in mm/s that controls the overall speed of the gantry. Its default is 400mm/s.
Warning: The default of 400 mm/s was chosen because it is the maximum speed Opentrons knows will workwith the gantry. Your specific robot may be able to move faster, but you shouldn’t make this value higher than thedefault without extensive experimentation.
from opentrons import protocol_api, types
metadata = {'apiLevel': '2.2'}
def run(protocol: protocol_api.ProtocolContext):pipette = protocol.load_instrument('p300_single', 'right')# Move to 50mm above the front left of slot 5, very quicklypipette.move_to(protocol.deck.position_for('5').move(types.Point(z=50)))# Slow down the pipettepipette.default_speed = 100# Move to 50mm above the front left of slot 9, much more slowlypipette.move_to(protocol.deck.position_for('9').move(types.Point(z=50)))
New in version 2.0.
31

Per-Axis Speed Limits
In addition to controlling the overall speed of motions, you can set per-axis speed limits for the OT-2’s axes. Unlikethe overall speed, which is controlled per-instrument, axis speed limits take effect for both pipettes and all motions.These can be set for the X (left-and-right gantry motion), Y (forward-and-back gantry motion), Z (left pipette up-and-down motion), and A (right pipette up-and-down motion) using ProtocolContext.max_speeds (page 61).This works like a dictionary, where the keys are axes, assigning to a key sets a max speed, and deleting a key or settingit to None resets that axis’s limit to the default:
metadata = {'apiLevel': '2.2'}
def run(protocol):protocol.max_speeds['X'] = 50 # limit x axis to 50 mm/sdel protocol.max_speeds['X'] # reset x axis limitprotocol.max_speeds['A'] = 10 # limit a axis to 10 mm/sprotocol.max_speeds['A'] = None # reset a axis limit
You cannot set limits for the pipette plunger axes with this mechanism; instead, set the flow rates or plunger speeds asdescribed in Plunger Flow Rates (page 29).
New in version 2.0.
Defaults
Head Speed: 400 mm/s
Well Bottom Clearances
• Aspirate default: 1mm above the bottom
• Dispense default: 1mm above the bottom
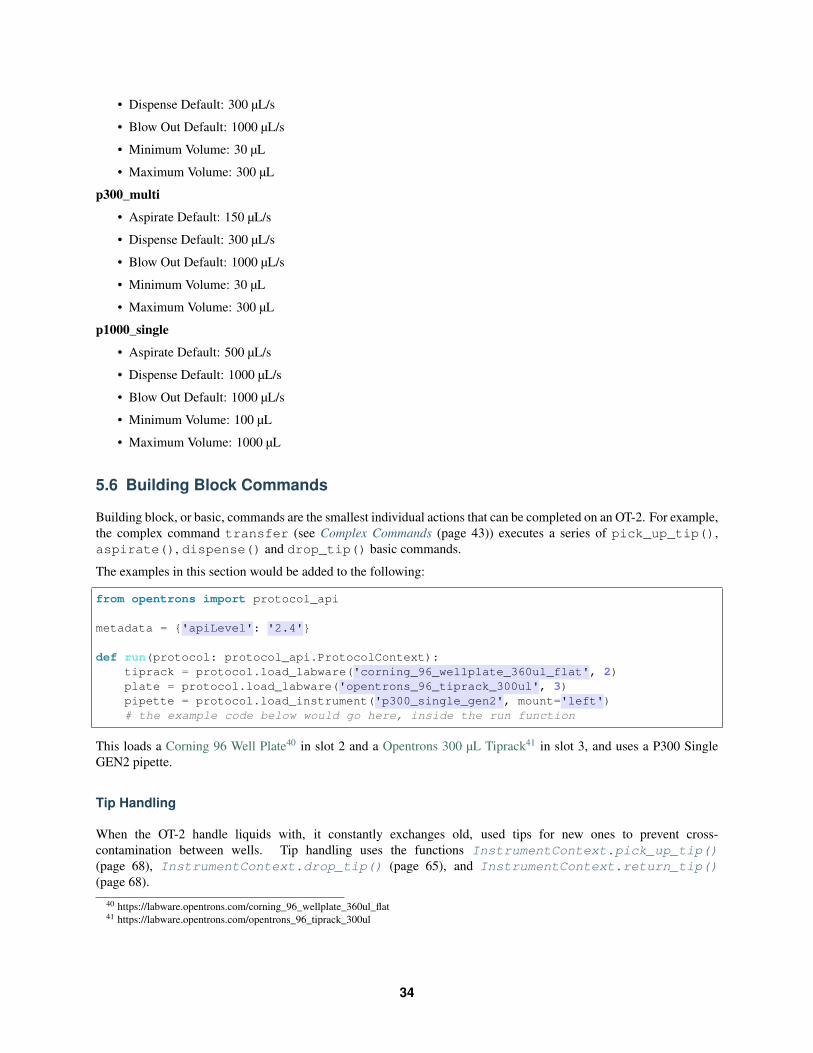
p20_single_gen2
• Aspirate Default: 3.78 µL/s
• Dispense Default: 3.78 µL/s
• Blow Out Default: 3.78 µL/s
• Minimum Volume: 1 µL
• Maximum Volume: 20 µL
p300_single_gen2
• Aspirate Default: 46.43 µL/s
• Dispense Default: 46.43 µL/s
• Blow Out Default: 46.43 µL/s
• Minimum Volume: 20 µL
• Maximum Volume: 300 µL
p1000_single_gen2
• Aspirate Default: 137.35 µL/s
• Dispense Default: 137.35 µL/s
• Blow Out Default: 137.35 µL/s
• Minimum Volume: 100 µL
• Maximum Volume: 1000 µL
32

p20_multi_gen2
• Aspirate Default: 7.6 µL/s
• Dispense Default: 7.6 µL/s
• Blow Out Default: 7.6 µL/s
• Minimum Volume: 1 µL
• Maximum Volume: 20 µL
p300_multi_gen2
• Aspirate Default: 94 µL/s
• Dispense Default: 94 µL/s
• Blow Out Default: 94 µL/s
• Minimum Volume: 20 µL
• Maximum Volume: 300 µL
p10_single
• Aspirate Default: 5 µL/s
• Dispense Default: 10 µL/s
• Blow Out Default: 1000 µL/s
• Minimum Volume: 1 µL
• Maximum Volume: 10 µL
p10_multi
• Aspirate Default: 5 µL/s
• Dispense Default: 10 µL/s
• Blow Out Default: 1000 µL/s
• Minimum Volume: 1 µL
• Maximum Volume: 10 µL
p50_single
• Aspirate Default: 25 µL/s
• Dispense Default: 50 µL/s
• Blow Out Default: 1000 µL/s
• Minimum Volume: 5 µL
• Maximum Volume: 50 µL
p50_multi
• Aspirate Default: 25 µL/s
• Dispense Default: 50 µL/s
• Blow Out Default: 1000 µL/s
• Minimum Volume: 5 µL
• Maximum Volume: 50 µL
p300_single
• Aspirate Default: 150 µL/s
33
• Dispense Default: 300 µL/s
• Blow Out Default: 1000 µL/s
• Minimum Volume: 30 µL
• Maximum Volume: 300 µL
p300_multi
• Aspirate Default: 150 µL/s
• Dispense Default: 300 µL/s
• Blow Out Default: 1000 µL/s
• Minimum Volume: 30 µL
• Maximum Volume: 300 µL
p1000_single
• Aspirate Default: 500 µL/s
• Dispense Default: 1000 µL/s
• Blow Out Default: 1000 µL/s
• Minimum Volume: 100 µL
• Maximum Volume: 1000 µL
5.6 Building Block Commands
Building block, or basic, commands are the smallest individual actions that can be completed on an OT-2. For example,the complex command transfer (see Complex Commands (page 43)) executes a series of pick_up_tip(),aspirate(), dispense() and drop_tip() basic commands.
The examples in this section would be added to the following:
from opentrons import protocol_api
metadata = {'apiLevel': '2.4'}
def run(protocol: protocol_api.ProtocolContext):tiprack = protocol.load_labware('corning_96_wellplate_360ul_flat', 2)plate = protocol.load_labware('opentrons_96_tiprack_300ul', 3)pipette = protocol.load_instrument('p300_single_gen2', mount='left')# the example code below would go here, inside the run function
This loads a Corning 96 Well Plate40 in slot 2 and a Opentrons 300 µL Tiprack41 in slot 3, and uses a P300 SingleGEN2 pipette.
Tip Handling
When the OT-2 handle liquids with, it constantly exchanges old, used tips for new ones to prevent cross-contamination between wells. Tip handling uses the functions InstrumentContext.pick_up_tip()(page 68), InstrumentContext.drop_tip() (page 65), and InstrumentContext.return_tip()(page 68).
40 https://labware.opentrons.com/corning_96_wellplate_360ul_flat41 https://labware.opentrons.com/opentrons_96_tiprack_300ul
34

Pick Up Tip
Before any liquid handling can be done, your pipette must have a tip on it. The command InstrumentContext.pick_up_tip() (page 68) will move the pipette over to the specified tip, then press down into it to create a vacuumseal. The below example picks up the tip at location 'A1' of the tiprack previously loaded in slot 3.
pipette.pick_up_tip(tiprack['A1'])
If you have associated a tiprack with your pipette such as in the Pipettes (page 27) or Protocols and Instruments(page 57) sections, then you can simply call
pipette.pick_up_tip()
This will use the next available tip from the list of tipracks passed in to the tip_racks argument ofProtocolContext.load_instrument() (page 59).
New in version 2.0.
Drop Tip
Once finished with a tip, the pipette will remove the tip when we call InstrumentContext.drop_tip()(page 65). You can specify where to drop the tip by passing in a location. The below example drops the tip backat its original location on the tip rack. If no location is specified, the OT-2 will drop the tip in the fixed trash in slot 12of the deck.
pipette.pick_up_tip()pipette.drop_tip(tiprack['A1']) # drop back in A1 of the tiprackpipette.pick_up_tip()pipette.drop_tip() # drop in the fixed trash on the deck
New in version 2.0.
Return Tip
To return the tip to the original location, you can call InstrumentContext.return_tip() (page 68). Theexample below will automatically return the tip to 'A3' on the tip rack.
pipette.pick_up_tip(tiprack['A3'])pipette.return_tip()
In API version 2.2 or above:
tip_rack = protocol.load_labware('opentrons_96_tiprack_300ul', 1)
pipette = protocol.load_instrument('p300_single_gen2', mount='left', tip_racks=[tip_rack])
pipette.pick_up_tip() # picks up tip_rack:A1pipette.return_tip()pipette.pick_up_tip() # picks up tip_rack:B1
In API version 2.0 and 2.1:
35

tip_rack = protocol.load_labware('opentrons_96_tiprack_300ul', 1)
pipette = protocol.load_instrument('p300_single_gen2', mount='left', tip_racks=[tip_rack])
pipette.pick_up_tip() # picks up tip_rack:A1pipette.return_tip()pipette.pick_up_tip() # picks up tip_rack:A1
Iterating Through Tips
For this section, instead of using the protocol defined above, consider this setup:
from opentrons import protocol_api
metadata = {'apiLevel': '2.2'}
def run(protocol: protocol_api.ProtocolContext):plate = protocol.load_labware(
'corning_96_wellplate_360ul_flat', 2)tip_rack_1 = protocol.load_labware(
'opentrons_96_tiprack_300ul', 3)tip_rack_2 = protocol.load_labware(
'opentrons_96_tiprack_300ul', 4)pipette = protocol.load_instrument(
'p300_single_gen2', mount='left', tip_racks=[tip_rack_1, tip_rack_2])
This loads a Corning 96 Well Plate42 in slot 2 and two Opentrons 300ul Tiprack43 in slots 3 and 4 respectively, anduses a P300 Single GEN2 pipette.
When a list of tip racks is associated with a pipette in its tip_racks argument, the pipette will automatically pick upthe next unused tip in the list whenever you call InstrumentContext.pick_up_tip() (page 68). The pipettewill first use all tips in the first tiprack, then move on to the second, and so on:
pipette.pick_up_tip() # picks up tip_rack_1:A1pipette.return_tip()pipette.pick_up_tip() # picks up tip_rack_1:A2pipette.drop_tip() # automatically drops in trash
# use loop to pick up tips tip_rack_1:A3 through tip_rack_2:H12tips_left = 94 + 96 # add up the number of tips leftover in both tipracksfor _ in range(tips_left):
pipette.pick_up_tip()pipette.return_tip()
If you try to InstrumentContext.pick_up_tip() (page 68) again when all the tips have been used, theProtocol API will show you an error:
# this will raise an exception if run after the previous code blockpipette.pick_up_tip()
To change the location of the first tip used by the pipette, you can use InstrumentContext.starting_tip(page 69):
42 https://labware.opentrons.com/corning_96_wellplate_360ul_flat43 https://labware.opentrons.com/opentrons_96_tiprack_300ul
36

pipette.starting_tip = tip_rack_1.well('C3')pipette.pick_up_tip() # pick up C3 from "tip_rack_1"pipette.return_tip()
To reset the tip tracking, you can call InstrumentContext.reset_tipracks() (page 68):
# Use up all tipsfor _ in range(96+96):
pipette.pick_up_tip()pipette.return_tip()
# Reset the tip trackerpipette.reset_tipracks()
# Picks up a tip from well A1 of the first tip rackpipette.pick_up_tip()
New in version 2.0.
Liquid Control
This section describes the InstrumentContext (page 62) ‘s liquid-handling commands.
The examples in this section should be inserted in the following:
metadata = {'apiLevel': '2.2'}
def run(protocol):tiprack = protocol.load_labware('corning_96_wellplate_360ul_flat', 2)plate = protocol.load_labware('opentrons_96_tiprack_300ul', 3)pipette = protocol.load_instrument('p300_single_gen2', mount='left', tip_
→˓racks=[tiprack])pipette.pick_up_tip()# example code goes here
This loads a Corning 96 Well Plate44 in slot 2 and a Opentrons 300ul Tiprack45 in slot 3, and uses a P300 Single GEN2pipette.
Aspirate
To aspirate is to pull liquid up into the pipette’s tip. When calling InstrumentContext.aspirate() (page 63)on a pipette, you can specify the volume to aspirate in µL, where to aspirate from, and how fast to aspirate liquid.
pipette.aspirate(50, plate['A1'], rate=2.0) # aspirate 50uL from plate:A1
Now the pipette’s tip is holding 50 µL.
The location parameter is either a well (like plate['A1']) or a position within a well, like the return value ofplate['A1'].bottom.
The rate parameter is a multiplication factor of the pipette’s default aspiration flow rate. The default aspiration flowrate for all pipettes is in the Defaults (page 32) section.
44 https://labware.opentrons.com/corning_96_wellplate_360ul_flat45 https://labware.opentrons.com/opentrons_96_tiprack_300ul
37
You can also simply specify the volume to aspirate, and not mention a location. The pipette will aspirate from itscurrent location (which we previously set as plate['A1']).
pipette.aspirate(50) # aspirate 50uL from current position
Now our pipette’s tip is holding 100 µL.
Note: In version 1 of this API, aspirate (and dispense) would inspect the types of the volume and locationarguments and do the right thing if you specified only a location or specified location and volume out of order. In thisand future versions of the Python Protocol API, this is no longer true. Like any other Python function, if you arespecifying arguments by position without using their names, you must always specify them in order.
Note: By default, the OT-2 will move to 1mm above the bottom of the target well before aspirating. You canchange this by using a well position function like Well.bottom() (page 75) (see Specifying Position Within Wells(page 15)) every time you call aspirate, or - if you want to change the default throughout your protocol - youcan change the default offset with InstrumentContext.well_bottom_clearance (page 71) (see DefaultPositions Within Wells (page 30)).
New in version 2.0.
Dispense
To dispense is to push out liquid from the pipette’s tip. The usage of InstrumentContext.dispense()(page 64) in the Protocol API is similar to InstrumentContext.aspirate() (page 63), in that you can specifyvolume in µL and location, or only volume.
pipette.dispense(50, plate['B1'], rate=2.0) # dispense 50uL to plate:B1 at twice the→˓normal ratepipette.dispense(50) # dispense 50uL to current position at the normal→˓rate
The location parameter is either a well (like plate['A1']) or a position within a well, like the return value ofplate['A1'].bottom.
The rate parameter is a multiplication factor of the pipette’s default dispense flow rate. The default dispense flowrate for all pipettes is in the Defaults (page 32) section.
Note: By default, the OT-2 will move to 1mm above the bottom of the target well before dispensing. You canchange this by using a well position function like Well.bottom() (page 75) (see Specifying Position Within Wells(page 15)) every time you call dispense, or - if you want to change the default throughout your protocol - youcan change the default offset with InstrumentContext.well_bottom_clearance (page 71) (see DefaultPositions Within Wells (page 30)).
Note: In version 1 of this API, dispense (and aspirate) would inspect the types of the volume and locationarguments and do the right thing if you specified only a location or specified location and volume out of order. In thisand future versions of the Python Protocol API, this is no longer true. Like any other Python function, if you arespecifying arguments by position without using their names, you must always specify them in order.
New in version 2.0.
38
Blow Out
To blow out is to push an extra amount of air through the pipette’s tip, to make sure that any remaining droplets areexpelled.
When calling InstrumentContext.blow_out() (page 64), you can specify a location to blow out the remain-ing liquid. If no location is specified, the pipette will blow out from its current position.
pipette.blow_out() # blow out in current locationpipette.blow_out(plate['B3']) # blow out in current plate:B3
New in version 2.0.
Touch Tip
To touch tip is to move the pipette’s currently attached tip to four opposite edges of a well, to knock off any dropletsthat might be hanging from the tip.
When calling InstrumentContext.touch_tip() (page 69) on a pipette, you have the option to specify alocation where the tip will touch the inner walls.
InstrumentContext.touch_tip() (page 69) can take up to 4 arguments: touch_tip(location,radius, v_offset, speed).
pipette.touch_tip() # touch tip within current locationpipette.touch_tip(v_offset=-2) # touch tip 2mm below the top of the current locationpipette.touch_tip(plate['B1']) # touch tip within plate:B1pipette.touch_tip(plate['B1'], speed=100) # touch tip within plate:B1 at 100 mm/spipette.touch_tip(plate['B1'], # touch tip in plate:B1, at 75% of total radius and -→˓2mm from top of well
radius=0.75,v_offset=-2)
New in version 2.0.
Mix
To mix is to perform a series of aspirate and dispense commands in a row on a single location. Instead ofhaving to write those commands out every time, you can call InstrumentContext.mix() (page 67).
The mix command takes up to three arguments: mix(repetitions, volume, location):
# mix 4 times, 100uL, in plate:A2pipette.mix(4, 100, plate.['A2'])# mix 3 times, 50uL, in current locationpipette.mix(3, 50)# mix 2 times, pipette's max volume, in current locationpipette.mix(2)
Note: Mixes consist of aspirates and then immediate dispenses. In between these actions, the pipette moves up andout of the target well. This is normal, and is done to avoid incorrect aspirate and dispense actions.
New in version 2.0.
39
Air Gap
When dealing with certain liquids, you may need to aspirate air after aspirating the liquid to prevent it from sliding outof the pipette’s tip. A call to InstrumentContext.air_gap() (page 63) with a volume in µL will aspirate thatmuch air into the tip. air_gap takes up to two arguments: air_gap(volume, height):
pipette.aspirate(100, plate['B4'])pipette.air_gap(20)pipette.drop_tip()
New in version 2.0.
Utility Commands
Move To
You can use InstrumentContext.move_to() (page 67) to move a pipette to any location on the deck.
For example, you can move to the first tip in your tip rack:
pipette.move_to(tiprack['A1'].top())
Unlike commands that require labware, like Aspirate (page 37) or Dispense (page 38), InstrumentContext.move_to() (page 67) deals with types.Location (page 86) instances, which combine positions in Deck Coor-dinates (page 91) and associated Labware (page 72) instances. You don’t have to create them yourself; this is whatis returned from methods such as Well.top() (page 76) and Well.bottom() (page 75). It does mean, however,that you can’t move to a well directly; you must use Well.top() (page 76) or build a types.Location (page 86)yourself.
You can also specify at what height you would like the robot to move to inside of a location using Well.top()(page 76) and Well.bottom() (page 75) methods on that location (more on these methods and others like them inthe Specifying Position Within Wells (page 15) section):
pipette.move_to(plate['A1'].bottom()) # move to the bottom of well A1pipette.move_to(plate['A1'].top()) # move to the top of well A1pipette.move_to(plate['A1'].bottom(2)) # move to 2mm above the bottom of well A1pipette.move_to(plate['A1'].top(-2)) # move to 2mm below the top of well A1
The above commands will cause the robot’s head to first move upwards, then over to above the target location, thenfinally downwards until the target location is reached. If instead you would like the robot to move in a straight line tothe target location, you can set the movement strategy to 'direct'.
pipette.move_to(plate['A1'].top(), force_direct=True)
Warning: Moving without an arc will run the risk of colliding with things on your deck. Be very careful whenusing this option.
Usually the above option is useful when moving inside of a well. Take a look at the below sequence of movements,which first move the head to a well, and use ‘direct’ movements inside that well, then finally move on to a differentwell.
40
pipette.move_to(plate['A1'].top())pipette.move_to(plate['A1'].bottom(1), force_direct=True)pipette.move_to(plate['A1'].top(-2), force_direct=True)pipette.move_to(plate['A2'].top())
New in version 2.0.
Delay
Sometimes you need to pause your protocol, for instance to wait for something to incubate. You can useProtocolContext.delay() (page 58) to pause your protocol for a specific amount of time. delay is a methodof ProtocolContext (page 57) since it concerns the protocol and the OT-2 as a whole.
The value passed into delay() is the number of minutes or seconds the OT-2 will wait until moving on to the nextcommand.
protocol.delay(seconds=2) # pause for 2 secondsprotocol.delay(minutes=5) # pause for 5 minutesprotocol.delay(minutes=5, seconds=2) # pause for 5 minutes and 2 seconds
User-Specified Pause
The method ProtocolContext.pause() (page 61) will pause protocol execution at a specific step. You canresume by pressing ‘resume’ in your Opentrons App. You can optionally specify a message that will be displayed inthe Opentrons App when protocol execution pauses.
from opentrons import protocol_api
metadata = {'apiLevel': '2.2'}
def run(protocol: protocol_api.ProtocolContext):# The start of your protocol goes here...
# The OT-2 stops here until you press resume. It will display the message in# the Opentrons App. You do not need to specify a message, but it makes things# more clear.protocol.pause('Time to take a break')
New in version 2.0.
Homing
You can manually request that the OT-2 home during protocol execution. This is typically not necessary; however,if at any point you will disengage motors or move the gantry with your hand, you may want to command a homeafterwards.
To home the entire OT-2, you can call ProtocolContext.home() (page 59).
To home a specific pipette’s Z axis and plunger, you can call InstrumentContext.home() (page 66).
To home a specific pipette’s plunger only, you can call InstrumentContext.home_plunger() (page 66).
None of these functions take any arguments:
41
from opentrons import protocol_api, types
metadata = {'apiLevel': '2.2'}
def run(protocol: protocol_api.ProtocolContext):pipette = protocol.load_instrument('p300_single', 'right')protocol.home() # Homes the gantry, z axes, and plungerspipette.home() # Homes the right z axis and plungerpipette.home_plunger() # Homes the right plunger
New in version 2.0.
Comment
The method ProtocolContext.comment() (page 58) lets you display messages in the Opentrons App duringprotocol execution:
from opentrons import protocol_api, types
metadata = {'apiLevel': '2.2'}
def run(protocol: protocol_api.ProtocolContext):protocol.comment('Hello, world!')
New in version 2.0.
Control and Monitor Robot Rail Lights
You can turn the robot rail lights on or off in the protocol using ProtocolContext.set_rail_lights()(page 62):
from opentrons import protocol_api
metadata = {'apiLevel': '2.5'}
def run(protocol: protocol_api.ProtocolContext):# turn on robot rail lightsprotocol.set_rail_lights(True)
# turn off robot rail lightsprotocol.set_rail_lights(False)
New in version 2.5.
You can also check whether the rail lights are on or off in the protocol using ProtocolContext.rail_lights_on (page 62):
protocol.rail_lights_on # returns True when the lights are on,# False when the lights are off
New in version 2.5.
42
Monitor Robot Door
The door safety switch feature flag has been added to the OT-2 software since the 3.19.0 release. Enabling the featureflag allows your robot to pause a running protocol and prohibit the protocol from running when the robot door is open.
You can also check whether or not the robot door is closed at a specific point in time in the protocol usingProtocolContext.door_closed (page 59):
protocol.door_closed # return True when the door is closed,# False when the door is open
Note: Both the top window and the front door must be closed in order for the robot to report the door is closed.
Warning: If you chose to enable the door safety switch feature flag, you should only use ProtocolContext.door_closed (page 59) as a form of status check, and should not use it to control robot behavior. If you wish toimplement custom method to pause or resume protocol using ProtocolContext.door_closed (page 59),make sure you have first disabled the feature flag.
New in version 2.5.
5.7 Complex Commands
Overview
The commands in this section execute long or complex series of the commands described in the Building BlockCommands (page 34) section. These advanced commands make it easier to handle larger groups of wells and repetitiveactions.
The examples in this section will use the following set up:
43
from opentrons import protocol_api
metadata = {'apiLevel': '2.2'}
def run(protocol: protocol_api.ProtocolContext):plate = protocol.load_labware('corning_96_wellplate_360ul_flat', 1)tiprack = protocol.load_labware('opentrons_96_tiprack_300ul', 2)tiprack_multi = protocol.load_labware('opentrons_96_tiprack_300ul', 3)pipette = protocol.load_instrument('p300_single', mount='left', tip_
→˓racks=[tiprack])pipette_multi = protocol.load_instrument('p300_multi', mount='right', tip_
→˓racks=[tiprack_multi])
# The code used in the rest of the examples goes here
This loads a Corning 96 Well Plate46 in slot 1 and a Opentrons 300 µL Tiprack47 in slot 2 and 3, and uses a P300Single pipette and a P300 Multi pipette.
You can follow along and simulate the protocol using our protocol simulator, which can be installed by following theinstructions at Using Python For Protocols (page 6).
There are three complex liquid handling commands:
Method One source well toa group of destinationwells
Many source wells toa group of destinationwells
Many source wells toone destination well
InstrumentContext.transfer() (page 70)
Yes Yes Yes
InstrumentContext.distribute() (page 65)
Yes Yes No
InstrumentContext.consolidate()(page 64)
No Yes Yes
You can also refer to these images for further clarification.
46 https://labware.opentrons.com/corning_96_wellplate_360ul_flat47 https://labware.opentrons.com/opentrons_96_tiprack_300ul
44

Transfer
Distribute
45

Consolidate
Parameters
Parameters for the complex liquid handling are listed here in order of operation. Check out the Complex LiquidHandling Parameters (page 52) section for examples on how to use these parameters.
Parame-ter(s)
Options Transfer De-faults
Distribute De-faults
Consolidate De-faults
new_tip 'always', 'never','once'
'once' 'once' 'once'
mix_before,mix_after
mix_before andmix_after require a tu-ple of (repetitions, volume)
No mixing ei-ther before aspi-rate or after dis-pense
No mixing beforeaspirate, mixing af-ter dispense is ig-nored
Mixing before aspirateis ignored, no mix af-ter dispense by default
touch_tipTrue or False, if true touchtip on both source and destina-tion wells
No touch tip bydefault
No touch tip by de-fault
No touch tip by de-fault
air_gap Volume in µL 0 0 0blow_out True or False, if true blow
out at dispenseFalse False False
trash True or False, if false returntip to tiprack
True True True
carryoverTrue or False, if true splitvolumes that exceed max vol-ume of pipette into smallerquantities
True False False
disposal_volumeExtra volume in µL to hold in tipwhile dispensing; better accura-cies in multi-dispense
0 10% of pipette maxvolume
0
46

Transfer
The most versatile complex liquid handling function is InstrumentContext.transfer() (page 70). For amajority of use cases you will most likely want to use this complex command.
Below you will find a few scenarios using the InstrumentContext.transfer() (page 70) command.
New in version 2.0.
Basic
This example below transfers 100 µL from well 'A1' to well 'B1' using the P300 Single pipette, automaticallypicking up a new tip and then disposing of it when finished.
pipette.transfer(100, plate.wells_by_name()['A1'], plate.wells_by_name()['B1'])
When you are using a multi-channel pipette, you can transfer the entire column (8 wells) in the plate to another using:
pipette.transfer(100, plate.wells_by_name()['A1'], plate.wells_by_name()['A2'])
Note: In API Versions 2.0 and 2.1, multichannel pipettes could only access the first row of a 384 well plate, andaccess to the second row would be ignored. If you need to transfer from all wells of a 384-well plate, please make sureto use API Version 2.2
Note: Multichannel pipettes can only access a limited number of rows in a plate during transfer, distribute andconsolidate: the first row (wells A1 - A12) of a 96-well plate, and (since API Version 2.2) the first two rows (wells A1- B24) for a 384-well plate. Wells specified outside of the limit will be ignored.
Transfer commands will automatically create entire series of InstrumentContext.aspirate() (page 63),InstrumentContext.dispense() (page 64), and other InstrumentContext() commands.
Large Volumes
Volumes larger than the pipette’s max_volume (see Defaults (page 32)) will automatically divide into smaller trans-fers.
pipette.transfer(700, plate.wells_by_name()['A2'], plate.wells_by_name()['B2'])
will have the steps. . .
Transferring 700 from well A2 in "1" to well B2 in "1"Picking up tip well A1 in "2"Aspirating 300.0 uL from well A2 in "1" at 1 speedDispensing 300.0 uL into well B2 in "1"Aspirating 200.0 uL from well A2 in "1" at 1 speedDispensing 200.0 uL into well B2 in "1"Aspirating 200.0 uL from well A2 in "1" at 1 speedDispensing 200.0 uL into well B2 in "1"Dropping tip well A1 in "12"
47
One to One
Transfer commands are most useful when moving liquid between multiple wells. This will be a one to one transferfrom where well A1’s contents are transferred to well A2, well B1’s contents to B2,and so on. This is the scenariodisplayed in the Transfer (page 45) visualization.
pipette.transfer(100, plate.columns_by_name()['1'], plate.columns_by_name()['2'])
will have the steps. . .
Transferring 100 from wells A1...H1 in "1" to wells A2...H2 in "1"Picking up tip well A1 in "2"Aspirating 100.0 uL from well A1 in "1" at 1 speedDispensing 100.0 uL into well A2 in "1"Aspirating 100.0 uL from well B1 in "1" at 1 speedDispensing 100.0 uL into well B2 in "1"Aspirating 100.0 uL from well C1 in "1" at 1 speedDispensing 100.0 uL into well C2 in "1"Aspirating 100.0 uL from well D1 in "1" at 1 speedDispensing 100.0 uL into well D2 in "1"Aspirating 100.0 uL from well E1 in "1" at 1 speedDispensing 100.0 uL into well E2 in "1"Aspirating 100.0 uL from well F1 in "1" at 1 speedDispensing 100.0 uL into well F2 in "1"Aspirating 100.0 uL from well G1 in "1" at 1 speedDispensing 100.0 uL into well G2 in "1"Aspirating 100.0 uL from well H1 in "1" at 1 speedDispensing 100.0 uL into well H2 in "1"Dropping tip well A1 in "12"
New in version 2.0.
One to Many
You can transfer from a single source to multiple destinations, and the other way around (many sources to one desti-nation).
pipette.transfer(100, plate.wells_by_name()['A1'], plate.columns_by_name()['2'])
will have the steps. . .
Transferring 100 from well A1 in "1" to wells A2...H2 in "1"Picking up tip well A1 in "2"Aspirating 100.0 uL from well A1 in "1" at 1 speedDispensing 100.0 uL into well A2 in "1"Aspirating 100.0 uL from well A1 in "1" at 1 speedDispensing 100.0 uL into well B2 in "1"Aspirating 100.0 uL from well A1 in "1" at 1 speedDispensing 100.0 uL into well C2 in "1"Aspirating 100.0 uL from well A1 in "1" at 1 speedDispensing 100.0 uL into well D2 in "1"Aspirating 100.0 uL from well A1 in "1" at 1 speedDispensing 100.0 uL into well E2 in "1"Aspirating 100.0 uL from well A1 in "1" at 1 speedDispensing 100.0 uL into well F2 in "1"Aspirating 100.0 uL from well A1 in "1" at 1 speed
(continues on next page)
48

(continued from previous page)
Dispensing 100.0 uL into well G2 in "1"Aspirating 100.0 uL from well A1 in "1" at 1 speedDispensing 100.0 uL into well H2 in "1"Dropping tip well A1 in "12"
New in version 2.0.
List of Volumes
Instead of applying a single volume amount to all source/destination wells, you can instead pass a list of volumes.
pipette.transfer([20, 40, 60],plate['A1'],[plate.wells_by_name()[well_name] for well_name in ['B1', 'B2', 'B3']])
will have the steps. . .
Transferring [20, 40, 60] from well A1 in "1" to wells B1...B3 in "1"Picking up tip well A1 in "2"Aspirating 20.0 uL from well A1 in "1" at 1 speedDispensing 20.0 uL into well B1 in "1"Aspirating 40.0 uL from well A1 in "1" at 1 speedDispensing 40.0 uL into well B2 in "1"Aspirating 60.0 uL from well A1 in "1" at 1 speedDispensing 60.0 uL into well B3 in "1"Dropping tip well A1 in "12"
New in version 2.0.
Distribute and Consolidate
InstrumentContext.distribute() (page 65) and InstrumentContext.consolidate()(page 64) are similar to InstrumentContext.transfer() (page 70), but optimized for specific uses.InstrumentContext.distribute() (page 65) is optimized for taking a large volume from a single (ora small number) of source wells, and distributing it to many smaller volumes in destination wells. Rather thanusing one-to-one transfers, it dispense many times for each aspirate. InstrumentContext.consolidate()(page 64) is optimized for taking small volumes from many source wells and consolidating them into one (or a smallnumber) of destination wells, aspirating many times for each dispense.
Consolidate
Volumes going to the same destination well are combined within the same tip, so that multiple aspirates can becombined to a single dispense. This is the scenario described by the Consolidate (page 46) graphic.
pipette.consolidate(30, plate.columns_by_name()['2'], plate.wells_by_name()['A1'])
will have the steps. . .
49

Consolidating 30 from wells A2...H2 in "1" to well A1 in "1"Transferring 30 from wells A2...H2 in "1" to well A1 in "1"Picking up tip well A1 in "2"Aspirating 30.0 uL from well A2 in "1" at 1 speedAspirating 30.0 uL from well B2 in "1" at 1 speedAspirating 30.0 uL from well C2 in "1" at 1 speedAspirating 30.0 uL from well D2 in "1" at 1 speedAspirating 30.0 uL from well E2 in "1" at 1 speedAspirating 30.0 uL from well F2 in "1" at 1 speedAspirating 30.0 uL from well G2 in "1" at 1 speedAspirating 30.0 uL from well H2 in "1" at 1 speedDispensing 240.0 uL into well A1 in "1"Dropping tip well A1 in "12"
If there are multiple destination wells, the pipette will not combine the transfers - it will aspirate from one source,dispense into the target, then aspirate from the other source.
pipette.consolidate(30,plate.columns_by_name()['1'],[plate.wells_by_name()[well_name] for well_name in ['A1', 'A2']])
will have the steps. . .
Consolidating 30 from wells A1...H1 in "1" to wells A1...A2 in "1"Transferring 30 from wells A1...H1 in "1" to wells A1...A2 in "1"Picking up tip well A1 in "2"Aspirating 30.0 uL from well A1 in "1" at 1 speedAspirating 30.0 uL from well B1 in "1" at 1 speedAspirating 30.0 uL from well C1 in "1" at 1 speedAspirating 30.0 uL from well D1 in "1" at 1 speedDispensing 120.0 uL into well A1 in "1"Aspirating 30.0 uL from well E1 in "1" at 1 speedAspirating 30.0 uL from well F1 in "1" at 1 speedAspirating 30.0 uL from well G1 in "1" at 1 speedAspirating 30.0 uL from well H1 in "1" at 1 speedDispensing 120.0 uL into well A2 in "1"Dropping tip well A1 in "12"
New in version 2.0.
Distribute
Volumes from the same source well are combined within the same tip, so that one aspirate can provide for multipledispenses. This is the scenario in the Distribute (page 45) graphic.
pipette.distribute(55, plate.wells_by_name()['A1'], plate.rows_by_name()['A'])
will have the steps. . .
Distributing 55 from well A1 in "1" to wells A1...A12 in "1"Transferring 55 from well A1 in "1" to wells A1...A12 in "1"Picking up tip well A1 in "2"Aspirating 250.0 uL from well A1 in "1" at 1 speedDispensing 55.0 uL into well A1 in "1"Dispensing 55.0 uL into well A2 in "1"
(continues on next page)
50
(continued from previous page)
Dispensing 55.0 uL into well A3 in "1"Dispensing 55.0 uL into well A4 in "1"Blowing out at well A1 in "12"Aspirating 250.0 uL from well A1 in "1" at 1 speedDispensing 55.0 uL into well A5 in "1"Dispensing 55.0 uL into well A6 in "1"Dispensing 55.0 uL into well A7 in "1"Dispensing 55.0 uL into well A8 in "1"Blowing out at well A1 in "12"Aspirating 250.0 uL from well A1 in "1" at 1 speedDispensing 55.0 uL into well A9 in "1"Dispensing 55.0 uL into well A10 in "1"Dispensing 55.0 uL into well A11 in "1"Dispensing 55.0 uL into well A12 in "1"Blowing out at well A1 in "12"Dropping tip well A1 in "12"
The pipette will aspirate more liquid than it intends to dispense by the minimum volume of the pipette. This is calledthe disposal_volume, and can be specified in the call to distribute.
If there are multiple source wells, the pipette will never combine their volumes into the same tip.
pipette.distribute(30,[plate.wells_by_name()[well_name] for well_name in ['A1', 'A2']],plate.rows()['A'])
will have the steps. . .
Distributing 30 from wells A1...A2 in "1" to wells A1...A12 in "1"Transferring 30 from wells A1...A2 in "1" to wells A1...A12 in "1"Picking up tip well A1 in "2"Aspirating 210.0 uL from well A1 in "1" at 1 speedDispensing 30.0 uL into well A1 in "1"Dispensing 30.0 uL into well A2 in "1"Dispensing 30.0 uL into well A3 in "1"Dispensing 30.0 uL into well A4 in "1"Dispensing 30.0 uL into well A5 in "1"Dispensing 30.0 uL into well A6 in "1"Blowing out at well A1 in "12"Aspirating 210.0 uL from well A2 in "1" at 1 speedDispensing 30.0 uL into well A7 in "1"Dispensing 30.0 uL into well A8 in "1"Dispensing 30.0 uL into well A9 in "1"Dispensing 30.0 uL into well A10 in "1"Dispensing 30.0 uL into well A11 in "1"Dispensing 30.0 uL into well A12 in "1"Blowing out at well A1 in "12"Dropping tip well A1 in "12"
New in version 2.0.
Order of Operations In Complex Commands
Parameters to complex commands add behaviors to the generated complex command in a specific order which cannotbe changed. Specifically, advanced commands execute their atomic commands in this order:
51

1. Tip logic
2. Mix at source location
3. Aspirate + Any disposal volume
4. Touch tip
5. Air gap
6. Dispense
7. Touch tip
<——Repeat above for all wells——>
8. Empty disposal volume into trash, if any
9. Blow Out
Notice how blow out only occurs after getting rid of disposal volume. If you want blow out to occu after everydispense, you should not include a disposal volume.
Complex Liquid Handling Parameters
Below are some examples of the parameters described in the Parameters (page 46) table.
new_tip
This parameter handles tip logic. You have options of the strings 'always', 'once' and 'never'. The defaultfor every complex command is 'once'.
If you want to avoid cross-contamination and increase accuracy, you should set this parameter to 'always'.
New in version 2.0.
Always Get a New Tip
Transfer commands will by default use the same tip for each well, then finally drop it in the trash once finished.
The pipette can optionally get a new tip at the beginning of each aspirate, to help avoid cross contamination.
pipette.transfer(100,[plate.wells_by_name()[well_name] for well_name in ['A1', 'A2', 'A3']],[plate.wells_by_name()[well_name] for well_name in ['B1', 'B2', 'B3']],new_tip='always') # always pick up a new tip
will have the steps. . .
Transferring 100 from wells A1...A3 in "1" to wells B1...B3 in "1"Picking up tip well A1 in "2"Aspirating 100.0 uL from well A1 in "1" at 1 speedDispensing 100.0 uL into well B1 in "1"Dropping tip well A1 in "12"Picking up tip well B1 in "2"Aspirating 100.0 uL from well A2 in "1" at 1 speedDispensing 100.0 uL into well B2 in "1"
(continues on next page)
52

(continued from previous page)
Dropping tip well A1 in "12"Picking up tip well C1 in "2"Aspirating 100.0 uL from well A3 in "1" at 1 speedDispensing 100.0 uL into well B3 in "1"Dropping tip well A1 in "12"
Never Get a New Tip
For scenarios where you instead are calling pick_up_tip() and drop_tip() elsewhere in your protocol, thetransfer command can ignore picking up or dropping tips.
pipette.pick_up_tip()...pipette.transfer(
100,[plate.wells_by_name()[well_name] for well_name in ['A1', 'A2', 'A3']],[plate.wells_by_name()[well_name] for well_name in ['B1', 'B2', 'B3']],new_tip='never') # never pick up or drop a tip
...pipette.drop_tip()
will have the steps. . .
Picking up tip well A1 in "2"...Transferring 100 from wells A1...A3 in "1" to wells B1...B3 in "1"Aspirating 100.0 uL from well A1 in "1" at 1 speedDispensing 100.0 uL into well B1 in "1"Aspirating 100.0 uL from well A2 in "1" at 1 speedDispensing 100.0 uL into well B2 in "1"Aspirating 100.0 uL from well A3 in "1" at 1 speedDispensing 100.0 uL into well B3 in "1"...Dropping tip well A1 in "12"
Use One Tip
The default behavior of complex commands is to use one tip:
pipette.transfer(100,[plate.wells_by_name()[well_name] for well_name in ['A1', 'A2', 'A3']],[plate.wells_by_name()[well_name] for well_name in ['B1', 'B2', 'B3']],new_tip='once') # use one tip (default behavior)
will have the steps. . .
Picking up tip well A1 in "2"Transferring 100 from wells A1...A3 in "1" to wells B1...B3 in "1"Aspirating 100.0 uL from well A1 in "1" at 1 speedDispensing 100.0 uL into well B1 in "1"Aspirating 100.0 uL from well A2 in "1" at 1 speedDispensing 100.0 uL into well B2 in "1"
(continues on next page)
53
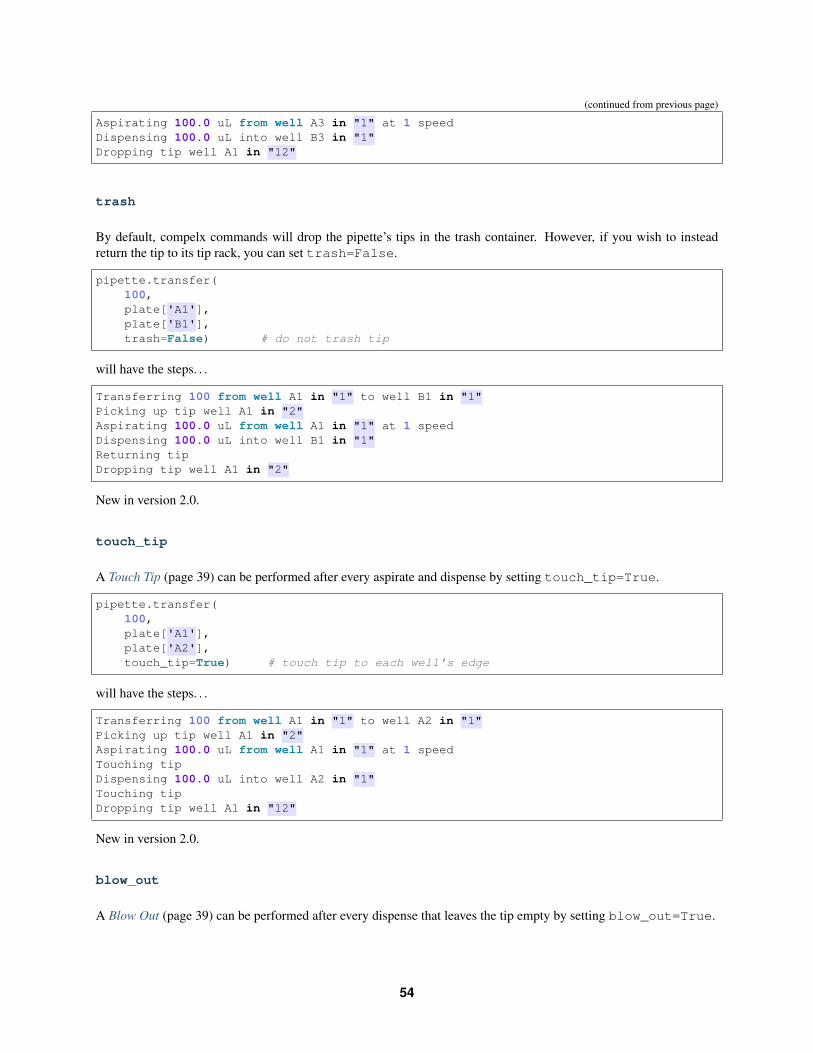
(continued from previous page)
Aspirating 100.0 uL from well A3 in "1" at 1 speedDispensing 100.0 uL into well B3 in "1"Dropping tip well A1 in "12"
trash
By default, compelx commands will drop the pipette’s tips in the trash container. However, if you wish to insteadreturn the tip to its tip rack, you can set trash=False.
pipette.transfer(100,plate['A1'],plate['B1'],trash=False) # do not trash tip
will have the steps. . .
Transferring 100 from well A1 in "1" to well B1 in "1"Picking up tip well A1 in "2"Aspirating 100.0 uL from well A1 in "1" at 1 speedDispensing 100.0 uL into well B1 in "1"Returning tipDropping tip well A1 in "2"
New in version 2.0.
touch_tip
A Touch Tip (page 39) can be performed after every aspirate and dispense by setting touch_tip=True.
pipette.transfer(100,plate['A1'],plate['A2'],touch_tip=True) # touch tip to each well's edge
will have the steps. . .
Transferring 100 from well A1 in "1" to well A2 in "1"Picking up tip well A1 in "2"Aspirating 100.0 uL from well A1 in "1" at 1 speedTouching tipDispensing 100.0 uL into well A2 in "1"Touching tipDropping tip well A1 in "12"
New in version 2.0.
blow_out
A Blow Out (page 39) can be performed after every dispense that leaves the tip empty by setting blow_out=True.
54

pipette.transfer(100,plate['A1'],plate['A2'],blow_out=True) # blow out droplets when tip is empty
will have the steps. . .
Transferring 100 from well A1 in "1" to well A2 in "1"Picking up tip well A1 in "2"Aspirating 100.0 uL from well A1 in "1" at 1 speedDispensing 100.0 uL into well A2 in "1"Blowing outDropping tip well A1 in "12"
New in version 2.0.
mix_before, mix_after
A Mix (page 39) can be performed before every aspirate by setting mix_before=, and after every dispense bysetting mix_after=. The value of mix_before= or mix_after= must be a tuple; the first value is the numberof repetitions, the second value is the amount of liquid to mix.
pipette.transfer(100,plate['A1'],plate['A2'],mix_before=(2, 50), # mix 2 times with 50uL before aspiratingmix_after=(3, 75)) # mix 3 times with 75uL after dispensing
will have the steps. . .
Transferring 100 from well A1 in "1" to well A2 in "1"Picking up tip well A1 in "2"Mixing 2 times with a volume of 50ulAspirating 50 uL from well A1 in "1" at 1.0 speedDispensing 50 uL into well A1 in "1"Aspirating 50 uL from well A1 in "1" at 1.0 speedDispensing 50 uL into well A1 in "1"Aspirating 100.0 uL from well A1 in "1" at 1 speedDispensing 100.0 uL into well A2 in "1"Mixing 3 times with a volume of 75ulAspirating 75 uL from well A2 in "1" at 1.0 speedDispensing 75.0 uL into well A2 in "1"Aspirating 75 uL from well A2 in "1" at 1.0 speedDispensing 75.0 uL into well A2 in "1"Aspirating 75 uL from well A2 in "1" at 1.0 speedDispensing 75.0 uL into well A2 in "1"Dropping tip well A1 in "12"
New in version 2.0.
air_gap
An Air Gap (page 40) can be performed after every aspirate by setting air_gap=volume, where the value is thevolume of air in µL to aspirate after aspirating the liquid. The entire volume in the tip, air gap and the liquid volume,
55

will be dispensed all at once at the destination specified in the complex command.
pipette.transfer(100,plate['A1'],plate['A2'],air_gap=20) # add 20uL of air after each aspirate
will have the steps. . .
Transferring 100 from well A1 in "1" to well A2 in "1"Picking up tip well A1 in "2"Aspirating 100.0 uL from well A1 in "1" at 1.0 speedAir gapAspirating 20 uL from well A1 in "1" at 1.0 speedDispensing 120.0 uL into well A2 in "1"Dropping tip well A1 in "12"
New in version 2.0.
disposal_volume
When dispensing multiple times from the same tip in InstrumentContext.distribute() (page 65), it is rec-ommended to aspirate an extra amount of liquid to be disposed of after distributing. This added disposal_volumecan be set as an optional argument.
The default disposal volume is the pipette’s minimum volume (see Defaults (page 32)), which will be blown out at thetrash after the dispenses.
pipette.distribute(30,[plate.wells_by_name()[well_name] for well_name in ['A1', 'A2']],plate.columns_by_name()['2'],disposal_volume=60) # include extra liquid to make dispenses more accurate, 20%
→˓of total volume
will have the steps. . .
Distributing 30 from wells A1...A2 in "1" to wells A2...H2 in "1"Transferring 30 from wells A1...A2 in "1" to wells A2...H2 in "1"Picking up tip well A1 in "2"Aspirating 130.0 uL from well A1 in "1" at 1 speedDispensing 30.0 uL into well A2 in "1"Dispensing 30.0 uL into well B2 in "1"Dispensing 30.0 uL into well C2 in "1"Dispensing 30.0 uL into well D2 in "1"Blowing out at well A1 in "12"Aspirating 130.0 uL from well A2 in "1" at 1 speedDispensing 30.0 uL into well E2 in "1"Dispensing 30.0 uL into well F2 in "1"Dispensing 30.0 uL into well G2 in "1"Dispensing 30.0 uL into well H2 in "1"Blowing out at well A1 in "12"Dropping tip well A1 in "12"
See this image for example,
56

New in version 2.0.
5.8 API Version 2 Reference
Protocols and Instruments
class opentrons.protocol_api.contexts.ProtocolContext(loop: asyn-cio.events.AbstractEventLoop= None, hardware:Union[opentrons.hardware_control.thread_manager.ThreadManager,open-trons.hardware_control.adapters.SynchronousAdapter,HasLoop] = None, bro-ker=None, bundled_labware:Dict[str, LabwareDefini-tion] = None, bundled_data:Dict[str, bytes] = None,extra_labware: Dict[str,LabwareDefinition] =None, api_version: open-trons.protocols.types.APIVersion= None)
The Context class is a container for the state of a protocol.
It encapsulates many of the methods formerly found in the Robot class, including labware, instrument, andmodule loading, as well as core functions like pause and resume.
Unlike the old robot class, it is designed to be ephemeral. The lifetime of a particular instance should be aboutthe same as the lifetime of a protocol. The only exception is the one stored in legacy_api.api.robot,which is provided only for back compatibility and should be used less and less as time goes by.
New in version 2.0.
property api_versionReturn the API version supported by this protoocl context.
57

The supported API version was specified when the protocol context was initialized. It may be lowerthan the highest version supported by the robot software. For the highest version supported by the robotsoftware, see protocol_api.MAX_SUPPORTED_VERSION.
New in version 2.0.
classmethod build_using(protocol: Union[opentrons.protocols.types.JsonProtocol, open-trons.protocols.types.PythonProtocol], *args, **kwargs)
Build an API instance for the specified parsed protocol
This is used internally to provision the context with bundle contents or api levels.
property bundled_dataAccessor for data files bundled with this protocol, if any.
This is a dictionary mapping the filenames of bundled datafiles, with extensions but without paths(e.g. if a file is stored in the bundle as data/mydata/aspirations.csv it will be in the dict as'aspirations.csv') to the bytes contents of the files.
New in version 2.0.
cleanup(self)Finalize and clean up the protocol context.
clear_commands(self)New in version 2.0.
commands(self)New in version 2.0.
comment(self, msg)Add a user-readable comment string that will be echoed to the Opentrons app.
The value of the message is computed during protocol simulation, so cannot be used to communicatereal-time information from the robot’s actual run.
New in version 2.0.
connect(self, hardware: opentrons.hardware_control.api.API)Connect to a running hardware API.
This can be either a simulator or a full hardware controller.
Note that there is no true disconnected state for a ProtocolContext (page 57); disconnect()(page 59) simply creates a new simulator and replaces the current hardware with it.
New in version 2.0.
property deckThe object holding the deck layout of the robot.
This object behaves like a dictionary with keys for both numeric and string slot numbers (for instance,protocol.deck[1] and protocol.deck['1'] will both return the object in slot 1). If nothingis loaded into a slot, None will be present. This object is useful for determining if a slot in the deck isfree. Rather than filtering the objects in the deck map yourself, you can also use loaded_labwares(page 61) to see a dict of labwares and loaded_modules (page 61) to see a dict of modules.
New in version 2.0.
delay(self, seconds=0, minutes=0, msg=None)Delay protocol execution for a specific amount of time.
Parameters
• seconds (float) – A time to delay in seconds
• minutes (float) – A time to delay in minutes
58

If both seconds and minutes are specified, they will be added.
New in version 2.0.
disconnect(self)Disconnect from currently-connected hardware and simulate instead
New in version 2.0.
property door_closedReturns True if the robot door is closed
New in version 2.5.
property fixed_trashThe trash fixed to slot 12 of the robot deck.
New in version 2.0.
home(self)Homes the robot.
New in version 2.0.
is_simulating(self)→ boolNew in version 2.0.
load_instrument(self, instrument_name: str, mount: Union[opentrons.types.Mount, str], tip_racks:List[opentrons.protocol_api.labware.Labware] = None, replace: bool = False)→ ’InstrumentContext’
Load a specific instrument required by the protocol.
This value will actually be checked when the protocol runs, to ensure that the correct instrument is attachedin the specified location.
Parameters
• instrument_name (str) – The name of the instrument model, or a prefix. For in-stance, ‘p10_single’ may be used to request a P10 single regardless of the version.
• mount (types.Mount (page 86) or str) – The mount in which this instrumentshould be attached. This can either be an instance of the enum type types.Mount(page 86) or one of the strings ‘left’ and ‘right’.
• tip_racks (List[Labware (page 72)]) – A list of tip racks from which to pick tips ifInstrumentContext.pick_up_tip() (page 68) is called without arguments.
• replace (bool) – Indicate that the currently-loaded instrument in mount (if such aninstrument exists) should be replaced by instrument_name.
New in version 2.0.
load_labware(self, load_name: str, location: Union[int, str], label: str = None, namespace: str =None, version: int = None)→ opentrons.protocol_api.labware.Labware
Load a labware onto the deck given its name.
For labware already defined by Opentrons, this is a convenient way to collapse the two stages of labwareinitialization (creating the labware and adding it to the protocol) into one.
This function returns the created and initialized labware for use later in the protocol.
Parameters
• load_name – A string to use for looking up a labware definition
• location (int or str) – The slot into which to load the labware such as 1 or ‘1’
59

• label (str) – An optional special name to give the labware. If specified, this is thename the labware will appear as in the run log and the calibration view in the Opentronsapp.
• namespace (str) – The namespace the labware definition belongs to. If unspecified,will search ‘opentrons’ then ‘custom_beta’
• version (int) – The version of the labware definition. If unspecified, will use version1.
New in version 2.0.
load_labware_by_name(self, load_name: str, location: Union[int, str], label: str =None, namespace: str = None, version: int = 1) → open-trons.protocol_api.labware.Labware
New in version 2.0.
load_labware_from_definition(self, labware_def: ’LabwareDefinition’, location:Union[int, str], label: str = None) → open-trons.protocol_api.labware.Labware
Specify the presence of a piece of labware on the OT2 deck.
This function loads the labware definition specified by labware_def to the location specified by location.
Parameters
• labware_def – The labware definition to load
• location (int or str) – The slot into which to load the labware such as 1 or ‘1’
• label (str) – An optional special name to give the labware. If specified, this is thename the labware will appear as in the run log and the calibration view in the Opentronsapp.
New in version 2.0.
load_module(self, module_name: str, location: Union[int, str, NoneType] = None, config-uration: str = None) → Union[ForwardRef(’TemperatureModuleContext’), For-wardRef(’MagneticModuleContext’), ForwardRef(’ThermocyclerContext’)]
Load a module onto the deck given its name.
This is the function to call to use a module in your protocol, like load_instrument() (page 59) is themethod to call to use an instrument in your protocol. It returns the created and initialized module context,which will be a different class depending on the kind of module loaded.
A map of deck positions to loaded modules can be accessed later using loaded_modules (page 61).
Parameters
• module_name (str) – The name or model of the module.
• location (str or int or None) – The location of the module. This is usuallythe name or number of the slot on the deck where you will be placing the module. Somemodules, like the Thermocycler, are only valid in one deck location. You do not have tospecify a location when loading a Thermocycler - it will always be in Slot 7.
• configuration – Used to specify the slot configuration of the Thermocycler. OnlyValid in Python API Version 2.4 and later. If you wish to use the non-full plate configura-tion, you must pass in the key word value semi
Returns ModuleContext The loaded and initialized ModuleContext.
New in version 2.0.
property loaded_instrumentsGet the instruments that have been loaded into the protocol.
60
This is a map of mount name to instruments previously loaded with load_instrument() (page 59).It is not necessarily the same as the instruments attached to the robot - for instance, if the robot has aninstrument in both mounts but your protocol has only loaded one of them with load_instrument()(page 59), the unused one will not be present.
Returns A dict mapping mount names in lowercase to the instrument in that mount. If no in-strument is loaded in the mount, it will not be present
New in version 2.0.
property loaded_labwaresGet the labwares that have been loaded into the protocol context.
Slots with nothing in them will not be present in the return value.
Note: If a module is present on the deck but no labware has been loaded into it with ModuleContext.load_labware(), there will be no entry for that slot in this value. That means you should not useloaded_labwares to determine if a slot is available or not, only to get a list of labwares. If you wanta data structure of all objects on the deck regardless of type, see deck (page 58).
Returns Dict mapping deck slot number to labware, sorted in order of the locations.
New in version 2.0.
property loaded_modulesGet the modules loaded into the protocol context.
This is a map of deck positions to modules loaded by previous calls to load_module() (page 60). Itis not necessarily the same as the modules attached to the robot - for instance, if the robot has a MagneticModule and a Temperature Module attached, but the protocol has only loaded the Temperature Modulewith load_module() (page 60), only the Temperature Module will be present.
Returns Dict[str, ModuleContext] Dict mapping slot name to module contexts. The elementsmay not be ordered by slot number.
New in version 2.0.
property max_speedsPer-axis speed limits when moving this instrument.
Changing this value changes the speed limit for each non-plunger axis of the robot, when moving thispipette. Note that this does only sets a limit on how fast movements can be; movements can still be slowerthan this. However, it is useful if you require the robot to move much more slowly than normal when usingthis pipette.
This is a dictionary mapping string names of axes to float values limiting speeds. To change a speed, setthat axis’s value. To reset an axis’s speed to default, delete the entry for that axis or assign it to None.
For instance,
def run(protocol):protocol.comment(str(right.max_speeds)) # '{}' - all defaultprotocol.max_speeds['A'] = 10 # limit max speed of
# right pipette Z to 10mm/sdel protocol.max_speeds['A'] # reset to defaultprotocol.max_speeds['X'] = 10 # limit max speed of x to
# 10 mm/sprotocol.max_speeds['X'] = None # reset to default
New in version 2.0.
61
pause(self, msg=None)Pause execution of the protocol until resume is called.
This function returns immediately, but the next function call that is blocked by a paused robot (anythingthat involves moving) will not return until resume() (page 62) is called.
Parameters msg (str) – A message to echo back to connected clients.
New in version 2.0.
property rail_lights_onReturns True if the rail lights are on
New in version 2.5.
resume(self)Resume a previously-paused protocol
New in version 2.0.
set_rail_lights(self, on: bool)Controls the robot rail lights
Parameters on (bool) – If true, turn on rail lights; otherwise, turn off.
New in version 2.5.
temp_connect(self, hardware: opentrons.hardware_control.api.API)Connect temporarily to the specified hardware controller.
This should be used as a context manager:
with ctx.temp_connect(hw):# do some tasksctx.home()
# after the with block, the context is connected to the same# hardware control API it was connected to before, even if# an error occurred in the code inside the with block
class opentrons.protocol_api.contexts.InstrumentContext(ctx: ProtocolContext,hardware_mgr: Hard-wareManager, mount:opentrons.types.Mount,log_parent: log-ging.Logger,at_version: open-trons.protocols.types.APIVersion,tip_racks:List[opentrons.protocol_api.labware.Labware]= None, trash: open-trons.protocol_api.labware.Labware= None, default_speed:float = 400.0, re-quested_as: str = None,**config_kwargs)
A context for a specific pipette or instrument.
This can be used to call methods related to pipettes - moves or aspirates or dispenses, or higher-level methods.
Instances of this class bundle up state and config changes to a pipette - for instance, changes to flow rates ortrash containers. Action methods (like aspirate() (page 63) or distribute() (page 65)) are definedhere for convenience.
62

In general, this class should not be instantiated directly; rather, instances are returned fromProtocolContext.load_instrument() (page 59).
New in version 2.0.
air_gap(self, volume: float = None, height: float = None)→ ’InstrumentContext’Pull air into the pipette current tip at the current location
Parameters
• volume (float) – The amount in uL to aspirate air into the tube. (Default will use allremaining volume in tip)
• height (float) – The number of millimiters to move above the current Well to air-gapaspirate. (Default: 5mm above current Well)
Raises
• NoTipAttachedError – If no tip is attached to the pipette
• RuntimeError – If location cache is None. This should happen if touch_tip iscalled without first calling a method that takes a location (eg, aspirate() (page 63),dispense() (page 64))
Returns This instance
Note: Both volume and height are optional, but unlike previous API versions, if you want to specifyonly height you must do it as a keyword argument: pipette.air_gap(height=2). If you callair_gap with only one unnamed argument, it will always be interpreted as a volume.
New in version 2.0.
property api_versionNew in version 2.0.
aspirate(self, volume: float = None, location: Union[opentrons.types.Location, open-trons.protocol_api.labware.Well] = None, rate: float = 1.0)→ ’InstrumentContext’
Aspirate a volume of liquid (in microliters/uL) using this pipette from the specified location
If only a volume is passed, the pipette will aspirate from its current position. If only a location is passed(as in instr.aspirate(location=wellplate['A1']), aspirate() (page 63) will defaultto the amount of volume available.
Parameters
• volume (int or float) – The volume to aspirate, in microliters. If not specified,max_volume (page 66).
• location – Where to aspirate from. If location is a Well (page 75), the robot willaspirate from well_bottom_clearance``.aspirate‘‘ mm above the bottom of thewell. If location is a Location (page 86) (i.e. the result of Well.top() (page 76) orWell.bottom() (page 75)), the robot will aspirate from the exact specified location. Ifunspecified, the robot will aspirate from the current position.
• rate (float) – The relative plunger speed for this aspirate. During this aspirate, thespeed of the plunger will be rate * aspirate_speed. If not specified, defaults to 1.0(speed will not be modified).
Returns This instance.
Note: If aspirate is called with a single argument, it will not try to guess whether the argument is avolume or location - it is required to be a volume. If you want to call aspirate with only a location,
63

specify it as a keyword argument: instr.aspirate(location=wellplate['A1'])
New in version 2.0.
blow_out(self, location: Union[opentrons.types.Location, opentrons.protocol_api.labware.Well] =None)→ ’InstrumentContext’
Blow liquid out of the tip.
If dispense (page 64) is used to completely empty a pipette, usually a small amount of liquid will remainin the tip. This method moves the plunger past its usual stops to fully remove any remaining liquid fromthe tip. Regardless of how much liquid was in the tip when this function is called, after it is done the tipwill be empty.
Parameters location (Well (page 75) or Location (page 86) or None) – The location toblow out into. If not specified, defaults to the current location of the pipette
Raises RuntimeError – If no location is specified and location cache is None. This shouldhappen if blow_out is called without first calling a method that takes a location (eg,aspirate() (page 63), dispense() (page 64))
Returns This instance
New in version 2.0.
property channelsThe number of channels on the pipette.
New in version 2.0.
consolidate(self, volume: float, source: List[opentrons.protocol_api.labware.Well], dest: open-trons.protocol_api.labware.Well, *args, **kwargs)→ ’InstrumentContext’
Move liquid from multiple wells (sources) to a single well(destination)
Parameters
• volume – The amount of volume to consolidate from each source well.
• source – List of wells from where liquid will be aspirated.
• dest – The single well into which liquid will be dispensed.
• kwargs – See transfer() (page 70). Some arguments are changed. Specifically,mix_before, if specified, is ignored and disposal_volume is ignored and set to 0.
Returns This instance
New in version 2.0.
property current_volumeThe current amount of liquid, in microliters, held in the pipette.
New in version 2.0.
property default_speedThe speed at which the robot’s gantry moves.
By default, 400 mm/s. Changing this value will change the speed of the pipette when moving betweenlabware. In addition to changing the default, the speed of individual motions can be changed with thespeed argument to InstrumentContext.move_to() (page 67).
New in version 2.0.
delay(self)New in version 2.0.
64

dispense(self, volume: float = None, location: Union[opentrons.types.Location, open-trons.protocol_api.labware.Well] = None, rate: float = 1.0)→ ’InstrumentContext’
Dispense a volume of liquid (in microliters/uL) using this pipette into the specified location.
If only a volume is passed, the pipette will dispense from its current position. If only a location is passed (asin instr.dispense(location=wellplate['A1'])), all of the liquid aspirated into the pipettewill be dispensed (this volume is accessible through current_volume (page 64)).
Parameters
• volume (int or float) – The volume of liquid to dispense, in microliters. If notspecified, defaults to current_volume (page 64).
• location – Where to dispense into. If location is a Well (page 75), the robot willdispense into well_bottom_clearance``.dispense‘‘ mm above the bottom of thewell. If location is a Location (page 86) (i.e. the result of Well.top() (page 76) orWell.bottom() (page 75)), the robot will dispense into the exact specified location. Ifunspecified, the robot will dispense into the current position.
• rate (float) – The relative plunger speed for this dispense. During this dispense, thespeed of the plunger will be rate * dispense_speed. If not specified, defaults to 1.0(speed will not be modified).
Returns This instance.
Note: If dispense is called with a single argument, it will not try to guess whether the argument is avolume or location - it is required to be a volume. If you want to call dispense with only a location,specify it as a keyword argument: instr.dispense(location=wellplate['A1'])
New in version 2.0.
distribute(self, volume: float, source: opentrons.protocol_api.labware.Well, dest:List[opentrons.protocol_api.labware.Well], *args, **kwargs)→ ’InstrumentContext’
Move a volume of liquid from one source to multiple destinations.
Parameters
• volume – The amount of volume to distribute to each destination well.
• source – A single well from where liquid will be aspirated.
• dest – List of Wells where liquid will be dispensed to.
• kwargs – See transfer() (page 70). Some arguments are changed. Specifically,mix_after, if specified, is ignored and disposal_volume, if not specified, is set tothe minimum volume of the pipette
Returns This instance
New in version 2.0.
drop_tip(self, location: Union[opentrons.types.Location, opentrons.protocol_api.labware.Well] =None, home_after: bool = True)→ ’InstrumentContext’
Drop the current tip.
If no location is passed, the Pipette will drop the tip into its trash_container (page 71), which if notspecified defaults to the fixed trash in slot 12.
The location in which to drop the tip can be manually specified with the location argument. The locationargument can be specified in several ways:
• If the only thing to specify is which well into which to drop a tip, location can be a Well (page 75).For instance, if you have a tip rack in a variable called tiprack, you can drop a tip into a specific well
65

on that tiprack with the call instr.drop_tip(tiprack.wells()[0]). This style of call can be used to makethe robot drop a tip into arbitrary labware.
• If the position to drop the tip from as well as the Well (page 75) to drop the tip into needsto be specified, for instance to tell the robot to drop a tip from an unusually large height abovethe tiprack, location can be a types.Location (page 86); for instance, you can call in-str.drop_tip(tiprack.wells()[0].top()).
Note: OT1 required homing the plunger after dropping tips, so the prior version of drop_tip auto-matically homed the plunger. This is no longer needed in OT2. If you need to home the plunger, usehome_plunger() (page 66).
Parameters location (types.Location (page 86) or Well (page 75) or None) – Thelocation to drop the tip
Returns This instance
New in version 2.0.
property flow_rateThe speeds (in uL/s) configured for the pipette.
This is an object with attributes aspirate, dispense, and blow_out holding the flow rates for thecorresponding operation.
Note: This property is equivalent to speed (page 68); the only difference is the units in which thisproperty is specified. specifiying this property uses the units of the volumetric flow rate of liquid into orout of the tip, while speed (page 68) uses the units of the linear speed of the plunger inside the pipette.Because speed (page 68) and flow_rate (page 66) modify the same values, setting one will overridethe other.
For instance, to change the flow rate for aspiration on an instrument you would do
instrument.flow_rate.aspirate = 50
New in version 2.0.
home(self)→ ’InstrumentContext’Home the robot.
Returns This instance.
New in version 2.0.
home_plunger(self)→ ’InstrumentContext’Home the plunger associated with this mount
Returns This instance.
New in version 2.0.
property hw_pipetteView the information returned by the hardware API directly.
Raises a types.PipetteNotAttachedError (page 86) if the pipette is no longer at-tached (should not happen).
New in version 2.0.
66
property max_volumeThe maximum volume, in microliters, this pipette can hold.
New in version 2.0.
property min_volumeNew in version 2.0.
mix(self, repetitions: int = 1, volume: float = None, location: Union[opentrons.types.Location, open-trons.protocol_api.labware.Well] = None, rate: float = 1.0)→ ’InstrumentContext’Mix a volume of liquid (uL) using this pipette. If no location is specified, the pipette will mix from itscurrent position. If no volume is passed, mix will default to the pipette’s max_volume (page 66).
Parameters
• repetitions – how many times the pipette should mix (default: 1)
• volume – number of microliters to mix (default: max_volume (page 66))
• location (types.Location (page 86)) – a Well or a position relative to well. e.g,plate.rows()[0][0].bottom()
• rate – Set plunger speed for this mix, where, speed = rate *(aspirate_speed or dispense_speed)
Raises NoTipAttachedError – If no tip is attached to the pipette.
Returns This instance
Note: All the arguments to mix are optional; however, if you do not want to specify one of them, allarguments after that one should be keyword arguments. For instance, if you do not want to specify volume,you would call pipette.mix(1, location=wellplate['A1']). If you do not want to specifyrepetitions, you would call pipette.mix(volume=10, location=wellplate['A1']). Un-like previous API versions, mix will not attempt to guess your inputs; the first argument will alwaysbe interpreted as repetitions, the second as volume, and the third as location unless you usekeywords.
New in version 2.0.
property modelThe model string for the pipette (e.g. ‘p300_single_v1.3’)
New in version 2.0.
property mountReturn the name of the mount this pipette is attached to
New in version 2.0.
move_to(self, location: opentrons.types.Location, force_direct: bool = False, minimum_z_height: float= None, speed: float = None)→ ’InstrumentContext’
Move the instrument.
Parameters
• location (types.Location (page 86)) – The location to move to.
• force_direct – If set to true, move directly to destination without arc motion.
• minimum_z_height – When specified, this Z margin is able to raise (but never lower)the mid-arc height.
• speed – The speed at which to move. By default, InstrumentContext.default_speed (page 64). This controls the straight linear speed of the motion; tolimit individual axis speeds, you can use ProtocolContext.max_speeds.
67
New in version 2.0.
property nameThe name string for the pipette (e.g. ‘p300_single’)
New in version 2.0.
pick_up_tip(self, location: Union[opentrons.types.Location, opentrons.protocol_api.labware.Well]= None, presses: int = None, increment: float = None)→ ’InstrumentContext’
Pick up a tip for the pipette to run liquid-handling commands with
If no location is passed, the Pipette will pick up the next available tip in its InstrumentContext.tip_racks (page 69) list.
The tip to pick up can be manually specified with the location argument. The location argument can bespecified in several ways:
• If the only thing to specify is which well from which to pick up a tip, location can be a Well(page 75). For instance, if you have a tip rack in a variable called tiprack, you can pick up a spe-cific tip from it with instr.pick_up_tip(tiprack.wells()[0]). This style of call canbe used to make the robot pick up a tip from a tip rack that was not specified when creating theInstrumentContext (page 62).
• If the position to move to in the well needs to be specified, for instance to tell the robot to run its pickup tip routine starting closer to or farther from the top of the tip, location can be a types.Location(page 86); for instance, you can call instr.pick_up_tip(tiprack.wells()[0].top()).
Parameters
• location (types.Location (page 86) or Well (page 75) to pick up a tip from.) –The location from which to pick up a tip.
• presses (int) – The number of times to lower and then raise the pipette when pickingup a tip, to ensure a good seal (0 [zero] will result in the pipette hovering over the tip butnot picking it up–generally not desireable, but could be used for dry-run).
• increment (float) – The additional distance to travel on each successive press (e.g.:if presses=3 and increment=1.0, then the first press will travel down into the tip by 3.5mm,the second by 4.5mm, and the third by 5.5mm).
Returns This instance
New in version 2.0.
reset_tipracks(self)Reload all tips in each tip rack and reset starting tip
New in version 2.0.
property return_heightThe height to return a tip to its tiprack.
New in version 2.2.
return_tip(self, home_after: bool = True)→ ’InstrumentContext’If a tip is currently attached to the pipette, then it will return the tip to it’s location in the tiprack.
It will not reset tip tracking so the well flag will remain False.
Returns This instance
New in version 2.0.
property speedThe speeds (in mm/s) configured for the pipette plunger.
68

This is an object with attributes aspirate, dispense, and blow_out holding the plunger speeds forthe corresponding operation.
Note: This property is equivalent to flow_rate (page 66); the only difference is the units in whichthis property is specified. Specifying this attribute uses the units of the linear speed of the plunger insidethe pipette, while flow_rate (page 66) uses the units of the volumetric flow rate of liquid into or out ofthe tip. Because speed (page 68) and flow_rate (page 66) modify the same values, setting one willoverride the other.
For instance, to set the plunger speed during an aspirate action, do
instrument.speed.aspirate = 50
New in version 2.0.
property starting_tipThe starting tip from which the pipette pick up
New in version 2.0.
property tip_racksThe tip racks that have been linked to this pipette.
This is the property used to determine which tips to pick up next when calling pick_up_tip() (page 68)without arguments.
New in version 2.0.
touch_tip(self, location: opentrons.protocol_api.labware.Well = None, radius: float = 1.0, v_offset:float = -1.0, speed: float = 60.0)→ ’InstrumentContext’
Touch the pipette tip to the sides of a well, with the intent of removing left-over droplets
Parameters
• location (Well (page 75) or None) – If no location is passed, pipette will touch tip atcurrent well’s edges
• radius (float) – Describes the proportion of the target well’s radius. When ra-dius=1.0, the pipette tip will move to the edge of the target well; when radius=0.5, itwill move to 50% of the well’s radius. Default: 1.0 (100%)
• v_offset (float) – The offset in mm from the top of the well to touch tip A positiveoffset moves the tip higher above the well, while a negative offset moves it lower into thewell Default: -1.0 mm
• speed (float) – The speed for touch tip motion, in mm/s. Default: 60.0 mm/s, Max:80.0 mm/s, Min: 20.0 mm/s
Raises
• NoTipAttachedError – if no tip is attached to the pipette
• RuntimeError – If no location is specified and location cache is None. This shouldhappen if touch_tip is called without first calling a method that takes a location (eg,aspirate() (page 63), dispense() (page 64))
Returns This instance
Note: This is behavior change from legacy API (which accepts any Placeable as the locationparameter)
New in version 2.0.
69
transfer(self, volume: Union[float, Sequence[float]], source:Union[opentrons.protocol_api.labware.Well, opentrons.types.Location,List[Union[opentrons.protocol_api.labware.Well, opentrons.types.Location]],List[List[opentrons.protocol_api.labware.Well]]], dest: Union[opentrons.protocol_api.labware.Well,opentrons.types.Location, List[Union[opentrons.protocol_api.labware.Well, open-trons.types.Location]], List[List[opentrons.protocol_api.labware.Well]]], trash=True,**kwargs)→ ’InstrumentContext’
Transfer will move a volume of liquid from a source location(s) to a dest location(s). It is a higher-level command, incorporating other InstrumentContext (page 62) commands, like aspirate()(page 63) and dispense() (page 64), designed to make protocol writing easier at the cost of specificity.
Parameters
• volume – The amount of volume to aspirate from each source and dispense to eachdestination. If volume is a list, each volume will be used for the sources/targets at thematching index. If volumes is a tuple with two elements, like (20, 100), then a list ofvolumes will be generated with a linear gradient between the two volumes in the tuple.
• source – A single well or a list of wells from where liquid will be aspirated.
• dest – A single well or a list of wells where liquid will be dispensed to.
• **kwargs – See below
Keyword Arguments
• new_tip (string) –
– ‘never’: no tips will be picked up or dropped during transfer
– ‘once’: (default) a single tip will be used for all commands.
– ‘always’: use a new tip for each transfer.
• trash (boolean) – If True (default behavior), tips will be dropped in the trash containerattached this Pipette. If False tips will be returned to tiprack.
• touch_tip (boolean) – If True, a touch_tip() (page 69) will occur following eachaspirate() (page 63) and dispense() (page 64). If set to False (default behavior),no touch_tip() (page 69) will occur.
• blow_out (boolean) – If True, a blow_out() (page 64) will occur following eachdispense() (page 64), but only if the pipette has no liquid left in it. If set to False(default), no blow_out() (page 64) will occur.
• mix_before (tuple) – The tuple, if specified, gives the amount of volume to mix()(page 67) preceding each aspirate() (page 63) during the transfer. The tuple is inter-preted as (repetitions, volume).
• mix_after (tuple) – The tuple, if specified, gives the amount of volume to mix()(page 67) after each dispense() (page 64) during the transfer. The tuple is interpretedas (repetitions, volume).
• disposal_volume (float) – (distribute() (page 65) only) Volume of liquid to bedisposed off after distributing. When dispensing multiple times from the same tip, it isrecommended to aspirate an extra amount of liquid to be disposed off after distributing.
• carryover (boolean) – If True (default), any volume that exceeds the maximum volumeof this Pipette will be split into multiple smaller volumes.
• gradient (lambda) – Function for calculating the curve used for gradient volumes. Whenvolume is a tuple of length 2, its values are used to create a list of gradient volumes. Thedefault curve for this gradient is linear (lambda x: x), however a method can be passedwith the gradient keyword argument to create a custom curve.
70

Returns This instance
New in version 2.0.
property trash_containerThe trash container associated with this pipette.
This is the property used to determine where to drop tips and blow out liquids when calling drop_tip()(page 65) or blow_out() (page 64) without arguments.
New in version 2.0.
property typeOne of ‘single’ or ‘multi’.
New in version 2.0.
property well_bottom_clearanceThe distance above the bottom of a well to aspirate or dispense.
This is an object with attributes aspirate and dispense, describing the default heights of the corre-sponding operation. The default is 1.0mm for both aspirate and dispense.
When aspirate() (page 63) or dispense() (page 64) is given a Well (page 75) rather than afull Location (page 86), the robot will move this distance above the bottom of the well to aspirate ordispense.
To change, set the corresponding attribute. For instance,
instr.well_bottom_clearance.aspirate = 1
New in version 2.0.
Labware and Wells
opentrons.protocol_api.labware: classes and functions for labware handling
This module provides things like Labware (page 72), and Well (page 75) to encapsulate labware instances used inprotocols and their wells. It also provides helper functions to load and save labware and labware calibration offsets. Itcontains all the code necessary to transform from labware symbolic points (such as “well a1 of an opentrons tiprack”)to points in deck coordinates.
class opentrons.protocol_api.labware.DateTimeDecoder
class opentrons.protocol_api.labware.DateTimeEncoder(*, skipkeys=False,ensure_ascii=True,check_circular=True,allow_nan=True,sort_keys=False, indent=None,separators=None, de-fault=None)
default(self, obj)Implement this method in a subclass such that it returns a serializable object for o, or calls the baseimplementation (to raise a TypeError).
For example, to support arbitrary iterators, you could implement default like this:
def default(self, o):try:
iterable = iter(o)except TypeError:
(continues on next page)
71

(continued from previous page)
passelse:
return list(iterable)# Let the base class default method raise the TypeErrorreturn JSONEncoder.default(self, o)
class opentrons.protocol_api.labware.Labware(definition: LabwareDefinition, par-ent: opentrons.types.Location, la-bel: str = None, api_level: open-trons.protocols.types.APIVersion = None)
This class represents a labware, such as a PCR plate, a tube rack, reservoir, tip rack, etc. It defines the physicalgeometry of the labware, and provides methods for accessing wells within the labware.
It is commonly created by calling ProtocolContext.load_labware().
To access a labware’s wells, you can use its well accessor methods: wells_by_name() (page 75),wells() (page 75), columns() (page 72), rows() (page 74), rows_by_name() (page 74), andcolumns_by_name() (page 72). You can also use an instance of a labware as a Python dictionary, ac-cessing wells by their names. The following example shows how to use all of these methods to access wellA1:
labware = context.load_labware('corning_96_wellplate_360ul_flat', 1)labware['A1']labware.wells_by_name()['A1']labware.wells()[0]labware.rows()[0][0]labware.columns()[0][0]labware.rows_by_name()['A'][0]labware.columns_by_name()[0][0]
property api_versionNew in version 2.0.
property calibrated_offsetNew in version 2.0.
columns(self, *args)→ List[List[opentrons.protocol_api.labware.Well]]Accessor function used to navigate through a labware by column.
With indexing one can treat it as a typical python nested list. To access row A for example, simply write:labware.columns()[0] This will output [‘A1’, ‘B1’, ‘C1’, ‘D1’. . . ].
Note that this method takes args for backward-compatibility, but use of args is deprecated and will beremoved in future versions. Args can be either strings or integers, but must all be the same type (e.g.:self.columns(1, 4, 8) or self.columns(‘1’, ‘2’), but self.columns(‘1’, 4) is invalid.
Returns A list of column lists
New in version 2.0.
columns_by_index(self)→ Dict[str, List[opentrons.protocol_api.labware.Well]]New in version 2.0.
columns_by_name(self)→ Dict[str, List[opentrons.protocol_api.labware.Well]]Accessor function used to navigate through a labware by column name.
With indexing one can treat it as a typical python dictionary. To access row A for example, simply write:labware.columns_by_name()[‘1’] This will output [‘A1’, ‘B1’, ‘C1’, ‘D1’. . . ].
Returns Dictionary of Well lists keyed by column name
New in version 2.0.
72

property highest_zThe z-coordinate of the tallest single point anywhere on the labware.
This is drawn from the ‘dimensions’/’zDimension’ elements of the labware definition and takes into ac-count the calibration offset.
New in version 2.0.
property is_tiprackNew in version 2.0.
property load_nameThe API load name of the labware definition
New in version 2.0.
property magdeck_engage_heightNew in version 2.0.
property nameCan either be the canonical name of the labware, which is used to load it, or the label of the labwarespecified by a user.
New in version 2.0.
next_tip(self, num_tips: int = 1, starting_tip: opentrons.protocol_api.labware.Well = None) →Union[opentrons.protocol_api.labware.Well, NoneType]
Find the next valid well for pick-up.
Determines the next valid start tip from which to retrieve the specified number of tips. There must be atleast num_tips sequential wells for which all wells have tips, in the same column.
Parameters num_tips (int) – target number of sequential tips in the same column
Returns the Well (page 75) meeting the target criteria, or None
property parametersInternal properties of a labware including type and quirks
New in version 2.0.
property parentThe parent of this labware. Usually a slot name.
New in version 2.0.
previous_tip(self, num_tips: int = 1)→ Union[opentrons.protocol_api.labware.Well, NoneType]Find the best well to drop a tip in.
This is the well from which the last tip was picked up, if there’s room. It can be used to return tips to thetip tracker.
Parameters num_tips (int) – target number of tips to return, sequential in a column
Returns The Well (page 75) meeting the target criteria, or None
property quirksQuirks specific to this labware.
New in version 2.0.
reset(self)Reset all tips in a tiprack
New in version 2.0.
return_tips(self, start_well: opentrons.protocol_api.labware.Well, num_channels: int = 1)Re-adds tips to the tip tracker
73
This method should be called when a tip is dropped in a tiprack. It should be called withnum_channels=1 or num_channels=8 for single- and multi-channel respectively. If returning morethan one channel, this method will automatically determine which tips are returned based on the start well,the number of channels, and the tiprack geometry.
Note that unlike use_tips() (page 74), calling this method in a way that would drop tips into wells withtips in them will raise an exception; this should only be called on a valid return of previous_tip()(page 73).
Parameters
• start_well (Well (page 75)) – The Well (page 75) into which to return a tip.
• num_channels (int) – The number of channels for the current pipette
rows(self, *args)→ List[List[opentrons.protocol_api.labware.Well]]Accessor function used to navigate through a labware by row.
With indexing one can treat it as a typical python nested list. To access row A for example, simply write:labware.rows()[0]. This will output [‘A1’, ‘A2’, ‘A3’, ‘A4’. . . ]
Note that this method takes args for backward-compatibility, but use of args is deprecated and will beremoved in future versions. Args can be either strings or integers, but must all be the same type (e.g.:self.rows(1, 4, 8) or self.rows(‘A’, ‘B’), but self.rows(‘A’, 4) is invalid.
Returns A list of row lists
New in version 2.0.
rows_by_index(self)→ Dict[str, List[opentrons.protocol_api.labware.Well]]New in version 2.0.
rows_by_name(self)→ Dict[str, List[opentrons.protocol_api.labware.Well]]Accessor function used to navigate through a labware by row name.
With indexing one can treat it as a typical python dictionary. To access row A for example, simply write:labware.rows_by_name()[‘A’] This will output [‘A1’, ‘A2’, ‘A3’, ‘A4’. . . ].
Returns Dictionary of Well lists keyed by row name
New in version 2.0.
set_calibration(self, delta: opentrons.types.Point)Called by save calibration in order to update the offset on the object.
property tip_lengthNew in version 2.0.
property uriA string fully identifying the labware.
Returns The uri, "namespace/loadname/version"
New in version 2.0.
use_tips(self, start_well: opentrons.protocol_api.labware.Well, num_channels: int = 1)Removes tips from the tip tracker.
This method should be called when a tip is picked up. Generally, it will be called with num_channels=1 ornum_channels=8 for single- and multi-channel respectively. If picking up with more than one channel, thismethod will automatically determine which tips are used based on the start well, the number of channels,and the geometry of the tiprack.
Parameters
74
• start_well (Well (page 75)) – The Well (page 75) from which to pick up a tip. Fora single-channel pipette, this is the well to send the pipette to. For a multi-channel pipette,this is the well to send the back-most nozzle of the pipette to.
• num_channels (int) – The number of channels for the current pipette
well(self, idx)→ opentrons.protocol_api.labware.WellDeprecated—use result of wells or wells_by_name
New in version 2.0.
wells(self, *args)→ List[opentrons.protocol_api.labware.Well]Accessor function used to generate a list of wells in top -> down, left -> right order. This is representativeof moving down rows and across columns (e.g. ‘A1’, ‘B1’, ‘C1’. . . ’A2’, ‘B2’, ‘C2’)
With indexing one can treat it as a typical python list. To access well A1, for example, simply write:labware.wells()[0]
Note that this method takes args for backward-compatibility, but use of args is deprecated and will beremoved in future versions. Args can be either strings or integers, but must all be the same type (e.g.:self.wells(1, 4, 8) or self.wells(‘A1’, ‘B2’), but self.wells(‘A1’, 4) is invalid.
Returns Ordered list of all wells in a labware
New in version 2.0.
wells_by_index(self)→ Dict[str, opentrons.protocol_api.labware.Well]New in version 2.0.
wells_by_name(self)→ Dict[str, opentrons.protocol_api.labware.Well]Accessor function used to create a look-up table of Wells by name.
With indexing one can treat it as a typical python dictionary whose keys are well names. To access wellA1, for example, simply write: labware.wells_by_name()[‘A1’]
Returns Dictionary of well objects keyed by well name
New in version 2.0.
exception opentrons.protocol_api.labware.OutOfTipsError
exception opentrons.protocol_api.labware.TipLengthCalNotFound
class opentrons.protocol_api.labware.Well(well_props: WellDefinition, parent:opentrons.types.Location, display_name:str, has_tip: bool, api_level: open-trons.protocols.types.APIVersion)
The Well class represents a single well in a Labware (page 72)
It provides functions to return positions used in operations on the well such as top() (page 76), bottom()(page 75)
property api_versionNew in version 2.0.
bottom(self, z: float = 0.0)→ opentrons.types.Location
Parameters z – the z distance in mm
Returns a Point corresponding to the absolute position of the bottom-center of the well (withthe front-left corner of slot 1 as (0,0,0)). If z is specified, returns a point offset by z mm frombottom-center
New in version 2.0.
center(self)→ opentrons.types.Location
75

Returns a Point corresponding to the absolute position of the center of the well relative to thedeck (with the front-left corner of slot 1 as (0,0,0))
New in version 2.0.
property diameterNew in version 2.0.
property has_tipNew in version 2.0.
property parentNew in version 2.0.
top(self, z: float = 0.0)→ opentrons.types.Location
Parameters z – the z distance in mm
Returns a Point corresponding to the absolute position of the top-center of the well relative tothe deck (with the front-left corner of slot 1 as (0,0,0)). If z is specified, returns a point offsetby z mm from top-center
New in version 2.0.
opentrons.protocol_api.labware.clear_calibrations()Delete all calibration files for labware. This includes deleting tip-length data for tipracks.
opentrons.protocol_api.labware.clear_tip_length_calibration()Delete all tip length calibration files.
opentrons.protocol_api.labware.get_all_labware_definitions()→ List[str]
Return a list of standard and custom labware definitions with load_name + name_space + version exist-ing on the robot
opentrons.protocol_api.labware.get_labware_definition(load_name: str, names-pace: str = None, ver-sion: int = None, bun-dled_defs: Dict[str, For-wardRef(’LabwareDefinition’)]= None, extra_defs:Dict[str, For-wardRef(’LabwareDefinition’)]= None) → ’LabwareDefini-tion’
Look up and return a definition by load_name + namespace + version and return it or raise an exception
Parameters
• load_name (str) – corresponds to ‘loadName’ key in definition
• namespace (str) – The namespace the labware definition belongs to. If unspecified, willsearch ‘opentrons’ then ‘custom_beta’
• version (int) – The version of the labware definition. If unspecified, will use version 1.
• bundled_defs – A bundle of labware definitions to exlusively use for finding labwaredefinitions, if specified
• extra_defs – An extra set of definitions (in addition to the system definitions) in whichto search
76

opentrons.protocol_api.labware.load(load_name: str, parent: opentrons.types.Location,label: str = None, namespace: str = None,version: int = 1, bundled_defs: Dict[str, For-wardRef(’LabwareDefinition’)] = None, extra_defs:Dict[str, ForwardRef(’LabwareDefinition’)] = None,api_level: opentrons.protocols.types.APIVersion =None)→ opentrons.protocol_api.labware.Labware
Return a labware object constructed from a labware definition dict looked up by name (definition must havebeen previously stored locally on the robot)
Parameters
• load_name – A string to use for looking up a labware definition previously saved to disc.The definition file must have been saved in a known location
• parent – A Location (page 86) representing the location where the front and left mostpoint of the outside of labware is (often the front-left corner of a slot on the deck).
• label (str) – An optional label that will override the labware’s display name from itsdefinition
• namespace (str) – The namespace the labware definition belongs to. If unspecified, willsearch ‘opentrons’ then ‘custom_beta’
• version (int) – The version of the labware definition. If unspecified, will use version 1.
• bundled_defs – If specified, a mapping of labware names to labware definitions. Onlythe bundle will be searched for definitions.
• extra_defs – If specified, a mapping of labware names to labware definitions. If nobundle is passed, these definitions will also be searched.
• api_level (APIVersion) – the API version to set for the loaded labware instance.The Labware (page 72) will conform to this level. If not specified, defaults toMAX_SUPPORTED_VERSION.
opentrons.protocol_api.labware.load_calibration(labware: open-trons.protocol_api.labware.Labware)
Look up a calibration if it exists and apply it to the given labware.
opentrons.protocol_api.labware.load_from_definition(definition: ’LabwareDef-inition’, parent: open-trons.types.Location, label:str = None, api_level: open-trons.protocols.types.APIVersion= None) → open-trons.protocol_api.labware.Labware
Return a labware object constructed from a provided labware definition dict
Parameters
• definition – A dict representing all required data for a labware, including metadata suchas the display name of the labware, a definition of the order to iterate over wells, the shapeof wells (shape, physical dimensions, etc), and so on. The correct shape of this definition isgoverned by the “labware-designer” project in the Opentrons/opentrons repo.
• parent – A Location (page 86) representing the location where the front and left mostpoint of the outside of labware is (often the front-left corner of a slot on the deck).
• label (str) – An optional label that will override the labware’s display name from itsdefinition
77

• api_level (APIVersion) – the API version to set for the loaded labware instance.The Labware (page 72) will conform to this level. If not specified, defaults toMAX_SUPPORTED_VERSION.
opentrons.protocol_api.labware.quirks_from_any_parent(loc:Union[opentrons.protocol_api.labware.Labware,open-trons.protocol_api.labware.Well,str, For-wardRef(’ModuleGeometry’),NoneType])→ List[str]
Walk the tree of wells and labwares and extract quirks
opentrons.protocol_api.labware.save_calibration(labware: open-trons.protocol_api.labware.Labware,delta: opentrons.types.Point)
Function to be used whenever an updated delta is found for the first well of a given labware. If an offset filedoes not exist, create the file using labware id as the filename. If the file does exist, load it and modify the deltaand the lastModified fields under the “default” key.
opentrons.protocol_api.labware.save_definition(labware_def: ’LabwareDefinition’,force: bool = False, location: path-lib.Path = None)→ None
Save a labware definition
Parameters
• labware_def – A deserialized JSON labware definition
• force (bool) – If true, overwrite an existing definition if found. Cannot overwrite Open-trons definitions.
opentrons.protocol_api.labware.save_tip_length(labware: open-trons.protocol_api.labware.Labware,length: float)
Function to be used whenever an updated tip length is found for of a given tip rack. If an offset file does notexist, create the file using labware id as the filename. If the file does exist, load it and modify the length and thelastModified fields under the “tipLength” key.
opentrons.protocol_api.labware.uri_from_definition(definition: ’LabwareDefinition’,delimiter=’/’)→ str
Build a labware URI from its definition.
A labware URI is a string that uniquely specifies a labware definition.
Returns str The URI.
opentrons.protocol_api.labware.uri_from_details(namespace: str, load_name: str, ver-sion: Union[str, int], delimiter=’/’)→str
Build a labware URI from its details.
A labware URI is a string that uniquely specifies a labware definition.
Returns str The URI.
opentrons.protocol_api.labware.verify_definition(contents: Union[~AnyStr, For-wardRef(’LabwareDefinition’),Dict[str, Any]]) → ’LabwareDefini-tion’
Verify that an input string is a labware definition and return it.
If the definition is invalid, an exception is raised; otherwise parse the json and return the valid definition.
Raises
78

• json.JsonDecodeError – If the definition is not valid json
• jsonschema.ValidationError – If the definition is not valid.
Returns The parsed definition
Modules
class opentrons.protocol_api.contexts.TemperatureModuleContext(ctx: Proto-colContext,hw_module:open-trons.hardware_control.modules.tempdeck.TempDeck,geometry: open-trons.protocol_api.module_geometry.ModuleGeometry,at_version:open-trons.protocols.types.APIVersion,loop: asyn-cio.events.AbstractEventLoop)
An object representing a connected Temperature Module.
It should not be instantiated directly; instead, it should be created through ProtocolContext.load_module() (page 60) using: ctx.load_module('Temperature Module',slot_number).
A minimal protocol with a Temperature module would look like this:
Note: In order to prevent physical obstruction of other slots, place the Temperature Module in a slot on thehorizontal edges of the deck (such as 1, 4, 7, or 10 on the left or 3, 6, or 7 on the right), with the USB cable andpower cord pointing away from the deck.
New in version 2.0.
property api_versionNew in version 2.0.
await_temperature(self, celsius: float)Wait until module reaches temperature, in C.
Must be between 4 and 95C based on Opentrons QA.
Parameters celsius – The target temperature, in C
New in version 2.3.
deactivate(self)Stop heating (or cooling) and turn off the fan.
New in version 2.0.
property geometryThe object representing the module as an item on the deck
Returns ModuleGeometry
New in version 2.0.
property labwareThe labware (if any) present on this module.
New in version 2.0.
79
load_labware(self, name: str, label: str = None, namespace: str = None, version: int = 1) →opentrons.protocol_api.labware.Labware
Specify the presence of a piece of labware on the module.
Parameters
• name – The name of the labware object.
• label (str) – An optional special name to give the labware. If specified, this is thename the labware will appear as in the run log and the calibration view in the Opentronsapp.
New in version 2.1.
Parameters namespace (str) – The namespace the labware definition belongs to. If unspec-ified, will search ‘opentrons’ then ‘custom_beta’
New in version 2.1.
Parameters version (int) – The version of the labware definition. If unspecified, will useversion 1.
New in version 2.1.
Returns The initialized and loaded labware object.
New in version 2.0.
load_labware_by_name(self, name: str, label: str = None, namespace: str = None, version: int =1)→ opentrons.protocol_api.labware.Labware
New in version 2.1.
load_labware_from_definition(self, definition: ’LabwareDefinition’, label: str = None) →opentrons.protocol_api.labware.Labware
Specify the presence of a labware on the module, using an inline definition.
Parameters
• definition – The labware definition.
• label (str) – An optional special name to give the labware. If specified, this is thename the labware will appear as in the run log and the calibration view in the Opentronsapp.
Returns The initialized and loaded labware object.
New in version 2.0.
load_labware_object(self, labware: opentrons.protocol_api.labware.Labware) → open-trons.protocol_api.labware.Labware
Specify the presence of a piece of labware on the module.
Parameters labware – The labware object. This object should be already initialized and itsparent should be set to this module’s geometry. To initialize and load a labware onto themodule in one step, see load_labware() (page 79).
Returns The properly-linked labware object
New in version 2.0.
set_temperature(self, celsius: float)Set the target temperature, in C.
Must be between 4 and 95C based on Opentrons QA.
Parameters celsius – The target temperature, in C
New in version 2.0.
80

property statusThe status of the module.
Returns ‘holding at target’, ‘cooling’, ‘heating’, or ‘idle’
New in version 2.3.
property targetCurrent target temperature in C
New in version 2.0.
property temperatureCurrent temperature in C
New in version 2.0.
class opentrons.protocol_api.contexts.MagneticModuleContext(ctx: Proto-colContext,hw_module: open-trons.hardware_control.modules.magdeck.MagDeck,geometry: open-trons.protocol_api.module_geometry.ModuleGeometry,at_version: open-trons.protocols.types.APIVersion,loop: asyn-cio.events.AbstractEventLoop)
An object representing a connected Temperature Module.
It should not be instantiated directly; instead, it should be created through ProtocolContext.load_module() (page 60).
New in version 2.0.
property api_versionNew in version 2.0.
calibrate(self)Calibrate the Magnetic Module.
The calibration is used to establish the position of the lawbare on top of the magnetic module.
New in version 2.0.
disengage(self)Lower the magnets back into the Magnetic Module.
New in version 2.0.
engage(self, height: float = None, offset: float = None, height_from_base: float = None)Raise the Magnetic Module’s magnets.
The destination of the magnets can be specified in several different ways, based on internally stored defaultheights for labware:
• If neither height, height_from_base nor offset is specified, the magnets will raise to areasonable default height based on the specified labware.
• The recommended way to adjust the height of the magnets is to specify height_from_base,which should be a distance in mm relative to the base of the labware that is on the magnetic module
• If height is specified, it should be a distance in mm from the home position of the magnets.
• If offset is specified, it should be an offset in mm from the default position. A positive numbermoves the magnets higher and a negative number moves the magnets lower.
81

Only certain labwares have defined engage heights for the Magnetic Module. If a labware that does nothave a defined engage height is loaded on the Magnetic Module (or if no labware is loaded), then heightor height_from_labware must be specified.
Parameters height_from_base – The height to raise the magnets to, in mm from the baseof the labware
New in version 2.1.
Parameters
• height – The height to raise the magnets to, in mm from home.
• offset – An offset relative to the default height for the labware in mm
New in version 2.0.
property geometryThe object representing the module as an item on the deck
Returns ModuleGeometry
New in version 2.0.
property labwareThe labware (if any) present on this module.
New in version 2.0.
load_labware(self, name: str, label: str = None, namespace: str = None, version: int = 1) →opentrons.protocol_api.labware.Labware
Specify the presence of a piece of labware on the module.
Parameters
• name – The name of the labware object.
• label (str) – An optional special name to give the labware. If specified, this is thename the labware will appear as in the run log and the calibration view in the Opentronsapp.
New in version 2.1.
Parameters namespace (str) – The namespace the labware definition belongs to. If unspec-ified, will search ‘opentrons’ then ‘custom_beta’
New in version 2.1.
Parameters version (int) – The version of the labware definition. If unspecified, will useversion 1.
New in version 2.1.
Returns The initialized and loaded labware object.
New in version 2.0.
load_labware_by_name(self, name: str, label: str = None, namespace: str = None, version: int =1)→ opentrons.protocol_api.labware.Labware
New in version 2.1.
load_labware_from_definition(self, definition: ’LabwareDefinition’, label: str = None) →opentrons.protocol_api.labware.Labware
Specify the presence of a labware on the module, using an inline definition.
Parameters
• definition – The labware definition.
82

• label (str) – An optional special name to give the labware. If specified, this is thename the labware will appear as in the run log and the calibration view in the Opentronsapp.
Returns The initialized and loaded labware object.
New in version 2.0.
load_labware_object(self, labware: opentrons.protocol_api.labware.Labware) → open-trons.protocol_api.labware.Labware
Load labware onto a Magnetic Module, checking if it is compatible
New in version 2.0.
property statusThe status of the module. either ‘engaged’ or ‘disengaged’
New in version 2.0.
class opentrons.protocol_api.contexts.ThermocyclerContext(ctx: ProtocolContext,hw_module: open-trons.hardware_control.modules.thermocycler.Thermocycler,geometry: open-trons.protocol_api.module_geometry.ThermocyclerGeometry,at_version: open-trons.protocols.types.APIVersion,loop: asyn-cio.events.AbstractEventLoop)
An object representing a connected Temperature Module.
It should not be instantiated directly; instead, it should be created through ProtocolContext.load_module() (page 60).
New in version 2.0.
property api_versionNew in version 2.0.
property block_target_temperatureTarget temperature in degrees C
New in version 2.0.
property block_temperatureCurrent temperature in degrees C
New in version 2.0.
property block_temperature_statusNew in version 2.0.
close_lid(self)Closes the lid
New in version 2.0.
deactivate(self)Turn off the well block temperature controller, and heated lid
New in version 2.0.
deactivate_block(self)Turn off the well block temperature controller
New in version 2.0.
83

deactivate_lid(self)Turn off the heated lid
New in version 2.0.
execute_profile(self, steps: List[Dict[str, float]], repetitions: int, block_max_volume: float =None)
Execute a Thermocycler Profile defined as a cycle of steps to repeat for a given number ofrepetitions
Parameters
• steps – List of unique steps that make up a single cycle. Each list item should be adictionary that maps to the parameters of the set_block_temperature() (page 85)method with keys ‘temperature’, ‘hold_time_seconds’, and ‘hold_time_minutes’.
• repetitions – The number of times to repeat the cycled steps.
• block_max_volume – The maximum volume of any individual well of the loaded lab-ware. If not supplied, the thermocycler will default to 25µL/well.
New in version 2.0.
property geometryThe object representing the module as an item on the deck
Returns ModuleGeometry
New in version 2.0.
property labwareThe labware (if any) present on this module.
New in version 2.0.
property lid_positionLid open/close status string
New in version 2.0.
property lid_target_temperatureTarget temperature in degrees C
New in version 2.0.
property lid_temperatureCurrent temperature in degrees C
New in version 2.0.
property lid_temperature_statusNew in version 2.0.
load_labware(self, name: str, label: str = None, namespace: str = None, version: int = 1) →opentrons.protocol_api.labware.Labware
Specify the presence of a piece of labware on the module.
Parameters
• name – The name of the labware object.
• label (str) – An optional special name to give the labware. If specified, this is thename the labware will appear as in the run log and the calibration view in the Opentronsapp.
New in version 2.1.
Parameters namespace (str) – The namespace the labware definition belongs to. If unspec-ified, will search ‘opentrons’ then ‘custom_beta’
84

New in version 2.1.
Parameters version (int) – The version of the labware definition. If unspecified, will useversion 1.
New in version 2.1.
Returns The initialized and loaded labware object.
New in version 2.0.
load_labware_by_name(self, name: str, label: str = None, namespace: str = None, version: int =1)→ opentrons.protocol_api.labware.Labware
New in version 2.1.
load_labware_from_definition(self, definition: ’LabwareDefinition’, label: str = None) →opentrons.protocol_api.labware.Labware
Specify the presence of a labware on the module, using an inline definition.
Parameters
• definition – The labware definition.
• label (str) – An optional special name to give the labware. If specified, this is thename the labware will appear as in the run log and the calibration view in the Opentronsapp.
Returns The initialized and loaded labware object.
New in version 2.0.
load_labware_object(self, labware: opentrons.protocol_api.labware.Labware) → open-trons.protocol_api.labware.Labware
Specify the presence of a piece of labware on the module.
Parameters labware – The labware object. This object should be already initialized and itsparent should be set to this module’s geometry. To initialize and load a labware onto themodule in one step, see load_labware() (page 84).
Returns The properly-linked labware object
New in version 2.0.
open_lid(self)Opens the lid
New in version 2.0.
set_block_temperature(self, temperature: float, hold_time_seconds: float = None,hold_time_minutes: float = None, ramp_rate: float = None,block_max_volume: float = None)
Set the target temperature for the well block, in °C.
Valid operational range yet to be determined.
Parameters
• temperature – The target temperature, in °C.
• hold_time_minutes – The number of minutes to hold, after reachingtemperature, before proceeding to the next command.
• hold_time_seconds – The number of seconds to hold, after reachingtemperature, before proceeding to the next command. If hold_time_minutesand hold_time_seconds are not specified, the Thermocycler will proceed to the nextcommand after temperature is reached.
• ramp_rate – The target rate of temperature change, in °C/sec. If ramp_rate is notspecified, it will default to the maximum ramp rate as defined in the device configuration.
85

• block_max_volume – The maximum volume of any individual well of the loaded lab-ware. If not supplied, the thermocycler will default to 25µL/well.
New in version 2.0.
set_lid_temperature(self, temperature: float)Set the target temperature for the heated lid, in °C.
Parameters temperature – The target temperature, in °C clamped to the range 20°C to105°C.
New in version 2.0.
Useful Types and Definitions
class opentrons.types.LocationA location to target as a motion.
The location contains a Point (page 86) (in Deck Coordinates (page 91)) and possibly an associated Labware(page 72) or Well (page 75) instance.
It should rarely be constructed directly by the user; rather, it is the return type of most Well (page 75)accessors like Well.top() (page 76) and is passed directly into a method like InstrumentContext.aspirate().
Warning: The labware (page 86) attribute of this class is used by the protocol API internals to, amongother things, determine safe heights to retract the instruments to when moving between locations. If con-structing an instance of this class manually, be sure to either specify None as the labware (so the robot doesits worst case retraction) or specify the correct labware for the point (page 86) attribute.
Warning: The == operation compares both the position and associated labware. If you only need tocompare locations, compare the point (page 86) of each item.
property labwareAlias for field number 1
move(self, point: opentrons.types.Point)→ ’Location’Alter the point stored in the location while preserving the labware.
This returns a new Location and does not alter the current one. It should be used like
>>> loc = Location(Point(1, 1, 1), 'Hi')>>> new_loc = loc.move(Point(1, 1, 1))>>> assert loc_2.point == Point(2, 2, 2) # True>>> assert loc.point == Point(1, 1, 1) # True
property pointAlias for field number 0
class opentrons.types.MountAn enumeration.
exception opentrons.types.PipetteNotAttachedErrorAn error raised if a pipette is accessed that is not attached
class opentrons.types.Point(x, y, z)
86

property xAlias for field number 0
property yAlias for field number 1
property zAlias for field number 2
class opentrons.types.TransferTipPolicyAn enumeration.
Executing and Simulating Protocols
opentrons.execute: functions and entrypoint for running protocols
This module has functions that can be imported to provide protocol contexts for running protocols during interactivesessions like Jupyter or just regular python shells. It also provides a console entrypoint for running a protocol fromthe command line.
opentrons.execute.execute(protocol_file: <class ’TextIO’>, protocol_name: str, propa-gate_logs: bool = False, log_level: str = ’warning’, emit_runlog:Callable[[Dict[str, Any]], NoneType] = None, custom_labware_paths:List[str] = None, custom_data_paths: List[str] = None)
Run the protocol itself.
This is a one-stop function to run a protocol, whether python or json, no matter the api verson, from external(i.e. not bound up in other internal server infrastructure) sources.
To run an opentrons protocol from other places, pass in a file like object as protocol_file; this function eitherreturns (if the run has no problems) or raises an exception.
To call from the command line use either the autogenerated entrypoint opentrons_execute or python-m opentrons.execute.
If the protocol is using Opentrons Protocol API V1, it does not need to explicitly call Robot.connect() orRobot.discover_modules(), or Robot.cache_instrument_models().
Parameters
• protocol_file (file-like) – The protocol file to execute
• protocol_name (str) – The name of the protocol file. This is required internally, but itmay not be a thing we can get from the protocol_file argument.
• propagate_logs (bool) – Whether this function should allow logs from the Opentronsstack to propagate up to the root handler. This can be useful if you’re integrating this func-tion in a larger application, but most logs that occur during protocol simulation are bestassociated with the actions in the protocol that cause them. Default: False
• log_level ('debug', 'info', 'warning', or 'error') – The level of logsto emit on the command line.. Default: ‘warning’
• emit_runlog – A callback for printing the runlog. If specified, this will be called when-ever a command adds an entry to the runlog, which can be used for display and progressestimation. If specified, the callback should take a single argument (the name doesn’t mat-ter) which will be a dictionary (see below). Default: None
• custom_labware_paths – A list of directories to search for custom labware, or None.Ignored if the apiv2 feature flag is not set. Loads valid labware from these paths and makesthem available to the protocol context.
87
• custom_data_paths – A list of directories or files to load custom data files from. Ig-nored if the apiv2 feature flag if not set. Entries may be either files or directories. Specifiedfiles and the non-recursive contents of specified directories are presented by the protocolcontext in ProtocolContext.bundled_data.
The format of the runlog entries is as follows:
{'name': command_name,'payload': {
'text': string_command_text,# The rest of this struct is command-dependent; see# opentrons.commands.commands. Its keys match format# keys in 'text', so that# entry['payload']['text'].format(**entry['payload'])# will produce a string with information filled in
}}
opentrons.execute.get_arguments(parser: argparse.ArgumentParser) → arg-parse.ArgumentParser
Get the argument parser for this module
Useful if you want to use this module as a component of another CLI program and want to add its arguments.
Parameters parser – A parser to add arguments to.
Returns argparse.ArgumentParser The parser with arguments added.
opentrons.execute.get_protocol_api(version: Union[str, open-trons.protocols.types.APIVersion], bundled_labware:Dict[str, ForwardRef(’LabwareDefinition’)] = None,bundled_data: Dict[str, bytes] = None, extra_labware:Dict[str, ForwardRef(’LabwareDefinition’)] = None) →opentrons.protocol_api.protocol_context.ProtocolContext
Build and return a ProtocolContext connected to the robot.
This can be used to run protocols from interactive Python sessions such as Jupyter or an interpreter on thecommand line:
>>> from opentrons.execute import get_protocol_api>>> protocol = get_protocol_api('2.0')>>> instr = protocol.load_instrument('p300_single', 'right')>>> instr.home()
If extra_labware is not specified, any labware definitions saved in the labware directory of the Jupyternotebook directory will be available.
When this function is called, modules and instruments will be recached.
Parameters
• version – The API version to use. This must be lower than opentrons.protocol_api.MAX_SUPPORTED_VERSION. It may be specified either as a string('2.0') or as a protocols.types.APIVersion (APIVersion(2, 0)).
• bundled_labware – If specified, a mapping from labware names to labware definitionsfor labware to consider in the protocol. Note that if you specify this, _only_ labware in thisargument will be allowed in the protocol. This is preparation for a beta feature and is bestnot used.
• bundled_data – If specified, a mapping from filenames to contents for data to be avail-able in the protocol from ProtocolContext.bundled_data.
88
• extra_labware – If specified, a mapping from labware names to labware definitions forlabware to consider in the protocol in addition to those stored on the robot. If this is anempty dict, and this function is called on a robot, it will look in the ‘labware’ subdirectoryof the Jupyter data directory for custom labware.
Returns opentrons.protocol_api.ProtocolContext The protocol context.
opentrons.execute.main()→ intHandler for command line invocation to run a protocol.
Parameters argv – The arguments the program was invoked with; this is usually sys.argv butif you want to override that you can.
Returns int A success or failure value suitable for use as a shell return code passed to sys.exit()(0 means success, anything else is a kind of failure).
opentrons.simulate: functions and entrypoints for simulating protocols
This module has functions that provide a console entrypoint for simulating a protocol from the command line.
class opentrons.simulate.AccumulatingHandler(level, command_queue)
emit(self, record)Do whatever it takes to actually log the specified logging record.
This version is intended to be implemented by subclasses and so raises a NotImplementedError.
class opentrons.simulate.CommandScraper(logger: logging.Logger, level: str, broker: open-trons.broker.Broker)
An object that handles scraping the broker for commands
This should be instantiated with the logger to integrate messages from (e.g. logging.getLogger('opentrons')), the level to scrape, and the opentrons broker object to subscribe to.
The commands (page 89) property contains the list of commands and log messages integrated together. Eachelement of the list is a dict following the pattern in the docs of simulate() (page 90).
property commandsThe list of commands. See simulate() (page 90)
opentrons.simulate.allow_bundle()→ boolCheck if bundling is allowed with a special not-exposed-to-the-app flag.
Returns True if the environment variable OT_API_FF_allowBundleCreation is "1"
opentrons.simulate.bundle_from_sim(protocol: opentrons.protocols.types.PythonProtocol, con-text: opentrons.protocol_api.protocol_context.ProtocolContext)→ opentrons.protocols.types.BundleContents
From a protocol, and the context that has finished simulating that protocol, determine what needs to go in abundle for the protocol.
opentrons.simulate.format_runlog(runlog: List[Mapping[str, Any]])→ strFormat a run log (return value of simulate`()) into a human-readable string
Parameters runlog – The output of a call to simulate() (page 90)
opentrons.simulate.get_arguments(parser: argparse.ArgumentParser) → arg-parse.ArgumentParser
Get the argument parser for this module
Useful if you want to use this module as a component of another CLI program and want to add its arguments.
Parameters parser – A parser to add arguments to. If not specified, one will be created.
Returns argparse.ArgumentParser The parser with arguments added.
89

opentrons.simulate.get_protocol_api(version: Union[str, open-trons.protocols.types.APIVersion], bundled_labware:Dict[str, ForwardRef(’LabwareDefinition’)] = None,bundled_data: Dict[str, bytes] = None, extra_labware:Dict[str, ForwardRef(’LabwareDefinition’)]= None, hardware_simulator:Union[opentrons.hardware_control.thread_manager.ThreadManager,opentrons.hardware_control.adapters.SynchronousAdapter,ForwardRef(’HasLoop’)] = None) → open-trons.protocol_api.protocol_context.ProtocolContext
Build and return a :py:class:‘ProtocolContext‘connected to Virtual Smoothie.
This can be used to run protocols from interactive Python sessions such as Jupyter or an interpreter on thecommand line:
>>> from opentrons.simulate import get_protocol_api>>> protocol = get_protocol_api('2.0')>>> instr = protocol.load_instrument('p300_single', 'right')>>> instr.home()
If extra_labware is not specified, any labware definitions saved in the labware directory of the Jupyternotebook directory will be available.
Parameters
• version – The API version to use. This must be lower than opentrons.protocol_api.MAX_SUPPORTED_VERSION. It may be specified either as a string('2.0') or as a protocols.types.APIVersion (APIVersion(2, 0)).
• bundled_labware – If specified, a mapping from labware names to labware definitionsfor labware to consider in the protocol. Note that if you specify this, _only_ labware in thisargument will be allowed in the protocol. This is preparation for a beta feature and is bestnot used.
• bundled_data – If specified, a mapping from filenames to contents for data to be avail-able in the protocol from ProtocolContext.bundled_data.
• extra_labware – If specified, a mapping from labware names to labware definitions forlabware to consider in the protocol in addition to those stored on the robot. If this is anempty dict, and this function is called on a robot, it will look in the ‘labware’ subdirectoryof the Jupyter data directory for custom labware.
• hardware_simulator – If specified, a hardware simulator instance.
Returns opentrons.protocol_api.ProtocolContext The protocol context.
opentrons.simulate.main()→ intRun the simulation
opentrons.simulate.simulate(protocol_file: <class ’TextIO’>, file_name: str =None, custom_labware_paths: List[str] = None, cus-tom_data_paths: List[str] = None, propagate_logs: bool= False, hardware_simulator_file_path: str = None,log_level: str = ’warning’) → Tuple[List[Mapping[str, Any]],Union[opentrons.protocols.types.BundleContents, NoneType]]
Simulate the protocol itself.
This is a one-stop function to simulate a protocol, whether python or json, no matter the api version, fromexternal (i.e. not bound up in other internal server infrastructure) sources.
To simulate an opentrons protocol from other places, pass in a file like object as protocol_file; this functioneither returns (if the simulation has no problems) or raises an exception.
90
To call from the command line use either the autogenerated entrypoint opentrons_simulate(opentrons_simulate.exe, on windows) or python -m opentrons.simulate.
The return value is the run log, a list of dicts that represent the commands executed by the robot; and either thecontents of the protocol that would be required to bundle, or None.
Each dict element in the run log has the following keys:
• level: The depth at which this command is nested - if this an aspirate inside a mix inside a transfer,for instance, it would be 3.
• payload: The command, its arguments, and how to format its text. For more specific details seeopentrons.commands. To format a message from a payload do payload['text'].format(**payload).
• logs: Any log messages that occurred during execution of this command, as a logging.LogRecord
Parameters
• protocol_file (file-like) – The protocol file to simulate.
• file_name (str) – The name of the file
• custom_labware_paths – A list of directories to search for custom labware, or None.Ignored if the apiv2 feature flag is not set. Loads valid labware from these paths and makesthem available to the protocol context.
• custom_data_paths – A list of directories or files to load custom data files from. Ig-nored if the apiv2 feature flag if not set. Entries may be either files or directories. Specifiedfiles and the non-recursive contents of specified directories are presented by the protocolcontext in ProtocolContext.bundled_data.
• hardware_simulator_file_path – A path to a JSON file defining a hardware sim-ulator.
• propagate_logs (bool) – Whether this function should allow logs from the Opentronsstack to propagate up to the root handler. This can be useful if you’re integrating this func-tion in a larger application, but most logs that occur during protocol simulation are bestassociated with the actions in the protocol that cause them. Default: False
• log_level ('debug', 'info', 'warning', or 'error') – The level of logsto capture in the runlog. Default: 'warning'
Returns A tuple of a run log for user output, and possibly the required data to write to abundle to bundle this protocol. The bundle is only emitted if bundling is allowed (seeallow_bundling()) and this is an unbundled Protocol API v2 python protocol. In othercases it is None.
Deck Coordinates
The OT2’s base coordinate system is known as deck coordinates. This coordinate system is referenced frequentlythrough the API. It is a right-handed coordinate system always specified in mm, with (0, 0, 0) at the front left of therobot. +x is to the right, +y is to the back, and +z is up.
Note that there are technically two z axes, one for each pipette mount. In these terms, z is the axis of the left pipettemount and a is the axis of the right pipette mount. These are obscured by the API’s habit of defining motion commandson a per-pipette basis; the pipettes internally select the correct z axis to move. This is also true of the pipette plungeraxes, b (left) and c (right).
When locations are specified to functions like opentrons.protocol_api.contexts.InstrumentContext.move_to() (page 67), in addition to being an instance of opentrons.protocol_api.labware.Well (page 75) they may define coordinates in this deck coordinate space.
91

These coordinates can be specified either as a standard python tuple of three floats, or as an instance of thecollections.namedtuple opentrons.types.Point (page 86), which can be created in the same way.
5.9 Examples
All examples on this page use a 'corning_96_wellplate_360ul_flat' (an ANSI standard 96-wellplate48) in slot 1, and two 'opentrons_96_tiprack_300ul' (the Opentrons standard 300 µL tiprack49)in slots 2 and 3. They also require a P300 Single attached to the right mount. Some examples also use a'usascientific_12_reservoir_22ml' (a USA Scientific 12-row reservoir50) in slot 4.
Basic Transfer
Moving 100 µL from one well to another:
from opentrons import protocol_api
metadata = {'apiLevel': '2.2'}
def run(protocol: protocol_api.ProtocolContext):plate = protocol.load_labware('corning_96_wellplate_360ul_flat', 1)tiprack_1 = protocol.load_labware('opentrons_96_tiprack_300ul', 2)p300 = protocol.load_instrument('p300_single', 'right', tip_racks=[tiprack_1])
p300.transfer(100, plate['A1'], plate['B1'])
This accomplishes the same thing as the following basic commands:
from opentrons import protocol_api
metadata = {'apiLevel': '2.2'}
def run(protocol: protocol_api.ProtocolContext):plate = protocol.load_labware('corning_96_wellplate_360ul_flat', 1)tiprack_1 = protocol.load_labware('opentrons_96_tiprack_300ul', 2)p300 = protocol.load_instrument('p300_single', 'right', tip_racks=[tiprack_1])
p300.pick_up_tip()p300.aspirate(100, plate.wells('A1'))p300.dispense(100, plate.wells('A1'))p300.return_tip()
Loops
Loops in Python allow your protocol to perform many actions, or act upon many wells, all within just a few lines. Thebelow example loops through the numbers 0 to 11, and uses that loop’s current value to transfer from all wells in areservoir to each row of a plate:
48 https://labware.opentrons.com/corning_96_wellplate_360ul_flat49 https://labware.opentrons.com/opentrons_96_tiprack_300ul50 https://labware.opentrons.com/usascientific_12_reservoir_22ml
92

from opentrons import protocol_api
metadata = {'apiLevel': '2.2'}
def run(protocol: protocol_api.ProtocolContext):plate = protocol.load_labware('corning_96_wellplate_360ul_flat', 1)tiprack_1 = protocol.load_labware('opentrons_96_tiprack_300ul', 2)reservoir = protocol.load_labware('usascientific_12_reservoir_22ml', 4)p300 = protocol.load_instrument('p300_single', 'right', tip_racks=[tiprack_1])# distribute 20uL from reservoir:A1 -> plate:row:1# distribute 20uL from reservoir:A2 -> plate:row:2# etc...
# range() starts at 0 and stops before 8, creating a range of 0-7for i in range(8):
p300.distribute(200, reservoir.wells()[i], plate.rows()[i])
Multiple Air Gaps
The OT-2 pipettes can do some things that a human cannot do with a pipette, like accurately alternate between aspirat-ing and creating air gaps within the same tip. The below example will aspirate from five wells in the reservoir, whilecreating an air gap between each sample.
from opentrons import protocol_api
metadata = {'apiLevel': '2.2'}
def run(protocol: protocol_api.ProtocolContext):plate = protocol.load_labware('corning_96_wellplate_360ul_flat', 1)tiprack_1 = protocol.load_labware('opentrons_96_tiprack_300ul', 2)reservoir = protocol.load_labware('usascientific_12_reservoir_22ml', 4)p300 = protocol.load_instrument('p300_single', 'right', tip_racks=[tiprack_1])p300.pick_up_tip()
for well in reservoir.wells():p300.aspirate(35, well)p300.air_gap(10)p300.dispense(45, plate['A1'])
p300.return_tip()
Dilution
This example first spreads a diluent to all wells of a plate. It then dilutes 8 samples from the reservoir across the 8columns of the plate.
from opentrons import protocol_api
metadata = {'apiLevel': '2.2'}
def run(protocol: protocol_api.ProtocolContext):
(continues on next page)
93

(continued from previous page)
plate = protocol.load_labware('corning_96_wellplate_360ul_flat', 1)tiprack_1 = protocol.load_labware('opentrons_96_tiprack_300ul', 2)tiprack_2 = protocol.load_labware('opentrons_96_tiprack_300ul', 3)reservoir = protocol.load_labware('usascientific_12_reservoir_22ml', 4)p300 = protocol.load_instrument('p300_single', 'right', tip_racks=[tiprack_1,
→˓tiprack_2])p300.distribute(50, reservoir['A12'], plate.wells()) # dilutent
# loop through each rowfor i in range(8):
# save the source well and destination column to variablessource = reservoir.wells()[i]row = plate.rows()[i]
# transfer 30uL of source to first well in columnp300.transfer(30, source, row[0], mix_after=(3, 25))
# dilute the sample down the columnp300.transfer(
30, row[:11], row[1:],mix_after=(3, 25))
Plate Mapping
This example deposits various volumes of liquids into the same plate of wells and automatically refill the tip volumewhen it runs out.
from opentrons import protocol_api
metadata = {'apiLevel': '2.2'}
def run(protocol: protocol_api.ProtocolContext):plate = protocol.load_labware('corning_96_wellplate_360ul_flat', 1)tiprack_1 = protocol.load_labware('opentrons_96_tiprack_300ul', 2)tiprack_2 = protocol.load_labware('opentrons_96_tiprack_300ul', 3)reservoir = protocol.load_labware('usascientific_12_reservoir_22ml', 4)p300 = protocol.load_instrument('p300_single', 'right', tip_racks=[tiprack_1,
→˓tiprack_2])
# these uL values were created randomly for this examplewater_volumes = [
1, 2, 3, 4, 5, 6, 7, 8,9, 10, 11, 12, 13, 14, 15, 16,17, 18, 19, 20, 21, 22, 23, 24,25, 26, 27, 28, 29, 30, 31, 32,33, 34, 35, 36, 37, 38, 39, 40,41, 42, 43, 44, 45, 46, 47, 48,49, 50, 51, 52, 53, 54, 55, 56,57, 58, 59, 60, 61, 62, 63, 64,65, 66, 67, 68, 69, 70, 71, 72,73, 74, 75, 76, 77, 78, 79, 80,81, 82, 83, 84, 85, 86, 87, 88,
(continues on next page)
94

(continued from previous page)
89, 90, 91, 92, 93, 94, 95, 96]
p300.distribute(water_volumes, reservoir['A12'], plate.wells())
5.10 Advanced Control
Sometimes, you may write a protocol that is not suitable for execution through the Opentrons App. Perhaps it requiresuser input; perhaps it needs to do a lot of things it cannot do when being simulated. There are two ways to run aprotocol on the OT-2 without using the Opentrons App.
Jupyter Notebook
The OT-2 runs a Jupyter Notebook server that you can connect to with your web browser. This is a convenientenvironment in which to write and debug protocols, since you can define different parts of your protocol in differentnotebook cells and run only part of the protocol at a given time.
You can access the OT-2’s Jupyter Notebook by following these steps:
1. Open your Opentrons App and look for the IP address of your OT-2 on the information page.
2. Type in (Your OT-2's IP Address):48888 into any browser on your computer.
Here, you can select a notebook and develop protocols that will be saved on the OT-2 itself. These protocols will onlybe on the OT-2 unless specifically downloaded to your computer using the File / Download As buttons in thenotebook.
Protocol Structure
To take advantage of Jupyter’s ability to run only parts of your protocol, you have to restructure your protocol -turn it inside out. Rather than writing a single run function that contains all your protocol logic, you can use thefunction opentrons.execute.get_protocol_api() (page 88), into which you pass the same API version(see Versioning (page 9)) that you would specify in your protocol’s metadata:
import opentrons.executeprotocol = opentrons.execute.get_protocol_api('2.0')protocol.home()
This returns the same kind of object - a ProtocolContext (page 57) - that is passed into your protocol’s runfunction when you upload your protocol in the Opentrons App. Full documentation on the capabilities and use of theProtocolContext (page 57) object is available in the other sections of this guide - Pipettes (page 27), BuildingBlock Commands (page 34), Complex Commands (page 43), Labware (page 12), and Hardware Modules (page 17); afull list of all available attributes and methods is available in API Version 2 Reference (page 57).
Whenever you call get_protocol_api, the robot will update its cache of attached instruments and modules. Youcan call get_protocol_api repeatedly; it will return an entirely new ProtocolContext (page 57) each time,without any labware loaded or any instruments established. This can be a good way to reset the state of the system, ifyou accidentally loaded in the wrong labware.
Now that you have a ProtocolContext (page 57), you call all its methods just as you would in a protocol, withoutthe encompassing run function, just like if you were prototyping a plotting or pandas script for later use.
95
Note: Before you can command the OT-2 to move using the protocol API you have just built, you must home therobot using protocol.home(). If you try to move the OT-2 before you have called protocol.home(), youwill get a MustHomeError.
Running A Previously-Written Protocol
If you have a protocol that you have already written you can run it directly in Jupyter. Copy the protocol into a celland execute it - this won’t cause the OT-2 to move, it just makes the function available. Then, call the run functionyou just defined, and give it a ProtocolContext (page 57):
import opentrons.executefrom opentrons import protocol_apidef run(protocol: protocol_api.ProtocolContext):
# the contents of your protocol are here...
protocol = opentrons.execute.get_protocol_api('2.0')run(protocol) # your protocol will now run
Custom Labware
If you have custom labware definitions you want to use with Jupyter, make a new directory called “labware” in Jupyterand put the definitions there. These definitions will be available when you call load_labware.
Command Line
The OT-2’s command line is accessible either by creating a new terminal in Jupyter or by using SSH to access itsterminal51.
To execute a protocol via SSH, copy it to the OT-2 using a program like scp and then use the command line programopentrons_execute:
# opentrons_execute /data/my_protocol.py
You can access help on the usage of opentrons_execute by calling opentrons_execute --help. Thisscript has a couple options to let you customize what it prints out when you run it. By default, it will print out thesame runlog you see in the Opentrons App when running a protocol, as it executes; it will also print out internal logsat level warning or above. Both of these behaviors can be changed.
51 https://support.opentrons.com/en/articles/3203681
96

Python Module Index
oopentrons.execute, 87opentrons.protocol_api.contexts, 57opentrons.protocol_api.labware, 71opentrons.simulate, 89opentrons.types, 86
97

Index
AAccumulatingHandler (class in open-
trons.simulate), 89air_gap() (opentrons.protocol_api.contexts.InstrumentContext
method), 63allow_bundle() (in module opentrons.simulate), 89api_version() (open-
trons.protocol_api.contexts.InstrumentContextproperty), 63
api_version() (open-trons.protocol_api.contexts.MagneticModuleContextproperty), 81
api_version() (open-trons.protocol_api.contexts.ProtocolContextproperty), 57
api_version() (open-trons.protocol_api.contexts.TemperatureModuleContextproperty), 79
api_version() (open-trons.protocol_api.contexts.ThermocyclerContextproperty), 83
api_version() (open-trons.protocol_api.labware.Labware property),72
api_version() (open-trons.protocol_api.labware.Well property),75
aspirate() (opentrons.protocol_api.contexts.InstrumentContextmethod), 63
await_temperature() (open-trons.protocol_api.contexts.TemperatureModuleContextmethod), 79
Bblock_target_temperature() (open-
trons.protocol_api.contexts.ThermocyclerContextproperty), 83
block_temperature() (open-trons.protocol_api.contexts.ThermocyclerContextproperty), 83
block_temperature_status() (open-trons.protocol_api.contexts.ThermocyclerContextproperty), 83
blow_out() (opentrons.protocol_api.contexts.InstrumentContextmethod), 64
bottom() (opentrons.protocol_api.labware.Wellmethod), 75
build_using() (open-trons.protocol_api.contexts.ProtocolContextclass method), 58
bundle_from_sim() (in module open-trons.simulate), 89
bundled_data() (open-trons.protocol_api.contexts.ProtocolContextproperty), 58
Ccalibrate() (open-
trons.protocol_api.contexts.MagneticModuleContextmethod), 81
calibrated_offset() (open-trons.protocol_api.labware.Labware property),72
center() (opentrons.protocol_api.labware.Wellmethod), 75
channels() (opentrons.protocol_api.contexts.InstrumentContextproperty), 64
cleanup() (opentrons.protocol_api.contexts.ProtocolContextmethod), 58
clear_calibrations() (in module open-trons.protocol_api.labware), 76
clear_commands() (open-trons.protocol_api.contexts.ProtocolContextmethod), 58
clear_tip_length_calibration() (in moduleopentrons.protocol_api.labware), 76
close_lid() (open-trons.protocol_api.contexts.ThermocyclerContextmethod), 83
columns() (opentrons.protocol_api.labware.Labwaremethod), 72
columns_by_index() (open-trons.protocol_api.labware.Labware method),72
columns_by_name() (open-trons.protocol_api.labware.Labware method),72
commands() (opentrons.protocol_api.contexts.ProtocolContextmethod), 58
commands() (opentrons.simulate.CommandScraperproperty), 89
CommandScraper (class in opentrons.simulate), 89comment() (opentrons.protocol_api.contexts.ProtocolContext
method), 58connect() (opentrons.protocol_api.contexts.ProtocolContext
method), 58consolidate() (open-
trons.protocol_api.contexts.InstrumentContextmethod), 64
current_volume() (open-
98

trons.protocol_api.contexts.InstrumentContextproperty), 64
DDateTimeDecoder (class in open-
trons.protocol_api.labware), 71DateTimeEncoder (class in open-
trons.protocol_api.labware), 71deactivate() (open-
trons.protocol_api.contexts.TemperatureModuleContextmethod), 79
deactivate() (open-trons.protocol_api.contexts.ThermocyclerContextmethod), 83
deactivate_block() (open-trons.protocol_api.contexts.ThermocyclerContextmethod), 83
deactivate_lid() (open-trons.protocol_api.contexts.ThermocyclerContextmethod), 83
deck() (opentrons.protocol_api.contexts.ProtocolContextproperty), 58
default() (opentrons.protocol_api.labware.DateTimeEncodermethod), 71
default_speed() (open-trons.protocol_api.contexts.InstrumentContextproperty), 64
delay() (opentrons.protocol_api.contexts.InstrumentContextmethod), 64
delay() (opentrons.protocol_api.contexts.ProtocolContextmethod), 58
diameter() (opentrons.protocol_api.labware.Wellproperty), 76
disconnect() (open-trons.protocol_api.contexts.ProtocolContextmethod), 59
disengage() (open-trons.protocol_api.contexts.MagneticModuleContextmethod), 81
dispense() (opentrons.protocol_api.contexts.InstrumentContextmethod), 64
distribute() (open-trons.protocol_api.contexts.InstrumentContextmethod), 65
door_closed() (open-trons.protocol_api.contexts.ProtocolContextproperty), 59
drop_tip() (opentrons.protocol_api.contexts.InstrumentContextmethod), 65
Eemit() (opentrons.simulate.AccumulatingHandler
method), 89
engage() (opentrons.protocol_api.contexts.MagneticModuleContextmethod), 81
execute() (in module opentrons.execute), 87execute_profile() (open-
trons.protocol_api.contexts.ThermocyclerContextmethod), 84
Ffixed_trash() (open-
trons.protocol_api.contexts.ProtocolContextproperty), 59
flow_rate() (open-trons.protocol_api.contexts.InstrumentContextproperty), 66
format_runlog() (in module opentrons.simulate),89
Ggeometry() (opentrons.protocol_api.contexts.MagneticModuleContext
property), 82geometry() (opentrons.protocol_api.contexts.TemperatureModuleContext
property), 79geometry() (opentrons.protocol_api.contexts.ThermocyclerContext
property), 84get_all_labware_definitions() (in module
opentrons.protocol_api.labware), 76get_arguments() (in module opentrons.execute), 88get_arguments() (in module opentrons.simulate),
89get_labware_definition() (in module open-
trons.protocol_api.labware), 76get_protocol_api() (in module open-
trons.execute), 88get_protocol_api() (in module open-
trons.simulate), 89
Hhas_tip() (opentrons.protocol_api.labware.Well
property), 76highest_z() (open-
trons.protocol_api.labware.Labware property),72
home() (opentrons.protocol_api.contexts.InstrumentContextmethod), 66
home() (opentrons.protocol_api.contexts.ProtocolContextmethod), 59
home_plunger() (open-trons.protocol_api.contexts.InstrumentContextmethod), 66
hw_pipette() (open-trons.protocol_api.contexts.InstrumentContextproperty), 66
99

IInstrumentContext (class in open-
trons.protocol_api.contexts), 62is_simulating() (open-
trons.protocol_api.contexts.ProtocolContextmethod), 59
is_tiprack() (open-trons.protocol_api.labware.Labware property),73
LLabware (class in opentrons.protocol_api.labware), 72labware() (opentrons.protocol_api.contexts.MagneticModuleContext
property), 82labware() (opentrons.protocol_api.contexts.TemperatureModuleContext
property), 79labware() (opentrons.protocol_api.contexts.ThermocyclerContext
property), 84labware() (opentrons.types.Location property), 86lid_position() (open-
trons.protocol_api.contexts.ThermocyclerContextproperty), 84
lid_target_temperature() (open-trons.protocol_api.contexts.ThermocyclerContextproperty), 84
lid_temperature() (open-trons.protocol_api.contexts.ThermocyclerContextproperty), 84
lid_temperature_status() (open-trons.protocol_api.contexts.ThermocyclerContextproperty), 84
load() (in module opentrons.protocol_api.labware), 76load_calibration() (in module open-
trons.protocol_api.labware), 77load_from_definition() (in module open-
trons.protocol_api.labware), 77load_instrument() (open-
trons.protocol_api.contexts.ProtocolContextmethod), 59
load_labware() (open-trons.protocol_api.contexts.MagneticModuleContextmethod), 82
load_labware() (open-trons.protocol_api.contexts.ProtocolContextmethod), 59
load_labware() (open-trons.protocol_api.contexts.TemperatureModuleContextmethod), 79
load_labware() (open-trons.protocol_api.contexts.ThermocyclerContextmethod), 84
load_labware_by_name() (open-trons.protocol_api.contexts.MagneticModuleContextmethod), 82
load_labware_by_name() (open-trons.protocol_api.contexts.ProtocolContextmethod), 60
load_labware_by_name() (open-trons.protocol_api.contexts.TemperatureModuleContextmethod), 80
load_labware_by_name() (open-trons.protocol_api.contexts.ThermocyclerContextmethod), 85
load_labware_from_definition() (open-trons.protocol_api.contexts.MagneticModuleContextmethod), 82
load_labware_from_definition() (open-trons.protocol_api.contexts.ProtocolContextmethod), 60
load_labware_from_definition() (open-trons.protocol_api.contexts.TemperatureModuleContextmethod), 80
load_labware_from_definition() (open-trons.protocol_api.contexts.ThermocyclerContextmethod), 85
load_labware_object() (open-trons.protocol_api.contexts.MagneticModuleContextmethod), 83
load_labware_object() (open-trons.protocol_api.contexts.TemperatureModuleContextmethod), 80
load_labware_object() (open-trons.protocol_api.contexts.ThermocyclerContextmethod), 85
load_module() (open-trons.protocol_api.contexts.ProtocolContextmethod), 60
load_name() (open-trons.protocol_api.labware.Labware property),73
loaded_instruments() (open-trons.protocol_api.contexts.ProtocolContextproperty), 60
loaded_labwares() (open-trons.protocol_api.contexts.ProtocolContextproperty), 61
loaded_modules() (open-trons.protocol_api.contexts.ProtocolContextproperty), 61
Location (class in opentrons.types), 86
Mmagdeck_engage_height() (open-
trons.protocol_api.labware.Labware property),73
MagneticModuleContext (class in open-trons.protocol_api.contexts), 81
main() (in module opentrons.execute), 89
100
main() (in module opentrons.simulate), 90max_speeds() (open-
trons.protocol_api.contexts.ProtocolContextproperty), 61
max_volume() (open-trons.protocol_api.contexts.InstrumentContextproperty), 66
min_volume() (open-trons.protocol_api.contexts.InstrumentContextproperty), 67
mix() (opentrons.protocol_api.contexts.InstrumentContextmethod), 67
model() (opentrons.protocol_api.contexts.InstrumentContextproperty), 67
Mount (class in opentrons.types), 86mount() (opentrons.protocol_api.contexts.InstrumentContext
property), 67move() (opentrons.types.Location method), 86move_to() (opentrons.protocol_api.contexts.InstrumentContext
method), 67
Nname() (opentrons.protocol_api.contexts.InstrumentContext
property), 68name() (opentrons.protocol_api.labware.Labware
property), 73next_tip() (opentrons.protocol_api.labware.Labware
method), 73
Oopen_lid() (opentrons.protocol_api.contexts.ThermocyclerContext
method), 85opentrons.execute (module), 87opentrons.protocol_api.contexts (module),
57opentrons.protocol_api.labware (module),
71opentrons.simulate (module), 89opentrons.types (module), 86OutOfTipsError, 75
Pparameters() (open-
trons.protocol_api.labware.Labware property),73
parent() (opentrons.protocol_api.labware.Labwareproperty), 73
parent() (opentrons.protocol_api.labware.Well prop-erty), 76
pause() (opentrons.protocol_api.contexts.ProtocolContextmethod), 61
pick_up_tip() (open-trons.protocol_api.contexts.InstrumentContextmethod), 68
PipetteNotAttachedError, 86Point (class in opentrons.types), 86point() (opentrons.types.Location property), 86previous_tip() (open-
trons.protocol_api.labware.Labware method),73
ProtocolContext (class in open-trons.protocol_api.contexts), 57
Qquirks() (opentrons.protocol_api.labware.Labware
property), 73quirks_from_any_parent() (in module open-
trons.protocol_api.labware), 78
Rrail_lights_on() (open-
trons.protocol_api.contexts.ProtocolContextproperty), 62
reset() (opentrons.protocol_api.labware.Labwaremethod), 73
reset_tipracks() (open-trons.protocol_api.contexts.InstrumentContextmethod), 68
resume() (opentrons.protocol_api.contexts.ProtocolContextmethod), 62
return_height() (open-trons.protocol_api.contexts.InstrumentContextproperty), 68
return_tip() (open-trons.protocol_api.contexts.InstrumentContextmethod), 68
return_tips() (open-trons.protocol_api.labware.Labware method),73
rows() (opentrons.protocol_api.labware.Labwaremethod), 74
rows_by_index() (open-trons.protocol_api.labware.Labware method),74
rows_by_name() (open-trons.protocol_api.labware.Labware method),74
Ssave_calibration() (in module open-
trons.protocol_api.labware), 78save_definition() (in module open-
trons.protocol_api.labware), 78save_tip_length() (in module open-
trons.protocol_api.labware), 78set_block_temperature() (open-
trons.protocol_api.contexts.ThermocyclerContextmethod), 85
101

set_calibration() (open-trons.protocol_api.labware.Labware method),74
set_lid_temperature() (open-trons.protocol_api.contexts.ThermocyclerContextmethod), 86
set_rail_lights() (open-trons.protocol_api.contexts.ProtocolContextmethod), 62
set_temperature() (open-trons.protocol_api.contexts.TemperatureModuleContextmethod), 80
simulate() (in module opentrons.simulate), 90speed() (opentrons.protocol_api.contexts.InstrumentContext
property), 68starting_tip() (open-
trons.protocol_api.contexts.InstrumentContextproperty), 69
status() (opentrons.protocol_api.contexts.MagneticModuleContextproperty), 83
status() (opentrons.protocol_api.contexts.TemperatureModuleContextproperty), 80
Ttarget() (opentrons.protocol_api.contexts.TemperatureModuleContext
property), 81temp_connect() (open-
trons.protocol_api.contexts.ProtocolContextmethod), 62
temperature() (open-trons.protocol_api.contexts.TemperatureModuleContextproperty), 81
TemperatureModuleContext (class in open-trons.protocol_api.contexts), 79
ThermocyclerContext (class in open-trons.protocol_api.contexts), 83
tip_length() (open-trons.protocol_api.labware.Labware property),74
tip_racks() (open-trons.protocol_api.contexts.InstrumentContextproperty), 69
TipLengthCalNotFound, 75top() (opentrons.protocol_api.labware.Well method),
76touch_tip() (open-
trons.protocol_api.contexts.InstrumentContextmethod), 69
transfer() (opentrons.protocol_api.contexts.InstrumentContextmethod), 70
TransferTipPolicy (class in opentrons.types), 87trash_container() (open-
trons.protocol_api.contexts.InstrumentContextproperty), 71
type() (opentrons.protocol_api.contexts.InstrumentContextproperty), 71
Uuri() (opentrons.protocol_api.labware.Labware prop-
erty), 74uri_from_definition() (in module open-
trons.protocol_api.labware), 78uri_from_details() (in module open-
trons.protocol_api.labware), 78use_tips() (opentrons.protocol_api.labware.Labware
method), 74
Vverify_definition() (in module open-
trons.protocol_api.labware), 78
WWell (class in opentrons.protocol_api.labware), 75well() (opentrons.protocol_api.labware.Labware
method), 75well_bottom_clearance() (open-
trons.protocol_api.contexts.InstrumentContextproperty), 71
wells() (opentrons.protocol_api.labware.Labwaremethod), 75
wells_by_index() (open-trons.protocol_api.labware.Labware method),75
wells_by_name() (open-trons.protocol_api.labware.Labware method),75
Xx() (opentrons.types.Point property), 86
Yy() (opentrons.types.Point property), 87
Zz() (opentrons.types.Point property), 87
102