sistema de seguridad wi-fi con cámara y sensores · para que el mensaje se escuche en el altavoz...
TRANSCRIPT

Sistema de seguridad Wi-Fi con cámara y sensores
Manual de instrucciones
V0.0 / 0617v

2
CCTV-2000
PRECAUCIONES
Antes de utilizar el producto, lea cuidadosamente este instructivo para evitar cualquier mal funcionamiento.
La información presentada sirve únicamente como referencia sobre el producto. Debido a actualizaciones pueden existir diferencias.
Consulte nuestra página web www.steren.com para obtener la versión más reciente de este manual.
• Este producto NO es un juguete; manténgalo fuera del alcance de los niños.• Este producto no está destinado a ser utilizado por personas con capacidades diferentes, a menos que sean supervisadas o instruidas por una persona responsable de su seguri-dad.• La empresa no se hace responsable por el uso indebido del contenido generado con este producto.• No extraiga la tarjeta micro SD mientras la cámara esté grabando; puede provocar mal funcionamiento y pérdida de datos. • No coloque objetos pesados sobre la cámara.• No utilice productos químicos o corrosivos para limpiarla.• No instale la cámara ni los sensores cerca de objetos magnéticos o que emitan mucho ruido.• No exponga la cámara a condiciones de agua o humedad.• No instale en intemperie.
La operación de este equipo está sujeta a las siguientes dos condiciones: (1) es posible que este equipo o dispositivo no cause interferencia perjudicial y (2) este equipo o dispo-sitivo debe aceptar cualquier interferencia, incluyendo la que pueda causar su operación no deseada.

3

4
CONTENIDO
Cámara
Sensores PIR
Controles
Sensores magnéticos

5
DESCRIPCIÓN GENERAL
Antenas
Lente
Conexión de red
Alarma por detección de movimiento activada
Alarma activada
Grabación en tarjeta micro SD
Entrada RJ45 para cable de red
Entrada de alimentación
Botón de reinicio
Infrarrojos (Visiónnocturna)
Micrófono
Entrada para soporte
Ranura para tarjeta micro SD

6
COLOCACIÓN DE BATERÍAS
Deslice la tapa, e inserte una batería “AA” en el compartimento. Vuelva a colocar la cubierta.
Remueva el tornillo inferior del sensor para retirar la cubierta.
Retire el tornillo, e inserte una batería tipo 27A en el compartimento. Vuelva a colocar la cubierta.
Saque el conector tipo broche. Conecte una batería de 9 V y acomódela dentro del compartimento. Vuelva a colocar la cubierta.
Sensor mágnetico
Sensor de movimiento
Control remoto

7
CONEXIONESConecte la cámara a un contacto eléctrico.
Utilice un cable de red para conectar la cámara al módem.

8
DESCARGAR LA APP Y REGISTRAR UNA CUENTAPara gestionar y monitorear el funcionamiento de la cámara, debe instalar la aplicación iEye-camera ; descárguela desde la tienda de aplicaciones de su dispositivo móvil.
Abra la aplicación. La primera vez debe crear una cuenta personal. Utilice la opción Mailbox / user ID.
Las imágenes presentadas corresponden a un dispositivo con sistema operativo iOS y aplicación iEye-camera (03.24.02.00), se muestran únicamente como referencia.
Esta aplicación no es propiedad de Steren; la empre-sa no se hace responsable por su funcionamiento ni actualizaciones
Introduzca un correo electrónico
Introduzca una contraseña
Presione para confirmar

9
CONFIGURACIÓN1. Con la cámara encendida, ingrese a la aplicación. Después de unos segundos aparecerá el mensaje: Discover 1 new device; presione › para continuar.
3. Asigne un nombre para identificar la cámara e introduzca la contraseña predetermina-da: 123456. Presione Save para continuar.
2. Aparecerá el número de identificación de la cámara encontrada. Presione +

10
MONITOREOCuando aparezca la siguiente pantalla con la leyenda On-line, significa que la cámara está lista para utilizarse.
Agregar dispositivo
Cambiar nombre de dispositivo
Activar/ Desactivar defensa
Menú de configuración
Registro de grabaciones
Modificar contraseña
Presione para empezar a monitorear
Si activa la alerta (activar la alarma) con el control remoto, deberá espe-rar apróximadamente 50 segundos para que se guarden los cambios. Se recomienda utilizar la aplicación para la activación / desactivación de las alertas.

11
A continuación podrá monitorear en tiempo real y controlar los movimientos de la cámara.
Regresar
Activar/Desacti-var micrófono en la cámara
Cambiar a pantalla completa
Deslice los dedos sobre la pantalla
Tomar unafotografía
Mantenga presionado mientras habla para que el mensaje se escuche en el
altavoz de la cámara
Activar/Desactivar defensa
Siempre ajuste el ángulo de visión de la cámara mediante la aplicación. Si gira manualmente la cámara, podría dañar el siste-ma interno.

12
VINCULAR LOS SENSORES Y EL CONTROL REMOTO
1. Ingrese al menú de configuración. Seleccione Add sensors.
2. Presione + para seleccionar el tipo de dispositivo (sensor o control remoto).
Sensores magnéticos y de movimiento
Control remoto

13
3. Cuando aparezca el siguiente mensaje, encienda el dispositivo seleccionado y presione Confirmed.
Sensor magnético
Control remoto
Sensor de movimiento En caso de que la vinculación no sea exitosa en el sensor de movimiento, repita los pasos anteriores y
presione el botón interno.
Espere hasta que finalice la búsqueda. Si el dispositivo se ha agregado correctamente, podrá verlo en la lista. Recuerde que debe configurar las alertas para recibir notificacio-nes en el smartphone y para activar la detección de movimiento. Consulte la sección “Activar Alertas” de este manual.

14
1. Ingrese al menú de configuración. Seleccione Alarm setting.
2. Active o desactive las opciones de su preferencia.
Notificación en el dispositivo móvil
Notificaciones SMS
Notificaciones por correo electrónico
Activar / Desactivar detección de movimiento
Activar / Desactivar tono de emergencia en la cámara
Duración de tono de emergencia
ACTIVAR ALERTAS

15
Si ha activado las notificaciones en el dispositivo móvil, recibirá alertas de acuerdo con la configuración seleccionada.
Deslice para visualizar

16
INSTALACIÓN
Cámara
Sensor magnético
Opción 1 (con las placas adhesivas)
Retire la cubierta protectora de la placa y pegue el detector (A) en el marco de la puerta; repita el proceso para el elemento magnético (B) y colóquelo en la puerta. Asegúrese de que las marcas triangulares coincidan.
Adhiera el sensor y el elemento magnético sobre las placas.
Recuerde: ¡La distancia entre ambas partes del sensor no debe exceder los 15 mm!

17
Opción 2 (con los tornillos)
Atornille el elemento magnético (B) en la puerta. Asegúrese de que las marcas triangulares coincidan. Recuerde: ¡La distancia entre ambas partes del sensor no debe exceder los 15 mm!
Retire la tapa del detector y atorní-llela en el marco de la puerta.
Vuelva a ensamblar el detector (A).

18
Sensor de movimiento

19
ESPECIFICACIONES
CámaraAlimentación: 5 V - - - 2 AIluminación mínima: 0,5 luxCompresión de video: H.264 720pVideo: 25 fps y 30 fpsFormato de audio: G.726Protocolo: TCP/IPRed inalámbrica: 802.11b/g/nCapacidad máxima de tarjeta micro SD: 64 GB
Sensor puertaAlimentación: 1,5 V - - - (1 x AA)Corriente en reposo: < 2,5 µACorriente de operación: < 30 mAFrecuencia de operación: 433 MHzAlcance: hasta 60 m (área abierta)
Sensor de movimientoAlimentación: 9 V - - - (1 x 6LR61)Corriente en reposo: < 25 µACorriente de operación: < 15 mAÁngulo de detección: 110°Frecuencia de operación: 433 MHzAlcance: hasta 60 m (área abierta)Distancia de detección: 8 m
Control remotoAlimentación: 12 V - - - (1 x 27A)Corriente en reposo: < 2,5 µACorriente de operación: < 15 mA
Temperatura de operación: -10 a 50°CHumedad relativa: < 85% no condensada
Convertidor CA/CCAlimentación: 100 - 240 V ~ 50 - 60 Hz 0,5 ASalida: 5 V - - - 2 A
Las especificaciones pueden cambiar sin previo aviso

HOME AND OFFICE SECURITY SYSTEM
User Manual
V0.0 / 0617v
21
CCTV-2000
CAUTIONS
Before to use the product, please read carefully this manual to avoid any malfunction.
The info in this manual is shown as reference.
Due to updates can exist differences. Consult our website www.steren.com to obtain the current version of this manual.
• This product is NOT a toy; keep it away from children.• This device cannot be used by people with different abilities, unless they have preparation and supervision.• The company is not responsible by bad use of the content with this product.• Don’t remove the microSD card while the camera is recording, may cause mal function and losing data.• Don’t place heavy objects over the camera.• Don’t use abrasive liquids to clean it.• Don’t install it near magnetic objects or emits that noise.• Don’t expose the camera to water or humidity.• Don’t install outdoor.
The operation of this equipment is subject to the following two conditions: (1) it is pos-sible that this equipment or device may not cause harmful interference and (2) this equi-pment or device must accept any interference, including interference that may cause its undesired operation

22
CONTENT
Camera
PIR Sensors
Controls
Magnetic sensors

23
GENERAL DESCRIPTION
Antennas
Lens
Network connection
Alarm activated by motion detection
Alarm activated
Recording in Micro SD card
RJ45 input Power input
Reset button
Infrarred (Nigth vision)
Microphone
Support hole
Micro SDcard slot

24
BATTERIES PLACEMENT
Slide the cover and insert a “AA” battery in the compartment. Place the cover again.
Remove the bottom screw of the sensor to remove the cover.
Remove the screw, and insert a 27A battery. Place a cover again.
Pull up the fastener. Connect a 9 V battery and adjust into the compartment. Place the cover again.
Magnetic sensor
Move sensor
Remote control

25
CONNECTIONSConnect the camera into an outlet.
Use a network cable to connect the camera to the modem.

26
To monitor, you must install the iEye-camera app; download it from the app store of your mobile device.
Open the app. The first time you must create a personal account. Use the Mailbox / user ID option.
The showed images corresponding to an iOS device and the iEye-camera app (03.24.02.00), it is only for reference.
This app is not property of Steren; the company is not responsible for the malfunction or updates.
Enter an e-mail
Enter a password
Press to confirm
APP DOWNLOAD AND ACCOUNT REGISTER

27
CONFIGURATION1. With the camera online, enter to the app. After a few seconds will appears the message: Discover 1 new device; press › to continue.
3. Assign a name to identify the camera and enter the default password: 123456. Press Save to continue.
2. Will appears the ID number of the camera. Press +

28
MONITORINGWhen the On-line message appears, it means that the camera it’s ready to be used.
Add device
Change the camera name
Activate/ Deactivate defense
Setting menu
Recording history
Passwordsetting
Press to start to monitor
If you activate the alarm (alert armed) with the remote control, you must wait approx 50 seconds to save the changes.It’s recommendable to use the app for activate / deactivate the alerts.

29
Next, you can monitor in real time and control the camera movements.
Back
Activate/Deactivate the microphone Full screen
Slide the fingers over the screen
Take a photo
Press and hold while you talk, the message is listen in the speaker of
the camera
Activate/Deactivate defense
Always adjust the vision angle of vision with the app. If you turn the camera manually, may cause internal damages.

30
PAIRING THE SENSORS AND THE REMOTE CONTROL
1. Enter to setting menu and select Add sensors.
2. Press + to select the device type (sensor or remote control).
Magnetic sensors and motion
Remote control

31
3. When the follow message appears, turn on the selected device and pressConfirmed.
Magnegtic sensor
Remote control
Motion sensor If the motion sensor fails while pairing,
repeat the previous steps and press the internal
button.
Wait until the search is over. If the device is correctly added, you will see in the list. Remember that you must configure the alerts to receive notifications in the smartphone and activate the motion detection. Consult the “Activate Alerts” section in this manual.

32
1. Enter to setting menu. Select Alarm setting.
2. Activate or deactivate the options that you want.
Notification in your mobile
SMS Notification
Notification in your e-mail
Activate / Deactivate motion detection
Activate / Deactivate emergency tone in the camera
Emergency tone length
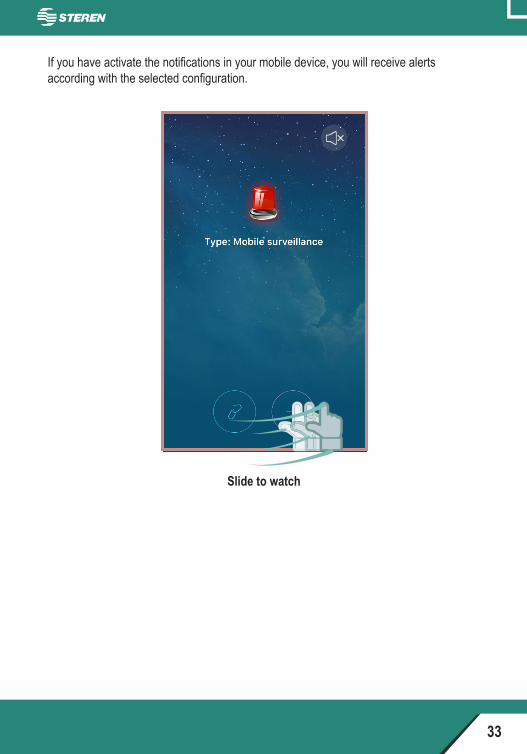
ACTIVATE ALERTS
33
If you have activate the notifications in your mobile device, you will receive alerts according with the selected configuration.
Slide to watch

34
INSTALLATION
Camera
Magnetic sensor
Option 1 (with the adhesive plates)
Remove the protector cover from the plate and paste the detector (A) in the door’s frame; repeat the same process for the magnetic element (B). Ensure that the triangular marks must be aligned.
Paste the sensor and the magnetic element over the plates.
Remember: The distance between both parts of the sensor don’t must exceed 15 mm!

35
Option 2 (with the screws)
Screw the magnetic element (B) in the door. Ensure that the triangular marks must be aligned. Remember: The distance between both parts of the sensor don’t must exceed 15 mm!
Remove the cover from the detec-tor and screw it in the door’s frame.
Assambly the detector (A) again.

36
Motion sensor

37
SPECIFICATIONS
CameraInput: 5 V - - - 2 AMinimum light: 0.5 luxVideo compression: H.264 720pVideo: 25 fps and 30 fpsAudio format: G.726Protocol: TCP/IPWireless network: 802.11b/g/nMaximum micro SD card capacity: 64 GB
Door sensorInput: 1.5 V - - - (1 x AA)Stand-by current: < 2.5 µAOperating current: < 30 mAOperating frequency: 433 MHzRange: up to 60 m (open area)
Motion sensorInput: 9 V - - - (1 x 6RL61)Stand-by current: < 25 µAOperating current: < 15 mADetection angle: 110°Operating frequency: 433 MHzRange: up to 60 m (open area)Detection distance: 8 m
Remote controlInput: 12 V - - - (1 x 27A)Stand-by current: < 2.5 µAOperating current: < 15 mA
Operating temperature: -10 to 50°CRH: < 85% non condensed
AD/DC converterInput: 100 - 240 V ~ 50 - 60 Hz 0.5 AOutput: 5 V - - - 2 A
Specifications may change without notice
