a guide to photo story
DESCRIPTION
A Guide to using Microsoft Photo StoryTRANSCRIPT

A Guideto Microsoft Photo Story.
Learning Services Guides

Starting Out With Photo Story ...…………………………………………………………… 2
Import and Arrange Pictures .………..…………………………………………………….. 3
Add Titles .…………………………………………………………………………………… 4
Narration and Motion .…………….………………………………………………………… 5
Background Music ………….………………………………………………………………. 7
Save .………………………….………………………………………………………………. 8
If you need to download Microsoft Photo Story 3 for Windows to install at home, you can get it from:http://www.microsoft.com/windowsxp/using/digitalphotography/photostory/default.mspx(Windows XP only)
Learning Services Education ICT Support Team 1
Contents

Photo Story helps you to create exciting video stories by adding panning and zooming effects to your pictures. Use Photo Story to record narration for your pictures, and add titles and background music to your story.
There are 5 steps to create your story:Import and Arrange Pictures, Add Titles, Narration and Motion, Background Music, and Save.
Learning Services Education ICT Support Team 2
Starting Out With Photo Story
To create a Photo Story:
Start Microsoft Photo Story 3Select ‘Begin a new story’Click Next

You can return to this step at any time and import more pictures as necessary.
Learning Services Education ICT Support Team 3
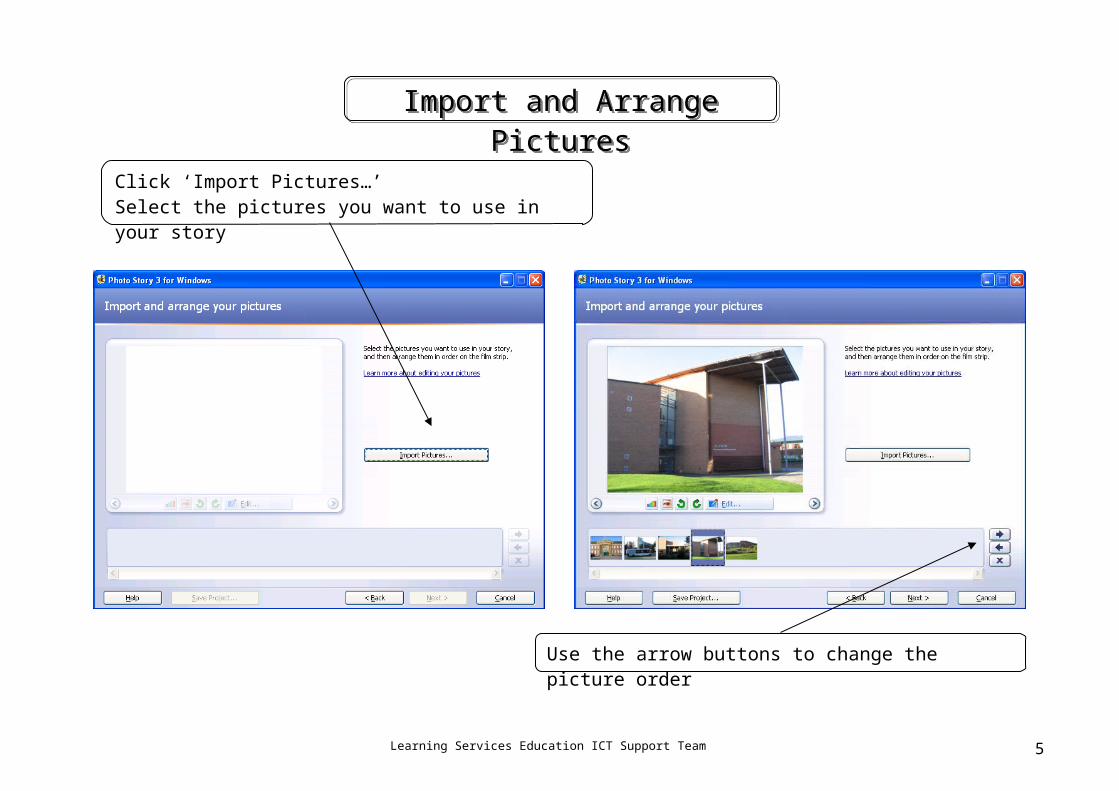
Import and Arrange Pictures
Use the arrow buttons to change the picture order
Click ‘Import Pictures…’Select the pictures you want to use in your story

Learning Services Education ICT Support Team 4
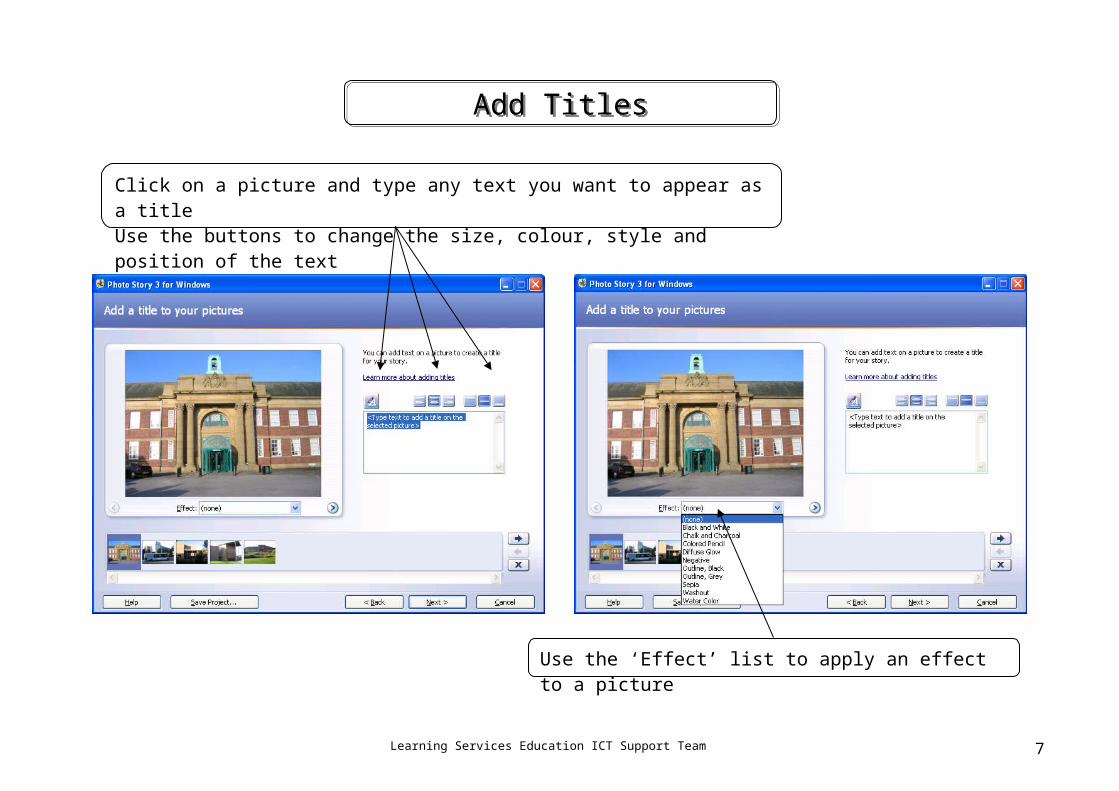
Add Titles
Click on a picture and type any text you want to appear as a titleUse the buttons to change the size, colour, style and position of the text
Use the ‘Effect’ list to apply an effect to a picture
Learning Services Education ICT Support Team 5
Narration and Motion
Record a voice-over narration for a picture using the recording tools
Click ‘Customize Motion…’ to specify motion, duration and transition settingsClick ‘Preview…’ to see how the video looks with the current settings

Learning Services Education ICT Support Team 6
Select a transition effect and set a manual duration for the transition if requiredClick ‘Save’ to keep the Motion and Duration, and Transition settings
Tick ‘Specify start and end position of motion’ to change the default settingSet a manual duration for the motion if requiredClick the ‘Transition’ tab to specify a transition effect for a picture
Learning Services Education ICT Support Team 7
Background Music
Click ‘Select Music…’ to add a pre-saved .wma, .mp3 or .wav fileClick ‘Create Music…’ to add customised music using the music creator

Learning Services Education ICT Support Team 8
Save
Click ‘Browse…’ to specify a file name and location to save the videoClick ‘Next >’ to create the video file
Click ‘Save Project…’ to save the Photo Story 3 project file for future editingClick ‘View your story’ to see the created video fileClick ‘Exit’ to close Photo Story 3