administering qlikview · the qlikview publisher document administrators, document administrators...
TRANSCRIPT
Administering QlikViewQlikView®
April 2019Copyright © 1993-2019 QlikTech International AB. 무단 전재 및 복제를 금합니다 .
HELP.QLIK.COM

© 2019 QlikTech International AB. All rights reserved. Qlik®, Qlik Sense®, QlikView®, QlikTech®, Qlik Cloud®, QlikDataMarket®, Qlik Analytics Platform®, Qlik NPrinting®, Qlik Connectors®, Qlik GeoAnalytics®, Qlik Core®,Associative Difference®, Lead with Data™, Qlik Data Catalyst™, Qlik Associative Big Data Index™ and the QlikTechlogos are trademarks of QlikTech International AB that have been registered in one or more countries. Othermarks and logos mentioned herein are trademarks or registered trademarks of their respective owners.

Administering QlikView - QlikView, April 2019 3
1 Introduction 61.1 Status 6
1.2 Documents 6
1.3 Users 6
1.4 System 6
2 QlikView Publisher Document Administrators 73 Status 8
3.1 Tasks 8
Functions 8Edit Task 10Run Task 10Stop Task 10Show Task Details 10Hide Task Details 11Refresh Options 11QlikView Distribution Service machine status 11
3.2 Services 11
Service Name 11Running On 12Status 12Show Alert 12Information 12Shutting down a QlikView Distribution Service 14
3.3 QVS Statistics 14
Open Documents 14Active Users 15Performance 15Documents and Users 17
4 Documents 194.1 QlikView Document Types and Functions 19
4.2 Source Documents 20
Functions 20Templates 22Wizard Start Page 25General 43Reload 44Reduce 45Distribute 48Document Information 55Triggers 56Search Functions 64Server 64
4.3 User Documents 70
Search Document 70
Contents

Administering QlikView - QlikView, April 2019 4
Configure Document Settings 70Server 70Authorization 77Document Information 79Reload 80Document CALs 83
4.4 Publish a link to a QlikView document in the Qlik Sense hub 85
QlikView documents 86Before you begin 86QlikView certificate requirements 86Configuring Qlik Sense to allow users to publish a link to shared content 86Configuring the QlikView Distribution Service with the Qlik Sense certificates 87Creating a task to publish a link to a QlikView document in the Qlik Sense hub 89
4.5 Publish a link to a QlikView document in a Qlik Sense cloud hub 90
Prerequisites 90Connecting QlikView Server to a Qlik Sense Enterprise cloud deployment 91Creating a task to distribute a link to a Qlik Sense cloud hub 91
5 Users 935.1 User Management 93
Search User 93View and Manage User 93CALs 93Server Objects 95Groups 96Documents 96Distributions 97User Management Search Functions 98
5.2 Section Access Management 99
Section Access Tables 99Manage Section Access Tables 99
6 System 1046.1 Setup 104
Management Service 104QlikView Servers 108Distribution Services 124Directory Service Connectors 131Delete 134Delete 135Delete 136Delete 137Delete 140Delete 142Delete 143Delete 144QlikView Web Servers 144
Contents
Administering QlikView - QlikView, April 2019 5
Delete 150Remote Management Services 152Mail Server 155License Service 157Cloud Deployments 157
6.2 Licenses 159
QlikView Publisher 159QlikView Server 160
6.3 About 168
About this QlikView System 1686.4 Supporting Tasks 169
External Programs 169Database Command 179Pause 188QVD Creation 197
Contents
1 Introduction
1 IntroductionIn this guide you will find information on how to configure and manage a QlikView site using the QlikView Management Console (QMC).
The QMC gives access to the QlikView Server (QVS) and the QlikView Publisher (QVP) module settings. It also supports the control of multiple instances of the QVS and multiple Publisher execution instances, from a single management console, by means of an integrated tree view control.
The QMC user interface is primarily built up of tabs, containing pages, tree views, folders, panes, and dialogs.
1.1 StatusThe Status section covers information about tasks that can be scheduled, and also information about the different QlikView services in Windows. You also find information about QlikView Server statistics.
1.2 DocumentsThe Documents section includes information about source documents, assigned tasks and user documents.
1.3 UsersIn the Users section, you will find details on user management and information about managing section access.
1.4 SystemThe System section covers setup, licensing, and supporting tasks. Additionally, you will find details on how computer information and services are presented in Windows.
Administering QlikView - QlikView, April 2019 6
2 QlikView Publisher Document Administrators
2 QlikView Publisher Document AdministratorsThe QlikView Publisher (QVP) allows delegation of task creation and task management to non-QlikView Administrators, that is, users that are not within the QlikView Administrator Windows group. These limited users, the QlikView Publisher Document Administrators, Document Administrators in short, are useful when multiple administrators are working with the QVP. This might, for example, be applicable in a large enterprise deployment with a shared infrastructure.
This feature requires a QlikView Publisher (QVP) license key.
In the QlikView Management Console (QMC), users can be assigned permission to the source document folders of the QlikView Distribution Service (QDS). In the QlikView Server (QVS) settings, users can be assigned to either the entire QVS, or to specific mounted folders that Document Administrators should be allowed to work with. Document Administrators that are logged into the QMC are only allowed to create and modify tasks on the source documents in these folders, and they cannot amend any system settings or CAL allocations in the QMC. A QlikView Administrator can also control if the triggers on the tasks worked with by the Document Administrator are enabled or disabled by default.
The System tab is unavailable for Document Administrators and Supervisors. This means that they cannot access supporting tasks.
Permissions on the folders of the QVS are given on the Folder Access tab.
Permissions on the source documents, are given on the General tab, where also the status of triggers created by the Document Administrator can be set.
After having configured a Document Administrator, and used that user to login to the QMC, a restricted version of the QMC will be presented. The Document Administrator is only allowed to work with the source documents that this user has permissions on.
Administering QlikView - QlikView, April 2019 7
3 Status
3 StatusThe Status tab contains the following pages:
l Tasks, where tasks can be edited, started, and stopped.
l Services, where QlikView services hosted in Windows can be supervised.
l QVS Statistics, where data for the QlikView Server can be viewed.
3.1 TasksOn the Tasks page, all tasks are presented and can be edited, started, and stopped.
Functions
Search Task
Enter the desired search term(s) in this text box, to find tasks, and click on the Search icon, .
Filter and Sort
The listed items can be filtered in various ways. A black Filter by... icon, , on a column indicates that a
filter is not used on that column. A blue Filter by... icon, , on a column indicates that a filter is used on that column. For more information about the respective column filters, see the description of each column header.
The sort function is only available when using a filter. Each click on a sort icon, or , in a column, or on a column name, toggles between ascending and descending sort order. Only one column at a time can be used for sorting; the active column having a revealed sort icon. By default, the list is sorted on the Name column.
NameThe tasks are presented alphabetically in a tree view, in a sort order depending on the names of the QlikView Servers and task categories. If no category was set in the Select Category field when a task was configured, the task is presented in the Default folder.
To filter by category, click on the Filter by Category icon, , in this column, and select/deselect the desired criteria in the dialog, by ticking/unticking the check boxes. To reset (that is, not use) the filter, deselect all criteria by clicking on the Clear Filter button. To confirm any change in the dialog, click on the OK button.
StatusThe current status of each task is indicated by one of the following alternatives:
l Waiting
l Warning
l Failed
Administering QlikView - QlikView, April 2019 8

3 Status
l Running
l Aborting
l Queued
l Unrunnable
To filter by status, click on the Filter by Status icon, , in this column, and select/deselect the desired criteria in the dialog, by ticking/unticking the check boxes. To reset (that is, not use) the filter, deselect all criteria by clicking on the Clear Filter button. To confirm any change in the dialog, click on the OK button.
The available options are the status indicators, but in alphabetical ascending order.
Publisher GroupThe group of machines associated with each task
To filter by status, click on the Filter by Publisher Group icon, , in this column, and select/deselect the desired criteria in the dialog, by ticking/unticking the check boxes. To reset (that is, not use) the filter, deselect all criteria by clicking on the Clear Filter button. To confirm any change in the dialog, click on the OK button.
Last ExecutionThe time stamp for the last start attempt of the task.
To filter by last execution, click on the Filter by Last Execution icon, , in this column, and select/deselect the desired criteria in the dialog, by ticking/unticking the check boxes, selecting options, and entering dates where applicable. To reset (that is, not use) the filter, deselect all criteria, including entered dates, by clicking on the Clear Filter button. To confirm any change in the dialog, click on the OK button.
The following options are available:
l Period, where one criterion can be selected, only:
l Last Hour, that is, within the present hour up to the current time, for example, if the current time is 09:12, the range is from 09:00 to 09:12.
l Earlier Today, that is, within the present day up to the current time, for example, if the current time is 09:12, the range is from 00:00 to 09:12.
l Earlier This Week, that is, within the present week, for example, if the current time is 09:12 on a Wednesday, the range is from Monday 00:00 to Wednesday 09:12.
l From... - To..., where an empty field means 'no limit', and the dates are selected in the Date Picker dialog.
l Never, meaning that tasks that have never been executed are presented, only.
Started/ScheduledThe time stamp for when the task was last started, manually or scheduled, or the time for when the task is scheduled to be started. To filter by started/scheduled, click on the Filter by Started/Scheduled icon,
, in this column, and select/deselect the desired criteria in the dialog, by ticking/unticking the check boxes,
Administering QlikView - QlikView, April 2019 9
3 Status
selecting options, and entering dates where applicable. To reset (that is, not use) the filter, deselect all criteria, including entered dates, by clicking on the Clear Filter button. To confirm any change in the dialog, click on the OK button.
The following options are available:
l Period, where one criterion can be selected, only (On a Schedule):
l This Hour, that is, within the present hour, for example, if the current time is 09:12, the range is from 09:00 to 09:59.
l Today, that is, within the present day, meaning that the range is from 00:00 to 23:59.
l This Week, that is, within the present week, meaning that the range is from Monday 00:00 to Sunday 23:59.
l From... - To..., where an empty field means 'no limit', and the dates are selected in the Date Picker dialog.
l On Event from Another Task.
l On External Event.
l On Multiple Events (On Multiple Events Completed).
l Not Scheduled, meaning that tasks that have not been scheduled are presented, only.
Edit TaskTo configure the task, click on the Edit this Task icon, .
Run TaskTo run a task, click on the Run this Task icon, .
Stop TaskTo stop a running task, click on the Abort this Task icon, . This removes the task from the queue.
Show Task DetailsTo view the following task details and log, click on the Show Task Details link:
l Task Details, presenting the following:
l Configuration Summary, including task recipients, task triggers, and information for the distribution to cloud deployments such as the cloud deployment name, collections, recipients (users or groups), and triggers.
l Details, including the details of the task and the execution of it; Name, Category, Distribution Service, Type, Document, Status, Last Execution, Started/Scheduled, and Average Duration of Successful Executions.
A task with a multiple event trigger lists all events that must be completed.
Administering QlikView - QlikView, April 2019 10

3 Status
l Task History, presenting the following:
l Execution Started, presenting the time the task was last started.
l Status, presenting the present status of the task; Succeeded or Failed.
l Duration, presenting the period of time during which the task has been executed.
l Log, presenting the logs of the latest task executions.
Tasks only displays the last 30 days of the QlikView server’s tasks. Tasks are dependent on QlikView log files, which are set to be deleted after 30 days. You can change how long log files are kept before being deleted.
≤ Logs and error codes
Hide Task DetailsTo hide the task details and log, click on the Hide Task Details link.
Refresh OptionsTo enable a periodic and automatic update of the list in the left pane, tick the Automatic Refresh of Task List check box. To disable the automatic update, untick this check box. To update the list manually,
click the Refresh icon, , which is only available when the automatic update is disabled.
In order to make a change of the refresh state persistent, cookies must be allowed in the browser.
QlikView Distribution Service machine statusWhen a QDS machine is down, an orange status bar is displayed at the top of the page. The status bar provides the name of the QDS machine that is down. The status of the tasks that are being run by this machine is set to Unrunnableand a black skull icon is displayed.
3.2 ServicesThe Services page presents a status overview of the Windows services. From here you can shut down the QlikView Distribution Service (QDS).
Shutting down a QlikView Distribution Service
The status of the services is automatically refreshed.
Service NameWhen running a QlikView Server with a QlikView Publisher (QVP) license, the following services are presented:
l QlikView Directory Service Connector (DSC)
l Qlik License Service
l QlikView Distribution Service (QDS)
Administering QlikView - QlikView, April 2019 11

3 Status
l QlikView Management Service (QMS)
l QlikView Server (QVS)
l QlikView Web Server (QVWS)
When running a QlikView Server without a QVP license, the following services are presented:
l QlikView Management Service (QMS)
l QlikView Directory Service Connector (DSC)
l Qlik License Service
l QlikView ReloadEngine (not a service)
l QlikView Server (QVS)
l QlikView Web Server (QVWS)
To view the status of a service in the right pane, Messages, click the service in the left pane.
Running OnThe Running On column shows the name of the server on which the service is running. If a service is running on multiple servers, the number of servers is presented.
StatusThe current status of the service. The possible statuses are the following:
l Running
l Disconnected
l <Number of servers running> of <total number of servers in cluster>
running, if one or more servers in the cluster are down (but not all).
l Invalid Setup, if multiple instances of the QlikView Management Service are running.
Show AlertSelect the checkbox to enable the alert function in case a service is disconnected.
Information
Service status messagesClick on a service under Service Name to view any status messages for that service. The message is displayed, and underneath, the name of the service followed by the status.
List of custom settings applied to config filesIf your deployment is upgraded to QlikView November 2018 or later, a list shows all non-default config values applied to the DSC, QDS, QMS and QVWS services in your deployment.
Administering QlikView - QlikView, April 2019 12
3 Status
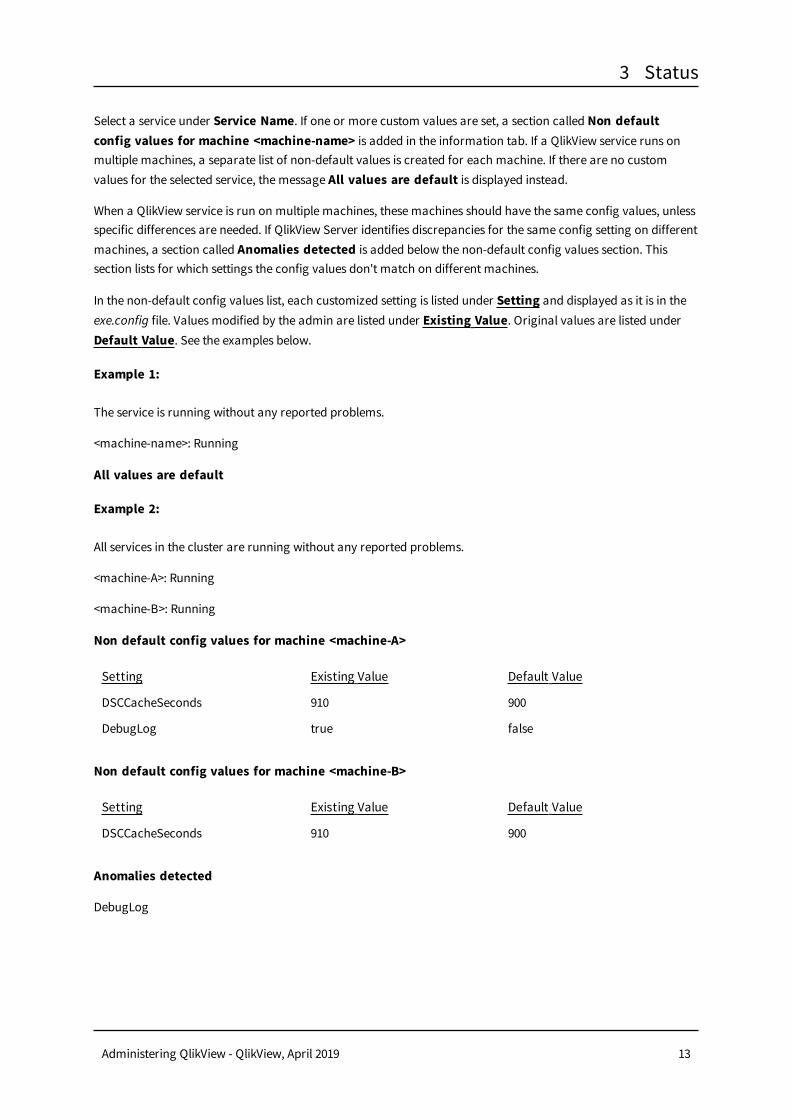
Select a service under Service Name. If one or more custom values are set, a section called Non default config values for machine <machine-name> is added in the information tab. If a QlikView service runs on multiple machines, a separate list of non-default values is created for each machine. If there are no custom values for the selected service, the message All values are default is displayed instead.
When a QlikView service is run on multiple machines, these machines should have the same config values, unless specific differences are needed. If QlikView Server identifies discrepancies for the same config setting on different machines, a section called Anomalies detected is added below the non-default config values section. This section lists for which settings the config values don't match on different machines.
In the non-default config values list, each customized setting is listed under Setting and displayed as it is in the exe.config file. Values modified by the admin are listed under Existing Value. Original values are listed under Default Value. See the examples below.
Example 1:
The service is running without any reported problems.
<machine-name>: Running
All values are default
Example 2:
All services in the cluster are running without any reported problems.
<machine-A>: Running
<machine-B>: Running
Non default config values for machine <machine-A>
Setting Existing Value Default Value
DSCCacheSeconds 910 900
DebugLog true false
Non default config values for machine <machine-B>
Setting Existing Value Default Value
DSCCacheSeconds 910 900
Anomalies detected
DebugLog
Administering QlikView - QlikView, April 2019 13

3 Status
Shutting down a QlikView Distribution ServiceFrom QlikView 12.10, the QMC provides a method for shutting down the QlikView Distribution Service (QDS), in a controlled way, a so-called graceful shutdown. This shuts down the QDS service, therefore allowing for maintenance activities, for example.
For a graceful shutdown of the QDS, a switch button icon is provided in the service status message for a QDS service. When you click the switch button, during a pre-configured grace period, any tasks running in the QDS are allowed to complete. If a task is not completed during the grace period, it is stopped. During this grace period, no new tasks can be started on that QDS service.
Do the following:
1. Under Service Name, click the QDS service you want to shut down.You might have to expand the tree browser of services if you are using clustered servers.
2. In the Information area, click the switch button icon.
3. Confirm that you want to shut down the QDS service.Graceful shutdown of the QDS is started. Any tasks not completed during the grace time will be stopped. The default grace period is 30 minutes.
To configure the grace period for graceful shutdown of the QDS, change the value of the following key in the QVDistributionService.exe.config file: ServiceStopGracetimeInSeconds.
3.3 QVS StatisticsOn the Statistics page, the live statistics on all of the QlikView Servers that are managed by the QlikView Management Console (QMC) are presented, sorted on the following tabs:
l Open Documents, where basic information about open documents is presented.
l Active Users, where users and the number of documents they are currently keeping open are presented.
l Performance, where the QlikView Server (QVS) system performance parameters are presented.
l Documents and Users, where open documents and the users currently using them are presented.
Open DocumentsOn the Open Documents tab, the paths to, and the number of sessions towards, any open document are presented.
PathThe path and file name of the open document, relative to the root of the server.
Example:
mydirectory/myfile.qvw
SessionsThe number of sessions towards the open document.
Administering QlikView - QlikView, April 2019 14
3 Status
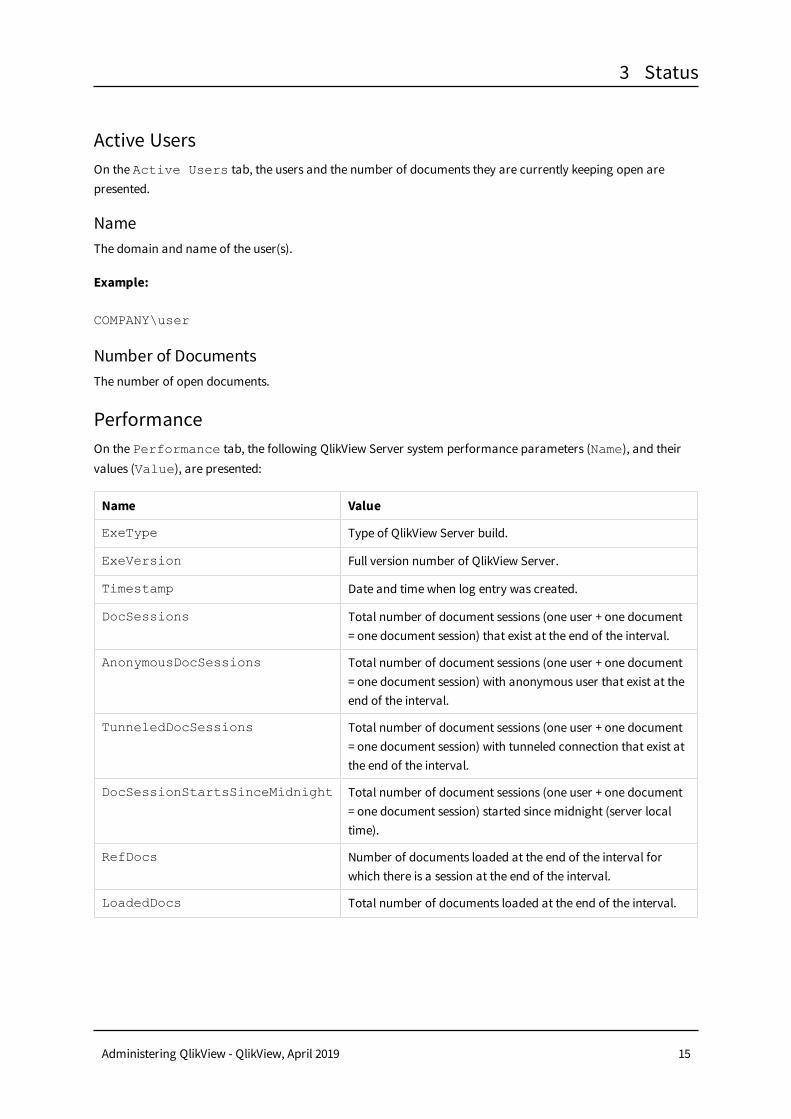
Active UsersOn the Active Users tab, the users and the number of documents they are currently keeping open are presented.
NameThe domain and name of the user(s).
Example:
COMPANY\user
Number of DocumentsThe number of open documents.
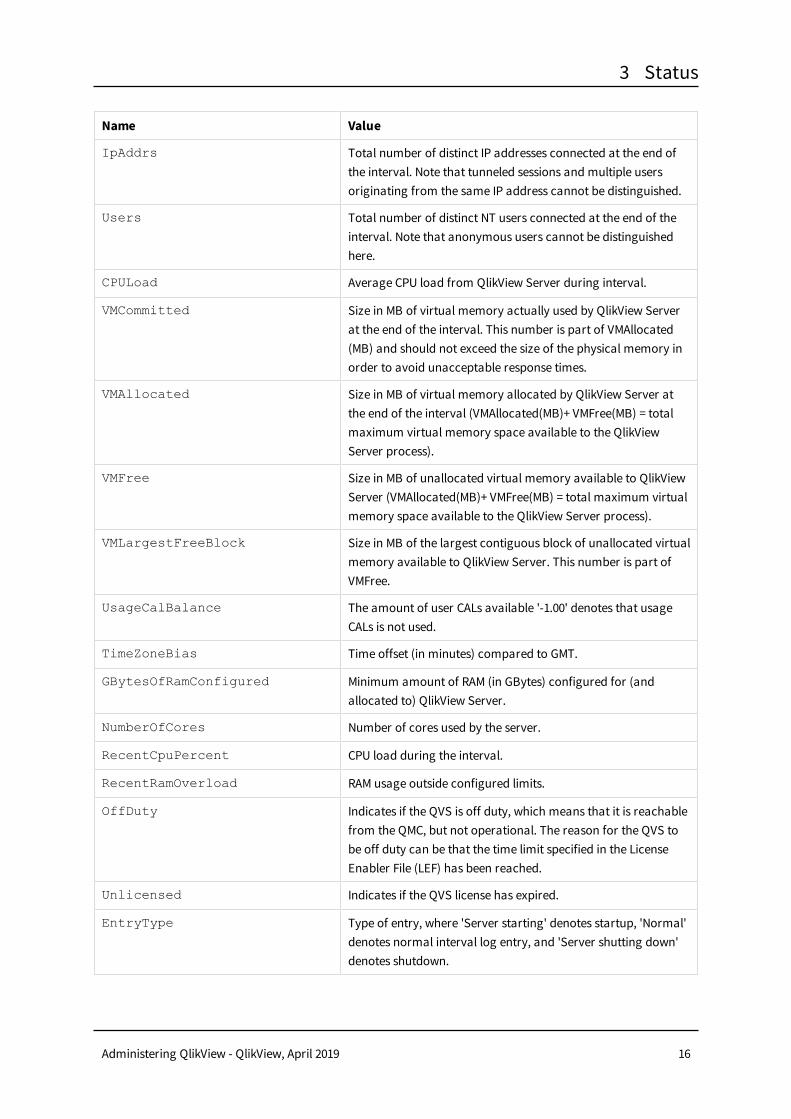
PerformanceOn the Performance tab, the following QlikView Server system performance parameters (Name), and their values (Value), are presented:
Name Value
ExeType Type of QlikView Server build.
ExeVersion Full version number of QlikView Server.
Timestamp Date and time when log entry was created.
DocSessions Total number of document sessions (one user + one document = one document session) that exist at the end of the interval.
AnonymousDocSessions Total number of document sessions (one user + one document = one document session) with anonymous user that exist at the end of the interval.
TunneledDocSessions Total number of document sessions (one user + one document = one document session) with tunneled connection that exist at the end of the interval.
DocSessionStartsSinceMidnight Total number of document sessions (one user + one document = one document session) started since midnight (server local time).
RefDocs Number of documents loaded at the end of the interval for which there is a session at the end of the interval.
LoadedDocs Total number of documents loaded at the end of the interval.
Administering QlikView - QlikView, April 2019 15
3 Status
Name Value
IpAddrs Total number of distinct IP addresses connected at the end of the interval. Note that tunneled sessions and multiple users originating from the same IP address cannot be distinguished.
Users Total number of distinct NT users connected at the end of the interval. Note that anonymous users cannot be distinguished here.
CPULoad Average CPU load from QlikView Server during interval.
VMCommitted Size in MB of virtual memory actually used by QlikView Server at the end of the interval. This number is part of VMAllocated(MB) and should not exceed the size of the physical memory in order to avoid unacceptable response times.
VMAllocated Size in MB of virtual memory allocated by QlikView Server at the end of the interval (VMAllocated(MB)+ VMFree(MB) = total maximum virtual memory space available to the QlikView Server process).
VMFree Size in MB of unallocated virtual memory available to QlikView Server (VMAllocated(MB)+ VMFree(MB) = total maximum virtual memory space available to the QlikView Server process).
VMLargestFreeBlock Size in MB of the largest contiguous block of unallocated virtual memory available to QlikView Server. This number is part of VMFree.
UsageCalBalance The amount of user CALs available '-1.00' denotes that usage CALs is not used.
TimeZoneBias Time offset (in minutes) compared to GMT.
GBytesOfRamConfigured Minimum amount of RAM (in GBytes) configured for (and allocated to) QlikView Server.
NumberOfCores Number of cores used by the server.
RecentCpuPercent CPU load during the interval.
RecentRamOverload RAM usage outside configured limits.
OffDuty Indicates if the QVS is off duty, which means that it is reachable from the QMC, but not operational. The reason for the QVS to be off duty can be that the time limit specified in the License Enabler File (LEF) has been reached.
Unlicensed Indicates if the QVS license has expired.
EntryType Type of entry, where 'Server starting' denotes startup, 'Normal' denotes normal interval log entry, and 'Server shutting down' denotes shutdown.
Administering QlikView - QlikView, April 2019 16
3 Status
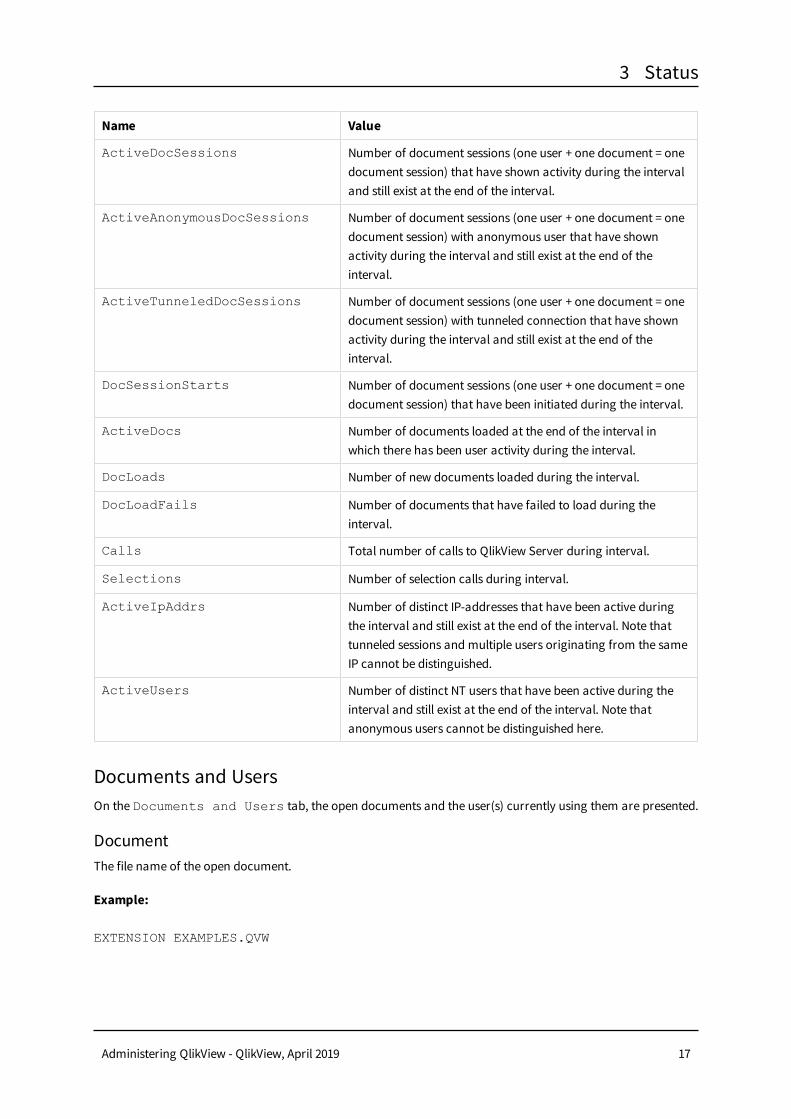
Name Value
ActiveDocSessions Number of document sessions (one user + one document = one document session) that have shown activity during the interval and still exist at the end of the interval.
ActiveAnonymousDocSessions Number of document sessions (one user + one document = one document session) with anonymous user that have shown activity during the interval and still exist at the end of the interval.
ActiveTunneledDocSessions Number of document sessions (one user + one document = one document session) with tunneled connection that have shown activity during the interval and still exist at the end of the interval.
DocSessionStarts Number of document sessions (one user + one document = one document session) that have been initiated during the interval.
ActiveDocs Number of documents loaded at the end of the interval in which there has been user activity during the interval.
DocLoads Number of new documents loaded during the interval.
DocLoadFails Number of documents that have failed to load during the interval.
Calls Total number of calls to QlikView Server during interval.
Selections Number of selection calls during interval.
ActiveIpAddrs Number of distinct IP-addresses that have been active during the interval and still exist at the end of the interval. Note that tunneled sessions and multiple users originating from the same IP cannot be distinguished.
ActiveUsers Number of distinct NT users that have been active during the interval and still exist at the end of the interval. Note that anonymous users cannot be distinguished here.
Documents and UsersOn the Documents and Users tab, the open documents and the user(s) currently using them are presented.
DocumentThe file name of the open document.
Example:
EXTENSION EXAMPLES.QVW
Administering QlikView - QlikView, April 2019 17
3 Status
UserThe domain and name of the user(s).
Example:
COMPANY\user
Administering QlikView - QlikView, April 2019 18
4 Documents
4 DocumentsThe Documents tab contains the following pages:
l Source Documents
This page is only available if a valid QlikView Publisher (QVP) license was installed.
l User Documents
On these pages, the source documents and the user documents can be managed.
4.1 QlikView Document Types and FunctionsEach 'document' mentioned in the QlikView Management Console (QMC) environment assumes a 'QlikView document', that is, a file with the extension .qvw, which can be opened by a QlikView Server (QVS), and which can be of one of the following states:
l Document
l Source document
l User document
A source document is managed by a QlikView Publisher (QVP), that is, a QlikView Distribution Service (QDS), whilst a user document is managed by a QVS. A document is not managed, but is still a QlikView document, and as soon as it is managed by either a QDS or a QVS, it is referred to as a source document or a user document, respectively.
A user document can be created from a source document managed by a QDS, by using the reduce function, and by using the distribute function, to let a QVS manage the user document. A user document can also be created by using the QlikView Desktop, and stored in a QVS folder. A user document distributed by a QDS will not include any script.
A source document includes one script. The contents of a source document always overrules the contents in a user document that is created from the source document. This means that any change in the source document will overwrite both data and meta data in the user document, for example, when a task is executed. This can be avoided by using different user document names, using a document name template.
A document is a source document that is distributed to an e-mail recipient or to a folder outside of the QVS and QDS environment, that is, the document is not managed.
Users can access user documents via a front-end, that is, a QlikView AccessPoint, whilst administrators can access source documents via a back-end, that is, a QDS.
A source document contains the script and a layout. When the script is executed at reload, a user document is created. Source documents, including the script and the layout, are created by QlikView Developers.
Administering QlikView - QlikView, April 2019 19

4 Documents
4.2 Source Documents
This page is only available if a valid QlikView Publisher (QVP) license was installed.
On the Source Documents page, all source documents, and all the assigned tasks, are listed in a tree view in the left pane. The tasks are sorted under the source document to which they belong. If a source document for some reason is unavailable, the tasks belonging to the source document are flagged as orphans and stored in the <Orphans> folder, which means that the tasks never run. If the missing source document is re-introduced, the orphan tasks become regular tasks again.
To view or manage the settings of a task assigned to a document, in the right pane, click on the document or task in the tree view.
Task chains, where one task triggers another task, can be created. For example, 'Document 1' can be configured to be reloaded every hour, and 'Document 2' can be configured to be distributed when the reload of 'Document 1' has been executed successfully, only. Furthermore, 'Document 3', can be configured to be distributed when the distribution of 'Document 2' has been executed successfully, only, and so on.
If a trigger for any of the tasks in the chain is disabled, the chain will be broken. If any of the tasks in the chain is disabled, the chain will continue, but the disabled task(s) will simply not execute.
Functions
Search Document, Task, or TemplateEnter the desired search term(s) in this text box, to find documents, tasks, or templates, and click on the Search
icon, .
FilterThe document and task list can be filtered. A black Filter by Documents With or Without Task
icon, , on the Name column indicates that a filter is not used on that column. A blue Filter Set icon,
, on the Name column indicates that a filter is used on that column. To filter documents with or without assigned
tasks, click on the Filter by Documents With or Without Tasks icon, , in the Name column, and select the desired criteria in the dialog, by ticking/unticking the check boxes. To reset (that is, not use) the filter, deselect all criteria by clicking on the Clear Filter button. To confirm any change in the dialog, click on the OK button.
The following options are available:
l Document With Tasks
l Document Without Tasks
Administering QlikView - QlikView, April 2019 20

4 Documents
View StatusTo overview the tasks for a document, in the right pane, click on the document in the tree view. The possible status indicator icons are the following:
l , indicating that the task is running.
l , indicating that a warning has occurred for the task.
l , indicating that the execution of the task has failed.
The statuses of the tasks are automatically refreshed.
Add TaskTo add a task, click on the Add Task Manually icon, , in the upper right corner of the right pane, or click
on the Add Task... icon, , and select one of the following options in the drop-down list:
l Add Task Manually, meaning that a task is created, and the settings have to be configured on each of the tabs belonging to the task.
l Add Task Using Wizard, meaning that a task is created by going through a basic sub set of the configuration settings, which are presented in a wizard guide.
l Add Task Using Template, meaning that a task is created, using the settings from a template.
Edit TaskTo configure a task, click on the Edit Task icon, , or click on the task in the tree view. In the right pane, the following tabs are presented:
l General
l Reload
l Reduce
l Distribute
l Document Information
l Triggers
l Server
Click on each tab label for more information.
Context MenuTo view the task context menu, from which the task can be managed, right-click on the task in the tree view. It is possible to multi-select tasks (using the control + click keys) and manage them batch-wise.
Copy Task
To copy a task, click on the Copy this task to clipboard icon, , or right-click on the task in the
tree view and choose Copy.
Administering QlikView - QlikView, April 2019 21

4 Documents
Paste TaskPasting a task into a document will create a new task. To paste a copied task to a specific document, either click
on (highlight) the document and click on the Paste Task icon, , in the right pane (to the left of the Add
Task icon, ), or right-click on the document and choose Paste.
Pasting a task into an existing task will merge the tasks, overwriting the settings of the destination task. To merge a copied task with another task, either click on (highlight) the document, in which the destination task resides, in
the tree view, and click on the Paste Special... icon of that task, , in the right pane (under the
Delete this task icon, ), or click on (highlight) the destination task in the tree view, and right-click on
Paste Special.... Choose which parts (components) of the task to be pasted (duplicated or merged) into the destination task and click on the OK button. The parts of a task to be chosen correspond to each of the tabs.
A copied task can be merged with several tasks simultaneously by multi-selecting the desired destination tasks in the tree view.
Import TaskTo import a task from another installation, right-click on a document and choose Import Task.This will bring up the remote system. Choose the task to be imported. If there is a task with the same name in the document already, a new name will be generated.
To import all tasks from a remote system, right-click on the Distribution Service and choose Import Tasks, which opens the Import dialog. Choose the Distribution Service from the remote system to be imported.
Run TaskTo start a task, click on the Run this task icon, .
Abort TaskTo stop a task, click on the Abort this task icon, .
Delete TaskTo entirely remove a task, either click on (highlight) the document, in which the task resides, in the tree view, and
click on the Delete this Task icon of that task, , in the right pane, or click on (highlight) the task in the
tree view, and right-click on Delete.
TemplatesIn the Templates folder, a way of creating, storing, and using templates for creating new tasks, and assigning them to source documents, is provided. Templates do not include any document specific settings, that is, the following functions are not applicable:
l Reduce
l Loop and Distribute
l PDF Report from Source Document
Administering QlikView - QlikView, April 2019 22

4 Documents
This means that document specific information is not included, when copying a task and pasting it into a new or existing template. Also, templates cannot be executed.
A template is not assigned to any source document. A template that is copied to a source document will become a task. Another way of adding a task, using a template, is to select the Add Task Using Template option.
Functions
Search Document, Task, or TemplateEnter the desired search term(s) in this text box, to find documents, tasks, or templates, and click on the Search
icon, .
ViewTo overview all of the templates, in the right pane, click on the Templates folder in the tree view.
Add Template
To add a template, click on the Add Template icon, , in the upper right corner of the right pane. A template is created, and the settings have to be configured on each of the tabs belonging to the template.
Edit Template
To configure a template, click on the Edit Template icon, , or click on the template in the tree view. In the right pane, the following tabs are presented:
l General
l Reload
l Distribute
l Document Information
l Triggers
l Server
Click on each tab label for more information.
These tabs present the settings of a task, but they still just make up a template that cannot be executed itself. To use the settings, an executable task must be created in a document.
Context MenuTo view the context menu of a template, from which it can be managed, right-click on the template in the tree view.
Copy Template
To copy a template, click on the Copy this Template to Clipboard icon, , or right-click on the
template in the tree view and choose Copy.
Administering QlikView - QlikView, April 2019 23
4 Documents
Paste Template
Pasting a template into the template folder will create a new template. To paste a copied template to the
template folder, either click on (highlight) the template folder and click on the Paste Template icon, , in
the right pane (to the left of the Add Template icon, ), or right-click on the template folder and choose
Paste.
Pasting a template into an existing template will merge the templates, overwriting the settings of the destination template. To merge a copied template with another template, either click on (highlight) the template folder, in which the destination template resides, in the tree view, and click on the Paste Special... icon of that
template, , in the right pane (under the Delete this template icon, ), or click on (highlight) the
destination template in the tree view, and right-click on Paste Special.... Choose which parts (components) of the template to be pasted (duplicated or merged) into the destination template and click on the OK button.
A copied template can be merged with several templates simultaneously by multi-selecting the desired destination templates in the tree view.
Import Template
To import a template from another installation, right-click on the template folder and choose Import Template.This will bring up the remote system. Choose the template to be imported. If there is a template with the same name in the template folder already, a new name will be generated.
To import all templates from a remote system, right-click on the Distribution Service and choose Import Templates, which opens the Import dialog. Choose the Distribution Service from the remote system to be imported.
Delete TemplateTo entirely remove a template, either click on (highlight) the template folder, in which the template resides, in the
tree view, and click on the Delete this Template icon of that template, , in the right pane, or click on
(highlight) the template in the tree view, and right-click on Delete.
HelpTo get context sensitive help information (this WebHelp), that is, detailed information about the contents of the current page, click on the Help text in the upper right corner of the page.
Movement ButtonsIf applicable and available, use the following buttons to move between pages within the wizard:
l Previous, meaning 'go back to the previous wizard guide page'; the configuration on the current wizard guide page will be stored until moving forward again, using the Next button.
l Next, meaning 'go ahead to the next wizard guide page'.
This button is only available when the current wizard guide page has been configured with
Administering QlikView - QlikView, April 2019 24

4 Documents
the required data.
l Finish, meaning 'finish this wizard', using the configured information.
This button is only available when all of the wizard guide pages have been configured.
l Cancel or , meaning 'abort this wizard', without using or storing any configuration; no task will be created.
Wizard Start PageThe Wizard provides the basic functionality configuration of a new task, involving distribution, reduction, and triggers.
Start PageOn the Wizard Start page, the type of task that is to be configured for the current document can be selected. A sub set of the configuration settings for the task will be presented on wizard guide pages, depending on the answers to the following questions:
l How do you want to select the recipients of the distribution?
l Do you want to reduce the document?
The task settings can be configured on the wizard guide pages. The combinations of possible answers result in that the following wizard guide pages are presented:
Enter recipients manually
Distribute to recipients based on a field in the document
No, distribute the whole document
l General
l Distribute, Manually
l Trigger Task
l General
l Distribute, Loop Field in Document
l Trigger Task
Yes, only distribute parts of the document
l General
l Reduce
l Distribute, Manually
l Trigger Task
l General
l Reduce
l Distribute, Loop Field in Document
l Trigger Task
HelpTo get context sensitive help information (this WebHelp), that is, detailed information about the contents of the current page, click on the Help text in the upper right corner of the page.
Administering QlikView - QlikView, April 2019 25
4 Documents
Movement ButtonsIf applicable and available, use the following buttons to move between pages within the wizard:
l Previous, meaning 'go back to the previous wizard guide page'; the configuration on the current wizard guide page will be stored until moving forward again, using the Next button.
l Next, meaning 'go ahead to the next wizard guide page'.
This button is only available when the current wizard guide page has been configured with the required data.
l Finish, meaning 'finish this wizard', using the configured information.
This button is only available when all of the wizard guide pages have been configured.
l Cancel or , meaning 'abort this wizard', without using or storing any configuration; no task will be created.
GeneralOn the General wizard guide page, the new task can be configured regarding reload, name, category, and attributes.
General
Perform Reload
To enable the function that reloads the document when the task is run, tick this check box. To disable the reload function, untick this check box.
Task Name
To edit the name of the task, enter the preferred name in this text box.
The Task Name must be unique; if it is not, a suffix number will be added to make it unique, for example, 'MyTask' will become 'MyTask (2)'.
Select Category
To assign a category to a document, select one of the available categories, presented in the drop-down list.
Default value: Default.
Or Type a New Category
To create a category, enter a descriptive name in this text box. The new category will be available in the Select Category drop-down list. The category is presented on the QlikView AccessPoint.
Administering QlikView - QlikView, April 2019 26
4 Documents
Categories can be reassigned, but cannot be deleted.
Document Description
To create a document description that is displayed in Document Details on QlikView AccessPoint, enter a description in this text box.
AttributesMeta data attributes can be created and assigned to a document. These attributes are arbitrary pairs of name and value. They are not saved in the document, but in the meta data of the QlikView Server, utilizing the QlikView Server Document Metadata Service (DMS) facility. A third-party application can read and extract the attributes from the database, using the qvpx protocol. The attributes are presented on the QlikView AccessPoint, in which they are used to help finding the correct document. To create an attribute and assigned
value entry, to be stored in the meta file, click on the Add icon, , to the right in the pane, and configure the following fields:
Name
To configure a meta data attribute name, enter a descriptive name in this text box.
Value
To assign a value to the meta attribute name in the Name field, enter the value in this text box.
Delete
To entirely remove a configured entry from the list, click on the Delete icon, .
HelpTo get context sensitive help information (this WebHelp), that is, detailed information about the contents of the current page, click on the Help text in the upper right corner of the page.
Movement ButtonsIf applicable and available, use the following buttons to move between pages within the wizard:
l Previous, meaning 'go back to the previous wizard guide page'; the configuration on the current wizard guide page will be stored until moving forward again, using the Next button.
l Next, meaning 'go ahead to the next wizard guide page'.
This button is only available when the current wizard guide page has been configured with the required data.
l Finish, meaning 'finish this wizard', using the configured information.
This button is only available when all of the wizard guide pages have been configured.
Administering QlikView - QlikView, April 2019 27

4 Documents
l Cancel or , meaning 'abort this wizard', without using or storing any configuration; no task will be created.
ReduceOn the Reduce wizard guide page, the new task can be configured how split a document into several reduced copies of the original.
A reduced document contains only the reduced information, while a document using the section access function contains all information, but hides and reveals parts of it.
Reduction based on Section Access may cause unwanted results in the distributed documents and should be used with caution.
It is mandatory to enter data on this wizard guide page.
Reduction Method
Reduce by
Select one of the following options:
l Reduce by Field Value, meaning that one reduced document is created, by selecting the fields and values that should be distributed.
l Reduce by Bookmark, meaning that one reduced document is created, by selecting the bookmarks that should be distributed.
You can also create several separate documents, based on a field value.
Open Document
To be able to use the contents of the document for selecting bookmarks or fields and field values, the document has to be opened by clicking on this button.
Using this function, that is, clicking the Open Document button or the ... button (if available), might be time consuming; therefore, it is done as an explicit command.
Reduce by Field ValuePresents the Fields and Values that are available in the document.
Only the first 1000 entries are included. All data not selected from the boxes will be removed from the reduced document.
This option is only available if the Reduce by Field Value option was chosen.
Administering QlikView - QlikView, April 2019 28
4 Documents
Fields
To select the fields that should be part of the reduced document to be distributed, select them in this box.
Values
To select the values that should be part of the reduced document to be distributed, select them in this box.
Selected Fields
Presents the selected fields.
Selected Values
Presents the selected values.
Clear Selection
To clear all selected fields and values, click on the Clear Selection icon, .
Reduce by BookmarkPresents the Bookmarks that are available in the document.
All data not selected from the drop-down list will be removed from the reduced document.
Bookmark
To select the bookmark to distribute, scroll down the drop-down list and select it.
Loop and Reduce
Field
To create several separate documents for each value in the selected field, select the Field from which the value is to be looped.
All data not selected from the drop-down list will be removed from the reduced document.
HelpTo get context sensitive help information (this WebHelp), that is, detailed information about the contents of the current page, click on the Help text in the upper right corner of the page.
Movement ButtonsIf applicable and available, use the following buttons to move between pages within the wizard:
l Previous, meaning 'go back to the previous wizard guide page'; the configuration on the current wizard guide page will be stored until moving forward again, using the Next button.
l Next, meaning 'go ahead to the next wizard guide page'.
Administering QlikView - QlikView, April 2019 29
4 Documents
This button is only available when the current wizard guide page has been configured with the required data.
l Finish, meaning 'finish this wizard', using the configured information.
This button is only available when all of the wizard guide pages have been configured.
l Cancel or , meaning 'abort this wizard', without using or storing any configuration; no task will be created.
Distribute, ManuallyOn the Distribute, Manually wizard guide page, the new task can be configured regarding the distribution method of the current document and the authorization of recipients.
It is mandatory to enter data on this wizard guide page.
Documents can be distributed to QlikView Servers, directly to users via e-mail, and to specific folders, and the methods are the following:
l Distribute to QlikView Server
l Distribute via E-mail
l Distribute to Folder
Any combination of distribution methods are allowed; 0, 1 only, any 2, or all 3.
Distribution of a PDF to a QlikView Server is not allowed.
Distribute to QlikView Server
To add a specific resource entry to distribute to, click on the Add icon, , to the right in the pane, and configure the following fields:
Server
Select the desired server in the drop-down list.
Mount
Select the desired mount in the drop-down list, if applicable.
User Type
The type of recipients.
To manage the authorization of users and groups, select one of the following drop-down list options:
All Users, meaning that all users are authorized (that is, anonymous access to the file is allowed).
Administering QlikView - QlikView, April 2019 30
4 Documents
The IQVS account controls file access when anonymous access is allowed. This means that the IQVS account has to be provided with the correct file access. The account is by default created as a local account in the QlikView installation. In a clustered environment, the IQVS account must be created as a domain account, so that all nodes can access it.
All Authenticated Users, meaning that any authenticated user is authorized.
Named Users, meaning that users that should be authorized are manually added, by searching for users and groups in a domain or on a computer (the names are resolved by the Directory Service Connector).
Recipients
If Named Users was chosen in the User Type field, do the following:
To manage users and groups, click on the Manage Users dialog icon, .
l Default Scope
Select the directory to be searched, in the drop-down list.
l Search for Users and Groups
Enter the desired search term(s) in this text box, to find a user or a group, and click on the Search icon,
.
l Search Result
This box presents the result of the search, using the desired criteria.
l Add >
To add a user or a group, click on it in the Search Result box and click on this button. Several items can be added at the same time.
l Selected Users
This box presents the selected users and groups.
l < Delete
To deselect a user or a group, click on it in the Selected Users box and click on this button. Several items can be deselected at the same time.
l << Delete All
To deselect all of the users and groups from the Selected Users box, click on this button.
Delete
To entirely remove a configured entry from the list, click on the Delete icon, .
Distribute via E-mailTo manage the authorization of e-mail recipients, do the following:
To manage users and groups, click on the Manage Users dialog icon, .
Administering QlikView - QlikView, April 2019 31

4 Documents
l Default Scope
Select the directory to be searched, in the drop-down list.
l Search for Users and Groups
Enter the desired search term(s) in this text box, to find a user or a group, and click on the Search icon,
.
l Search Result
This box presents the result of the search, using the desired criteria.
l Add >
To add a user or a group, click on it in the Search Result box and click on this button. Several items can be added at the same time.
l Selected Users
This box presents the selected users and groups.
l < Delete
To deselect a user or a group, click on it in the Selected Users box and click on this button. Several items can be deselected at the same time.
l << Delete All
To deselect all of the users and groups from the Selected Users box, click on this button.
To distribute via email to a group of users, create a distribution group with an email address of the group itself. When the DSC performs a lookup on the group name, the email address of the group is returned and the document is distributed to that email address.
Distribute to Folder
Path
To select a folder to distribute to, click on the Browse icon, , and choose the folder in the Choose Folder dialog.
User Type
To select the method for managing users and groups, click on one of the following drop-down list options:
l All Authenticated Users, meaning that any authenticated user is authorized.
l Named Users, meaning that users that should be authorized are manually added, by searching for users and groups in a domain or on a computer (the names are resolved by the Directory Service Connector).
Add Users and Groups
If Named Users was chosen in the User Type field, do the following:
To manage users and groups, click on the Manage Users dialog icon, .
Administering QlikView - QlikView, April 2019 32

4 Documents
l Default Scope
Select the directory to be searched, in the drop-down list.
l Search for Users and Groups
Enter the desired search term(s) in this text box, to find a user or a group, and click on the Search icon,
.
l Search Result
This box presents the result of the search, using the desired criteria.
l Add >
To add a user or a group, click on it in the Search Result box and click on this button. Several items can be added at the same time.
l Selected Users
This box presents the selected users and groups.
l < Delete
To deselect a user or a group, click on it in the Selected Users box and click on this button. Several items can be deselected at the same time.
l << Delete All
To deselect all of the users and groups from the Selected Users box, click on this button.
HelpTo get context sensitive help information (this WebHelp), that is, detailed information about the contents of the current page, click on the Help text in the upper right corner of the page.
Movement ButtonsIf applicable and available, use the following buttons to move between pages within the wizard:
l Previous, meaning 'go back to the previous wizard guide page'; the configuration on the current wizard guide page will be stored until moving forward again, using the Next button.
l Next, meaning 'go ahead to the next wizard guide page'.
This button is only available when the current wizard guide page has been configured with the required data.
l Finish, meaning 'finish this wizard', using the configured information.
This button is only available when all of the wizard guide pages have been configured.
l Cancel or , meaning 'abort this wizard', without using or storing any configuration; no task will be created.
Administering QlikView - QlikView, April 2019 33

4 Documents
Distribute, Loop Field in DocumentOn the Distribute, Loop Field in Document wizard guide page, the new task can be configured to let the QlikView Publisher (QVP) distribute the current document.
It is mandatory to enter data on this wizard guide page.
The Loop Field in Document function provides distribution to users based on the content of each user. Combining the Loop and Reduce function with the Loop and Distribute function, the result can be that each user gets specific and relevant information, only.
For example, one document should be distributed to all the people employed in a specific country, and the document should be distributed to the QlikView Server, each document given a unique name. The following describes a solution:
1. In the source document, which contains the information that should be distributed, add an Employee field containing the user name of each employee, and make sure that they are associated to the country of the user.
2. Set up By Field Value for Loop and Reduce to use the Country field.
3. Edit the name template to include the Country field, %SourceDocumentName% %DocumentField,Country%.
4. In the Field Containing Recipient Information drop-down list, select the Employee field.
5. In the Check User Identity On drop-down list, select the SAMAccountName option.
6. In the Target Type drop-down list, select the QlikView Server option.
Loop and Distribute
Open Document
To open the document, thus enabling the selection of a field that contains information about the recipients, click on this button.
Using this function, that is, clicking the Open Document button or the ... button (if available), might be time consuming; therefore, it is done as an explicit command.
Field Containing Recipient Information
Select the field that contains the desired information about the recipients, in the drop-down list.
Check User Identity On
Select the desired type of user identity check, in the drop-down list. The available options are the following directory service attributes:
l SecurityIdentifier
l DisplayName
Administering QlikView - QlikView, April 2019 34

4 Documents
l SAMAccountName
l EmailAddress
l UserPrincipalName
These attribute names correspond to the attributes in the Microsoft Active Directory, which are described in the following:
l SecurityIdentifier, a unique value of variable length used to identify a user account, group account, or logon session to which an ACE applies.
l DisplayName, the display name for an object, which is usually the combination of the first name, middle initial, and last name of a user.
l SAMAccountName, the logon name used to support clients and servers running older versions of the operating system, such as Windows NT 4.0, Windows 95, Windows 98, and LAN Manager. This attribute has to consist of less than 20 characters to support older clients.
l E-mailAddress, the list of e-mail addresses for a contact.
l UserPrincipalName, this attribute contains the UPN, that is, an Internet-style user login name, based on the Internet standard RFC 822. The UPN is shorter than the distinguished name and easier to remember. By convention, this should map to the user e-mail name. The value set for this attribute is equal to the length of the ID of the user and the domain name.
If another Directory Service Provider (DSP) is used, these attribute names correspond as closely as possible to attributes with similar functions.
Destination
Target Type
To choose the document distribution method, tick one of the following check boxes, and configure the applicable fields:
If no destination is given, no loop distribution will be done, and no recipients are given, since they are configured by the loop.
QlikView ServerTo distribute to the QlikView Server (QVS), tick this check box and select the desired Server and Mount in the drop-down lists.
E-mailTo distribute to the e-mail recipient(s), tick this check box.
FolderTo select a folder to distribute to, click on the Browse icon, , and choose the folder in the Choose Folder dialog.
Administering QlikView - QlikView, April 2019 35
4 Documents
HelpTo get context sensitive help information (this WebHelp), that is, detailed information about the contents of the current page, click on the Help text in the upper right corner of the page.
Movement ButtonsIf applicable and available, use the following buttons to move between pages within the wizard:
l Previous, meaning 'go back to the previous wizard guide page'; the configuration on the current wizard guide page will be stored until moving forward again, using the Next button.
l Next, meaning 'go ahead to the next wizard guide page'.
This button is only available when the current wizard guide page has been configured with the required data.
l Finish, meaning 'finish this wizard', using the configured information.
This button is only available when all of the wizard guide pages have been configured.
l Cancel or , meaning 'abort this wizard', without using or storing any configuration; no task will be created.
Trigger TaskOn the Trigger Task wizard guide page, the new task can be configured to be started by triggers. A task can have multiple triggers, creating a workflow of tasks.
Triggers for Running this TaskEach row presents a separate trigger. The current task is started if any trigger is released (OR operator). If several triggers (multiple conditions) are to be released, before the current task is started, the On Multiple Events Completed function should be used (AND operator).
To create a trigger, click on the Add icon, , to the right in the pane.
Trigger
The type of the trigger. The possible value is the following:
l Once Trigger
l Task Finished Trigger
l External Event Trigger
l And Trigger
Details
The trigger condition settings, that is, a summary of when the trigger starts the current task.
Administering QlikView - QlikView, April 2019 36
4 Documents
Enabled
The current status of the trigger. The possible values are the following:
l Enabled
l Disabled
Edit Trigger
To configure a trigger, click on the Edit Trigger icon, .
Delete
To entirely remove a trigger, click on the Delete icon, .
Configure Trigger Dialog
Start the Task
Choose the type of trigger, by clicking on one of the following options in the drop-down list:
l On a Schedule
l On Event from Another Task
l On an External Event
l On Multiple Events Completed
Enabled
To enable the trigger for execution of the task, tick this check box. To disable the trigger, untick this check box.
On a Schedule
When the On a Schedule trigger type was chosen, a trigger can be scheduled to start the current task. The following configuration options are available:
RecurrenceChoose a schedule for the trigger to start, by clicking on one of the following options:
l Once
l Hourly
l Daily
l Weekly
l Monthly
l Continuously
All time specifications must be in the 24-hour format.
Start atEnter the date and time of the initial trigger start in this text box, by using the following format: yyyy-mm-dd hh:mm:ss.
Administering QlikView - QlikView, April 2019 37

4 Documents
Example:
2011-12-31 23:59:59
OnceNo further settings are available.
Hourly
Run EveryChoose a time interval for the trigger to start, by entering the desired number in the Hours and Minutes text boxes.
Example:
1 and 10, meaning that the trigger will start every 70 minutes (the example not considering other possible limiting settings).
OnChoose the day(s) of the week for the trigger to start, by ticking any of the following check boxes:
l Monday
l Tuesday
l Wednesday
l Thursday
l Friday
l Saturday
l Sunday
If no day was chosen, the trigger runs all days.
Run Only BetweenTo limit the trigger start within a day, tick this check box. Enter the start time and the stop time, in between which trigger start is allowed, in the start and stop text boxes, by using the following format: hh:mm. To disable the limitation, untick this check box.
Max Number of ExecutionsTo limit the number of trigger starts, tick this check box and enter the allowed number of trigger starts in the Max Number text box. To not limit the number of trigger starts, untick this check box.
Administering QlikView - QlikView, April 2019 38
4 Documents
ExpireTo make the trigger expire on a specific date and time, tick this check box and enter the date and time in this text box, by using the following format: yyyy-mm-dd hh:mm:ss. To make the trigger not to expire, untick this check box.
Example:
2012-12-31 23:59:59
Daily
Run EveryChoose a time interval for the trigger to start, by entering the desired number in the Day text box.
Example:
3, meaning that the trigger will start every third day (the example not considering other possible limiting settings).
Max Number of ExecutionsTo limit the number of trigger starts, tick this check box and enter the allowed number of trigger starts in the Max Number text box. To not limit the number of trigger starts, untick this check box.
ExpireTo make the trigger expire on a specific date and time, tick this check box and enter the date and time in this text box, by using the following format: yyyy-mm-dd hh:mm:ss. To make the trigger not to expire, untick this check box.
Example:
2012-12-31 23:59:59
Weekly
Run EveryChoose a time interval for the trigger to start, by entering the desired number in the Weeks text box.
Example:
2, meaning that the trigger will start every second week (the example not considering other possible limiting settings).
OnChoose the day(s) of the week for the trigger to start, by ticking any of the following check boxes:
Administering QlikView - QlikView, April 2019 39
4 Documents
l Monday
l Tuesday
l Wednesday
l Thursday
l Friday
l Saturday
l Sunday
If no day was chosen, the current day is selected.
Max Number of ExecutionsTo limit the number of trigger starts, tick this check box and enter the allowed number of trigger starts in the Max Number text box. To not limit the number of trigger starts, untick this check box.
ExpireTo make the trigger expire on a specific date and time, tick this check box and enter the date and time in this text box, by using the following format: yyyy-mm-dd hh:mm:ss. To make the trigger not to expire, untick this check box.
Example:
2012-12-31 23:59:59
Monthly
MonthsChoose the month(s) of the year for the trigger to start, by ticking any of the following check boxes:
l January
l February
l March
l April
l May
l June
l July
l August
l September
l October
l November
l December
Administering QlikView - QlikView, April 2019 40
4 Documents
If no month was chosen, the current month is selected.
Check AllTo automatically tick all of the months, click on this button.
Uncheck AllTo automatically untick all of the months, click on this button.
Run OnlyTo limit the trigger start within the selected Months, select one of the following options:
l Days, and select the day(s) of the month(s) for the trigger to start, by ticking any of the following check boxes:
1, 2, 3... 31, where each value represents that day of the month(s)Last, meaning the very last day of the month(s)
If no day was chosen, the trigger will not occur.
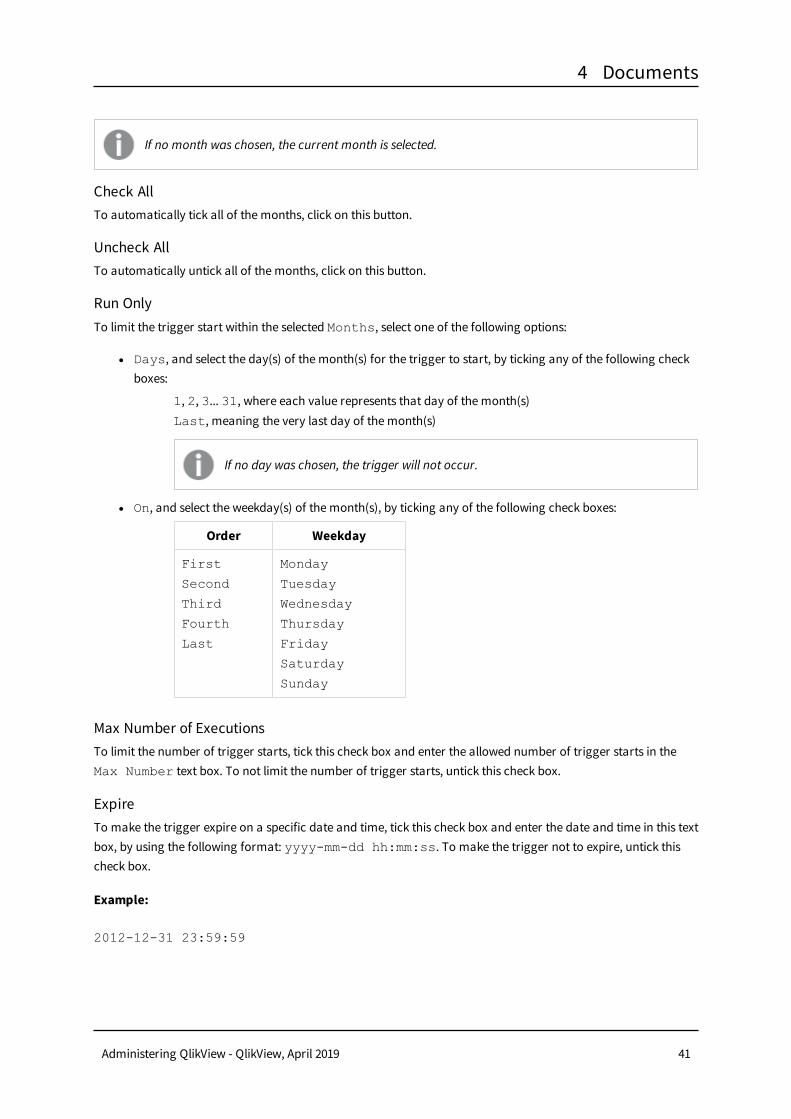
l On, and select the weekday(s) of the month(s), by ticking any of the following check boxes:
Order Weekday
First
Second
Third
Fourth
Last
Monday
Tuesday
Wednesday
Thursday
Friday
Saturday
Sunday
Max Number of ExecutionsTo limit the number of trigger starts, tick this check box and enter the allowed number of trigger starts in the Max Number text box. To not limit the number of trigger starts, untick this check box.
ExpireTo make the trigger expire on a specific date and time, tick this check box and enter the date and time in this text box, by using the following format: yyyy-mm-dd hh:mm:ss. To make the trigger not to expire, untick this check box.
Example:
2012-12-31 23:59:59
Administering QlikView - QlikView, April 2019 41
4 Documents
ContinuouslyNo further settings are available.
On Event from Another Task
When the On Event from Another Task trigger type was chosen, the trigger can be configured to start the current task on the event from another task. The following configuration options are available:
Start onChoose a trigger event, by clicking on one of the following options in the drop-down list:
l Successful, meaning that the execution of the task was successful
l Failed, meaning that the execution of the task failed
Completion ofChoose a trigger task, by clicking on one of the options in the drop-down list.
On an External Event
When the On an External Event trigger type was chosen, the trigger can be configured to start the current task on an external event, that is, an outside component, making a QlikView Management Service (QMS) API call. The following configuration options are available:
PasswordThis password is used to access the task and release the trigger. The external event has to know the password. To enable an external event to release the trigger of the task, enter a password in this text box.
On Multiple Events Completed
When the On Multiple Events Completed trigger type was chosen, the trigger can be configured to start the current task when other tasks have all been completed in their execution within a certain time. The following configuration options are available:
Time ConstraintChoose a time limit, within which all of the tasks have to complete their execution, by entering the desired number in the Minutes text box.
Default value: 360, meaning 6 hours.
Run Task When All of these Events Completed
External EventTo add an external event to the list of tasks that have to be completed for the trigger to be started, tick this check box. To entirely remove an external event from the list, untick this check box.
PasswordThis password is used to access the task and release the trigger. The external event has to know the password. To enable an external event to release the trigger of the task, enter a password in this text box.
Administering QlikView - QlikView, April 2019 42
4 Documents
Task CompletedTo add tasks, and the events with which they have to be completed for the trigger to be started, click on the Add
icon, , to the right in the pane.
EventSelect the event for the task in the drop-down list.
TaskSelect the corresponding task, for which an event was selected in the Event field, in the drop-down list.
HelpTo get context sensitive help information (this WebHelp), that is, detailed information about the contents of the current page, click on the Help text in the upper right corner of the page.
Movement ButtonsIf applicable and available, use the following buttons to move between pages within the wizard:
l Previous, meaning 'go back to the previous wizard guide page'; the configuration on the current wizard guide page will be stored until moving forward again, using the Next button.
l Next, meaning 'go ahead to the next wizard guide page'.
This button is only available when the current wizard guide page has been configured with the required data.
l Finish, meaning 'finish this wizard', using the configured information.
This button is only available when all of the wizard guide pages have been configured.
l Cancel or , meaning 'abort this wizard', without using or storing any configuration; no task will be created.
GeneralOn the General tab, the current task can be enabled and disabled, and the status is presented.
Basics
EnabledTo enable the task, tick this check box. To disable the task, untick this check box.
A disabled task does not perform any work, but it will still run, which means that any task chain will just skip this task. To completely disable a task, disable all triggers, which means that any task after this task, in a chain, will not run.
Administering QlikView - QlikView, April 2019 43
4 Documents
Task NameTo edit the name of the task, enter the preferred name in this text box.
The Task Name must be unique; if it is not, a suffix number will be added to make it unique, for example, 'MyTask' will become 'MyTask (2)'.
Publisher GroupTo create a dedicated task, select a publisher group from the dropdown selection.
Task DescriptionTo edit the description of the task, enter the preferred description in this text box.
SummaryA summary of the task set for the document, including recipients and triggers.
ReloadOn the Reload tab, the current task can be configured to reload the document.
The possibility to use different user document names is configured using the document name template.
Unsafe macros are not allowed on reload tasks.
Perform Reload
EnableTo enable the function that reloads the document when the task is run, tick this check box. To disable the reload function, untick this check box.
Data Protection
Section AccessBy default, the reload will be performed as the user under which the QlikView Distribution Service (QDS) is running. The Section Access setting allows the use of another user when performing the reload. To by-pass the default setting, tick this check box and enter the desired user and password in the User Name and Password text boxes. To use the default setting, untick this check box.
The default setting may have to be redefined.
Administering QlikView - QlikView, April 2019 44
4 Documents
User NameTo configure the user name, enter the desired credentials in this text box.
PasswordTo configure the password, enter the desired credentials in this text box.
Script Setup
Partial ReloadIf some part of the data is updated more frequently than the bulk of the data, a script can be written to support partial reload. This will typically mean that two tasks will exist. One task is less frequent, doing the full reload, and one task is more frequent, doing the partial reload. To select the partial reload functionality, tick this check box. To select the full reload functionality, untick this check box.
Script ParametersA separate document will be created for each value. If selecting a field from the document, all values in that field will be used.
Parameter NameThe variable created in the QlikView script, which will be used in the script execution of the document.
Parameter ValueThe value(s) that will be assigned to the variable in the Parameter Name field. The value(s) will be used to create the document. To use a sequence of data, enter the start and stop values separated with a '-' (dash). To separate single values or sequences, enter a ';' (semi-colon).
Or
To select a specific field in the document and create a separate document for each value in that field, click the Open Document button, and select the desired document field. The values present at the start of the execution will be used. If field values change during the execution, such changes will not be reflected in the new documents. The use of this field will suppress the use of any value in the Parameter Name field.
Using this function, that is, clicking the Open Document button or the ... button (if available), might be time consuming; therefore, it is done as an explicit command.
ReduceOn the Reduce tab, a document can be configured how to be split into several reduced copies of the original.
A reduced document contains only the reduced information, while a document using the section access function contains all information, but hides and reveals parts of it.
Administering QlikView - QlikView, April 2019 45
4 Documents
Reduction based on Section Access may cause unwanted results in the distributed documents and should be used with caution.
Reduction MethodSelect one of the following options:
l Reduce by Field Value, meaning that one reduced document is created, by selecting the fields and values that should be distributed.
l Reduce by Bookmark, meaning that one reduced document is created, by selecting the bookmarks that should be distributed.
You can also create several separate documents, based on a field value or on a bookmark.
Open DocumentTo be able to use the contents of the document for selecting bookmarks or fields and field values, the document has to be opened by clicking on this button.
Using this function, that is, clicking the Open Document button or the ... button (if available), might be time consuming; therefore, it is done as an explicit command.
Reduced Document Name
Save the Reduced Document with the Following NameThe name template for the reduced user document.
To create a document name template, either open the advanced name template dialog by clicking on the Edit
NameTemplate icon, , and perform the configuration, or edit the default document name template in this text field.
Be sure to create unique resulting document names, to avoid documents to be overwritten.
The advanced name template dialog contains the following fields:
l Publisher Elements
l Source Document Name
l Task Name
l Serial Number
l Script Variable Value
l Select Document Field
l '\' (back-slash), '-' (dash), '_' (under-score), ' ' (white space) l Date and Time
Administering QlikView - QlikView, April 2019 46
4 Documents
l Year - Two Digits
l Year - Four Digits
l Month
l Month Text
l Day
l Year Month Day
l Hour (AM/PM)
l Hour (24h)
l Hour Minute
l Year Month Day - Hour Minute
To create a document name template, click on the buttons to insert values from the Publisher Element and Date and Time panes. The resulting template is presented in the Template field, which can also be freely edited. In the Example field, the resulting document name is presented, using the applicable current values.
Simple ReducePresents the Fields and Values that are available in the document.
Only the first 1000 entries are included. All data not selected from the boxes will be removed from the reduced document.
This option is only available if the Reduce by Field Value option was chosen.
FieldsTo select the fields that should be part of the reduced document to be distributed, select them in this box.
ValuesTo select the values that should be part of the reduced document to be distributed, select them in this box.
Selected FieldsPresents the selected fields.
Selected ValuesPresents the selected values.
Clear Selection
To clear all selected fields and values, click on the Clear Selection icon, .
Reduce by BookmarkPresents the Bookmarks that are available in the document. To select the bookmark to distribute, scroll down the drop-down list and select it.
Administering QlikView - QlikView, April 2019 47
4 Documents
All data not selected from the drop-down list will be removed from the reduced document.
This option is only available if the Reduce by Bookmark option was chosen.
Loop and Reduce
QlikView does not support Loop and Reduce over tables that contain input fields. The original value of each input field is replaced by the index value of the row in the table.
By Field ValueTo create several separate documents for each value in the selected field, choose this option, then select the Field from which the value is to be looped.
By BookmarkTo create one separate document per each available bookmark, choose this option.
DistributeThe Distribute tab contains the following pages:
Reduction based on Section Access may cause unwanted results in the distributed documents and should be used with caution.
l Manually
l Loop Field in Document
l File Type
l Notify
l Cloud Native Links
Cloud Native Links (page 54)
On these pages, the distribution of source documents, becoming user documents, can be managed.
ManuallyOn the Manually tab, the document distribution method and the authorization of recipients can be managed. Documents can be distributed to QlikView Servers, directly to users via e-mail, and to specific folders, and the methods are the following:
l Distribute to QlikView Server
l Distribute via E-mail
l Distribute to Folder
Any combination of distribution methods are allowed; 0, 1 only, any 2, or all 3.
Administering QlikView - QlikView, April 2019 48
4 Documents
When you distribute a document to folder, document information, metadata such as categories or attributes, is not distributed. If you want to distribute document information as well, you need to use the Distribute to QlikView Server method.
Distribution of a PDF to a QlikView Server is not allowed.
Distribute to QlikView Server
Add
To add a specific resource entry to distribute to, click on the Add icon, , to the right in the pane, and configure the following fields:
l Server
Select the desired server in the drop-down list.
l Mount
Select the desired mount in the drop-down list, if applicable.
l User Type
The type of recipients.
To manage the authorization of users and groups, select one of the following drop-down list options:
All Users, meaning that all users are authorized (that is, anonymous access to the file is allowed).
The IQVS account controls file access when anonymous access is allowed. This means that the IQVS account has to be provided with the correct file access. The account is by default created as a local account in the QlikView installation. In a clustered environment, the IQVS account must be created as a domain account, so that all nodes can access it.
All Authenticated Users, meaning that any authenticated user is authorized.
Named Users, meaning that users that should be authorized are manually added, by searching for users and groups in a domain or on a computer (the names are resolved by the Directory Service Connector).
Recipients
If Named Users was chosen in the User Type field, do the following:
To manage users and groups, click on the Manage Users dialog icon, .
l Default Scope
Select the directory to be searched, in the drop-down list.
l Search for Users and Groups
Administering QlikView - QlikView, April 2019 49
4 Documents
Enter the desired search term(s) in this text box, to find a user or a group, and click on the Search icon,
.
l Search Result
This box presents the result of the search, using the desired criteria.
l Add >
To add a user or a group, click on it in the Search Result box and click on this button. Several items can be added at the same time.
l Selected Users
This box presents the selected users and groups.
l < Delete
To deselect a user or a group, click on it in the Selected Users box and click on this button. Several items can be deselected at the same time.
l << Delete All
To deselect all of the users and groups from the Selected Users box, click on this button.
Delete
To entirely remove a configured entry from the list, click on the Delete icon, .
Distribute via E-mail
Add Users and Groups
To manage the authorization of e-mail recipients, do the following:
To manage users and groups, click on the Manage Users dialog icon, .
l Default Scope
Select the directory to be searched, in the drop-down list.
l Search for Users and Groups
Enter the desired search term(s) in this text box, to find a user or a group, and click on the Search icon,
.
l Search Result
This box presents the result of the search, using the desired criteria.
l Add >
To add a user or a group, click on it in the Search Result box and click on this button. Several items can be added at the same time.
l Selected Users
This box presents the selected users and groups.
Administering QlikView - QlikView, April 2019 50

4 Documents
l < Delete
To deselect a user or a group, click on it in the Selected Users box and click on this button. Several items can be deselected at the same time.
l << Delete All
To deselect all of the users and groups from the Selected Users box, click on this button.
To distribute via email to a group of users, create a distribution group with an email address of the group itself. When the DSC performs a lookup on the group name, the email address of the group is returned and the document is distributed to that email address.
Distribute to Folder
Path
To select a folder to distribute to, click on the Browse icon, , and choose the folder in the Choose Folder dialog.
User Type
To select the method for managing users and groups, click on one of the following drop-down list options:
l All Authenticated Users, meaning that any authenticated user is authorized.
l Named Users, meaning that users that should be authorized are manually added, by searching for users and groups in a domain or on a computer (the names are resolved by the Directory Service Connector).
Add Users and Groups
If Named Users was chosen in the User Type field, do the following:
To manage users and groups, click on the Manage Users dialog icon, .
l Default Scope
Select the directory to be searched, in the drop-down list.
l Search for Users and Groups
Enter the desired search term(s) in this text box, to find a user or a group, and click on the Search icon,
.
l Search Result
This box presents the result of the search, using the desired criteria.
l Add >
To add a user or a group, click on it in the Search Result box and click on this button. Several items can be added at the same time.
l Selected Users
Administering QlikView - QlikView, April 2019 51
4 Documents
This box presents the selected users and groups.
l < Delete
To deselect a user or a group, click on it in the Selected Users box and click on this button. Several items can be deselected at the same time.
l << Delete All
To deselect all of the users and groups from the Selected Users box, click on this button.
Loop Field in DocumentOn the Loop Field in Document tab, the QlikView Publisher (QVP) can be configured to distribute the current document.
The Loop Field in Document function provides distribution to users based on the content of each user. Combining the Loop and Reduce function with the Loop and Distribute function, the result can be that each user gets specific and relevant information, only.
For example, one document should be distributed to all the people employed in a specific country, and the document should be distributed to the QlikView Server, each document given a unique name. The following describes a solution:
1. In the source document, which contains the information that should be distributed, add an Employee field containing the user name of each employee, and make sure that they are associated to the country of the user.
2. Set up By Field Value for Loop and Reduce to use the Country field.
3. Edit the name template to include the Country field, %SourceDocumentName% %DocumentField,Country%.
4. In the Field Containing Recipient Information drop-down list, select the Employee field.
5. In the Check User Identity On drop-down list, select the SAMAccountName option.
6. In the Target Type drop-down list, select the QlikView Server option.
Loop and Distribute
Open Document
To open the document, thus enabling the selection of a field that contains information about the recipients, click on this button.
Using this function, that is, clicking the Open Document button or the ... button (if available), might be time consuming; therefore, it is done as an explicit command.
Field Containing Recipient Information
Select the field that contains the desired information about the recipients, in the drop-down list.
Administering QlikView - QlikView, April 2019 52
4 Documents
Check User Identity On
Select the desired type of user identity check, in the drop-down list. The available options are the following directory service attributes:
l SecurityIdentifier
l DisplayName
l SAMAccountName
l EmailAddress
l UserPrincipalName
These attribute names correspond to the attributes in the Microsoft Active Directory, which are described in the following:
l SecurityIdentifier, a unique value of variable length used to identify a user account, group account, or logon session to which an ACE applies.
l DisplayName, the display name for an object, which is usually the combination of the first name, middle initial, and last name of a user.
l SAMAccountName, the logon name used to support clients and servers running older versions of the operating system, such as Windows NT 4.0, Windows 95, Windows 98, and LAN Manager. This attribute has to consist of less than 20 characters to support older clients.
l E-mailAddress, the list of e-mail addresses for a contact.
l UserPrincipalName, this attribute contains the UPN, that is, an Internet-style user login name, based on the Internet standard RFC 822. The UPN is shorter than the distinguished name and easier to remember. By convention, this should map to the user e-mail name. The value set for this attribute is equal to the length of the ID of the user and the domain name.
If another Directory Service Provider (DSP) is used, these attribute names correspond as closely as possible to attributes with similar functions.
Destination
Target Type
To choose the document distribution method, tick one of the following check boxes, and configure the applicable fields:
If no destination is given, no loop distribution will be done, and no recipients are given, since they are configured by the loop.
QlikView ServerTo distribute to the QlikView Server (QVS), tick this check box and select the desired Server and Mount in the drop-down lists.
E-mailTo distribute to the e-mail recipient(s), tick this check box.
Administering QlikView - QlikView, April 2019 53
4 Documents
FolderTo select a folder to distribute to, click on the Browse icon, , and choose the folder in the Choose Folder dialog.
File TypeOn the File Type tab, the type of the current distributed document can be configured.
Distribution of a PDF to a QlikView Server is not allowed.
Output Document TypeSelect one of the following options:
l QlikView Document, meaning that the document is distributed as a QlikView document.
l PDF Report from Source Document, meaning that the document is distributed as a PDF report from the source document. To get a report as basis for the PDF report, select a QlikView report in the drop-down list and click the Open Document button. Note that the drop-down list is not populated with available reports until the document is opened. A special license is required to distribute the document as a PDF report.
Using this function, that is, clicking the Open Document button or the ... button (if available), might be time consuming; therefore, it is done as an explicit command.
NotifyOn the Notify tab, distribution recipients can be set as recipients of notification e-mails, informing about that the document has been updated. Each e-mail address is retrieved from the directory service to which the user belongs. For example, a Windows user e-mail address is retrieved from the Windows Active Directory.
Notification E-mail
Send Notification E-mail To Recipients
To send a notification e-mail to all recipients that are part of the distribution, check this option.
Recipients that are part of an e-mail distribution will not receive any notification e-mail, in addition to the e-mail that includes the document.
Cloud Native LinksIn the Cloud Native Links tab, you can set the generation a of link to a QlikView document, and the distribution of this link to a cloud deployment.
Administering QlikView - QlikView, April 2019 54
4 Documents
Users can access the link to the QlikView document from the cloud hub. The link redirects users to the QlikView environment. A QlikView Server (QVS) machine handles the access to the document. For a step by step procedure on how to publish a link to a QlikView document in a cloud environment, see: Publish a link to a QlikView document in a Qlik Sense cloud hub (page 90).
Send links to Cloud Native for QlikView Server distributions
Send links to Cloud Native
Select this option to enable the distribution of a link to a cloud deployment. By selecting this option the Cloud Deployment drop-down menu becomes available.
Cloud deployment
Select from the drop-down menu the cloud deployment to which you want to distribute the link for accessing the QlikView document.
Collections
Type the name of an existing collection in the cloud deployment. If the name you insert does not correspond to any existing collection, a new collection with that name will be created and populated with the link.
Users
If you want to make the link accessible only to specific users, insert the name of the users here separated by a semicolon.
Groups
If you want to make the link accessible only to specific groups of users, insert the name of the groups here separated by a semicolon.
Apply
Select Apply to confirm the change.
Cancel
Select Cancel to revert the change.
Document InformationOn the Document Information tab, a category for the current document can be assigned, created, edited, and deleted. Categories are used to bundle documents in containers, to make categorization easier for the end-user. The categories are only visible to the end-user on the QlikView AccessPoint. Each document can only be part of one category.
General
Select CategoryTo assign a category to a document, select one of the available categories, presented in the drop-down list.
Default value: Default.
Administering QlikView - QlikView, April 2019 55
4 Documents
Or Type a New CategoryTo create a category, enter a descriptive name in this text box. The new category will be available in the Select Category drop-down list. The category is presented on the QlikView AccessPoint.
Categories can be reassigned, but cannot be deleted.
Document DescriptionTo create a document description that is displayed in Document Details on QlikView AccessPoint, enter a description in this text box.
AttributesMeta data attributes can be created and assigned to a document. These attributes are arbitrary pairs of name and value. They are not saved in the document, but in the meta data of the QlikView Server, utilizing the QlikView Server Document Metadata Service (DMS) facility. A third-party application can read and extract the attributes from the database, using the qvpx protocol. The attributes are presented on the QlikView AccessPoint, in which they are used to help finding the correct document. To create an attribute and assigned
value entry, to be stored in the meta file, click on the Add icon, , to the right in the pane, and configure the following fields:
NameTo configure a meta data attribute name, enter a descriptive name in this text box.
ValueTo assign a value to the meta attribute name in the Name field, enter the value in this text box.
Delete
To entirely remove a configured entry from the list, click on the Delete icon, .
TriggersOn the Triggers tab, the current task can be configured to be started by triggers. A task can have multiple triggers, creating a workflow of tasks. This tab contains the following headings:
l Current Triggers
l Task Dependencies
l Task Execution Options
Current TriggersEach row presents a separate trigger. The current task is started if any trigger is released (OR operator). If several triggers (multiple conditions) are to be released, before the current task is started, the On Multiple Events Completed function should be used (AND operator).
To create a trigger, click on the Add icon, , to the right in the pane.
Administering QlikView - QlikView, April 2019 56

4 Documents
TriggerThe type of the trigger. The possible value is the following:
l Once Trigger
l Task Finished Trigger
l External Event Trigger
l And Trigger
DetailsThe trigger condition settings, that is, a summary of when the trigger starts the current task.
EnabledThe current status of the trigger. The possible values are the following:
l Enabled
l Disabled
Edit Trigger
To configure a trigger, click on the Edit Trigger icon, .
Delete
To entirely remove a trigger, click on the Delete icon, .
Configure Trigger Dialog
Start the TaskChoose the type of trigger, by clicking on one of the following options in the drop-down list:
l On a Schedule
l On Event from Another Task
l On an External Event
l On Multiple Events Completed
EnabledTo enable the trigger for execution of the task, tick this check box. To disable the trigger, untick this check box.
On a ScheduleWhen the On a Schedule trigger type was chosen, a trigger can be scheduled to start the current task. The following configuration options are available:
Recurrence
Choose a schedule for the trigger to start, by clicking on one of the following options:
l Once
l Hourly
Administering QlikView - QlikView, April 2019 57
4 Documents
l Daily
l Weekly
l Monthly
l Continuously
All time specifications must be in the 24-hour format.
Start at
Enter the date and time of the initial trigger start in this text box, by using the following format: yyyy-mm-dd hh:mm:ss.
Example:
2011-12-31 23:59:59
Once
No further settings are available.
Hourly
Run EveryChoose a time interval for the trigger to start, by entering the desired number in the Hours and Minutes text boxes.
Example:
1 and 10, meaning that the trigger will start every 70 minutes (the example not considering other possible limiting settings).
OnChoose the day(s) of the week for the trigger to start, by ticking any of the following check boxes:
l Monday
l Tuesday
l Wednesday
l Thursday
l Friday
l Saturday
l Sunday
If no day was chosen, the trigger runs all days.
Administering QlikView - QlikView, April 2019 58
4 Documents
Run Only BetweenTo limit the trigger start within a day, tick this check box. Enter the start time and the stop time, in between which trigger start is allowed, in the start and stop text boxes, by using the following format: hh:mm. To disable the limitation, untick this check box.
Max Number of ExecutionsTo limit the number of trigger starts, tick this check box and enter the allowed number of trigger starts in the Max Number text box. To not limit the number of trigger starts, untick this check box.
ExpireTo make the trigger expire on a specific date and time, tick this check box and enter the date and time in this text box, by using the following format: yyyy-mm-dd hh:mm:ss. To make the trigger not to expire, untick this check box.
Example:
2012-12-31 23:59:59
Daily
Run EveryChoose a time interval for the trigger to start, by entering the desired number in the Day text box.
Example:
3, meaning that the trigger will start every third day (the example not considering other possible limiting settings).
Max Number of ExecutionsTo limit the number of trigger starts, tick this check box and enter the allowed number of trigger starts in the Max Number text box. To not limit the number of trigger starts, untick this check box.
ExpireTo make the trigger expire on a specific date and time, tick this check box and enter the date and time in this text box, by using the following format: yyyy-mm-dd hh:mm:ss. To make the trigger not to expire, untick this check box.
Example:
2012-12-31 23:59:59
Weekly
Run EveryChoose a time interval for the trigger to start, by entering the desired number in the Weeks text box.
Administering QlikView - QlikView, April 2019 59
4 Documents
Example:
2, meaning that the trigger will start every second week (the example not considering other possible limiting settings).
OnChoose the day(s) of the week for the trigger to start, by ticking any of the following check boxes:
l Monday
l Tuesday
l Wednesday
l Thursday
l Friday
l Saturday
l Sunday
If no day was chosen, the current day is selected.
Max Number of ExecutionsTo limit the number of trigger starts, tick this check box and enter the allowed number of trigger starts in the Max Number text box. To not limit the number of trigger starts, untick this check box.
ExpireTo make the trigger expire on a specific date and time, tick this check box and enter the date and time in this text box, by using the following format: yyyy-mm-dd hh:mm:ss. To make the trigger not to expire, untick this check box.
Example:
2012-12-31 23:59:59
Monthly
MonthsChoose the month(s) of the year for the trigger to start, by ticking any of the following check boxes:
l January
l February
l March
l April
l May
l June
l July
Administering QlikView - QlikView, April 2019 60
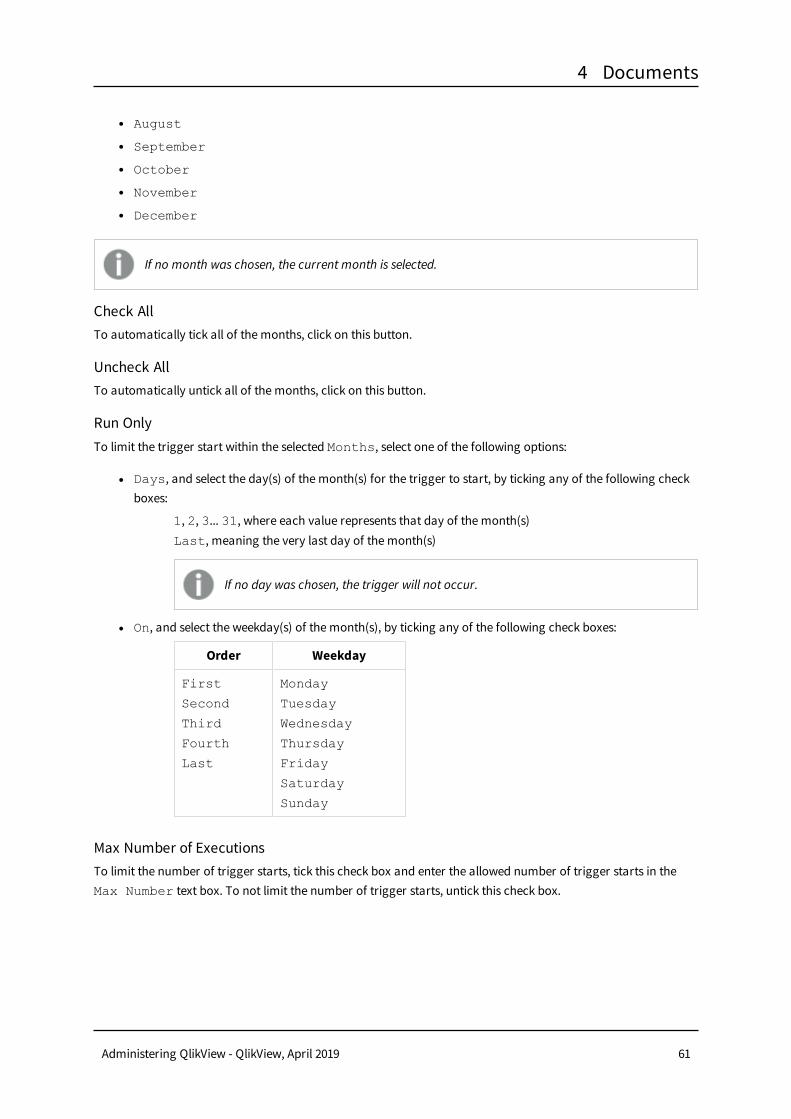
4 Documents
l August
l September
l October
l November
l December
If no month was chosen, the current month is selected.
Check AllTo automatically tick all of the months, click on this button.
Uncheck AllTo automatically untick all of the months, click on this button.
Run OnlyTo limit the trigger start within the selected Months, select one of the following options:
l Days, and select the day(s) of the month(s) for the trigger to start, by ticking any of the following check boxes:
1, 2, 3... 31, where each value represents that day of the month(s)Last, meaning the very last day of the month(s)
If no day was chosen, the trigger will not occur.
l On, and select the weekday(s) of the month(s), by ticking any of the following check boxes:
Order Weekday
First
Second
Third
Fourth
Last
Monday
Tuesday
Wednesday
Thursday
Friday
Saturday
Sunday
Max Number of ExecutionsTo limit the number of trigger starts, tick this check box and enter the allowed number of trigger starts in the Max Number text box. To not limit the number of trigger starts, untick this check box.
Administering QlikView - QlikView, April 2019 61
4 Documents
ExpireTo make the trigger expire on a specific date and time, tick this check box and enter the date and time in this text box, by using the following format: yyyy-mm-dd hh:mm:ss. To make the trigger not to expire, untick this check box.
Example:
2012-12-31 23:59:59
Continuously
No further settings are available.
On Event from Another TaskWhen the On Event from Another Task trigger type was chosen, the trigger can be configured to start the current task on the event from another task. The following configuration options are available:
Start on
Choose a trigger event, by clicking on one of the following options in the drop-down list:
l Successful, meaning that the execution of the task was successful
l Failed, meaning that the execution of the task failed
Completion of
Choose a trigger task, by clicking on one of the options in the drop-down list.
On an External EventWhen the On an External Event trigger type was chosen, the trigger can be configured to start the current task on an external event, that is, an outside component, making a QlikView Management Service (QMS) API call. The following configuration options are available:
Password
This password is used to access the task and release the trigger. The external event has to know the password. To enable an external event to release the trigger of the task, enter a password in this text box.
On Multiple Events CompletedWhen the On Multiple Events Completed trigger type was chosen, the trigger can be configured to start the current task when other tasks have all been completed in their execution within a certain time. The following configuration options are available:
Time Constraint
Choose a time limit, within which all of the tasks have to complete their execution, by entering the desired number in the Minutes text box.
Default value: 360, meaning 6 hours.
Administering QlikView - QlikView, April 2019 62
4 Documents
Run Task When All of these Events Completed
External EventTo add an external event to the list of tasks that have to be completed for the trigger to be started, tick this check box. To entirely remove an external event from the list, untick this check box.
Password
This password is used to access the task and release the trigger. The external event has to know the password. To enable an external event to release the trigger of the task, enter a password in this text box.
Task Completed
To add tasks, and the events with which they have to be completed for the trigger to be started, click on the Add
icon, , to the right in the pane.
EventSelect the event for the task in the drop-down list.
TaskSelect the corresponding task, for which an event was selected in the Event field, in the drop-down list.
Task DependenciesTask dependency is a way of making sure that the current task runs only if other tasks have finished their last execution successfully. The task dependencies overrule any trigger, which means that a trigger might not be able to start the current task, if a task dependency for the current task is not fulfilled. To configure a
dependency for the current task, click on the Add icon, , to the right in the pane.
TaskSelect the task(s), which must have been successfully executed before the current task can be executed, in the drop-down list.
Delete
To entirely remove a task dependency, click on the Delete icon, .
Task Execution OptionsTriggers can be allowed to attempt to start the current task a number of times during a time period.
Number of TriesTo choose a number of start attempts for the current task, enter the desired number in this text box.
Default value: 1.
Timeout in MinutesTo choose a time period for the Number of Tries, enter the desired number in this text box.
Default value: 1440, meaning 24 hours.
Administering QlikView - QlikView, April 2019 63

4 Documents
Search FunctionsIn the search field, the following apply:
l Searches are performed on the entries listed in the tree view to the left.
l The asterisk operator, '*', meaning 'match of any character(s)', is supported.
l The separator operator, ';' (semicolon), meaning that several search criteria can be stated at the same time, is supported.
Example:
doc*;test* will search for entries matching doc* or test*.
l Searches are not case sensitive, meaning that upper and lower case characters are treated as if they were the same.
l Searches automatically includes the extension .qvw.
Example:
document;test adds the search for document.qvw;test.qvw; hence, the entries document.qvw and test.qvw will match.
ServerThe Server tab contains the following pages:
l Server Objects
l Availability
l Performance
On these pages, the authorization of server objects and access control of the current document can be managed.
Server ObjectsOn the Server Objects tab, users are authorized to create server objects in the current document.
Allow Creation of Server ObjectsTo allow users to create server objects, tick this check box. To deny users to create server objects, untick this check box.
When the check box is unticked, no server objects, except server bookmarks, can be created. For server bookmarks, unticking the check box only affects the possibility to share the bookmarks with other users.
User Type
To manage the authorization of users and groups, click on one of the following drop-down list options:
Administering QlikView - QlikView, April 2019 64
4 Documents
All Authenticated Users, meaning that any authenticated user is authorized.
Named Users, meaning that users that should be authorized are manually added, by searching for users and groups in a domain or on a computer (the names are resolved by the Directory Service Connector).
Add Users and Groups
If Named Users was chosen in the User Type field, do the following:
l Default Scope
Select the directory to be searched, in the drop-down list.
l Search for Users and Groups
Enter the desired search term(s) in this text box, to find a user or a group, and click on the Search icon,
.
l Search Result
This box presents the result of the search, using the desired criteria.
l Add >
To add a user or a group, click on it in the Search Result box and click on this button. Several items can be added at the same time.
l Selected Users
This box presents the selected users and groups.
l < Delete
To deselect a user or a group, click on it in the Selected Users box and click on this button. Several items can be deselected at the same time.
l << Delete All
To deselect all of the users and groups from the Selected Users box, click on this button.
AvailabilityOn the Availability tab, the control of the current document, that is, for example, client access, download restriction, and session collaboration, can be managed.
AccessPoint
Access Method
To enable which QlikView clients, used to open and download the current document, which are presented through the QlikView AccessPoint, tick one of the following check boxes:
l IE Client, meaning the Microsoft Internet Explorer plugin client.
l Mobile Client, meaning the various mobile device applications.
l Full Browser and Small Device Version, meaning the AJAX client and AJAX for Small Devices.
Administering QlikView - QlikView, April 2019 65
4 Documents
l Full Browser URL, to use other html pages, instead of the default, for displaying the AJAX pages, enter a valid path in this text box.
Small Devices always use the following URL: /QvAJAXZfc/mobile/opendoc.htm
User Privileges
Download Document
Allowing documents to be downloaded gives users access to the document, which might be a security risk.
To manage the authorization of the downloading of documents, that is, allowing users to download the current document and open it in the QlikView Desktop, tick this check box, and do the following:
User TypeTo select the method for managing users and groups, click on one of the following drop-down list options:
All Users, meaning that all users are authorized (that is, anonymous access to the file is allowed).
The IQVS account controls file access when anonymous access is allowed. This means that the IQVS account has to be provided with the correct file access. The account is by default created as a local account in the QlikView installation. In a clustered environment, the IQVS account must be created as a domain account, so that all nodes can access it.
All Authenticated Users, meaning that any authenticated user is authorized.
Named Users, meaning that users that should be authorized are manually added, by searching for users and groups in a domain or on a computer (the names are resolved by the Directory Service Connector).
Add Users and Groups
To manage users and groups, click on the Manage Users dialog icon, .
l Default Scope
Select the directory to be searched, in the drop-down list.
l Search for Users and Groups
Enter the desired search term(s) in this text box, to find a user or a group, and click on the Search icon,
.
l Search Result
This box presents the result of the search, using the desired criteria.
l Add >
Administering QlikView - QlikView, April 2019 66
4 Documents
To add a user or a group, click on it in the Search Result box and click on this button. Several items can be added at the same time.
l Selected Users
This box presents the selected users and groups.
l < Delete
To deselect a user or a group, click on it in the Selected Users box and click on this button. Several items can be deselected at the same time.
l << Delete All
To deselect all of the users and groups from the Selected Users box, click on this button.
Print and Export to Excel
In QlikView 11, touch-based clients cannot export documents to Microsoft Excel.
To manage the authorization of the printing and export of documents, tick this check box, and do the following:
User TypeTo select the method for managing users and groups, click on one of the following drop-down list options:
All Users, meaning that all users are authorized (that is, anonymous access to the file is allowed).
The IQVS account controls file access when anonymous access is allowed. This means that the IQVS account has to be provided with the correct file access. The account is by default created as a local account in the QlikView installation. In a clustered environment, the IQVS account must be created as a domain account, so that all nodes can access it.
All Authenticated Users, meaning that any authenticated user is authorized.
Named Users, meaning that users that should be authorized are manually added, by searching for users and groups in a domain or on a computer (the names are resolved by the Directory Service Connector).
Add Users and Groups
To manage users and groups, click on the Manage Users dialog icon, .
l Default Scope
Select the directory to be searched, in the drop-down list.
l Search for Users and Groups
Enter the desired search term(s) in this text box, to find a user or a group, and click on the Search icon,
.
l Search Result
Administering QlikView - QlikView, April 2019 67
4 Documents
This box presents the result of the search, using the desired criteria.
l Add >
To add a user or a group, click on it in the Search Result box and click on this button. Several items can be added at the same time.
l Selected Users
This box presents the selected users and groups.
l < Delete
To deselect a user or a group, click on it in the Selected Users box and click on this button. Several items can be deselected at the same time.
l << Delete All
To deselect all of the users and groups from the Selected Users box, click on this button.
Session CollaborationTo allow users to share a session on the current document, tick this check box.
PerformanceOn the Performance tab, the control of the current document, that is, for example, load balancing, preloading, concurrent session access, and audit logging, can be managed.
Sessions
Maximum Number of Concurrent Sessions
To choose a maximum number of concurrent sessions towards the current document, enter the desired number in this text box. An empty field means no limit.
Maximum Inactive Session Time
User sessions, which have had no activity during a specified time limit, can be configured to be closed by the QVS. To set the session timeout, enter a suitable figure in this text box.
The maximum inactive session time can also be set on a global level. The session time with the lowest value takes precedence. If the session time entered in this text box is lower than the global session time, the global session time is disregarded.
If left empty or set to 0 means no limit.
Document Timeout
Open documents take up valuable system resources (that is, memory space, RAM, is allocated) and should not be allowed to remain open when not in use. However, if a document is closed too quickly, the users may get longer delay times when accessing the document, because the server has to reopen it. This value controls for how long a document will be allowed to be unused before the QlikView Server (QVS) closes the document and reclaims the resources.
Administering QlikView - QlikView, April 2019 68
4 Documents
Enable Audit Logging
To enable the audit log functionality, tick this check box. To disable the audit log functionality, untick this check box.
Document Control
Server
Select a server in the drop-down list.
CustomizeIf there is more than one server, and if the Customize option was selected in the Document Available field, configure the following:
Document Available
To configure the load balancing, that is, on which nodes the current document is to be available, select one of the following options:
l Always on All Nodes, meaning availability on all nodes.
l Preload
To make the current document quickly accessed at all times, by preloading it into the primary memory of the server, tick this check box. To disable the preload function, untick this check box.
Using the preload functionality will use memory resources also when no user is accessing the document.
l Customize, meaning that the availability can be customized.
CustomizeIf the Customize option was selected in the Document Available field, customize the following:
Cluster Node
Presents an auto populated list of all of the servers and clusters, including all cluster nodes, that are selected for distribution.
Document Available
To configure when the current document is to be available, select one of the following drop-down list options:
l Never, meaning that the current document will never be loaded on the node.
l Always, meaning that the document will always be available to be loaded on the node.
Preload
To make the current document quickly accessed at all times, by preloading it into the primary memory of the server, tick this check box. To disable the preload function, untick this check box.
Administering QlikView - QlikView, April 2019 69

4 Documents
Using the preload functionality will use memory resources also when no user is accessing the document.
This option is only available if the Always option in the Document Available field was selected.
4.3 User DocumentsOn the User Documents page, all documents that are available on the QlikView Server (QVS) are listed in a tree view in the left pane. To view or manage the settings of a document, in the right pane, click on the document in the tree view.
A red asterisk is used to indicate mounted folders in tree views. The icon for the root folder does not carry a red asterisk.
These settings should not be changed if a QlikView Publisher (QVP) is set up to distribute the documents, because they are overridden by the settings for the QVP.
Search Document
Enter the desired search term(s) in this text box, to find documents, and click on the Search icon, .
Configure Document SettingsTo configure the settings of a document, click on the document in the tree view. In the right pane, the following tabs are presented:
l Server
l Authorization
l Document Information
l Reload
l Document CALs
Click on each tab label for more information.
ServerThe Server tab contains the following pages:
l Server Objects
l Availability
Administering QlikView - QlikView, April 2019 70

4 Documents
l Performance
On these pages, the authorization of server objects and access control of the current document can be managed.
Server ObjectsOn the Server Objects tab, users are authorized to create server objects in the current document.
Allow Creation of Server Objects
When collaboration is disabled in the QlikView license (that is, the license contains DISABLE_COLLABORATION;YES;;), server objects and server bookmarks are not allowed. This means that the Allow Creation of Server Objects check box does not have any effect when collaboration is disabled.
To allow users to create server objects, tick this check box. To deny users to create server objects, untick this check box.
When the check box is unticked, no server objects, except server bookmarks, can be created. For server bookmarks, unticking the check box only affects the possibility to share the bookmarks with other users.
User Type
To manage the authorization of users and groups, click on one of the following drop-down list options:
All Authenticated Users, meaning that any authenticated user is authorized.
Named Users, meaning that users that should be authorized are manually added, by searching for users and groups in a domain or on a computer (the names are resolved by the Directory Service Connector).
Add Users and Groups
If Named Users was chosen in the User Type field, do the following:
To manage users and groups, click on the Manage User dialog icon, .
l Default Scope
Select the directory to be searched, in the drop-down list.
l Search for Users and Groups
Enter the desired search term(s) in this text box, to find a user or a group, and click on the Search icon,
.
l Search Result
This box presents the result of the search, using the desired criteria.
Administering QlikView - QlikView, April 2019 71
4 Documents
l Add >
To add a user or a group, click on it in the Search Result box and click on this button. Several items can be added at the same time.
l Selected Users
This box presents the selected users and groups.
l < Delete
To deselect a user or a group, click on it in the Selected Users box and click on this button. Several items can be deselected at the same time.
l << Delete All
To deselect all of the users and groups from the Selected Users box, click on this button.
ObjectsAll the server objects within the document are presented in a list with the following information fields:
l ID
l Type
l Sub Type
l Owner
To manage users and groups, click on the Manage User dialog icon, .
l Default Scope
Select the directory to be searched, in the drop-down list.
l Search for Users and Groups
Enter the desired search term(s) in this text box, to find a user or a group, and click on the Search icon,
.
l Search Result
This box presents the result of the search, using the desired criteria.
l Replace >
Click this button to replace the user in the Selected Users box with the user selected in the Search Result box.
l Selected Users
This box presents the selected users and groups.
To entirely remove the server object from an assigned document, click on the Delete icon, .
AvailabilityOn the Availability tab, the control of the current document, that is, for example, client access, download restriction, and session collaboration, can be managed.
Administering QlikView - QlikView, April 2019 72
4 Documents
AccessPoint
Access Method
To enable which QlikView clients, used to open and download the current document, which are presented through the QlikView AccessPoint, tick one of the following check boxes:
l IE Client, meaning the Microsoft Internet Explorer plugin client.
l Mobile Client, meaning the various mobile device applications.
l Full Browser and Small Device Version, meaning the AJAX client and AJAX for Small Devices.
l Full Browser URL, to use other html pages, instead of the default, for displaying the AJAX pages, enter a valid path in this text box.
Small Devices always use the following URL: /QvAJAXZfc/mobile/opendoc.htm
User Privileges
Download Document
Allowing documents to be downloaded gives users access to the document, which might be a security risk.
To manage the authorization of the downloading of documents, that is, allowing users to download the current document and open it in the QlikView Desktop, tick this check box, and do the following:
User TypeTo select the method for managing users and groups, click on one of the following drop-down list options:
All Users, meaning that all users are authorized (that is, anonymous access to the file is allowed).
The IQVS account controls file access when anonymous access is allowed. This means that the IQVS account has to be provided with the correct file access. The account is by default created as a local account in the QlikView installation. In a clustered environment, the IQVS account must be created as a domain account, so that all nodes can access it.
All Authenticated Users, meaning that any authenticated user is authorized.
Named Users, meaning that users that should be authorized are manually added, by searching for users and groups in a domain or on a computer (the names are resolved by the Directory Service Connector).
Add Users and Groups
To manage users and groups, click on the Manage Users dialog icon, .
Administering QlikView - QlikView, April 2019 73
4 Documents
l Default Scope
Select the directory to be searched, in the drop-down list.
l Search for Users and Groups
Enter the desired search term(s) in this text box, to find a user or a group, and click on the Search icon,
.
l Search Result
This box presents the result of the search, using the desired criteria.
l Add >
To add a user or a group, click on it in the Search Result box and click on this button. Several items can be added at the same time.
l Selected Users
This box presents the selected users and groups.
l < Delete
To deselect a user or a group, click on it in the Selected Users box and click on this button. Several items can be deselected at the same time.
l << Delete All
To deselect all of the users and groups from the Selected Users box, click on this button.
Print and Export to Excel
In QlikView 11, touch-based clients cannot export documents to Microsoft Excel.
To manage the authorization of the printing and export of documents, tick this check box, and do the following:
User TypeTo select the method for managing users and groups, click on one of the following drop-down list options:
All Users, meaning that all users are authorized (that is, anonymous access to the file is allowed).
The IQVS account controls file access when anonymous access is allowed. This means that the IQVS account has to be provided with the correct file access. The account is by default created as a local account in the QlikView installation. In a clustered environment, the IQVS account must be created as a domain account, so that all nodes can access it.
All Authenticated Users, meaning that any authenticated user is authorized.
Named Users, meaning that users that should be authorized are manually added, by searching for users and groups in a domain or on a computer (the names are resolved by the Directory Service Connector).
Administering QlikView - QlikView, April 2019 74
4 Documents
Add Users and Groups
To manage users and groups, click on the Manage Users dialog icon, .
l Default Scope
Select the directory to be searched, in the drop-down list.
l Search for Users and Groups
Enter the desired search term(s) in this text box, to find a user or a group, and click on the Search icon,
.
l Search Result
This box presents the result of the search, using the desired criteria.
l Add >
To add a user or a group, click on it in the Search Result box and click on this button. Several items can be added at the same time.
l Selected Users
This box presents the selected users and groups.
l < Delete
To deselect a user or a group, click on it in the Selected Users box and click on this button. Several items can be deselected at the same time.
l << Delete All
To deselect all of the users and groups from the Selected Users box, click on this button.
Session CollaborationTo allow users to share a session on the current document, tick this check box.
PerformanceOn the Performance tab, the control of the current document, that is, for example,load balancing, preloading, concurrent session access, and audit logging, can be managed.
Sessions
Maximum Number of Concurrent Sessions
To choose a maximum number of concurrent sessions towards the current document, enter the desired number in this text box. An empty field means no limit.
Maximum Inactive Session Time
User sessions, which have had no activity during a specified time limit, can be configured to be closed by the QVS. To set the session timeout, enter a suitable figure in this text box.
Administering QlikView - QlikView, April 2019 75

4 Documents
The maximum inactive session time can also be set on a global level. The session time with the lowest value takes precedence. If the session time entered in this text box is lower than the global session time, the global session time is disregarded.
If left empty or set to 0 means no limit.
Document Timeout
Open documents take up valuable system resources (that is, memory space, RAM, is allocated) and should not be allowed to remain open when not in use. However, if a document is closed too quickly, the users may get longer delay times when accessing the document, because the server has to reopen it. This value controls for how long a document will be allowed to be unused before the QlikView Server (QVS) closes the document and reclaims the resources.
Enable Audit Logging
To enable the audit log functionality, tick this check box. To disable the audit log functionality, untick this check box.
Document ControlIf there is more than one server, configure the following:
Document Available
To configure the load balancing, that is, on which nodes the current document is to be available, select one of the following options:
l Always on All Nodes, meaning availability on all nodes.
l Preload
To make the current document quickly accessed at all times, by preloading it into the primary memory of the server, tick this check box. To disable the preload function, untick this check box.
Using the preload functionality will use memory resources also when no user is accessing the document.
l Customize, meaning that the availability can be customized.
CustomizeIf the Customize option was selected in the Document Available field, customize the following:
Cluster Node
Presents an auto populated list of all of the servers and clusters, including all cluster nodes, that are selected for distribution.
Administering QlikView - QlikView, April 2019 76

4 Documents
Document Available
To configure when the current document is to be available, select one of the following drop-down list options:
l Never, meaning that the current document will never be loaded on the node.
l Always, meaning that the document will always be available to be loaded on the node.
Preload
To make the current document quickly accessed at all times, by preloading it into the primary memory of the server, tick this check box. To disable the preload function, untick this check box.
Using the preload functionality will use memory resources also when no user is accessing the document.
This option is only available if the Always option in the Document Available field was selected.
AuthorizationOn the Authorization tab, the user and group access to the current document can be managed. Only specified users are allowed to access the current document, utilizing the QlikView Server (QVS) Document Metadata Service (DMS) authorization.
This tab is only available if DMS Authorization was selected as the authorization method for this QVS.
Users Authorized to Access DocumentTo create an entry for managing the access of the current document, click on the Add icon, , to the right in the pane. Configure the following fields:
AccessTo configure when the current document is to be available, open the Access dialog by clicking on the
Edit icon, , and perform the configuration for one of the following options:
l Always, meaning that the current document will always be available.
l Restricted, meaning that the current document will be available as configured:
Week Days
Choose the day(s) of the week for the document to be available, by ticking one of the following check boxes:
Administering QlikView - QlikView, April 2019 77
4 Documents
l Monday
l Tuesday
l Wednesday
l Thursday
l Friday
l Saturday
l Sunday
If no day was chosen, the document will never be available.
From
The document will be available from when the specified time is reached. To edit this parameter, enter the preferred value, in the format hh:mm, in this text box.
Example: 09:00.
Until
The document will be available until the specified time is reached. To edit this parameter, enter the preferred value, in the format hh:mm, in this text box.
Default value: 23:59.
User TypeTo configure the access of the current document, do the following:
To manage the authorization of users and groups, select one of the following drop-down list options:
All Users, meaning that all users are authorized (that is, anonymous access to the file is allowed).
The IQVS account controls file access when anonymous access is allowed. This means that the IQVS account has to be provided with the correct file access. The account is by default created as a local account in the QlikView installation. In a clustered environment, the IQVS account must be created as a domain account, so that all nodes can access it.
All Authenticated Users, meaning that any authenticated user is authorized.
Named Users, meaning that users that should be authorized are manually added, by searching for users and groups in a domain or on a computer (the names are resolved by the Directory Service Connector).
Users and Groups
This option is only available if Named Users was selected.
To manage users and groups, click on the Manage Users dialog icon, .
Administering QlikView - QlikView, April 2019 78

4 Documents
l Default Scope
Select the directory to be searched, in the drop-down list.
l Search for Users and Groups
Enter the desired search term(s) in this text box, to find a user or a group, and click on the Search icon,
.
l Search Result
This box presents the result of the search, using the desired criteria.
l Add >
To add a user or a group, click on it in the Search Result box and click on this button. Several items can be added at the same time.
l Selected Users
This box presents the selected users and groups.
l < Delete
To deselect a user or a group, click on it in the Selected Users box and click on this button. Several items can be deselected at the same time.
l << Delete All
To deselect all of the users and groups from the Selected Users box, click on this button.
l Manual Input of User Names
This field is used for manual input of user names that do not exist in the specified directory. If the entered user name exists in a directory in the Default Scope drop-down list, the user is listed in the Selected Users box the next time the dialog is launched.
Delete
To entirely remove a configured entry from the list, click on the Delete icon, .
Document InformationOn the Document Information tab, categories for the current document can be assigned, created, edited, and deleted. Categories are used to bundle documents in containers, to make categorization easier for the end-user. The categories are only visible to the end-user on the QlikView AccessPoint. Each document can only be part of one category.
General
Select CategoryTo assign a category to a document, select one of the available categories, presented in the drop-down list.
Default value: Default.
Administering QlikView - QlikView, April 2019 79

4 Documents
Or Type a New CategoryTo create a category, enter a descriptive name in this text box. The new category will be available in the Select Category drop-down list. The category is presented on the QlikView AccessPoint.
Categories can be reassigned, but cannot be deleted.
Source DocumentThe name of the source document. To select a source document, enter the name of it in this text box.
The source document name is not changed by a QlikView Server reload.
Document DescriptionTo create a document description that is displayed in Document Details on QlikView AccessPoint, enter a description in this text box.
AttributesMeta data attributes can be created and assigned to a document. These attributes are arbitrary pairs of name and value. They are not saved in the document, but in the meta data of the QlikView Server, utilizing the QlikView Server Document Metadata Service (DMS) facility. A third-party application can read and extract the attributes from the database, using the qvpx protocol. The attributes are presented on the QlikView AccessPoint, in which they are used to help finding the correct document. To create an attribute and assigned
value entry, to be stored in the meta file, click on the Add icon, , to the right in the pane, and configure the following fields:
NameTo configure a meta data attribute name, enter a descriptive name in this text box.
ValueTo assign a value to the meta attribute name in the Name field, enter the value in this text box.
Delete
To entirely remove a configured entry from the list, click on the Delete icon, .
ReloadOn the Reload tab, the current document can be scheduled to be reloaded.
This tab is just available when running only the QlikView Server, that is, not running the QlikView Publisher (QVP).
Unsafe macros are not allowed on reload tasks.
Administering QlikView - QlikView, April 2019 80
4 Documents
Reload Schedule
EnabledTo enable the reload function, configured on this tab, tick this check box. To disable the reload function, untick this check box.
RecurrenceChoose a schedule for the reload function, by clicking on one of the following options:
l None, meaning that no reload is performed.
l Hourly
l Daily
l Weekly
l Monthly
l Continuously, meaning that the reload is performed all the time, that is it is started and when executed, it is started again, and so on.
l On Event from Another Task
l On an External Event
All time specifications must be in the 24-hour format.
Hourly
Every
Choose a time interval for the reload function to start, by entering the desired number in the Hours and Minutes text boxes.
Start
Enter the date and time of the initial start of the reload function in this text box, by using the following format: yyyy-mm-dd hh:mm:ss.
Example:
2011-12-31 23:59:59
Daily
Every
Choose a time interval and the time of the initial start for the reload function to start, by entering the desired number in the Day text box, and in the time in the Time text box, the latter by using the following format: hh:mm.
Weekly
Select the day of the week for the reload function to start, in the drop-down list:
Administering QlikView - QlikView, April 2019 81
4 Documents
l Sunday
l Monday
l Tuesday
l Wednesday
l Thursday
l Friday
l Saturday
Also, choose the time of the initial start for the reload function to start, by entering the time in the Time text box, by using the following format: hh:mm.
MonthlySelect the number of day of every month (having that number of day), for the reload function to start, in the drop-down list:
l 1, 2, 3... 31, and Last Day, where each value represents that day of every months.
Also, enter the time for the reload function to start, in this text box, by using the following format: hh:mm.
On Event from Another TaskThe reload function can be configured to be started on the event from another task. The following configuration options are available:
Start on
Choose a start event, by clicking on one of the following options in the drop-down list:
l Successful, meaning that the execution of the task was successful.
l Failed, meaning that the execution of the task failed.
Completion of
Choose a start task, by clicking on one of the options in the drop-down list.
On an External EventThe reload function can be configured to be started on an external event, that is, an outside component, making a QlikView Management Service (QMS) API call. The following configuration options are available:
Password
This password is used to access the task and release the trigger. The external event has to know the password. To enable an external event to release the trigger of the task, enter a password in this text box.
Timeout SecondsTo choose a time limit for the reload function to execute, enter the desired number in this text box.
Default value: 21600, meaning 6 hours.
Administering QlikView - QlikView, April 2019 82
4 Documents
If the document is not reloaded within this timeout, the process will be terminated and the old data is kept in the document.
DependencyWhen a reload that has a dependency is about to be executed, the status of this dependency will first be checked, and if the status is 'failed', the current reload will not be executed. Select a dependency in the drop-down list.
Data Protection
Section Access
By default, the reload will be performed as the user under which the QlikView Distribution Service (QDS) is running. The Section Access setting allows the use of another user when performing the reload. To by-pass the default setting, tick this check box and enter the desired user and password in the User Name and Password text boxes. To use the default setting, untick this check box.
The default setting may have to be redefined.
User Name
To configure the user name, enter the desired credentials in this text box.
Password
To configure the password, enter the desired credentials in this text box.
Reload NowTo execute the reload immediately, click on this button.
Document CALsOn the Document CALs tab, the assignment of document Client Access Licenses (CALs) to users can be managed.
This tab is only available if document CALs are included in the QlikView Server license.
Assigning of a CAL does not imply access to the document.
SummaryPresents the following document CAL information:
l Document CALs Available on Server, meaning the number of document CALs that the current license contains.
Administering QlikView - QlikView, April 2019 83
4 Documents
l Document CALs Not Allocated on Server, meaning the number of document CALs that are not yet allocated to any document.
l Document CALs Allocated to this Document, meaning the number of document CALs allocated to the current document.
l Document CALs Embedded in Document, meaning the number of document CALs within the current document, which are assigned to users.
l Document CALs Assigned to Users, meaning the number of document CALs that are already embedded in the current document.
Document CALs
Number of CALs Allocated to this DocumentThe number of document CALs that should be allocated to the current document. By default, this value is set to '0' (zero). To change the value, enter the desired value in this text box. To reset the value to zero again, enter '0' (zero) in the text box.
Allow Dynamic CAL AssignmentIf this option is used, a new document CAL will automatically be granted to a user connecting to this QlikView Server for the first time, as long as there are available document CALs to assign. To allow the QlikView Server to assign CALs to any user that opens the document, tick this check box. To deny the QlikView Server to assign CALs to any user that opens the document, untick this check box.
Assigned UsersPresents the assignment of document CALs to users in a list. Document CALs can be assigned to users either automatically, see 'Allow Dynamic CAL Assignment', or manually. To manually assign the current document CALs to a user, do the following:
To manage users, click on the Manage Users dialog icon, .
l Default Scope
Select the directory to be searched, in the drop-down list.
l Search for Users
Enter the desired search term(s) in this text box, to find a user, and click on the Search icon, .
l Search Result
This box presents the result of the search, using the desired criteria.
l Add >
To add a user, click on it in the Search Result box and click on this button. Several items can be added at the same time.
l Selected Users
This box presents the selected users.
l < Delete
Administering QlikView - QlikView, April 2019 84
4 Documents
To deselect a user, click on it in the Selected Users box and click on this button. Several items can be deselected at the same time.
l << Delete All
To deselect all of the users from the Selected Users box, click on this button.
l Manual Input of User Names
This field is used for manual input of user names that do not exist in the specified directory. If the entered user name exists in a directory in the Default Scope drop-down list, the user is listed in the Selected Users box the next time the dialog is launched.
NamePresents a list of the names of all users currently holding a document CAL on the current document. A user can represent an authenticated User Name or a Machine Name.
Last Used (UTC)
The time stamp (UTC) from the last server activity of each user.
Quarantined Until (UTC)
If a CAL-to-user association has not been in use for the last 7 days, it will be deleted immediately. If a CAL-to-user association is currently being used or has recently been used, it will be marked for deletion, which means that new user access sessions through this CAL are not allowed. However, the CAL-to-user association will still occupy an allocated CAL until this quarantine period has passed.
Restore
Before that the Quarantined Until (UTC) time stamp has passed, a CAL-to-user association can be
undeleted, by clicking on the Restore icon, .
Delete
When the Quarantined Until (UTC) time stamp has passed, a CAL-to-user association can be removed manually. To entirely remove a CAL-to-user association from the list, thus freeing a document CAL, click on the
Delete icon, .
The CAL-to-user association is formally deleted after the expiration time.
The CAL will not be available for 7 days.
4.4 Publish a link to a QlikView document in the Qlik Sense hub
You can publish a link to a QlikView document in the Qlik Sense hub instead of distributing files by e-mail or to a specific folder location. You can use this method when you want to share a QlikView document with a named user that is part of the Active Directory user group in both QlikView and Qlik Sense.
Administering QlikView - QlikView, April 2019 85
4 Documents
QlikView documentsOnce shared, QlikView documents are listed in the Qlik Sense hub. You can open a document from the hub and interact with it using the functionality of the AJAX client. When viewing QlikView documents in Qlik Sense, no changes can be saved.
QlikView documents cannot be displayed using the mobile view for small devices.
Before you begin To enable link to QlikView documents in the Qlik Sense hub, the following is required:
l Your QlikView version is 12.00 SR3 or later.
l Your QlikView installation has a publisher license.
l A different set of certificates (client.pfx, server.pfx, and root.cer) have been exported, by your system administrator, from the Qlik Sense Management Console to each of the QlikView Distribution Service (QDS) machines.
l The server connection to the Qlik Sense AccessPoint has been configured to use the machine name.
l Qlik Sense has been configured to allow shared content.
QlikView certificate requirementsWhen creating a set of certificate for QlikView, the following is required:
l The certificates must be created using the full name, including the domain of the QDS machine.
l The certificates must be password protected.
l A secret key pair must be created.
A new set of certificates is required for each QlikView Distribution Service (QDS) machine.
≤ Exporting certificates through the QMC
Configuring Qlik Sense to allow users to publish a link to shared contentYou must create a Qlik Sense security rule and configure the Qlik Sense repository to allow QlikView to publish links on the Qlik Sense hub.
Adding a shared content security rule Enable shared content by creating a new security rule in the Qlik Sense Management Console.
Do the following:
1. In the Qlik Sense Management Console, click Security Rules.
2. Click Create new at the bottom of the page.
Administering QlikView - QlikView, April 2019 86
4 Documents
3. In the Identification section add a name and rule description. You can use the suggestions in the following table:
Field Value
Name SharedContentCreate-AllUsersFromUserGroupName
Description All users from the domain UserGroupName are allowed to create shared content
4. In the Basic section, select the Create action.
5. Ensure that the Read action is cleared.
6. Complete the action rule definition using the values in following image and by replacing UserGroupName with the name of your authentication user group.
7. In the Basic section type SharedContent_* as a Resource filter.
8. (Optional) If you want all authenticated users to be allowed to share QlikView content, type !user.IsAnonymous() in the Conditions box.
9. Click Apply. The security rule is added to the Qlik Sense Management Console for authenticated users.
Configuring the QlikView Distribution Service with the Qlik Sense certificatesYou must configure the QlikView Distribution Service (QDS) with Qlik Sense certificates to allow links to QlikView documents to be published in the Qlik Sense hub. To configure the QDS, you must import three different Qlik Sense certificates: client.pfx, root.cer, and server.pfx.
Importing the Qlik Sense certificates on the QDS machine All certificates can be imported using the native Windows Certificate Import Wizard.
The root.cer certificate must be imported before all other certificates.
Importing the root.cer certificate 1. Double-click to open the certificate.
2. Click Install Certificate.
The Certificate Import Wizard is initiated.
3. Select Current User.
4. Select Place all certificates in the following store.
Administering QlikView - QlikView, April 2019 87
4 Documents
5. Click Browse and select the Trusted Root Certification Authorities folder.
6. Review the certificate information and click Finish.
The root.cer certificate is imported on the QDS machine.
Importing the client.pfx and server.pfx certificates 1. Double-click to open the certificate.
The Certificate Import Wizard is initiated.
2. Select Current User.
3. On the Private key protection screen type the certificate password.
4. Select Automatically select the certificate store based on the type of certificate.
5. Review the certificate information and click Finish.
The certificate is imported on the QDS machine.
Configuring the QDS properties with the Qlik Sense certificate and machine informationThe QDS configuration file must be updated on each machine with the associated certificate thumbnail and Qlik Sense and QDS machine information. By default, the QVDistributionService.exe.config QDS configuration file is located in C:\Program Files\QlikView\Distribution Service.
1. In the <appSettings> section, type <add key="QRSMachineName" value="MySenseMachine.domain.com" />replacing QlikSenseMachineName.domain.com with the name of your machine running the Qlik Sense Repository.
The machine name must include the domain and match the name used when creating the Qlik Sense certificates.
2. On a separate line, type <add key="QVWSMachineName" value="QlikViewMachineName" /> replacing QlikViewMachineName with the name of your machine running the QlikView Web Server.
The domain is not required
3. (Optional) On a separate line, type <add key="AjaxClientPath" value="/MyAjaxURL/opendoc.htm" /> replacing MyAjaxURL with the URL of your Ajax Client. If this configuration option is not added, the default /QvAJAXZfc/opendoc.htm is used.
4. Open the Windows Microsoft Management Console.
5. Click the Certificates - Current Userdrop-down arrow.
6. Open the Personal > Certificates folder.
7. Double-click the QlikClient certificate. The certificate properties are displayed.
8. On the Details tab, copy the Thumbprint value.
Administering QlikView - QlikView, April 2019 88

4 Documents
9. On a separate line in the QVDistributionService.exe.config file, type <add key="SenseClientCertificateThumbprint" value="ThumprintID" /> replacing ThumbprintID with the value of the thumbprint found in the certificate properties.
10. Save your changes. The QDS is configured to allow you to publish links to QlikView documents in the QlikSense Hub.
Creating a task to publish a link to a QlikView document in the Qlik Sense hubYou can create a link to a QlikView document in the Qlik Sense hub by using the Qlik Management Console
QlikView documents in the Qlik Sense hub only support interactions using the Ajax client.
Before you begin To publish a link to a QlikView document in Qlik Sense you need a QlikView Server setup with a connection to an Active Directory and source documents.
Configuring the QlikView Management ConsoleYou must configure QlikView Web Server Access Point to connect with the Qlik Sense machine.
Do the following:
1. Click the System tab.
2. In the QlikView Web Server folder open the current QlikView Web Server machine.
3. On the Access Point tab, click Server Connections.
4. Using the drop-down menu, change the name of the QlikView web server from local to the machine name.
Publishing a link to a QlikView documentDo the following task in the QlikView Management Console to publish a link to a document:
1. Click the Documents tab.
The Source Document page opens.
Only source documents can be published.
2. Expand a QDS instance and locate the document you want to share.
3. Click to create a new task.
4. On the Distribute tab, click to add a recipient.
5. Select the Named User user type.
6. Click to add a user.
Administering QlikView - QlikView, April 2019 89
4 Documents
The named user must be part of the Active Directory user group in both QlikView and Qlik Sense.
7. On the Document Information tab click to add an attribute.
8. Type ShowInSenseHub in the Name field and true in the Value field.
9. Click Apply. The task may be run and will now add a link to the QlikView document on the Qlik Sense hub.
Viewing QlikView documents in the Qlik Sense hubDo the following:
1. Log into the Qlik Sense hub using the same credentials as the named user with which the QlikView document was shared.
2. From the hub, click QlikView documents.
3. Click a link to a document to open the QlikView AccessPoint in a new window.
QlikView documents cannot be deleted from the Qlik Sense Hub.
4.5 Publish a link to a QlikView document in a Qlik Sense cloud hub
You can publish a link to a QlikView document in a cloud hub on Qlik Sense Enterprise on Cloud Services or on Qlik Sense Enterprise on Kubernetes. You must connect your QlikView Server installation to a Qlik Sense Enterprise cloud deployment.
To publish a link to a QlikView document in a Qlik Sense cloud hub you must:
l Configure the connection to a Qlik Sense Enterprise cloud deployment in the QlikView Management Console.
l Create a task to publish the link to a QlikView document in the cloud hub for the connected Qlik Sense Enterprise cloud deployment.
Prerequisites l A licensed and running version of QlikView Server April 2019 or later, with a valid Publisher license.
l A configured and running Qlik Sense Enterprise on Cloud Services or Qlik Sense Enterprise on Kubernetes cloud environment.
Administering QlikView - QlikView, April 2019 90
4 Documents
Connecting QlikView Server to a Qlik Sense Enterprise cloud deploymentTo allow the distribution of links to QlikView documents to a Qlik Sense cloud hub, you must connect your QlikView Server deployment to an existing Qlik Sense Enterprise cloud deployment.
다음과 같이 하십시오 .
1. In the QlikView Management Console, navigate to System, open the Setup tab, and select the Cloud Deployments folder.
2. Select the Add button to create a new cloud deployment connection.
3. In the Service URL field, enter the complete URL to the Qlik Sense Enterprise cloud deployment. Select Apply to confirm the addition of the cloud deployment.
4. You now see a new cloud deployment listed in the Cloud Deployments folder.
5. To edit the cloud deployment connection you added, select it from the list of available cloud deployments in the left-hand side menu. Then, select the General tab.
a. In Deployment name, enter a name for the cloud deployment.
b. In API endpoint, enter the address to the Qlik Sense cloud hub for the Qlik Sense Enterprise cloud deployment.
c. Select a web server from the Web Sever drop-down menu.
d. If selected, deselect Disable distribution of links.
6. In the General tab under Issuer configuration, generate the local bearer token by selecting Generate configuration.If you want to generate the local bearer token in Qlik Cloud Services format, select Qlik Cloud Services format.If you want to generate the local bearer token in text format, deselect Qlik Cloud Services format.
7. Copy and save the local bearer token to a preferred location. You will need to apply it in the Qlik Sense Enterprise cloud deployment to complete the connection with your QlikView Server deployment.
For step by step instruction on how to apply the local bearer token in the Qlik Sense Enterprise cloud deployment, see: Configuring your Qlik Cloud Services deployment.
8. Select Apply to confirm the changes.
Creating a task to distribute a link to a Qlik Sense cloud hubYou distribute a link to a QlikView document to a connected Qlik Sense cloud hub by creating a task in the QlikView Management Console. Once the link is opened in the Qlik Sense cloud hub, the user is redirected to the QlikView Server environment, where the document is opened.
다음과 같이 하십시오 .
1. In the QlikView Management Console, navigate to Documents, and open the Source Documents tab.
2. Select the source document for which you want to distribute a link to a connected Qlik Sense cloud hub.
Administering QlikView - QlikView, April 2019 91

4 Documents
3. Select the Add button to create a new document task.
If you want to edit an already existing task, select the Edit Task button.
For a detailed description of how to configure a task, see the section: Source Documents (page 20).
4. Set the QlikView Server (QVS) machine that will manage the document. The document is always opened in the QlikView Server environment and handled by a QVS machine.
a. Select the Distribute tab, and open the Manually (page 48) section.
b. Under Distribute to QlikView Server, select the Add button to create a new entry in the list.
c. Under Server, select the QlikView Server (QVS) machine you want to use for opening the QlikView document when a user is redirected from the Qlik Sense cloud hub.
d. Under User Type select the users you want to allow to access the document. For a detailed description of the options, see: Manually (page 48).
5. Configure the link distribution.
a. Select the Cloud Native Links (page 54) tab.
b. Select Send links to Cloud Native to enable the distribution of the link to a Qlik Sense cloud hub.
c. In the Cloud Deployment drop-down menu select the Qlik Sense Enterprise cloud deployment you want to distribute the link to.
You can select only one cloud deployment. To distribute to multiple Qlik Sense Enterprise cloud deployments, create a separate document task for each cloud deployment.
d. In the Collection field, type the name of an existing collection in the Qlik Sense cloud hub. If the name you insert does not correspond to any existing collection, a new collection with that name will be created and populated with the link.
e. Select the users or groups you want to allow to access the link.
6. Select Apply to confirm the creation of the task.
7. Once created, the task is listed in theStatus, Task section. See: Tasks (page 8). Reload the task to distribute the link to the Qlik Sense cloud hub.
Administering QlikView - QlikView, April 2019 92
5 Users
5 UsersThe Users tab contains the following pages:
l User Management, where the CALs, server objects, groups, documents, and distributions of users can be managed.
l Section Access Management, where the tables for section access can be configured.
The Users and System tabs are only available for QlikView Administrators, and not for QlikView Publisher Document Administrators.
5.1 User ManagementOn the User Management page, all of the users in the QlikView Server (QVS) and QlikView Publisher (QVP) systems can viewed and managed, for the objects in the following tabs:
l CALs
l Server Objects
l Groups
l Documents
l Distributions
Search UserTo search for a user, do the following:
l User
Enter the desired search term(s) to find the user name, in this text box, and click on the Search icon,
, to initiate the search.
l Search in
To restrict the boundary in which to search for a user, select one of the directories, or All Directories in the drop-down list.
l Search Result
The result of the search is presented in the left pane, listing the name(s), User, and the location(s), Path, of the user(s).
View and Manage UserTo view and manage the settings of a user, in any of the tabs to the right, click on the user in the left pane.
CALsOn the CALs tab, information about users assigned to Client Access Licenses (CALs), on servers or in user documents, can be viewed and removed. All of the CAL-to-user associations are presented in the list.
Administering QlikView - QlikView, April 2019 93
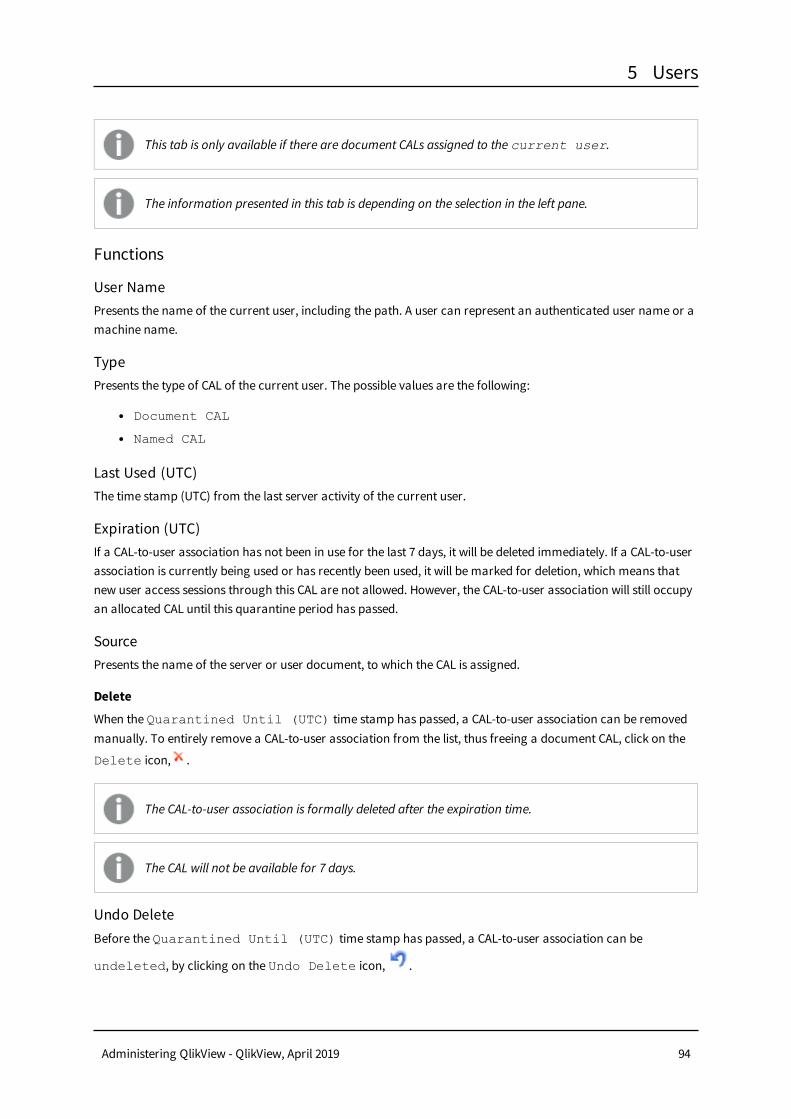
5 Users
This tab is only available if there are document CALs assigned to the current user.
The information presented in this tab is depending on the selection in the left pane.
Functions
User NamePresents the name of the current user, including the path. A user can represent an authenticated user name or a machine name.
TypePresents the type of CAL of the current user. The possible values are the following:
l Document CAL
l Named CAL
Last Used (UTC)The time stamp (UTC) from the last server activity of the current user.
Expiration (UTC)If a CAL-to-user association has not been in use for the last 7 days, it will be deleted immediately. If a CAL-to-user association is currently being used or has recently been used, it will be marked for deletion, which means that new user access sessions through this CAL are not allowed. However, the CAL-to-user association will still occupy an allocated CAL until this quarantine period has passed.
SourcePresents the name of the server or user document, to which the CAL is assigned.
Delete
When the Quarantined Until (UTC) time stamp has passed, a CAL-to-user association can be removed manually. To entirely remove a CAL-to-user association from the list, thus freeing a document CAL, click on the
Delete icon, .
The CAL-to-user association is formally deleted after the expiration time.
The CAL will not be available for 7 days.
Undo DeleteBefore the Quarantined Until (UTC) time stamp has passed, a CAL-to-user association can be
undeleted, by clicking on the Undo Delete icon, .
Administering QlikView - QlikView, April 2019 94

5 Users
Server ObjectsOn the Server Objects tab, all the server objects that are owned by a user can be viewed and removed.
This tab is only available if there are document CALs assigned to the current user.
The information presented in this tab is depending on the selection in the left pane.
IDPresents the ID of the server object.
Object TypePresents the type of the server object.
SharedIndicates whether the server object is shared, or not.
Document NamePresents the name of the document in which the server object reside.
OwnerPresents the name of the owner of the server object. A user can represent an authenticated user name or a machine name.
Manage UserTo reassign the ownership of a server object, enter the name and the path of the user in the text field, or do the following:
To manage users and groups, click on the Manage User dialog icon, .
l Default Scope
Select the directory to be searched, in the drop-down list.
l Search for Users and Groups
Enter the desired search term(s) in this text box, to find a user or a group, and click on the Search icon,
.
l Search Result
This box presents the result of the search, using the desired criteria.
l Add >
Administering QlikView - QlikView, April 2019 95
5 Users
To add a user or a group, click on it in the Search Result box and click on this button. Several items can be added at the same time.
l Selected Users
This box presents the selected users and groups.
l < Delete
To deselect a user or a group, click on it in the Selected Users box and click on this button. Several items can be deselected at the same time.
l << Delete All
To deselect all of the users and groups from the Selected Users box, click on this button.
Delete
To entirely remove a configured entry from the list, click on the Delete icon, .
Undo Delete
To undelete a previously deleted server object, click on the Undo Delete icon, .
Number of EntriesPresents the number of configured entries in the current section access table. Select the number of entries to be presented on each page, in the drop-down list:
l 10 per page
l 20 per page
l 50 per page
l 100 per page
GroupsOn the Groups tab, all of the groups that a user is a member of are presented.
The information presented in this tab is depending on the selection in the left pane.
Group NameThe left pane presents any directory group name(s), in which the current user is a member.
Group NameThe right pane presents the existing QlikView group names. A ticked, , group name indicates that the current user is a member of that group.
DocumentsOn the Document tab, all of the user documents and the source documents that a user has access to are presented.
Administering QlikView - QlikView, April 2019 96

5 Users
The information presented in this tab is depending on the selection in the left pane.
User Document NameThe left pane presents the names of the user documents to which the current user has access.
Source Document NameThe right pane presents the names of the source documents to which the current user has access.
DistributionsOn the Distributions tab, all of the distributions, for which the current user is a recipient, are presented. Also, the task settings can be edited.
The information presented in this tab is depending on the selection in the left pane.
Task NameTo edit a task, click on the task name.
MatchPresents the matching criterion, filtering the current user into the distribution list. Possible values are the following:
All Users, meaning that all users are authorized (that is, anonymous access to the file is allowed).
The IQVS account controls file access when anonymous access is allowed. This means that the IQVS account has to be provided with the correct file access. The account is by default created as a local account in the QlikView installation. In a clustered environment, the IQVS account must be created as a domain account, so that all nodes can access it.
All Authenticated Users, meaning that any authenticated user is authorized.
Named Users, meaning that users that should be authorized are manually added, by searching for users and groups in a domain or on a computer (the names are resolved by the Directory Service Connector).
DistributionsPresents the server available for document distribution.
Delete
To entirely remove a configured entry from the list, click on the Delete icon, .
Administering QlikView - QlikView, April 2019 97
5 Users
A configured entry can only be deleted by the user if the user is an explicit recipient to the distribution, but not if the user belongs to a group that is configured as a recipient.
User Management Search FunctionsIn the search field of the Manage Users dialog, the following apply:
l Searches in the Microsoft Active Directory are performed on the account names, sAMAccountName (the login name) and name (the entire account name), only.
Example: sAMAccountName
jsmith
Example: name
John Smith
l The asterisk operator, '*', meaning 'match of any character(s)', is supported.
l The separator operator, ';' (semicolon), meaning that several search criteria can be stated at the same time, is supported.
Example:
jsmith*;wjones* will search for account names matching jsmith* or wjones*.
l Searches are not case sensitive, meaning that upper and lower case characters are treated as if they were the same.
l Searches can be limited within a specific directory service provider, by stating a qualifier.
Example 1:
<domain_name>\jsmith* will search for account names matching jsmith* in the directory <domain_name>, only.
Example 2:
<computer_name>\jsmith* will search for local account names matching jsmith* on the local <computer_name>, only.
Example 3:
custom\jsmith will search for account names matching jsmith in custom users, only.
Administering QlikView - QlikView, April 2019 98
5 Users
Example 4:
jsmith* will search for account names matching jsmith* in any configured directory service provider.
5.2 Section Access ManagementOn the Section Access Management page, all the available tables for section access are listed in a tree view in the left pane. These tables act as a central repository for section access tables to use in QlikView documents. The actual use of these tables is defined in the load script of the document.
Section access is similar to reduction, but is done by the QlikView Server when a user accesses the document. The choice between section access and static reduction is a question of performance and memory usage. When QlikView Publisher opens a section access protected QlikView file, the file is reduced based on the reduction values.
Reduction based on Section Access may cause unwanted results in the distributed documents and should be used with caution.
Section Access Tables
Section Access Table URLIn order to use all of the defined section access tables, add the presented path (URL) to the load script in the QlikView Script Editor.
AddTo create a table entry, click on the Add icon, , to the right in the pane, and enter a descriptive name in the new text box. The new table will be available in the tree view in the left pane.
DeleteTo entirely remove a configured entry from the list, click on the Delete icon, .
Manage Section Access TablesTo view and manage the settings of an existing section access table, in the right pane, click on the table in the tree view in the left pane. For example, click on the predefined table named default.
Allowed Users...The current section access table URL can be configured, so that only specific users can use it.
Members of the Administrators group always have access to the section access table.
To manage users and groups, click on this button.
Administering QlikView - QlikView, April 2019 99
5 Users
l Default Scope
Select the directory to be searched, in the drop-down list.
l Search for Users and Groups
Enter the desired search term(s) in this text box, to find a user or a group, and click on the Search icon,
.
l Search Result
This box presents the result of the search, using the desired criteria.
l Add >
To add a user or a group, click on it in the Search Result box and click on this button. Several items can be added at the same time.
l Selected Users
This box presents the selected users and groups.
l < Delete
To deselect a user or a group, click on it in the Selected Users box and click on this button. Several items can be deselected at the same time.
l << Delete All
To deselect all of the users and groups from the Selected Users box, click on this button.
Search for Users inIn the drop-down list, select the directory service connector, in which to search for users and groups using the Allowed Users... function. This also applies to the section access tables below (Column User with the clickable icon that brings up Manage Users).
Edit Columns...In the Edit Table Columns dialog columns can be added to, or removed from, the current section access table. The available table columns are listed in Table Columns.
To open the dialog, click on this button.
l QlikView Column
This list contains all the possible reserved columns in a QlikView section access table. To view an explanation of a column, click on it. The explanation is presented between the left available columns list and the right chosen columns list.
l Add Column (upper)
To add a reserved column to the current section access table, click on the column and click on this button. The column is moved from the left available columns list to the right chosen columns list.
l Type Column
Administering QlikView - QlikView, April 2019 100
5 Users
To add a custom column to the current section access table, enter a name in this text box and click on the Add Column (lower) button.
l Add Column (lower)
To add the custom column to the current section access table, click on this button. The new column is added to the right chosen columns list.
l Promote
To move a column to the left, within the current section access table, click on the column in the right
chosen columns list and click on the Promote icon, , as many times as needed. The column will
be moved upwards in the right chosen columns list and to the left in the current section access table.
l Demote
To move a column to the right, within the current section access table, click on the column in the right
chosen columns list and click on the Demote icon, , as many times as needed. The column will
be moved downwards in the right chosen columns list and to the right in the current section access table.
l Remove Column
To entirely remove a column from the current section access table, click on the column and click on this button. Reserved columns are moved from the right chosen columns list to the left available columns list, whilst custom columns are deleted.
Table ColumnsThe following table columns are available:
l ACCESS, a field that defines what access the corresponding user should have. The following options are available in the drop-down list:
l ADMIN
l USER
l NTNAME, a field that should contain a string corresponding to a Windows NT domain user name or group name. In this filed, users and groups are given access to the documents distributed by the section access functionality. The QlikView Server will fetch the logon information from the operative system and compare it to the value in this field. To manage users and groups, either enter a valid string in this field, or do the following:
To manage users and groups, click on the Manage Users dialog icon, .
l Default Scope
Select the directory to be searched, in the drop-down list.
l Search for Users and Groups
Enter the desired search term(s) in this text box, to find a user or a group, and click on the
Search icon, .
Administering QlikView - QlikView, April 2019 101
5 Users
l Search Result
This box presents the result of the search, using the desired criteria.
l Add >
To add a user or a group, click on it in the Search Result box and click on this button. Several items can be added at the same time.
l Selected Users
This box presents the selected users and groups.
l < Delete
To deselect a user or a group, click on it in the Selected Users box and click on this button. Several items can be deselected at the same time.
l << Delete All
To deselect all of the users and groups from the Selected Users box, click on this button.
l NTSID, a field that should contain a Windows NT SID. The QlikView Server will fetch the logon information from the operative system and compare it to the value in this field.
Example:
S-1-5-21-125976590-467238106-1092489882-1378
l NTDOMAINSID, a field that should contain a string corresponding to a Windows NT Domain SID.
l SERIAL, a field that should contain a number corresponding to the QlikView serial number. The QlikView Server will check the serial number of the user and compare it to the value in this field.
Example:
4900 2394 7113 7304
l USERID, a field that should contain an accepted user ID. The QlikView Server will prompt for a user ID and compare it to the value in this field. This user ID is not the same as the Windows user ID.
l PASSWORD, a field that should contain an accepted password. The QlikView Server will prompt for a password and compare it to the value in this field. This password is not the same as the Windows password.
l OMIT, a field that should contain the field that should be omitted for this specific user. Wildcards may be used and the field may be empty. A facile way of doing this is to use a sub field.
Do not apply OMIT on key fields, since this changes the underlying data structure and may create logical islands and calculation inconsistencies.
l Custom, a custom field defined as desired.
Administering QlikView - QlikView, April 2019 102
5 Users
Import Table Data...The contents of a tab separated file can be pasted into the current section access table. To open the Import dialog, click on this button.
l Paste Tab Separated File Below:
Enter the tab separated file contents in this text box.
l Treat First Row as Column Names
If the first row of the tab separated file is made up of, for example, column names, this row should not be imported. To exclude the first row from being imported, tick this check box. To include the first row to being imported, untick this check box.
l Clear Table Data
If the imported data is to replace the possibly already existing data in the current section access table, tick this check box. If the imported data is to be appended into the current section access table, untick this check box.
SearchTo filter the list of entries for the current section access table, enter the desired term(s) to search for in all
columns in this text field, and click on the Search icon, , to initiate the search and filtering.
AddTo create a table row entry in the current table, click on the Add icon, , to the left in the table header. The new entry will be added last in the table.
Copy and Paste
To copy a table row entry in the current table, click on the Add Row icon, , in the table row to be copied. The new entry will be added just under the copied entry in the table.
DeleteTo entirely remove a configured entry from the list, click on the Delete icon, .
Number of EntriesPresents the number of configured entries in the current section access table. Select the number of entries to be presented on each page, in the drop-down list:
l 10 per page
l 20 per page
l 50 per page
l 100 per page
Administering QlikView - QlikView, April 2019 103

6 System
6 SystemThe System tab contains the following pages:
l Setup
l Licenses
l About
l Supporting Tasks
On these pages, all the settings of the various services in the QlikView Server (QVS) and the QlikView Publisher (QVP) can be managed.
The Users and System tabs are only available for QlikView Administrators, and not for QlikView Publisher Document Administrators.
6.1 SetupThe Setup page contains the following folders:
l Management Service, where the QlikView Management Service, communicating with all services and hosting the QMC Graphical User Interface (GUI), can be viewed and managed.
l QlikView Servers, where the hosting of the user documents can be managed.
l Distribution Services, where the QlikView Distribution Service (QDS) settings can be managed.
l Directory Service Connectors, where user information from various sources can be monitored.
l Directory Service Providers, where the configuration of the directory services can be managed.
l QlikView Web Servers, where the web servers for AJAX web pages, the hosting of the QlikView AccessPoint, and the load balancing of the QlikView Server, can be managed.
l Remote Management Services, where tasks can be imported from remote server management services.
l Mail Server, where the alert and distribution e-mail service can be managed.
l License Service where you can see the License Service information.
l Cloud Deployments
Click on each folder label for more information.
Management ServiceIn the Management Service folder, the central coordinating component in the QlikView Publisher (QVP) can be managed. The Management Service is responsible for maintaining the QlikView Publisher Repository (QVPR), keeps track of the various components, communicates with all services, and hosts the QMC Graphical User Interface (GUI). A QVP installation has only one Management Service.
The Management Service folder contains the following tabs:
l Summary, where the address of the Management Service can be viewed.
l General, where the level of logging of the Management Service can be managed.
Administering QlikView - QlikView, April 2019 104

6 System
l Repository, where the QlikView Publisher Repository (QVPR), that is, the database containing the task information, can be managed.
l Auditing, where the user tracking of changes on tasks and settings in the system can be viewed.
SummaryOn the Summary tab, the address used to connect to the API of the Management Service is presented.
Click the link to show the Web Services Description Language (WSDL) for the API.
GeneralOn the General tab, the level of logging of the Management Service can be managed.
Location
URL
Presents the URL of the Management Service.
Example:
http://<mycomputer>:4799/QMS
Logging LevelThe log level of the service. Select one of the following options:
l No Logging
l Normal Logging
l Debug Logging
The debug logging level might cause heavy load on the system.
RepositoryOn the Repository tab, the name of the database to use as repository for the QlikView Publisher (QVP) can be set. If the database does not exist, it will be created. The QlikView Publisher Repository (QVPR), is the database containing the information about every QVP task. The repository can be either XML based or stored on a Microsoft SQL Server.
This tab is only available if a valid QlikView Publisher (QVP) license was installed.
Choice of Repository TypeOne of the following options can be chosen:
l XML Repository
l Microsoft SQL Server
Depending on the chosen repository type, the settings available on the Repository tab will change.
Administering QlikView - QlikView, April 2019 105
6 System
Settings for XML Repository
Database
The name of the XML repository.
Optional Base Path
The path to the folder where the XML repository is to be created.
If this path contains a database with the same name, the data will be overwritten.
Migrate Data From Current Repository
When creating a database, it is possible to move the data from, for example, a company database to the new one. To migrate data from the current QVPR repository to a new path, tick this check box. To not migrate any data, untick this check box.
If the destination repository contains data, it will be overwritten. Please make a backup before continuing. If creating a database, the old one can be migrated, or the database will be empty from start.
Backup Settings
Schedule
It is possible to configure a scheduled backup of the repository. One of the following options can be chosen:
l Never, meaning that no backup is performed.
l Daily at, meaning that a backup is performed every day at a set time.
l Every, meaning that a backup is performed at an interval; each set minutes.
The backup is saved as a .zip file, named using the time stamp of the file creation.
Optional Backup Path
To change the path to the backup .zip file, enter a valid path in this field. By default, the .zip file is saved to the same path as the repository.
Backup Now
To create a backup immediately, click on the Backup Now button.
Settings for Microsoft SQL Server Repository
Get Servers
To choose a server from a list of Microsoft SQL Servers that are available on the network, click on this button.
Server
The chosen Microsoft SQL Server name.
Administering QlikView - QlikView, April 2019 106
6 System
Port
The port number of the communication.
Connection Model
The protocol that should be used for the communication with the Microsoft SQL Server.
Connect Using
Select the authentication method. One of the following options can be chosen:
l Management Service User (Windows authentication), meaning that the Windows user, under which the service run, is used.
l SQL Server Authentication
Database
The name of the database on the Microsoft SQL Server. If this field is set to the name of an already existing QVP database, the data in the existing database will be updated.
Migrate Data from Current Repository
When creating a database, it is possible to move the data from, for example, a company database to the new one. To migrate the data from the current QVPR repository to a new path, tick this check box. To not migrate any data, untick this check box.
If the destination repository contains data, it will be overwritten. Please make a backup before continuing. If creating a database, the old one can be migrated, or the database will be empty from start.
AuditingOn the Auditing tab, it is possible to manage the settings of the tracking of changes on tasks and settings made by users in the system. The audit log stores information about the users, the changes, and the time stamp.
EnabledThis check box indicates whether the audit logging is turned on (ticked) or off (unticked).
It is not possible to enable the audit logging on this tab, but auditing must be turned on in the Management Service configuration file, QVManagementService.exe.config, found in the directory C:\Program Files\QlikView\Management Service. Changing any of the parameter values requires a restart of the QlikView Management Service (QMS).
Audit Files
Folder
The full absolute path for the audit logs.
Administering QlikView - QlikView, April 2019 107
6 System
Days to Keep Audit Logs
The number of days that the audit logs are saved. Logs older than this setting are overwritten by new logs.
QlikView ServersIn the QlikView Servers folder, the QlikView Server (QVS) cluster(s) hosting the user documents can be viewed, added, edited, and deleted.
A cluster might include one or more nodes.
Functions
Add
To create a QVS cluster entry, click on the Add icon, , to the right in the pane, and enter the URL in the new text box. The new entry will be available in the tree view in the left pane.
Example:
qvp://<mycomputer>/
Edit
To configure a QlikView Server cluster entry, click on the Edit icon, , or click on the entry in the tree view. In the right pane, the following tabs are presented:
l General
l Folders
l Documents
l Performance
l Logging
l Security
l Folder Access
l Login
Click on each tab label for more information.
Delete
To entirely remove a configured entry from the list, click on the Delete icon, .
ApplySelect Apply to confirm the change.
CancelSelect Cancel to revert the change.
Administering QlikView - QlikView, April 2019 108
6 System
ViewTo view or configure the settings of a QlikView Server cluster, in the right pane, click on the entry in the tree view. Each entry contains the following tabs:
l General
l Folders
l Documents
l Performance
l Logging
l Security
l Folder Access
l Login
Click on each tab label for more information.
GeneralOn the General tab, the settings of the current QlikView Server (QVS) cluster can be managed.
Cluster
Name
The name of the QlikView Server cluster. To edit the name, enter a name in this text box.
Serial Number
Presents the serial number of the QlikView Server software license.
Control
To set up a QlikView Server cluster, enter the control number for the QlikView Server software license in this text box.
Add
To add a cluster node entry, click on the Add icon, , to the right in the pane, and configure the following new text boxes:
l URL
Enter the path to the second QlikView Server in this text box.
Example:
qvp://<mycomputer>/
l Link Machine Name
If the QlikView Server cluster is not exposed externally with the same name as is used internally, an external name must be entered in this text box. This is to enable QlikView documents in the Microsoft Internet Explorer plugin. To mimic the behavior of version 8.5, it is possible to enter (FromRequest)
Administering QlikView - QlikView, April 2019 109
6 System
(including the parenthesis) in this text box. The name exposed externally will then be the same as the URL that the client uses to connect to the QlikView AccessPoint, that is, the setting is taken from the request coming from the client.
If this text box is left empty, the name exposed for the clients will be the computer name of the QlikView Server.
Delete
To entirely remove a configured entry from the list, click on the Delete icon, .
FoldersOn the Folders tab, the paths to the documents and temporary files for clustering and load balancing, can be configured.
The root folder for the user documents in the QlikView Server (QVS) and the source folder for the source documents in the QlikView Distribution Service (QDS) should never use the same folder path.
Document Folders
Root FolderThe path to the documents that are to be accessed through the QlikView Server has to be configured. This path will typically reflect the default document location. Documents may also reside in sub folders of this folder. The Microsoft Windows file security applies for all user access to document folders and files, unless using the QlikView Server Document Metadata Service (DMS) Authorization mode.
The default location after installation may differ depending on the operating system.
Default value: C:\ProgramData\QlikTech\Documents.
To select a folder, enter the valid and absolute path in this text box, or click on the Browse icon, , and choose
the folder in the Choose Folder dialog.
Valid value(s) must be entered, which might be indicated with a red asterisk and a tool-tip error message.
Mounted FoldersIt is also possible to specify Mounted Folders. Such a folder may contain sub folders to any level.
Add
To add a mounted folder, click on the Add icon, , to the right in the pane, and configure the following text boxes:
Administering QlikView - QlikView, April 2019 110

6 System
l Name
Enter a descriptive name of the folder.
l Path
To select a folder, enter the valid and absolute path in this text box, or click on the Browse icon, , and
choose the folder in the Choose Folder dialog.
Valid value(s) must be entered, which might be indicated with a red asterisk and a tool-tip error message.
l Browsable
To make the folder, and the contents of it, browsable from the Open in Server dialog in the QlikView Desktop, tick this check box. To disable the browse function, untick this check box.
Delete
To entirely remove a configured entry from the list, click on the Delete icon, .
System Folders
Alternate Temporary Files Folder Path
If clustering or load balancing is used for the QlikView Server, an alternate path for temporary files has to be configured. This path must be reachable by all QlikView Servers in the cluster.
To select a folder, enter the valid and absolute path in this text box, or click on the Browse icon, , and choose
the folder in the Choose Folder dialog.
Alternate Extensions Path
Enter the path of, or browse to, the directory where your QlikView Extensions are located.
DocumentsOn the Documents tab, the settings for document control can be managed.
Server
Document Timeout
Open documents take up valuable system resources (that is, memory space, RAM, is allocated) and should not be allowed to remain open when not in use. However, if a document is closed too quickly, the users may get longer delay times when accessing the document, because the server has to reopen it. This value controls for how long a document will be allowed to be unused before the QlikView Server (QVS) closes the document and reclaims the resources.
Default value: 480 minutes.
Allow Document Download
Allowing documents to be downloaded gives users access to the document, which might be a security risk.
Administering QlikView - QlikView, April 2019 111

6 System
Documents can be allowed to be downloaded by clients through the QlikView AccessPoint. To allow documents to be downloaded, tick this check box. To deny documents to be downloaded, untick this check box.
Allow Document Upload
New or updated documents can be allowed to be uploaded to the QlikView Server through the QlikView Distribution Service (QDS) in the QlikView Publisher (QVP). For this upload function to work, the QlikView Server is required to be defined as a resource in the QVP. And, if using the QVP, this upload function has to be allowed. To allow documents to be uploaded to the QlikView Server through the QDS, tick this check box. To deny documents to be uploaded to the QlikView Server through the QDS, untick this check box.
Denying documents to be uploaded will stop all distributions from working.
Allow Only One Copy of Document in Memory
If there are changes to a document, for example, a reload or a layout change, the QVS can be configured to do either of the following options.
l Force an immediate update of the document for the user during the session, that is, allowing only one version of a document. This will conserve memory resources on the QVS.
l Await a new session, then update the document for the user. This may cause several copies of different versions of the document, residing in memory at the same time.
To allow only one version of the document in memory, tick this check box. To allow several versions of the document in memory, untick this check box.
Allow Print and Export to Excel
Documents can be allowed to be printed and exported to Microsoft Excel. To allow documents to be printed and exported, tick this check box. To deny documents to be printed or exported, deselect this check box.
Default limitations in number of rows and columnsThe default maximum number of rows and columns in the Excel export file is:
l 1048566 rows per sheet. For pivot tables: 1048566 column dimensions. 10 rows can be added after the export.
l 16384 columns per sheet. If the number of columns exceeds the limit, the exported file is truncated and a warning message is sent.
If the export to Excel takes more than three minutes (180 seconds) to be performed, QlikView Server terminates the process and returns an error message.
Allow Server Annotations
To enable server annotations, that is, to let clients present annotations for sheet objects in the documents, and to allow users to view, write, edit, and delete annotations, tick this check box. To disable server annotations, untick this check box.
Administering QlikView - QlikView, April 2019 112
6 System
Allow Session Collaboration
To allow users to share sessions on documents, tick this check box. To deny users to share sessions on documents, untick this check box.
Allow Server Objects
When collaboration is disabled in the QlikView license (that is, the license contains DISABLE_COLLABORATION;YES;;), server objects and server bookmarks are not allowed. This means that the Allow Server Objects and Allow Anonymous Server Bookmarks check boxes cannot be checked when collaboration is disabled.
To allow the users to create server objects, that is, Sheet Objects and Reports, tick this check box. To deny the creation of server objects, untick this check box.
When the check box is unticked, no server objects, except server bookmarks, can be created. For server bookmarks, unticking the check box only affects the possibility to share the bookmarks with other users.
l Allow Anonymous Server Bookmarks
Anonymous users can be allowed to create bookmarks. The machine ID of the user client is used for ownership, and the user client has to allow persistent cookies to be created. To allow anonymous users to create bookmarks, tick this check box. To deny anonymous users to create bookmarks, untick this check box.
Allow Session Recovery
Session recovery saves the current selection state for each user when a session ends. It then re-applies the selection state the next time that the same user reconnects to the same document.
Session recovery affects all users and documents on a server.
To allow session recovery, tick this check box. To disallow session recovery, untick this check box.
Objects
Allow Moving and Sizing Objects
All of the users can be allowed to move and resize the QlikView objects in the various clients. To allow all of the users to move and resize the QlikView objects, tick this check box. To deny all of the users to move and resize the QlikView objects, untick this check box.
Default Label for 'Total'
The default label for Totals in bar charts, pivot tables, and straight tables can be configured. To edit the default label for Totals, enter a descriptive name in this text box.
Default value: Total.
Administering QlikView - QlikView, April 2019 113

6 System
Default Label for 'Others'
The default label for Others in bar charts and pie charts can be configured. To edit the default label for Others, enter a descriptive name in this text box.
Default value: Others.
PerformanceOn the Performance tab, the performance tuning of the CPU, sessions, memory (RAM), and document handling can be managed.
Reload Limits
This option is just available when running only the QlikView Server, that is, not running the QlikView Publisher (QVP).
Max Concurrent Reloads
Sets how many documents that may be reloaded at any one time.
Be careful not to set too many reloads simultaneously, as it may degrade the overall performance of the computer.
CPU
CPU Affinity
By default, the QlikView Server (QVS) automatically selects the processors to use on the hosting computer. It is possible to configure whether specific processors are to be used, or not. To deselect the use of a CPU, untick the corresponding check box. To select a CPU to use, tick the corresponding check box.
This function must only be used when the default setting, that is, all CPUs are used, is purposefully to be overridden.
CPU Throttle
By default, the QlikView Server (QVS) is set to use 100% of the CPU capacity, that is, no throttling is used. It is possible to increase or decrease the priority of the QVS process, depending on how much CPU capacity the process is utilizing. In this way, some of the CPU capacity can be freed and used by other applications, improving the overall performance of the server. To set a threshold value, enter a suitable figure in this text box.
If the server is dedicated for the QlikView Server, this function should not be used.
Should the CPU utilization for the QlikView Server process exceed the set threshold, it is most likely because Windows considers more resources available.
Administering QlikView - QlikView, April 2019 114

6 System
Default value: 0 % (0 means no throttling).
Sessions
Maximum Number of Concurrent Sessions
For each document that a user opens on the QVS, a new user session is generated. It is possible to configure the maximum number of concurrent user sessions that are allowed on the QVS. To set the maximum number of concurrent user sessions, enter a suitable figure in this text box.
If the server is dedicated for the QlikView Server, this function should not be used.
This setting is not related to Client Access Licenses (CALs).
Default value: 5000 (an empty field means no limit).
Maximum Inactive Session Time
User sessions, which have had no activity during a specified time limit, can be configured to be closed by the QVS. To set the session timeout, enter a suitable figure in this text box.
The maximum inactive session time can also be set per document. The session time with the lowest value takes precedence. If the session time entered in this text box is lower than the document session time, the document session time is disregarded.
Default value: 1800 seconds (0 is not allowed; empty means no limit).
Possible Session Timeout
User sessions, which have had no activity during a specified time limit, can be configured to be eligible for being closed by the QVS, if needed. To set the session timeout, enter a suitable figure in this text box.
The QlikView Server may close inactive sessions and re-use the slot, if needed for other users.
Default value: 1800 seconds (0 is not allowed; empty means no limit).
Maximum Total Session Time
All user sessions, active or not, can be configured to be terminated by the QVS after a specified time limit. To set the session timeout, enter a suitable figure in this text box.
Default value: No limit (0 is not allowed; empty means no limit).
Working SetThe minimum and maximum of the physical amount of RAM that is allocated to, and can be used by, an application or process can be configured. This way it is possible to control whether an application can be swapped out of physical memory, or not.
Administering QlikView - QlikView, April 2019 115
6 System
There are no guarantees that the operating system can host the process with the configured amount of memory.
Using too high values will degrade the performance of other processes on the server. However, this might be desirable if the server is dedicated for the QlikView Server.
It is assumed that the physical memory up to the Low limit is reserved for the QlikView Server.
Do not change these settings unless being well acquainted with the Windows Virtual Memory Manager! Read more about working sets in the Microsoft Windows documentation.
Low
The minimum of the physical amount of RAM, in percentage, which can be used by an application. To set the minimum amount of memory, enter a suitable figure in this text box.
If the use of RAM exceeds this value, Windows is allowed to swap the memory that the QlikView Server is using to disk.
Default value: 70 %.
High
The maximum of the physical amount of RAM, in percentage, which can be used by an application. To set the maximum amount of memory, enter a suitable figure in this text box.
If the use of RAM exceeds this value, Windows should swap the memory that the QlikView Server is using to disk.
Default value: 90 %.
Document
Object Calculation Time Limit
The maximum amount of time that the QlikView Server will attempt to calculate a chart object can be configured. The time is set in seconds of total CPU time. To set the maximum amount of time, enter a suitable figure in this text box.
The total CPU time is not the same as the elapsed real time on a computer with parallel processing technology.
Default value: 60 seconds (of total CPU time).
Administering QlikView - QlikView, April 2019 116
6 System
Max Symbols in Charts
The maximum number of symbols to plot in one chart can be configured. To set the maximum number of symbols, enter a suitable figure in this text box.
Default value: 100.
Allow Document Auto Load
It is possible to configure so that documents are automatically loaded and unloaded. To enable automated document loading and unloading, tick this check box. To disable automated document loading and unloading, untick this check box.
LoggingOn the Logging tab, the settings for the session, performance, event, and audit logs can be managed.
Logging
Enable Session Logging
To enable the detailed session logging from the QlikView Server, tick this check box. The stored log file will be named Session-Stats.log.
Enable Performance Logging Every
To enable the performance logging from the QlikView Server, tick this check box, and enter a suitable logging interval, between 1 and 1440 minutes (24 hours). The stored log file will be named Performance.log.
Default value: 5 minutes.
Enable Event Logging
To enable mirroring to a log file of the entries from the QlikView Server to the Windows event log, tick this check box. The stored file will be named Events.log.
Enable Audit Logging
To enable the logging of user selections, clear selections, sheet activation, the application of bookmarks, report access, and the maximization of objects, tick this check box. The stored file will be named as described in Log Folder.
To enable the logging to include more details (for example, all selections that come with a bookmark), tick this check box:
l Enable Extensive Audit Logging
Log FolderThe folder in which the QlikView Server will create and store the log file can be configured. To select a folder,
enter the valid and absolute path in this text box, or click on the Browse icon, , and choose the folder in the
Choose Folder dialog.
Default value: C:\ProgramData\QlikTech\QlikViewServer
Administering QlikView - QlikView, April 2019 117
6 System
Event Log VerbosityThis setting controls how much information that will be written to the event log files. To configure the verbosity level, select one of the following options:
l Low
l Medium
l High
The high log level might cause heavy load on the system.
Split FilesThis setting controls how often the log files are to be split, that is, a new file is created and used, in order to avoid having too large files. When this setting is used, all log files are split: event logs, session logs, performance logs, server-side extension (SSE) logs, and audit logs. To configure the recurrence time for splitting files, select one of the following options:
l Never, meaning that the event log files are never split, the same one file is always used.
l Daily, meaning that each event log file contains information from a day, at maximum.
l Weekly, meaning that each event log file contains information from a week, at maximum.
l Monthly, meaning that each event log file contains information from a month, at maximum.
l Yearly, meaning that each event log file contains information from a year, at maximum.
For the change in Split File setting to become effective you must restart QlikView Server (QVS).
SecurityOn the Security tab, the settings for authentication, authorization, communication, and cluster license can be managed.
Authentication
Clients
It is possible to select whether the QlikView Server (QVS) should use Windows authentication, when possible, or not. To configure the type of authentication, select one of the following options:
l Always Anonymous, meaning that anonymous communication is forced.
l Allow Anonymous (default), meaning that authentication is used whenever possible.
l Prohibit Anonymous, meaning that authentication is forced.
Administering QlikView - QlikView, April 2019 118
6 System
Make sure that this selection is consistent with any other security setting that may be specified in the virtual directories of the web server. For example, if the Microsoft IIS allows anonymous communication, but the QlikView Server does not, the client user will get an error message when trying to open the application through the virtual directory.
Anonymous Account
By default, the QVS will create the anonymous account on the local machine. If a cluster is used, the anonymous account should be changed to be a domain account, so that the servers in the cluster can share the account. This setting is only applicable if the server is running in NTFS mode. To configure the type of account, select one of the following options:
l On Domain
l On Local Computer
AuthorizationThe mode that the QVS will use when authorizing access to documents can be configured. Traditionally and by default, the QVS uses the NTFS Authorization mode, which means that the Windows operating system controls the file (document) access for users and groups through the NTFS security settings. The DMS Authorization mode uses the QVS Document Metadata Service (DMS) facility to authorize the file (document) access for users and groups. When this mode is used, the QlikView Publisher (QVP) Directory Service Connector (DSC) must be accessible, in order to resolve group membership. To select which Directory Service Connector to use, select one of the following options:
l NTFS Authorization, meaning that the Windows operating system controls the file access.
l DMS Authorization, meaning that the QlikView Server DMS controls the file access.
Miscellaneous
Allow Dynamic Data Update
To enable macros or external processes to update parts of the data in semi-real time, tick this check box.
This feature allows dynamic updates of the data in the currently loaded document. It is intended for QlikView Administrators to feed limited amounts of data to a QlikView document from a single source without running a reload of the document.
The uploaded information is only stored in RAM, so any data added or updated using the Allow Dynamic Data Update feature is lost, if a reload of the document is performed.
It is recommended to disable the Allow Dynamic Data Update feature, since it can be time-consuming.
Administering QlikView - QlikView, April 2019 119
6 System
The Allow Dynamic Data Update feature is not supported in clustered QlikView Server (QVS) environments.
Default value: Disabled (unticked check box)
Allow Macro Execution on Server
To enable macros to execute on the QVS, tick this check box.
This feature applies to AJAX clients, since macros run on the QVS when using AJAX and in the client when using QlikView Desktop or the Microsoft Internet Explorer plugin.
If disabled, macros that use AJAX are blocked.
Default value: Enabled (ticked check box)
Allow Unsafe Macro Execution on Server
To enable unsafe macros to execute on the QVS, tick this check box.
Unsafe macros are not allowed on reload tasks.
Default value: Disabled (unticked check box)
Allow Admin Using Name and Password
If the QVP is running in a separate Windows Active Directory, this setting has to be enabled to be able to connect to the QVS service. Also, the account used to connect must be part of the QlikView Administrators group. To enable the support of the separate Windows Active Directory, tick this check box.
If this setting cannot be enabled through the QMC, instead, it can be added in the QlikView settings file, Settings.ini, which is located in the directory C:\ProgramData\QlikTech\QlikViewServer\. Add AllowAlternateAdmin=1 in the Settings 7 section.
Enable Server Push Over HTTP Tunnels
To enable graceful document refresh over HTTP tunnels, tick this check box.
The Enable Server Push Over HTTP Tunnels feature only applies when a) using QlikView Desktop or the Microsoft Internet Explorer plugin and b) the communication is tunneled.
If enabled, the client keeps asking the QVS if there is an available refresh, which consumes bandwidth.
If disabled, the user is not informed of an available refresh until actively performing some other operation.
Default value: Disabled (unticked check box)
Administering QlikView - QlikView, April 2019 120
6 System
Compress Network Traffic
To let large packages be compressed in communication between the client and the QlikView Server, tick this check box.
The Compress Network Traffic feature should always be enabled.
Default value: Enabled (ticked check box)
Allow Extensions
To enable QlikView Extensions to be added to documents, tick this check box.
If enabled, extensions (normal or document) – residing in the proper Extensions folder – are available and used.
If disabled, the QVS does not check for or use any extensions.
Default value: Enabled (ticked check box)
Cluster LicenseAll QVSs in a cluster must have the same build number and share the same document root. When upgrading to a new version of QlikView, this is normally not a problem, if all servers are stopped, upgraded, and re-started in one go. However, if not all servers are upgraded at the same time, the build number and document root have to be taken into consideration, since the original cluster is split into two sub-clusters during the upgrade process – one that runs the original version of QlikView and one that runs the new version of QlikView – until all servers have been successfully upgraded to the new version of QlikView. Both sub-clusters share the existing cluster license, including all CALs.
The process for upgrading a single server in a cluster to a new version of QlikView is as follows:
1. Open the QlikView Management Console (QMC) on any server in the cluster.
2. Fill in the Alternate Build Number and Alternate Document Root fields (see below for details). The field values are automatically propagated to all servers in the cluster.
3. Stop the server that is to be upgraded.
4. Install the new version of QlikView on the server that was stopped.
5. Open the Settings.ini file (normally located in the C:\ProgramData\QlikTech\QlikViewServer folder) on the server where the new version of QlikView was installed.
6. Edit the path to the root folder (“DocumentDirectory”), so that it points to the same folder as the Alternate Document Root field in the QMC.
7. Start the upgraded server.
Alternate Build Number
In this text box, enter the build number for the new version of QlikView that is installed on the servers in the cluster that are upgraded.
The build number is part of the QlikView version number. The format of the QlikView version number is as follows:
<Major release version>.<Service release version>.<Build number>.0
Administering QlikView - QlikView, April 2019 121
6 System
l 12: Major release version (in this case, QlikView 12)
l 0: Service release version (in this case, QlikView 12.0)
l 11154: Build number
l 0: Always zero
Alternate Document Root
In this text box, enter the document root to be used by the servers in the cluster that are upgraded to the new version of QlikView.
The document root for the sub-cluster that runs the new version of QlikView must differ from the document root for the sub-cluster that runs the original version of QlikView (that is, the sub-clusters must not share the same document root).
Folder AccessOn the Folder Access tab, Supervisors and QlikView Publisher (QVP) Document Administrators can be managed.
The System tab is unavailable for Document Administrators and Supervisors. This means that they cannot access supporting tasks.
Manage Supervisors and Document AdministratorsThe user access to the whole server (meaning all folders on the QlikView Server, including the root folder and the mounted folders), the root folder, or mounted folders, can be managed.
To manage the user access, add or remove Supervisors or QlikView Publisher (QVP) Document Administrators, do as follows:
To manage users and groups, click on the Manage Users dialog icon, .
l Default Scope
Select the directory to be searched, in the drop-down list.
l Search for Users and Groups
Enter the desired search term(s) in this text box, to find a user or a group, and click on the Search icon,
.
l Search Result
This box presents the result of the search, using the desired criteria.
l Add >
To add a user or a group, click on it in the Search Result box and click on this button. Several items can be added at the same time.
Administering QlikView - QlikView, April 2019 122

6 System
l Selected Users
This box presents the selected users and groups.
l < Delete
To deselect a user or a group, click on it in the Selected Users box and click on this button. Several items can be deselected at the same time.
l << Delete All
To deselect all of the users and groups from the Selected Users box, click on this button.
The specifically defined folders are configured in Folders.
Default values:
Name Path
Whole server N/A
Root folder C:\ProgramData\QlikTech\Documents
AlertsOn the Alerts tab, e-mail recipients to be alerted, if the reload of a document was unsuccessful, can be added and deleted.
This tab is just available when running only the QlikView Server, that is, not running the QlikView Publisher (QVP).
Alerts are not triggered when performing a reload using a command line statement.
Address
To add an e-mail recipient for the unsuccessful reload alerts, click on the Add icon, , and enter the e-mail address in this text box.
To delete a recipient, click on the Delete icon, .
Login
Server LoginNormally, the remote system will be accessed from the service account running this management service. If this is not feasible, for example, when the remote system is located on an different Windows Active Directory, it is possible to enter the user name and password for a valid remote user. To enable the management of a service installed on a remote server, configure the following text boxes:
Administering QlikView - QlikView, April 2019 123

6 System
l User Name
Enter the name a of a user that is member of the QlikView Administrators group on the remote server.
l Password
Enter the password for the entered User Name.
Distribution ServicesIn the Distribution Services folder, the QlikView Distribution Service (QDS) cluster(s), that is, the component that prepares and distributes the QlikView documents can be viewed and edited. A QlikView Publisher (QVP) installation can contain many QDSs located on different machines. Hence, these components can also be added and deleted.
A cluster might include one or more nodes.
Functions
Add
To create a QDS entry, click on the Add icon, , to the right in the pane, and enter the URL in the new text box. The new entry will be available in the tree view in the left pane.
Example:
http://<mycomputer>:4720/qtxs.asmx
Delete
To entirely remove a configured entry from the list, click on the Delete icon, .
ApplySelect Apply to confirm the change.
CancelSelect Cancel to revert the change.
ViewTo view or configure the settings of a QDS, in the right pane, click on the entry in the tree view. Each entry contains the following tabs:
l Summary
l General
l Alert E-mail
l E-mail Templates
Administering QlikView - QlikView, April 2019 124
6 System
l Advanced
l Login
Click on each tab label for more information.
SummaryOn the Summary tab, the address to the current QlikView Distribution Service (QDS) is presented.
GeneralOn the General tab, the host name, port number, level of logging, Directory Service Connector (DSC), and source folder settings of the QlikView Distribution Service (QDS) can be managed.
Cluster
Name
The name of the QlikView Distribution Service (QDS) cluster. To edit the name, enter a name in this text box.
Add
To add an additional QDS node, click on the Add icon, , to the right in the pane, and configure the following new text box:
l URL
Enter the path to the QDS in this text box.
Example:
http://<mycomputer>:4720/qtxs.asmx
Delete
To entirely remove a configured entry from the list, click on the Delete icon, .
Settings for QDS
Directory Service Connector
Select the DSC to connect to in the drop-down list.
Application Data Folder
The path to the folder in which the data for the QDS is stored. If the QDS is part of a cluster, this path must be changed. The default location after installation may differ depending on the operating system.
Default value: C:\ProgramData\QlikTech\DistributionService.
To select a folder, enter the valid and absolute path in this text box, or click on the Browse icon, , and choose
the folder in the Choose Folder dialog.
Logging Level
The log level of the service. Select one of the following options:
Administering QlikView - QlikView, April 2019 125
6 System
l No Logging
l Normal Logging
l Debug Logging
The debug logging level might cause heavy load on the system.
Security
To enable the setting to use secure socket layer communication for the QDS, tick the Use SSL for Distribution Service Communication check box.
Source Folders
The root folder for the user documents in the QlikView Server (QVS) and the source folder for the source documents in the QlikView Distribution Service (QDS) should never use the same folder path.
Disable Task Triggers for Document Administrators
To deny all QlikView Publisher (QVP) Document Administrators to activate any triggers, when creating or editing tasks and triggers, tick this check box. To allow all document administrators to activate any triggers, when creating or editing tasks and triggers, untick this check box.
Add
Source Documents are documents that contain data that is to be made accessible to end-users in the form of distributed User Documents. Source Folders are folders in which the Source Documents reside, and the paths and access rights to them can be configured.
To add an additional source folder entry, click on the Add icon, , to the right in the pane, and configure the following new text boxes:
l Path
To select a folder, enter the valid and absolute path in this text box, or click on the Browse icon, , and
choose the folder in the Choose Folder dialog.
The default location after installation may differ depending on the operating system.
Default value: C:\ProgramData\QlikTech\SourceDocuments.
l Users and Groups
To give QlikView Publisher (QVP) Document Administrators access to the specifically defined source folder(s), add or remove users, as follows:
To manage users and groups, click on the Manage Users dialog icon, .
l Default Scope
Select the directory to be searched, in the drop-down list.
Administering QlikView - QlikView, April 2019 126
6 System
l Search for Users and Groups
Enter the desired search term(s) in this text box, to find a user or a group, and click on the
Search icon, .
l Search Result
This box presents the result of the search, using the desired criteria.
l Add >
To add a user or a group, click on it in the Search Result box and click on this button. Several items can be added at the same time.
l Selected Users
This box presents the selected users and groups.
l < Delete
To deselect a user or a group, click on it in the Selected Users box and click on this button. Several items can be deselected at the same time.
l << Delete All
To deselect all of the users and groups from the Selected Users box, click on this button.
l Alert E-mail
To send alert e-mails to the configured document administrator(s), tick this check box.
Delete
To entirely remove a configured entry from the list, click on the Delete icon, .
To shut down an entry on the QDS, use the QDS shutdown button in the QlikView Management Console. This shuts down the QDS in a controlled way, allowing tasks to run to completion during a grace period before the services shut down. See Services (page 11)
Alert E-mailOn the Alert E-mail tab, e-mail recipients for the QlikView Distribution Service (QDS) alerts can be added and deleted.
Alert E-mail Recipients (separated by semicolon)To add an e-mail recipient for the QDS alerts, enter the e-mail address in this text box. To add more recipients, use the separator operator, ; (semicolon). To delete an recipient, edit this text box.
E-mail TemplatesOn the E-mail Template tab, the e-mail templates for the various messages that can be sent from the QlikView Publisher (QVP) can be managed. The messages include the following:
Administering QlikView - QlikView, April 2019 127
6 System
l Attachment (HTML)
l Attachment (Plain)
l Notify (HTML)
l Notify (Plain)
l Alert (HTML)
l Alert (Plain)
The contents of each template can be edited using html, using any of the following variables, which must be inside square brackets:
l [DocTitle], meaning the title of the document
l [DateTime], meaning the current date and time
l [Location], meaning the QlikView Server folder to which the document has been distributed
l [ResourceName], meaning the QVP resource to which the document has been distributed
l [TaskName] or [JobName], meaning the name of the task
l [Log], meaning the log of the task
Attachment (HTML)This template is used when documents are e-mailed.
Subject
Default value: QlikView Publisher: [DocTitle] is attached to this message.
Body
Default value: Your document "[DocTitle]" has been distributed by QlikView Publisher. The document is attached to this message.<br><br>Time:
[DateTime]<br>
Attachment (Plain)This template is used when documents are e-mailed.
Subject
Default value: QlikView Publisher: [DocTitle] is attached to this message.
Body
Default value: Your document "[DocTitle]" has been distributed by QlikView Publisher. The document is attached to this message. Time: [DateTime]
Notify (HTML)This template is used when documents are distributed.
Subject
Value: QlikView Publisher Summary
The subject for notification email cannot be modified.
Administering QlikView - QlikView, April 2019 128
6 System
Body
Default value: Your document "[DocTitle]" has been distributed by QlikView Publisher.<br/><br/>Location: <a href="[Location]">
[Location]</a><br/>Time: [DateTime]
Notify (Plain)This template is used when documents are distributed.
Subject
Value: QlikView Publisher Summary
The subject for notification email cannot be modified.
Body
Default value: Your document "[DocTitle]" has been distributed by QlikView Publisher. The document is attached to this message.<br><br>Time:
[DateTime]<br>
Alert (HTML)This template is used when e-mail is sent as defined in Alert E-mail.
Subject
Default value: QlikView Publisher: [DocTitle] is attached to this message.
Body
Default value: Your document "[DocTitle]" has been distributed by QlikView Publisher. The document is attached to this message. Time: [DateTime]
Alert (Plain)This template is used when e-mail is sent as defined in Alert E-mail.
Subject
Default value: QlikView Publisher: [DocTitle] has been distributed.
Body
Default value: Your document "[DocTitle]" has been distributed by QlikView Publisher.<br/><br/>Location: <a href="[Location]">
[Location]</a><br/>Time: [DateTime]
AdvancedOn the Advanced tab, the QlikView Distribution Service (QDS) handling of the QlikView engine (QVB.exe) can be managed.
Administering QlikView - QlikView, April 2019 129

6 System
QlikView Engine
Section AccessWhen section access is defined in the documents, it may be necessary to configure a specific entry for the QDS to avoid that it interfere with the work of the task. By default, the QDS will apply the section access associated to the Windows user under which the service run. This may be overridden at each task. If a default override is preferable, it can be defined by configuring the login credentials in the following text boxes:
User Name
To configure the user name, enter the desired credentials in this text box.
Password
To configure the password, enter the desired credentials in this text box.
Cluster Node SettingsWhen a distribution group is activated, this section provides QlikView Distribution Service (QDS) URL as well as lists the configuration defined in the DistributionGroupDefinition.xml file.
For each QDS in a publisher group, the following is configured:
l Max Simultaneous Engines (For Dist) - The maximum number of simultaneous QlikView Batch instances (default 4).
l Max Simultaneous Engines (For Admin) - The maximum number of simultaneous QlikView Batch readers (default 20).
l Number of Dedicated Engines - The number of dedicated QlikView Batch instances (default 0).
l Run Dedicated Tasks Alone- Whether to run dedicated tasks alone or not (default false).
l Dedicated Task Grace Time- If Run Dedicated Tasks Alone is set to Yesand this setting means that no regular task may be started by this QDS within number of minutes or less until the nearest dedicated task is scheduled (default 0).
l Distribution Groups - List of available distribution groups
Distribution GroupsWhen a distribution group is activated, this section provides the QDS URL as well as list the group(s) this QDS node is part of.
Work OrderTo send a work order to the designated QDS, click on the Send Work Order button.
Login
Server LoginNormally, the remote system will be accessed from the service account running this management service. If this is not feasible, for example, when the remote system is located on an different Windows Active Directory, it is possible to enter the user name and password for a valid remote user. To enable the management of a service installed on a remote server, configure the following text boxes:
Administering QlikView - QlikView, April 2019 130
6 System
l User Name
Enter the name a of a user that is member of the QlikView Administrators group on the remote server.
l Password
Enter the password for the entered User Name.
Directory Service ConnectorsIn theDirectory Service Connectors (DSC) folder, the function responsible for communicating with each of the Directory Services, which keep track of all the users and groups in the QlikView environment, can be managed.
Functions
Add
To create a QlikView DSC cluster entry, click on the Add icon, , to the right in the pane, and enter the URL in the new text box. The new entry will be available in the tree view in the left pane.
Example:
http://<mycomputer>:4730/qtds.asmx
A cluster might include one or more nodes.
Delete
To entirely remove a configured entry from the list, click on the Delete icon, .
ApplySelect Apply to confirm the change.
CancelSelect Cancel to revert the change.
ViewTo view or configure the settings of a DSC, in the right pane, click on the entry in the tree view. Each entry contains the following tabs:
l Summary
l General
l Login
Click on each tab label for more information.
To view or configure the settings of a service of a Directory Service Providers (DSP), in the right pane, click on the entry in the tree view.
Administering QlikView - QlikView, April 2019 131
6 System
SummaryOn the Summary tab, the address to the current QlikView Directory Services Connector (DSC) is presented.
GeneralOn the General tab, the host name, port number, level of logging, and clustering settings of the QlikView Directory Service Connector (DSC) can be managed.
Cluster
Name
The name of the DSC cluster. To edit the name, enter a name in this text box.
Add
To add an additional DSC cluster node entry, click on the Add icon, , to the right in the pane, and configure the following new text boxes:
l URL
Enter the path to the DSC in this text box.
Default value: http://<mycomputer>:4730/qtds.asmx
Delete
To entirely remove a configured entry from the list, click on the Delete icon, .
Logging LevelThe log level of the service. Select one of the following options:
l No Logging
l Normal Logging
l Debug Logging
The debug logging level might cause heavy load on the system.
Login
Server LoginNormally, the remote system will be accessed from the service account running this management service. If this is not feasible, for example, when the remote system is located on an different Windows Active Directory, it is possible to enter the user name and password for a valid remote user. To enable the management of a service installed on a remote server, configure the following text boxes:
l User Name
Enter the name a of a user that is member of the QlikView Administrators group on the remote server.
Administering QlikView - QlikView, April 2019 132
6 System
l Password
Enter the password for the entered User Name.
Directory Service ProvidersIn the Directory Service Providers (DSP) folders, the configuration of the following DSPs are described:
l Active Directory
l Custom Directory
l Configurable ODBC
l Configurable LDAP
l Local Directory
l Windows NT
Click on each folder label for more information.
Active DirectoryThe Active Directory service provider can connect to any Active Directory available through the underlying Windows operating system. This folder includes only a General tab.
Directory Service
AddTo add a Windows Active Directory entry, click on the Add icon, , to the right in the pane, and configure the following text boxes:
l Path
To configure the path to the directory service, click on the Get Default icon, , to use the default path, or enter a valid path in this text box.
Default value: LDAP://qliktech.com.
l User Name
To configure the user name used for accessing the directory service, enter the desired credentials in this text box.
l Password
To configure the password used for accessing the directory service, enter the desired credentials in this text box.
l Settings
To configure the Directory Service Provider (DSP) Settings, open the dialog by
clicking on the Edit icon, , and enter the desired values in the following text boxes:
Administering QlikView - QlikView, April 2019 133
6 System
l Cache Expiry in Minutes
Set the time for how long the queries to the directory service should be cached.
Default value: 60 (minutes).
l Service Timeout in Seconds
Set the timeout for the connection to the directory service.
Default value: 30 (seconds).
DeleteTo entirely remove a configured entry from the list, click on the Delete icon, .
Custom DirectoryThe Custom Directory service provider does not rely on any external system for the users or groups. All data is stored within the QlikView Publisher Repository (QVPR). Unlike the other Directory Service Providers (DSP), the Custom Directory supports authentication through the QlikView AccessPoint, and therefore requires user and password. By default, there is no Custom Directory installed. In order to use Custom Users, a DSP for Custom Users must first be added. The Custom Directory folder contains the following tabs:
l General, where the Custom Directory service settings can be managed.
l Users, where the settings of users and groups can be managed.
General
On the General tab, the Custom Directory service settings can be managed.
Directory Service
AddTo add a Custom Directory entry, click on the Add icon, , to the right in the pane, and configure the following text boxes:
l Path
To configure the path to the directory service, click on the Get Default icon, , to use the default path, or enter a valid path in this text box.
This text box should not be empty.
Default value: Custom.
l User Name
To configure the user name used for accessing the directory service, enter the desired credentials in this text box.
l Password
Administering QlikView - QlikView, April 2019 134
6 System
To configure the password used for accessing the directory service, enter the desired credentials in this text box.
l Port
To configure the port used for accessing the directory service, enter the desired credentials in this text box.
Default value: 4735.
DeleteTo entirely remove a configured entry from the list, click on the Delete icon, .
Users
On the Users tab, the settings of users and groups of the Customer Directory can be managed. There is a possibility to create customized users and groups, using the Custom Usersand Custom User Groups functions, respectively. The information about the functions is stored in the following file:
C:\ProgramData\QlikTech\DirectoryServiceConnector\CustomDataDirectory.xml
Functions
Custom UsersTo add a Custom User entry, click on the Add icon, , to the right in the pane, and configure the following text boxes:
l User Name
To configure the user name used for accessing the directory service, enter the desired credentials in this text box.
l Full Name
To configure the full name of the custom user, enter the desired credentials in this text box.
l Password
To configure the password used for accessing the directory service, enter the desired credentials in this text box.
l E-mail
To configure the e-mail address of the custom user, enter the desired credentials in this text box.
l Groups
To configure the group(s) that the custom user should belong to, do the following:
To manage groups, click on the Manage Groups dialog icon, .
l Default Scope
Select the directory to be searched, in the drop-down list.
Administering QlikView - QlikView, April 2019 135
6 System
l Search for Groups
Enter the desired search term(s) in this text box, to find a group, and click on the Search icon,
.
l Search Result
This box presents the result of the search, using the desired criteria.
l Add >
To add a group, click on it in the Search Result box and click on this button. Several items can be added at the same time.
l Selected Groups
This box presents the selected groups.
l < Delete
To deselect a group, click on it in the Selected Groups box and click on this button. Several items can be deselected at the same time.
l << Delete All
To deselect all of the groups from the Selected Groups box, click on this button.
l Enabled
To enable the custom user, tick this check box. To disable the custom user, untick this check box.
Any change of the settings of a custom user will result in that a message, The password must be reset in order to save the changes., is shown, indicating that a valid password must be re-entered in the Password field.
DeleteTo entirely remove a configured entry from the list, click on the Delete icon, .
Custom User GroupsTo add a Custom User Group entry, click on the Add icon, , to the right in the pane, and configure the following text boxes:
l Group Name
To configure the name of the custom user group used for accessing the directory service, enter the desired credentials in this text box.
l Users
To configure the user(s) and group(s) that should belong to the custom user group, do the following:
To manage users, click on the Manage Users dialog icon, .
Administering QlikView - QlikView, April 2019 136

6 System
l Default Scope
Select the directory to be searched, in the drop-down list.
l Search for Groups
Enter the desired search term(s) in this text box, to find a group, and click on the Search icon,
.
l Search Result
This box presents the result of the search, using the desired criteria.
l Add >
To add a group, click on it in the Search Result box and click on this button. Several items can be added at the same time.
l Selected Groups
This box presents the selected groups.
l < Delete
To deselect a group, click on it in the Selected Groups box and click on this button. Several items can be deselected at the same time.
l << Delete All
To deselect all of the groups from the Selected Groups box, click on this button.
DeleteTo entirely remove a configured entry from the list, click on the Delete icon, .
Configurable ODBCThe Configurable ODBC directory service provider can connect to ODBC databases. This folder includes only a General tab.
The ODBC database has to have two tables, or two views; one for entities and one for groups. The entity table (the name of which is defined by the Entity Table Database Name setting below) has to contain the following fields:
l entityid (unique identifier, suitable for primary key)
l name (string) (the name of this field is defined by the Entity Name setting below)
l descr (string)
l email (string)
The groups table (the name of which is defined by the Groups Table Database Name setting below) has to contain the following fields, which together create a unique identifier:
l groupid
l memberid
Administering QlikView - QlikView, April 2019 137

6 System
Example
Groups table
Groupid Memberid
1001 101
1001 102
1001 103
1001 104
1002 104
1002 105
Entity table
Entityid Name Descr Email
101 sandra.franklin Sandra Franklin [email protected]
102 michael.milliken Michael Milliken [email protected]
103 lucille.pender Lucille Pender [email protected]
104 dustin.plunkett Dustin Plunkett [email protected]
105 benjamin.mitchell Benjamin Mitchell [email protected]
1001 users Users
1002 admins Administrators
In this example, everyone but Benjamin Mitchell is member of the group named Users, and Dustin Plunkett and Benjamin are the only members of the group called Administrators.
Directory Service
AddTo add a Configurable ODBC entry, click on the Add icon, , to the right in the pane, and configure the following text boxes:
l Path
To configure the path to the directory service, click on the Get Default icon, , to use the default path, or enter a valid path in this text box.
Default value: ODBC://localhost.
l User Name
Administering QlikView - QlikView, April 2019 138
6 System
To configure the user name used for accessing the directory service, enter the desired credentials in this text box.
l Password
To configure the password used for accessing the directory service, enter the desired credentials in this text box.
l Settings
To configure the Directory Service Provider (DSP) Settings, open the dialog by
clicking on the Edit icon, , and enter the desired values in the following text boxes:
l Service Timeout in Seconds
Set the timeout for the connection to the directory service.
Default value: 30 (seconds).
l Directory Label
Set the label of the directory service to connect to.
Default value: DB DSP.
l Entity Name
Set the name of the entity to connect to.
Default value: entity_name.
l Entity Table Database Name
Set the name of the entity table to connect to.
Default value: entity.
l Groups Table Database Name
Set the name of the table named groups to connect to.
Default value: groups.
l Data Source Name
Set the name of the ODBC driver.
Default value: MySQL ODBC 5.1 Driver.
l Connection Database Name
Set the name of the ODBC database to connect to.
Default value: dbname.
l Database Backend
Set the type of connection to the database:
Administering QlikView - QlikView, April 2019 139
6 System
l ODBC: This connection type makes the system use the .NET OdbcConnection class.≤ http://msdn.microsoft.com/en-us/library/system.data.odbc.odbcconnection.aspx
l SQL: This connection type makes the system use the .NET SqlConnection class. Enter the custom connection string in the Override Connection String field.≤ http://msdn.microsoft.com/en-us/library/system.data.sqlclient.sqlconnection.aspx
l Oracle: This connection type makes the system use the .NET OracleConnection class. Enter the custom connection string in the Override Connection String field.≤ http://msdn.microsoft.com/en-us/library/system.data.oracleclient.oracleconnection.aspx
Default value: ODBC.
l Override Connection String
If entering a string in this field, the entered value will be used, while the settings in Connection Database Name and Data Source Name will be ignored. The variables {user} and {pwd} can be used in the connection string. The variables are automatically replaced by the contents of the User Name and Password text boxes and can be used independently of each other.
Example:
Server=MyServer;Database=MyDB;User Id={user};Password={pwd};
If not entering a string in this field, the Database Backend drop-down will be ignored and the connection to the database will be set to ODBC.
Default value: Driver={Microsoft Access Driver (*.mdb, *.accdb)};Dbq=C:\AccessTest.accdb;.
l Cache Expiry in Minutes
Set the time for how long the queries to the directory service should be cached.
Default value: 15 (minutes).
Valid value(s) must be entered, which might be indicated with a red asterisk and a tool-tip error message.
DeleteTo entirely remove a configured entry from the list, click on the Delete icon, .
Configurable LDAPThe Configurable LDAP directory service provider can connect to any generic Lightweight Directory Access Protocol (LDAP). This folder includes only a General tab.
Administering QlikView - QlikView, April 2019 140

6 System
Directory Service
AddTo add a Configurable LDAP entry, click on the Add icon, , to the right in the pane, and configure the following text boxes:
l Path
To configure the path to the directory service, click on the Get Default icon, , to use the default path, or enter a valid path in this text box.
Default value: LDAP://localhost.
l User Name
To configure the user name used for accessing the directory service, enter the desired credentials in this text box.
l Password
To configure the password used for accessing the directory service, enter the desired credentials in this text box.
l Settings
To configure the Directory Service Provider (DSP) Settings, open the dialog by
clicking on the Edit icon, , and enter the desired values in the following text boxes:
l Account Name Property Name
Map the name of the LDAP property to the corresponding account name.
Default value: sAMAccountName.
l Cache Expiry in Minutes
Set the time for how long the queries to the directory service should be cached.
Default value: 60 (minutes).
l Directory Label
Set the unique name of the directory service instance.
Default value: DSP1.
l Display Name Property Name
Map the name of the LDAP property name to the corresponding display name.
Default value: name.
l Distinguished Name Property Name
Map the name of the LDAP property name to the corresponding distinguished name.
Administering QlikView - QlikView, April 2019 141

6 System
Default value: distinguishedName.
l E-mail Property Name
Map the name of the LDAP property to the corresponding e-mail address.
Default value: mail.
l Group Member Property Name
Map the name of the LDAP property to the corresponding group member.
l Group Object Class Value
Set the class value of the LDAP group object.
Default value: group.
l ID Property Name
Map the name of the LDAP property to the corresponding ID.
Default value: sAMAccountName.
l LDAP Filter
Set the LDAP filter to use when searching for user objects.
Default value: (&(!(objectclass=computer))(objectGUID=*)).
l Service Timeout in Seconds
Set the timeout for the connection to the directory service.
Default value: 30 (seconds).
l User Member of Property Name
Map the name of the LDAP property to the corresponding user member.
Default value: memberof.
l User Object Class Value
Set the class value of the LDAP user object.
Default value: user.
Valid value(s) must be entered, which might be indicated with a red asterisk and a tool-tip error message.
DeleteTo entirely remove a configured entry from the list, click on the Delete icon, .
Administering QlikView - QlikView, April 2019 142
6 System
Local DirectoryThe Local Directory service provider can connect to the local users on a selected machine. This folder includes only a General tab.
Directory Service
AddTo add a Local Directory entry, click on the Add icon, , to the right in the pane, and configure the following text boxes:
l Path
To configure the path to the directory service, click on the Get Default icon, , to use the default path, or enter a valid path in this text box.
Default value: local://<mycomputer>.
l User Name
To configure the user name used for accessing the directory service, enter the desired credentials in this text box.
l Password
To configure the password used for accessing the directory service, enter the desired credentials in this text box.
l Settings
To configure the Directory Service Provider (DSP) Settings, open the dialog by
clicking on the Edit icon, , and enter the desired values in the following text boxes:
l Cache expiry in minutes
Set the time for how long the queries to the directory service should be cached.
Default value: 15 (minutes).
DeleteTo entirely remove a configured entry from the list, click on the Delete icon, .
Windows NTThe Windows NT directory service provider can connect to any Windows NT Directory available through the underlying Windows operating system. This folder includes only a General tab.
Directory Service
AddTo add a Windows NT entry, click on the Add icon, , to the right in the pane, and configure the following text boxes:
Administering QlikView - QlikView, April 2019 143
6 System
l Path
To configure the path to the directory service, click on the Get Default icon, , to use the default path, or enter a valid path in this text box.
Default value: WinNT://AKQUINET.
l User Name
To configure the user name used for accessing the directory service, enter the desired credentials in this text box.
l Password
To configure the password used for accessing the directory service, enter the desired credentials in this text box.
l Settings
To configure the Directory Service Provider (DSP) Settings, open the dialog by
clicking on the Edit icon, , and enter the desired values in the following text boxes:
l Cache Expiry in Minutes
Set the time for how long the queries to the directory service should be cached.
Default value: 15 (minutes).
Valid value(s) must be entered, which might be indicated with a red asterisk and a tool-tip error message.
DeleteTo entirely remove a configured entry from the list, click on the Delete icon, .
QlikView Web ServersIn the QlikView Web Servers folder, the QlikView Web Server(s) (QVWS) can be viewed and edited. A QlikView Publisher (QVP) installation can contain many QVWSs located on different machines. Hence, these components can also be added and deleted. A QVWS handles the following tasks:
l Hosting of the QlikView AccessPoint
l Load balancing of the QlikView Server (QVS)
l Keeping track of open sessions for the AJAX clients
l Handling of authentication (optional)
l Handling of general web content (optional)
A QVWS can either be installed as a windows service or to run under a Microsoft IIS; in the latter case, the hosting of web content is not relevant.
Administering QlikView - QlikView, April 2019 144
6 System
If using a Microsoft IIS web server instead of the QVWS, the QVWS resource should still have the Running status and the QVWS service under the Windows services applet should not be running or installed.
Functions
Add
To create a QlikView Web Server entry, click on the Add icon, , to the right in the pane, and enter the URL in the new text box. The new entry will be available in the tree view in the left pane.
Default value: http://<mycomputer>:4750/qvws.asmx.
Delete
To entirely remove a configured entry from the list, click on the Delete icon, .
ApplySelect Apply to confirm the change.
CancelSelect Cancel to revert the change.
ViewTo view or configure the settings of a QlikView Web Server, in the right pane, click on the entry in the tree view. Each entry contains the following tabs:
l Summary
l General
l Authentication
l AccessPoint
l AJAX
l Web
l Login
Click on each tab label for more information.
SummaryOn the Summary tab, the address to the current QlikView Web Server (QVWS) is presented.
GeneralOn the General tab, the host name, port number, level of logging, communication, and directory service connector settings of the current QlikView Web Server (QVWS) can be managed.
Administering QlikView - QlikView, April 2019 145
6 System
Location
Name
The name of the QVWS. To edit the name, enter a name in this text box.
URL
The Host Name and the Port of the server where the service is running. To edit the server address, enter a valid URL in this text box.
Default value: http://<mycomputer>:4750/qvws.asmx.
Logging LevelThe log level of the service. Select one of the following options:
l Low
l Medium
l High
The high log level might cause heavy load on the system.
Enable Utilization Logging
This log presents the utilization of the QlikView Servers, in order to supervise the load balance function in the QlikView AccessPoint. To enable the utilization logging, tick this check box. To disable the utilization logging, untick this check box.
Communication
Port
To configure the port number of the QVWS, enter a valid number in this text box.
Use HTTPS
To force all communication to go through secure HTTP, HTTPS, tick this check box (default). To let all communication go through ordinary HTTP, untick this check box.
Directory Service ConnectorsQlikView Publisher (QVP) Directory Service Connectors (DSC) are used for group resolution, that is, keeping track of all the users and groups in the QlikView environment.
Name
To configure which DSC to use, select one of the options in the drop-down list.
AuthenticationOn the Authentication tab, the method for letting a user of the current QlikView Web Server (QVWS) access the QlikView AccessPoint can be managed.
Administering QlikView - QlikView, April 2019 146
6 System
AuthenticationTo configure the user access method, select one of the following options:
l Always, meaning that the user has to log in to the QlikView AccessPoint.
l Login, meaning that the user can login, but can access the QlikView AccessPoint even without logging in.
l Never, meaning that the QlikView AccessPoint only accepts anonymous users.
If Never was selected, the Type and Login Address settings will be hidden.
TypeTo configure the type of authentication to use, select one of the following options:
l NTLM, meaning that the Microsoft authentication protocol is used.
l Header, meaning that an http header specified under Parameters is used:
l Header Name
If a customized login system is used, the http header has to be specified, in order to configure the login process in the QlikView AccessPoint. To configure the header name, enter a value in this text box.
Default value: QVUSER.
l Prefix
To configure the prefix used for the header, enter a value in this text box.
Default value: CUSTOM\.
l Custom User, meaning that the QlikView AccessPoint only accepts Custom users (defined in the Custom Directory DSP), and a prefix specified under Parameters is used:
l Prefix
To configure the prefix for the custom user Directory Service Provider, enter a value in this text box.
Default value: CUSTOM\.
Login AddressIf using custom users, an address to the login page has to be specified. Select one of the following options:
l Default Login Page (Browser Authentication), meaning that the login prompt of the web browser is used
l Alternate Login Page (Web Form), meaning that the login is performed using a web page
l Custom Login Page, meaning that the login is performed using a customized login page, which has to be entered in this text box
Administering QlikView - QlikView, April 2019 147
6 System
The text box contains an example string. The string has to be edited for the Custom Login Page option to take effect.
AccessPointOn the AccessPoint tab, the QlikView AccessPoint settings can be reached, by clicking on the following tabs:
l AccessPoint Settings
l Server Connections
AccessPoint SettingsOn the AccessPoint Settings tab, the following QlikView AccessPoint settings can be managed.
l Custom System Message
l Path
l Open Document Options
l Default Preferred Client
l Client Paths
l Plugin Download
Custom System Message
To configure a custom system message to be presented in the QlikView AccessPoint, enter the desired statement in this text box.
Path
To configure the path to the QlikView AccessPoint, enter a valid path in this text box.
Default value: /QvAJAXZfc/AccessPoint.aspx.
Open Document Options
To configure in which windows documents are opened, select one of the following options:
l Reuse New Window
The document is opened in a new browser window. The next opened document will use the same window.
l Same Window
The document is opened in the same browser window as the QlikView AccessPoint.
l New Window
Each document is opened in a new browser window.
Default Preferred Client
To configure which client that is the preferred one, when a user for the very first time accesses the QlikView AccessPoint, select one of the following options:
Administering QlikView - QlikView, April 2019 148
6 System
l IE Plugin
l Full Browser and Small Device Version
l Download, meaning download of the .qvw files from the QlikView AccessPoint.
Client Paths
IE PluginTo edit the web page of the Microsoft Internet Explorer client plugin file, enter a valid path in this text box.
Default value: /QvPlugin/opendoc.htm.
Full BrowserTo edit the web page of the AJAX client file, enter a valid path in this text box.
Default value: /QvAJAXZfc/opendoc.htm.
Small Devices always use the following URL: /QvAJAXZfc/mobile/opendoc.htm
Plugin Download
Show LinkIf the link for downloading the client plugin file is to be visible on the QlikView AccessPoint, tick this check box and enter a valid path to the file in the following text box.
l URL
Default value: /QvPlugin/QvPluginSetup.exe.
If the link for downloading the client plugin file is not to be visible on the QlikView AccessPoint, untick this check box.
Server ConnectionsOn the Server Connections tab, the settings of the QlikView AccessPoint connections to QlikView Servers (QVS), can be managed.
Server Connections
Respect Browsable Flag on MountTo set that only mounts in the QVS, which are set as Browsable in Folders, are presented on the QlikView AccessPoint, tick this check box. To allow that any mount in the QVS is presented on the QlikView AccessPoint, untick this check box.
AddTo add a QVS entry, click on the Add icon, , in the upper right corner of the right pane, and configure the following fields:
Administering QlikView - QlikView, April 2019 149
6 System
l Name
Select the desired QVS in the drop-down list.
l Load Balancing
To select the load balance calculation method, select one of the following options:
l CPU with RAM Overload, meaning that the client is directed to the least busy QVS.
l Loaded Document, meaning that the client is directed to the QVS in which the requested document is already loaded.
l Random, meaning that the client is directed to a QVS randomly.
l Always Tunnel
To always tunnel the communication to the QVS, select this check box. If left unselected, communication will tunnel only when the client is unable to receive QVP connections over Port 4747. QVS uses HTTPS or HTTP to handle connections when tunneling, depending on the protocol used by the web server.
DeleteTo entirely remove a configured entry from the list, click on the Delete icon, .
AjaxOn the AJAX tab, the settings for the AJAX client can be managed.
Paths
Path
The paths to the AJAX client files. To create a path entry, click on the Add icon, , to the right in the pane, and enter the full path to the AJAX client file in the new text box.
Default value 1: /QvAJAXZfc/QvsViewClient.aspx.
Default value 2: /QvAJAXZfc/QvsViewClient.asp.
The default paths may be changed, but the file names have to remain unchanged for the installation to work.
Delete
To entirely remove a configured entry from the list, click on the Delete icon, .
Advanced
No Crypto
To prohibit the use of encryption between the QlikView Web Server (QVWS) and the QVS,tick this check box. To allow the use of encryption, untick this check box.
Administering QlikView - QlikView, April 2019 150
6 System
Prohibit Machine ID
The usage of anonymous bookmarks can be effectively excluded, by prohibiting the sending of machine ID. To prohibit the sending of machine ID, tick this check box. To allow the sending of machine ID, untick this check box.
Recording
To enable the logging for the AJAX client, tick this check box. To disable the logging, untick this check box.
WebOn the Web tab, the web browser MIME types and root folders can be managed.
MIME TypesThe MIME file extensions that the QlikView Web Server (QWS) should allow. To create a MIME path entry, click on
the Add icon, , to the right in the pane, and enter the desired values in the following text boxes:
Extension
The MIME file extension, starting with a full stop, '.', for example (and corresponding to the Contents examples): '.CSS', '.HTM', '.HTML', '.JPG', '.GIF', and '.JAR'.
Content
The MIME type contents, for example (and corresponding to the Extension examples): 'text/css', 'text/html', 'text/html', 'image/jpg', 'image/gif', and 'application/octet-stream'.
Delete
To entirely remove a configured entry from the list, click on the Delete icon, .
Root FoldersThe paths to the various virtual folders in the QlikView Web Server. To create a path entry, click on the Add icon,
, to the right in the pane, and enter the desired values in the following text boxes:
Name
Default value 1a: QLIKVIEW.
Default value 2a: QVCLIENTS.
Default value 3a: QVAJAXZFC.
Default value 4a: QVDESKTOP.
Default value 5a: QVPLUGIN.
Path
Default value 1b: C:\Program Files\QlikView\Web.
Default value 2b: C:\Program Files\QlikView\Server\QlikViewClients.
Default value 3b: C:\Program Files\QlikView\Server\QlikViewClients\QlikViewAjax.
Default value 4b: C:\Program Files\QlikView\Server\QlikViewClients\QlikViewDesktop.
Administering QlikView - QlikView, April 2019 151
6 System
Default value 5b: C:\Program Files\QlikView\Server\QlikViewClients\QlikViewPlugin.
Delete
To entirely remove a configured entry from the list, click on the Delete icon, .
Login
Server LoginNormally, the remote system will be accessed from the service account running this management service. If this is not feasible, for example, when the remote system is located on an different Windows Active Directory, it is possible to enter the user name and password for a valid remote user. To enable the management of a service installed on a remote server, configure the following text boxes:
l User Name
Enter the name a of a user that is member of the QlikView Administrators group on the remote server.
l Password
Enter the password for the entered User Name.
Remote Management ServicesIn theRemote Management Services folder, tasks from the management services of remote servers can be imported.
The involved environments must use the same major QlikView release (for example, QlikView 12 and QlikView 12 or QlikView November 2018 and QlikView November 2018). If the involved environments use different major releases (for example, QlikView November 2017 and QlikView November 2018), the Remote Management Services cannot be used.
Each connection is set up by the user account of the current Management Service; hence, this account has to be a member of the QlikView Management API security group of the remote system.
If the QlikView Management API security group does not exist on the remote system, it must be created.
This function can be used to retrieve tasks between QlikView Publisher (QVP) environments, typically between a test system and a production system. To do this, a link, a remote management service, has to be set up in the production system, towards the test system. Using the link, tasks can be pulled from the test system into the production system. Since the test system usually has its own set of folders and servers, and other folders and servers are used in production, the test items have to be mapped to the production items. The link and the map are set up once only. Hence, when importing the tasks, the retrieval and mapping are performed automatically.
The Remote Management Services cannot be used to import Supporting Tasks.
Administering QlikView - QlikView, April 2019 152
6 System
When importing a task, triggers of the type On Event from Another Task are excluded (that is, not imported). To keep such triggers, all tasks have to be imported as described in Import task.
Functions
Add
To create a Remote Management Service entry, click on the Add icon, , to the right in the pane, and enter the
URL in the new text box. The new entry will be available in the tree view in the left pane.
Default value: http://remotehost:4799/QMS.
Delete
To entirely remove a configured entry from the list, click on the Delete icon, .
ApplySelect Apply to confirm the change.
CancelSelect Cancel to revert the change.
ViewTo view or configure the settings of a Remote Management Service, in the right pane, click on the entry in the tree view. Each entry contains the following tabs:
l Summary
l General
l Source Folders
l QlikView Servers
l Login
Click on each tab label for more information.
SummaryOn the Summary tab, the API of the Remote Management Service can be accessed.
GeneralOn the General tab, the URL and import options of the QlikView management services on remote hosts can be managed.
Location
Name
The name of the remote management service.
Default value: QMS@remotehost.
Administering QlikView - QlikView, April 2019 153
6 System
URL
The URL of the remote management service.
Default value: http://remotehost:4799/QMS.
Import Options
Disable Task Triggers on Import
To disable all of the imported tasks, tick this check box (default). To enable all of the imported tasks, untick this check box.
Source FoldersOn the Source Folders tab, the mappings of the source and target document folders of the various management services can be managed. When importing tasks from another system, this mapping will be used to match the document on the remote system with the corresponding local document.
Source Document Folder Mappings
From
Presents all source document folders on the remote system. To set up the mapping for the source document folder, select one of the options in the drop-down list.
To
Presents all target document folders on the local system. To set up the mapping for the target document folder, select one of the options in the drop-down list.
QlikView ServersOn the QlikView Servers tab, the mappings of the source and target QlikView Servers can be managed. When importing tasks from another system, this mapping will be used to match the remote system with the corresponding local system.
For example, a QVS is used for test purposes on a test system, and distributions are performed to this QVS. To retrieve tasks from the test system into the production system, without causing that the production system starts to distribute to the test servers, a mapping has to be set up. The mapping should define that every task distributes to server 'X' when running on the test system, while the same task distributes to server 'Y' when running on the production system.
QlikView Server Mappings
From
Presents all available servers on the remote system (server 'X' on the test system, in the example). To set up the mapping for a source QlikView Server, select one of the options in the drop-down list.
To
Presents all available servers on the local system (server 'Y' on the production system, in the example). To set up the mapping for a target QlikView Server, select one of the options in the drop-down list.
Administering QlikView - QlikView, April 2019 154
6 System
Login
Server LoginNormally, the remote system will be accessed from the service account running this management service. If this is not feasible, for example, when the remote system is located on an different Windows Active Directory, it is possible to enter the user name and password for a valid remote user. To enable the management of a service installed on a remote server, configure the following text boxes:
l User Name
Enter the name a of a user that is member of the QlikView Administrators group on the remote server.
l Password
Enter the password for the entered User Name.
Mail ServerIn the Mail Server folder, on the General tab, the e-mail service used for alerts and distribution of documents can be configured.
Location
Host NameSet the address of the SMTP server.
Default value: localhost.
PortSet the port of the SMTP server.
Default value: 25.
Miscellaneous
E-mail FormatSet the e-mail format, by selecting one of the following options in the drop-down list:
l Plain text
l HTML message
SMTP Server TimeoutSet the time for how long the service should wait for a response from the server.
Default value: 100 (seconds).
From AddressSet the e-mail address of the sender.
Default value: [email protected].
Administering QlikView - QlikView, April 2019 155

6 System
Authentication MethodSet how the user should be authenticated when sending an e-mail, by selecting one of the following options:
l Anonymous, meaning that no authentications is used
l Use Distribution Service Account, meaning that the Windows user, under which the service run, is used
l User Name and Password, meaning that the user credentials configured in the following text boxes is used:
l User Name
To configure the user name, enter the desired credentials in this text box.
l Password
To configure the password, enter the desired credentials in this text box.
Override E-mail
These settings are for test purposes, only.
Send All E-mails ToTo configure a receiver of all of the e-mails sent by the QlikView Publisher (QVP), enter a valid e-mail address in this text box.
No other recipient will receive any e-mail sent by the QlikView Publisher (QVP).
Send Test E-mail ToTo test the settings, enter an e-mail address in this text box and click on the Send button.
Document Administrators Authorized to Distribute via E-mailUsers can be QlikView Publisher (QVP) Document Administrators who are allowed to distribute documents via e-mail.
To manage users, click on the Manage Users dialog icon, .
l Default Scope
Select the directory to be searched, in the drop-down list.
l Search for Users and Groups
Enter the desired search term(s) in this text box, to find a user or a group, and click on the Search icon,
.
l Search Result
This box presents the result of the search, using the desired criteria.
Administering QlikView - QlikView, April 2019 156
6 System
l Add >
To add a user or a group, click on it in the Search Result box and click on this button. Several items can be added at the same time.
l Selected Users
This box presents the selected users and groups.
l < Delete
To deselect a user or a group, click on it in the Selected Users box and click on this button. Several items can be deselected at the same time.
l << Delete All
To deselect all of the users and groups from the Selected Users box, click on this button.
License ServiceIn the License Service folder, you can see the status and information of the License Service for your QlikView Server
License ServiceThe license service tab lists the license service for your QlikView Server installation.
Edit
Click on the Edit icon, , to open the Summary (page 157) tab for the License Service.
Example:
http://<mycomputer>:9200/
SummaryHere you can see the address of the License Service for your QlikView Server installation.
Cloud DeploymentsIn the Cloud Deployments folder, you can add and configure cloud deployments you want to connect to QlikView Server.
Cloud DeploymentsThe Cloud Deployments tab lists all cloud deployments connected with your QlikView Server installation.
Add
To add a new cloud deployment, click on the Add icon, , to the right in the pane, and enter the URL in the new text box. The new entry will be available in the tree view in the left pane.
Example:
qvp://<mycomputer>/
Administering QlikView - QlikView, April 2019 157
6 System
Edit
To configure a cloud deployment entry, click on the Edit icon, , or click on the entry in the tree view. This
opens the Summary (page 158) tab for the selected cloud deployment.
Delete
To entirely remove a configured entry from the list, click on the Delete icon, .
ApplySelect Apply to confirm the change.
CancelSelect Cancel to revert the change.
SummaryIn the Summary tab you can see the URL of the selected cloud deployment.
GeneralIn the General tab you configure the details for connecting the cloud deployment to QlikView Server.
Location
Deployment name
The name of the cloud deployment.
API endpoint
The address to the cloud hub for the cloud deployment.
QlikView Web Server
Web Server
A drop-down menu lists all the QlikView Web Servers available in your deployment.
Distribution Settings
Disable distribution of links
Select this option if you want to disable the distribution of QlikView documents' links to the cloud deployment.
Issuer configuration
Qlik Cloud Services format
Select this option if you want to generate the local barer token (configuration) in Qlik Cloud Services format. If unselected, the token is generated as a text file.
Generate configuration
Click this button to trigger the configuration of the local barer token.
Copy to clipboard
Click this button to copy the local barer token text in the clipboard.
Administering QlikView - QlikView, April 2019 158
6 System
ApplySelect Apply to confirm the change.
CancelSelect Cancel to revert the change.
6.2 LicensesOn the Licenses page, all of the available product licenses are listed in a tree view in the left pane. A license can be viewed, added, and edited. Also, the QlikView Server (QVS) Client Access Licenses (CALs) can be managed. To view or manage a license or a CAL, in the right pane, click on the license in the tree view.
TypeThe following licenses are presented:
l QlikView Publisher
l QlikView Server
NameThe name of the service on the hosting server, on which the license resides.
QlikView PublisherOn the QlikView Publisher (QVP) pane, the QlikView Publisher License tab is presented.
QlikView Publisher LicenseOn the QlikView Publisher License tab, the QlikView Publisher (QVP) product license can be viewed, added, and edited. To add a license, configure the following text boxes:
Serial and Control
Serial Number
Enter the serial number assigned to the QVP software in this text box.
Control
Enter the control number assigned to the QVP software in this text box.
Paste the Contents of LEF File Here (Optional)
This is an alternative to the use of Update License from Server, to add a product license. Should the server not be able to access the QVP License Enabler File (LEF) information through the Internet, this information can be obtained from the product vendor, instead. Contact the product vendor for more information.
Owner Information
Name
Enter the user name of the product owner in this text box.
Administering QlikView - QlikView, April 2019 159

6 System
Organization
Enter the organization name of the product owner in this text box.
Register License
Update License from Server
This is the common way to add a product license. To register the license through the Internet, using the Serial Number and Control text boxes, click on this button.
A new LEF file will be downloaded from the LEF server at QlikTech.
Apply License
To register the license, using the Paste the Contents of LEF File Here (Optional) text box, click on this button.
QlikView ServerOn the QlikView Server (QVS) pane, the following tabs are presented:
l QlikView Server License
l Client Access Licenses This tab is available if QlikView Server is licensed using a serial number and control number.
l Professional and Analyzer accessThis tab is available if QlikView Server is licensed using a signed key.
QlikView Server LicenseOn the QlikView Server License tab, you activate, update, and consult the details of your QlikView Server (QVS) product license. The available options change based on what license you choose to activate: a license that requires serial and control number, or a license that requires a signed key.
Use Signed Key LicenseIf selected, it shows only the field specific for licensing QlikView Server (QVS) with a signed key. If unselected, it shows only the field specific for licensing QlikView Server (QVS) with a serial number and control number.
The license is checked every time a document is opened. If the time limit specified by the License Enabler File (LEF) is reached, the QVS automatically enters offline mode, which means that it is reachable from the QMC, but not operational. The OffDuty parameter indicates if the QVS is off duty.
With "Use Signed Key License" unselected
Serial and Control
Serial NumberEnter the serial number assigned to the QVS software in this text box.
Administering QlikView - QlikView, April 2019 160
6 System
ControlEnter the control number assigned to the QVS software in this text box.
Paste the Contents of LEF File Here (Optional)This is an alternative to the use of Update License from Server, to add a product license. Should the server not be able to access the QVS License Enabler File (LEF) information through the Internet, this information can be obtained from the product vendor, instead. Contact the product vendor for more information.
Owner Information
NameEnter the user name of the product owner in this text box.
OrganizationEnter the organization name of the product owner in this text box.
Clear LicenseTo unregister the license, click on this button.
Update License from ServerThis is the common way to add a product license. To register the license through the Internet, using the Serial Number and Control text boxes, click on this button.
Apply LicenseTo register the license, using the Paste the Contents of LEF File Here (Optional) text box, click on this button.
A new LEF file will be downloaded from the LEF server at QlikTech.
With "Use Signed Key License" selected
Signed Key License
Signed KeyEnter the signed key for licensing the QVS software in this text box.
License DefinitionThe text in this field shows the details for you QVS license. It is not modifiable.
Apply LicenseTo register the license, click on this button.
Administering QlikView - QlikView, April 2019 161
6 System
Client Access LicensesOn the Client Access Licenses (CALs) tab, information about the CALs that are available on the QlikView Server (QVS) is presented in the following tabs:
l General
l Assigned CALs
l History
l Limitations
GeneralOn the General tab, the present information about the named user CALs, document CALs, session CALs, and usage CALs is presented.
Functions
Refresh
To refresh the information currently presented, click on the Refresh icon, .
Identification
Identify User byThe named users can be identified in one of two ways. To set the identification method, select one of the following options:
l User Name, meaning the named user name
l Machine Name, meaning the computer name together with the MAC address
It is possible to change this setting at any time, but it is strongly recommended to use one mode consistently within a given QlikView Server. If changed during operation, the same user might take up two CALs; one based on the User Name and one based on the Machine Name.
Named User CALs: X assigned (Y in license)
The number of presently assigned (used), X, and licensed (defined in the LEF file) named user CALs, Y, are presented in the header.
Allow License LeaseTo allow users to 'borrow' a license for use off-line for a period of 30 days, tick this check box. To deny users to 'borrow' a license, untick this check box.
Allow Dynamic CAL AssignmentA new Named User CAL can automatically be granted to a user connecting for the first time to the QlikView Server, as long as there are available Named User CALs to assign. To enable that CALs are added dynamically, tick this check box. To disable that CALs are added dynamically, untick this check box.
Administering QlikView - QlikView, April 2019 162
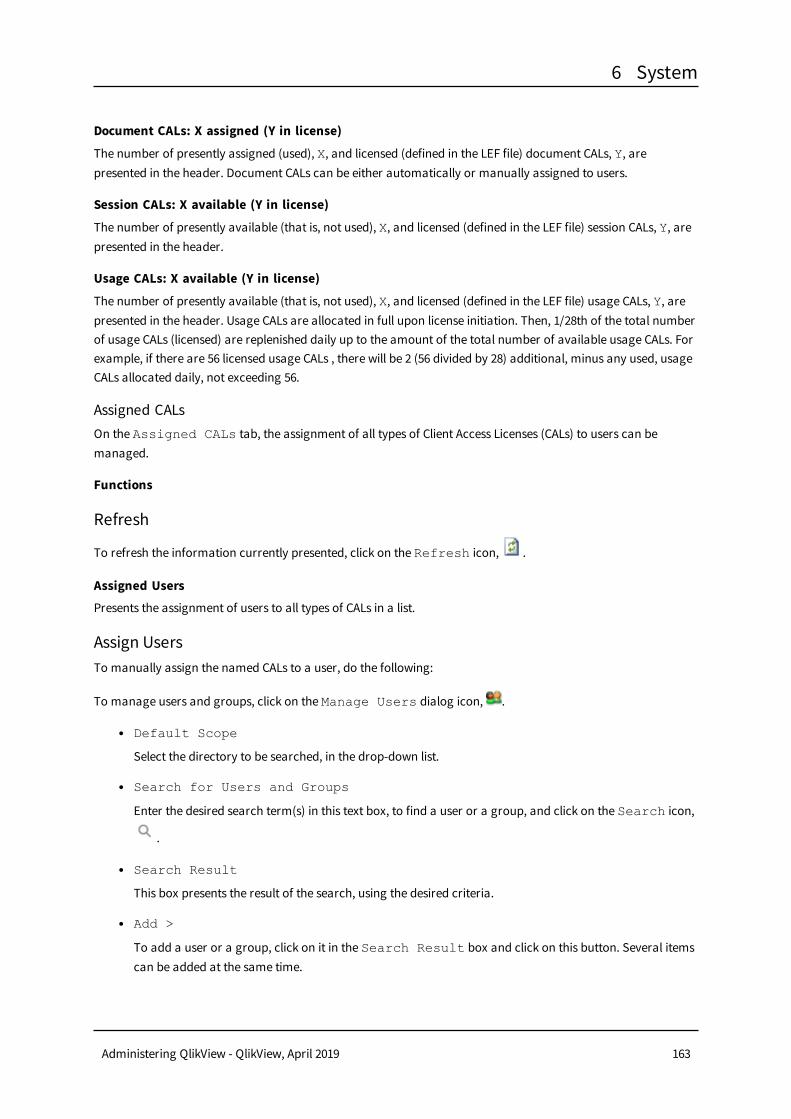
6 System
Document CALs: X assigned (Y in license)
The number of presently assigned (used), X, and licensed (defined in the LEF file) document CALs, Y, are presented in the header. Document CALs can be either automatically or manually assigned to users.
Session CALs: X available (Y in license)
The number of presently available (that is, not used), X, and licensed (defined in the LEF file) session CALs, Y, are presented in the header.
Usage CALs: X available (Y in license)
The number of presently available (that is, not used), X, and licensed (defined in the LEF file) usage CALs, Y, are presented in the header. Usage CALs are allocated in full upon license initiation. Then, 1/28th of the total number of usage CALs (licensed) are replenished daily up to the amount of the total number of available usage CALs. For example, if there are 56 licensed usage CALs , there will be 2 (56 divided by 28) additional, minus any used, usage CALs allocated daily, not exceeding 56.
Assigned CALsOn the Assigned CALs tab, the assignment of all types of Client Access Licenses (CALs) to users can be managed.
Functions
Refresh
To refresh the information currently presented, click on the Refresh icon, .
Assigned Users
Presents the assignment of users to all types of CALs in a list.
Assign UsersTo manually assign the named CALs to a user, do the following:
To manage users and groups, click on the Manage Users dialog icon, .
l Default Scope
Select the directory to be searched, in the drop-down list.
l Search for Users and Groups
Enter the desired search term(s) in this text box, to find a user or a group, and click on the Search icon,
.
l Search Result
This box presents the result of the search, using the desired criteria.
l Add >
To add a user or a group, click on it in the Search Result box and click on this button. Several items can be added at the same time.
Administering QlikView - QlikView, April 2019 163
6 System
l Selected Users
This box presents the selected users and groups.
l < Delete
To deselect a user or a group, click on it in the Selected Users box and click on this button. Several items can be deselected at the same time.
l << Delete All
To deselect all of the users and groups from the Selected Users box, click on this button.
NamePresents a list of the names of all users that are currently assigned to a named CAL. A user can represent an authenticated User Name or a Machine Name.
Last Used (UTC)The time stamp (UTC) from the last server activity of each user.
Quarantined Until (UTC)If a CAL-to-user association has not been in use for the last 7 days, it will be deleted immediately. If a CAL-to-user association is currently being used or has recently been used, it will be marked for deletion, which means that new user access sessions through this CAL are not allowed. However, the CAL-to-user association will still occupy an allocated CAL until this quarantine period has passed.
RestoreBefore that the Quarantined Until (UTC) time stamp has passed, a CAL-to-user association can be
undeleted, by clicking on the Restore icon, .
DeleteWhen the Quarantined Until (UTC) time stamp has passed, a CAL-to-user association can be removed manually. To entirely remove a CAL-to-user association from the list, thus freeing a document CAL, click on the
Delete icon, .
The CAL-to-user association is formally deleted after the expiration time.
The CAL will not be available for 7 days.
HistoryOn the History tab, the current information about leased license activity is presented. A leased license is used by end-users who connect to the QlikView Server (QVS) and are allowed to 'borrow' a license to open a downloaded document during a period of 30 days.
Administering QlikView - QlikView, April 2019 164
6 System
Functions
Refresh
To refresh the information currently presented, click on the Refresh icon, .
License Lease History
UserPresents the name of the leased license user.
Machine IDPresents the computer identity of the leased license end-user.
Time (UTC)The time stamp (UTC) from the latest time the user leased the license.
LimitationsOn the Limitations tab, the number of CALs that may be in use at the same time can be limited. The number of CALs can be limited to be less than the default values that are stated in the QlikView Publisher (QVP) License Enabler File (LEF).
Functions
Refresh
To refresh the information currently presented, click on the Refresh icon, .
Limit number of CALs
To limit the number of simultaneously open CALs, enter the desired values in the following text boxes:
l Named user CALs
Set the number of simultaneously open named user CALs. The text in parenthesis to the right of this text box presents the current licensed named user CALs.
Default value: 5.
l Session CALs
Set the number of simultaneously open session CALs. The text in parenthesis to the right of this text box presents the current licensed session CALs.
Default value: 5.
l Usage CALs
Set the number of simultaneously open usage CALs. The text in parenthesis to the right of this text box presents the current licensed usage CALs.
Default value: 300.
Administering QlikView - QlikView, April 2019 165

6 System
l Document CALs
Set the number of simultaneously open document CALs. The text in parenthesis to the right of this text box presents the current licensed document CALs.
Default value: 30.
Professional and Analyzer accessIn the Professional and Analyzer access tab, you find information about the available and allocated Professional and Analyzer access. Here you also assign or revoke Professional and Analyzer access from users.
General
Allow dynamic assignment for Professional accessSelect this option to allow dynamic allocation of Professional access. A Professional access is automatically granted to a user connecting to QlikView for the first time, if any Professional access quota is available. Leave the option unselected to deny Professional access dynamic allocation.
Allow dynamic assignment for Analyzer accessSelect this option to allow dynamic allocation of Analyzer access. A Analyzer access is automatically granted to a user connecting to QlikView for the first time, if any Analyzer access quota is available. Leave the option unselected to deny Analyzer access dynamic allocation.
Allow license leaseSelect this option to allow users to use Professional access off-line with QlikView Desktop. Leave the option unselected to deny users to borrow Professional access.
Analyzer: X assigned (Y in license)
This field states the number of assigned Analyzer access (X), and the total number Analyzer access (Y) available for your QVS license.
Professional: X assigned (Y in license)
This field states the number of assigned Professional access (X), and the total number Professional access (Y) available for your QVS license.
Analyzer capacity
Analyzer capacity: X min.Indicates the number (X) of minutes available for Analyzer capacity access with your QVS license.
Consumed this month: X min. (Remaining: Y)Indicates the number (X) of minutes consumed for Analyzer capacity access in the current month. In brackets, it indicates the number of minutes available in the current month for Analyzer capacity access.
Administering QlikView - QlikView, April 2019 166
6 System
Overage:This fields indicates if your license allows for exceeding the number of allocated minutes for Analyzer capacity access. Depending on your license, the overage fields shows:
l Yes: indicates that your QVSlicense allows for unlimited overage of minutes for Analyzer capacity access.
l Max X min.: indicated that your QVS license allows for a maximum number of X minutes for Analyzer capacity access.
The overage field is not available if your QVS license does not allow for overage minutes for Analyzer capacity access.
Analyzer Access
Assigned Users
Shows the list of users assigned with Analyzer access.
NameList of names of users assigned with Analyzer access.
Allocating and removing Analyzer access to users
To allocate Analyzer access to users:
1. Click on the Manage Users icon, . An access assignment window opens.
2. Search for a user in the dedicated search field. You can search for multiple users at the same time by writing a semicolon-separated list. The user or users matching with your search are listed in under Search Result.
3. Select the user you want to grant with Analyzer access, and click Add.
4. Select OK to confirm the access allocation. The access assignment window is closed.
5. Select Apply to confirm the access allocation.
6. The users with Analyzer access are now listed under Assigned Users.
Removing an access allocationTo remove Analyzer access from a user, click on the Delete icon, . Then, select Apply to confirm.
If you wish to cancel an access removal before it is applied, select the Restore icon in the row of the user
for which you want to maintain the allocated access. This option is available only before selecting Apply.
Professional Access
Assigned Users
Shows the list of users assigned with Professional access.
NameList of names of users assigned with Professional access.
Administering QlikView - QlikView, April 2019 167
6 System
Allocating and removing Professional access to users
To allocate Professional access to users:
1. Click on the Manage Users icon, . An access assignment window opens.
2. Search for a user in the dedicated search field. You can search for multiple users at the same time by writing a semicolon-separated list. The user or users matching with your search are listed in under Search Result.
3. Select the user you want to grant with Professional access, and click Add.
4. Select OK to confirm the access allocation. The access assignment window is closed.
If you wish to cancel an access allocation before it is applied, select the Restore icon in the row of
the user for which you want to revert the allocation. This option is available only before selecting Apply.
5. Select Apply to confirm the access allocation.
6. The users with Professional access are now listed under Assigned Users.
Removing an access allocationTo remove Professional access from a user, click on the Delete icon, . Then, select Apply to confirm.
If you wish to cancel an access removal before it is applied, select the Restore icon in the row of the user
for which you want to maintain the allocated access. This option is available only before selecting Apply.
6.3 AboutOn the About page, information about the entire QlikView system, that is, the various Windows services and the computer they run on, is presented. Each service is presented under a separate heading.
About this QlikView System
More Details / Less DetailsTo view less details, click on the Less Details link, which will result in that the following information is presented:
l Product Information
l Machine Information
l CPU Information
To view more details, click on the More Details link, which will result in that the following information is presented:
l Product Information
l Current Process Information
l Machine Information
l CPU Information
l Logical Drives Information
Administering QlikView - QlikView, April 2019 168
6 System
l Network Information
l File Information
6.4 Supporting TasksOn the Supporting Tasks page, the following available supporting task groups are listed in a tree view in the left pane:
l External Programs
l Database Command
l Pause
l QVD Creation
To view or manage the supporting tasks of a group, in the right pane, click on the folder in the tree view.
External ProgramsIn the External Programs folder, supporting tasks for external programs can be viewed and managed.
Functions
Add Task
To add a task, click on the Add Task icon, , in the upper right corner of the right pane. The following tabs will be created:
l General
l Triggers
Click on each tab label for more information.
View StatusTo view the status and the settings of a task, in the right pane, click on the task in the tree view.
Edit Task
To configure a task, click on the Edit Task icon, , or click on the task in the tree view. In the right pane, the following tabs are presented:
l General
l Triggers
Click on each tab label for more information.
Copy Task
To copy a task, click on the Copy this task to clipboard icon, .
Administering QlikView - QlikView, April 2019 169
6 System
Paste TaskPasting a task into a folder will create a new task. To paste a copied task to a specific folder, click on (highlight)
the folder and click on the Paste Task icon, , in the right pane (to the left of the Add Task icon, ).
Run Task
To start a task, click on the Run this task icon, .
Abort Task
To stop a task, click on the Abort this task icon, .
Delete TaskTo entirely remove a task, either click on (highlight) the document, in which the task resides, in the tree view, and
click on the Delete this Task icon of that task, , in the right pane, or click on (highlight) the task in the
tree view, and right-click on Delete.
GeneralOn the General tab, the basic settings and parameters of the current task can be managed. The categories for a document can be assigned, created, edited, and deleted. A category bundles documents in containers, to make categorization easier for the end-user. The categories are only visible to the end-user on the QlikView AccessPoint. Each document can only be part of one category.
Basics
Enabled
To enable the task, select this check box. To disable the task, clear this check box.
Task Name
To edit the name of the task, enter the preferred name in this text box.
The Task Name must be unique; if it is not, a suffix number will be added to make it unique, for example, 'MyTask' will become 'MyTask (2)'.
Select Category
To assign a category to a supporting task, select one of the available categories, presented in the drop-down list.
Default value: Default.
Or Type a New Category
To create a category, enter a descriptive name in this text box. The new category will be available in the Select Category drop-down list.
Categories can be reassigned, but cannot be deleted.
Administering QlikView - QlikView, April 2019 170
6 System
Task Description
To edit the description of the task, enter the preferred description in this text box.
Parameters
Command Line Statement
The command line statement that will be executed. To edit the command line, enter the preferred statement in this text box.
If the statement contains any ' ' (white space), the path must start and end with quotation marks, ".
Example:
The task starts the application notepad.exe and displays the content of the file odbc.ini: c:\windows\notepad.exe c:\windows\odbc.ini
Task Result Handling
Ignore Errors (Non-zero Return Codes)
Normally, any non-zero result code will be treated as if the task failed. To ignore the result code, making the task always being treated as successful, select this check box. To handle errors, clear this check box.
File Exists
Run task to check if file exists
By enabling File Exists, the task verifies that the selected file is available at the desired location. When a File Exists task is set to trigger a document task, the document task only runs if the File Exists task successfully locates the file. This setting prevents the failures of document tasks when the files required to complete the task are not available. A File Exists task completes successfully even when the file is not located. A File Exists task fails when the file path entered is empty, or if a network failure prevents the task from being completed.
You can enable File Exists by selecting the Run task to check if file exists check box. Then, insert the path to a file in the Path: field.
When you select Run task to check if file exists, the Command Line Statement text box in the Parameters section is deactivated.
Path
Enter the file path in the text box. The file path must include the file extension.
You can set a File Exist task to locate any file. This means that the target of the File Exists task can be an alternative file not connected to a document task. The document task only runs when the File Exists task locates the alternative file. If you set the File Exists task to locate an alternative file, make sure that the file read by the document task is available when the document task runs.
You can use asterisks in the file path. When the path contains asterisks, the following rules apply:
Administering QlikView - QlikView, April 2019 171

6 System
l The file extension must always be included. For example:
C:\ProgramData\QlikTech\SourceDocuments\Data*.qvw
l If more than one file satisfies the path conditions, the task is completed as soon as the first file matching the file path is located.
l An asterisk can be added before or after the file name. Two asterisks can be used simultaneously, one at each end.
C:\ProgramData\QlikTech\SourceDocuments\*Data.qvw
C:\ProgramData\QlikTech\SourceDocuments\Data*.qvw
C:\ProgramData\QlikTech\SourceDocuments\*Data*.qvw
l An Asterisk cannot be inserted within a file name. The following path is invalid:
C:\ProgramData\QlikTech\SourceDocuments\Data*3.qvw
TriggersOn the Triggers tab, the current task can be configured to be started by triggers. A task can have multiple triggers, creating a workflow of tasks. This tab contains the following headings:
l Current Triggers
l Task Dependencies
Current TriggersEach row presents a separate trigger. The current task is started if any trigger is released (OR operator). If several triggers (multiple conditions) are to be released, before the current task is started, the On Multiple Events Completed function should be used (AND operator).
To create a trigger, click on the Add icon, , to the right in the pane.
Trigger
The type of the trigger. The possible value is the following:
l Once Trigger
l Task Finished Trigger
l External Event Trigger
l And Trigger
Details
The trigger condition settings, that is, a summary of when the trigger starts the current task.
Enabled
The current status of the trigger. The possible values are the following:
l Enabled
l Disabled
Administering QlikView - QlikView, April 2019 172

6 System
Edit Trigger
To configure a trigger, click on the Edit Trigger icon, .
Delete
To entirely remove a trigger, click on the Delete icon, .
Configure Trigger Dialog
Start the Task
Choose the type of trigger, by clicking on one of the following options in the drop-down list:
l On a Schedule
l On Event from Another Task
l On an External Event
l On Multiple Events Completed
Enabled
To enable the trigger for execution of the task, tick this check box. To disable the trigger, untick this check box.
On a Schedule
When the On a Schedule trigger type was chosen, a trigger can be scheduled to start the current task. The following configuration options are available:
RecurrenceChoose a schedule for the trigger to start, by clicking on one of the following options:
l Once
l Hourly
l Daily
l Weekly
l Monthly
l Continuously
All time specifications must be in the 24-hour format.
Start atEnter the date and time of the initial trigger start in this text box, by using the following format: yyyy-mm-dd hh:mm:ss.
Example:
2011-12-31 23:59:59
Administering QlikView - QlikView, April 2019 173

6 System
OnceNo further settings are available.
Hourly
Run EveryChoose a time interval for the trigger to start, by entering the desired number in the Hours and Minutes text boxes.
Example:
1 and 10, meaning that the trigger will start every 70 minutes (the example not considering other possible limiting settings).
OnChoose the day(s) of the week for the trigger to start, by ticking any of the following check boxes:
l Monday
l Tuesday
l Wednesday
l Thursday
l Friday
l Saturday
l Sunday
If no day was chosen, the trigger runs all days.
Run Only BetweenTo limit the trigger start within a day, tick this check box. Enter the start time and the stop time, in between which trigger start is allowed, in the start and stop text boxes, by using the following format: hh:mm. To disable the limitation, untick this check box.
Max Number of ExecutionsTo limit the number of trigger starts, tick this check box and enter the allowed number of trigger starts in the Max Number text box. To not limit the number of trigger starts, untick this check box.
ExpireTo make the trigger expire on a specific date and time, tick this check box and enter the date and time in this text box, by using the following format: yyyy-mm-dd hh:mm:ss. To make the trigger not to expire, untick this check box.
Example:
2012-12-31 23:59:59
Administering QlikView - QlikView, April 2019 174

6 System
Daily
Run EveryChoose a time interval for the trigger to start, by entering the desired number in the Day text box.
Example:
3, meaning that the trigger will start every third day (the example not considering other possible limiting settings).
Max Number of ExecutionsTo limit the number of trigger starts, tick this check box and enter the allowed number of trigger starts in the Max Number text box. To not limit the number of trigger starts, untick this check box.
ExpireTo make the trigger expire on a specific date and time, tick this check box and enter the date and time in this text box, by using the following format: yyyy-mm-dd hh:mm:ss. To make the trigger not to expire, untick this check box.
Example:
2012-12-31 23:59:59
Weekly
Run EveryChoose a time interval for the trigger to start, by entering the desired number in the Weeks text box.
Example:
2, meaning that the trigger will start every second week (the example not considering other possible limiting settings).
OnChoose the day(s) of the week for the trigger to start, by ticking any of the following check boxes:
l Monday
l Tuesday
l Wednesday
l Thursday
l Friday
l Saturday
l Sunday
Administering QlikView - QlikView, April 2019 175
6 System
If no day was chosen, the current day is selected.
Max Number of ExecutionsTo limit the number of trigger starts, tick this check box and enter the allowed number of trigger starts in the Max Number text box. To not limit the number of trigger starts, untick this check box.
ExpireTo make the trigger expire on a specific date and time, tick this check box and enter the date and time in this text box, by using the following format: yyyy-mm-dd hh:mm:ss. To make the trigger not to expire, untick this check box.
Example:
2012-12-31 23:59:59
Monthly
MonthsChoose the month(s) of the year for the trigger to start, by ticking any of the following check boxes:
l January
l February
l March
l April
l May
l June
l July
l August
l September
l October
l November
l December
If no month was chosen, the current month is selected.
Check AllTo automatically tick all of the months, click on this button.
Uncheck AllTo automatically untick all of the months, click on this button.
Administering QlikView - QlikView, April 2019 176
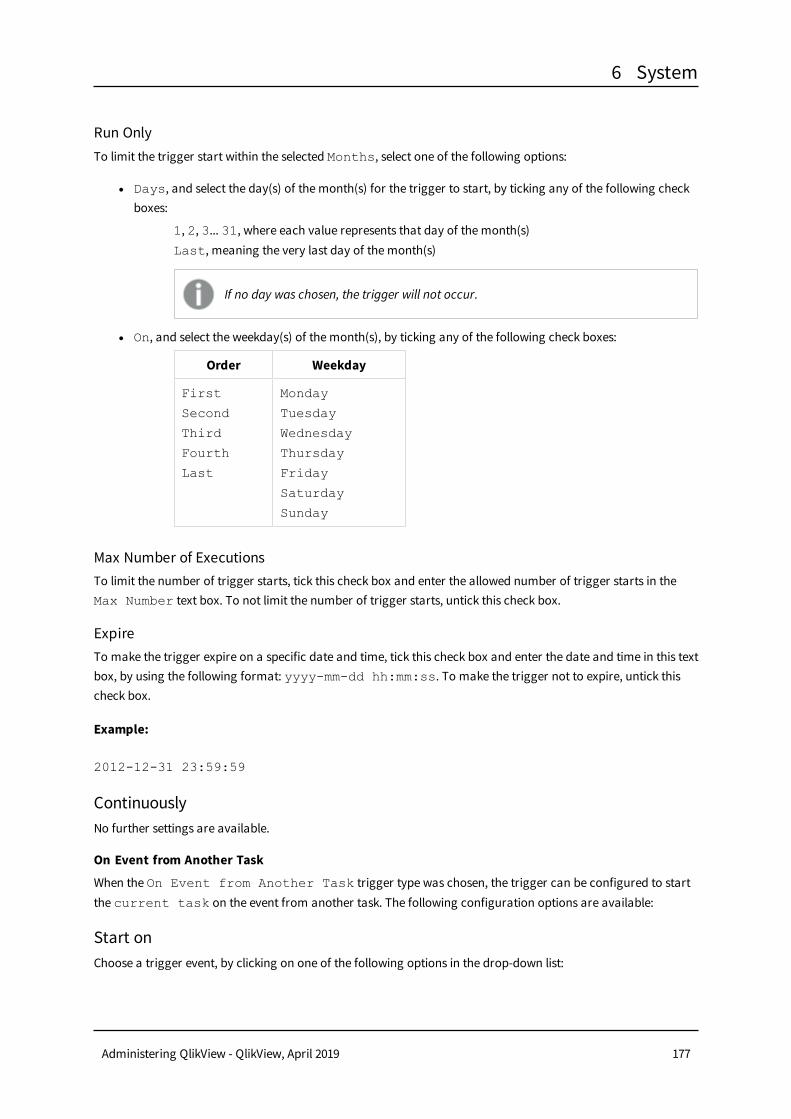
6 System
Run OnlyTo limit the trigger start within the selected Months, select one of the following options:
l Days, and select the day(s) of the month(s) for the trigger to start, by ticking any of the following check boxes:
1, 2, 3... 31, where each value represents that day of the month(s)Last, meaning the very last day of the month(s)
If no day was chosen, the trigger will not occur.
l On, and select the weekday(s) of the month(s), by ticking any of the following check boxes:
Order Weekday
First
Second
Third
Fourth
Last
Monday
Tuesday
Wednesday
Thursday
Friday
Saturday
Sunday
Max Number of ExecutionsTo limit the number of trigger starts, tick this check box and enter the allowed number of trigger starts in the Max Number text box. To not limit the number of trigger starts, untick this check box.
ExpireTo make the trigger expire on a specific date and time, tick this check box and enter the date and time in this text box, by using the following format: yyyy-mm-dd hh:mm:ss. To make the trigger not to expire, untick this check box.
Example:
2012-12-31 23:59:59
ContinuouslyNo further settings are available.
On Event from Another Task
When the On Event from Another Task trigger type was chosen, the trigger can be configured to start the current task on the event from another task. The following configuration options are available:
Start onChoose a trigger event, by clicking on one of the following options in the drop-down list:
Administering QlikView - QlikView, April 2019 177
6 System
l Successful, meaning that the execution of the task was successful
l Failed, meaning that the execution of the task failed
Completion ofChoose a trigger task, by clicking on one of the options in the drop-down list.
On an External Event
When the On an External Event trigger type was chosen, the trigger can be configured to start the current task on an external event, that is, an outside component, making a QlikView Management Service (QMS) API call. The following configuration options are available:
PasswordThis password is used to access the task and release the trigger. The external event has to know the password. To enable an external event to release the trigger of the task, enter a password in this text box.
On Multiple Events Completed
When the On Multiple Events Completed trigger type was chosen, the trigger can be configured to start the current task when other tasks have all been completed in their execution within a certain time. The following configuration options are available:
Time ConstraintChoose a time limit, within which all of the tasks have to complete their execution, by entering the desired number in the Minutes text box.
Default value: 360, meaning 6 hours.
Run Task When All of these Events Completed
External EventTo add an external event to the list of tasks that have to be completed for the trigger to be started, tick this check box. To entirely remove an external event from the list, untick this check box.
PasswordThis password is used to access the task and release the trigger. The external event has to know the password. To enable an external event to release the trigger of the task, enter a password in this text box.
Task CompletedTo add tasks, and the events with which they have to be completed for the trigger to be started, click on the Add
icon, , to the right in the pane.
EventSelect the event for the task in the drop-down list.
TaskSelect the corresponding task, for which an event was selected in the Event field, in the drop-down list.
Administering QlikView - QlikView, April 2019 178

6 System
Task DependenciesTask dependency is a way of making sure that the current task runs only if other tasks have finished their last execution successfully. The task dependencies overrule any trigger, which means that a trigger might not be able to start the current task, if a task dependency for the current task is not fulfilled. To configure a
dependency for the current task, click on the Add icon, , to the right in the pane.
Task
Select the task(s), which must have been successfully executed before the current task can be executed, in the drop-down list.
Delete
To entirely remove a task dependency, click on the Delete icon, .
Database CommandIn the Database Command folder, supporting tasks for running commands against databases can be viewed and managed.
Functions
Add Task
To add a task, click on the Add Task icon, , in the upper right corner of the right pane. The following tabs will be created:
l General
l Triggers
Click on each tab label for more information.
View StatusTo view the status and the settings of a task, in the right pane, click on the task in the tree view.
Edit Task
To configure a task, click on the Edit Task icon, , or click on the task in the tree view. In the right pane, the following tabs are presented:
l General
l Triggers
Click on each tab label for more information.
Copy Task
To copy a task, click on the Copy this task to clipboard icon, .
Administering QlikView - QlikView, April 2019 179

6 System
Paste TaskPasting a task into a folder will create a new task. To paste a copied task to a specific folder, click on (highlight)
the folder and click on the Paste Task icon, , in the right pane (to the left of the Add Task icon, ).
Run Task
To start a task, click on the Run this task icon, .
Abort Task
To stop a running task, click on the Abort this task icon, .
Delete TaskTo entirely remove a task, either click on (highlight) the document, in which the task resides, in the tree view, and
click on the Delete this Task icon of that task, , in the right pane, or click on (highlight) the task in the
tree view, and right-click on Delete.
GeneralOn the General tab, the basic settings and parameters of the current task can be managed. The categories for a document can be assigned, created, edited, and deleted. A category bundles documents in containers, to make categorization easier for the end-user. The categories are only visible to the end-user on the QlikView AccessPoint. Each document can only be part of one category.
Basics
Enabled
To enable the task, tick this check box. To disable the task, untick this check box.
Task Name
To edit the name of the task, enter the preferred name in this text box.
The Task Name must be unique; if it is not, a suffix number will be added to make it unique, for example, 'MyTask' will become 'MyTask (2)'.
Select Category
To assign a category to a supporting task, select one of the available categories, presented in the drop-down list.
Default value: Default.
Or Type a New Category
To create a category, enter a descriptive name in this text box. The new category will be available in the Select Category drop-down list.
Categories can be reassigned, but cannot be deleted.
Administering QlikView - QlikView, April 2019 180
6 System
Task Description
To edit the description of the task, enter the preferred description in this text box.
Parameters
User Name
User name used for the connection string.
Password
Password used for the connection string. In this field the password is hidden to avoid displaying it in clear text.
Connection String
The connection string that will be used for connecting to the database. To edit the connection string, enter the preferred statement in this text box.
Use they keyword {user} and {pwd} in the connection string to insert the user name and password.
Database Command
The database command statement that will be executed. This can be any command that the database will recognize (Stored Procedures or SQL statements). To edit the database command, enter the preferred statement in this text box.
TriggersOn the Triggers tab, the current task can be configured to be started by triggers. A task can have multiple triggers, creating a workflow of tasks. This tab contains the following headings:
l Current Triggers
l Task Dependencies
Current TriggersEach row presents a separate trigger. The current task is started if any trigger is released (OR operator). If several triggers (multiple conditions) are to be released, before the current task is started, the On Multiple Events Completed function should be used (AND operator).
To create a trigger, click on the Add icon, , to the right in the pane.
Trigger
The type of the trigger. The possible value is the following:
l Once Trigger
l Task Finished Trigger
l External Event Trigger
l And Trigger
Details
The trigger condition settings, that is, a summary of when the trigger starts the current task.
Administering QlikView - QlikView, April 2019 181

6 System
Enabled
The current status of the trigger. The possible values are the following:
l Enabled
l Disabled
Edit Trigger
To configure a trigger, click on the Edit Trigger icon, .
Delete
To entirely remove a trigger, click on the Delete icon, .
Configure Trigger Dialog
Start the Task
Choose the type of trigger, by clicking on one of the following options in the drop-down list:
l On a Schedule
l On Event from Another Task
l On an External Event
l On Multiple Events Completed
Enabled
To enable the trigger for execution of the task, tick this check box. To disable the trigger, untick this check box.
On a Schedule
When the On a Schedule trigger type was chosen, a trigger can be scheduled to start the current task. The following configuration options are available:
RecurrenceChoose a schedule for the trigger to start, by clicking on one of the following options:
l Once
l Hourly
l Daily
l Weekly
l Monthly
l Continuously
All time specifications must be in the 24-hour format.
Start atEnter the date and time of the initial trigger start in this text box, by using the following format: yyyy-mm-dd hh:mm:ss.
Administering QlikView - QlikView, April 2019 182

6 System
Example:
2011-12-31 23:59:59
OnceNo further settings are available.
Hourly
Run EveryChoose a time interval for the trigger to start, by entering the desired number in the Hours and Minutes text boxes.
Example:
1 and 10, meaning that the trigger will start every 70 minutes (the example not considering other possible limiting settings).
OnChoose the day(s) of the week for the trigger to start, by ticking any of the following check boxes:
l Monday
l Tuesday
l Wednesday
l Thursday
l Friday
l Saturday
l Sunday
If no day was chosen, the trigger runs all days.
Run Only BetweenTo limit the trigger start within a day, tick this check box. Enter the start time and the stop time, in between which trigger start is allowed, in the start and stop text boxes, by using the following format: hh:mm. To disable the limitation, untick this check box.
Max Number of ExecutionsTo limit the number of trigger starts, tick this check box and enter the allowed number of trigger starts in the Max Number text box. To not limit the number of trigger starts, untick this check box.
Administering QlikView - QlikView, April 2019 183

6 System
ExpireTo make the trigger expire on a specific date and time, tick this check box and enter the date and time in this text box, by using the following format: yyyy-mm-dd hh:mm:ss. To make the trigger not to expire, untick this check box.
Example:
2012-12-31 23:59:59
Daily
Run EveryChoose a time interval for the trigger to start, by entering the desired number in the Day text box.
Example:
3, meaning that the trigger will start every third day (the example not considering other possible limiting settings).
Max Number of ExecutionsTo limit the number of trigger starts, tick this check box and enter the allowed number of trigger starts in the Max Number text box. To not limit the number of trigger starts, untick this check box.
ExpireTo make the trigger expire on a specific date and time, tick this check box and enter the date and time in this text box, by using the following format: yyyy-mm-dd hh:mm:ss. To make the trigger not to expire, untick this check box.
Example:
2012-12-31 23:59:59
Weekly
Run EveryChoose a time interval for the trigger to start, by entering the desired number in the Weeks text box.
Example:
2, meaning that the trigger will start every second week (the example not considering other possible limiting settings).
OnChoose the day(s) of the week for the trigger to start, by ticking any of the following check boxes:
Administering QlikView - QlikView, April 2019 184

6 System
l Monday
l Tuesday
l Wednesday
l Thursday
l Friday
l Saturday
l Sunday
If no day was chosen, the current day is selected.
Max Number of ExecutionsTo limit the number of trigger starts, tick this check box and enter the allowed number of trigger starts in the Max Number text box. To not limit the number of trigger starts, untick this check box.
ExpireTo make the trigger expire on a specific date and time, tick this check box and enter the date and time in this text box, by using the following format: yyyy-mm-dd hh:mm:ss. To make the trigger not to expire, untick this check box.
Example:
2012-12-31 23:59:59
Monthly
MonthsChoose the month(s) of the year for the trigger to start, by ticking any of the following check boxes:
l January
l February
l March
l April
l May
l June
l July
l August
l September
l October
l November
l December
Administering QlikView - QlikView, April 2019 185

6 System
If no month was chosen, the current month is selected.
Check AllTo automatically tick all of the months, click on this button.
Uncheck AllTo automatically untick all of the months, click on this button.
Run OnlyTo limit the trigger start within the selected Months, select one of the following options:
l Days, and select the day(s) of the month(s) for the trigger to start, by ticking any of the following check boxes:
1, 2, 3... 31, where each value represents that day of the month(s)Last, meaning the very last day of the month(s)
If no day was chosen, the trigger will not occur.
l On, and select the weekday(s) of the month(s), by ticking any of the following check boxes:
Order Weekday
First
Second
Third
Fourth
Last
Monday
Tuesday
Wednesday
Thursday
Friday
Saturday
Sunday
Max Number of ExecutionsTo limit the number of trigger starts, tick this check box and enter the allowed number of trigger starts in the Max Number text box. To not limit the number of trigger starts, untick this check box.
ExpireTo make the trigger expire on a specific date and time, tick this check box and enter the date and time in this text box, by using the following format: yyyy-mm-dd hh:mm:ss. To make the trigger not to expire, untick this check box.
Example:
2012-12-31 23:59:59
Administering QlikView - QlikView, April 2019 186
6 System
ContinuouslyNo further settings are available.
On Event from Another Task
When the On Event from Another Task trigger type was chosen, the trigger can be configured to start the current task on the event from another task. The following configuration options are available:
Start onChoose a trigger event, by clicking on one of the following options in the drop-down list:
l Successful, meaning that the execution of the task was successful
l Failed, meaning that the execution of the task failed
Completion ofChoose a trigger task, by clicking on one of the options in the drop-down list.
On an External Event
When the On an External Event trigger type was chosen, the trigger can be configured to start the current task on an external event, that is, an outside component, making a QlikView Management Service (QMS) API call. The following configuration options are available:
PasswordThis password is used to access the task and release the trigger. The external event has to know the password. To enable an external event to release the trigger of the task, enter a password in this text box.
On Multiple Events Completed
When the On Multiple Events Completed trigger type was chosen, the trigger can be configured to start the current task when other tasks have all been completed in their execution within a certain time. The following configuration options are available:
Time ConstraintChoose a time limit, within which all of the tasks have to complete their execution, by entering the desired number in the Minutes text box.
Default value: 360, meaning 6 hours.
Run Task When All of these Events Completed
External EventTo add an external event to the list of tasks that have to be completed for the trigger to be started, tick this check box. To entirely remove an external event from the list, untick this check box.
PasswordThis password is used to access the task and release the trigger. The external event has to know the password. To enable an external event to release the trigger of the task, enter a password in this text box.
Administering QlikView - QlikView, April 2019 187
6 System
Task CompletedTo add tasks, and the events with which they have to be completed for the trigger to be started, click on the Add
icon, , to the right in the pane.
EventSelect the event for the task in the drop-down list.
TaskSelect the corresponding task, for which an event was selected in the Event field, in the drop-down list.
Task DependenciesTask dependency is a way of making sure that the current task runs only if other tasks have finished their last execution successfully. The task dependencies overrule any trigger, which means that a trigger might not be able to start the current task, if a task dependency for the current task is not fulfilled. To configure a
dependency for the current task, click on the Add icon, , to the right in the pane.
Task
Select the task(s), which must have been successfully executed before the current task can be executed, in the drop-down list.
Delete
To entirely remove a task dependency, click on the Delete icon, .
PauseIn the Pause folder, supporting tasks for pauses can be viewed and managed.
Functions
Add Task
To add a task, click on the Add Task icon, , in the upper right corner of the right pane. The following tabs will be created:
l General
l Triggers
Click on each tab label for more information.
View StatusTo view the status and the settings of a task, in the right pane, click on the task in the tree view.
Edit Task
To configure a task, click on the Edit Task icon, , or click on the task in the tree view. In the right pane, the following tabs are presented:
Administering QlikView - QlikView, April 2019 188

6 System
l General
l Triggers
Click on each tab label for more information.
Copy Task
To copy a task, click on the Copy this task to clipboard icon, .
Paste TaskPasting a task into a folder will create a new task. To paste a copied task to a specific folder, click on (highlight)
the folder and click on the Paste Task icon, , in the right pane (to the left of the Add Task icon, ).
Run Task
To start a task, click on the Run this task icon, .
Abort Task
To stop a task, click on the Abort this task icon, .
Delete TaskTo entirely remove a task, either click on (highlight) the document, in which the task resides, in the tree view, and
click on the Delete this Task icon of that task, , in the right pane, or click on (highlight) the task in the
tree view, and right-click on Delete.
GeneralOn the General tab, the basic settings and parameters of the current task can be managed. The categories for a document can be assigned, created, edited, and deleted. A category bundles documents in containers, to make categorization easier for the end-user. The categories are only visible to the end-user on the QlikView AccessPoint. Each document can only be part of one category.
Basics
Enabled
To enable the task, tick this check box. To disable the task, untick this check box.
Task Name
To edit the name of the task, enter the preferred name in this text box.
The Task Name must be unique; if it is not, a suffix number will be added to make it unique, for example, 'MyTask' will become 'MyTask (2)'.
Select Category
To assign a category to a supporting task, select one of the available categories, presented in the drop-down list.
Default value: Default.
Administering QlikView - QlikView, April 2019 189

6 System
Or Type a New Category
To create a category, enter a descriptive name in this text box. The new category will be available in the Select Category drop-down list.
Categories can be reassigned, but cannot be deleted.
Task Description
To edit the description of the task, enter the preferred description in this text box.
ParametersSelect one of the following pause options:
l Delay Seconds
This will pause for n seconds. To edit this parameter, enter the preferred value in this text box.
Default value: 0 (seconds).
l Delay Until
This will pause until the specified time is reached. To edit this parameter, enter the preferred value, in the format hh:mm, in this text box.
TriggersOn the Triggers tab, the current task can be configured to be started by triggers. A task can have multiple triggers, creating a workflow of tasks. This tab contains the following headings:
l Current Triggers
l Task Dependencies
Current TriggersEach row presents a separate trigger. The current task is started if any trigger is released (OR operator). If several triggers (multiple conditions) are to be released, before the current task is started, the On Multiple Events Completed function should be used (AND operator).
To create a trigger, click on the Add icon, , to the right in the pane.
Trigger
The type of the trigger. The possible value is the following:
l Once Trigger
l Task Finished Trigger
l External Event Trigger
l And Trigger
Details
The trigger condition settings, that is, a summary of when the trigger starts the current task.
Administering QlikView - QlikView, April 2019 190
6 System
Enabled
The current status of the trigger. The possible values are the following:
l Enabled
l Disabled
Edit Trigger
To configure a trigger, click on the Edit Trigger icon, .
Delete
To entirely remove a trigger, click on the Delete icon, .
Configure Trigger Dialog
Start the Task
Choose the type of trigger, by clicking on one of the following options in the drop-down list:
l On a Schedule
l On Event from Another Task
l On an External Event
l On Multiple Events Completed
Enabled
To enable the trigger for execution of the task, tick this check box. To disable the trigger, untick this check box.
On a Schedule
When the On a Schedule trigger type was chosen, a trigger can be scheduled to start the current task. The following configuration options are available:
RecurrenceChoose a schedule for the trigger to start, by clicking on one of the following options:
l Once
l Hourly
l Daily
l Weekly
l Monthly
l Continuously
All time specifications must be in the 24-hour format.
Start atEnter the date and time of the initial trigger start in this text box, by using the following format: yyyy-mm-dd hh:mm:ss.
Administering QlikView - QlikView, April 2019 191

6 System
Example:
2011-12-31 23:59:59
OnceNo further settings are available.
Hourly
Run EveryChoose a time interval for the trigger to start, by entering the desired number in the Hours and Minutes text boxes.
Example:
1 and 10, meaning that the trigger will start every 70 minutes (the example not considering other possible limiting settings).
OnChoose the day(s) of the week for the trigger to start, by ticking any of the following check boxes:
l Monday
l Tuesday
l Wednesday
l Thursday
l Friday
l Saturday
l Sunday
If no day was chosen, the trigger runs all days.
Run Only BetweenTo limit the trigger start within a day, tick this check box. Enter the start time and the stop time, in between which trigger start is allowed, in the start and stop text boxes, by using the following format: hh:mm. To disable the limitation, untick this check box.
Max Number of ExecutionsTo limit the number of trigger starts, tick this check box and enter the allowed number of trigger starts in the Max Number text box. To not limit the number of trigger starts, untick this check box.
Administering QlikView - QlikView, April 2019 192
6 System
ExpireTo make the trigger expire on a specific date and time, tick this check box and enter the date and time in this text box, by using the following format: yyyy-mm-dd hh:mm:ss. To make the trigger not to expire, untick this check box.
Example:
2012-12-31 23:59:59
Daily
Run EveryChoose a time interval for the trigger to start, by entering the desired number in the Day text box.
Example:
3, meaning that the trigger will start every third day (the example not considering other possible limiting settings).
Max Number of ExecutionsTo limit the number of trigger starts, tick this check box and enter the allowed number of trigger starts in the Max Number text box. To not limit the number of trigger starts, untick this check box.
ExpireTo make the trigger expire on a specific date and time, tick this check box and enter the date and time in this text box, by using the following format: yyyy-mm-dd hh:mm:ss. To make the trigger not to expire, untick this check box.
Example:
2012-12-31 23:59:59
Weekly
Run EveryChoose a time interval for the trigger to start, by entering the desired number in the Weeks text box.
Example:
2, meaning that the trigger will start every second week (the example not considering other possible limiting settings).
OnChoose the day(s) of the week for the trigger to start, by ticking any of the following check boxes:
Administering QlikView - QlikView, April 2019 193

6 System
l Monday
l Tuesday
l Wednesday
l Thursday
l Friday
l Saturday
l Sunday
If no day was chosen, the current day is selected.
Max Number of ExecutionsTo limit the number of trigger starts, tick this check box and enter the allowed number of trigger starts in the Max Number text box. To not limit the number of trigger starts, untick this check box.
ExpireTo make the trigger expire on a specific date and time, tick this check box and enter the date and time in this text box, by using the following format: yyyy-mm-dd hh:mm:ss. To make the trigger not to expire, untick this check box.
Example:
2012-12-31 23:59:59
Monthly
MonthsChoose the month(s) of the year for the trigger to start, by ticking any of the following check boxes:
l January
l February
l March
l April
l May
l June
l July
l August
l September
l October
l November
l December
Administering QlikView - QlikView, April 2019 194

6 System
If no month was chosen, the current month is selected.
Check AllTo automatically tick all of the months, click on this button.
Uncheck AllTo automatically untick all of the months, click on this button.
Run OnlyTo limit the trigger start within the selected Months, select one of the following options:
l Days, and select the day(s) of the month(s) for the trigger to start, by ticking any of the following check boxes:
1, 2, 3... 31, where each value represents that day of the month(s)Last, meaning the very last day of the month(s)
If no day was chosen, the trigger will not occur.
l On, and select the weekday(s) of the month(s), by ticking any of the following check boxes:
Order Weekday
First
Second
Third
Fourth
Last
Monday
Tuesday
Wednesday
Thursday
Friday
Saturday
Sunday
Max Number of ExecutionsTo limit the number of trigger starts, tick this check box and enter the allowed number of trigger starts in the Max Number text box. To not limit the number of trigger starts, untick this check box.
ExpireTo make the trigger expire on a specific date and time, tick this check box and enter the date and time in this text box, by using the following format: yyyy-mm-dd hh:mm:ss. To make the trigger not to expire, untick this check box.
Example:
2012-12-31 23:59:59
Administering QlikView - QlikView, April 2019 195

6 System
ContinuouslyNo further settings are available.
On Event from Another Task
When the On Event from Another Task trigger type was chosen, the trigger can be configured to start the current task on the event from another task. The following configuration options are available:
Start onChoose a trigger event, by clicking on one of the following options in the drop-down list:
l Successful, meaning that the execution of the task was successful
l Failed, meaning that the execution of the task failed
Completion ofChoose a trigger task, by clicking on one of the options in the drop-down list.
On an External Event
When the On an External Event trigger type was chosen, the trigger can be configured to start the current task on an external event, that is, an outside component, making a QlikView Management Service (QMS) API call. The following configuration options are available:
PasswordThis password is used to access the task and release the trigger. The external event has to know the password. To enable an external event to release the trigger of the task, enter a password in this text box.
On Multiple Events Completed
When the On Multiple Events Completed trigger type was chosen, the trigger can be configured to start the current task when other tasks have all been completed in their execution within a certain time. The following configuration options are available:
Time ConstraintChoose a time limit, within which all of the tasks have to complete their execution, by entering the desired number in the Minutes text box.
Default value: 360, meaning 6 hours.
Run Task When All of these Events Completed
External EventTo add an external event to the list of tasks that have to be completed for the trigger to be started, tick this check box. To entirely remove an external event from the list, untick this check box.
PasswordThis password is used to access the task and release the trigger. The external event has to know the password. To enable an external event to release the trigger of the task, enter a password in this text box.
Administering QlikView - QlikView, April 2019 196
6 System
Task CompletedTo add tasks, and the events with which they have to be completed for the trigger to be started, click on the Add
icon, , to the right in the pane.
EventSelect the event for the task in the drop-down list.
TaskSelect the corresponding task, for which an event was selected in the Event field, in the drop-down list.
Task DependenciesTask dependency is a way of making sure that the current task runs only if other tasks have finished their last execution successfully. The task dependencies overrule any trigger, which means that a trigger might not be able to start the current task, if a task dependency for the current task is not fulfilled. To configure a
dependency for the current task, click on the Add icon, , to the right in the pane.
Task
Select the task(s), which must have been successfully executed before the current task can be executed, in the drop-down list.
Delete
To entirely remove a task dependency, click on the Delete icon, .
QVD CreationIn the QVD Creation folder, supporting tasks for QlikView Data (QVD) creation can be viewed and managed.
The QVD creation feature allows QlikView Administrators to deliver specific QVD files to specific QlikView Developers and end-users. With QVD creation, QlikView Administrators can schedule tasks to create QVD files. These tasks do not require an existing QlikView document (.qvw) file. Instead, the QlikView Administrator can insert the load script necessary to generate a QlikView table into the QVD creation task, and the QlikView Publisher (QVP) will execute the load script and automatically store the QVD in a desired location.
Functions
Add Task
To add a task, click on the Add Task icon, , in the upper right corner of the right pane. The following tabs will be created:
l General
l Triggers
Click on each tab label for more information.
View StatusTo view the status and the settings of a task, in the right pane, click on the task in the tree view.
Administering QlikView - QlikView, April 2019 197
6 System
Edit Task
To configure a task, click on the Edit Task icon, , or click on the task in the tree view. In the right pane, the following tabs are presented:
l General
l Triggers
Click on each tab label for more information.
Copy Task
To copy a task, click on the Copy this task to clipboard icon, .
Paste TaskPasting a task into a folder will create a new task. To paste a copied task to a specific folder, click on (highlight)
the folder and click on the Paste Task icon, , in the right pane (to the left of the Add Task icon, ).
Run Task
To start a task, click on the Run this task icon, .
Abort Task
To stop a task, click on the Abort this task icon, .
Delete TaskTo entirely remove a task, either click on (highlight) the document, in which the task resides, in the tree view, and
click on the Delete this Task icon of that task, , in the right pane, or click on (highlight) the task in the
tree view, and right-click on Delete.
GeneralOn the General tab, the basic settings and parameters of the current task can be managed. The categories for a document can be assigned, created, edited, and deleted. A category bundles documents in containers, to make categorization easier for the end-user. The categories are only visible to the end-user on the QlikView AccessPoint. Each document can only be part of one category.
Basics
Enabled
To enable the task, tick this check box. To disable the task, untick this check box.
Task Name
To edit the name of the task, enter the preferred name in this text box.
The Task Name must be unique; if it is not, a suffix number will be added to make it unique, for example, 'MyTask' will become 'MyTask (2)'.
Administering QlikView - QlikView, April 2019 198
6 System
Select Category
To assign a category to a supporting task, select one of the available categories, presented in the drop-down list.
Default value: Default.
Or Type a New Category
To create a category, enter a descriptive name in this text box. The new category will be available in the Select Category drop-down list.
Categories can be reassigned, but cannot be deleted.
Task Description
To edit the description of the task, enter the preferred description in this text box.
Parameters
Table Name
The name of the QVD database table. To edit the table name, enter the preferred name in this text box.
The table name is required, because the QVD creation task uses this name to generate the QlikView table and QVD file. The QVD creation task will fail if the table name is not provided.
QVD Path
To select a folder for the QVD, click on the Browse icon, , and choose the folder in the Choose Folder dialog.
QVD Users
To select the method for managing users and groups, click on one of the following drop-down list options:
l All Authenticated Users, meaning that any authenticated user is authorized.
l Named Users, meaning that users that should be authorized are manually added, by searching for users and groups in a domain or on a computer (the names are resolved by the Directory Service Connector).
Add Users and Groups
If Named Users was chosen in the User Type field, do the following:
To manage users and groups, click on the Manage Users dialog icon, .
l Default Scope
Select the directory to be searched, in the drop-down list.
l Search for Users and Groups
Enter the desired search term(s) in this text box, to find a user or a group, and click on the Search icon,
.
Administering QlikView - QlikView, April 2019 199
6 System
l Search Result
This box presents the result of the search, using the desired criteria.
l Add >
To add a user or a group, click on it in the Search Result box and click on this button. Several items can be added at the same time.
l Selected Users
This box presents the selected users and groups.
l < Delete
To deselect a user or a group, click on it in the Selected Users box and click on this button. Several items can be deselected at the same time.
l << Delete All
To deselect all of the users and groups from the Selected Users box, click on this button.
Script
The load script that is required to generate the QVD file. To edit the script, enter the preferred statement in this text box.
A QVD generation task can only create a single QVD file. The script entered into the task should contain all the script necessary to create the QlikView table, including the necessary 'CONNECT' statements. The QVD creation task automatically adds the necessary 'STORE' statement; therefore, this statement should not be included in the script.
TriggersOn the Triggers tab, the current task can be configured to be started by triggers. A task can have multiple triggers, creating a workflow of tasks. This tab contains the following headings:
l Current Triggers
l Task Dependencies
Current TriggersEach row presents a separate trigger. The current task is started if any trigger is released (OR operator). If several triggers (multiple conditions) are to be released, before the current task is started, the On Multiple Events Completed function should be used (AND operator).
To create a trigger, click on the Add icon, , to the right in the pane.
Trigger
The type of the trigger. The possible value is the following:
l Once Trigger
l Task Finished Trigger
Administering QlikView - QlikView, April 2019 200

6 System
l External Event Trigger
l And Trigger
Details
The trigger condition settings, that is, a summary of when the trigger starts the current task.
Enabled
The current status of the trigger. The possible values are the following:
l Enabled
l Disabled
Edit Trigger
To configure a trigger, click on the Edit Trigger icon, .
Delete
To entirely remove a trigger, click on the Delete icon, .
Configure Trigger Dialog
Start the Task
Choose the type of trigger, by clicking on one of the following options in the drop-down list:
l On a Schedule
l On Event from Another Task
l On an External Event
l On Multiple Events Completed
Enabled
To enable the trigger for execution of the task, tick this check box. To disable the trigger, untick this check box.
On a Schedule
When the On a Schedule trigger type was chosen, a trigger can be scheduled to start the current task. The following configuration options are available:
RecurrenceChoose a schedule for the trigger to start, by clicking on one of the following options:
l Once
l Hourly
l Daily
l Weekly
l Monthly
l Continuously
Administering QlikView - QlikView, April 2019 201

6 System
All time specifications must be in the 24-hour format.
Start atEnter the date and time of the initial trigger start in this text box, by using the following format: yyyy-mm-dd hh:mm:ss.
Example:
2011-12-31 23:59:59
OnceNo further settings are available.
Hourly
Run EveryChoose a time interval for the trigger to start, by entering the desired number in the Hours and Minutes text boxes.
Example:
1 and 10, meaning that the trigger will start every 70 minutes (the example not considering other possible limiting settings).
OnChoose the day(s) of the week for the trigger to start, by ticking any of the following check boxes:
l Monday
l Tuesday
l Wednesday
l Thursday
l Friday
l Saturday
l Sunday
If no day was chosen, the trigger runs all days.
Run Only BetweenTo limit the trigger start within a day, tick this check box. Enter the start time and the stop time, in between which trigger start is allowed, in the start and stop text boxes, by using the following format: hh:mm. To disable the limitation, untick this check box.
Administering QlikView - QlikView, April 2019 202
6 System
Max Number of ExecutionsTo limit the number of trigger starts, tick this check box and enter the allowed number of trigger starts in the Max Number text box. To not limit the number of trigger starts, untick this check box.
ExpireTo make the trigger expire on a specific date and time, tick this check box and enter the date and time in this text box, by using the following format: yyyy-mm-dd hh:mm:ss. To make the trigger not to expire, untick this check box.
Example:
2012-12-31 23:59:59
Daily
Run EveryChoose a time interval for the trigger to start, by entering the desired number in the Day text box.
Example:
3, meaning that the trigger will start every third day (the example not considering other possible limiting settings).
Max Number of ExecutionsTo limit the number of trigger starts, tick this check box and enter the allowed number of trigger starts in the Max Number text box. To not limit the number of trigger starts, untick this check box.
ExpireTo make the trigger expire on a specific date and time, tick this check box and enter the date and time in this text box, by using the following format: yyyy-mm-dd hh:mm:ss. To make the trigger not to expire, untick this check box.
Example:
2012-12-31 23:59:59
Weekly
Run EveryChoose a time interval for the trigger to start, by entering the desired number in the Weeks text box.
Example:
2, meaning that the trigger will start every second week (the example not considering other possible limiting settings).
Administering QlikView - QlikView, April 2019 203
6 System
OnChoose the day(s) of the week for the trigger to start, by ticking any of the following check boxes:
l Monday
l Tuesday
l Wednesday
l Thursday
l Friday
l Saturday
l Sunday
If no day was chosen, the current day is selected.
Max Number of ExecutionsTo limit the number of trigger starts, tick this check box and enter the allowed number of trigger starts in the Max Number text box. To not limit the number of trigger starts, untick this check box.
ExpireTo make the trigger expire on a specific date and time, tick this check box and enter the date and time in this text box, by using the following format: yyyy-mm-dd hh:mm:ss. To make the trigger not to expire, untick this check box.
Example:
2012-12-31 23:59:59
Monthly
MonthsChoose the month(s) of the year for the trigger to start, by ticking any of the following check boxes:
l January
l February
l March
l April
l May
l June
l July
l August
l September
l October
Administering QlikView - QlikView, April 2019 204

6 System
l November
l December
If no month was chosen, the current month is selected.
Check AllTo automatically tick all of the months, click on this button.
Uncheck AllTo automatically untick all of the months, click on this button.
Run OnlyTo limit the trigger start within the selected Months, select one of the following options:
l Days, and select the day(s) of the month(s) for the trigger to start, by ticking any of the following check boxes:
1, 2, 3... 31, where each value represents that day of the month(s)Last, meaning the very last day of the month(s)
If no day was chosen, the trigger will not occur.
l On, and select the weekday(s) of the month(s), by ticking any of the following check boxes:
Order Weekday
First
Second
Third
Fourth
Last
Monday
Tuesday
Wednesday
Thursday
Friday
Saturday
Sunday
Max Number of ExecutionsTo limit the number of trigger starts, tick this check box and enter the allowed number of trigger starts in the Max Number text box. To not limit the number of trigger starts, untick this check box.
ExpireTo make the trigger expire on a specific date and time, tick this check box and enter the date and time in this text box, by using the following format: yyyy-mm-dd hh:mm:ss. To make the trigger not to expire, untick this check box.
Example:
2012-12-31 23:59:59
Administering QlikView - QlikView, April 2019 205

6 System
ContinuouslyNo further settings are available.
On Event from Another Task
When the On Event from Another Task trigger type was chosen, the trigger can be configured to start the current task on the event from another task. The following configuration options are available:
Start onChoose a trigger event, by clicking on one of the following options in the drop-down list:
l Successful, meaning that the execution of the task was successful
l Failed, meaning that the execution of the task failed
Completion ofChoose a trigger task, by clicking on one of the options in the drop-down list.
On an External Event
When the On an External Event trigger type was chosen, the trigger can be configured to start the current task on an external event, that is, an outside component, making a QlikView Management Service (QMS) API call. The following configuration options are available:
PasswordThis password is used to access the task and release the trigger. The external event has to know the password. To enable an external event to release the trigger of the task, enter a password in this text box.
On Multiple Events Completed
When the On Multiple Events Completed trigger type was chosen, the trigger can be configured to start the current task when other tasks have all been completed in their execution within a certain time. The following configuration options are available:
Time ConstraintChoose a time limit, within which all of the tasks have to complete their execution, by entering the desired number in the Minutes text box.
Default value: 360, meaning 6 hours.
Run Task When All of these Events Completed
External EventTo add an external event to the list of tasks that have to be completed for the trigger to be started, tick this check box. To entirely remove an external event from the list, untick this check box.
PasswordThis password is used to access the task and release the trigger. The external event has to know the password. To enable an external event to release the trigger of the task, enter a password in this text box.
Administering QlikView - QlikView, April 2019 206
6 System
Task CompletedTo add tasks, and the events with which they have to be completed for the trigger to be started, click on the Add
icon, , to the right in the pane.
EventSelect the event for the task in the drop-down list.
TaskSelect the corresponding task, for which an event was selected in the Event field, in the drop-down list.
Task DependenciesTask dependency is a way of making sure that the current task runs only if other tasks have finished their last execution successfully. The task dependencies overrule any trigger, which means that a trigger might not be able to start the current task, if a task dependency for the current task is not fulfilled. To configure a
dependency for the current task, click on the Add icon, , to the right in the pane.
Task
Select the task(s), which must have been successfully executed before the current task can be executed, in the drop-down list.
Delete
To entirely remove a task dependency, click on the Delete icon, .
Administering QlikView - QlikView, April 2019 207