_kerkythea rendering system
TRANSCRIPT
8/8/2019 _Kerkythea Rendering System..
http://slidepdf.com/reader/full/kerkythea-rendering-system 1/14
Kerkythea forum
some misc tips and tricks
Getting started in Kerkythea
originally written for Kerkythea release 1.3.02.adapted for
the new release called KT2007 ( version 1.41 )
With the new release of KT2007 Kim Frederik published an excellent pdf-tutorial
find it here .
I will adapt this step by step tutorial to reflect the new release.
manandmouse
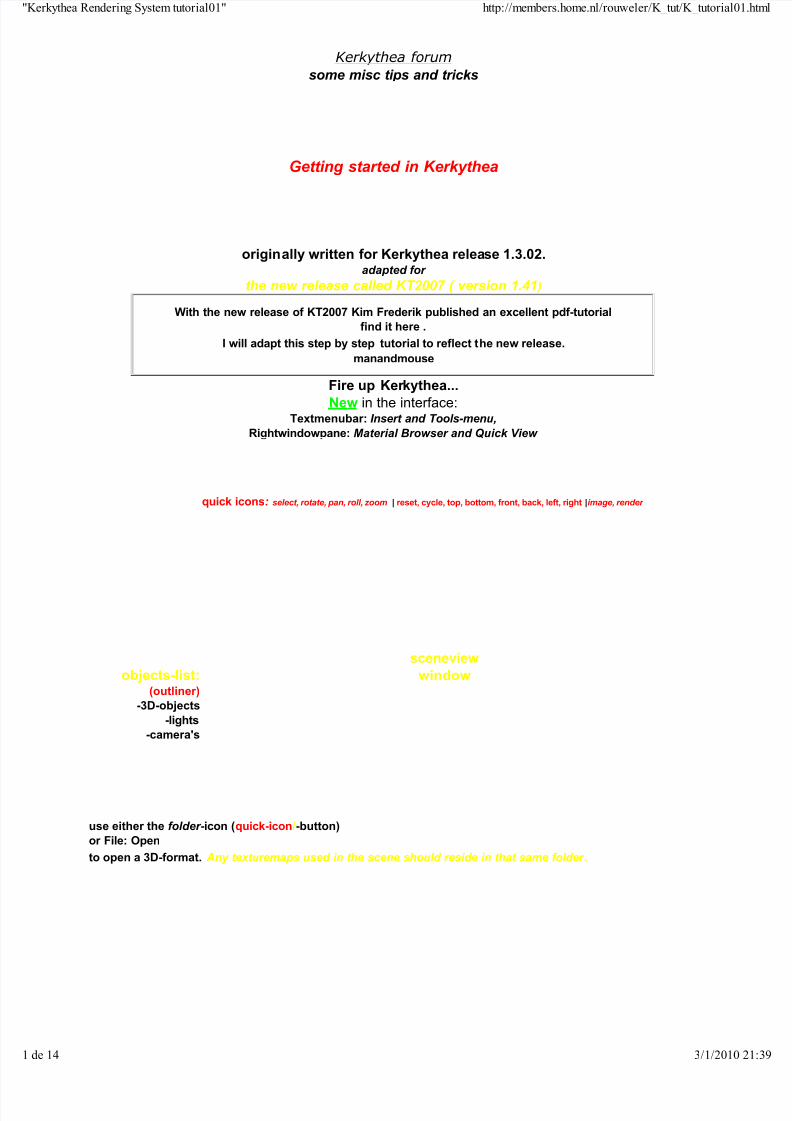
Fire up Kerkythea...
New in the interface:Textmenubar: Insert and Tools-menu,
Rightwindowpane: Material Browser and Quick View
quick icons: select, rotate, pan, roll, zoom | reset, cycle, top, bottom, front, back, left, right|image, render
objects-list:(outliner)
-3D-objects
-lights
-camera's
sceneview
window
use either the folder -icon (quick-icon/-button)
or File: Open
to open a 3D-format. Any texturemaps used in the scene should reside in that same folder .
rkythea Rendering System tutorial01" http://members.home.nl/rouweler/K_tut/K_tutorial01.html
14 3/1/2010 21:39

8/8/2019 _Kerkythea Rendering System..
http://slidepdf.com/reader/full/kerkythea-rendering-system 2/14
use the File Filter:-arrow to choose the default KT xml-format or other :
*.3ds or *.obj (both have some issues) or *.sia (=Silo)
quick buttons: select, rotate, pan, roll, zoom | reset, cycle, top, bottom, front, back, left, right | image, render
circle of progress
-lights
-camera's
After importing/opening: outliner and sceneview (closed MaterialQuickView-pane)
rkythea Rendering System tutorial01" http://members.home.nl/rouweler/K_tut/K_tutorial01.html
14 3/1/2010 21:39

8/8/2019 _Kerkythea Rendering System..
http://slidepdf.com/reader/full/kerkythea-rendering-system 3/14
next: push the Reset button
Now you can use the mouse-scrollwheel to move (zoom) in or out
of the current view
Next push the rotate-button
rkythea Rendering System tutorial01" http://members.home.nl/rouweler/K_tut/K_tutorial01.html
14 3/1/2010 21:39

8/8/2019 _Kerkythea Rendering System..
http://slidepdf.com/reader/full/kerkythea-rendering-system 4/14
Rotate as you like with the Left Mous Button (LMB)
The Right Mouse Button (RMB) always pans in every mode. Find a satisfactory Point Of View.
When you are satisfied it is time to add a camera. (now in the insertmenu )
accept or change the default name
In the outliner-list of objects on the left you find your camera
rkythea Rendering System tutorial01" http://members.home.nl/rouweler/K_tut/K_tutorial01.html
14 3/1/2010 21:39

8/8/2019 _Kerkythea Rendering System..
http://slidepdf.com/reader/full/kerkythea-rendering-system 5/14
LMB to select the camera RMB-click Go to View/Follow
In Active Cameraview you see the Sceneviewpane: a green dotted rectangle representing
thecameralimits . Also now a camerasymbol and a slider have appeared.
rkythea Rendering System tutorial01" http://members.home.nl/rouweler/K_tut/K_tutorial01.html
14 3/1/2010 21:39

8/8/2019 _Kerkythea Rendering System..
http://slidepdf.com/reader/full/kerkythea-rendering-system 6/14
I changed from camera to Frontview keyboard 5
you see the camera is still selected (select or unselect any object bij doubleclicking it in the objectslist )
handles/arrows allow to translate (move and rotate) the selected (camera-)object,
and for camera's and light also the target.
But hit the Escape-button first to switch from rotation-mode to selection-mode if you want to
move the camera.
keyboard D centers the selected (camera)
Use mousewheelscroll to zoom
and RMB to pan/position the view so you can translate the camera
rkythea Rendering System tutorial01" http://members.home.nl/rouweler/K_tut/K_tutorial01.html
14 3/1/2010 21:39

8/8/2019 _Kerkythea Rendering System..
http://slidepdf.com/reader/full/kerkythea-rendering-system 7/14
Moving the camera
In topview (keyboard 1) it is clear the camera is positioned much too high.
rkythea Rendering System tutorial01" http://members.home.nl/rouweler/K_tut/K_tutorial01.html
14 3/1/2010 21:39

8/8/2019 _Kerkythea Rendering System..
http://slidepdf.com/reader/full/kerkythea-rendering-system 8/14
So move the camera by using the handles/arrows.
Use the cycle-button at anytime to go to cameraview(s)
Instead I choose to add a new camera after using RMB to move/pan.....
.
As my object came in flipped the groundgrid appears to the right.
rkythea Rendering System tutorial01" http://members.home.nl/rouweler/K_tut/K_tutorial01.html
14 3/1/2010 21:39

8/8/2019 _Kerkythea Rendering System..
http://slidepdf.com/reader/full/kerkythea-rendering-system 9/14
Go to Edit: Select All to rotate: use the ring(s) around the handle-/arrow(s).
More instructions on translating and scaling objects can be found in Clipi's tutorial
for release 1.3.01
Find it at the tutorials-section at
Kerkythea Home
GUI Tutorial by Clipi
This is a zipped tutorial (~5.8Mb) that shows the new GUI of release 1.3.01,
including object manipulation, light and camera setup, material editor,
basic render settings and many more. Requires Macromedia flash player.
Magnificent and a MUST for a starter. Thanks Claudio :)
Several other interesting tutorials are around there too!
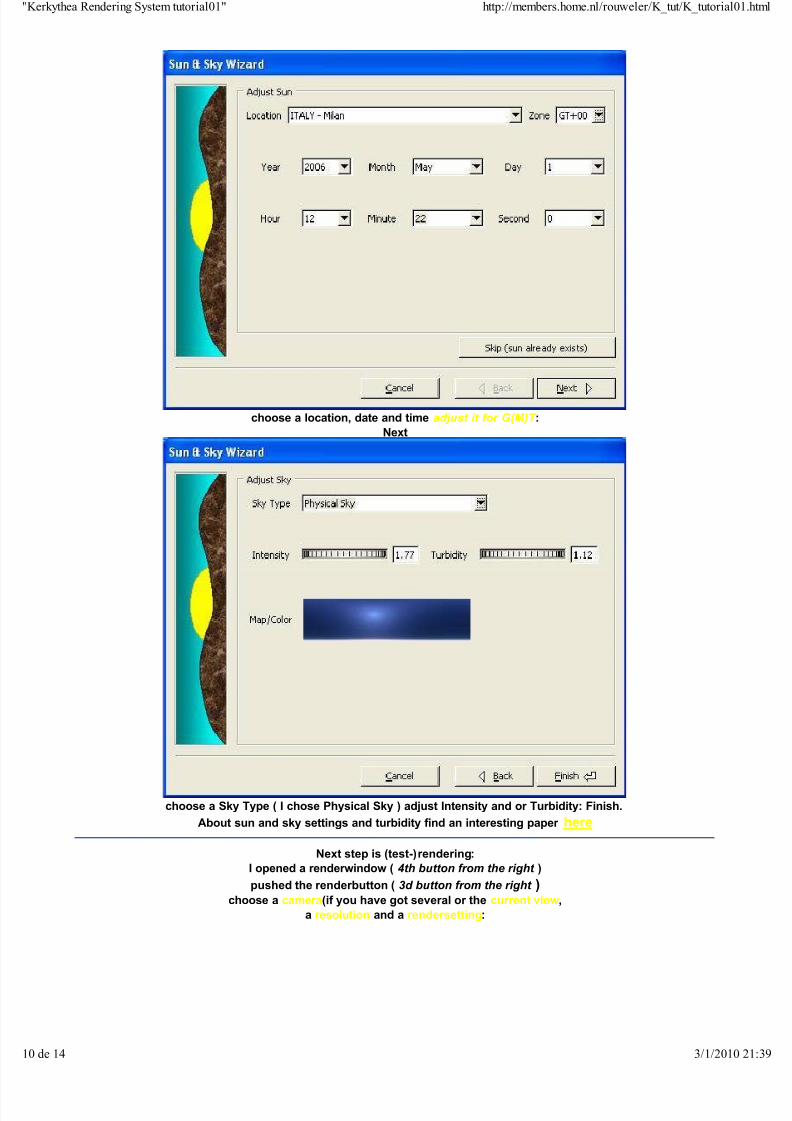
So now a lightsource is needed.
As this is a outdoorscene only a sun is needed
Go to Menu:Settings: Sun and Sky....
rkythea Rendering System tutorial01" http://members.home.nl/rouweler/K_tut/K_tutorial01.html
14 3/1/2010 21:39
8/8/2019 _Kerkythea Rendering System..
http://slidepdf.com/reader/full/kerkythea-rendering-system 10/14
choose a location, date and time adjust it for G(M)T :
Next
choose a Sky Type ( I chose Physical Sky ) adjust Intensity and or Turbidity: Finish.
About sun and sky settings and turbidity find an interesting paper here
Next step is (test-)rendering:
I opened a renderwindow ( 4th button from the right )
pushed the renderbutton ( 3d button from the right )choose a camera(if you have got several or the current view,
a resolution and a rendersetting:
rkythea Rendering System tutorial01" http://members.home.nl/rouweler/K_tut/K_tutorial01.html
de 14 3/1/2010 21:39

8/8/2019 _Kerkythea Rendering System..
http://slidepdf.com/reader/full/kerkythea-rendering-system 11/14
the default choice ## custom settings ##
will be the same as 01. Ray Tracing - Quick
(as you have not as of yet changed anything in the rendersettings)
So try out: 05. GI-Quick
while raytracing is progressing try out a few of the tonemapping-options
adjusting the wheels you see immediate results
above is a render using setting 10. GI + Caustics - Medium
rkythea Rendering System tutorial01" http://members.home.nl/rouweler/K_tut/K_tutorial01.html
de 14 3/1/2010 21:39

8/8/2019 _Kerkythea Rendering System..
http://slidepdf.com/reader/full/kerkythea-rendering-system 12/14
and this a render with camera 2 is using setting 05. GI - Quick
The higher the number of the rendersettings
the more time the rendering will take.
Save the rendered image as often as you like with different tonemappingvariations,
under different names of course .
===========================
To get an idea of what you have done sofar in rendering:
Go to: WindowConsolelog
Click LMB in the log
Ctrl + A: selects al the text
Ctrl + C: copies it to the clipboard
Create a new text-document, open it
Ctrl + V: will paste the log text:
--------- KERKYTHEA RENDERING SYSTEM ------------------ Copyright (c) 2004-2006 ---------
INITIALIZING KERNEL (Version 1.3.02)This program uses Fox Toolkit, http://www.fox-toolkit.org/ - Copyright (C) 1997,2004 Jeroen van der Zijp. All Rights Reserved.This program uses FreeImage, a free, open source image library supporting all common bitmap formats. See http://freeimage.sourceforge.net for details
(Version 3.8.0)Kernel: Setting active image handler to Free Image SupportKernel: Setting active environment to Octree EnvironmentKernel: Setting active modeller to XML Modeller Kernel: Setting active ray tracer to Standard Ray Tracer Kernel: Setting active direct light estimator to Refraction Enhanced
Warning: Active scene is nullOpening file "D:\3DExport\nsAllLuuv.obj"Kernel: Setting active modeller to XML Modeller Kernel: Setting active modeller to 3DS Modeller Kernel: Setting active modeller to OBJ Modeller Kernel: Setting active scene to Default SceneParsing obj file D:\3DExport\nsAllLuuv.objSuccessfully parsed file in 0 secondsBegining scene creationSuccessfully created scene in 1 secondsFinished in 1 seconds!Kernel: Setting active camera to Camera #1
Kernel: Setting active camera to Camera #2Building Octree : |ooooooo|ooooooo|ooooooo|ooooooo|ooooooo| (376 triangles, 305 nodes, 181 leaves)Final Gathering: Using secondary irradiance estimator Density EstimationDensity Estimation: Using 1.62269m detail in mesh generation.Photon Shooting : |ooooooo|ooooooo|ooooooo|ooooooo|ooooooo| (1 seconds)Building Meshes : |ooooooo|ooooooo|ooooooo|ooooooo|ooooooo|Final Gathering: Avoiding last level light sampling (secondary estimator direct lighting).Final Gathering: Unsupported caustics sampling by secondary estimator.Refraction Enhanced DL Estimator: Optimizing area light computation.Info: Cached 0 lightsRay Tracing : |ooooooo|ooooooo|ooooooo|ooooooo|ooooooo| (269 seconds)Final Gathering Statistics and InformationMax Gathering Depth : 2, Max Tracing Depth : 5Gathering Rays : 150, Interpolation Accuracy : 0.25Total Gatherings : 195987, Total Interpolations : 1114713Total Ray Tests : 40035007, Intersections found : 25090863Shadow Ray Tests : 0, Intersections found : 0Finished in 4 minutes and 31 seconds!Saving image D:\3DExport\nsAllLuuv_objcam2GIQecm.jpg ... succ ess
Building Octree : |ooooooo|ooooooo|ooooooo|ooooooo|ooooooo| (376 triangles, 305 nodes, 181 leaves)Warning: Active irradiance estimator is nullRefraction Enhanced DL Estimator: Optimizing area light computation.Info: Cached 0 lightsRay Tracing : |ooooooo|ooooooo|ooooooo|ooooooo|ooooooo| (0 seconds)Total Ray Tests : 60814, Intersections found : 47705Shadow Ray Tests : 0, Intersections found : 0
rkythea Rendering System tutorial01" http://members.home.nl/rouweler/K_tut/K_tutorial01.html
de 14 3/1/2010 21:39
8/8/2019 _Kerkythea Rendering System..
http://slidepdf.com/reader/full/kerkythea-rendering-system 13/14
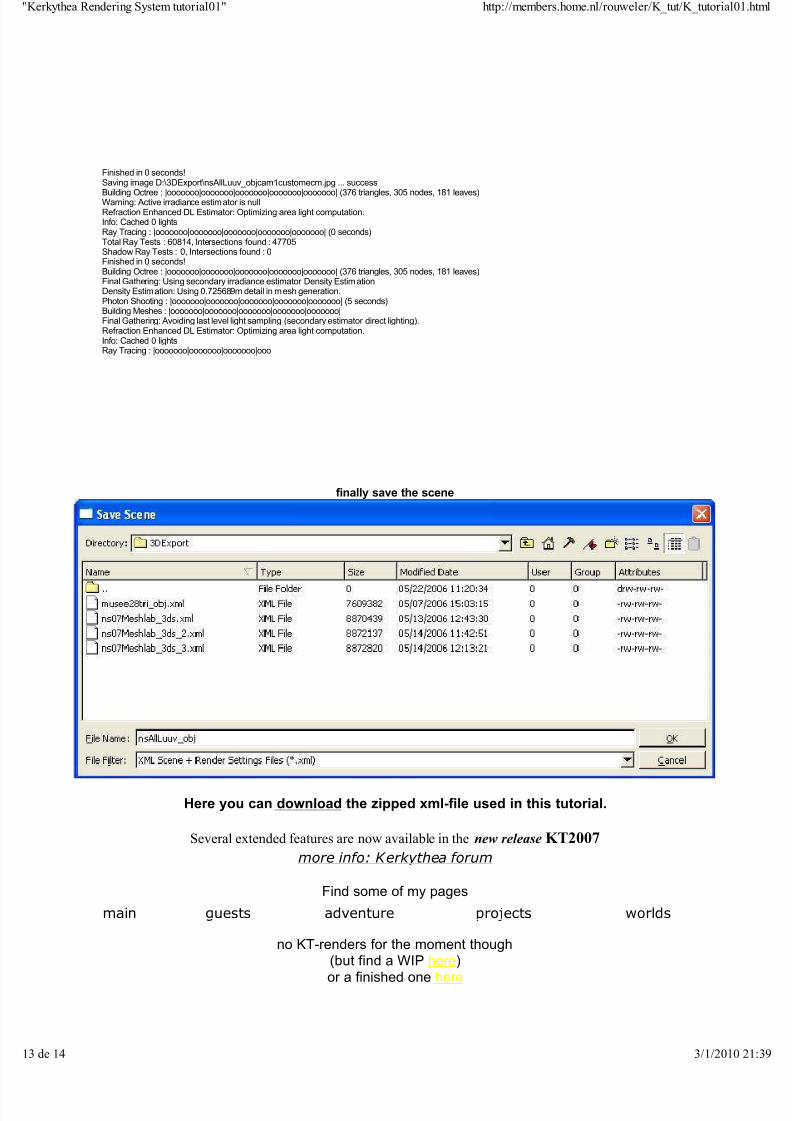
Finished in 0 seconds!
Saving image D:\3DExport\nsAllLuuv_objcam1customecm.jpg ... successBuilding Octree : |ooooooo|ooooooo|ooooooo|ooooooo|ooooooo| (376 triangles, 305 nodes, 181 leaves)Warning: Active irradiance estimator is nullRefraction Enhanced DL Estimator: Optimizing area light computation.Info: Cached 0 lightsRay Tracing : |ooooooo|ooooooo|ooooooo|ooooooo|ooooooo| (0 seconds)Total Ray Tests : 60814, Intersections found : 47705Shadow Ray Tests : 0, Intersections found : 0Finished in 0 seconds!Building Octree : |ooooooo|ooooooo|ooooooo|ooooooo|ooooooo| (376 triangles, 305 nodes, 181 leaves)Final Gathering: Using secondary irradiance estimator Density EstimationDensity Estimation: Using 0.725689m detail in mesh generation.Photon Shooting : |ooooooo|ooooooo|ooooooo|ooooooo|ooooooo| (5 seconds)Building Meshes : |ooooooo|ooooooo|ooooooo|ooooooo|ooooooo|Final Gathering: Avoiding last level light sampling (secondary estimator direct lighting).Refraction Enhanced DL Estimator: Optimizing area light computation.Info: Cached 0 lightsRay Tracing : |ooooooo|ooooooo|ooooooo|ooo
finally save the scene
Here you can download the zipped xml-file used in this tutorial.
Several extended features are now available in the new release KT2007
more info: Kerkythea forum
Find some of my pages
main guests adventure projects worlds
no KT-renders for the moment though(but find a WIP here)
or a finished one here
rkythea Rendering System tutorial01" http://members.home.nl/rouweler/K_tut/K_tutorial01.html
de 14 3/1/2010 21:39

8/8/2019 _Kerkythea Rendering System..
http://slidepdf.com/reader/full/kerkythea-rendering-system 14/14
reworked 11 February 2007
rkythea Rendering System tutorial01" http://members.home.nl/rouweler/K_tut/K_tutorial01.html