معمل التشخيص و الابحاث الجزيئيه
TRANSCRIPT
.
كهيت انخميت انطبي انضاي
1 معمل التشخيص الجزيئي
بسن هللا الرحون الرحين
دوله ليبيب
لتعلين العبلي وزارة ا
جبهعه الساويه
كليت التقنيه الطبيه الساويه
هعول التشخيص و األبحبث الجسيئيت
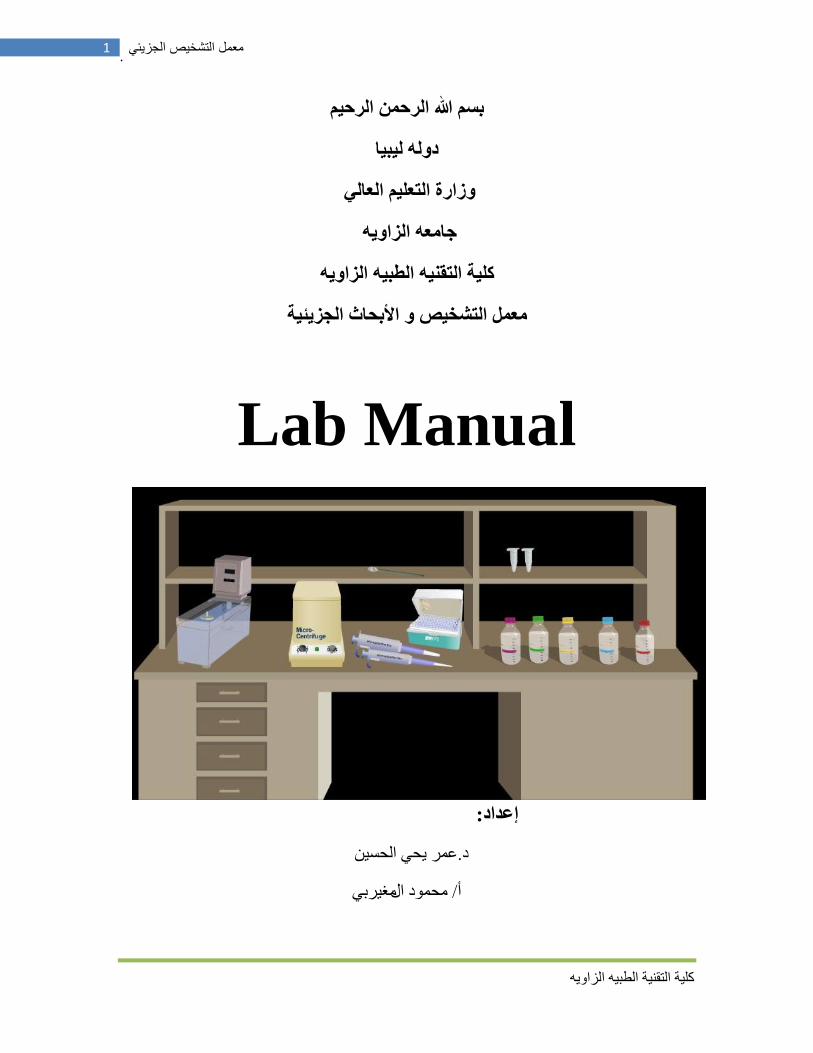
Lab Manual
:إعذاد
ػش يحي انحسي .د
يغيشبيليحد ا/ أ
.
كهيت انخميت انطبي انضاي
2 معمل التشخيص الجزيئي
:الوحتويبث
..................................................................انمذي .1
.........................................................يكبث انؼم .2
.........................................انلبيت ي انخبؽش انؼهي .3
4. Safety roles.
5. Reagent preparation.
6. DNA extraction methods.
7. RNA extraction.
8. Gel electrophoresis.
9. Standard PCR.
.
كهيت انخميت انطبي انضاي
3 معمل التشخيص الجزيئي
:ــــتالوقذم
نيم فى انكثيش ي ػهى األحيبء اندضيئي يب أدي نخزخالل انؼششي ست انبػي، سبػذث انخطساث انخمي في حمذو
انخطس انزي حذد في حطبيمبث انخمي انحيي اني أدي ". - The cancerانسشؽب "األيشاع ي ػب
إبخكبس ؽشق حشخيض خذيذ ، بم سبج في انخبؤ ببؼغ األيشاع يخببؼ انخطساث انخي ححذد ػهي انحبالث
كم رنك بظسة اكثش دل بألم خذ . انشػي ي إسخدبب نهؼالخبث يؼشف حبنت اخشبس انشع في اندسى
. ػهي صي يب كب
يخببؼ حؼفي انشيغ ي يب –انخشخيض –ي ػ حطبيمبث انخمي انحيي انخي فشػج فسب بمة في انخبؤ
يمو زا انخفبػم بؼبػفت أخضاء ي . Polymerase Chain Reactionيؼشف بخفبػم انبهشة انخسهسم ا
ز األخضاء ي انحغ . ػي اندشدػهي ببل اإلسخذاللانحغ اني ليذ انذساس بطشيمت حخيح
راث أي ؽبي فمذ حبئ ػ حذد انشع في انسخمبم، ا أي حشخيظي حيذ يشيش (Biomarker)اني
خدب نحذد ا اسخفحبل انشع لج فحض انشيغ ، أ أيبث اخشي يثم يؼشف يالئ ػالج يؼي يغ
. غيشب كثيش. يشيغ
انطفيهيبث ببإلػبف اني يسبخب انبكخشيب ,انفيشسبثاأليشاع يثم بكشف يسبببث (PCR)يت الحمو ايؼب حم
( (PCRفيسم ي خالل ال. حغيش ي خاص إمسبو انخاليب ححيهب اني خاليب سشؽبيانفبػه في دساس ال
اال نلف إخشبس انشع بخبني يخى ػالخبيسبببث ز األيشاع يؼبػفت خضء انحبيغ اني انيض ل
بؼغ انطفشاث انخي في يخببؼتPCR) )أػف اني رنك، فمذ سبػذث حميت ال.انخؼبيم يغ انشيغ ػهي انح األيثم
يب حدؼهب يمبي نهؼمبليش انطبي ، ببنخبني يخى حبذيم انبكخشيب انطفيهيبث ,انفيشسبث, ححذد في انخاليب انسشؽبي
أي ( Personalized Medicine)ببنؼالج انشخظي خبئح يؼم األحيبء اندضيئي فيب يؼشف انؼالخبث ػهي ػء
.يؼشفت انؼالخبث انخي حالئى يشيغ د األخش
يؼم يؼم انخشخيض انبحذ اندضيئي خبب اني خب يغ انظيبث انؼهي األخشي نؼكس حبنت انشيغ
خي انشيغ في انماث انظحيح حمذيى خذيت طحي راث خد بظس أكثش ػحب نهطبلى انطبي حخي يخى ح
.يشدغ انؼم انبحذ فيب يؼكس ػهي سفغ كفبءة انخشخيض ي بحيت انؼالج ي بحي أخشي. ػبني
ػش يحيي انحسي يحذ/ د
يششف يؼم انخشخيض انبحذ اندضيئي
.
كهيت انخميت انطبي انضاي
4 معمل التشخيص الجزيئي
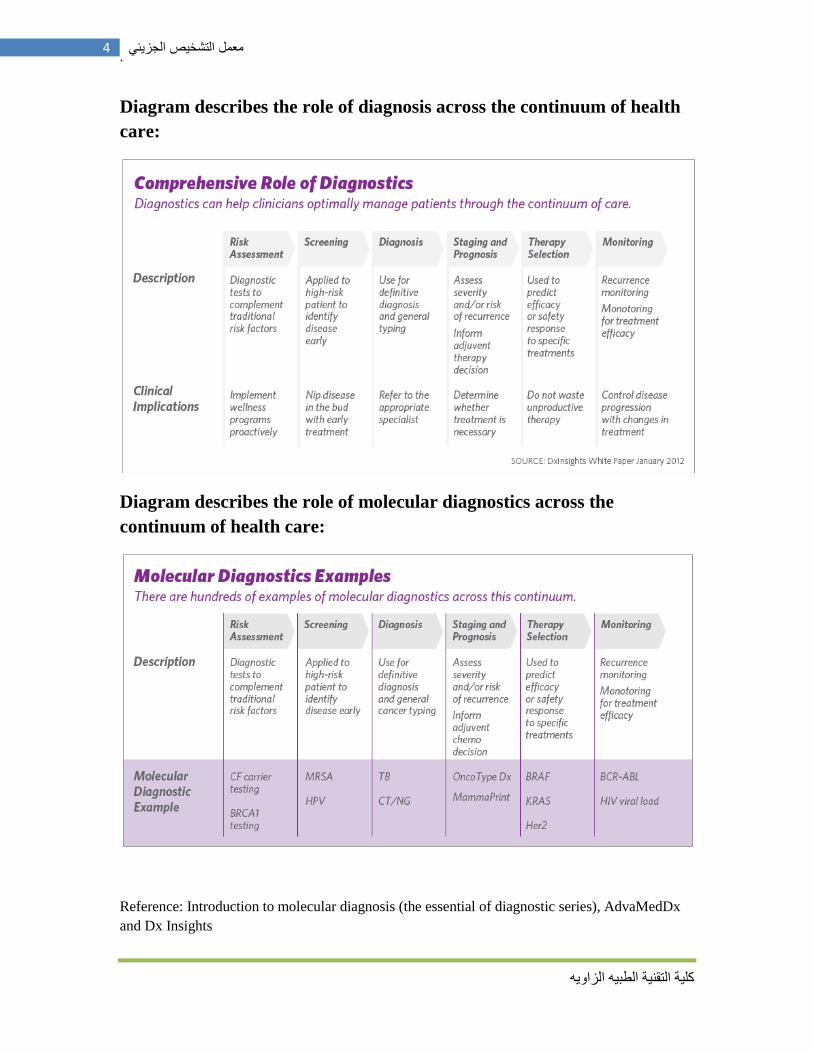
Diagram describes the role of diagnosis across the continuum of health
care:
Diagram describes the role of molecular diagnostics across the
continuum of health care:
Reference: Introduction to molecular diagnosis (the essential of diagnostic series), AdvaMedDx
and Dx Insights
.
كهيت انخميت انطبي انضاي
5 معمل التشخيص الجزيئي
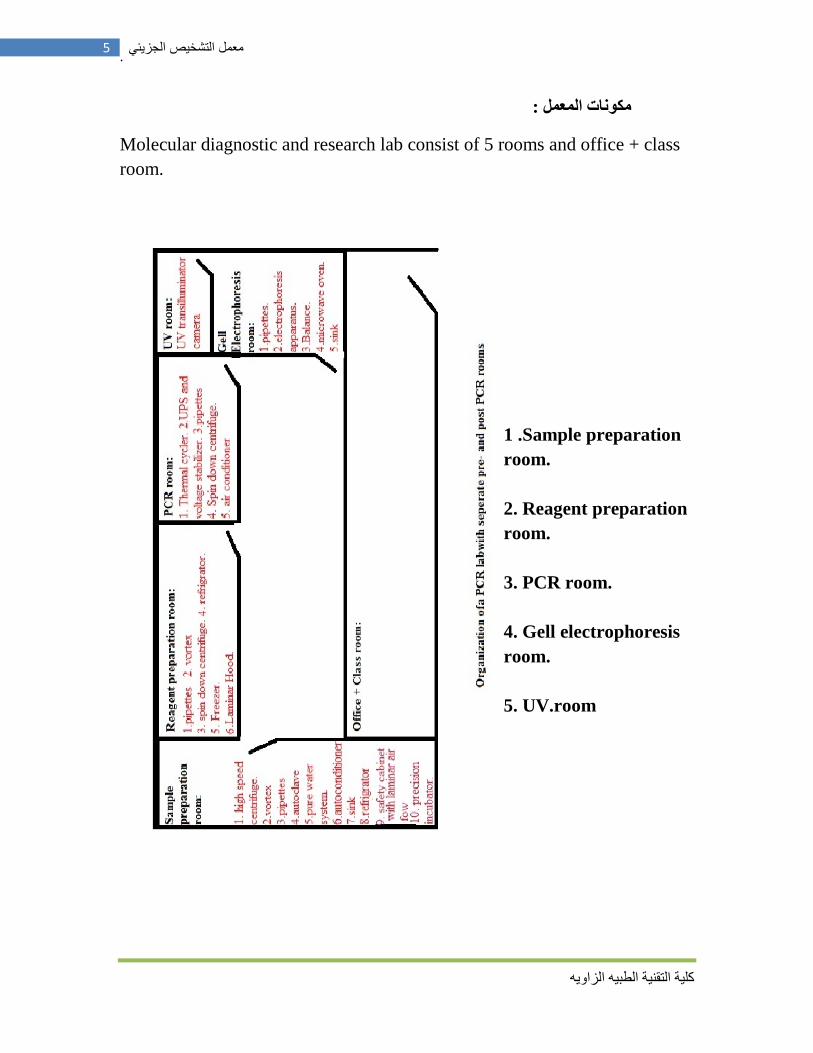
:هكونبث الوعول
Molecular diagnostic and research lab consist of 5 rooms and office + class
room.
1 .Sample preparation
room.
2. Reagent preparation
room.
3. PCR room.
4. Gell electrophoresis
room.
5. UV.room
.
كهيت انخميت انطبي انضاي
6 معمل التشخيص الجزيئي
الوقبيت هن الوخبطر الوعوليت
:First: the chemicals كييبئيتاناد ال: ووال
حمو انششكبث . انؼذيذ ي اناد انكييبئيت انسخخذيت في يؼم األحيبء اندضيئي ػهي دسخ ػبنيت ي انخطس
MSDS ني خطسة ز اناد انكييبئي بظس اػح فيب يؼشفانظؼ بػغ ػاليبث أ ػببساث حب إ
Material Safety Data Sheet) ( . ز انؼهيبث ححخي ػهي اإلسى انكييبئي ، بيببث انخبؽشانظحي
اث أيؼب انخاص انفيضيبئي، يخبؽش انحشيك ا اإلفدبس، بيب.اإلسؼبفبث األني انالصي في حبنت لع اطبب
. انخفبػألث انخطش، ؽشيمت اإلسخخذاو األي نهبد
The following chemicals are particularly noteworthy:
1. Phenol and Chloroform:
Can cause severe burns so use protective measures whenever
appropriate. Wear gloves when dealing with these chemicals and use
the laminar hood in case of Phenol.
2. Acrylamide :
Potential neurotoxin, avoid inhalation by using face masks.
3. Ethidium bromide :
Carcinogen, use protective gloves in case of working in an Ethidium bromide
contaminated zone in the Lab.
NOTES:
These chemicals are not harmful if used properly.
Always wear gloves when using potentially hazardous chemicals and never
mouth-pipet them.
If you accidently splash any of these chemicals on your skin, immediately
rinse the area thoroughly with water and inform the instructor.
Discard the waste in appropriate container.
Second: Ultraviolet Light (in normal PCR not real time):
Exposure to ultraviolet light can cause acute eyes irritation. Since the retina can’t detect
UV light, you can have serious damage and not realize it until 30 min to 24 hours after
exposure. Therefore, always wear appropriate eye protection when using UV lamps.
Third: Electricity:
The voltages used for electrophoresis are sufficient to cause electrocution. Cover the
buffer reservoirs during electrophoresis. Always turn off the power supply and unplug the
leads before removing a gel.
.
كهيت انخميت انطبي انضاي
7 معمل التشخيص الجزيئي
Safety roles:
1. Place bags, Lab coats, books…. etc. in specific locations
(NEVER ON THE BENCH TOPS).
2. No eating or drinking in the laboratory. Do not store food in the laboratory.
3. No pipetting by mouth. Use mechanical pipetting device only.
4. Wear lab coats, disposable gloves, and safety glasses when appropriate.
5. Keep all noxious and volatile compounds in the fume hood.
6. Dispose of all biological waste into appropriate receptacles. Live cultures can
be treated with Clorox bleach or autoclaved. Do not toss out into regular trash
or down drains without autoclaving.
7. Do not use plastic or polycarbonate containers, tests tubes, pipettes etc. with
phenol and chloroform. Instead use polypropylene or glass with these organic
compounds.
8. Do not dispose of hazardous or noxious chemicals in laboratory sink. Use
proper containers in fume hood.
9. Wash your hand before leaving the Lab.
10. Report all accident to Lab manager immediately.
11. General housekeeping :
All common area should be kept free of clutter and all dirty dishes,
electrophoresis equipment, etc. should be dealt with appropriately.
Since you will use common facilities, all solutions and everything stored
in an incubator, refrigerator, etc. must be labeled. In order to limit
confusion.
Unlabelled material found in refrigerators, incubators, or freezers may be
destroyed.
Always mark the backs of the plates with your initials, the date, and
relevant experimental data, e.g. type of tissue and test.
.
كهيت انخميت انطبي انضاي
8 معمل التشخيص الجزيئي
Reagent preparation:
General information:
Molar solutions:
A molar solution is one which 1 liter of solution contains the number of grams equal to
its molecular weight.
E.g. to make up 100 ml of a 5M NACL solution = 58.456 (mwt of NACL) g/mol x 0.1
liter = 29.29 g in 100 ml of solution
Percent solutions (%):
Percentage (w/v) = weight (g) in 100 ml of solution;
Percentage (v/v) = volume (ml) in 100 ml of solution
To make 100 ml of TE buffer (10 mM Tris, 1 mM EDTA), combine 1 ml of a 1 M Tris
solution and 0.2 ml of 0.5 M EDTA and 98.8 ml sterile water. The following is useful for
calculating amounts of stock solution needed: C i x V i = C f x V f , where C i = initial
concentration, or conc of stock solution; V i = initial vol, or amount of stock solution
needed C f = final concentration, or conc of desired solution; V f = final vol, or volume
of desired solution
E.g. to make a 0.7% solution of Agarose in TBE buffer, weight 0.7 of Agarose and bring
up volume to 100 ml with TBE buffer.
X solutions:
Many enzymes buffers are prepared as concentrated solutions,
E.g. 5X or 10X (5 or 10 times the concentration of the working solution) and are diluted
such that the final concentration of the buffer in the reaction is 1X.
E.g. to set up a restriction digestion in 25 micro liter, one would add 2.5 micro.l of a 10 x
buffer, the other reaction components, and water to final volume of 25 micro.l
.
كهيت انخميت انطبي انضاي
9 معمل التشخيص الجزيئي
DNA extraction methods
In this Experiment you need to isolate some DNA from a human test subject
Why, you may ask, do you need a human DNA?
Scientists isolate DNA for variety of reasons, some of which
include:
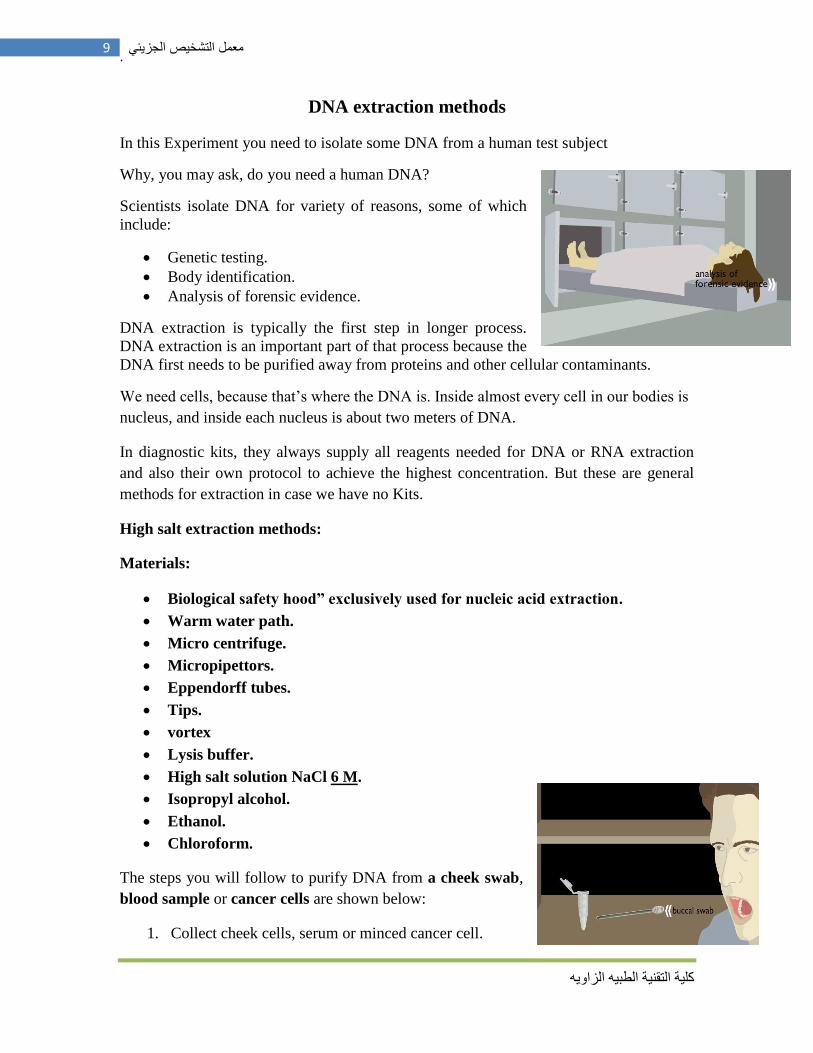
Genetic testing.
Body identification.
Analysis of forensic evidence.
DNA extraction is typically the first step in longer process.
DNA extraction is an important part of that process because the
DNA first needs to be purified away from proteins and other cellular contaminants.
We need cells, because that’s where the DNA is. Inside almost every cell in our bodies is
nucleus, and inside each nucleus is about two meters of DNA.
In diagnostic kits, they always supply all reagents needed for DNA or RNA extraction
and also their own protocol to achieve the highest concentration. But these are general
methods for extraction in case we have no Kits.
High salt extraction methods:
Materials:
Biological safety hood” exclusively used for nucleic acid extraction.
Warm water path.
Micro centrifuge.
Micropipettors.
Eppendorff tubes.
Tips.
vortex
Lysis buffer.
High salt solution NaCl 6 M.
Isopropyl alcohol.
Ethanol.
Chloroform.
The steps you will follow to purify DNA from a cheek swab,
blood sample or cancer cells are shown below:
1. Collect cheek cells, serum or minced cancer cell.
.
كهيت انخميت انطبي انضاي
10 معمل التشخيص الجزيئي
2. Burst cells open to release DNA.
3. Separate DNA from proteins and other debris.
4. Isolate concentrated DNA.
The procedures:
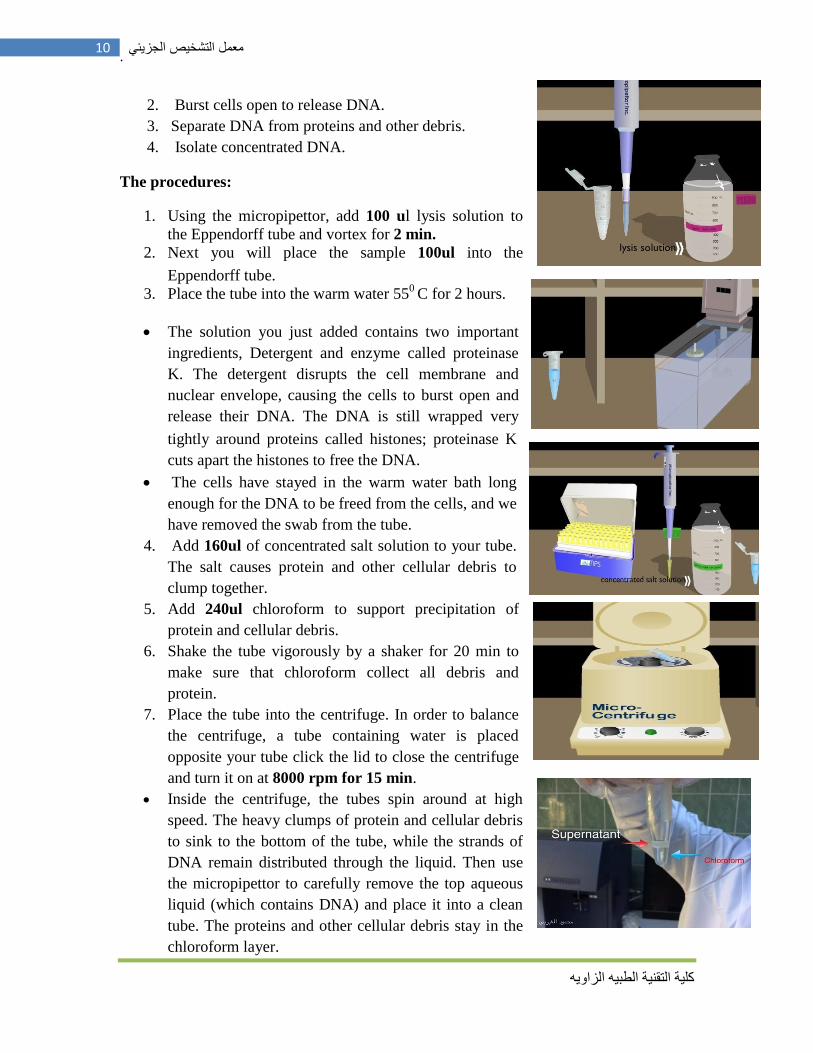
1. Using the micropipettor, add 100 ul lysis solution to
the Eppendorff tube and vortex for 2 min.
2. Next you will place the sample 100ul into the
Eppendorff tube.
3. Place the tube into the warm water 550
C for 2 hours.
The solution you just added contains two important
ingredients, Detergent and enzyme called proteinase
K. The detergent disrupts the cell membrane and
nuclear envelope, causing the cells to burst open and
release their DNA. The DNA is still wrapped very
tightly around proteins called histones; proteinase K
cuts apart the histones to free the DNA.
The cells have stayed in the warm water bath long
enough for the DNA to be freed from the cells, and we
have removed the swab from the tube.
4. Add 160ul of concentrated salt solution to your tube.
The salt causes protein and other cellular debris to
clump together.
5. Add 240ul chloroform to support precipitation of
protein and cellular debris.
6. Shake the tube vigorously by a shaker for 20 min to
make sure that chloroform collect all debris and
protein.
7. Place the tube into the centrifuge. In order to balance
the centrifuge, a tube containing water is placed
opposite your tube click the lid to close the centrifuge
and turn it on at 8000 rpm for 15 min.
Inside the centrifuge, the tubes spin around at high
speed. The heavy clumps of protein and cellular debris
to sink to the bottom of the tube, while the strands of
DNA remain distributed through the liquid. Then use
the micropipettor to carefully remove the top aqueous
liquid (which contains DNA) and place it into a clean
tube. The proteins and other cellular debris stay in the
chloroform layer.
.
كهيت انخميت انطبي انضاي
11 معمل التشخيص الجزيئي
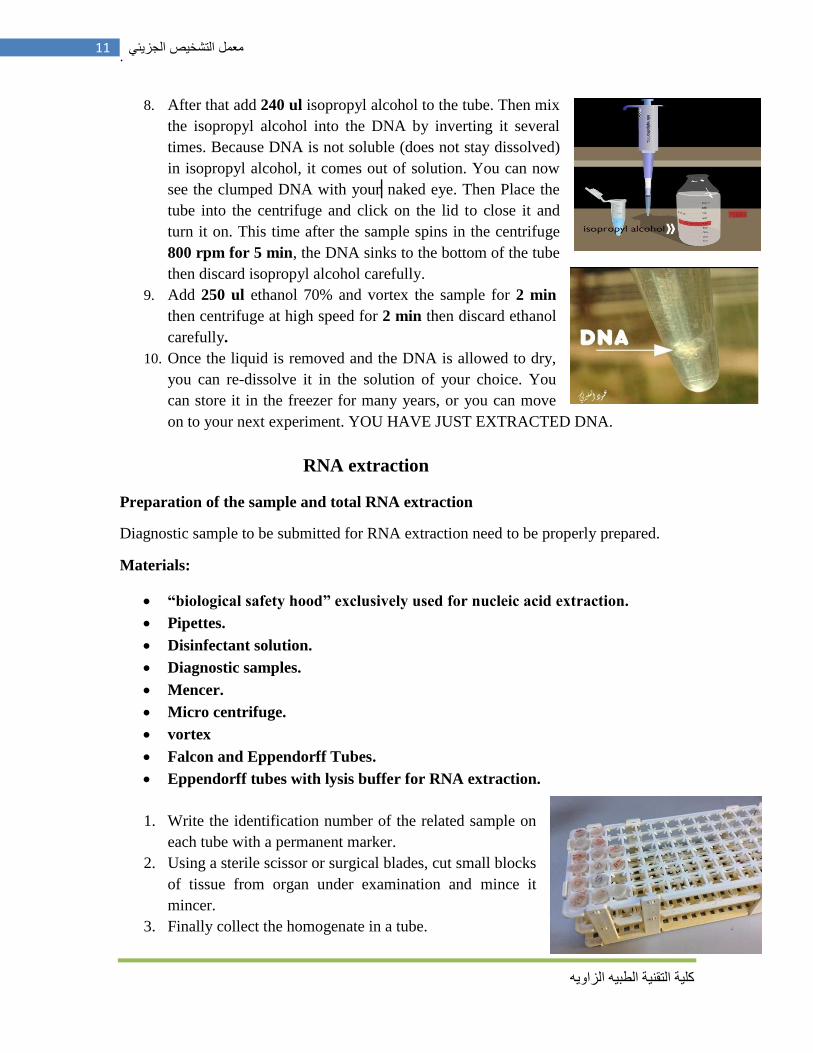
8. After that add 240 ul isopropyl alcohol to the tube. Then mix
the isopropyl alcohol into the DNA by inverting it several
times. Because DNA is not soluble (does not stay dissolved)
in isopropyl alcohol, it comes out of solution. You can now
see the clumped DNA with your naked eye. Then Place the
tube into the centrifuge and click on the lid to close it and
turn it on. This time after the sample spins in the centrifuge
800 rpm for 5 min, the DNA sinks to the bottom of the tube
then discard isopropyl alcohol carefully.
9. Add 250 ul ethanol 70% and vortex the sample for 2 min
then centrifuge at high speed for 2 min then discard ethanol
carefully.
10. Once the liquid is removed and the DNA is allowed to dry,
you can re-dissolve it in the solution of your choice. You
can store it in the freezer for many years, or you can move
on to your next experiment. YOU HAVE JUST EXTRACTED DNA.
RNA extraction
Preparation of the sample and total RNA extraction
Diagnostic sample to be submitted for RNA extraction need to be properly prepared.
Materials:
“biological safety hood” exclusively used for nucleic acid extraction.
Pipettes.
Disinfectant solution.
Diagnostic samples.
Mencer.
Micro centrifuge.
vortex
Falcon and Eppendorff Tubes.
Eppendorff tubes with lysis buffer for RNA extraction.
1. Write the identification number of the related sample on
each tube with a permanent marker.
2. Using a sterile scissor or surgical blades, cut small blocks
of tissue from organ under examination and mince it
mincer.
3. Finally collect the homogenate in a tube.
.
كهيت انخميت انطبي انضاي
12 معمل التشخيص الجزيئي
Total RNA extraction:
1. Before you added the lysis buffer the sample is still
dangerous especially that containing viruses. A filter face
mask can also be worn to increase operator protection.
2. In diagnostic laboratory RNA extraction is commonly
performed using commercial kits. Commercial RNA
extraction kits are generally based on the same principles
and should be used following the manufacturer’s
instructions.
3. Begin the working session by marking the tube the
corresponding sample identification number.
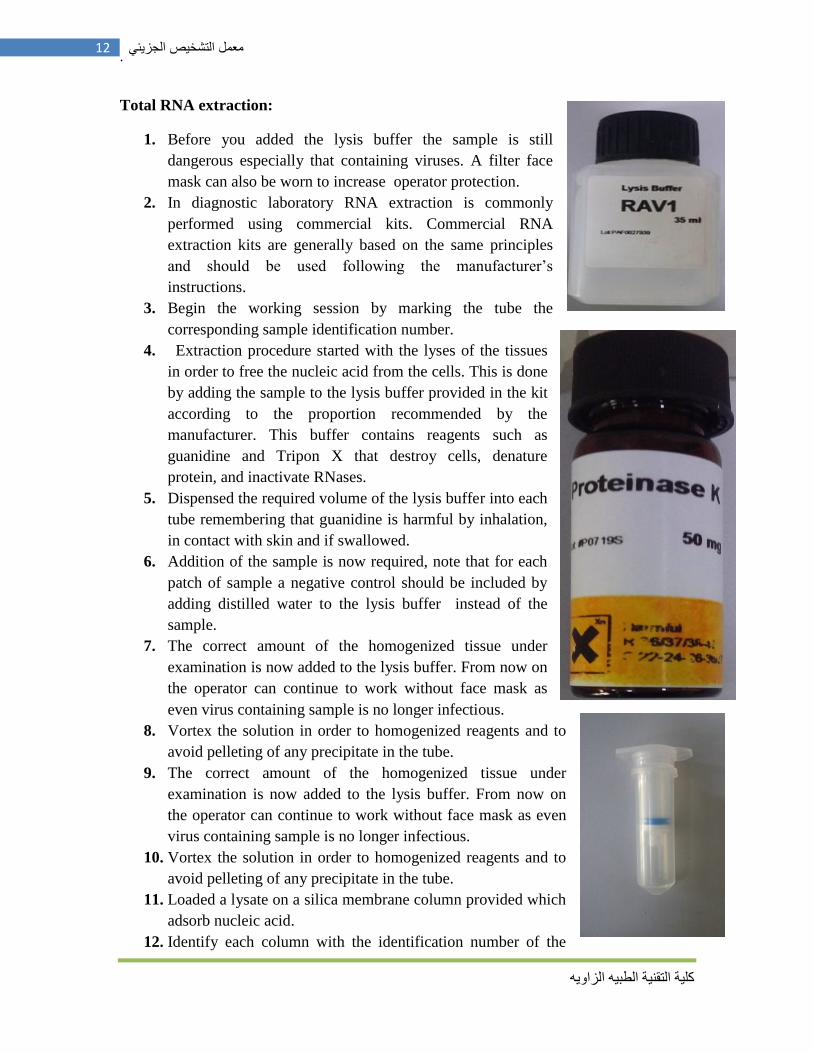
4. Extraction procedure started with the lyses of the tissues
in order to free the nucleic acid from the cells. This is done
by adding the sample to the lysis buffer provided in the kit
according to the proportion recommended by the
manufacturer. This buffer contains reagents such as
guanidine and Tripon X that destroy cells, denature
protein, and inactivate RNases.
5. Dispensed the required volume of the lysis buffer into each
tube remembering that guanidine is harmful by inhalation,
in contact with skin and if swallowed.
6. Addition of the sample is now required, note that for each
patch of sample a negative control should be included by
adding distilled water to the lysis buffer instead of the
sample.
7. The correct amount of the homogenized tissue under
examination is now added to the lysis buffer. From now on
the operator can continue to work without face mask as
even virus containing sample is no longer infectious.
8. Vortex the solution in order to homogenized reagents and to
avoid pelleting of any precipitate in the tube.
9. The correct amount of the homogenized tissue under
examination is now added to the lysis buffer. From now on
the operator can continue to work without face mask as even
virus containing sample is no longer infectious.
10. Vortex the solution in order to homogenized reagents and to
avoid pelleting of any precipitate in the tube.
11. Loaded a lysate on a silica membrane column provided which
adsorb nucleic acid.
12. Identify each column with the identification number of the
.
كهيت انخميت انطبي انضاي
13 معمل التشخيص الجزيئي
sample.
13. Dispense the lysate in to the middle of the column
making sure that the filter are not touch by the tips in
order to avoid breaking of the glass fiber.
14. Since this is a high risk contamination procedure, it is
strongly recommended that one tube is opened at a
time and to change tip after each sample in order to
avoid transfer of RNA by contaminated tips.
15. Remember to change gloves before leaving the hood.
16. Centrifugation is now to performed to allow adsorption
of nucleic acids to the filter.
17. Now return to the hood and prepare new collection
tubes into which the column will be placed for the next step of the
procedure.
18. Discard the flow-through into the waste vessel. During this step
total DNA present in the sample is degraded and only the total
RNA of the sample remains on the filter.
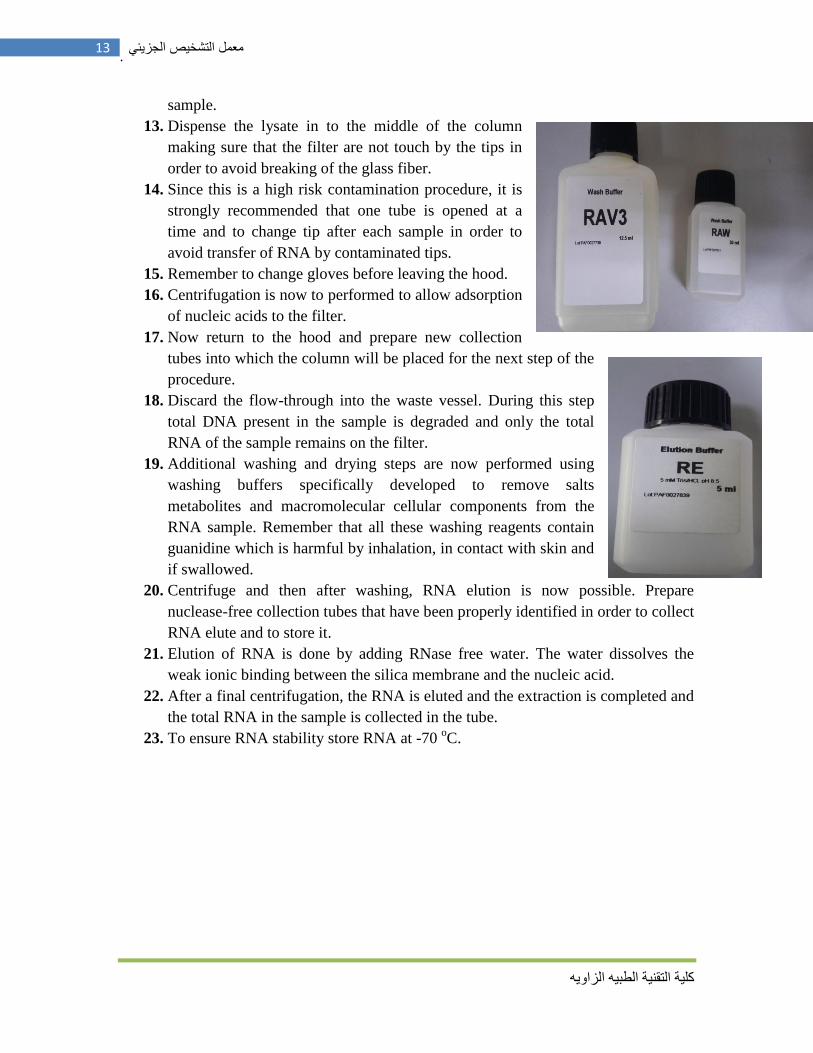
19. Additional washing and drying steps are now performed using
washing buffers specifically developed to remove salts
metabolites and macromolecular cellular components from the
RNA sample. Remember that all these washing reagents contain
guanidine which is harmful by inhalation, in contact with skin and
if swallowed.
20. Centrifuge and then after washing, RNA elution is now possible. Prepare
nuclease-free collection tubes that have been properly identified in order to collect
RNA elute and to store it.
21. Elution of RNA is done by adding RNase free water. The water dissolves the
weak ionic binding between the silica membrane and the nucleic acid.
22. After a final centrifugation, the RNA is eluted and the extraction is completed and
the total RNA in the sample is collected in the tube.
23. To ensure RNA stability store RNA at -70 oC.
.
كهيت انخميت انطبي انضاي
14 معمل التشخيص الجزيئي
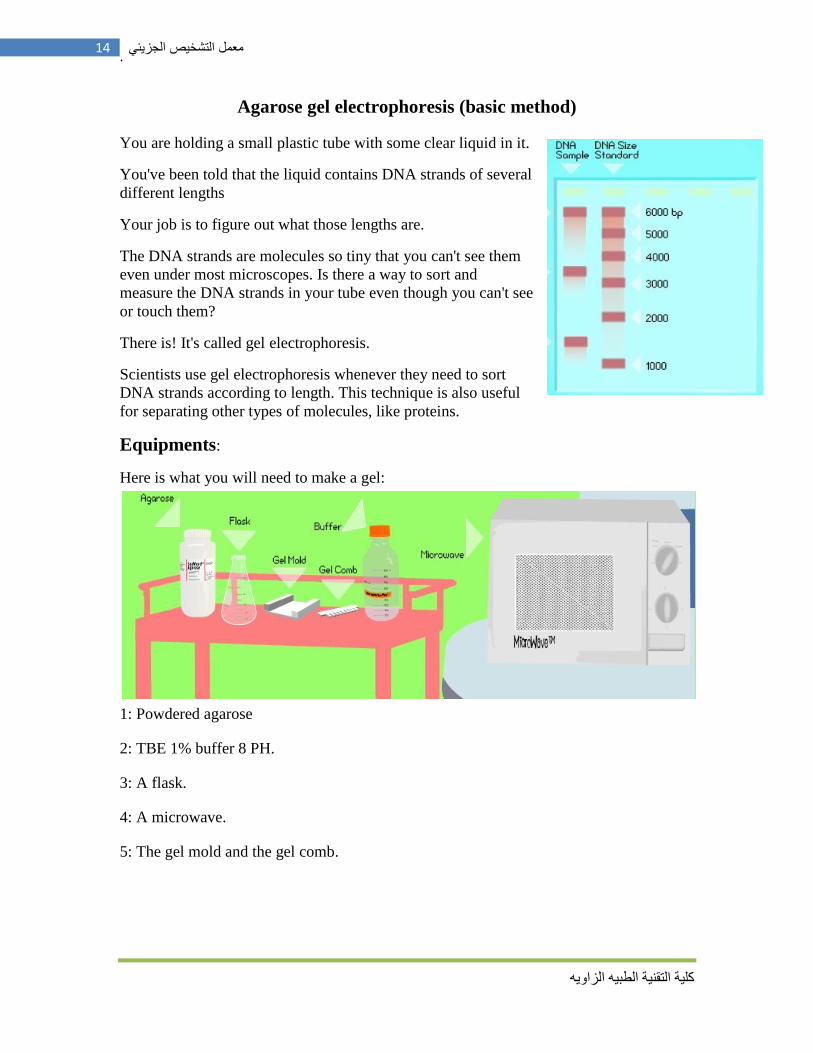
Agarose gel electrophoresis (basic method)
You are holding a small plastic tube with some clear liquid in it.
You've been told that the liquid contains DNA strands of several
different lengths
Your job is to figure out what those lengths are.
The DNA strands are molecules so tiny that you can't see them
even under most microscopes. Is there a way to sort and
measure the DNA strands in your tube even though you can't see
or touch them?
There is! It's called gel electrophoresis.
Scientists use gel electrophoresis whenever they need to sort
DNA strands according to length. This technique is also useful
for separating other types of molecules, like proteins.
Equipments:
Here is what you will need to make a gel:
1: Powdered agarose
2: TBE 1% buffer 8 PH.
3: A flask.
4: A microwave.
5: The gel mold and the gel comb.
.
كهيت انخميت انطبي انضاي
15 معمل التشخيص الجزيئي
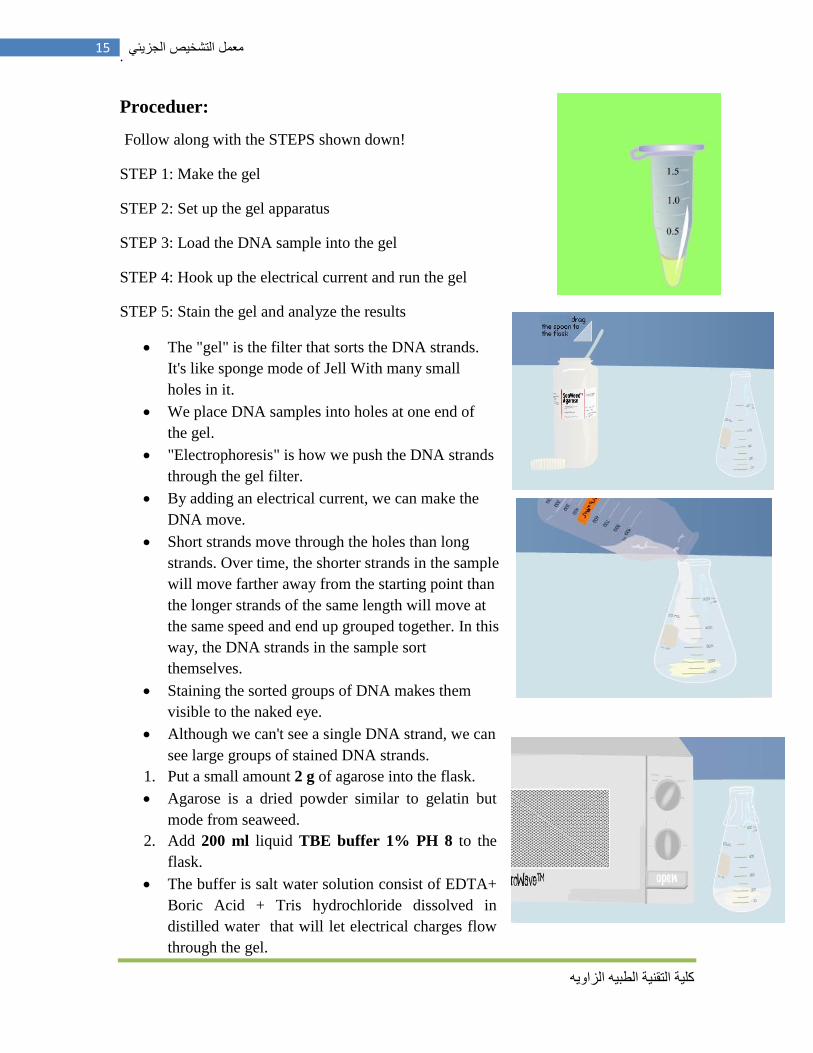
Proceduer:
Follow along with the STEPS shown down!
STEP 1: Make the gel
STEP 2: Set up the gel apparatus
STEP 3: Load the DNA sample into the gel
STEP 4: Hook up the electrical current and run the gel
STEP 5: Stain the gel and analyze the results
The "gel" is the filter that sorts the DNA strands.
It's like sponge mode of Jell With many small
holes in it.
We place DNA samples into holes at one end of
the gel.
"Electrophoresis" is how we push the DNA strands
through the gel filter.
By adding an electrical current, we can make the
DNA move.
Short strands move through the holes than long
strands. Over time, the shorter strands in the sample
will move farther away from the starting point than
the longer strands of the same length will move at
the same speed and end up grouped together. In this
way, the DNA strands in the sample sort
themselves.
Staining the sorted groups of DNA makes them
visible to the naked eye.
Although we can't see a single DNA strand, we can
see large groups of stained DNA strands.
1. Put a small amount 2 g of agarose into the flask.
Agarose is a dried powder similar to gelatin but
mode from seaweed.
2. Add 200 ml liquid TBE buffer 1% PH 8 to the
flask.
The buffer is salt water solution consist of EDTA+
Boric Acid + Tris hydrochloride dissolved in
distilled water that will let electrical charges flow
through the gel.
.
كهيت انخميت انطبي انضاي
16 معمل التشخيص الجزيئي
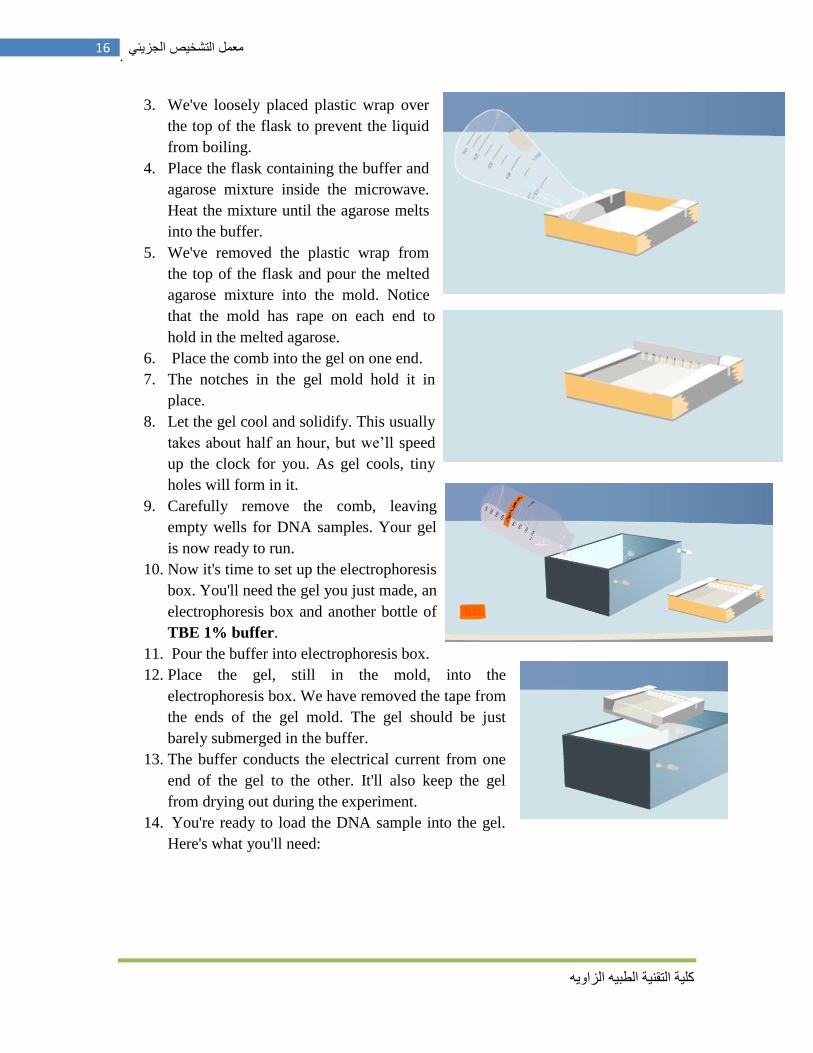
3. We've loosely placed plastic wrap over
the top of the flask to prevent the liquid
from boiling.
4. Place the flask containing the buffer and
agarose mixture inside the microwave.
Heat the mixture until the agarose melts
into the buffer.
5. We've removed the plastic wrap from
the top of the flask and pour the melted
agarose mixture into the mold. Notice
that the mold has rape on each end to
hold in the melted agarose.
6. Place the comb into the gel on one end.
7. The notches in the gel mold hold it in
place.
8. Let the gel cool and solidify. This usually
takes about half an hour, but we’ll speed
up the clock for you. As gel cools, tiny
holes will form in it.
9. Carefully remove the comb, leaving
empty wells for DNA samples. Your gel
is now ready to run.
10. Now it's time to set up the electrophoresis
box. You'll need the gel you just made, an
electrophoresis box and another bottle of
TBE 1% buffer.
11. Pour the buffer into electrophoresis box.
12. Place the gel, still in the mold, into the
electrophoresis box. We have removed the tape from
the ends of the gel mold. The gel should be just
barely submerged in the buffer.
13. The buffer conducts the electrical current from one
end of the gel to the other. It'll also keep the gel
from drying out during the experiment.
14. You're ready to load the DNA sample into the gel.
Here's what you'll need:
.
كهيت انخميت انطبي انضاي
17 معمل التشخيص الجزيئي
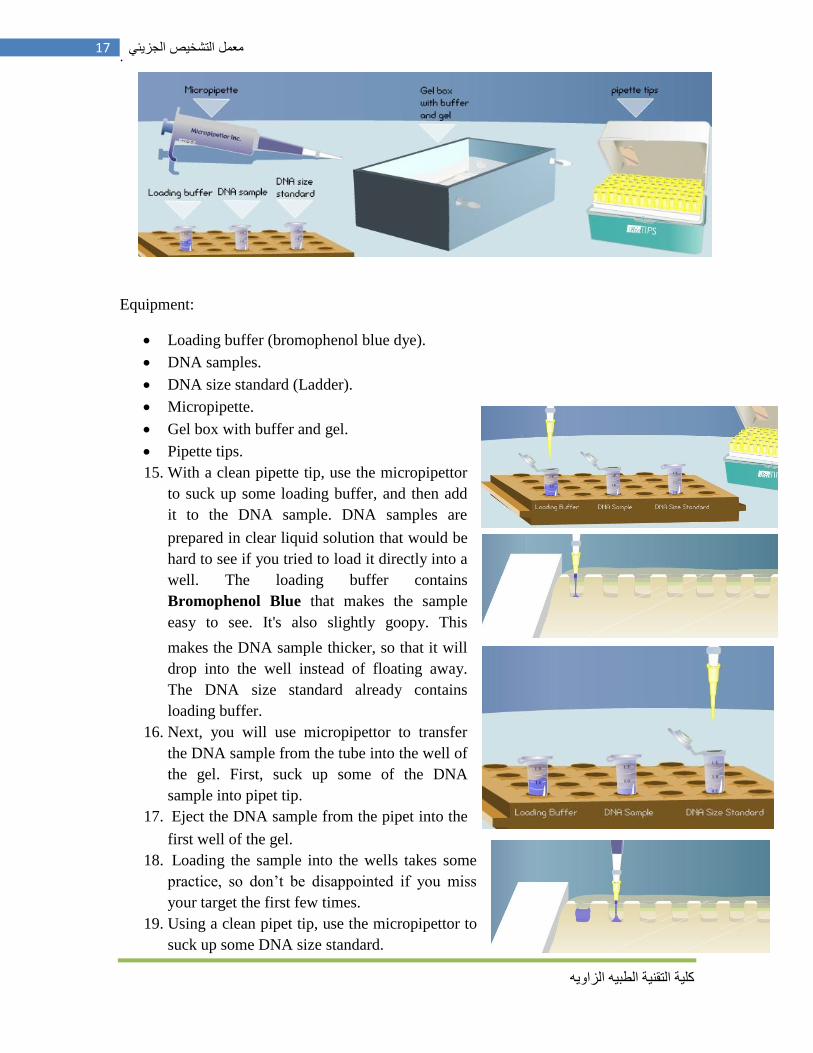
Equipment:
Loading buffer (bromophenol blue dye).
DNA samples.
DNA size standard (Ladder).
Micropipette.
Gel box with buffer and gel.
Pipette tips.
15. With a clean pipette tip, use the micropipettor
to suck up some loading buffer, and then add
it to the DNA sample. DNA samples are
prepared in clear liquid solution that would be
hard to see if you tried to load it directly into a
well. The loading buffer contains
Bromophenol Blue that makes the sample
easy to see. It's also slightly goopy. This
makes the DNA sample thicker, so that it will
drop into the well instead of floating away.
The DNA size standard already contains
loading buffer.
16. Next, you will use micropipettor to transfer
the DNA sample from the tube into the well of
the gel. First, suck up some of the DNA
sample into pipet tip.
17. Eject the DNA sample from the pipet into the
first well of the gel.
18. Loading the sample into the wells takes some
practice, so don’t be disappointed if you miss
your target the first few times.
19. Using a clean pipet tip, use the micropipettor to
suck up some DNA size standard.
.
كهيت انخميت انطبي انضاي
18 معمل التشخيص الجزيئي
20. Transfer the DNA size standard into the next empty well. The DNA size standard
contains DNA strands of known lengths. Running it on the gel will give you a
reference by which to estimate the lengths of DNA strands in your sample.
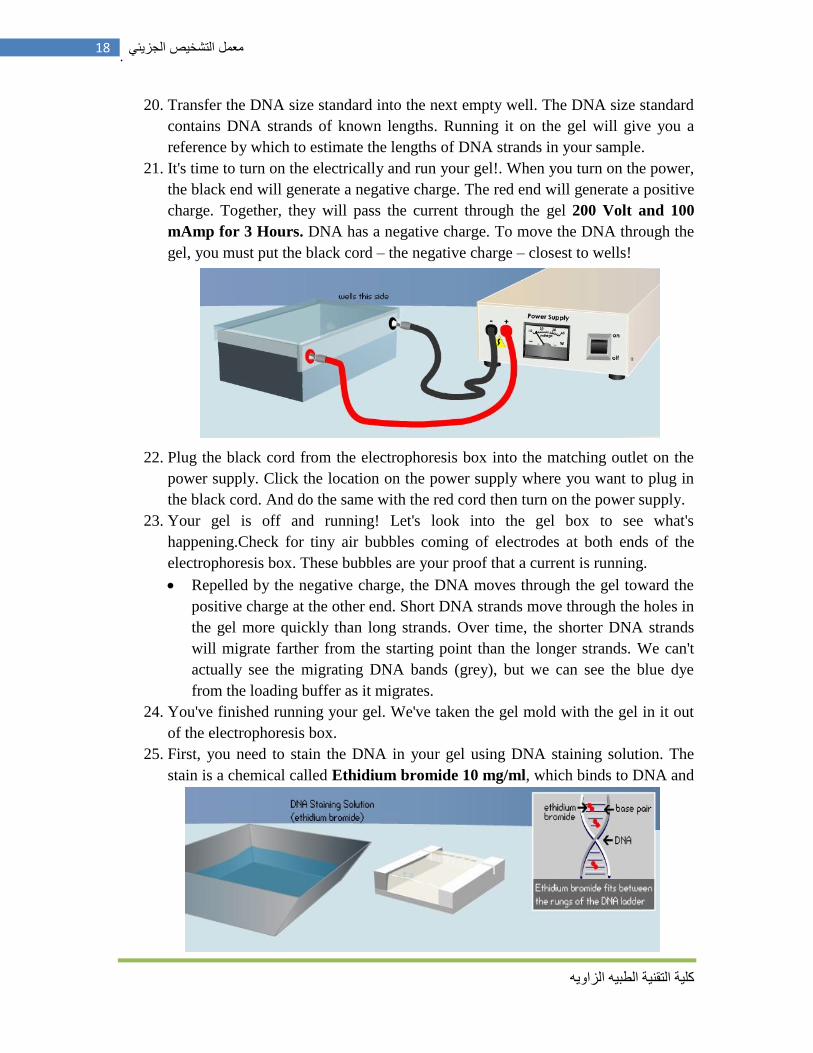
21. It's time to turn on the electrically and run your gel!. When you turn on the power,
the black end will generate a negative charge. The red end will generate a positive
charge. Together, they will pass the current through the gel 200 Volt and 100
mAmp for 3 Hours. DNA has a negative charge. To move the DNA through the
gel, you must put the black cord – the negative charge – closest to wells!
22. Plug the black cord from the electrophoresis box into the matching outlet on the
power supply. Click the location on the power supply where you want to plug in
the black cord. And do the same with the red cord then turn on the power supply.
23. Your gel is off and running! Let's look into the gel box to see what's
happening.Check for tiny air bubbles coming of electrodes at both ends of the
electrophoresis box. These bubbles are your proof that a current is running.
Repelled by the negative charge, the DNA moves through the gel toward the
positive charge at the other end. Short DNA strands move through the holes in
the gel more quickly than long strands. Over time, the shorter DNA strands
will migrate farther from the starting point than the longer strands. We can't
actually see the migrating DNA bands (grey), but we can see the blue dye
from the loading buffer as it migrates.
24. You've finished running your gel. We've taken the gel mold with the gel in it out
of the electrophoresis box.
25. First, you need to stain the DNA in your gel using DNA staining solution. The
stain is a chemical called Ethidium bromide 10 mg/ml, which binds to DNA and
.
كهيت انخميت انطبي انضاي
19 معمل التشخيص الجزيئي
shows up under fluorescent light.
Although we can't see single DNA
strands, we can see large groups of
stained DNA strands. These groups
will show up as bands in the gel.
26. Drag the gel out of the mold and put
it into the DNA staining solution.
Because Ethidium bromide binds to
DNA, it can damage the DNA in your
cells. If you stain a gel in real life,
wear gloves and avoid direct contact
with the staining solution.
27. It takes about half an hour to the
DNA in the gel. We'll speed up the
clock for you.
28. Remove the gel from the staining
solution and place it in the UV
(ultraviolet) light box.
29. Turn on the UV box.
30. Ultraviolet (UV) light from the box can
damage your eyes, If you do this in real life,
be sure to wear protective goggles.
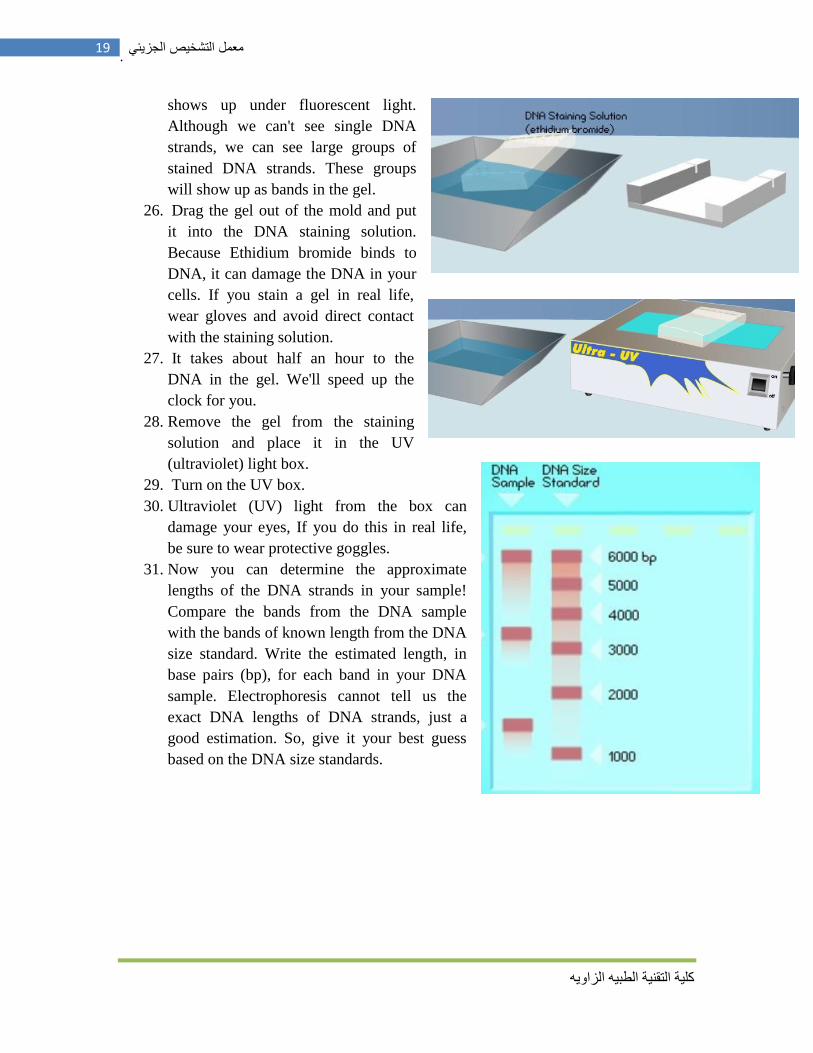
31. Now you can determine the approximate
lengths of the DNA strands in your sample!
Compare the bands from the DNA sample
with the bands of known length from the DNA
size standard. Write the estimated length, in
base pairs (bp), for each band in your DNA
sample. Electrophoresis cannot tell us the
exact DNA lengths of DNA strands, just a
good estimation. So, give it your best guess
based on the DNA size standards.
.
كهيت انخميت انطبي انضاي
20 معمل التشخيص الجزيئي
TBE preparation:
TBE stands for Tris Borate EDTA.
People also use TAE (Tris Acetate EDTA). Make up a 10x stock using cheap reagents.
Do not use expensive 'analytical grade' reagents. Cheap Tris base and boric acid can be
bought in bulk.
Recipe for 2L of 10xTBE
218 g Tris base
110 g Boric acid
9.3 g EDTA
Dissolve the ingredients in 1.9 L of distilled water. pH to about 8.3 using NaOH and
make up to 2 L.
Thermal Cycling Profile for Standard PCR
Initial denaturation:
It is very important to denature the template DNA completely. Initial heating of the PCR
mixture for 2 minutes at 94°–95°C is enough to completely denature complex genomic
DNA so that the primers can anneal to the template as the reaction mix is cooled. If the
template DNA is only partially denatured, it will tend to “snap-back” very quickly,
preventing efficient primer annealing and extension, or leading to “self-priming,” which
can lead to false-positive results.
Denaturation step during cycling:
Denaturation at 94°–95°C for 20–30 seconds is usually sufficient, but this must be
adapted for the thermal cycler and tubes being used. (For example, longer times are
required for denaturation in 500 µl tubes than in 200 µl tubes.) If the denaturation
temperature is too low, the incompletely melted DNA “snaps-back” as described earlier,
thus giving no access to the primers. Use a longer denaturation time or higher denaturing
temperature for GC-rich template DNA.
Note: Never use a longer denaturation time than absolutely required for complete
denaturation of template DNA. Unnecessarily long denaturation times decrease the
activity of Taq DNA Polymerase.
Primer annealing:
For most purposes, annealing temperature has to be optimized empirically. The choice of
the primer annealing temperature is probably the most critical factor in designing a high
.
كهيت انخميت انطبي انضاي
21 معمل التشخيص الجزيئي
specificity PCR. If the temperature is too high, no annealing occurs, but if it is too low,
non-specific annealing will increase dramatically. Primer-dimers will form if the primers
have one or more complementary bases so that base pairing between the 3' ends of the
two primers can occur.
Primer extension: For fragments up to 3 kb, primer extension is normally carried out at 72°C. Taq DNA
Polymerase can add approximately 60 bases per second at 72°C. A 45-second extension
is sufficient for fragments up to 1 kb. For extension of fragments up to 3 kb, allow about
45 seconds per kb. However, these times may need to be adjusted for specific templates.
For improved yield, use the cycle extension feature of the thermal cycler. For instance,
perform the first 10 cycles at a constant extension time (e.g. 45 s for a 1 kb product).
Then, for the next 20 cycles, increase the extension time by 2–5 s per cycle (e.g. 50 s for
cycle 11, 55 s for cycle 12, etc.). Cycle extension allows the enzyme more time to do its
job, because as PCR progresses, there is more template to amplify and less enzyme (due
to denaturation during the prolonged high PCR temperatures) to do the extension.
Cycle number:
In an optimal reaction, less than 10 template molecules can be amplified in less than 40
cycles to a product that is easily detectable on a gel stained with Ethidium bromide. Most
PCRs should, therefore, include only 25 to 35 cycles. As cycle number increases,
nonspecific products can accumulate.
Final extension:
Usually, after the last cycle, the reaction tubes are held at 72°C for 5–15 minutes to
promote completion of partial extension products and annealing of single-stranded
complementary products.