perfect exposure & composition
TRANSCRIPT
/noushadgd https://500px.com/noushad BACK NEXT EXIT
Welcome Perfect Exposure & Composition
/noushadgd https://500px.com/noushad BACK NEXT EXIT
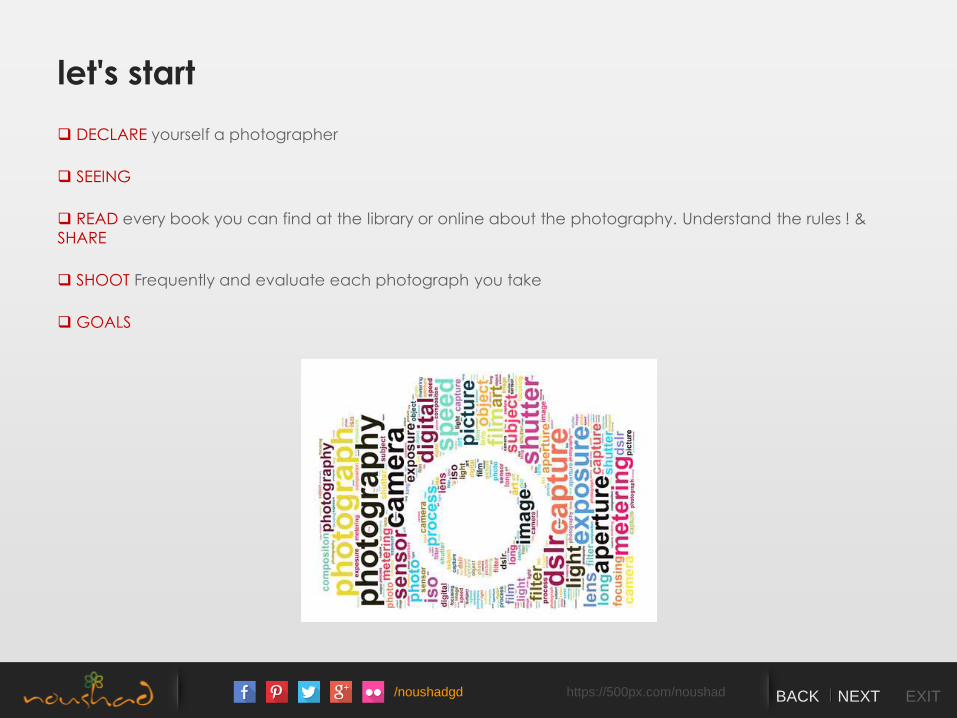
let's start
DECLARE yourself a photographer
SEEING
READ every book you can find at the library or online about the photography. Understand the rules ! &
SHARE
SHOOT Frequently and evaluate each photograph you take
GOALS
/noushadgd https://500px.com/noushad BACK NEXT EXIT
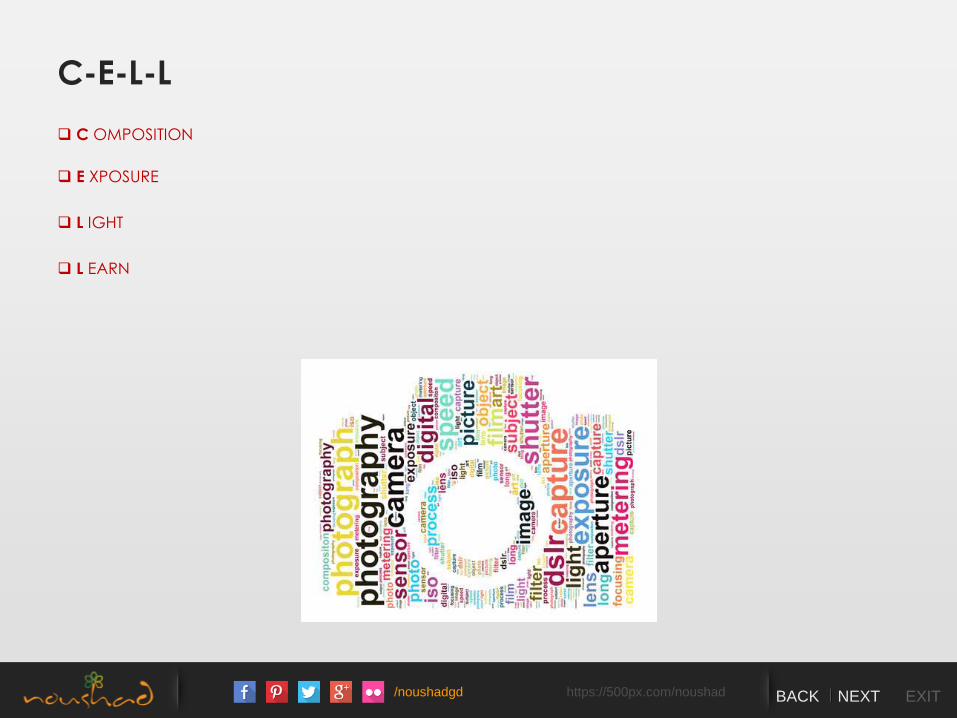
C-E-L-L
C OMPOSITION
E XPOSURE
L IGHT
L EARN
/noushadgd https://500px.com/noushad BACK NEXT EXIT
Perfect Exposure
/noushadgd https://500px.com/noushad BACK NEXT EXIT
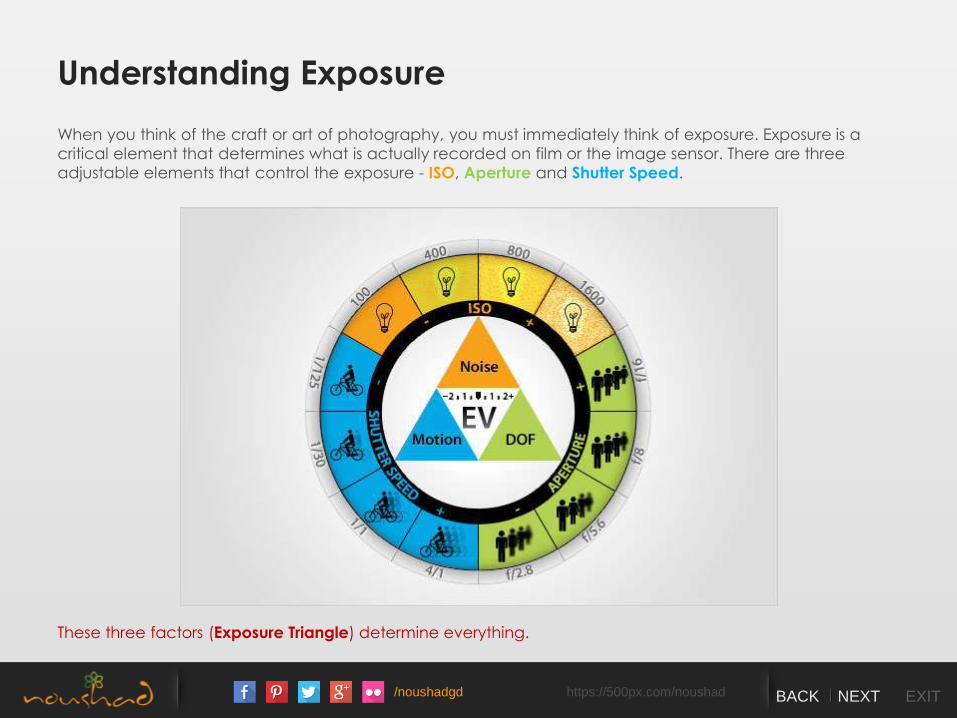
Understanding Exposure
When you think of the craft or art of photography, you must immediately think of exposure. Exposure is a
critical element that determines what is actually recorded on film or the image sensor. There are three
adjustable elements that control the exposure - ISO, Aperture and Shutter Speed.
These three factors (Exposure Triangle) determine everything.
/noushadgd https://500px.com/noushad BACK NEXT EXIT
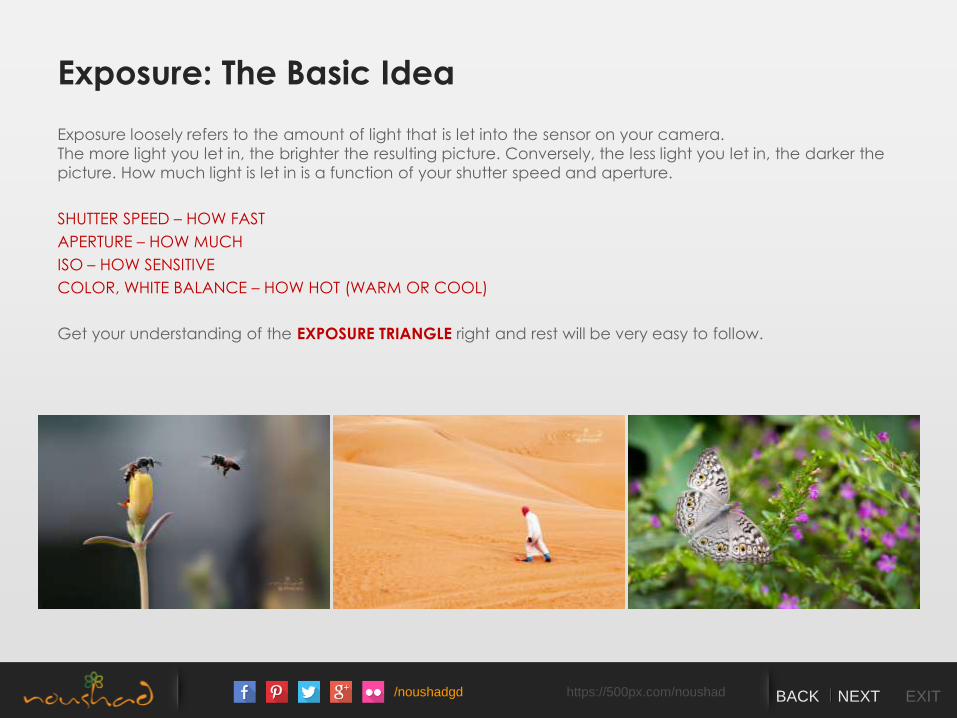
Exposure: The Basic Idea
Exposure loosely refers to the amount of light that is let into the sensor on your camera.
The more light you let in, the brighter the resulting picture. Conversely, the less light you let in, the darker the
picture. How much light is let in is a function of your shutter speed and aperture.
SHUTTER SPEED – HOW FAST
APERTURE – HOW MUCH
ISO – HOW SENSITIVE
COLOR, WHITE BALANCE – HOW HOT (WARM OR COOL)
Get your understanding of the EXPOSURE TRIANGLE right and rest will be very easy to follow.
/noushadgd https://500px.com/noushad BACK NEXT EXIT
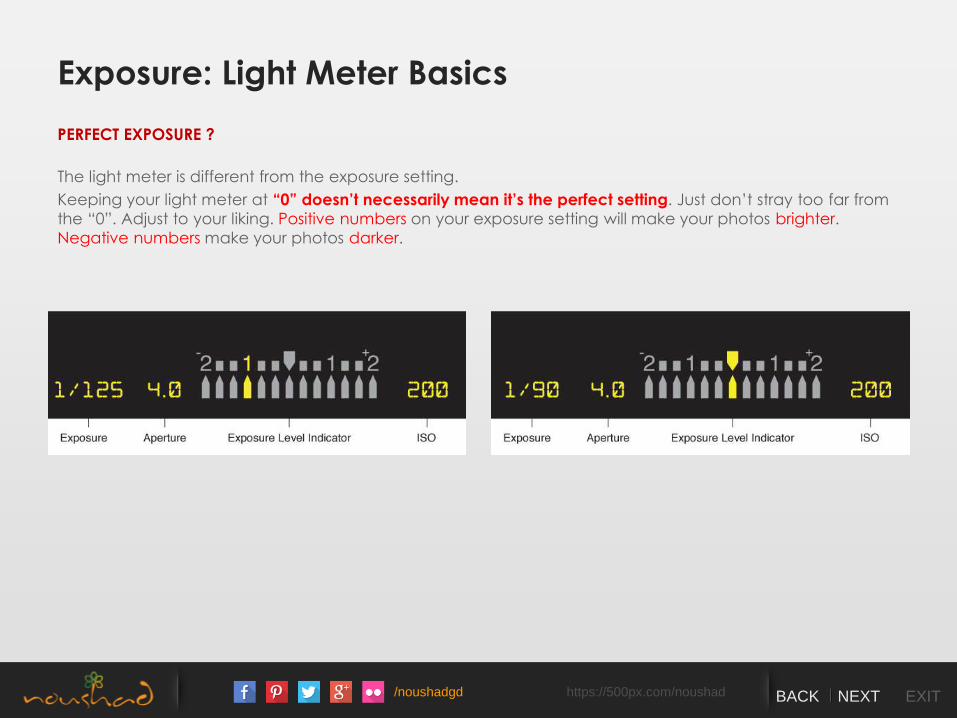
Exposure: Light Meter Basics
PERFECT EXPOSURE ?
The light meter is different from the exposure setting.
Keeping your light meter at “0” doesn’t necessarily mean it’s the perfect setting. Just don’t stray too far from
the “0”. Adjust to your liking. Positive numbers on your exposure setting will make your photos brighter.
Negative numbers make your photos darker.
/noushadgd https://500px.com/noushad BACK NEXT EXIT
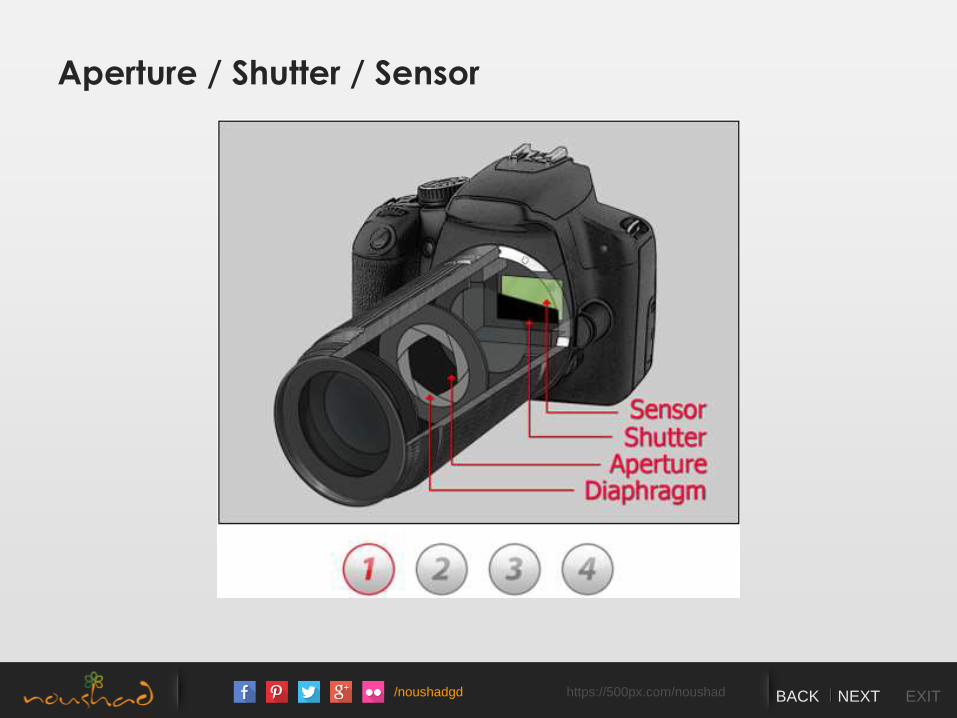
Aperture / Shutter / Sensor
/noushadgd https://500px.com/noushad BACK NEXT EXIT
Aperture / Shutter / Sensor
/noushadgd https://500px.com/noushad BACK NEXT EXIT
Aperture / Shutter / Sensor
/noushadgd https://500px.com/noushad BACK NEXT EXIT
Aperture / Shutter / Sensor
/noushadgd https://500px.com/noushad BACK NEXT EXIT
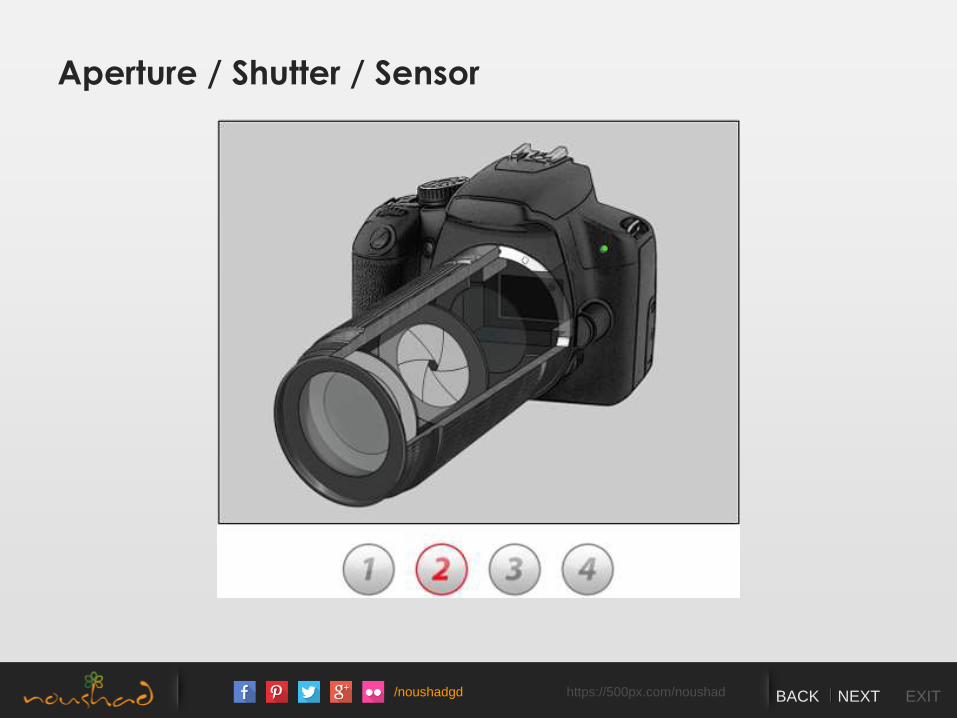
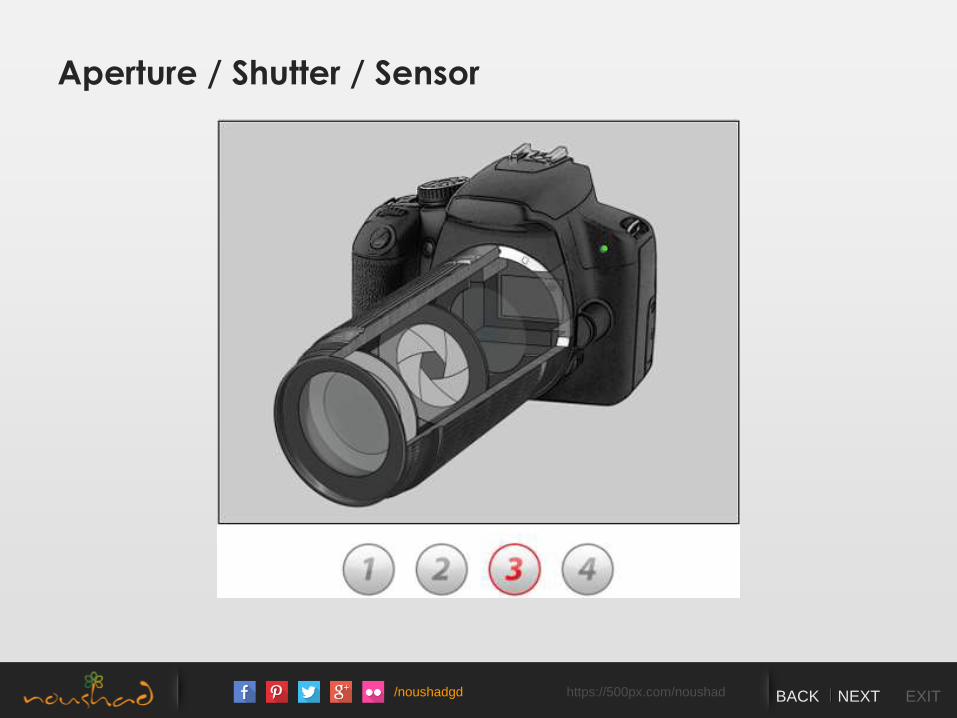
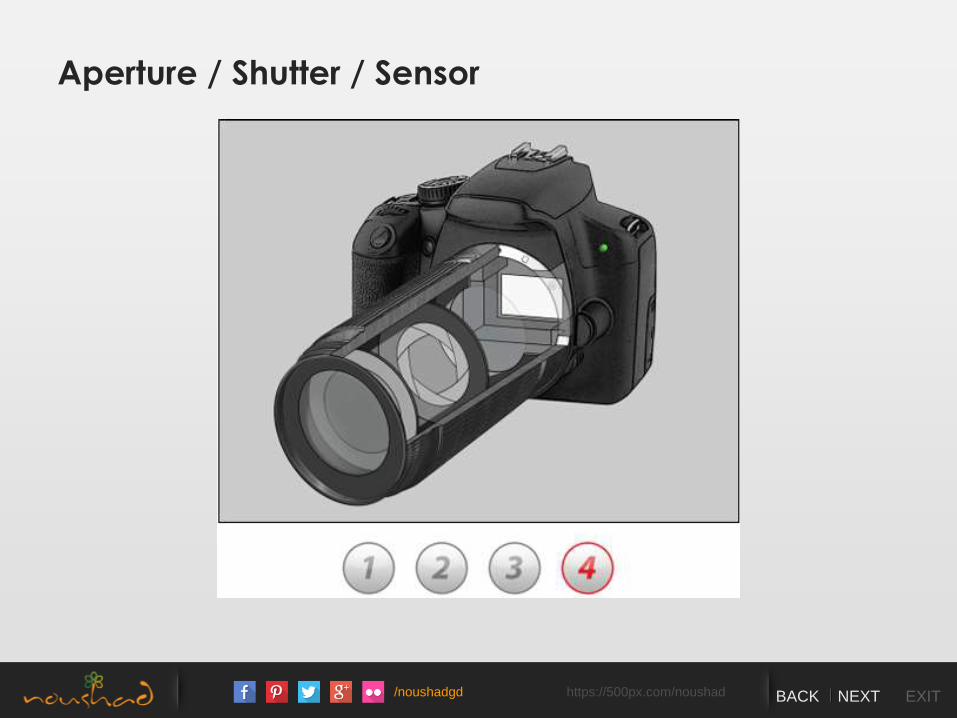
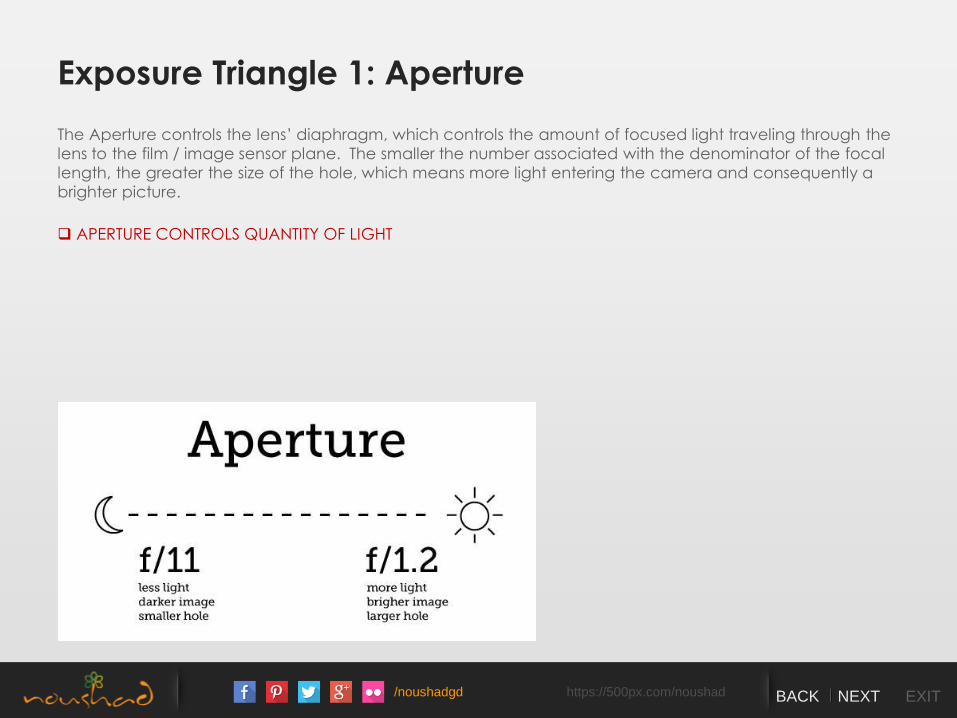
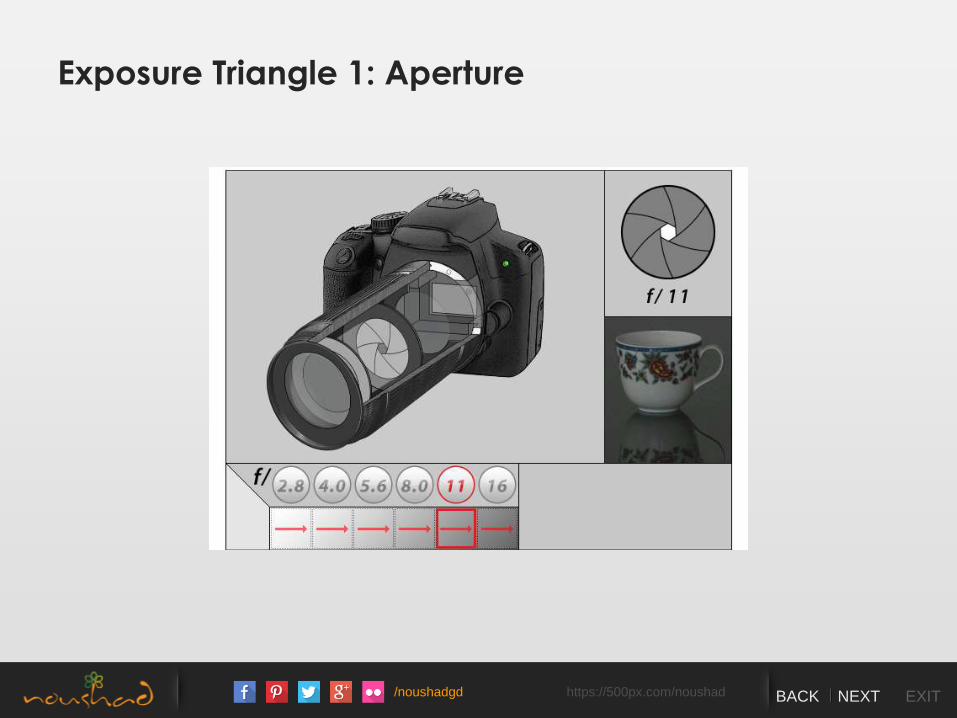
Exposure Triangle 1: Aperture
The Aperture controls the lens’ diaphragm, which controls the amount of focused light traveling through the
lens to the film / image sensor plane. The smaller the number associated with the denominator of the focal
length, the greater the size of the hole, which means more light entering the camera and consequently a
brighter picture.
APERTURE CONTROLS QUANTITY OF LIGHT
/noushadgd https://500px.com/noushad BACK NEXT EXIT
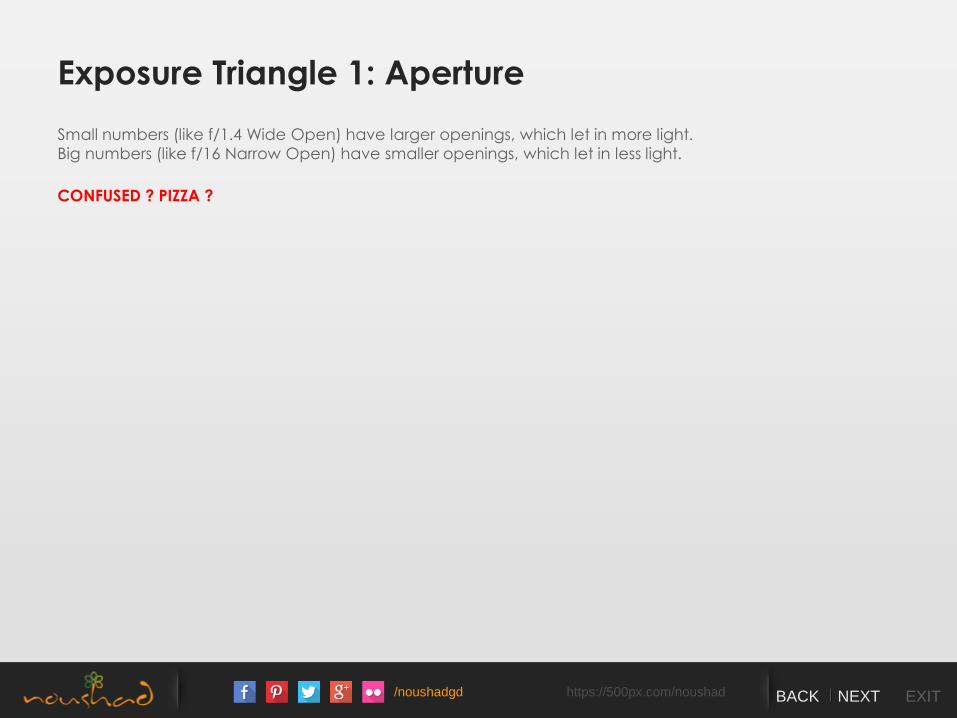
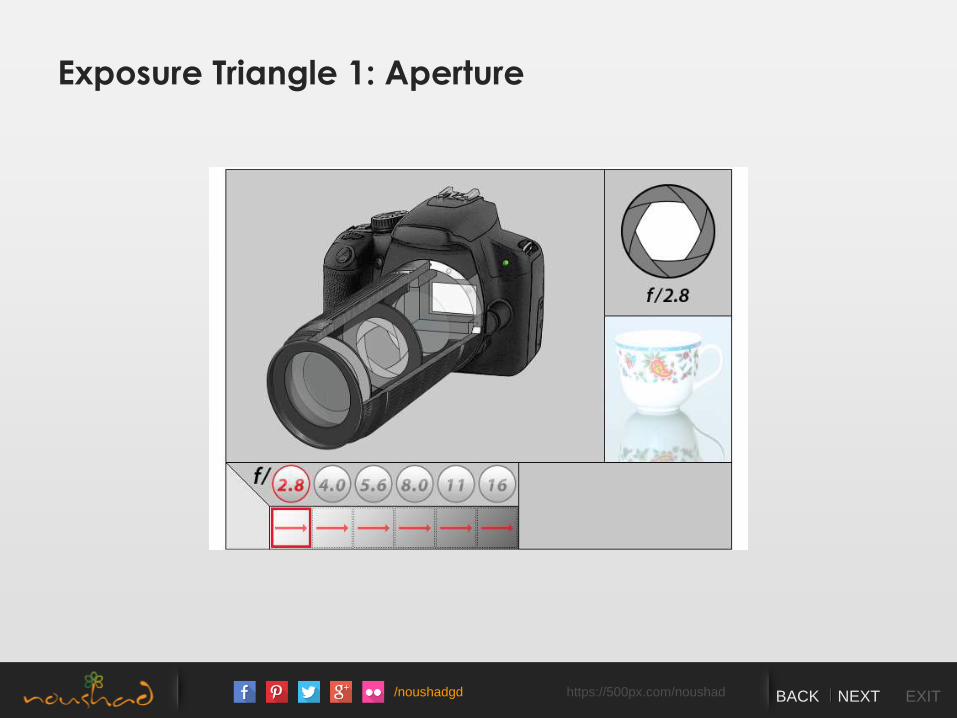
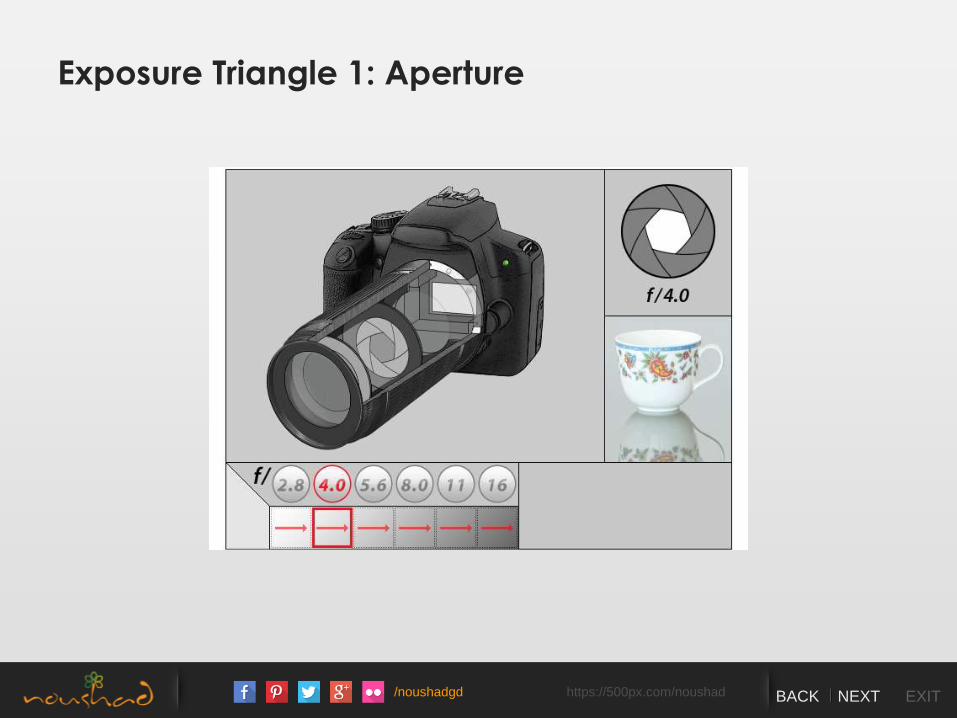
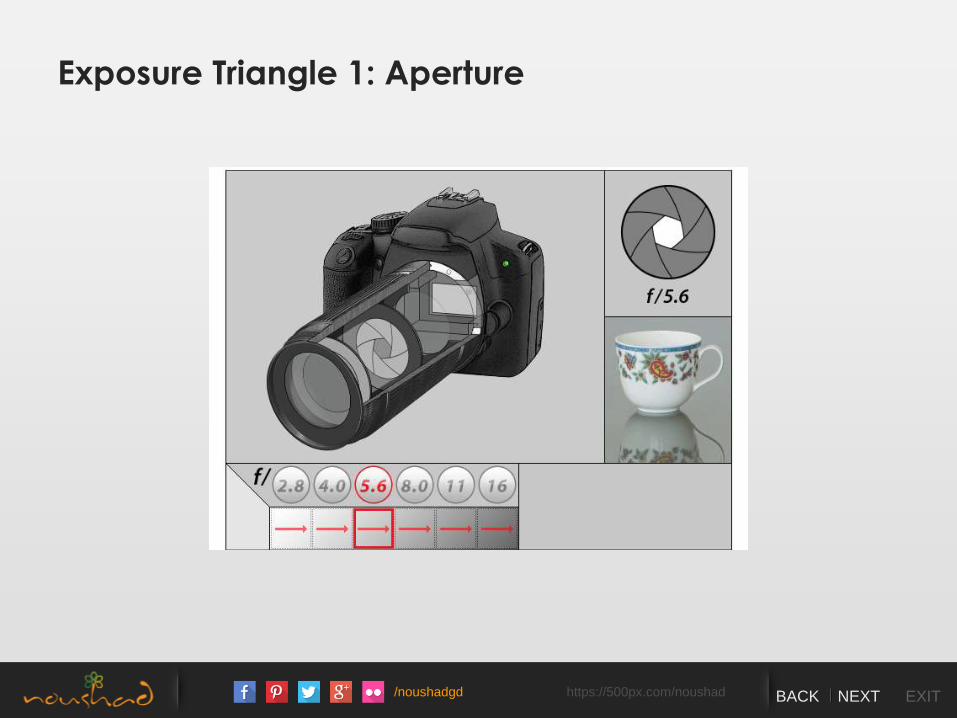
Exposure Triangle 1: Aperture
Small numbers (like f/1.4 Wide Open) have larger openings, which let in more light.
Big numbers (like f/16 Narrow Open) have smaller openings, which let in less light.
CONFUSED ? PIZZA ?
/noushadgd https://500px.com/noushad BACK NEXT EXIT
Exposure Triangle 1: Aperture
/noushadgd https://500px.com/noushad BACK NEXT EXIT
Exposure Triangle 1: Aperture
/noushadgd https://500px.com/noushad BACK NEXT EXIT
Exposure Triangle 1: Aperture

/noushadgd https://500px.com/noushad BACK NEXT EXIT
Exposure Triangle 1: Aperture
/noushadgd https://500px.com/noushad BACK NEXT EXIT
Exposure Triangle 1: Aperture

/noushadgd https://500px.com/noushad BACK NEXT EXIT
Exposure Triangle 1: Aperture
/noushadgd https://500px.com/noushad BACK NEXT EXIT
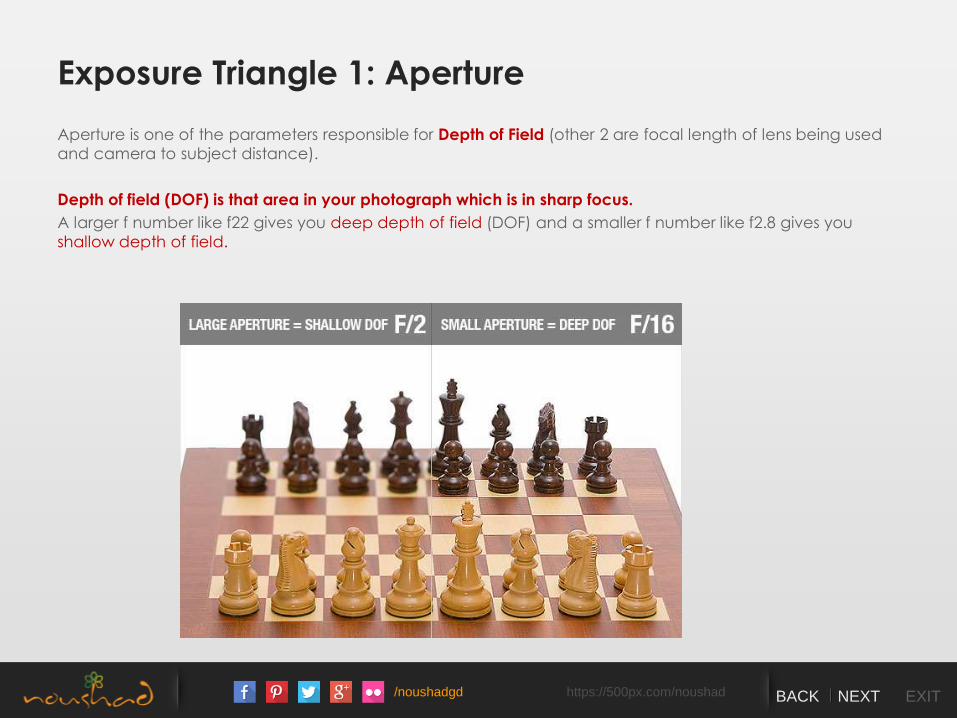
Exposure Triangle 1: Aperture
Aperture is one of the parameters responsible for Depth of Field (other 2 are focal length of lens being used
and camera to subject distance).
Depth of field (DOF) is that area in your photograph which is in sharp focus.
A larger f number like f22 gives you deep depth of field (DOF) and a smaller f number like f2.8 gives you
shallow depth of field.
/noushadgd https://500px.com/noushad BACK NEXT EXIT
Depth of Field
Depth of Field (DOF) is the front-to-back zone of a photograph in which the image is razor sharp (In focus).
Most landscapes like to have everything in sharp focus.
Many portraits have the subject in focus, but not the background.
Three things are control Depth of field
1. APERTURE
2. FOCAL LENGTH - FOCAL PLANE
3. DISTANCE FROM THE LENS (PHYSICAL)
/noushadgd https://500px.com/noushad BACK NEXT EXIT
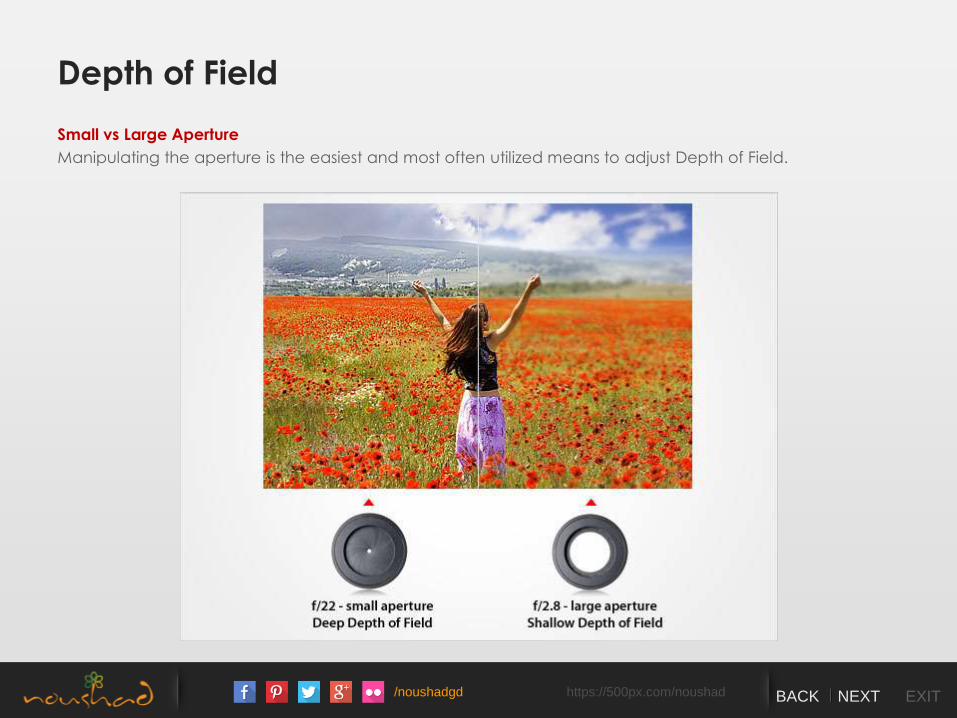
Small vs Large Aperture
Manipulating the aperture is the easiest and most often utilized means to adjust Depth of Field.
Depth of Field

/noushadgd https://500px.com/noushad BACK NEXT EXIT
Depth of Field
APERTURE SETTING
FOCAL LENGTH
SHOOTING DISTANCE
Deep (More) Shallow (Less)
f/22 f/1.4
Wide angle Telephoto
Faraway Close-up
/noushadgd https://500px.com/noushad BACK NEXT EXIT
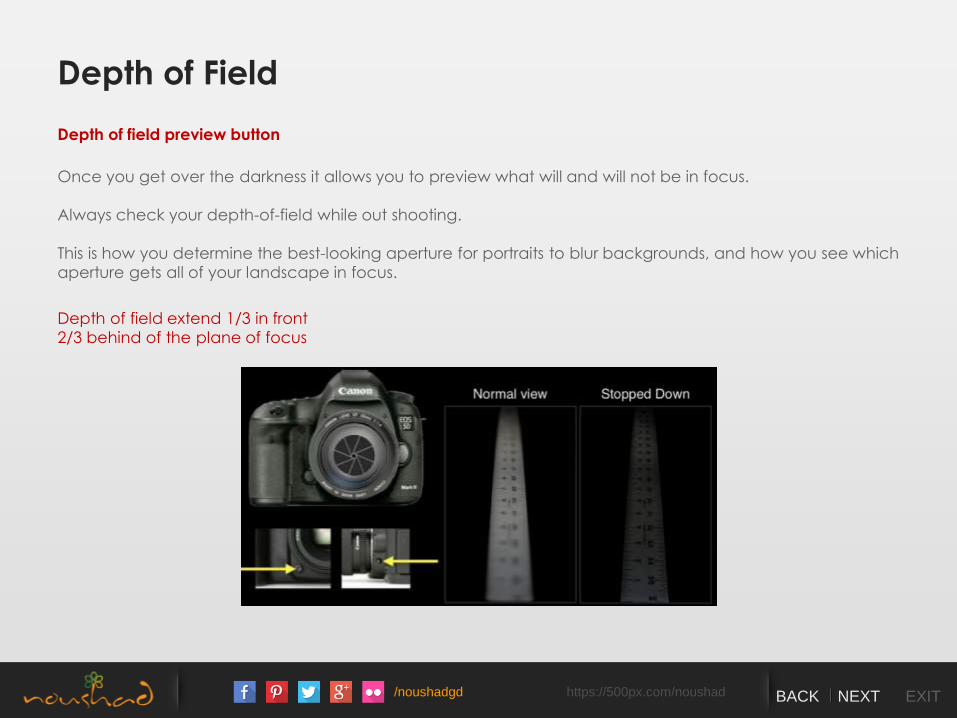
Depth of field preview button
Once you get over the darkness it allows you to preview what will and will not be in focus.
Always check your depth-of-field while out shooting.
This is how you determine the best-looking aperture for portraits to blur backgrounds, and how you see which
aperture gets all of your landscape in focus.
Depth of field extend 1/3 in front
2/3 behind of the plane of focus
Depth of Field
/noushadgd https://500px.com/noushad BACK NEXT EXIT
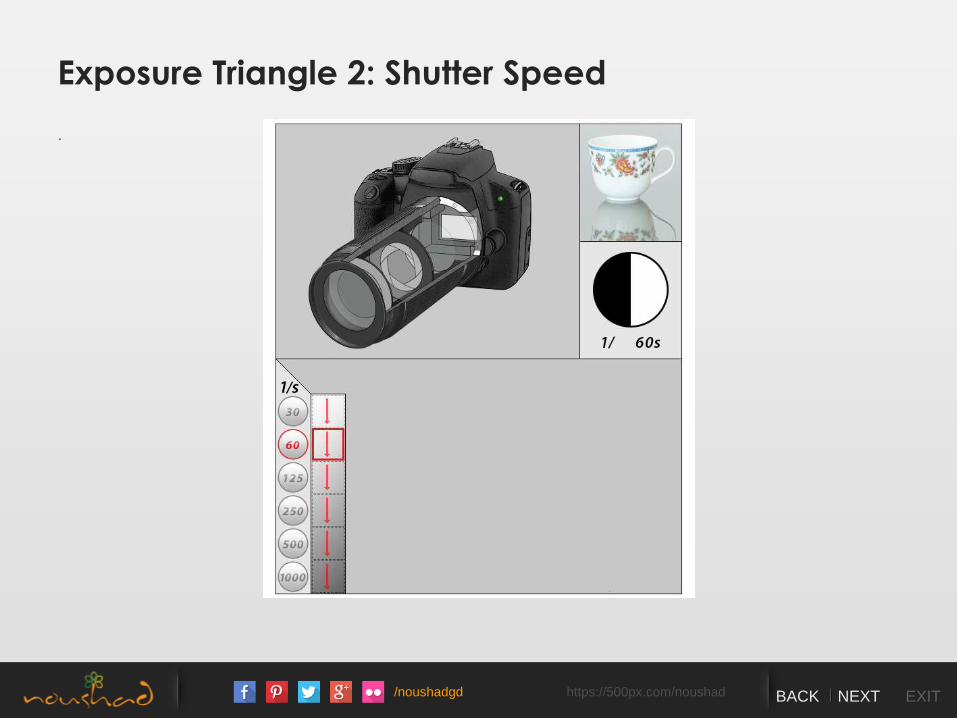
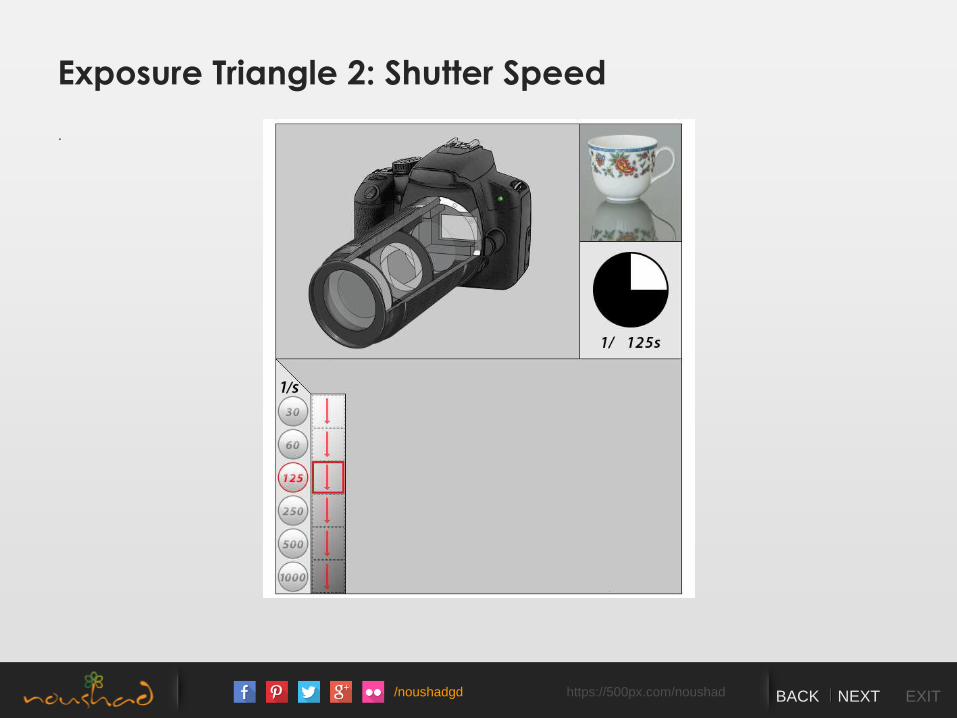
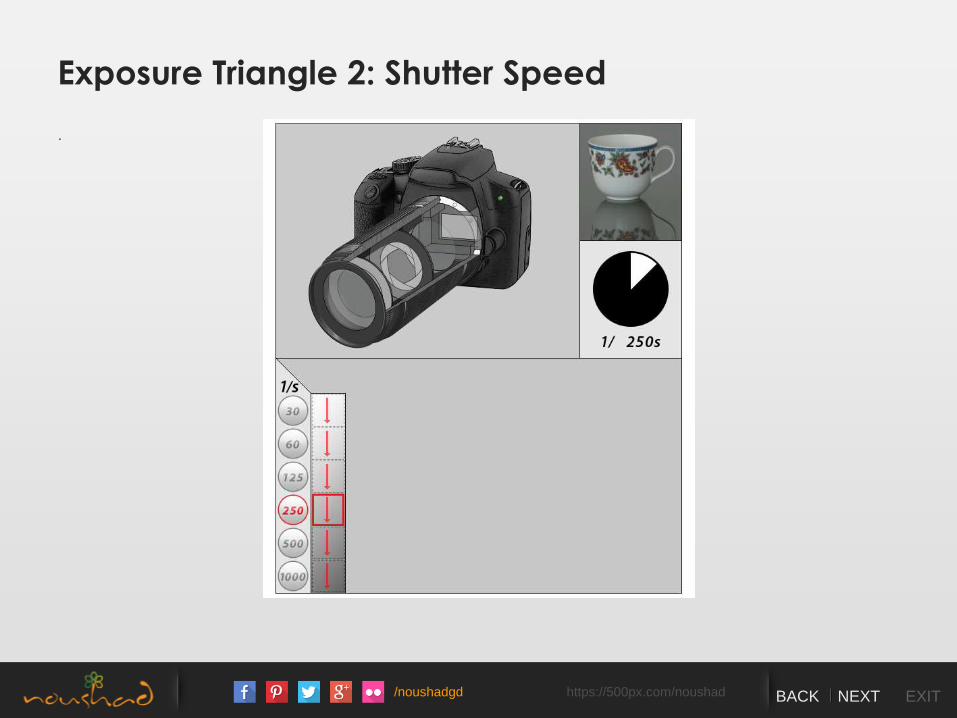
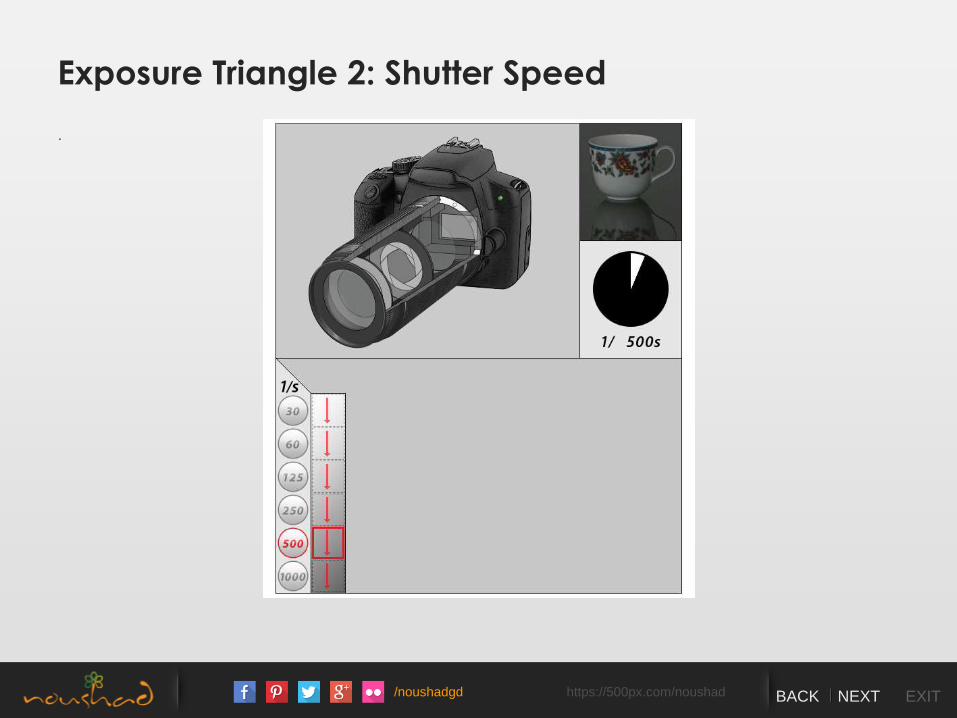
Exposure Triangle 2: Shutter Speed
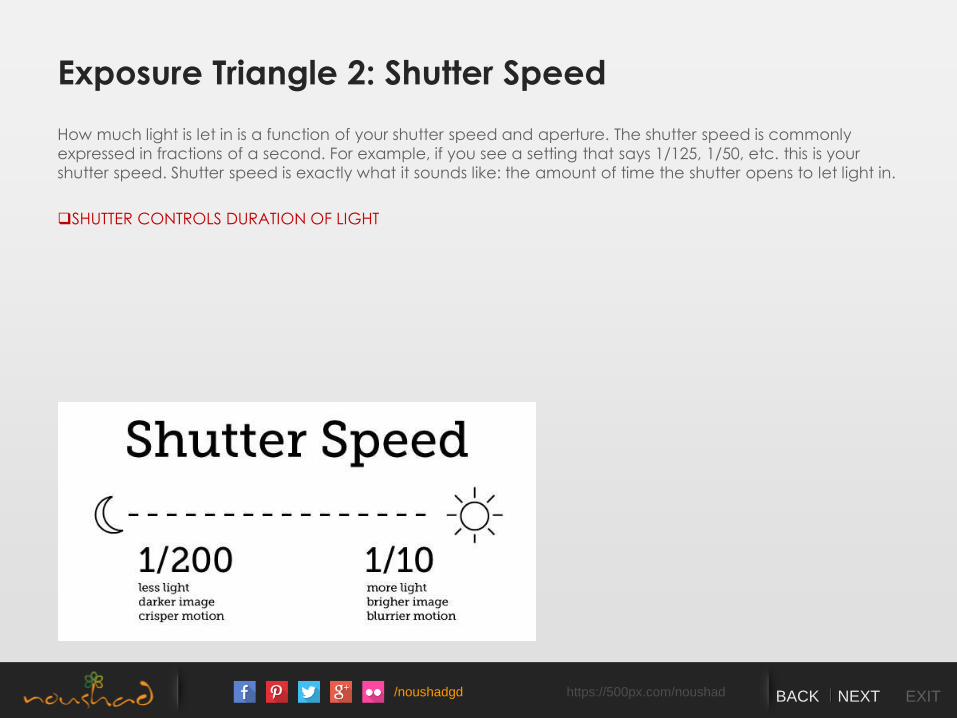
How much light is let in is a function of your shutter speed and aperture. The shutter speed is commonly
expressed in fractions of a second. For example, if you see a setting that says 1/125, 1/50, etc. this is your
shutter speed. Shutter speed is exactly what it sounds like: the amount of time the shutter opens to let light in.
SHUTTER CONTROLS DURATION OF LIGHT
/noushadgd https://500px.com/noushad BACK NEXT EXIT
Exposure Triangle 2: Shutter Speed
Seeing 100, 250, 320, etc. on your viewfinder means “1/(number seen)”, like “1/100”.
Safe Shutter Speeds for Handholding
Rule of Thumb
Try not to use 1/focal length or less when handheld, that’s when you use a tripod or look for something
steady. Using longer exposure (slow shutter speed) will let in more light.
Using shorter exposure (fast shutter speed) will let in less light.
/noushadgd https://500px.com/noushad BACK NEXT EXIT
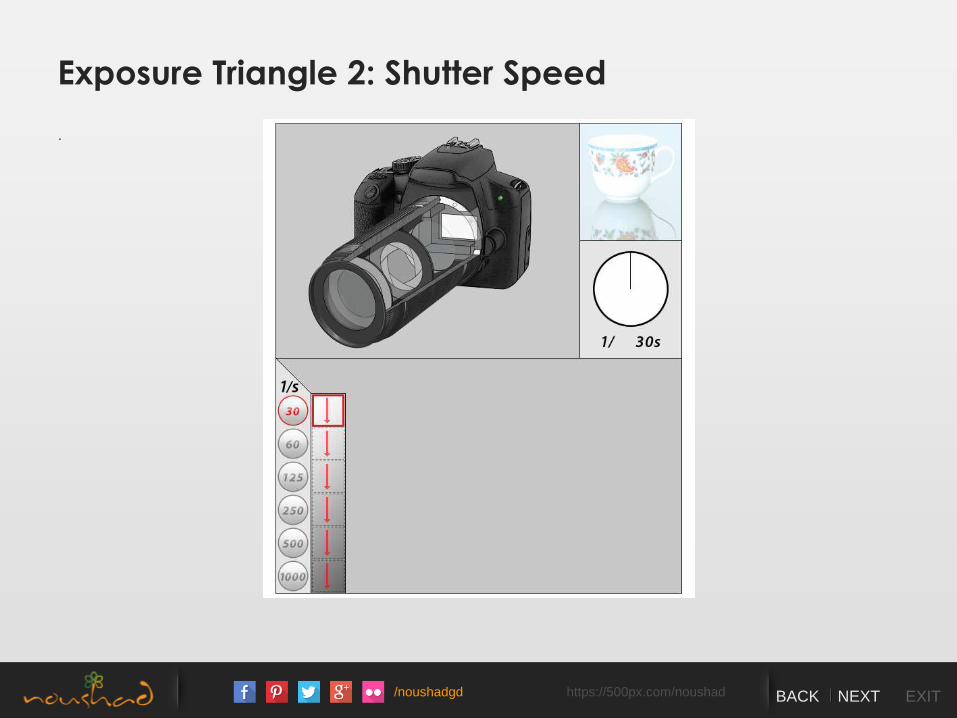
Exposure Triangle 2: Shutter Speed
.
/noushadgd https://500px.com/noushad BACK NEXT EXIT
Exposure Triangle 2: Shutter Speed
.
/noushadgd https://500px.com/noushad BACK NEXT EXIT
Exposure Triangle 2: Shutter Speed
.
/noushadgd https://500px.com/noushad BACK NEXT EXIT
Exposure Triangle 2: Shutter Speed
.
/noushadgd https://500px.com/noushad BACK NEXT EXIT
Exposure Triangle 2: Shutter Speed
.
/noushadgd https://500px.com/noushad BACK NEXT EXIT
Exposure Triangle 2: Shutter Speed
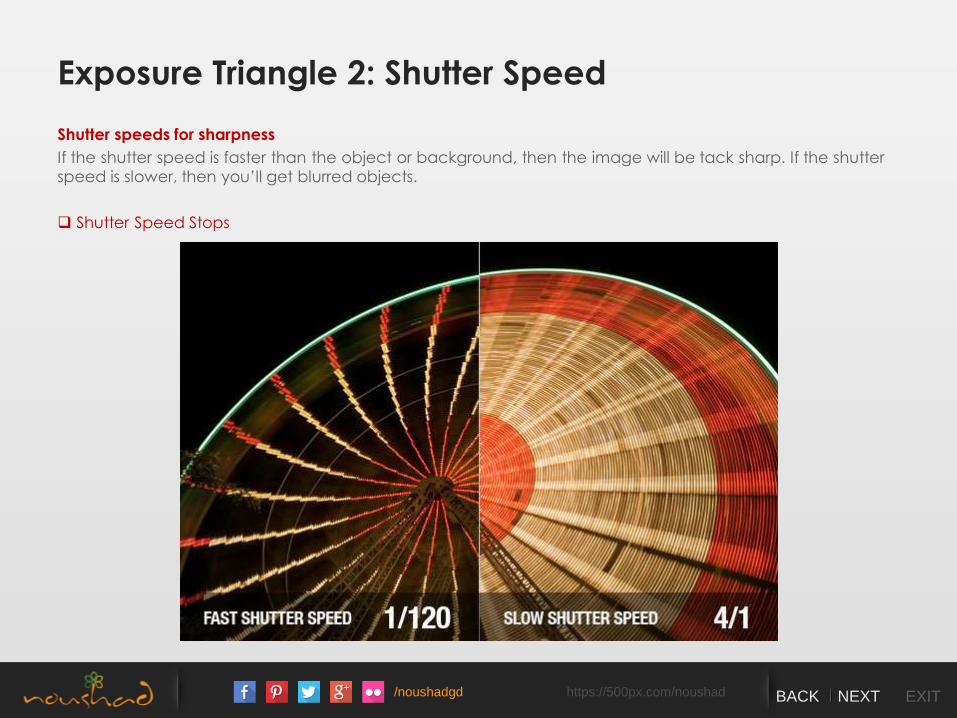
Shutter speeds for sharpness
If the shutter speed is faster than the object or background, then the image will be tack sharp. If the shutter
speed is slower, then you’ll get blurred objects.
Shutter Speed Stops
/noushadgd https://500px.com/noushad BACK NEXT EXIT
Exposure Triangle 2: Shutter Speed
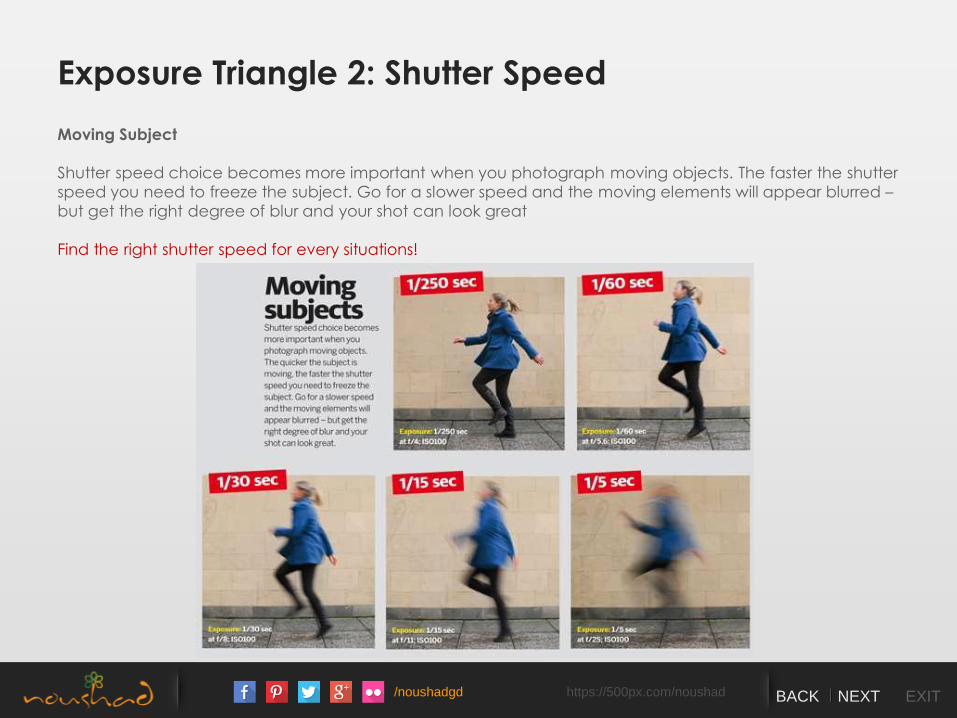
Moving Subject
Shutter speed choice becomes more important when you photograph moving objects. The faster the shutter
speed you need to freeze the subject. Go for a slower speed and the moving elements will appear blurred –
but get the right degree of blur and your shot can look great
Find the right shutter speed for every situations!
/noushadgd https://500px.com/noushad BACK NEXT EXIT
Exposure Triangle 3: ISO
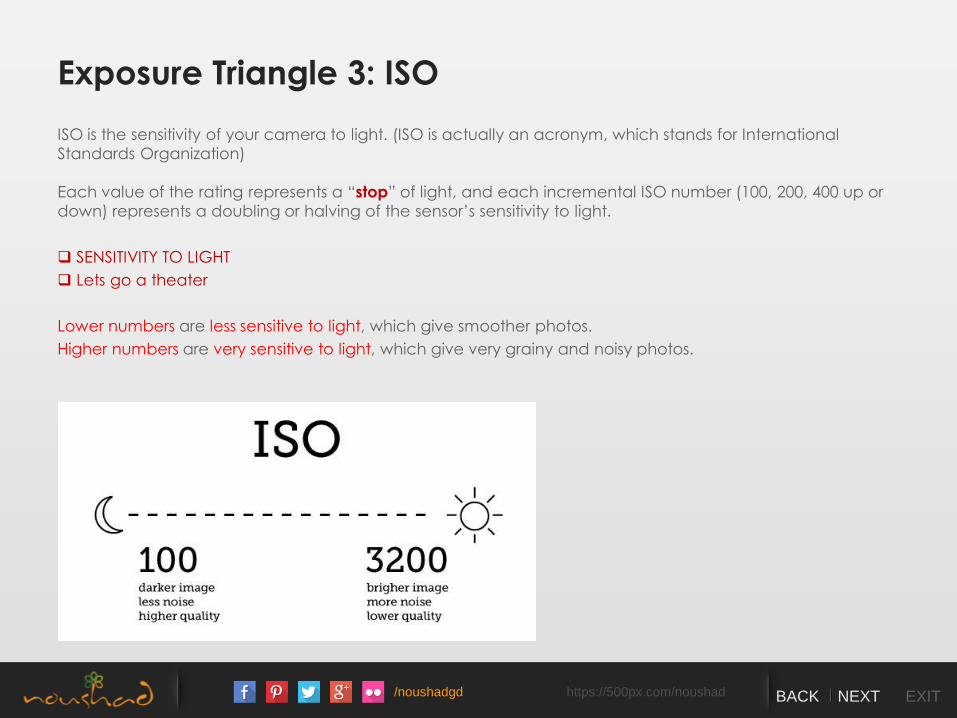
ISO is the sensitivity of your camera to light. (ISO is actually an acronym, which stands for International
Standards Organization)
Each value of the rating represents a “stop” of light, and each incremental ISO number (100, 200, 400 up or
down) represents a doubling or halving of the sensor’s sensitivity to light.
SENSITIVITY TO LIGHT
Lets go a theater
Lower numbers are less sensitive to light, which give smoother photos.
Higher numbers are very sensitive to light, which give very grainy and noisy photos.
/noushadgd https://500px.com/noushad BACK NEXT EXIT
Exposure Triangle 3: ISO
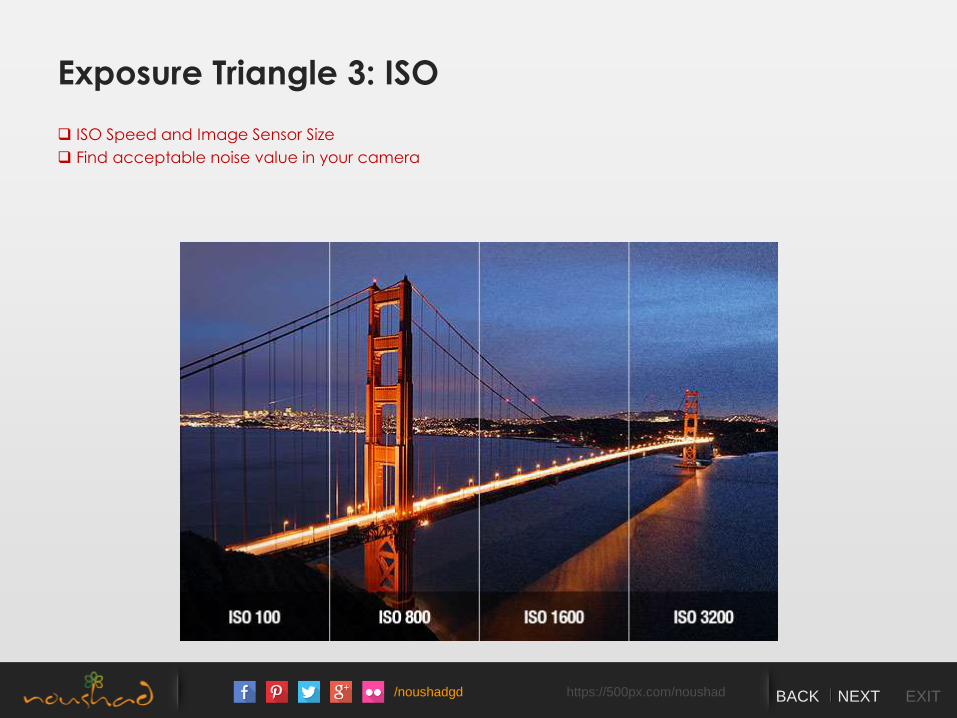
ISO Speed and Image Sensor Size
Find acceptable noise value in your camera
/noushadgd https://500px.com/noushad BACK NEXT EXIT
Exposure is Measured in “STOPS”
For every one stop you change in any setting, you are essentially doubling or halving the amount of light that
hit's the camera's sensor. If you change a setting by two stops then you are allowing in (or reducing) four
times the amount of light into the camera, and so forth.
What's great about exposure stops is that they create an even playing field for aperture, shutter speed and
ISO in regards to light. This means that we can swap any of the three elements while keeping the overall
exposure the same.
Just to make sure this concept is clear
/noushadgd https://500px.com/noushad BACK NEXT EXIT
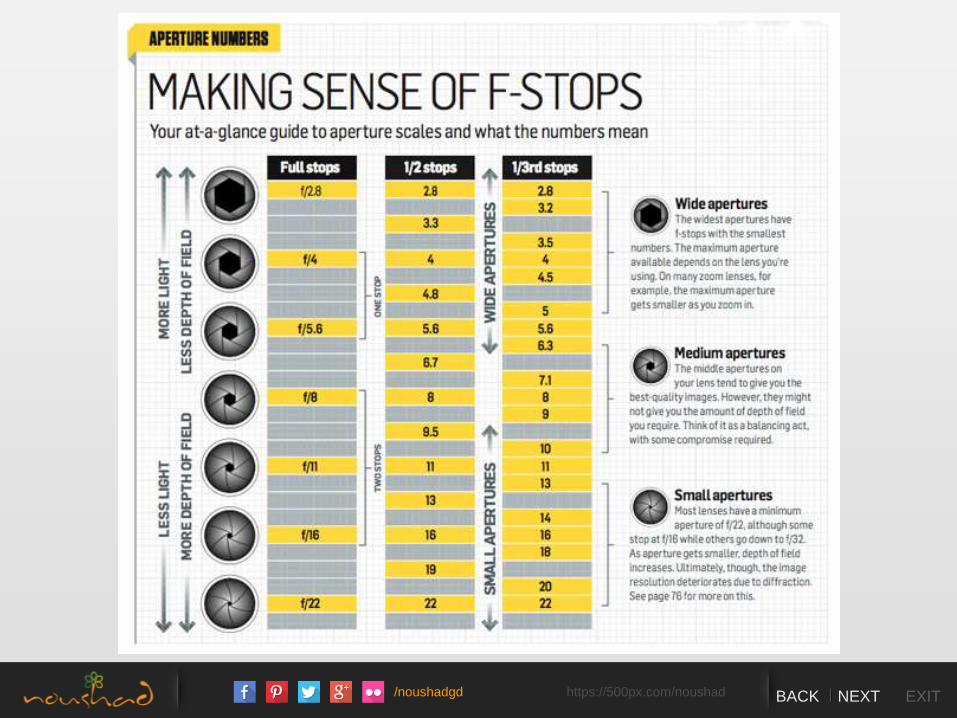
Aperture f-Stops
With aperture, going from f/ 1.4 to f/ 2 is one exposure stop. Changing from f/ 22 to f/ 16 is also one exposure
stop. Moving from f/ 8 to f/ 16 would be two exposure stops.
/noushadgd https://500px.com/noushad BACK NEXT EXIT

/noushadgd https://500px.com/noushad BACK NEXT EXIT
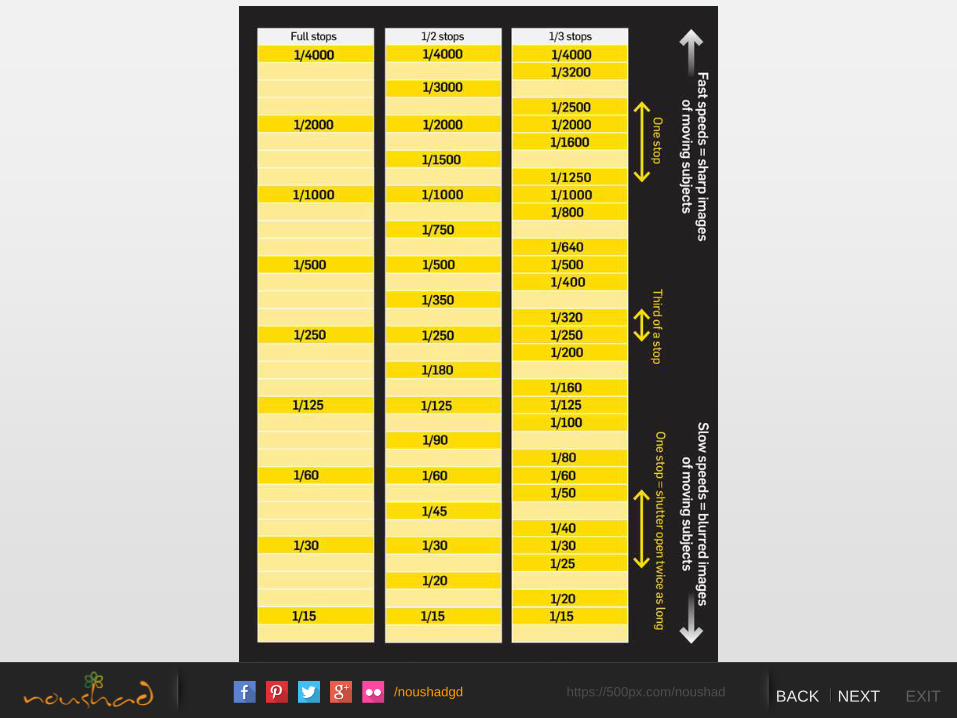
Shutter Speed - Stops
With shutter speed, going from 1/ 30 to 1/ 60 is one exposure stop. Changing from 1/ 125 to 1/ 30 is two
exposure stops. Moving from 1/ 2 to 1/ 15 would be three exposure stops.
/noushadgd https://500px.com/noushad BACK NEXT EXIT
/noushadgd https://500px.com/noushad BACK NEXT EXIT
ISO - Stops
With ISO, going from 800 to 1600 is one exposure stop. Changing from 100 to 400 would be two exposure
stops. Moving from 200 to 3200 would be four exposure stops.
/noushadgd https://500px.com/noushad BACK NEXT EXIT
What is Correct Exposure?
“Correct” camera exposure is defined as an exposure that achieves the effect the photographer intended.
Depending on what the photographer is trying to capture within a photo will determine if it is an acceptable
exposure or not.
/noushadgd https://500px.com/noushad BACK NEXT EXIT
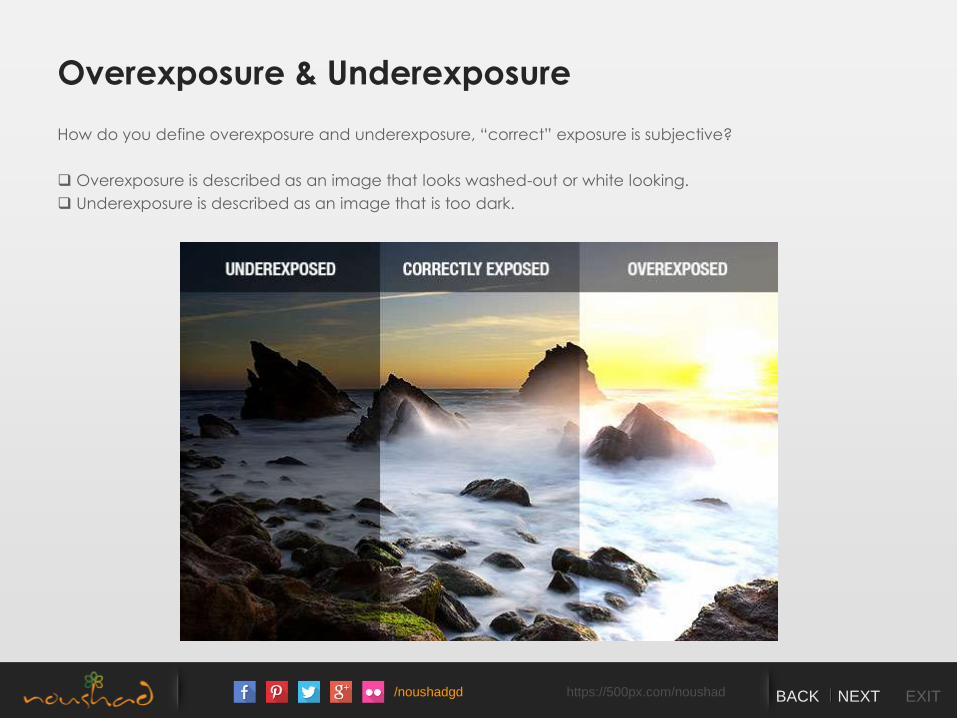
Overexposure & Underexposure
How do you define overexposure and underexposure, “correct” exposure is subjective?
Overexposure is described as an image that looks washed-out or white looking.
Underexposure is described as an image that is too dark.
/noushadgd https://500px.com/noushad BACK NEXT EXIT
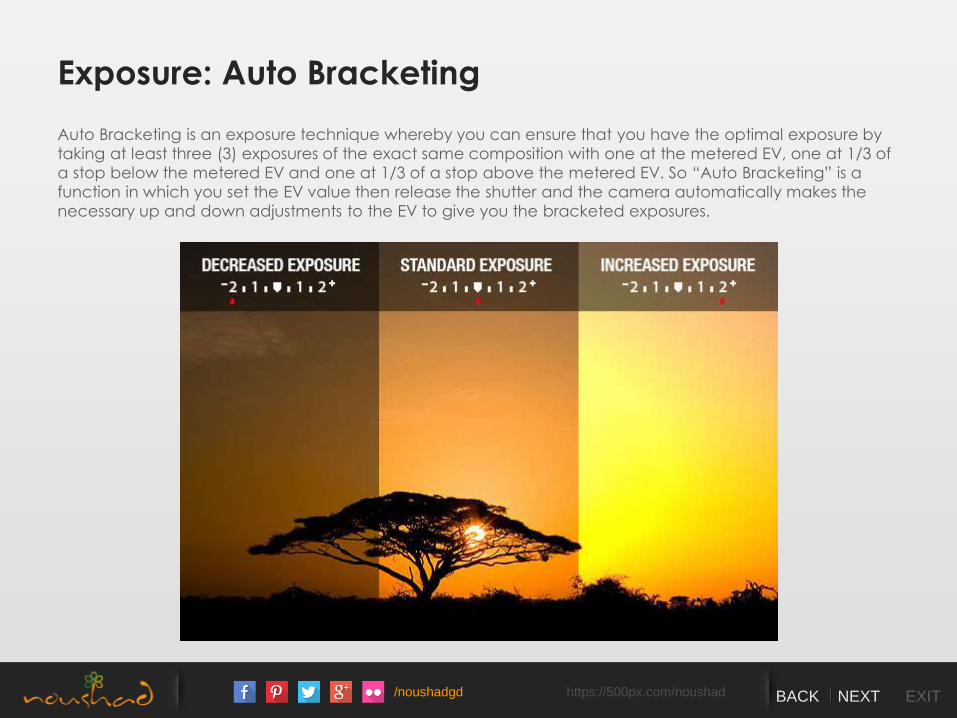
Exposure: Auto Bracketing
Auto Bracketing is an exposure technique whereby you can ensure that you have the optimal exposure by
taking at least three (3) exposures of the exact same composition with one at the metered EV, one at 1/3 of
a stop below the metered EV and one at 1/3 of a stop above the metered EV. So “Auto Bracketing” is a
function in which you set the EV value then release the shutter and the camera automatically makes the
necessary up and down adjustments to the EV to give you the bracketed exposures.
/noushadgd https://500px.com/noushad BACK NEXT EXIT
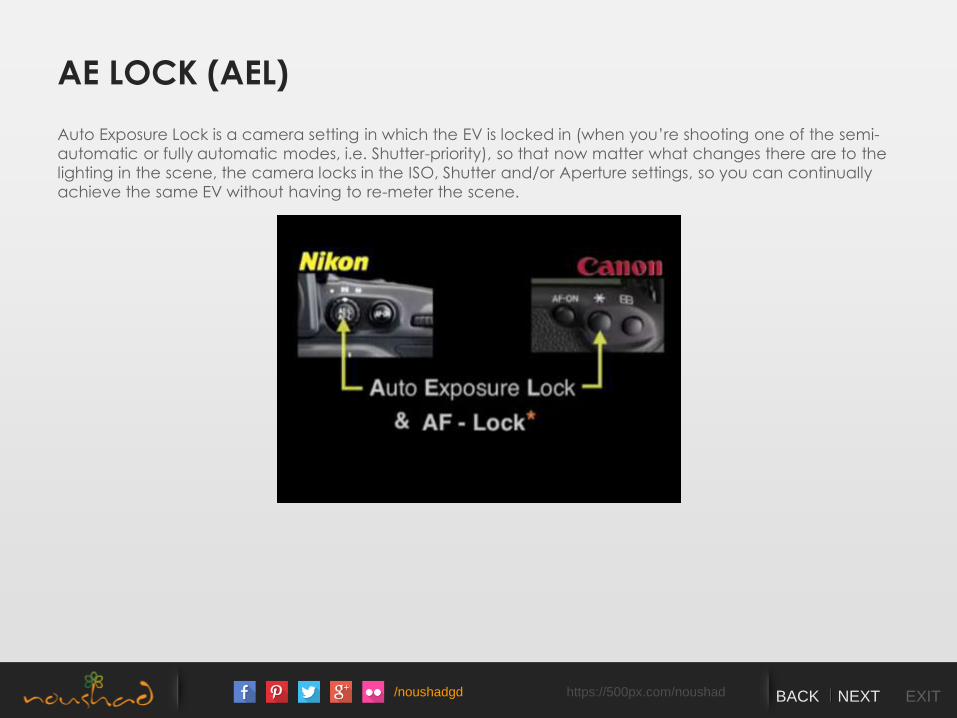
AE LOCK (AEL)
Auto Exposure Lock is a camera setting in which the EV is locked in (when you’re shooting one of the semi-
automatic or fully automatic modes, i.e. Shutter-priority), so that now matter what changes there are to the
lighting in the scene, the camera locks in the ISO, Shutter and/or Aperture settings, so you can continually
achieve the same EV without having to re-meter the scene.
/noushadgd https://500px.com/noushad BACK NEXT EXIT
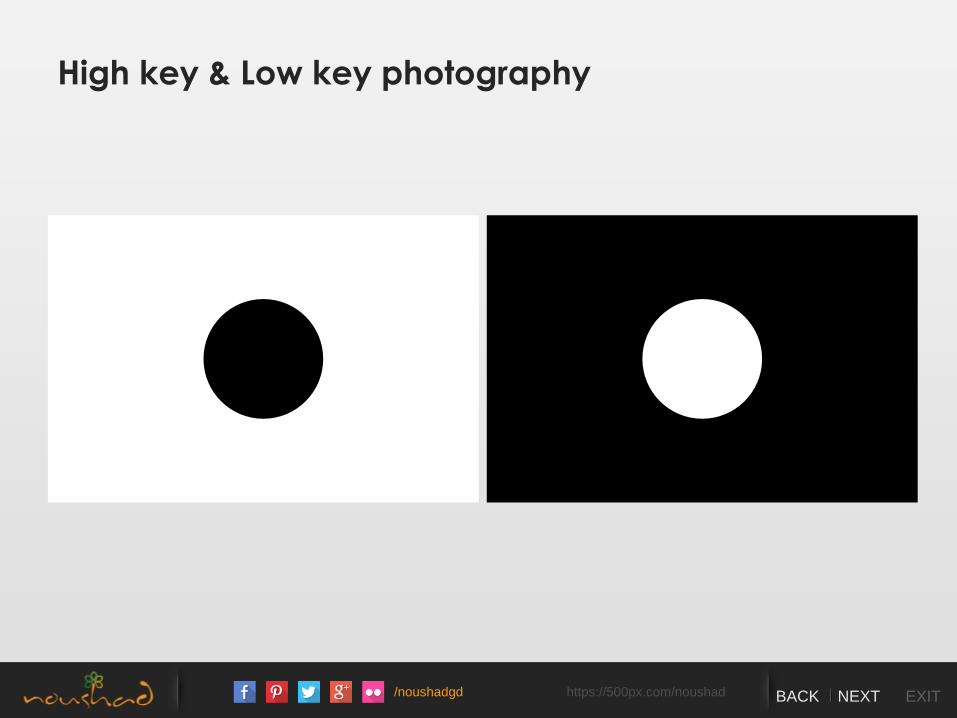
High key & Low key photography
/noushadgd https://500px.com/noushad BACK NEXT EXIT
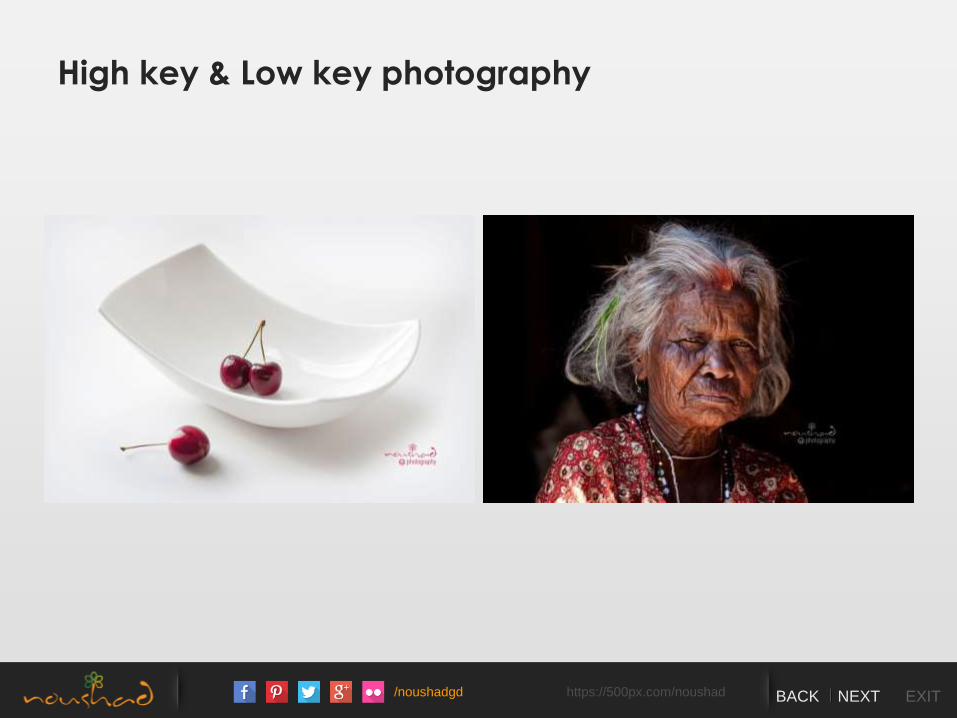
High key & Low key photography
/noushadgd https://500px.com/noushad BACK NEXT EXIT
Considerations When Adjusting Exposure
Changing each setting (aperture, shutter speed and ISO) not only impacts the exposure of a photo but also
impacts other aspects, including: depth of field, the ability to freeze motion and the amount of digital noise
present in an image
/noushadgd https://500px.com/noushad BACK NEXT EXIT
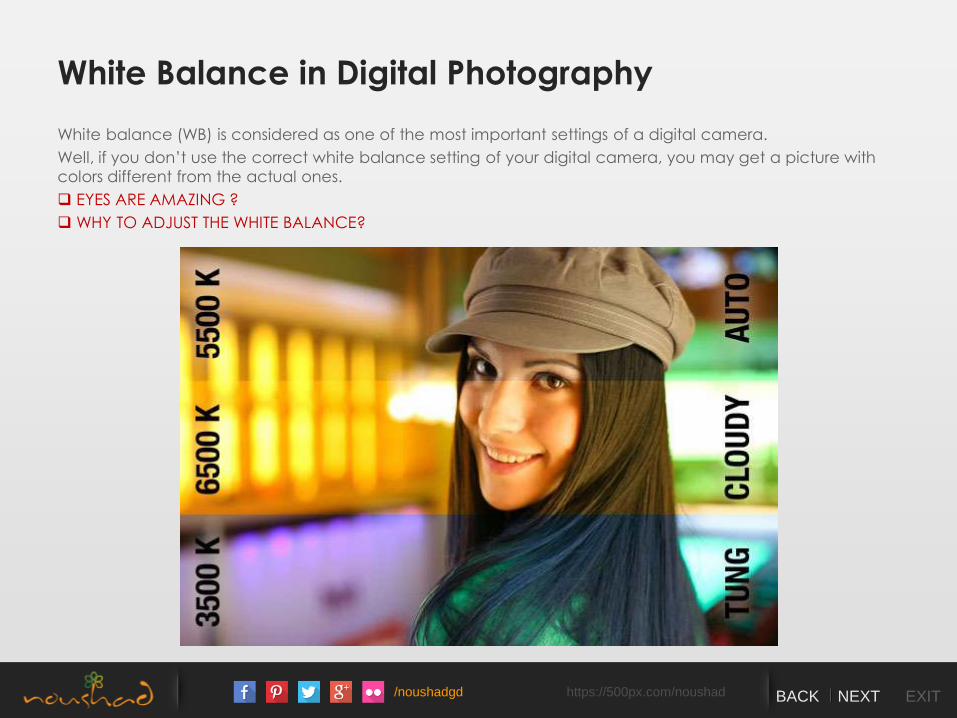
White Balance in Digital Photography
White balance (WB) is considered as one of the most important settings of a digital camera.
Well, if you don’t use the correct white balance setting of your digital camera, you may get a picture with
colors different from the actual ones.
EYES ARE AMAZING ?
WHY TO ADJUST THE WHITE BALANCE?
/noushadgd https://500px.com/noushad BACK NEXT EXIT
Advanced Camera Modes
On most DSLR cameras, there will also be the letter modes – M (Manual), AV (Aperture-Priority), TV or S
(Shutter-Priority) and P (Programmed Auto). Manual allows the photographer to change every single setting;
Aperture-Priority allows the photographer to set the aperture value and the camera automatically sets the
correct shutter speed; TV lets the photographer choose the shutter speed first. P-Program mode is similar to
Auto mode - the shutter and aperture settings are determined by the camera, but the photographer can
adjust the shooting and image-recording functions.
MANUAL mode where you can specify everything.
AUTOMATIC mode where the camera will make a best guess.
PROGRAMMED mode where certain characteristics are pre-determind.
Some people consider it amateurish to use pre determined settings, when in fact there may be times when
we are in a rush and cannot adjust everything manually. Also remember that using these modes will teach
you about photography and ideal settings for different conditions. If in doubt, you can use Auto camera
mode, then adjust the settings manually. Auto settings are there to be used so try them all, and become
familiar with what each one does.
Av: Aperture Value.
This is the most widely used mode for general shooting and gives you control over the Aperture. The camera
will calculate the best shutter speed and exposure to use.
Tv: Time Value. This gives you control over the shutter speed, allowing you to capture either motion or a
single moment. The camera will calculate the best aperture and exposure values to use.
These two modes are where you’ll spend most of your time if you’re a beginner to DSLR photography
/noushadgd https://500px.com/noushad BACK NEXT EXIT
Metering Modes
The first thing you need to master with your camera – besides how to load the memory card – is how to
measure the light on the subject that you are photographing. DSLRs have a built-in TTL (Through-The-Lens)
light meter, which measures the ambient or reflective light on the subject.
Why is this so important?
So you can accurately represent the image by capturing all the exciting details, colors, shadows and
textures.
/noushadgd https://500px.com/noushad BACK NEXT EXIT
Metering Modes
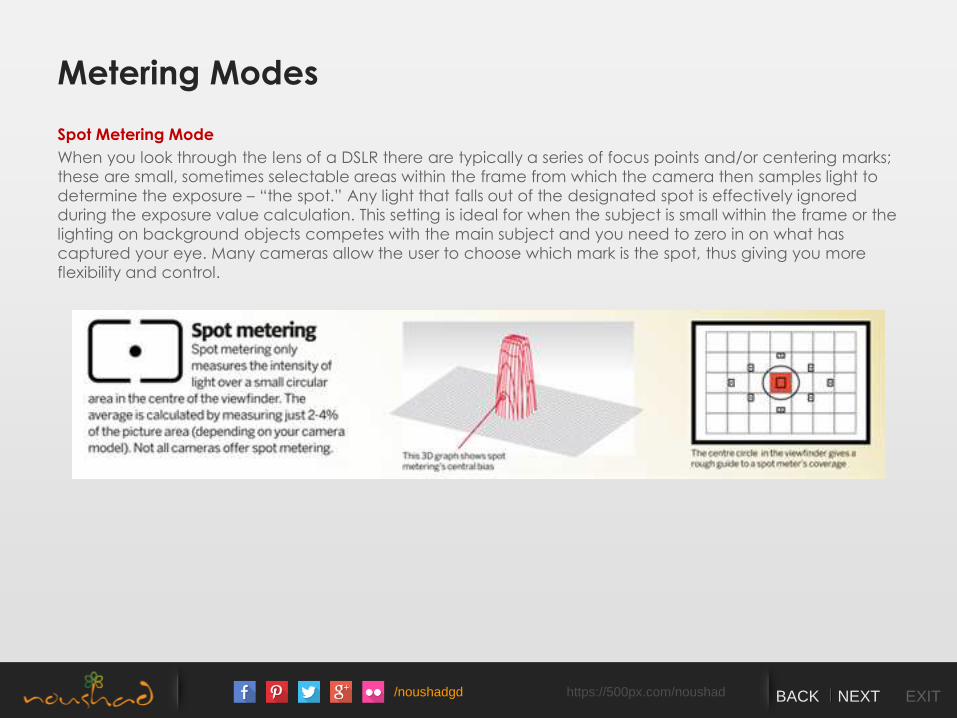
Spot Metering Mode
When you look through the lens of a DSLR there are typically a series of focus points and/or centering marks;
these are small, sometimes selectable areas within the frame from which the camera then samples light to
determine the exposure – “the spot.” Any light that falls out of the designated spot is effectively ignored
during the exposure value calculation. This setting is ideal for when the subject is small within the frame or the
lighting on background objects competes with the main subject and you need to zero in on what has
captured your eye. Many cameras allow the user to choose which mark is the spot, thus giving you more
flexibility and control.
/noushadgd https://500px.com/noushad BACK NEXT EXIT
Metering Modes
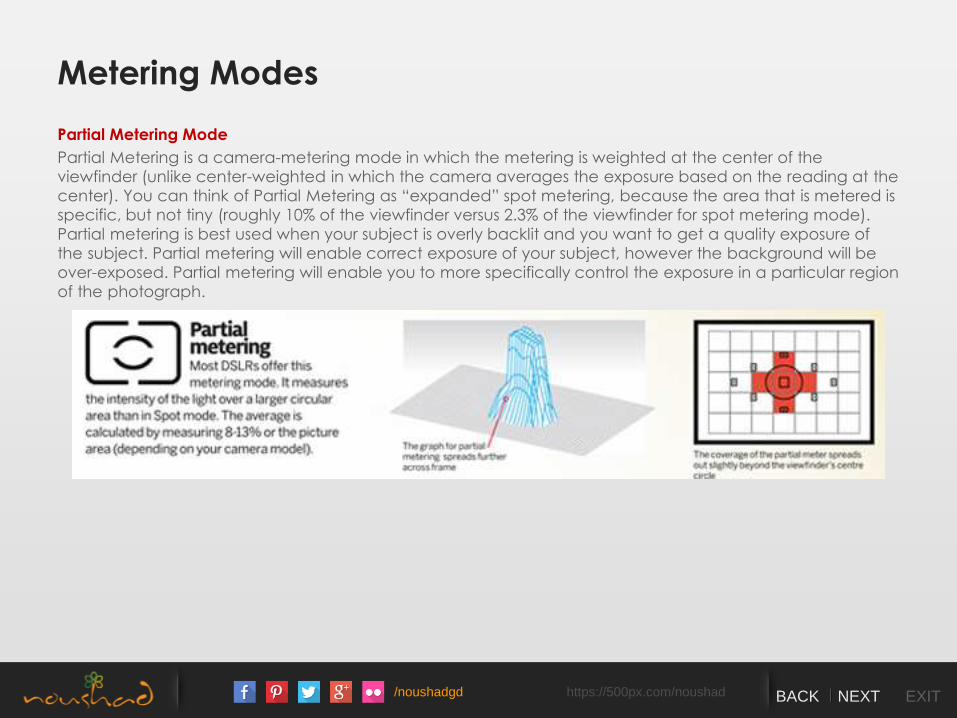
Partial Metering Mode
Partial Metering is a camera-metering mode in which the metering is weighted at the center of the
viewfinder (unlike center-weighted in which the camera averages the exposure based on the reading at the
center). You can think of Partial Metering as “expanded” spot metering, because the area that is metered is
specific, but not tiny (roughly 10% of the viewfinder versus 2.3% of the viewfinder for spot metering mode).
Partial metering is best used when your subject is overly backlit and you want to get a quality exposure of
the subject. Partial metering will enable correct exposure of your subject, however the background will be
over-exposed. Partial metering will enable you to more specifically control the exposure in a particular region
of the photograph.
/noushadgd https://500px.com/noushad BACK NEXT EXIT
Metering Modes
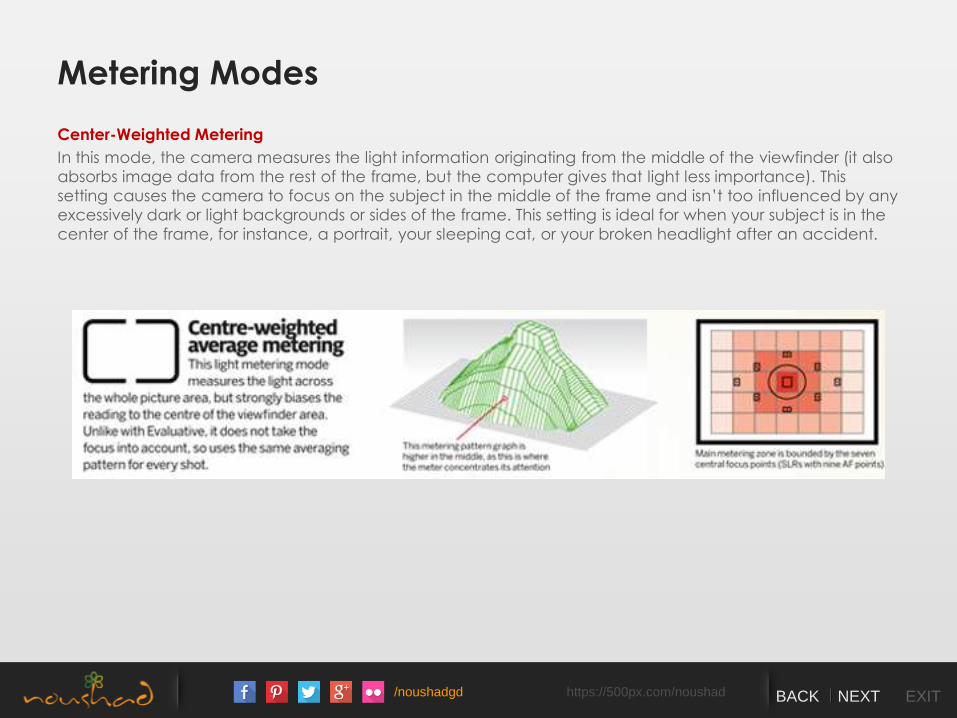
Center-Weighted Metering
In this mode, the camera measures the light information originating from the middle of the viewfinder (it also
absorbs image data from the rest of the frame, but the computer gives that light less importance). This
setting causes the camera to focus on the subject in the middle of the frame and isn’t too influenced by any
excessively dark or light backgrounds or sides of the frame. This setting is ideal for when your subject is in the
center of the frame, for instance, a portrait, your sleeping cat, or your broken headlight after an accident.
/noushadgd https://500px.com/noushad BACK NEXT EXIT
Metering Modes
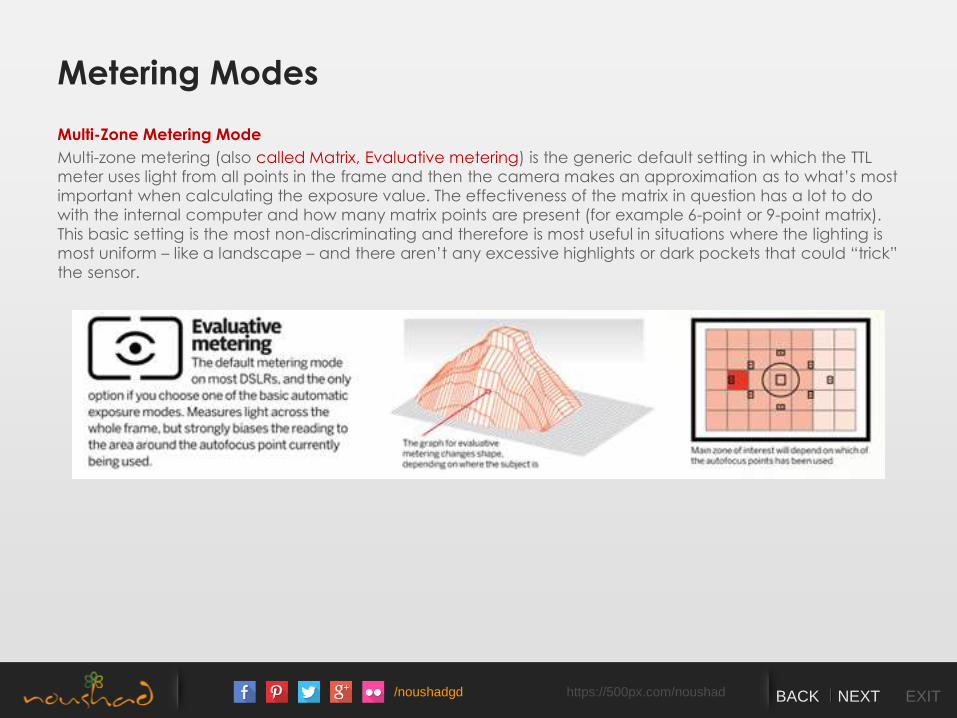
Multi-Zone Metering Mode
Multi-zone metering (also called Matrix, Evaluative metering) is the generic default setting in which the TTL
meter uses light from all points in the frame and then the camera makes an approximation as to what’s most
important when calculating the exposure value. The effectiveness of the matrix in question has a lot to do
with the internal computer and how many matrix points are present (for example 6-point or 9-point matrix).
This basic setting is the most non-discriminating and therefore is most useful in situations where the lighting is
most uniform – like a landscape – and there aren’t any excessive highlights or dark pockets that could “trick”
the sensor.
/noushadgd https://500px.com/noushad BACK NEXT EXIT
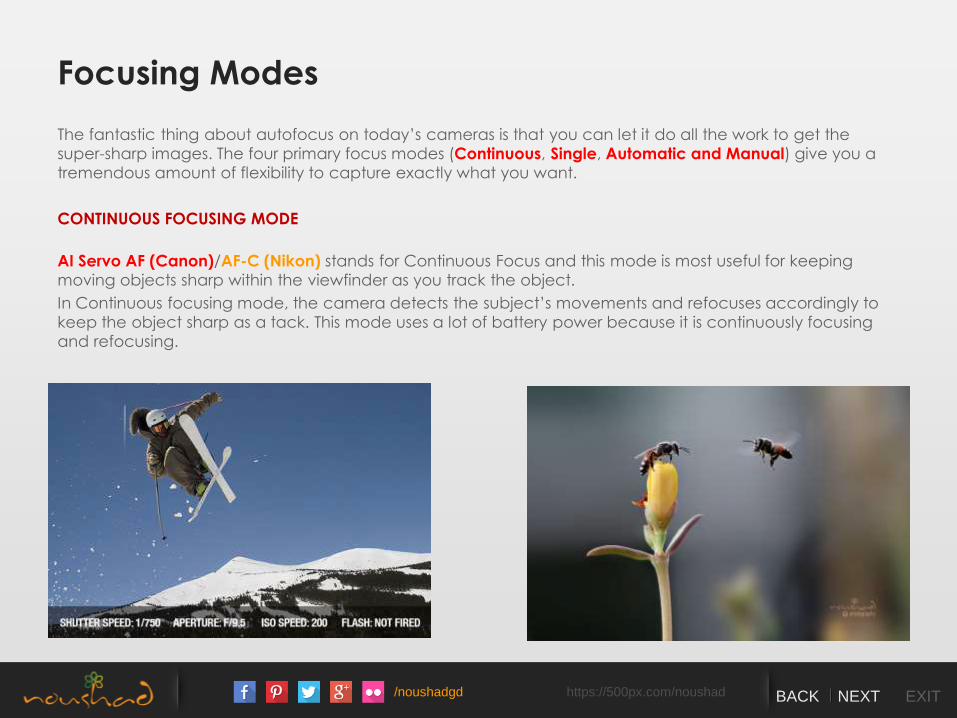
Focusing Modes
The fantastic thing about autofocus on today’s cameras is that you can let it do all the work to get the
super-sharp images. The four primary focus modes (Continuous, Single, Automatic and Manual) give you a
tremendous amount of flexibility to capture exactly what you want.
CONTINUOUS FOCUSING MODE
AI Servo AF (Canon)/AF-C (Nikon) stands for Continuous Focus and this mode is most useful for keeping
moving objects sharp within the viewfinder as you track the object.
In Continuous focusing mode, the camera detects the subject’s movements and refocuses accordingly to
keep the object sharp as a tack. This mode uses a lot of battery power because it is continuously focusing
and refocusing.
/noushadgd https://500px.com/noushad BACK NEXT EXIT
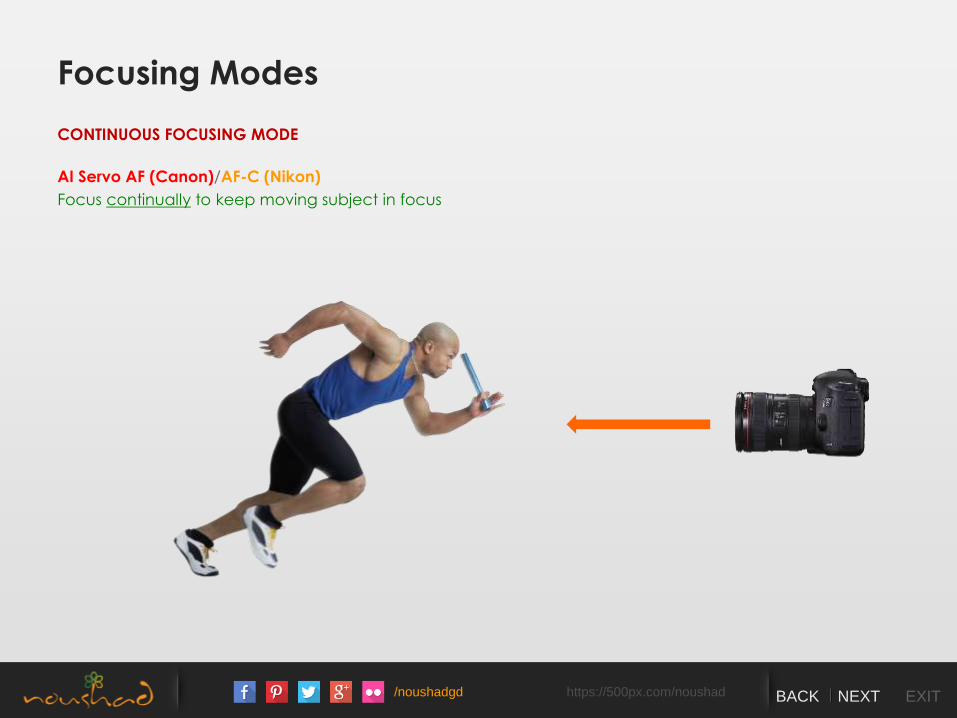
Focusing Modes
CONTINUOUS FOCUSING MODE
AI Servo AF (Canon)/AF-C (Nikon)
Focus continually to keep moving subject in focus
/noushadgd https://500px.com/noushad BACK NEXT EXIT
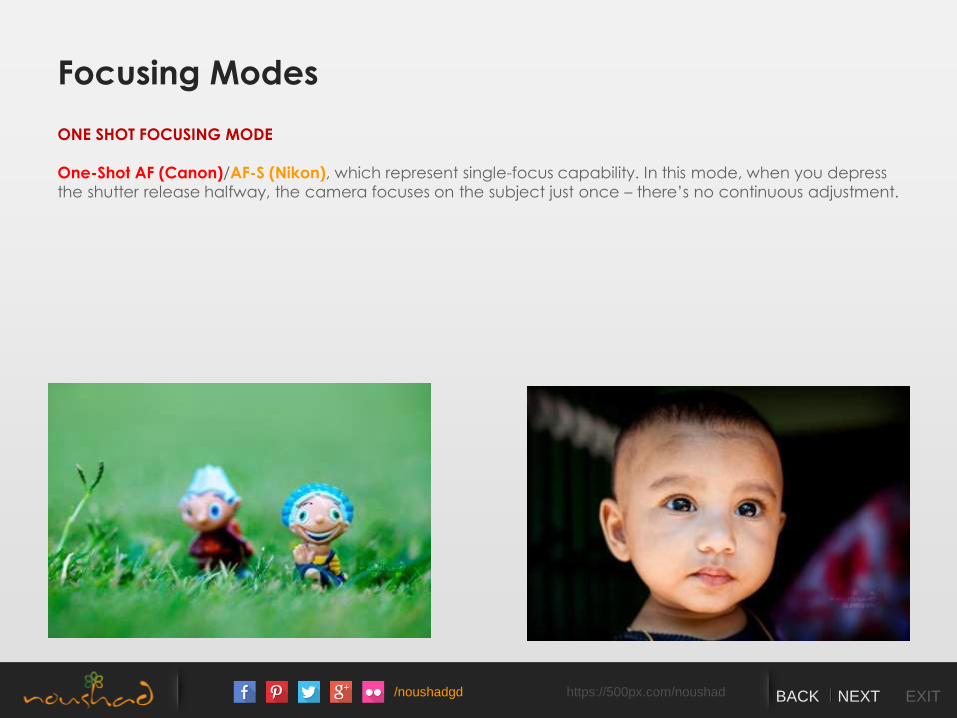
Focusing Modes
ONE SHOT FOCUSING MODE
One-Shot AF (Canon)/AF-S (Nikon), which represent single-focus capability. In this mode, when you depress
the shutter release halfway, the camera focuses on the subject just once – there’s no continuous adjustment.
/noushadgd https://500px.com/noushad BACK NEXT EXIT
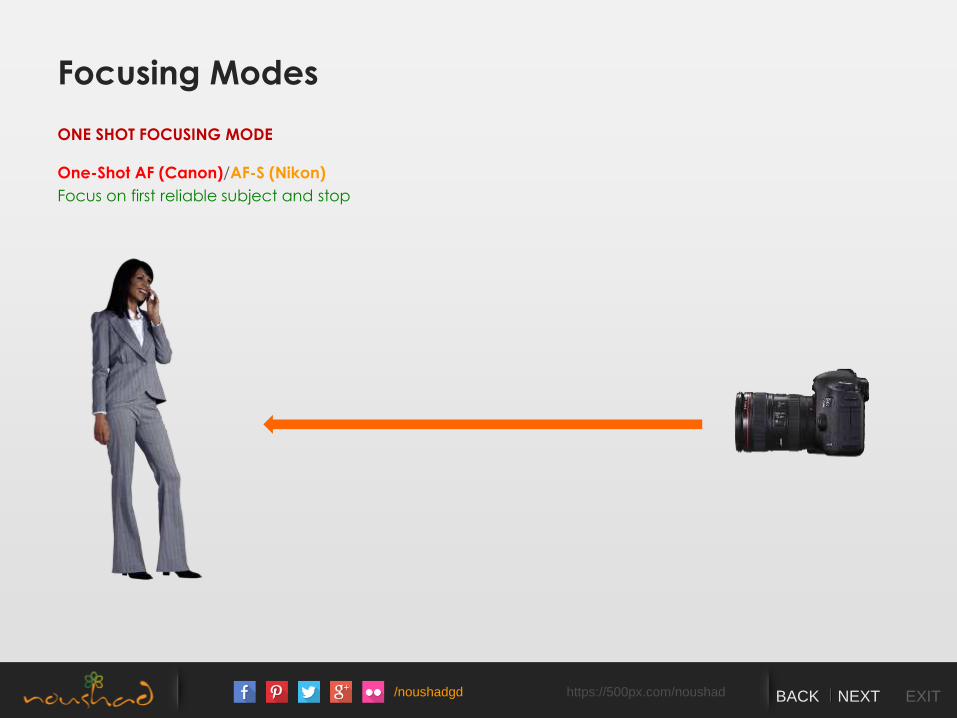
Focusing Modes
ONE SHOT FOCUSING MODE
One-Shot AF (Canon)/AF-S (Nikon)
Focus on first reliable subject and stop
/noushadgd https://500px.com/noushad BACK NEXT EXIT
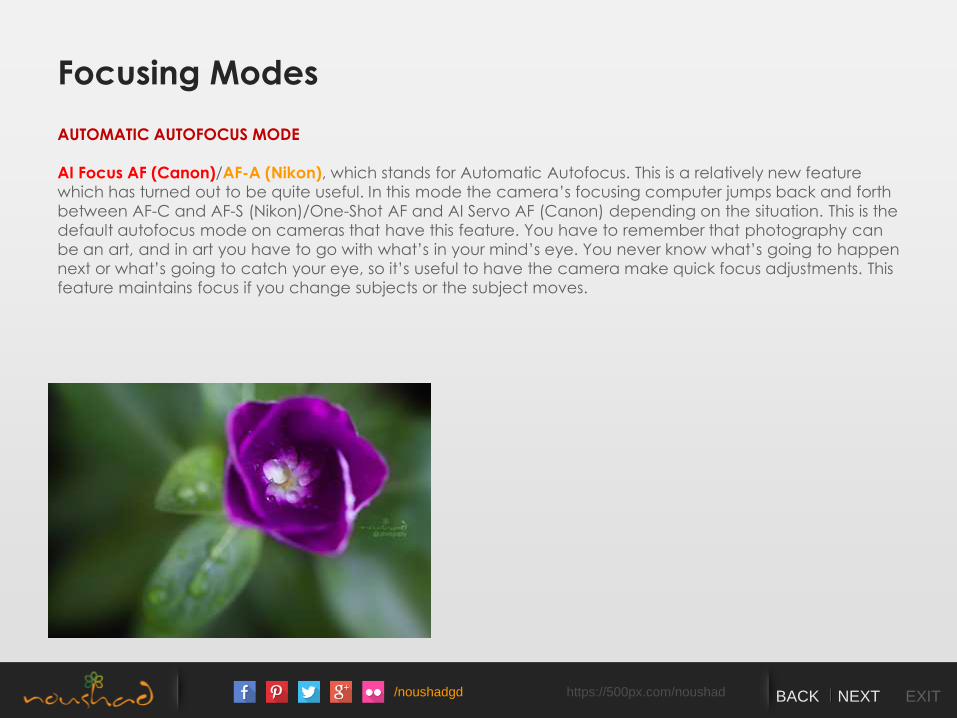
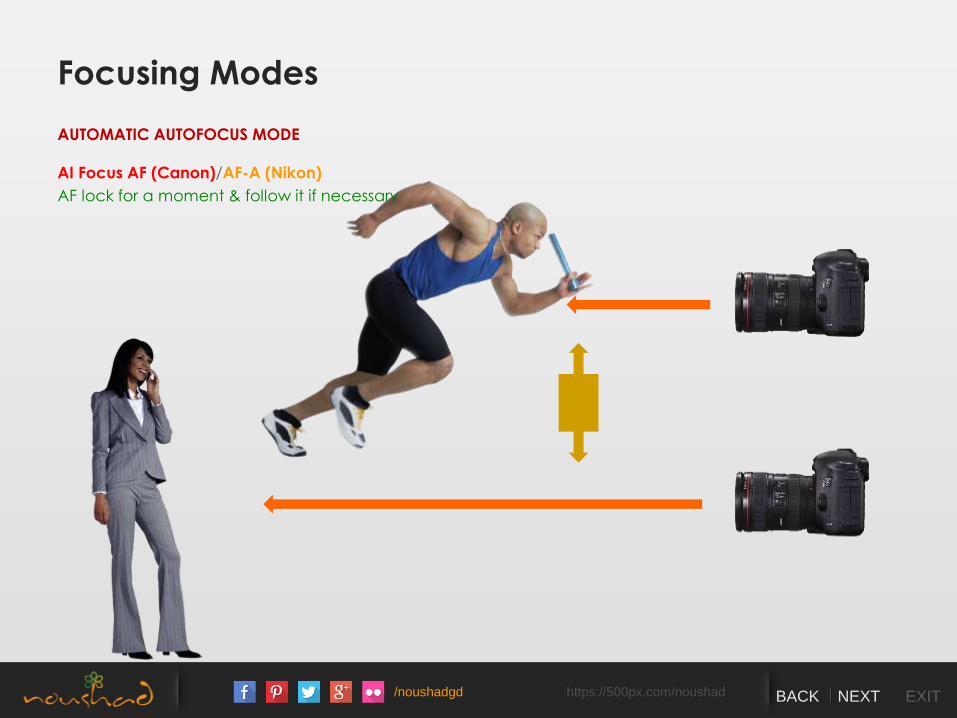
Focusing Modes
AUTOMATIC AUTOFOCUS MODE
AI Focus AF (Canon)/AF-A (Nikon), which stands for Automatic Autofocus. This is a relatively new feature
which has turned out to be quite useful. In this mode the camera’s focusing computer jumps back and forth
between AF-C and AF-S (Nikon)/One-Shot AF and AI Servo AF (Canon) depending on the situation. This is the
default autofocus mode on cameras that have this feature. You have to remember that photography can
be an art, and in art you have to go with what’s in your mind’s eye. You never know what’s going to happen
next or what’s going to catch your eye, so it’s useful to have the camera make quick focus adjustments. This
feature maintains focus if you change subjects or the subject moves.
/noushadgd https://500px.com/noushad BACK NEXT EXIT
Focusing Modes
AUTOMATIC AUTOFOCUS MODE
AI Focus AF (Canon)/AF-A (Nikon)
AF lock for a moment & follow it if necessary
/noushadgd https://500px.com/noushad BACK NEXT EXIT
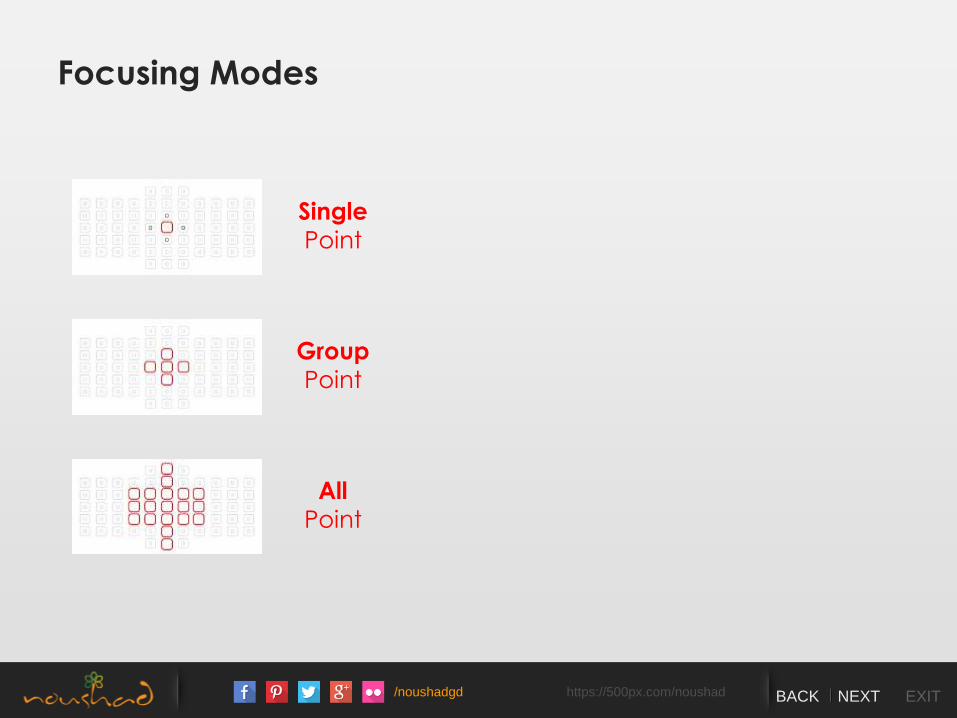
Focusing Modes
Single
Point
All
Point
Group
Point
/noushadgd https://500px.com/noushad BACK NEXT EXIT
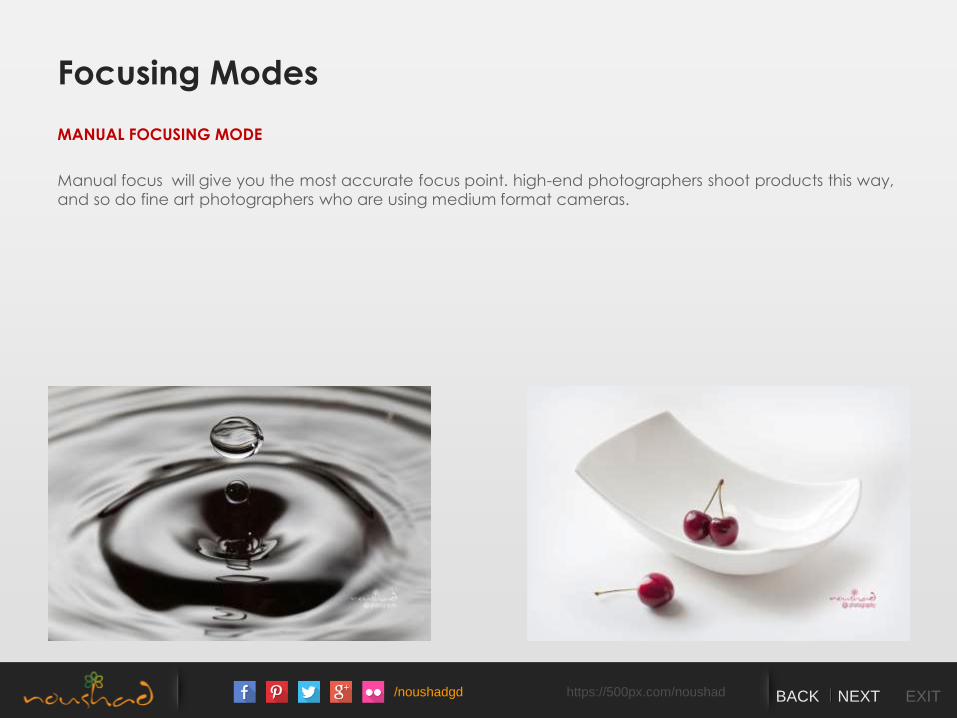
Focusing Modes
MANUAL FOCUSING MODE
Manual focus will give you the most accurate focus point. high-end photographers shoot products this way, and so do fine art photographers who are using medium format cameras.
/noushadgd https://500px.com/noushad BACK NEXT EXIT
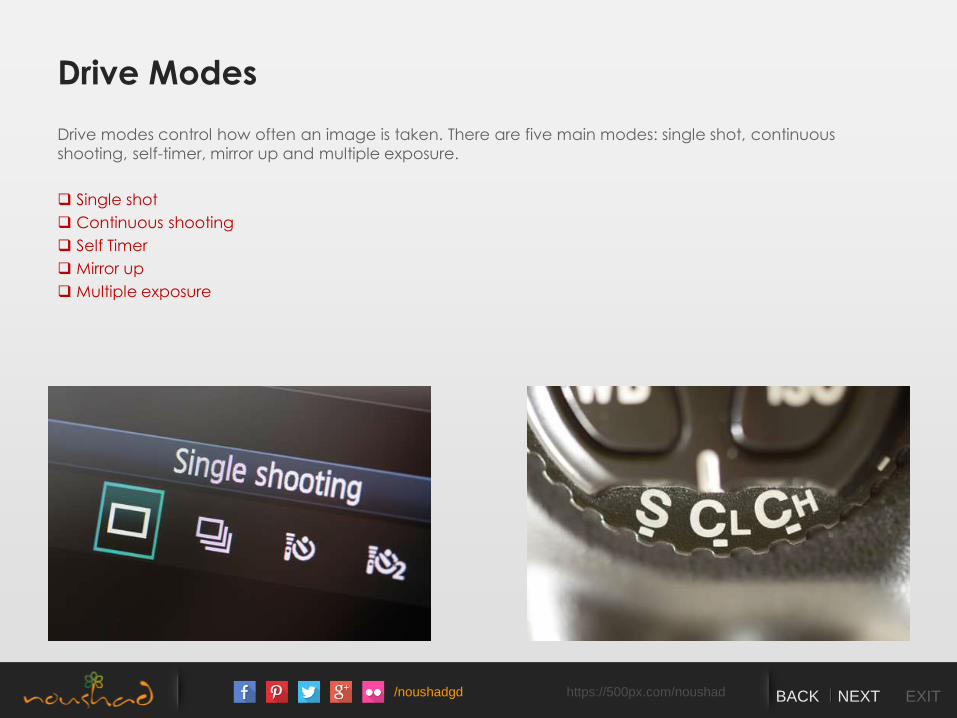
Drive Modes
Drive modes control how often an image is taken. There are five main modes: single shot, continuous
shooting, self-timer, mirror up and multiple exposure.
Single shot
Continuous shooting
Self Timer
Mirror up
Multiple exposure
/noushadgd https://500px.com/noushad BACK NEXT EXIT
Understanding Light

/noushadgd https://500px.com/noushad BACK NEXT EXIT
Understanding Light
Light is the photographer’s chief resource. The word ‘photography’ derives from Greek, and literally means
‘light drawing’. From the brightest light of the midday sun to the fuzzy glow of a streetlamp at twilight, the
light falling on the subject of your photograph is what determines the mood of the final image.
The way light falls on a subject totally dictates the physical appearance, how much texture and detail are
revealed, the strength and neutrality of its colors and whether it looks flat or three-dimensional. This in turn
influences the mood of your picture and the way people respond to it emotionally, so to get the most out of
your photograph you must have a thorough understanding of light and how you can use it to your
advantage.
SOURCE
Ambient – Daylight, Tungsten, Fluorescent, Firelight
Artificial – Flash, Tungsten
/noushadgd https://500px.com/noushad BACK NEXT EXIT
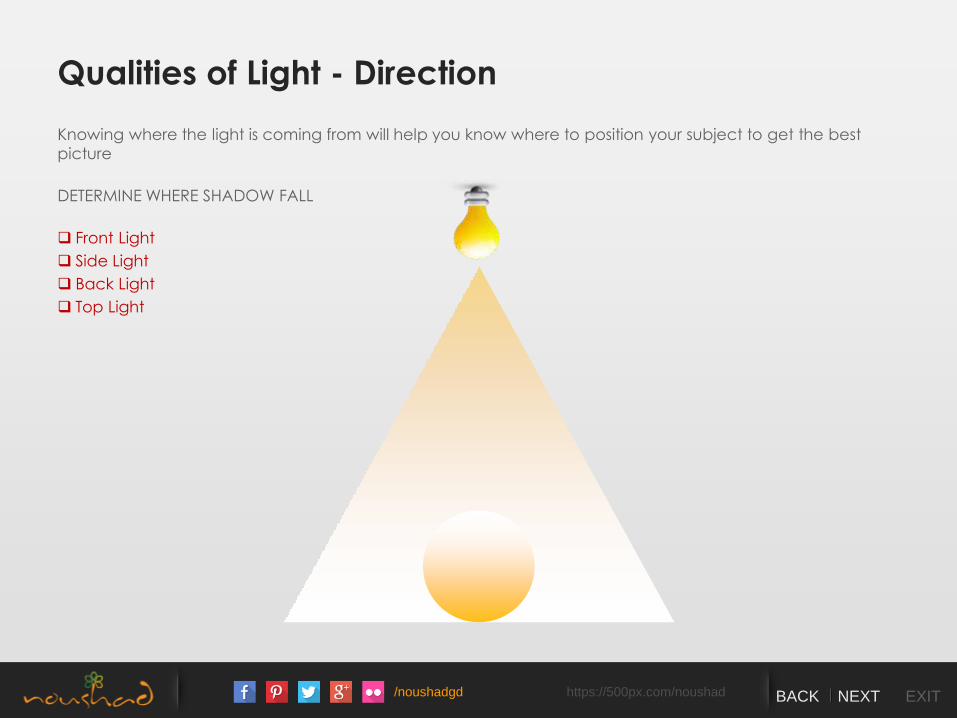
Qualities of Light - Direction
Knowing where the light is coming from will help you know where to position your subject to get the best
picture
DETERMINE WHERE SHADOW FALL
Front Light
Side Light
Back Light
Top Light
/noushadgd https://500px.com/noushad BACK NEXT EXIT
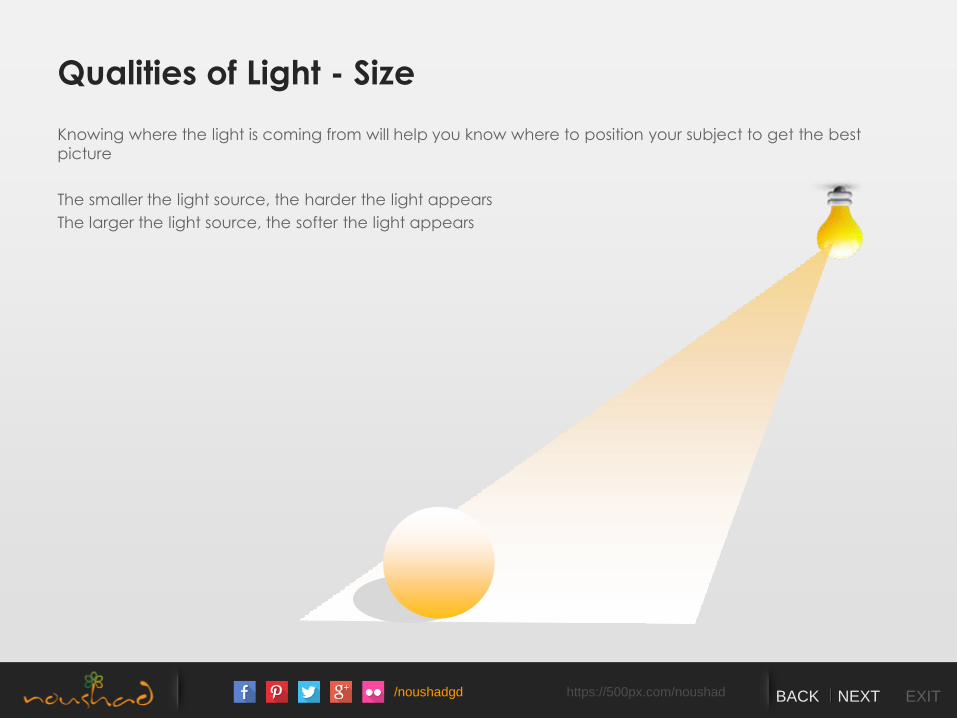
Qualities of Light - Size
Knowing where the light is coming from will help you know where to position your subject to get the best
picture
The smaller the light source, the harder the light appears
The larger the light source, the softer the light appears
/noushadgd https://500px.com/noushad BACK NEXT EXIT
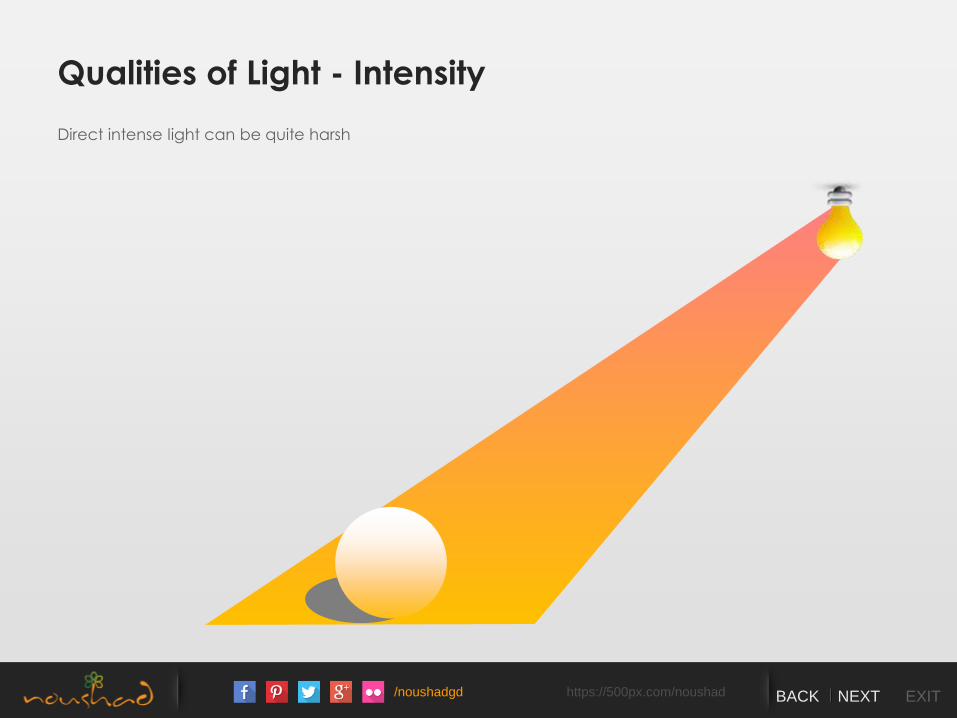
Qualities of Light - Intensity
Direct intense light can be quite harsh
/noushadgd https://500px.com/noushad BACK NEXT EXIT
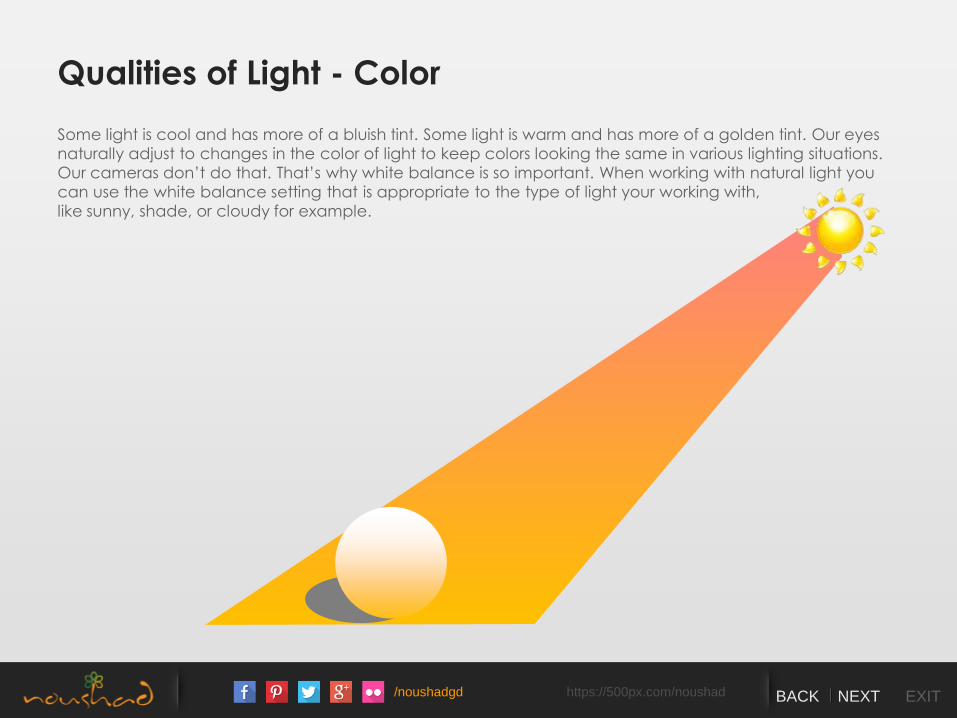
Qualities of Light - Color
Some light is cool and has more of a bluish tint. Some light is warm and has more of a golden tint. Our eyes
naturally adjust to changes in the color of light to keep colors looking the same in various lighting situations.
Our cameras don’t do that. That’s why white balance is so important. When working with natural light you
can use the white balance setting that is appropriate to the type of light your working with,
like sunny, shade, or cloudy for example.
/noushadgd https://500px.com/noushad BACK NEXT EXIT
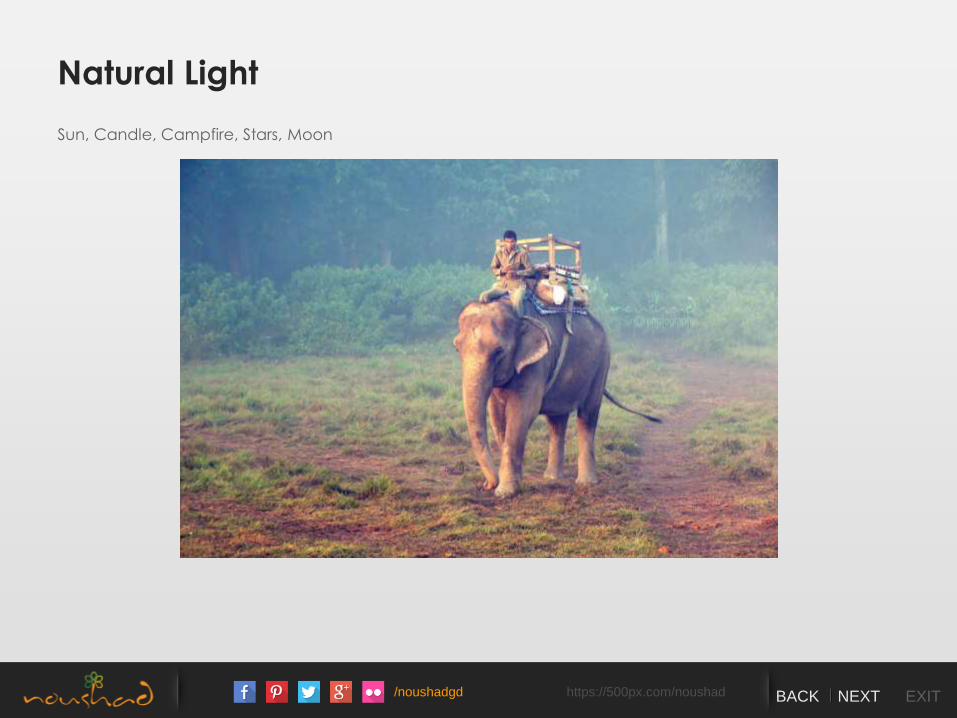
Natural Light
Sun, Candle, Campfire, Stars, Moon
/noushadgd https://500px.com/noushad BACK NEXT EXIT
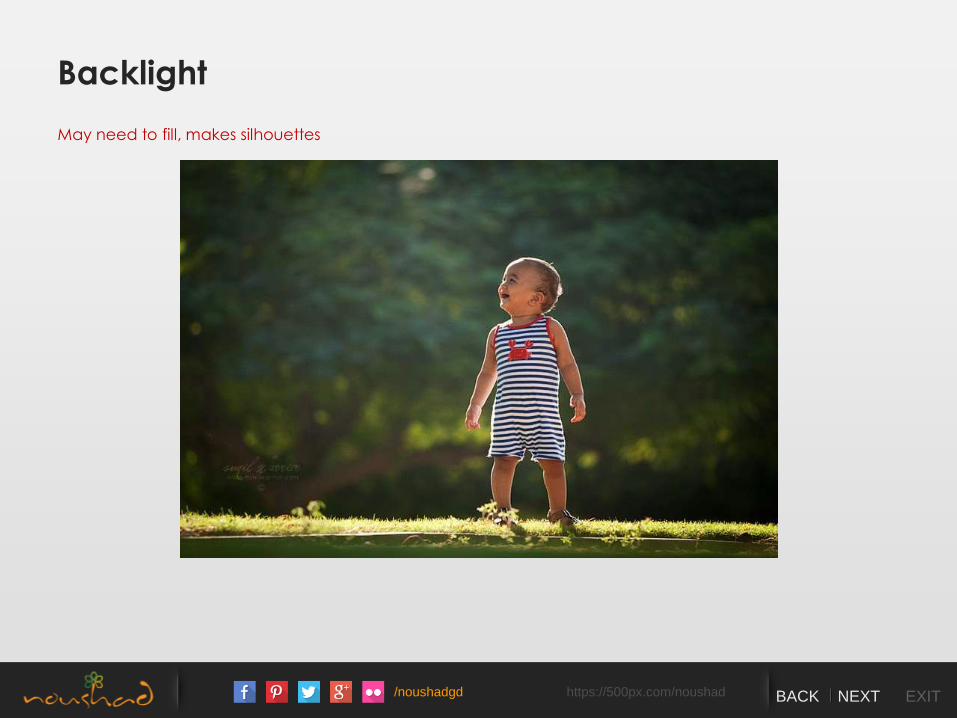
Backlight
May need to fill, makes silhouettes
/noushadgd https://500px.com/noushad BACK NEXT EXIT
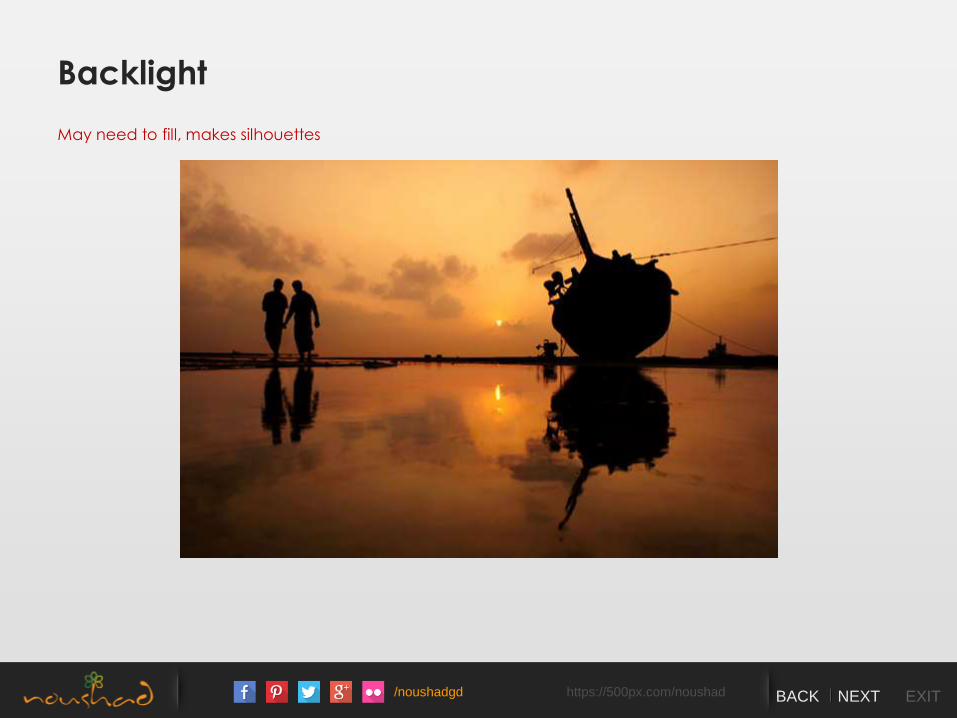
Backlight
May need to fill, makes silhouettes
/noushadgd https://500px.com/noushad BACK NEXT EXIT
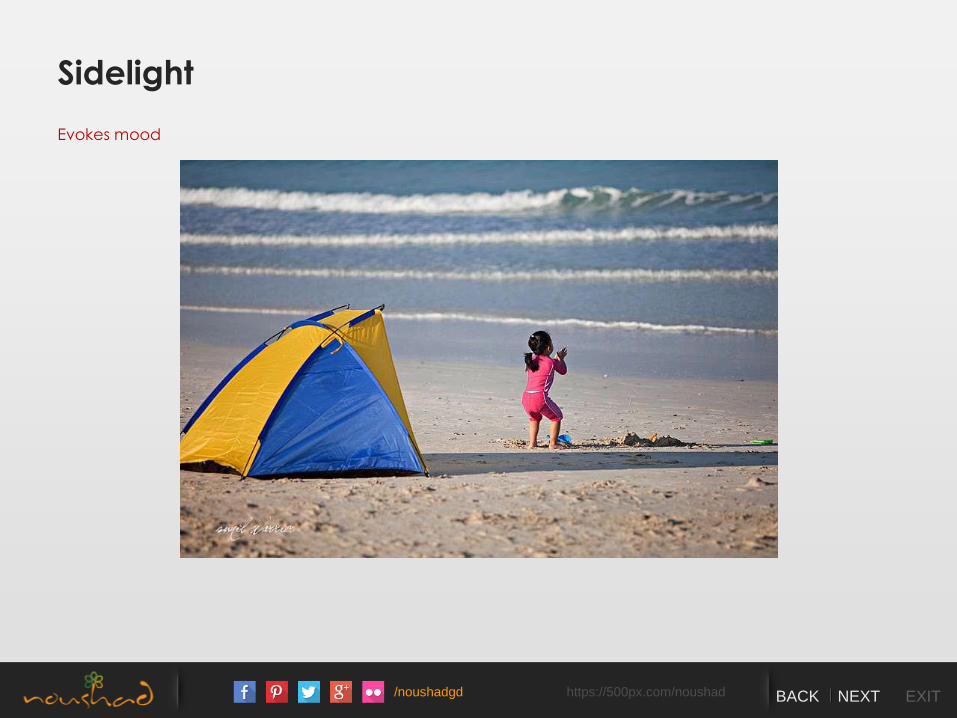
Sidelight
Evokes mood
/noushadgd https://500px.com/noushad BACK NEXT EXIT
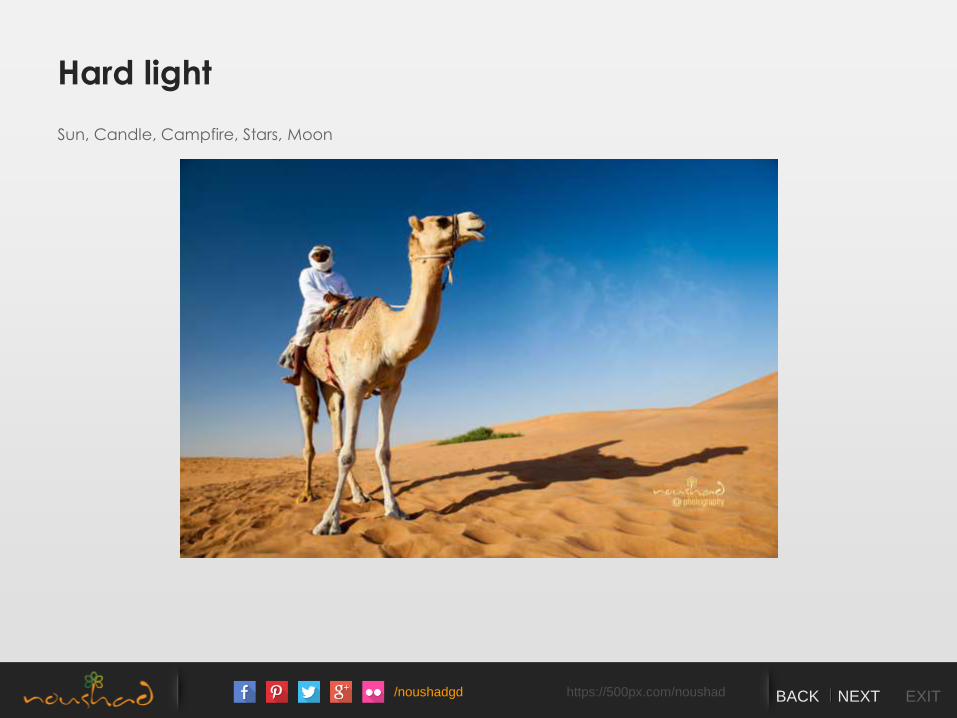
Hard light
Sun, Candle, Campfire, Stars, Moon

/noushadgd https://500px.com/noushad BACK NEXT EXIT
Even light
/noushadgd https://500px.com/noushad BACK NEXT EXIT
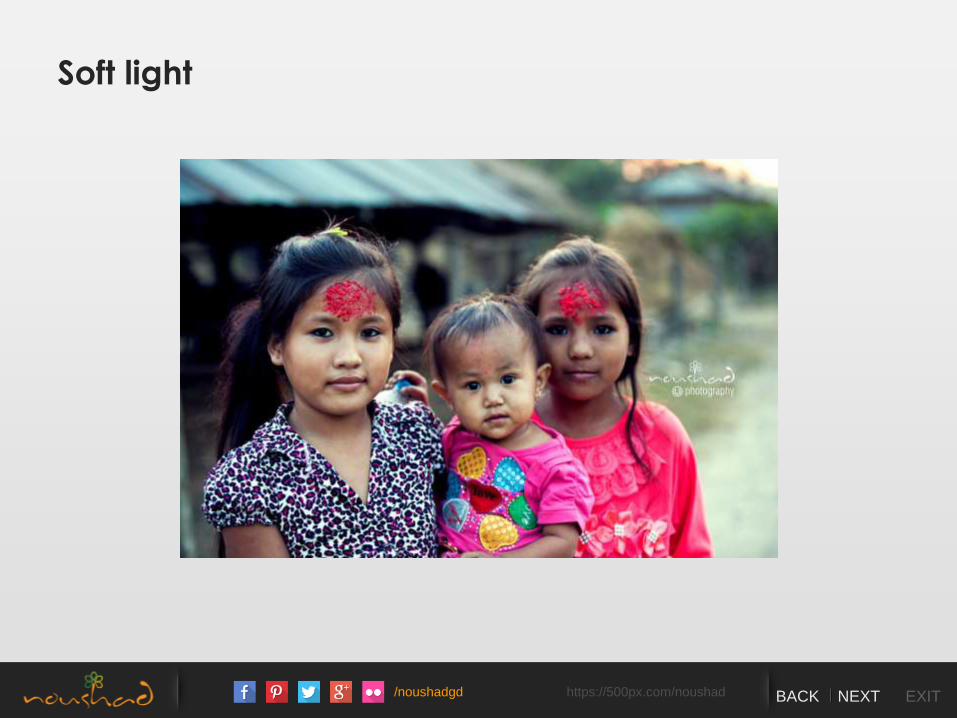
Soft light
/noushadgd https://500px.com/noushad BACK NEXT EXIT
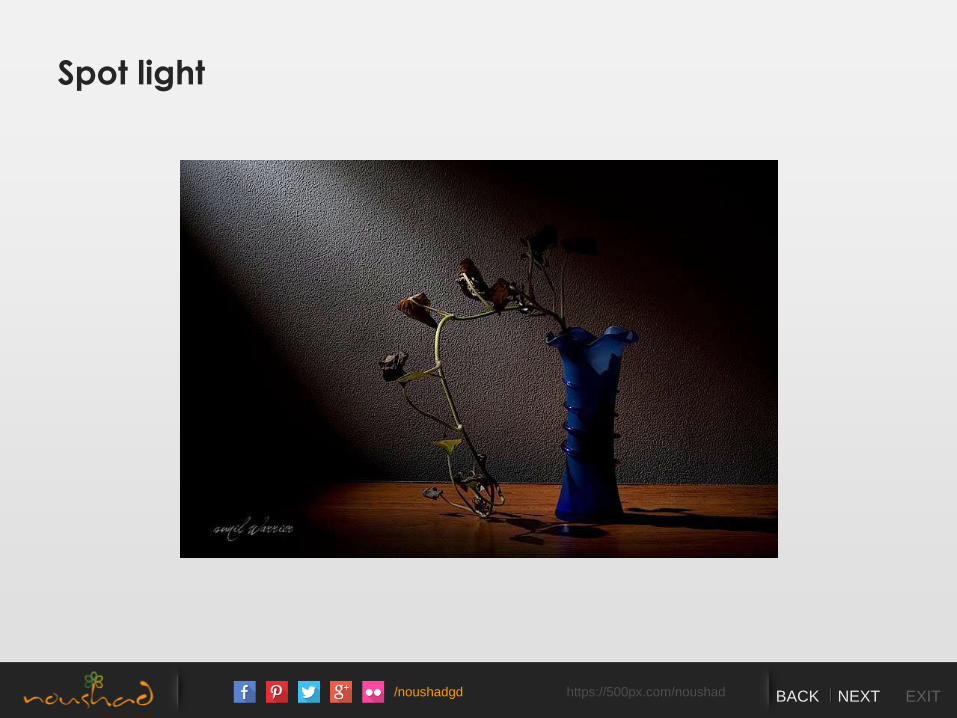
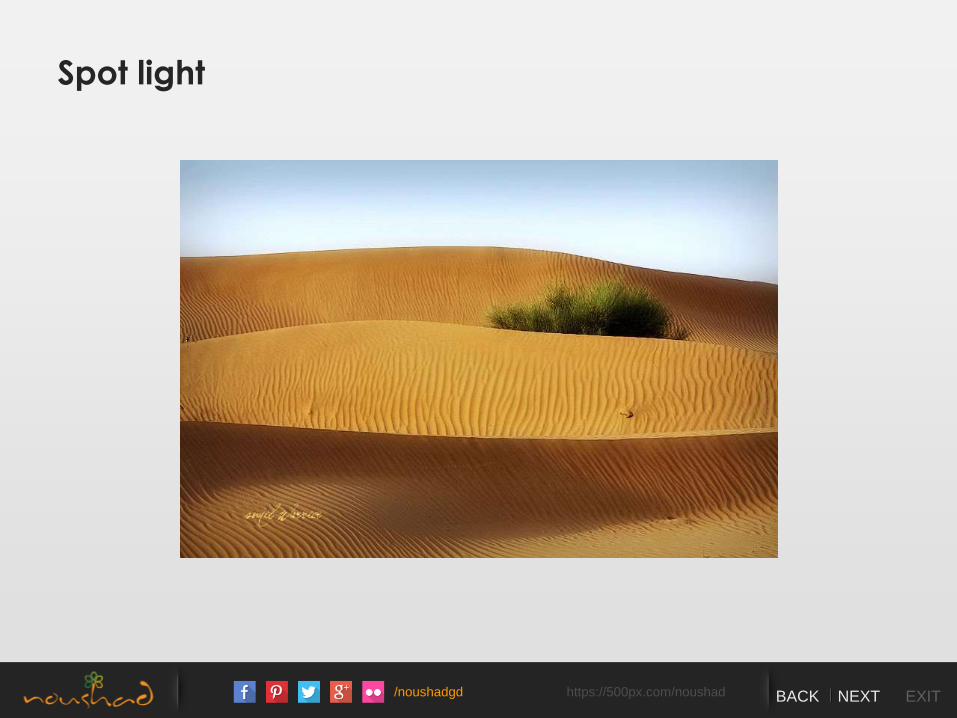
Spot light
/noushadgd https://500px.com/noushad BACK NEXT EXIT
Spot light
/noushadgd https://500px.com/noushad BACK NEXT EXIT
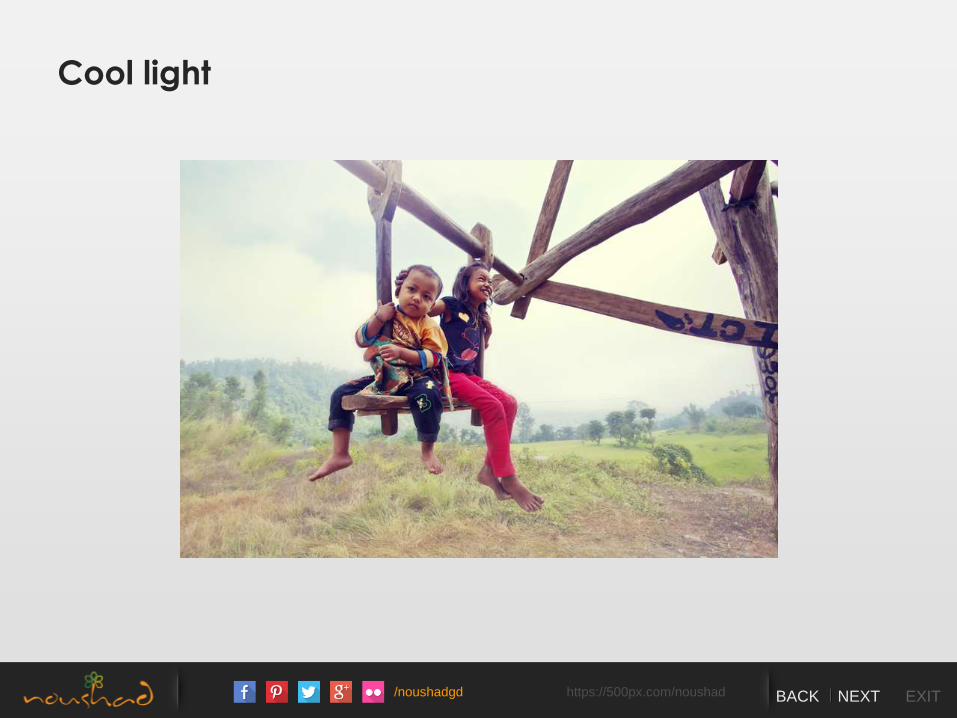
Cool light
/noushadgd https://500px.com/noushad BACK NEXT EXIT
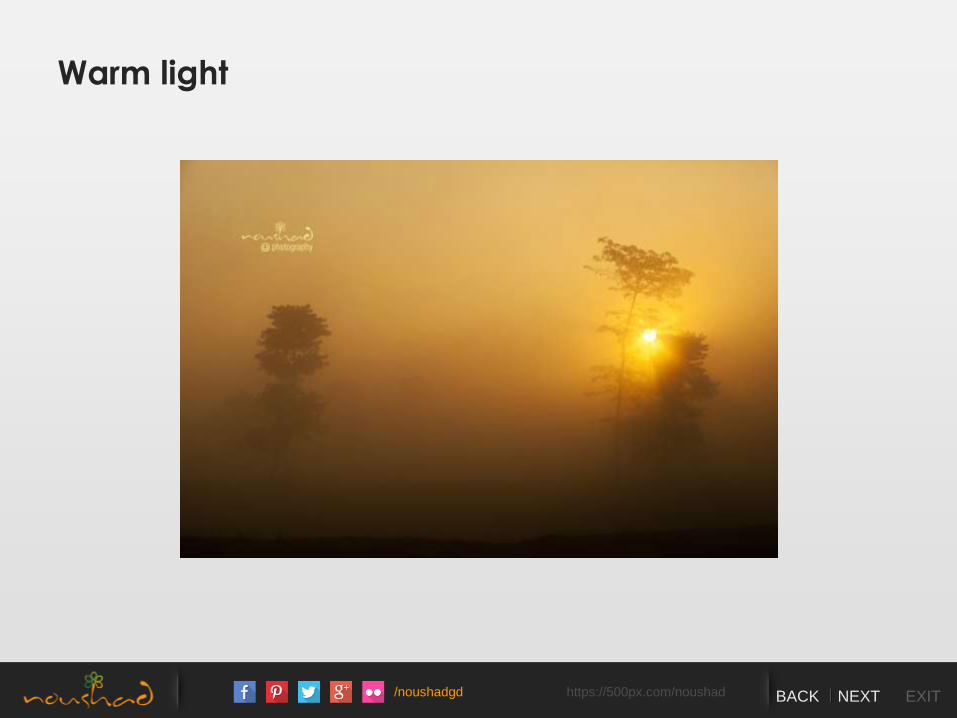
Warm light
/noushadgd https://500px.com/noushad BACK NEXT EXIT
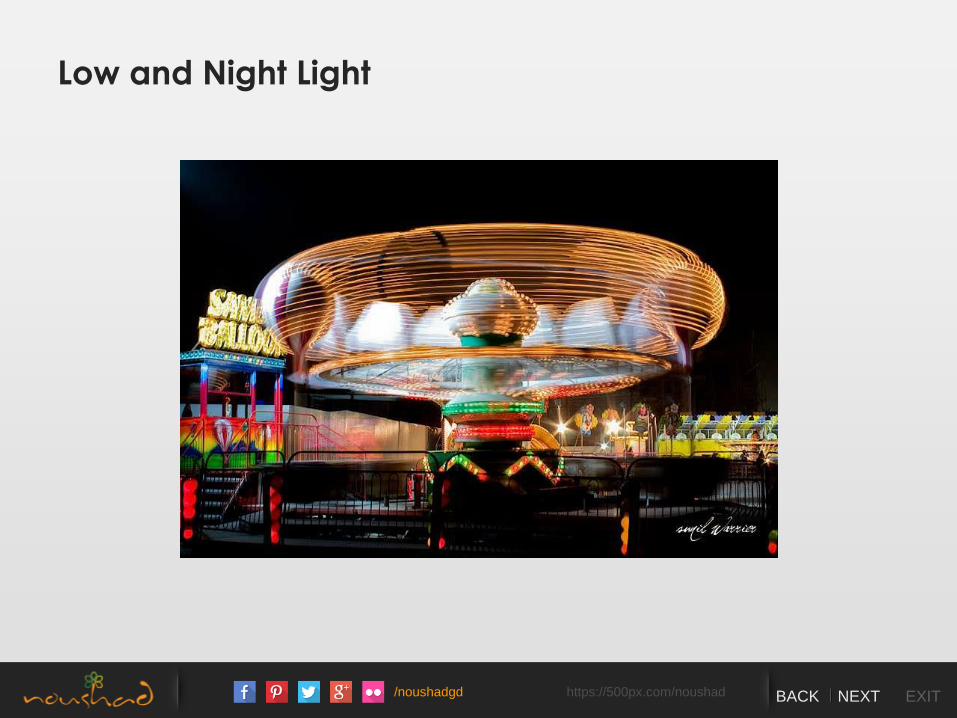
Low and Night Light
/noushadgd https://500px.com/noushad BACK NEXT EXIT
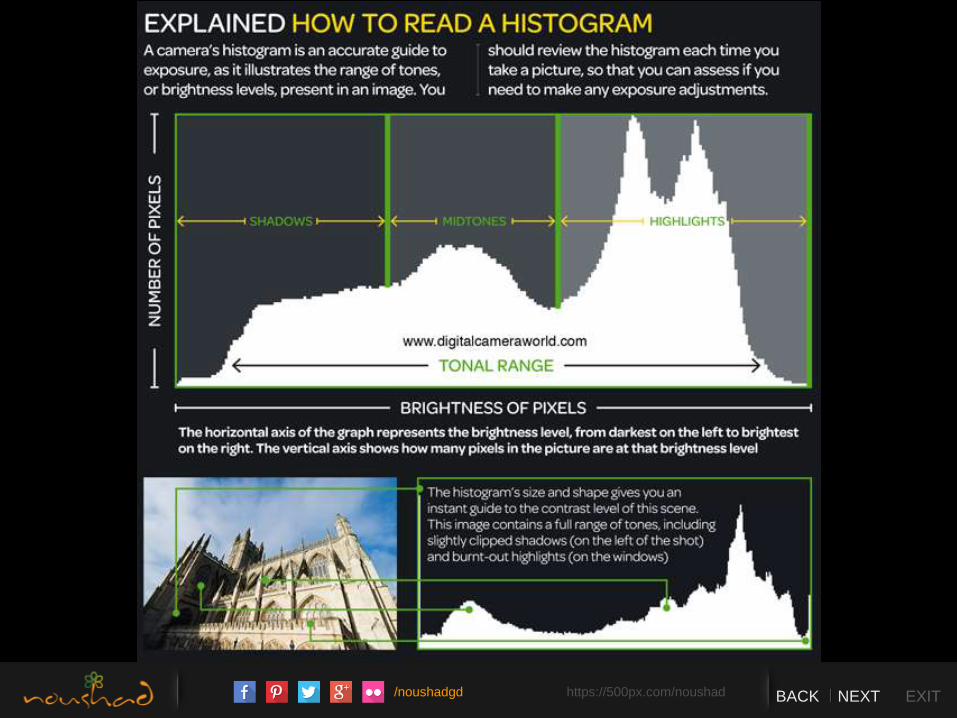
Camera's Histogram
The most important tool in digital photography besides the camera - the histogram! Learning to expose
photos properly can be a headache for new photographers.
/noushadgd https://500px.com/noushad BACK NEXT EXIT
/noushadgd https://500px.com/noushad BACK NEXT EXIT
Formula for Taking Great Photos
Camera
Time
The hardest part of photography is being in the right PLACE at the right TIME
Effort
Knowledge
“If you want to be a better photographer, stand in front of more interesting stuff" — Jim Richardson
/noushadgd https://500px.com/noushad BACK NEXT EXIT
Composition
/noushadgd https://500px.com/noushad BACK NEXT EXIT
Why learn composition?
Getting the best out of the situation
Consistency
Bettering your visuals
Confidence to try various genres
Completeness, for discovering the artist in you
/noushadgd https://500px.com/noushad BACK NEXT EXIT
Composition = Visual Elements + Creative Rules
“To be a fine art photographer knowing about Visual Elements is very important.”
/noushadgd https://500px.com/noushad BACK NEXT EXIT
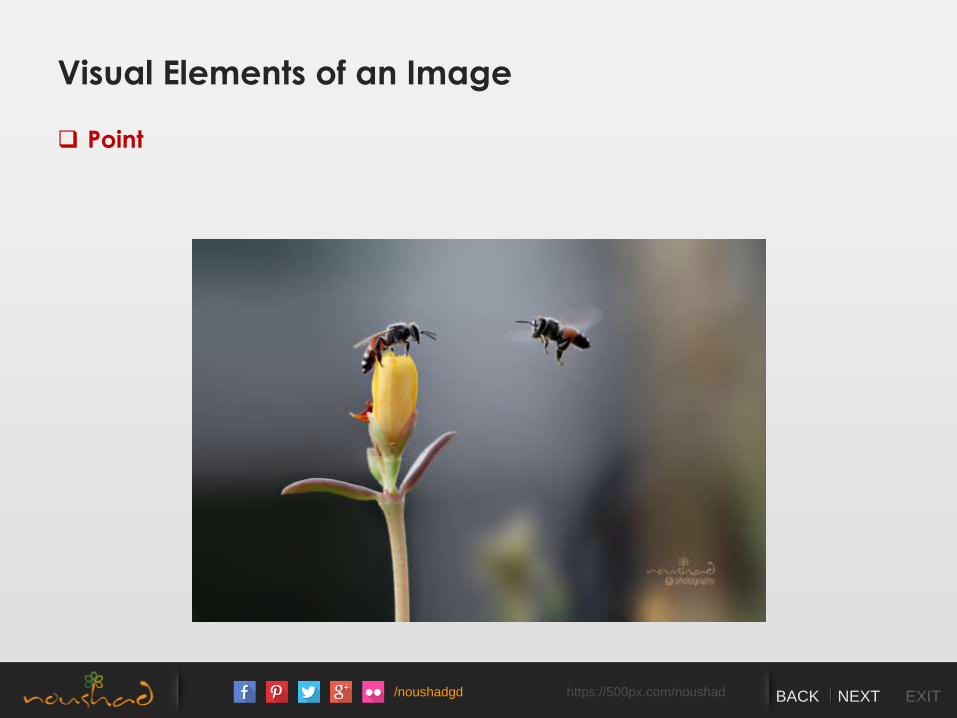
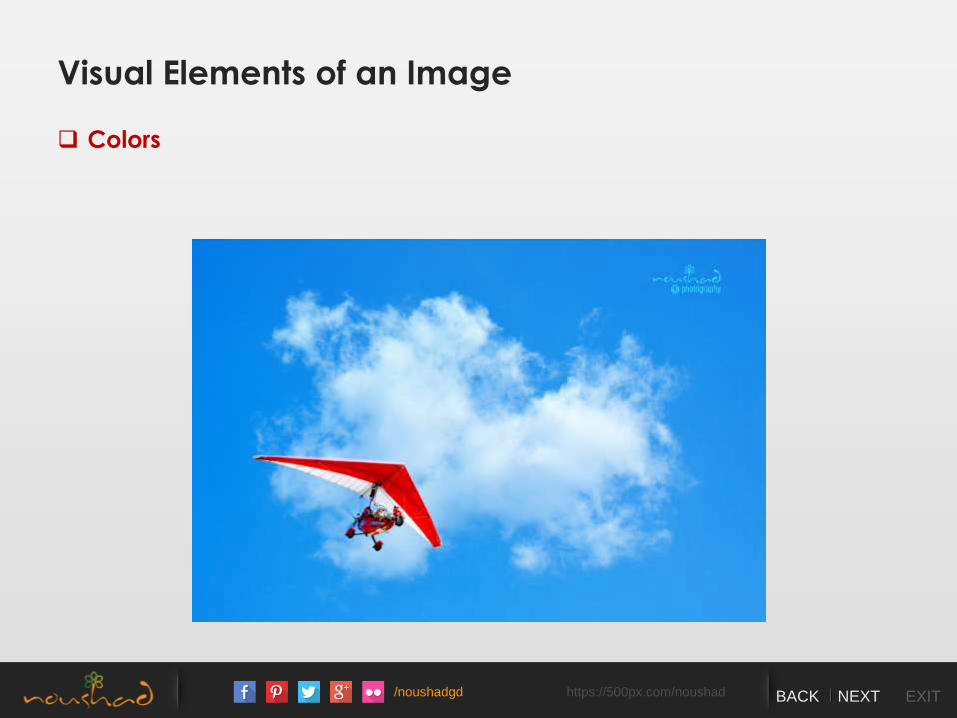
Visual Elements of an Image
Point
Lines
Shapes
Textures
Colors
/noushadgd https://500px.com/noushad BACK NEXT EXIT
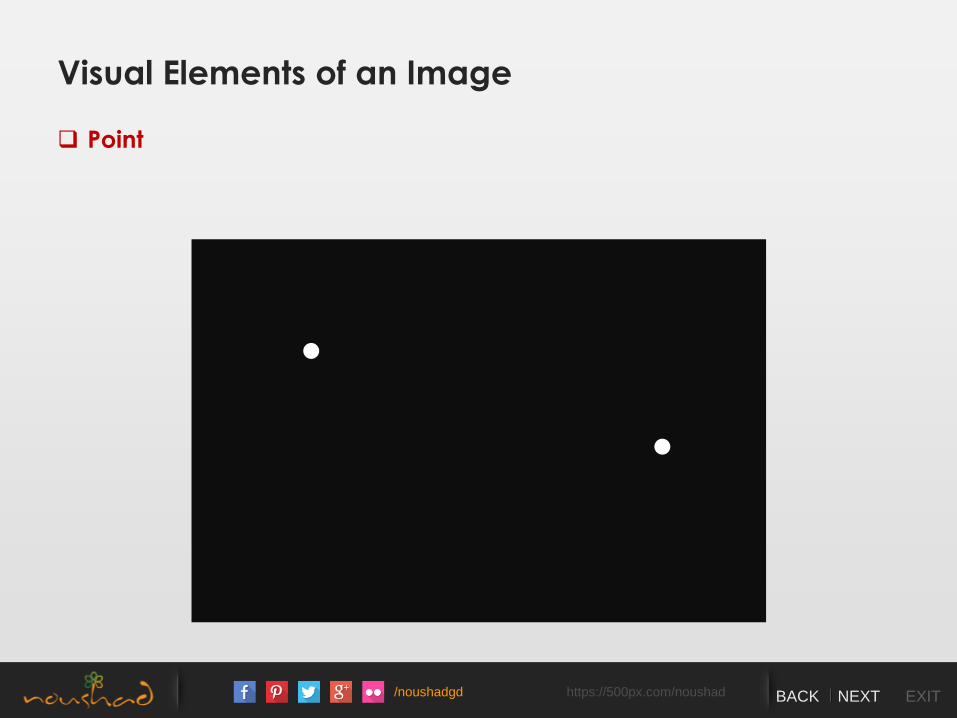
Visual Elements of an Image
Point
/noushadgd https://500px.com/noushad BACK NEXT EXIT
Visual Elements of an Image
Point
/noushadgd https://500px.com/noushad BACK NEXT EXIT
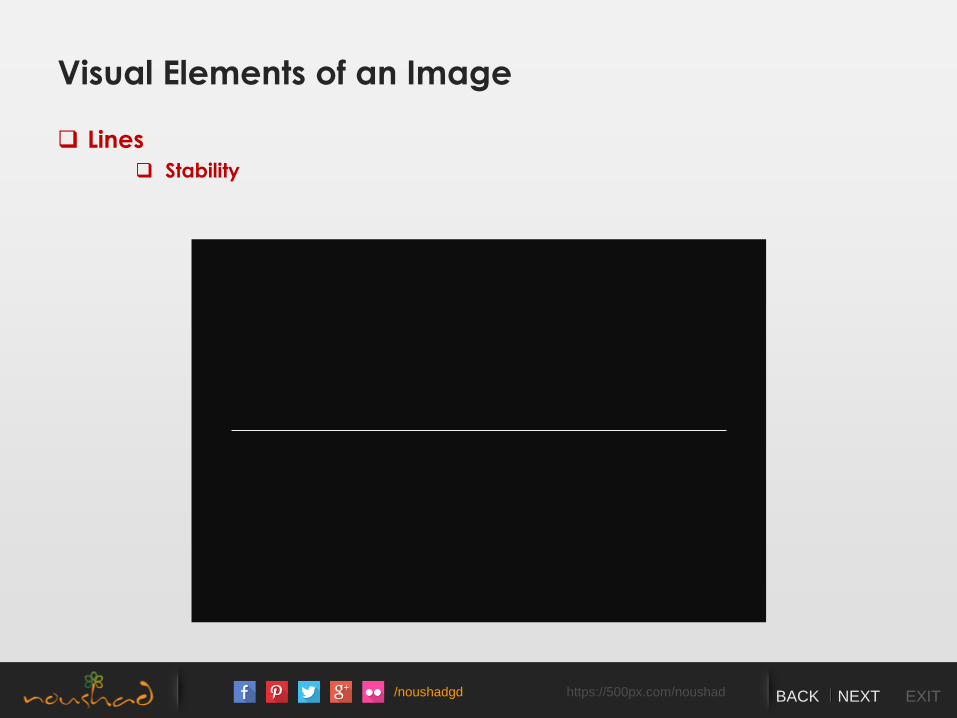
Visual Elements of an Image
Lines
Stability
/noushadgd https://500px.com/noushad BACK NEXT EXIT
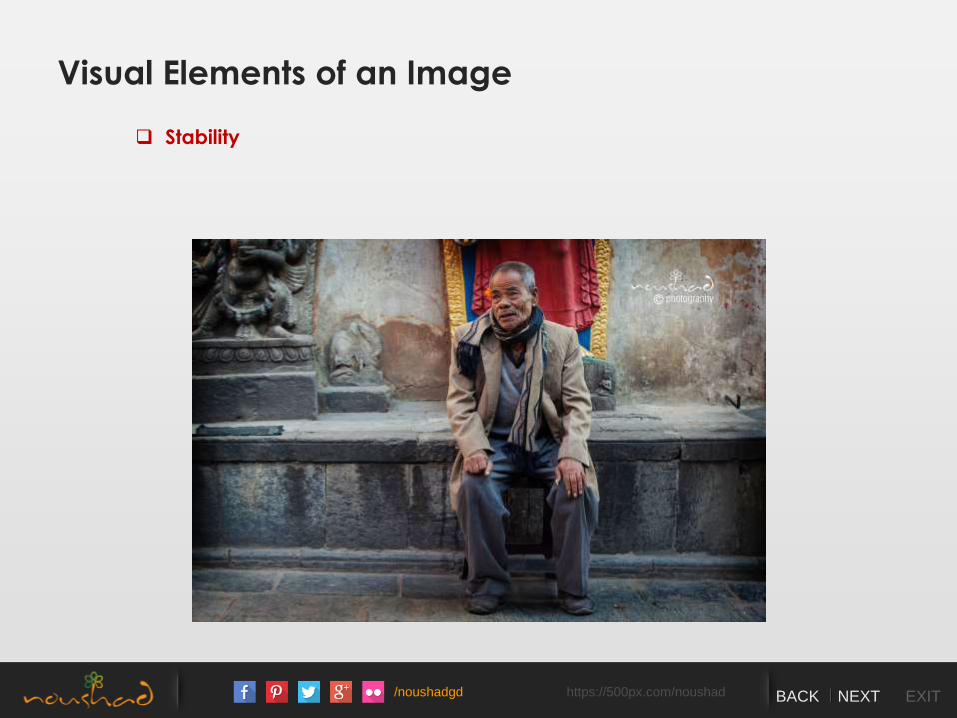
Visual Elements of an Image
Stability
/noushadgd https://500px.com/noushad BACK NEXT EXIT
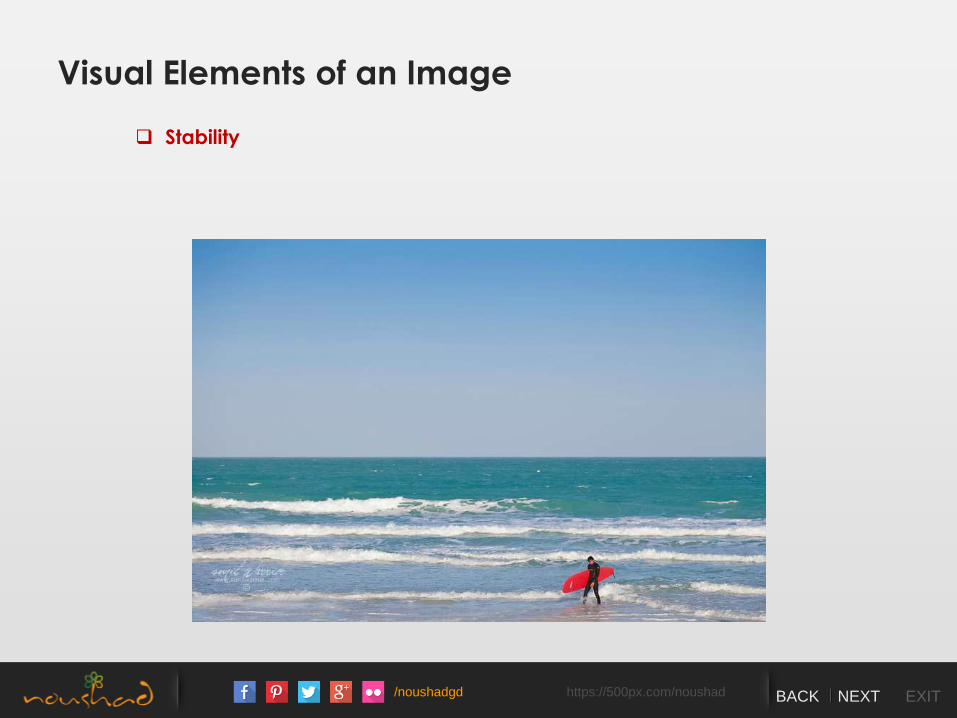
Visual Elements of an Image
Stability

/noushadgd https://500px.com/noushad BACK NEXT EXIT
Visual Elements of an Image
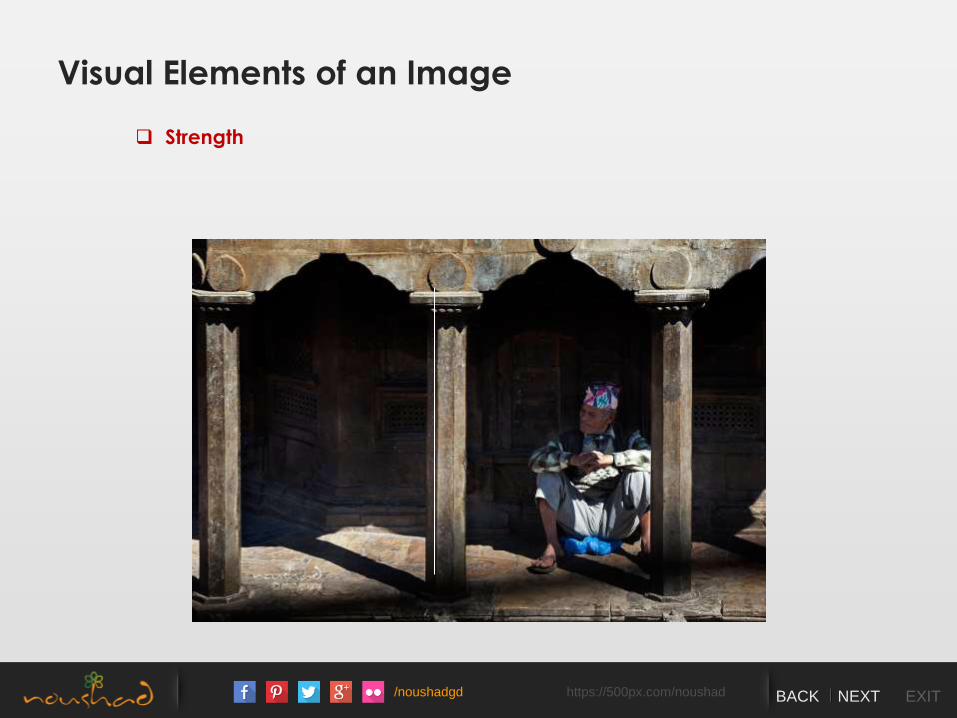
Lines
Strength
/noushadgd https://500px.com/noushad BACK NEXT EXIT
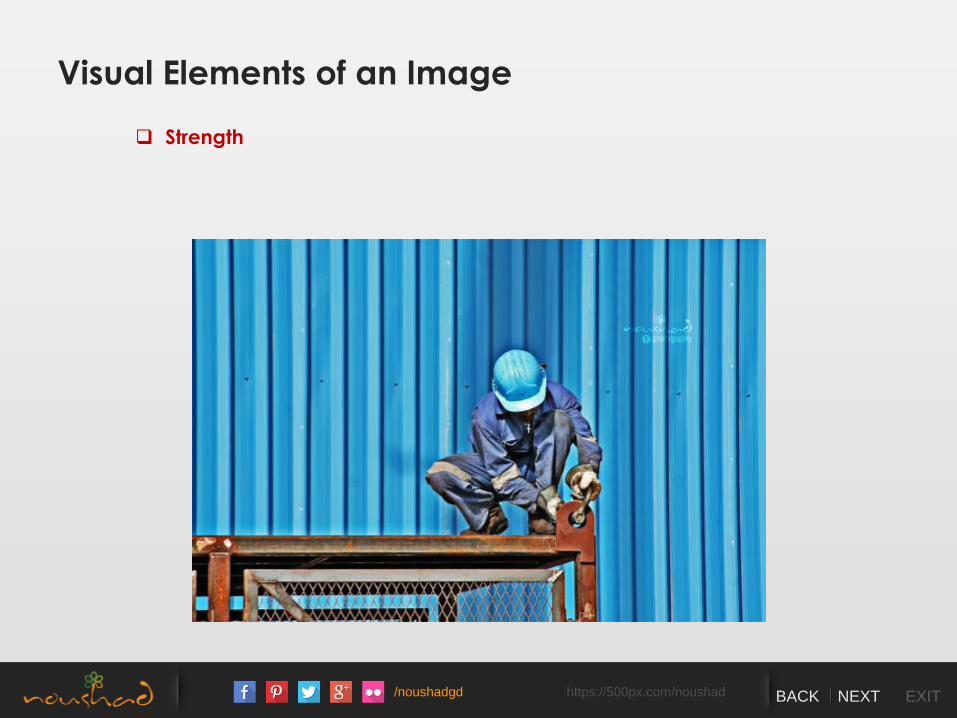
Visual Elements of an Image
Strength
/noushadgd https://500px.com/noushad BACK NEXT EXIT
Visual Elements of an Image
Strength
/noushadgd https://500px.com/noushad BACK NEXT EXIT
Visual Elements of an Image
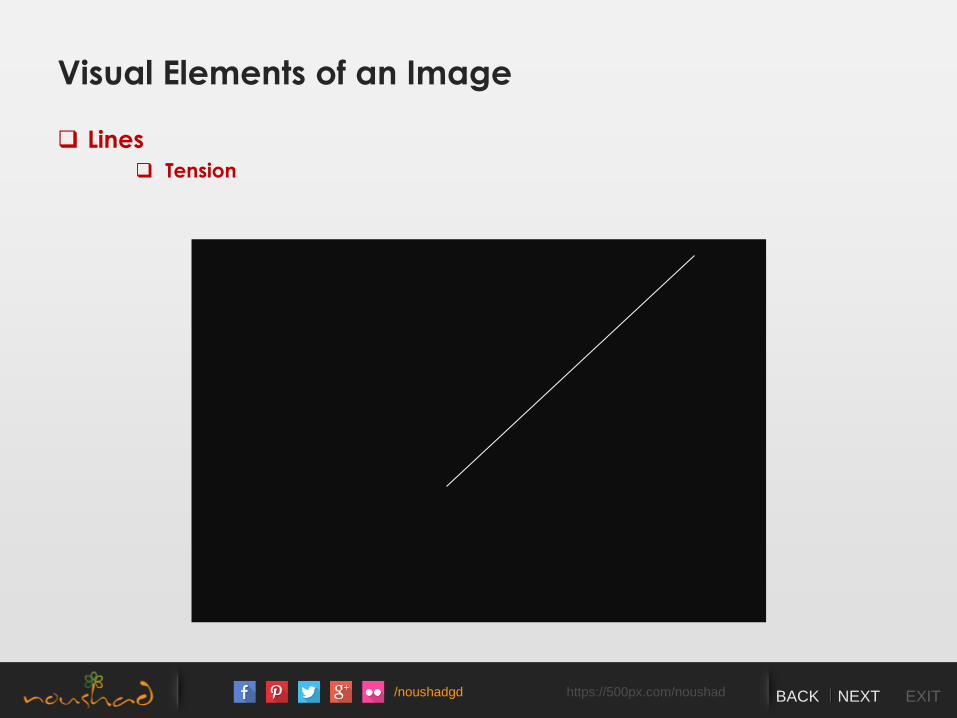
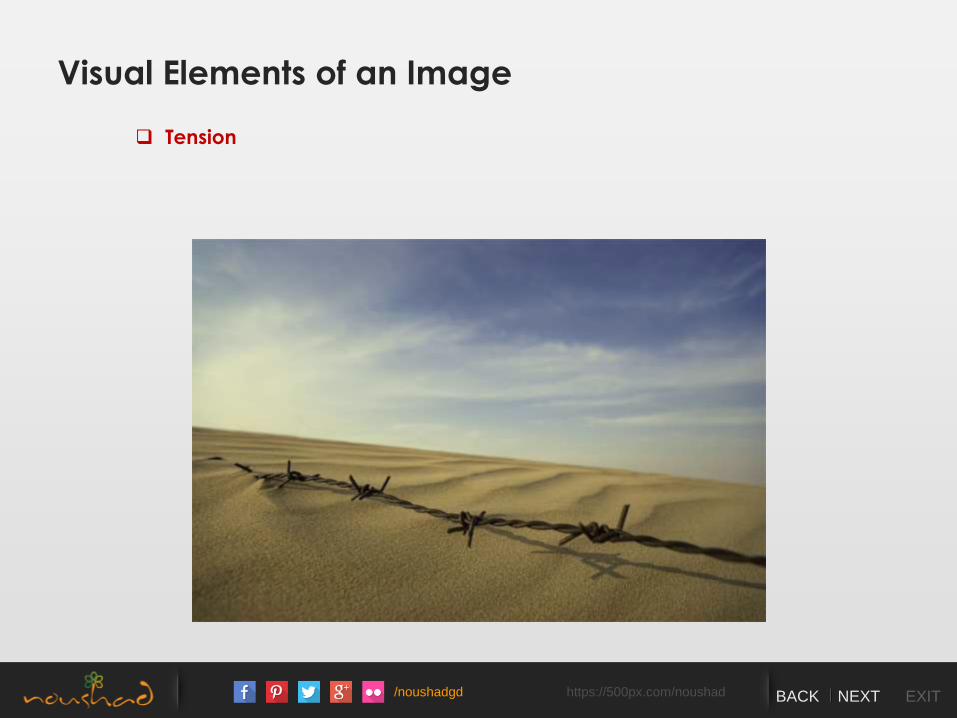
Lines
Tension
/noushadgd https://500px.com/noushad BACK NEXT EXIT
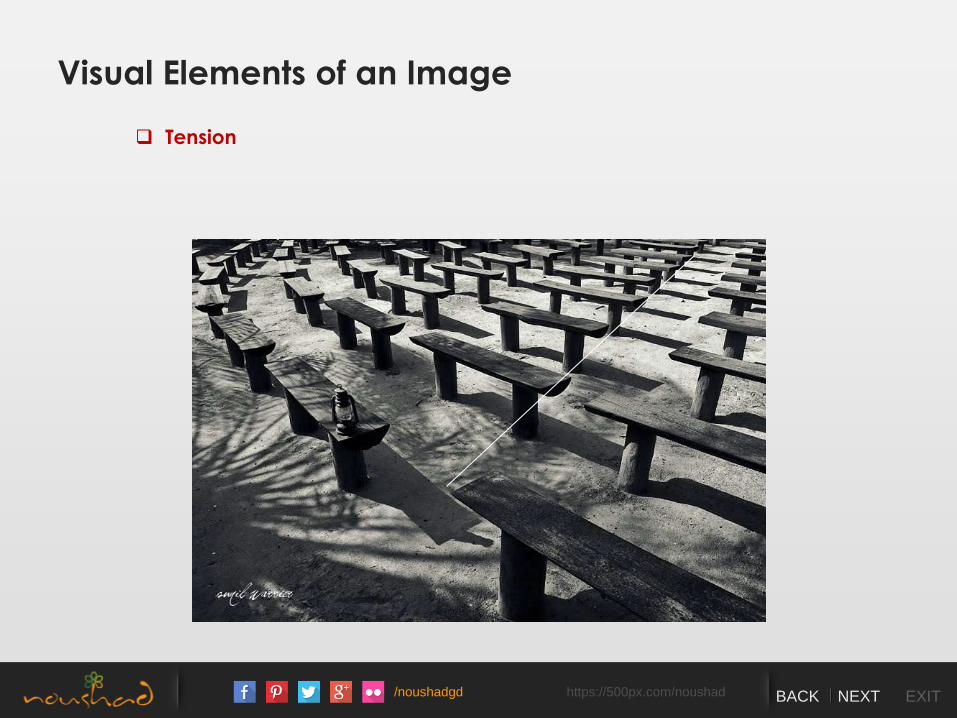
Visual Elements of an Image
Tension
/noushadgd https://500px.com/noushad BACK NEXT EXIT
Visual Elements of an Image
Tension
/noushadgd https://500px.com/noushad BACK NEXT EXIT
Visual Elements of an Image
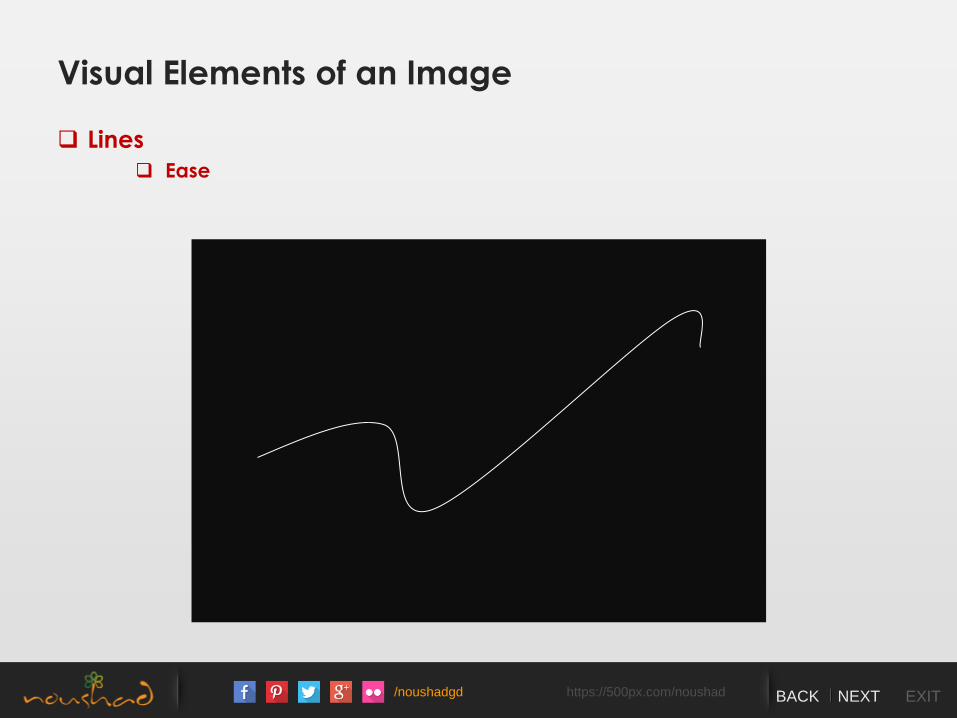
Lines
Ease

/noushadgd https://500px.com/noushad BACK NEXT EXIT
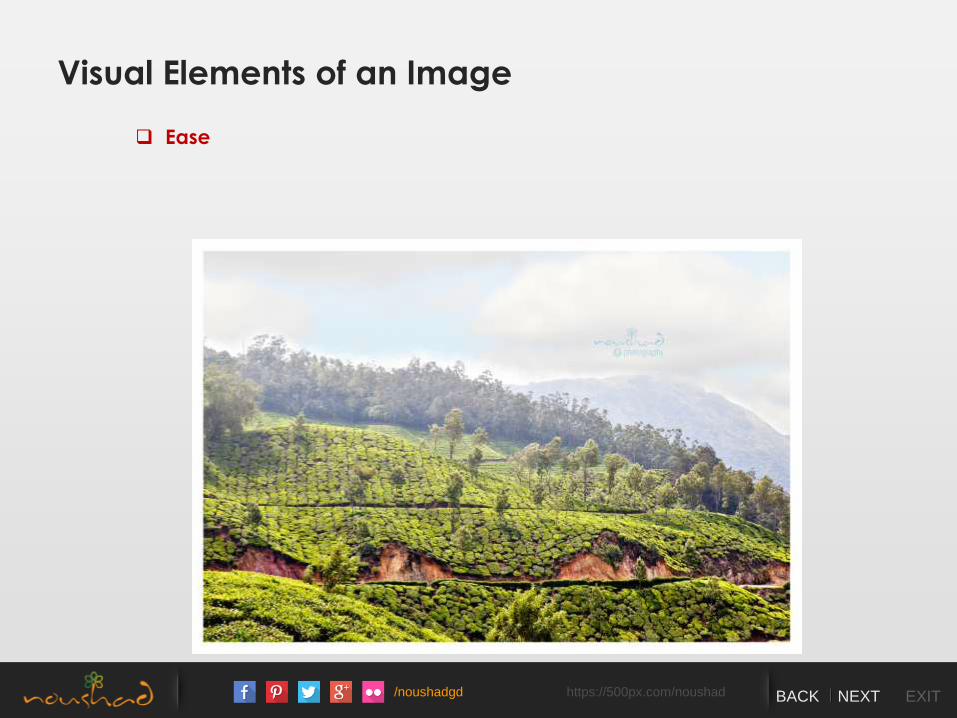
Visual Elements of an Image
Ease
/noushadgd https://500px.com/noushad BACK NEXT EXIT
Visual Elements of an Image
Ease
/noushadgd https://500px.com/noushad BACK NEXT EXIT
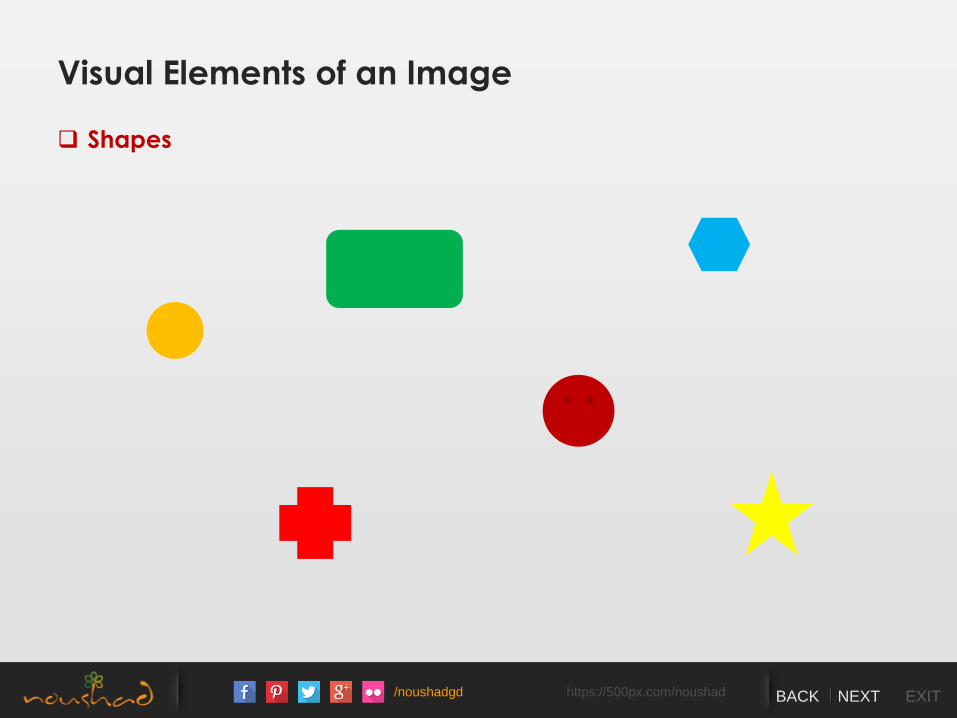
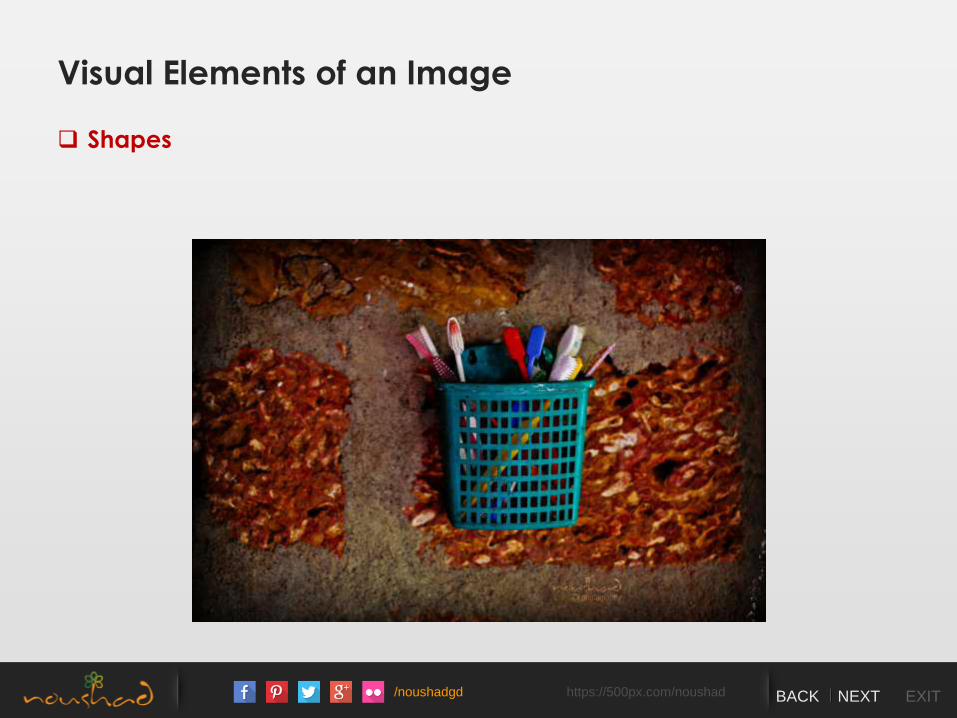
Visual Elements of an Image
Shapes
/noushadgd https://500px.com/noushad BACK NEXT EXIT
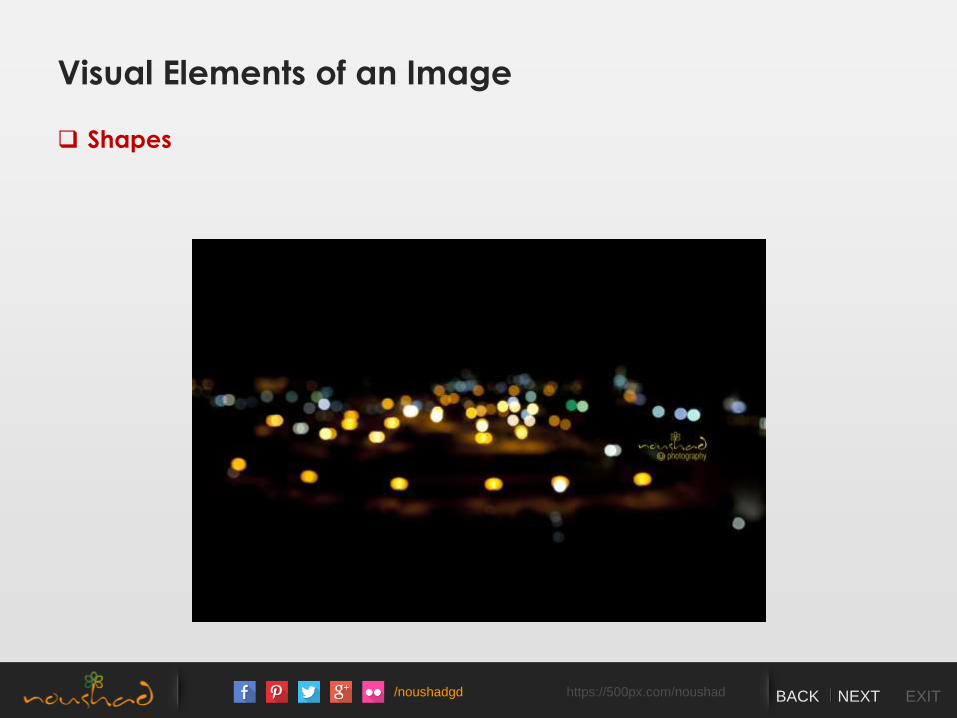
Visual Elements of an Image
Shapes
/noushadgd https://500px.com/noushad BACK NEXT EXIT
Visual Elements of an Image
Shapes

/noushadgd https://500px.com/noushad BACK NEXT EXIT
Visual Elements of an Image
Shapes
/noushadgd https://500px.com/noushad BACK NEXT EXIT
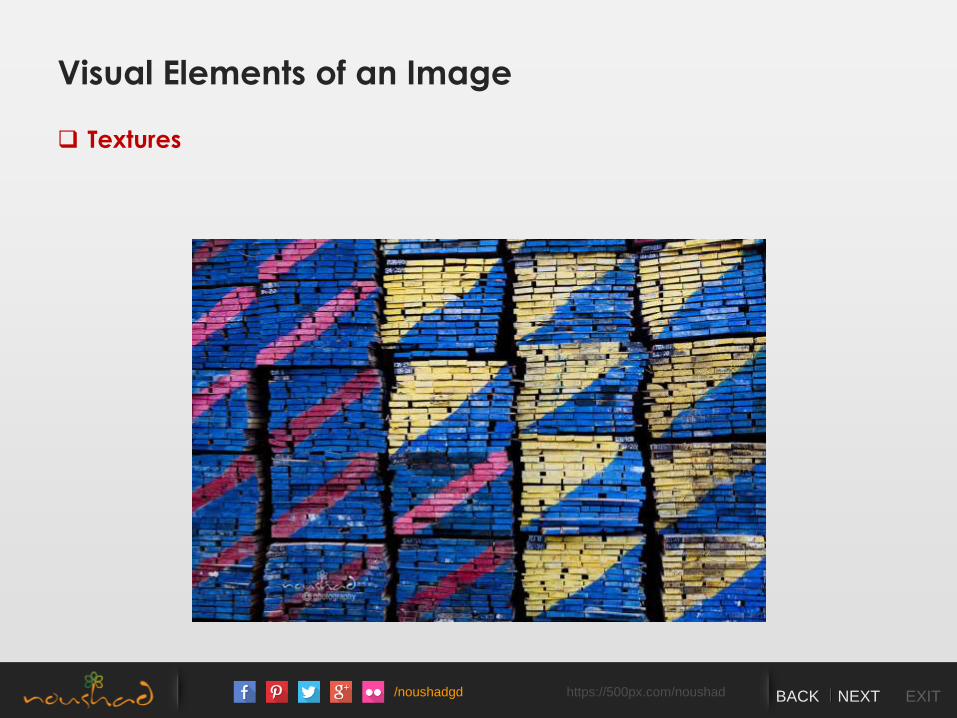
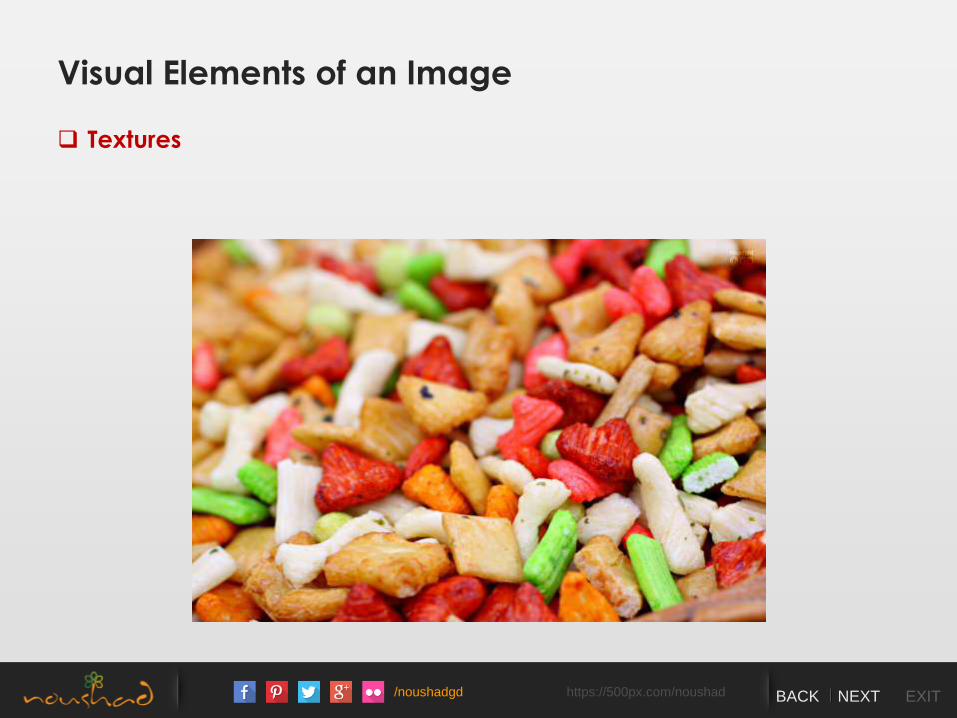
Visual Elements of an Image
Textures
/noushadgd https://500px.com/noushad BACK NEXT EXIT
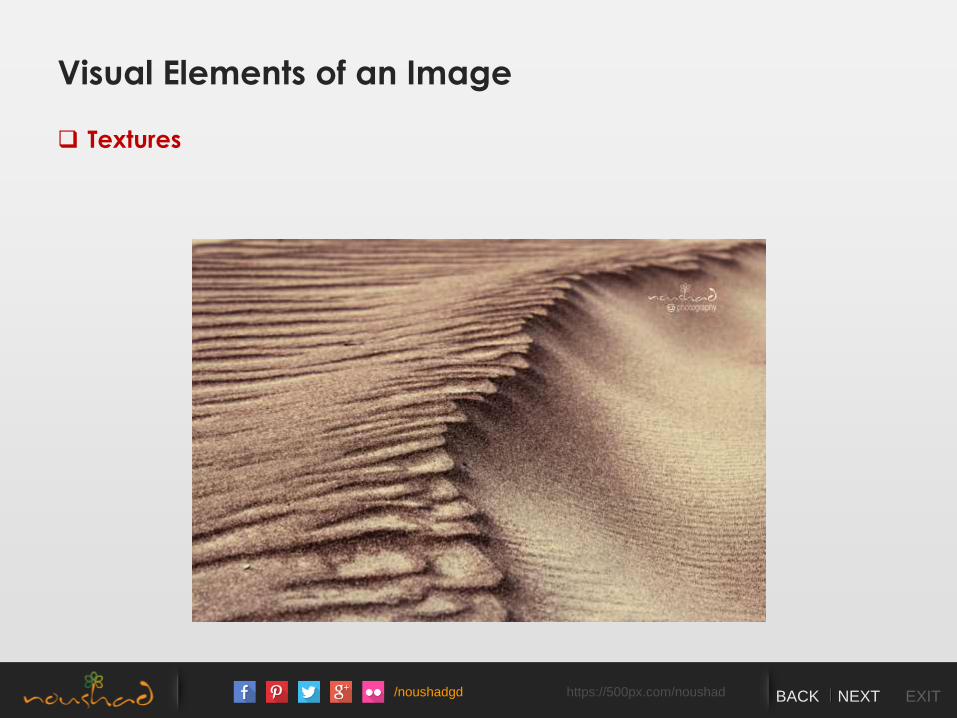
Visual Elements of an Image
Textures
/noushadgd https://500px.com/noushad BACK NEXT EXIT
Visual Elements of an Image
Textures
/noushadgd https://500px.com/noushad BACK NEXT EXIT
Visual Elements of an Image
Lines define shape. Shape defines textures.
/noushadgd https://500px.com/noushad BACK NEXT EXIT
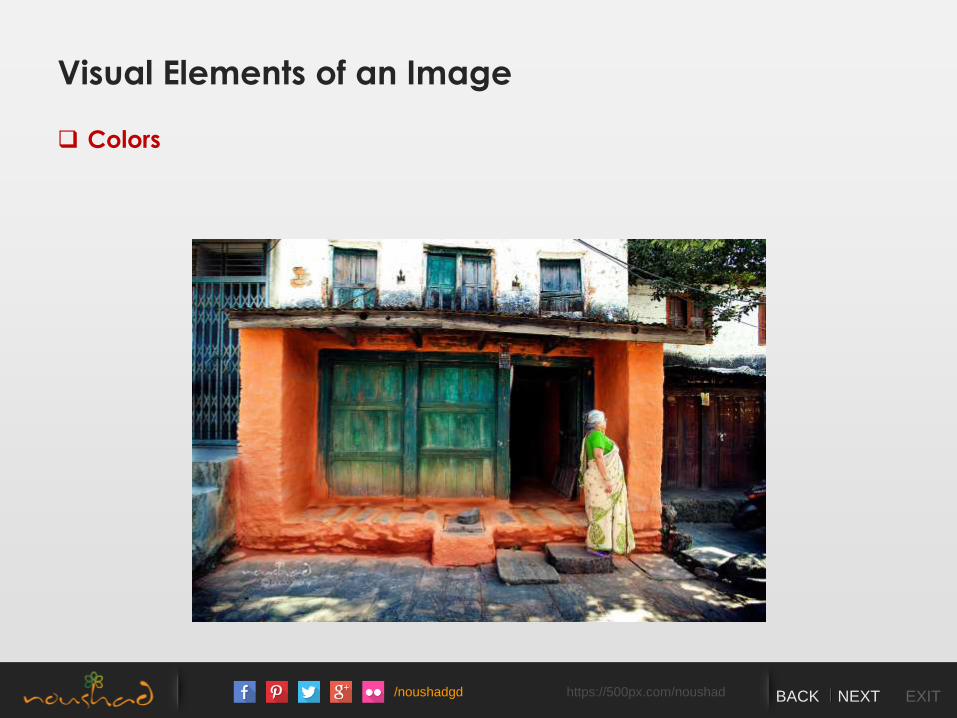
Visual Elements of an Image
Colors
/noushadgd https://500px.com/noushad BACK NEXT EXIT
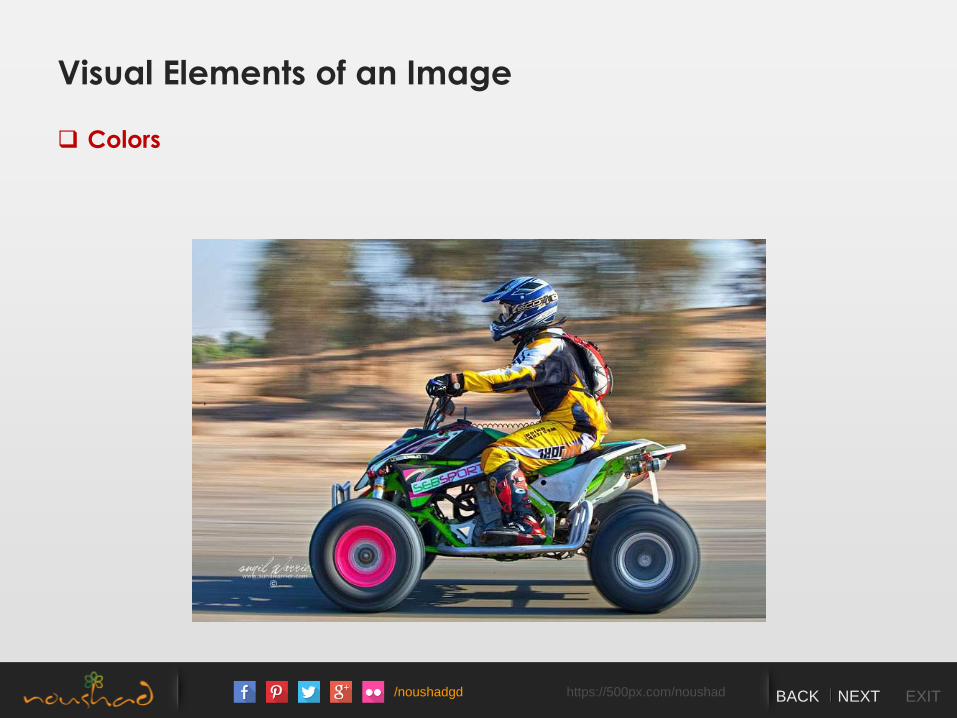
Visual Elements of an Image
Colors
/noushadgd https://500px.com/noushad BACK NEXT EXIT
Visual Elements of an Image
Colors

/noushadgd https://500px.com/noushad BACK NEXT EXIT
Exercise
Identify the ruling element in the following images
/noushadgd https://500px.com/noushad BACK NEXT EXIT
Focal Element
Something that the viewer is drawn to immediately
1. High contrast
2. Saturation
3. Camera focus
4. Motion
5. Face or figures
/noushadgd https://500px.com/noushad BACK NEXT EXIT
Composition = Visual Elements + Creative Rules
Golden Ratio, Viewpoint, Natural Framing, Active Space, Minimalism,
Triangular Law, Rule of Third, Horizon Line, Fill the Frame. . . Etc.
/noushadgd https://500px.com/noushad BACK NEXT EXIT
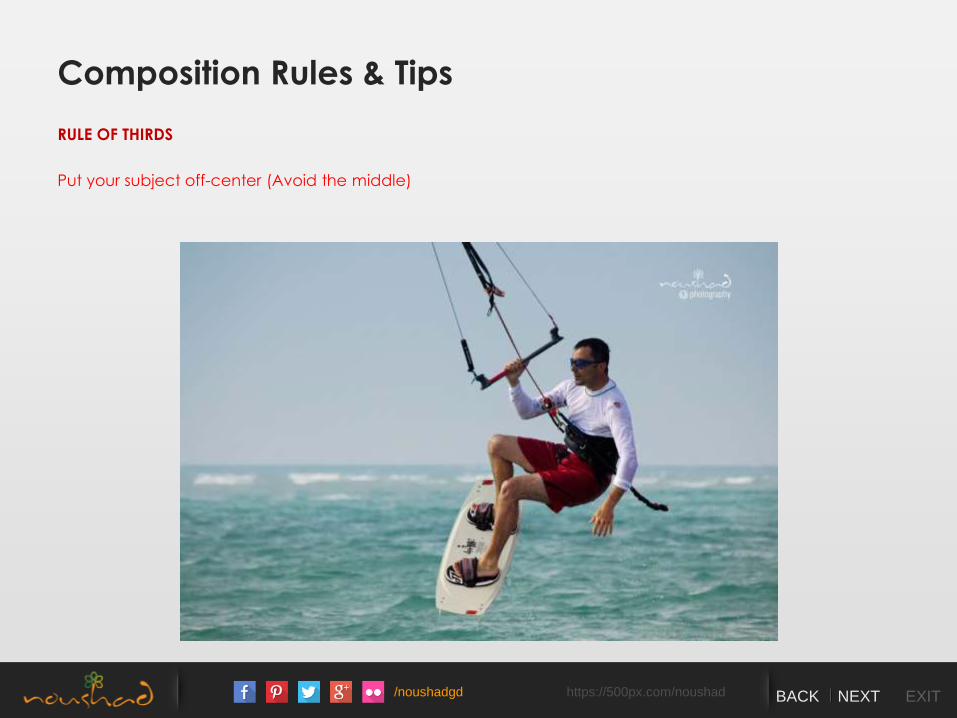
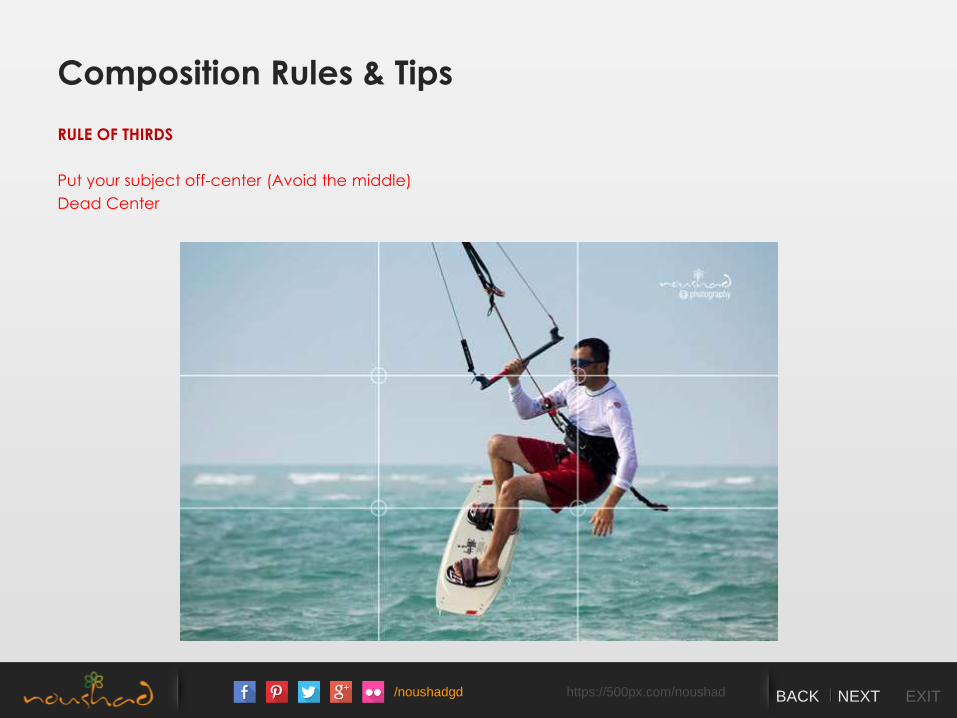
Composition Rules & Tips
RULE OF THIRDS
Put your subject off-center (Avoid the middle)
/noushadgd https://500px.com/noushad BACK NEXT EXIT
Composition Rules & Tips
RULE OF THIRDS
Put your subject off-center (Avoid the middle)
Dead Center
/noushadgd https://500px.com/noushad BACK NEXT EXIT
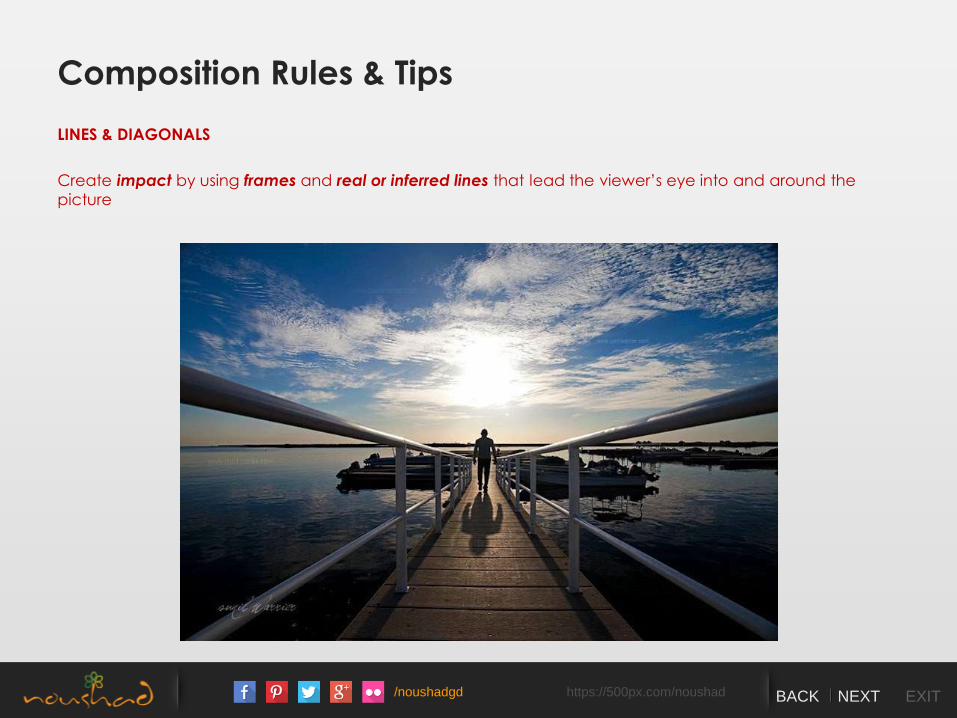
Composition Rules & Tips
LINES & DIAGONALS
Create impact by using frames and real or inferred lines that lead the viewer’s eye into and around the
picture
/noushadgd https://500px.com/noushad BACK NEXT EXIT
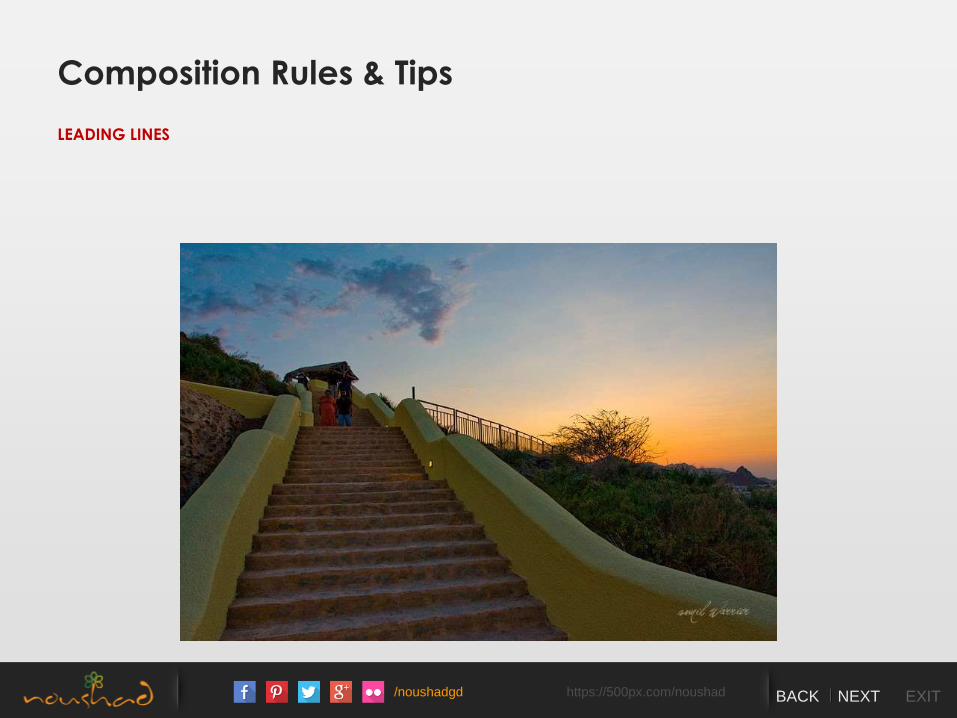
Composition Rules & Tips
LEADING LINES
/noushadgd https://500px.com/noushad BACK NEXT EXIT
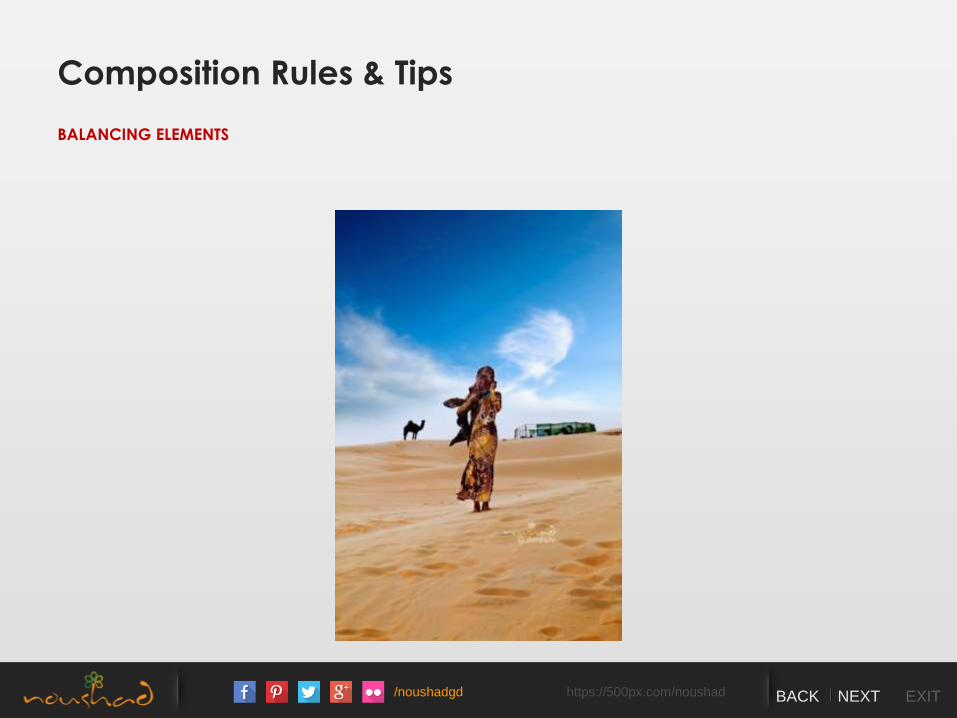
Composition Rules & Tips
BALANCING ELEMENTS
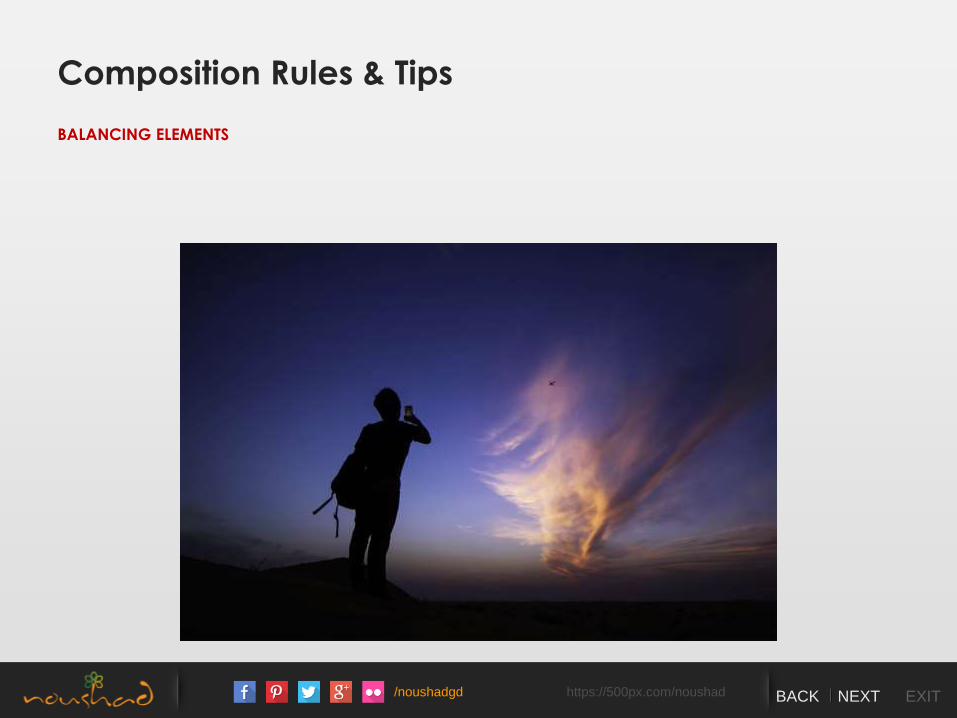
/noushadgd https://500px.com/noushad BACK NEXT EXIT
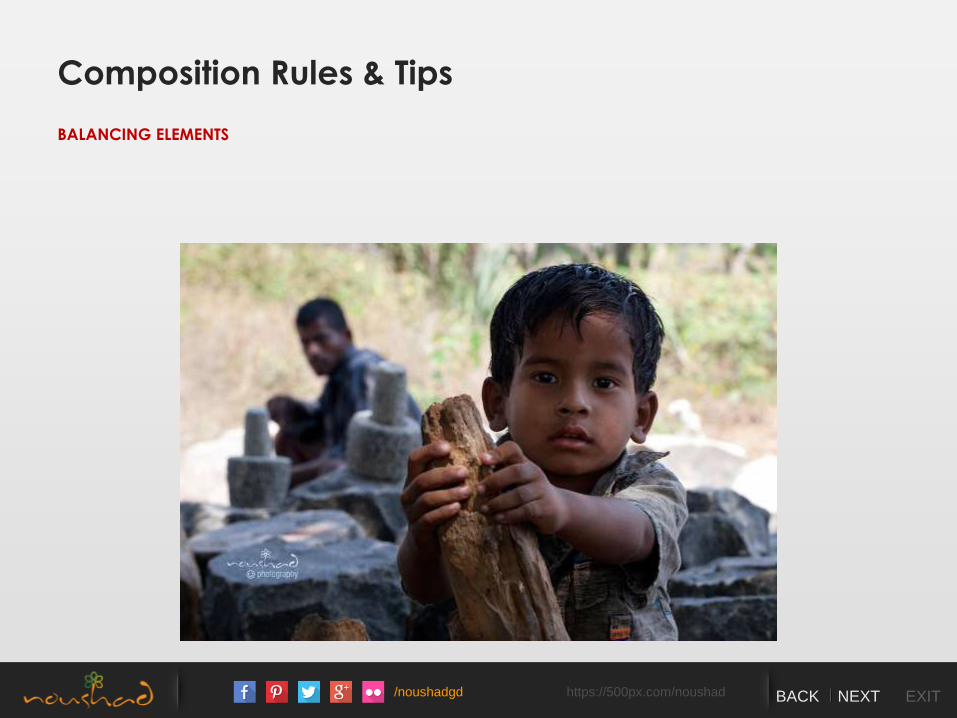
Composition Rules & Tips
BALANCING ELEMENTS
/noushadgd https://500px.com/noushad BACK NEXT EXIT
Composition Rules & Tips
BALANCING ELEMENTS
/noushadgd https://500px.com/noushad BACK NEXT EXIT graphic designer www.noushadgd.com www.wkndphotos.com [email protected] BACK NEXT EXIT
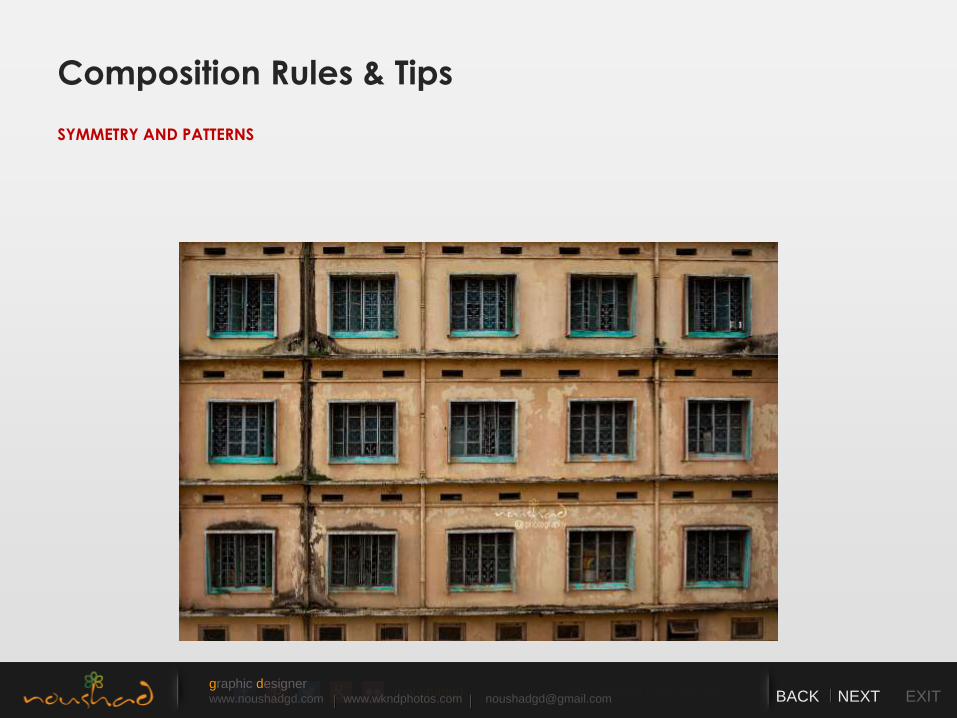
Composition Rules & Tips
SYMMETRY AND PATTERNS
/noushadgd https://500px.com/noushad BACK NEXT EXIT
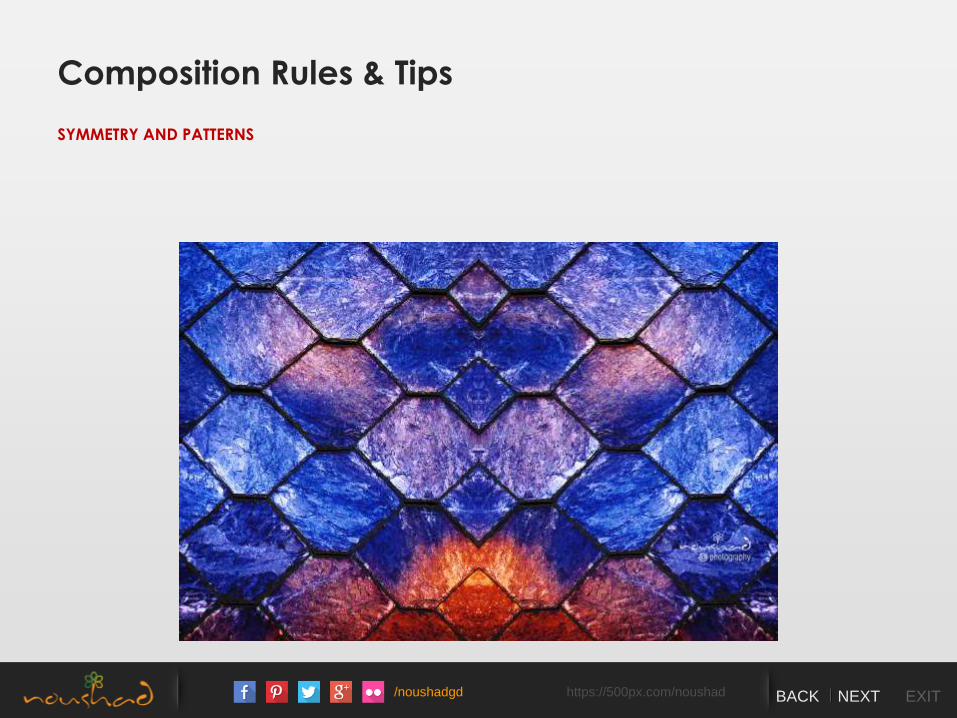
Composition Rules & Tips
SYMMETRY AND PATTERNS
/noushadgd https://500px.com/noushad BACK NEXT EXIT
Composition Rules & Tips
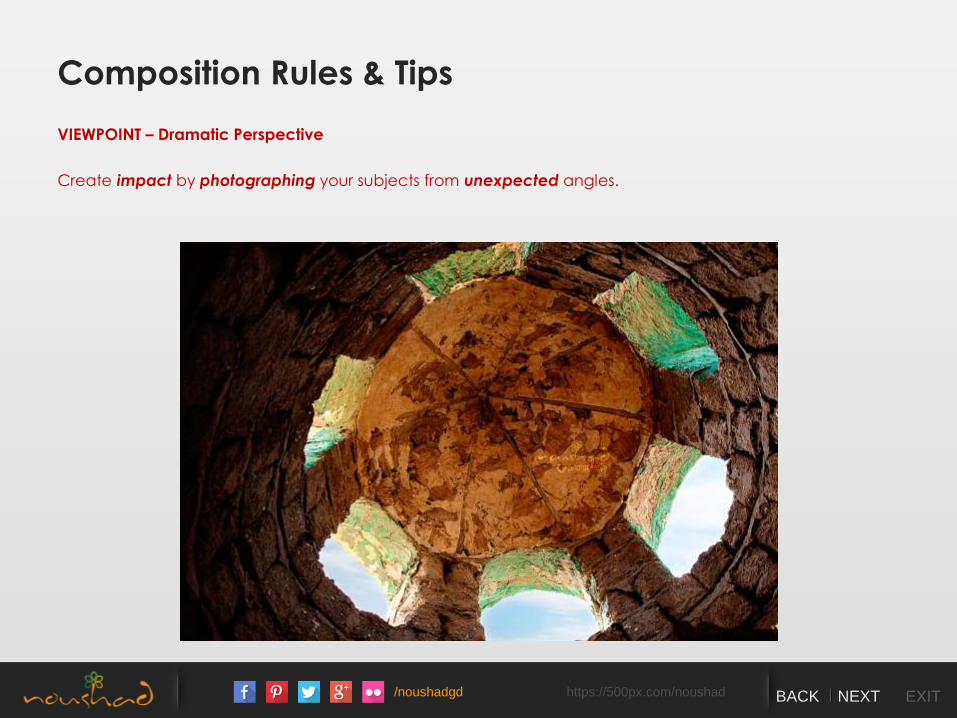
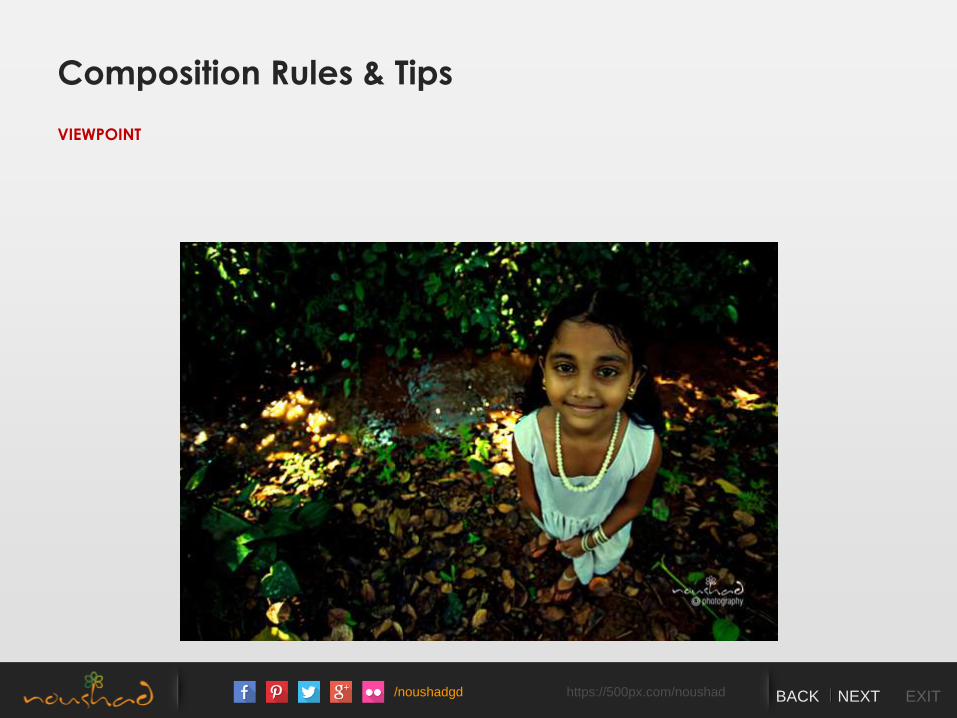
VIEWPOINT – Dramatic Perspective
Create impact by photographing your subjects from unexpected angles.
/noushadgd https://500px.com/noushad BACK NEXT EXIT
Composition Rules & Tips
VIEWPOINT

/noushadgd https://500px.com/noushad BACK NEXT EXIT
Composition Rules & Tips
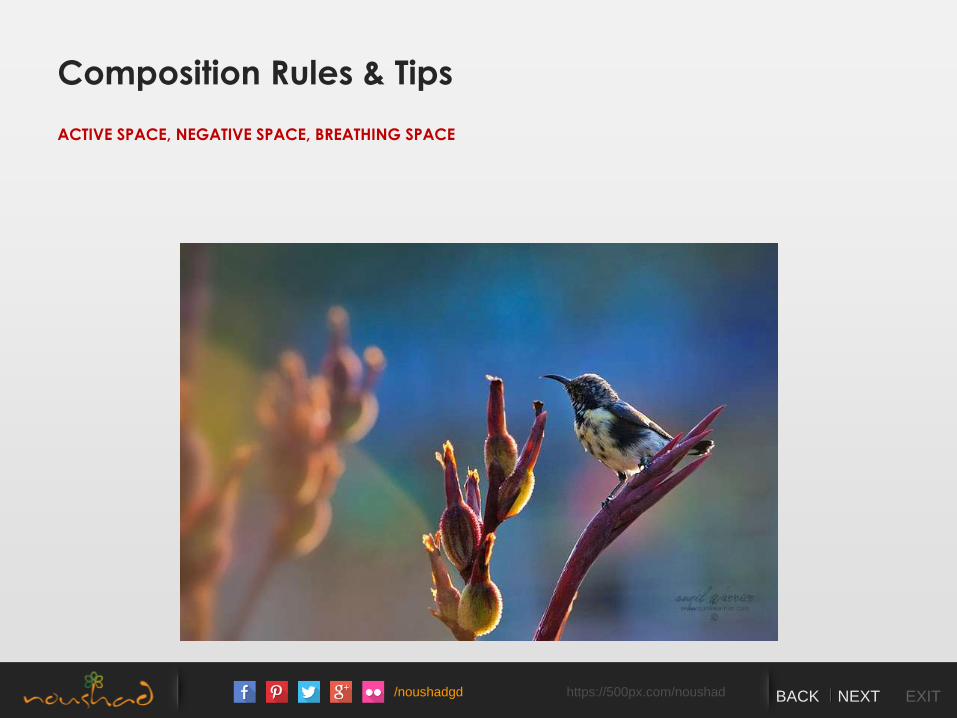
ACTIVE SPACE, NEGATIVE SPACE, BREATHING SPACE
/noushadgd https://500px.com/noushad BACK NEXT EXIT
Composition Rules & Tips
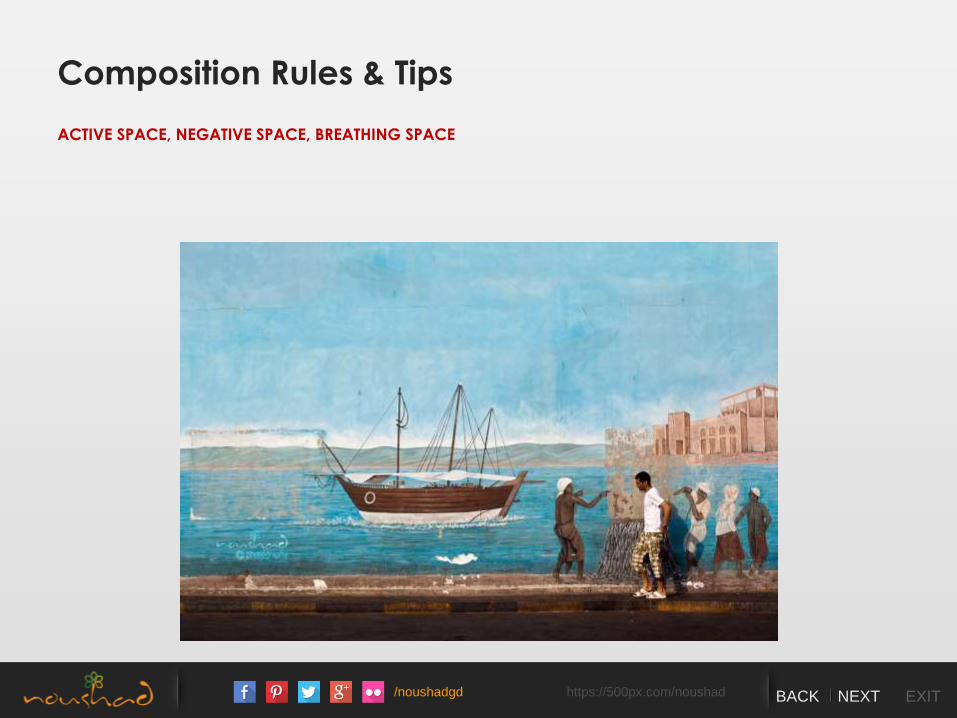
ACTIVE SPACE, NEGATIVE SPACE, BREATHING SPACE
/noushadgd https://500px.com/noushad BACK NEXT EXIT
Composition Rules & Tips
ACTIVE SPACE, NEGATIVE SPACE, BREATHING SPACE
/noushadgd https://500px.com/noushad BACK NEXT EXIT
Composition Rules & Tips
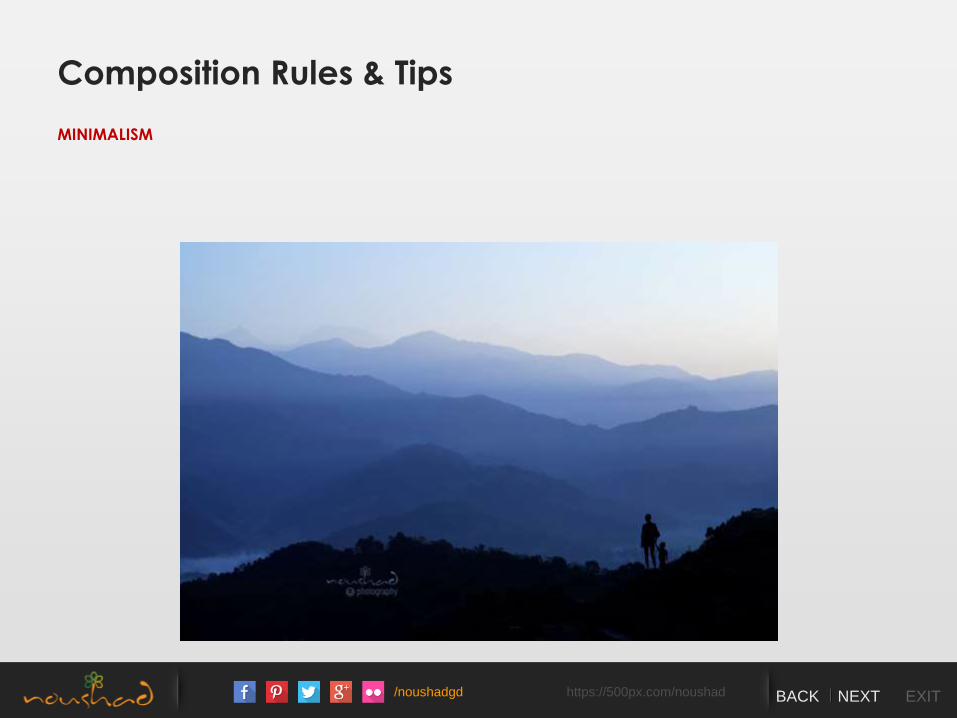
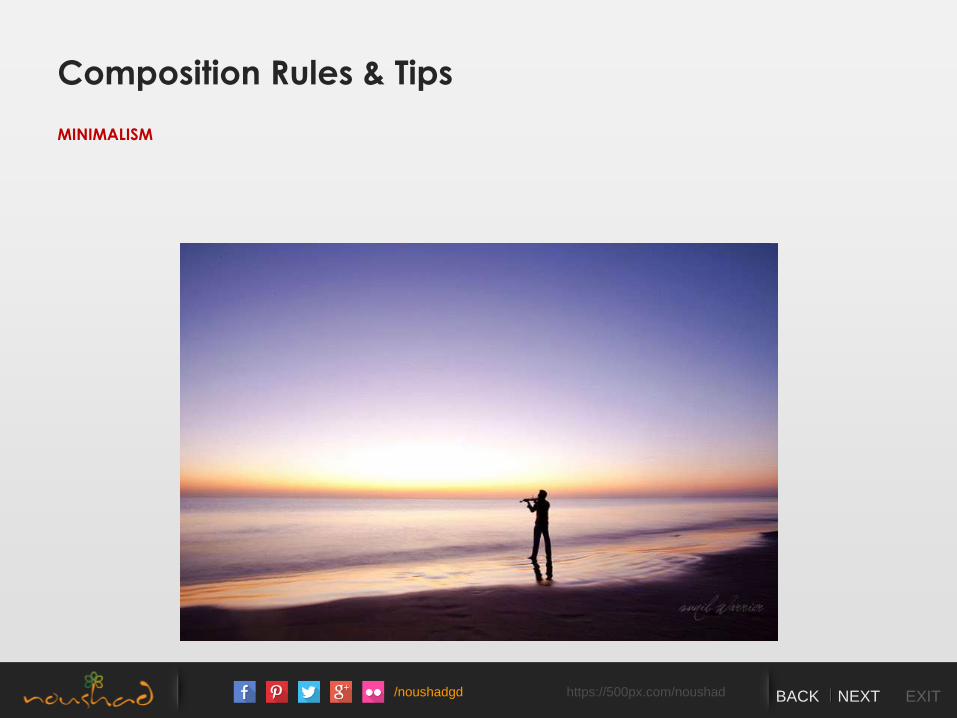
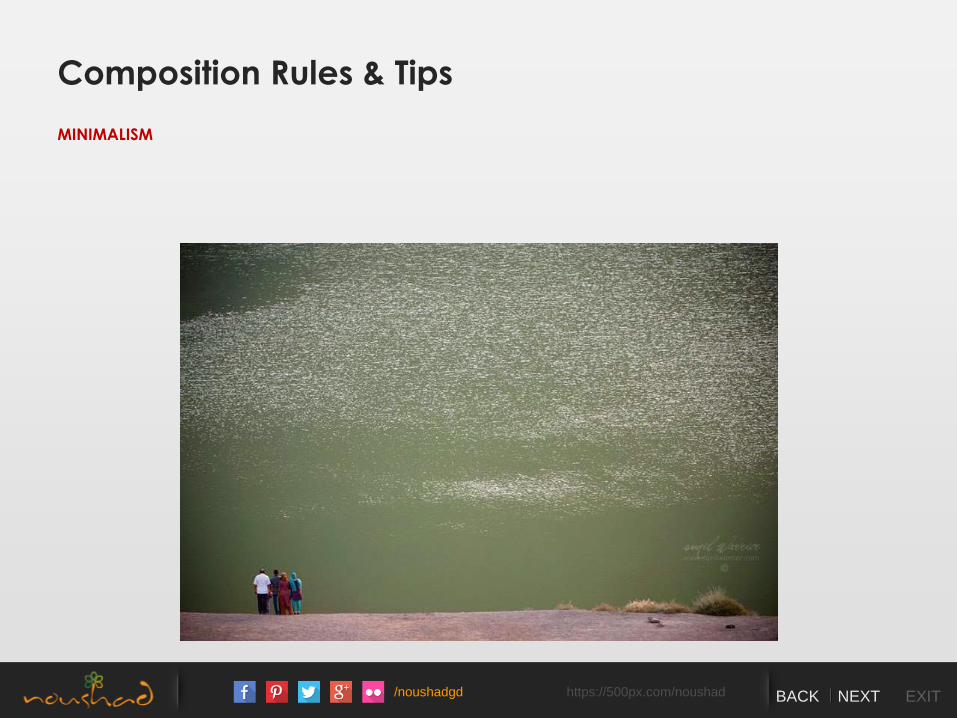
MINIMALISM
/noushadgd https://500px.com/noushad BACK NEXT EXIT
Composition Rules & Tips
MINIMALISM
/noushadgd https://500px.com/noushad BACK NEXT EXIT
Composition Rules & Tips
MINIMALISM
/noushadgd https://500px.com/noushad BACK NEXT EXIT
Composition Rules & Tips
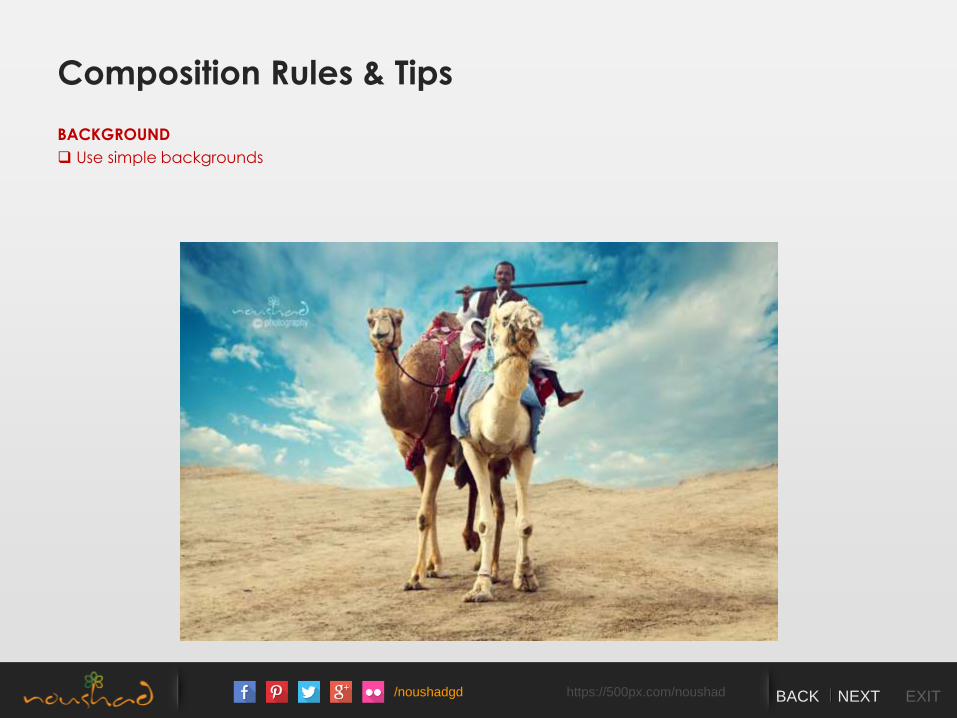
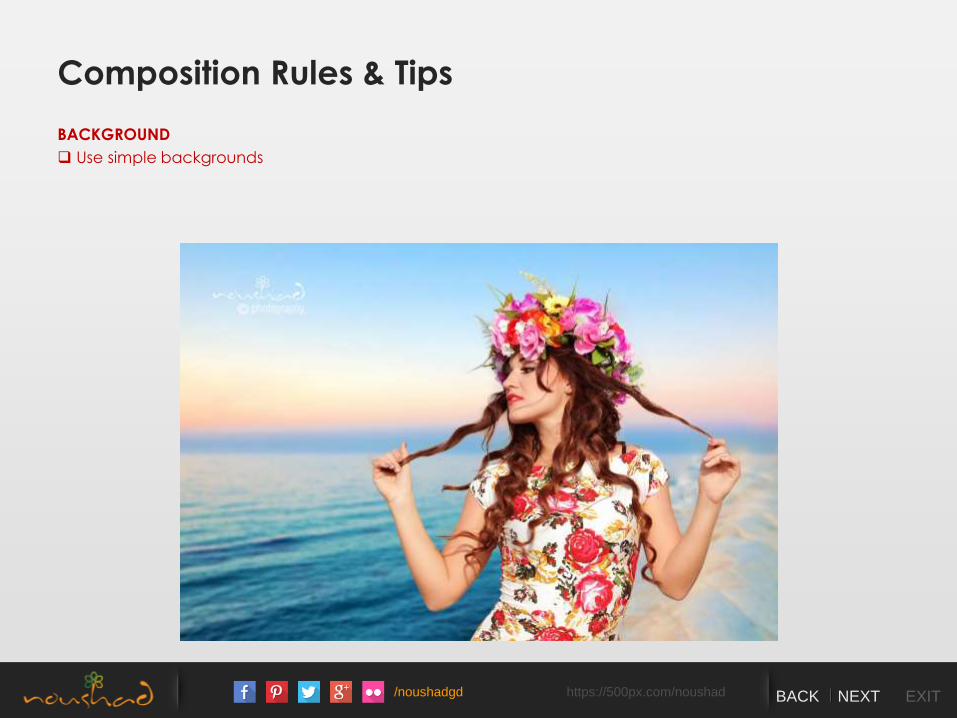
BACKGROUND
Use simple backgrounds
/noushadgd https://500px.com/noushad BACK NEXT EXIT
Composition Rules & Tips
BACKGROUND
Use simple backgrounds
/noushadgd https://500px.com/noushad BACK NEXT EXIT
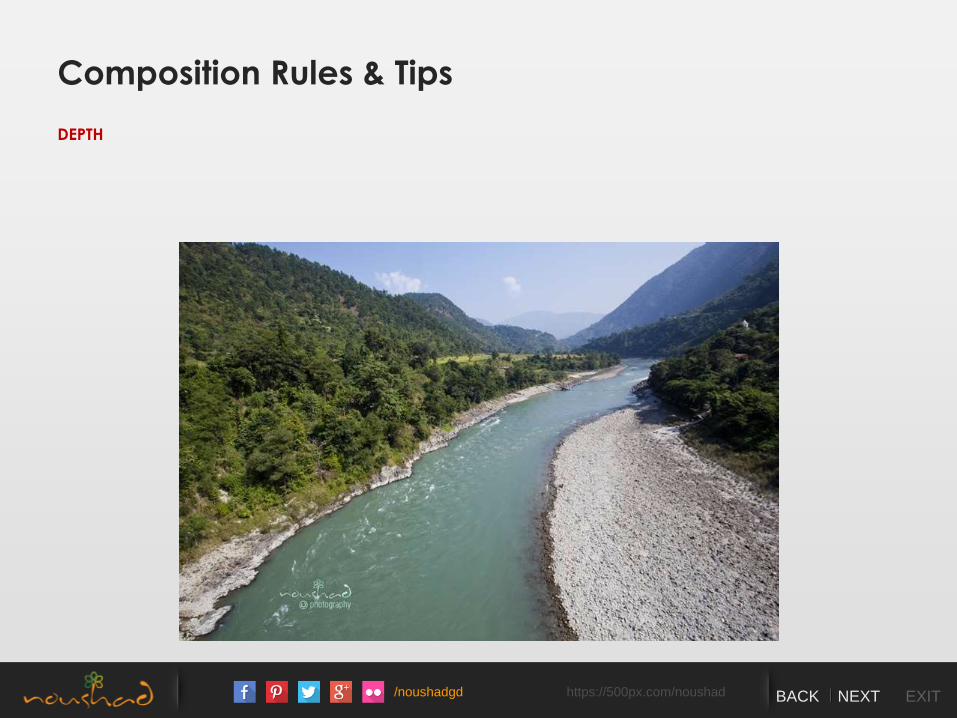
Composition Rules & Tips
DEPTH
/noushadgd https://500px.com/noushad BACK NEXT EXIT
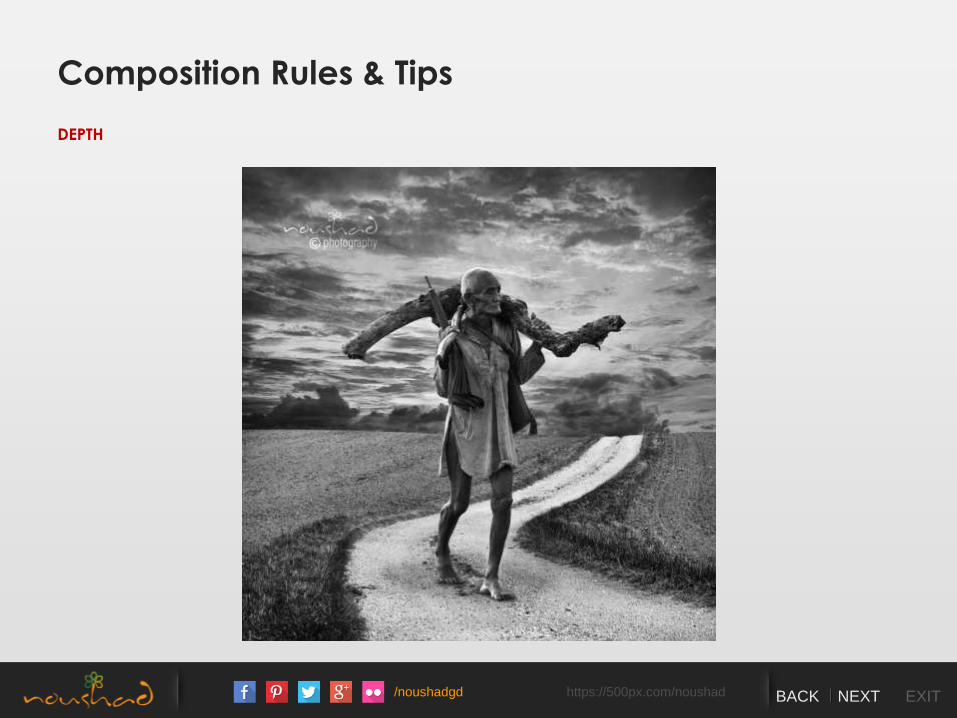
Composition Rules & Tips
DEPTH
/noushadgd https://500px.com/noushad BACK NEXT EXIT
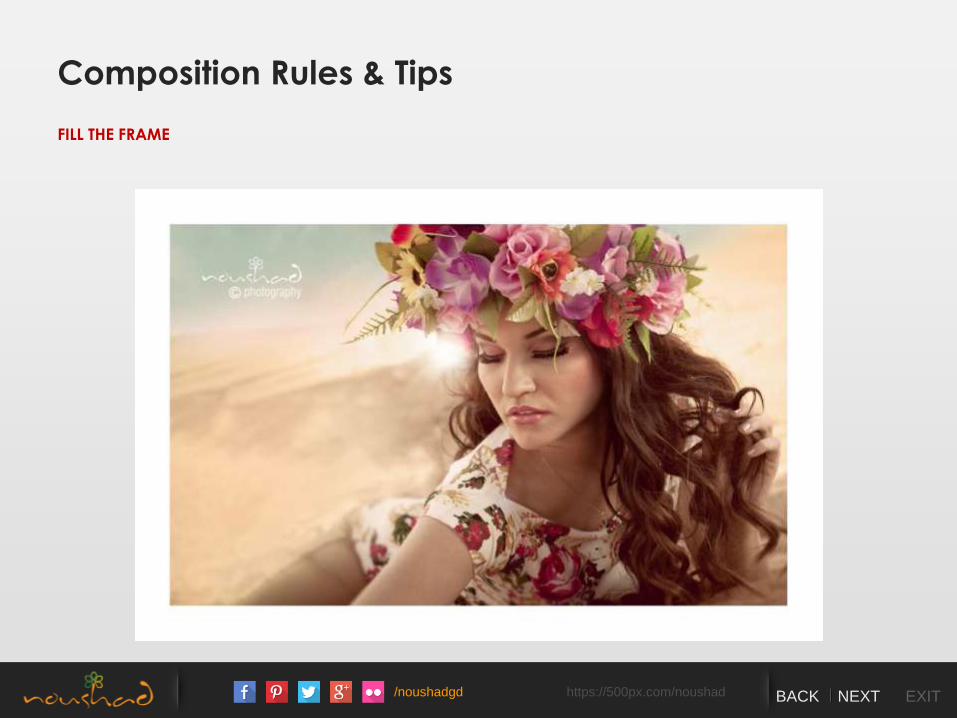
Composition Rules & Tips
FILL THE FRAME
/noushadgd https://500px.com/noushad BACK NEXT EXIT
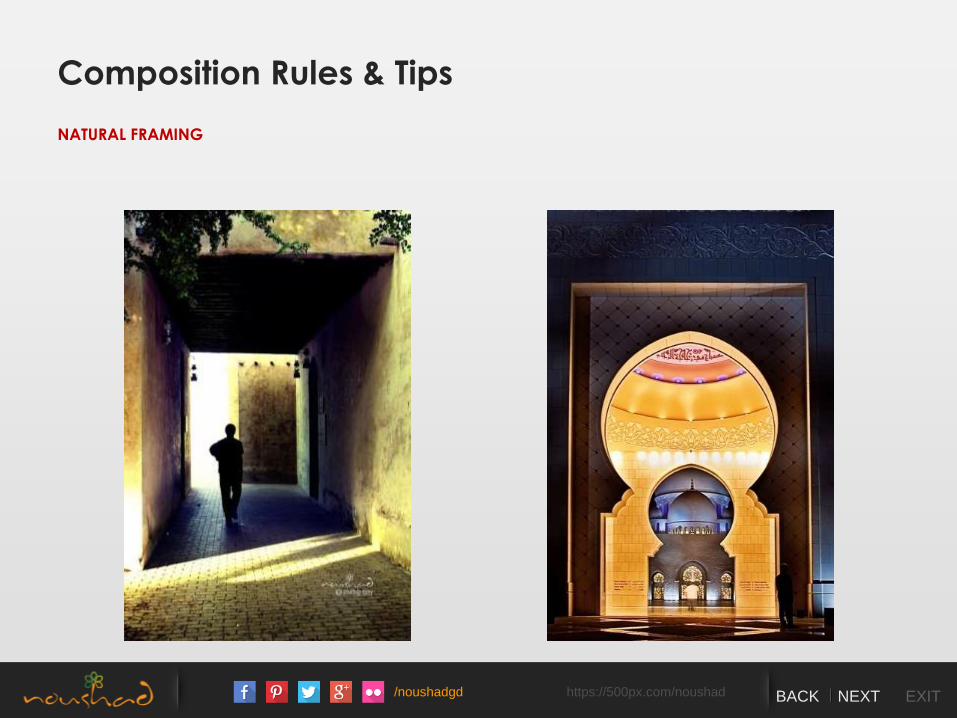
Composition Rules & Tips
NATURAL FRAMING

/noushadgd https://500px.com/noushad BACK NEXT EXIT
Composition Rules & Tips
NATURAL FRAMING
/noushadgd https://500px.com/noushad BACK NEXT EXIT
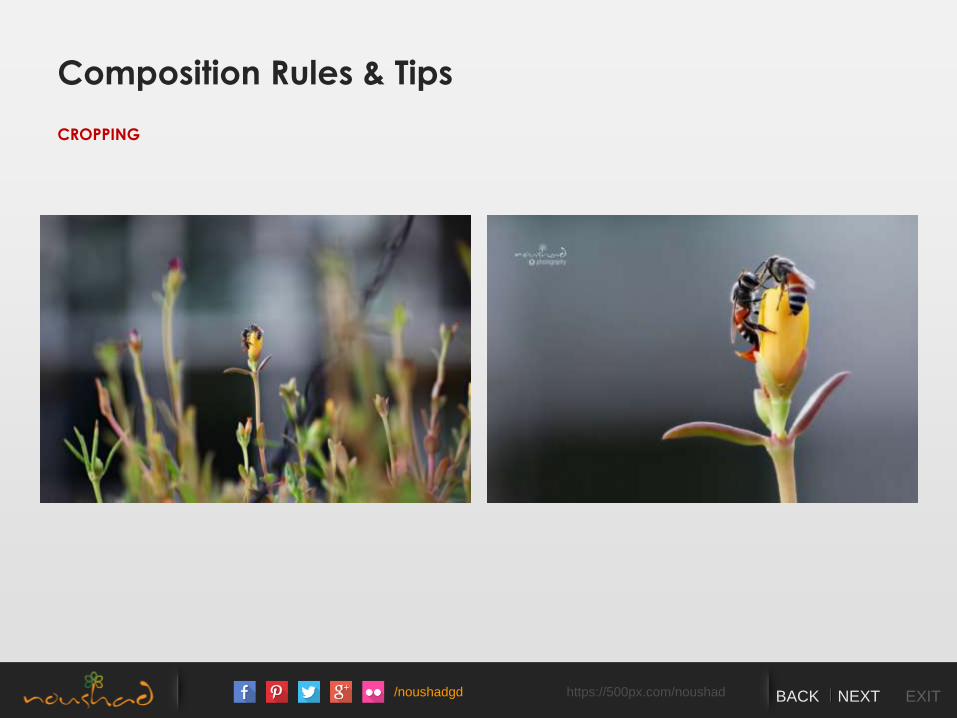
Composition Rules & Tips
CROPPING
/noushadgd https://500px.com/noushad BACK NEXT EXIT
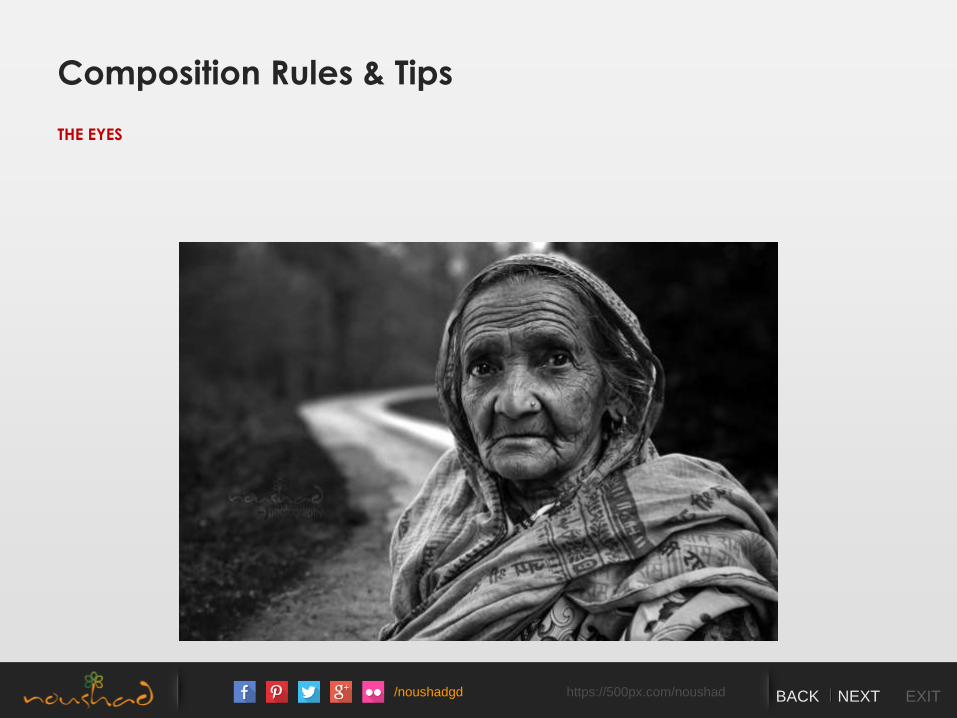
Composition Rules & Tips
THE EYES
/noushadgd https://500px.com/noushad BACK NEXT EXIT
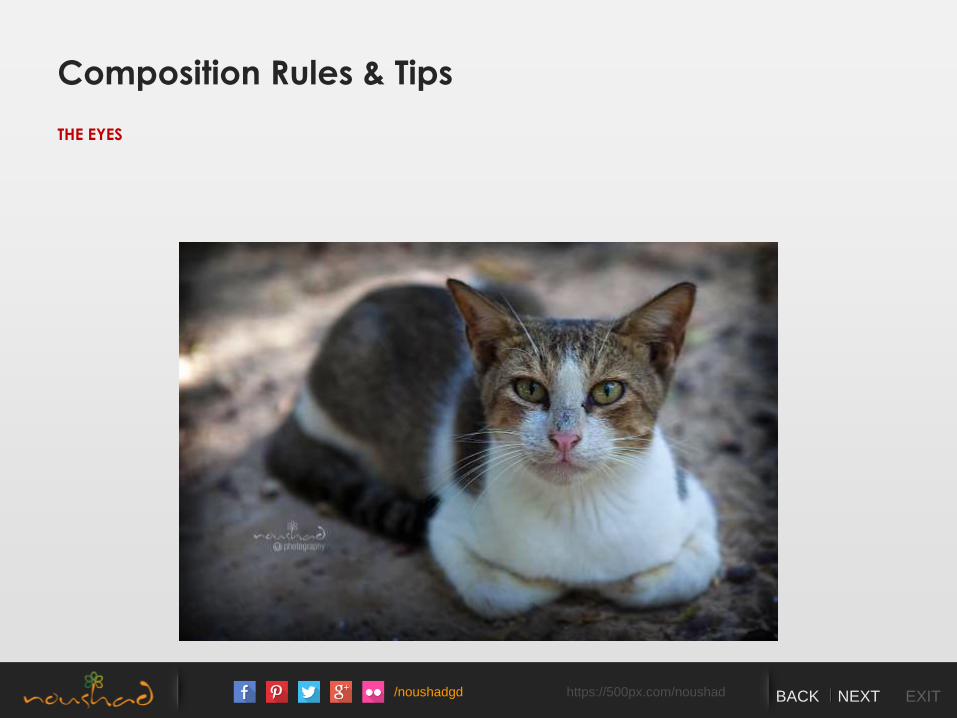
Composition Rules & Tips
THE EYES
/noushadgd https://500px.com/noushad BACK NEXT EXIT
Composition Rules & Tips
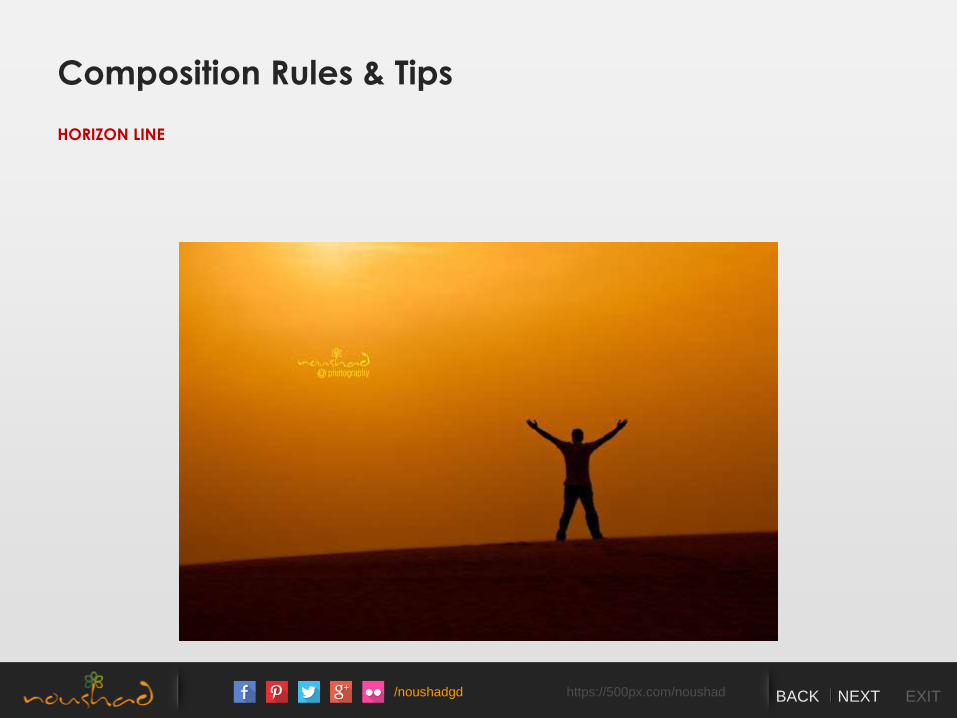
HORIZON LINE
/noushadgd https://500px.com/noushad BACK NEXT EXIT
Composition Rules & Tips
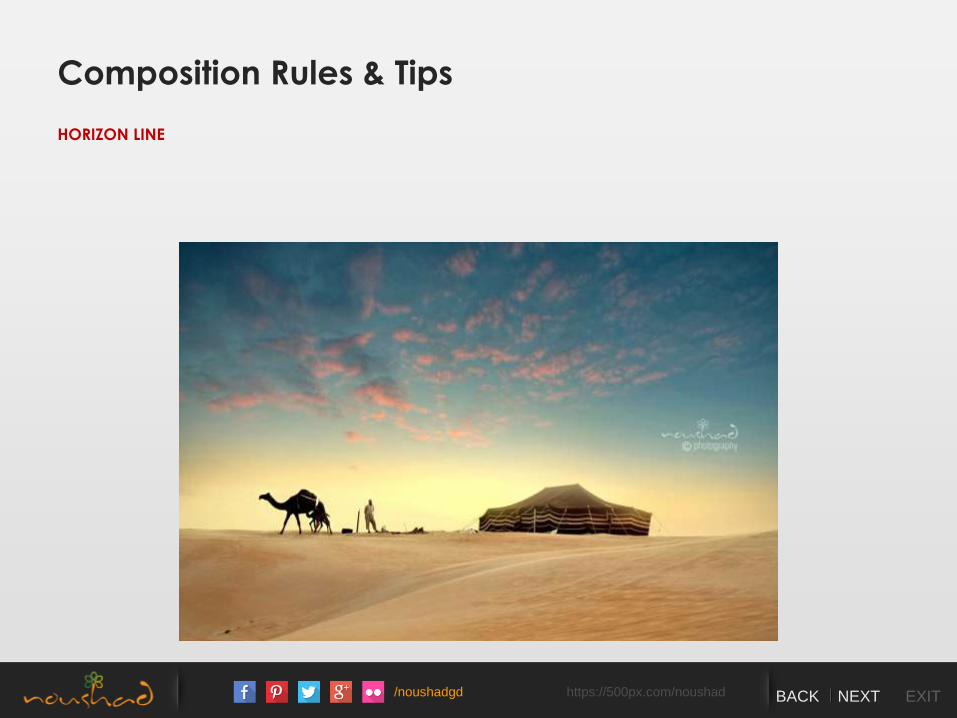
HORIZON LINE
/noushadgd https://500px.com/noushad BACK NEXT EXIT
Composition Rules & Tips
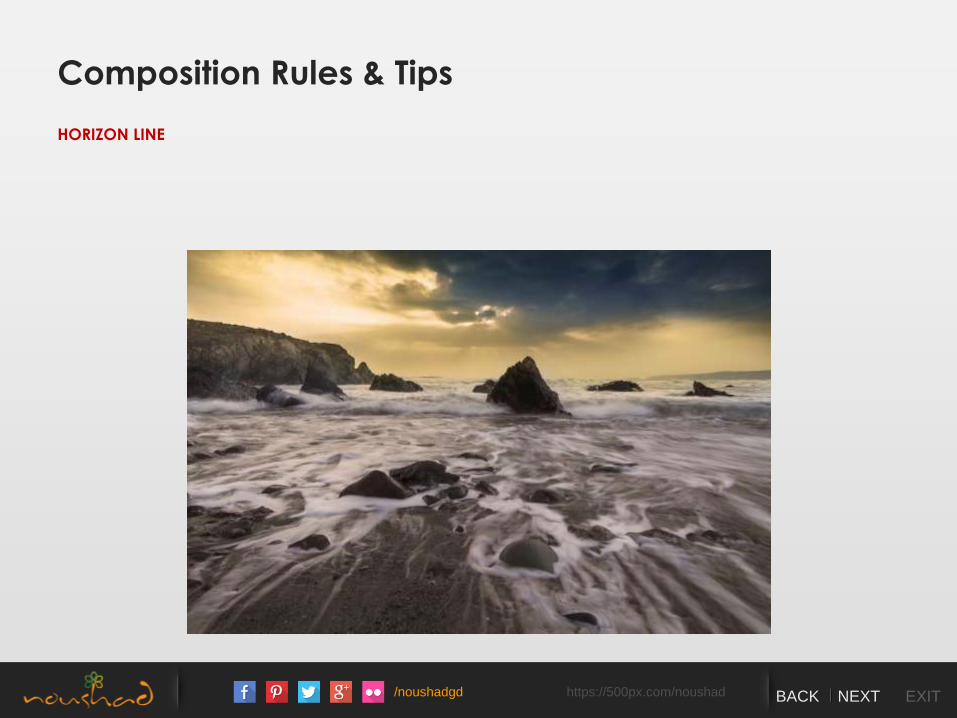
HORIZON LINE
/noushadgd https://500px.com/noushad BACK NEXT EXIT
Composition Rules & Tips
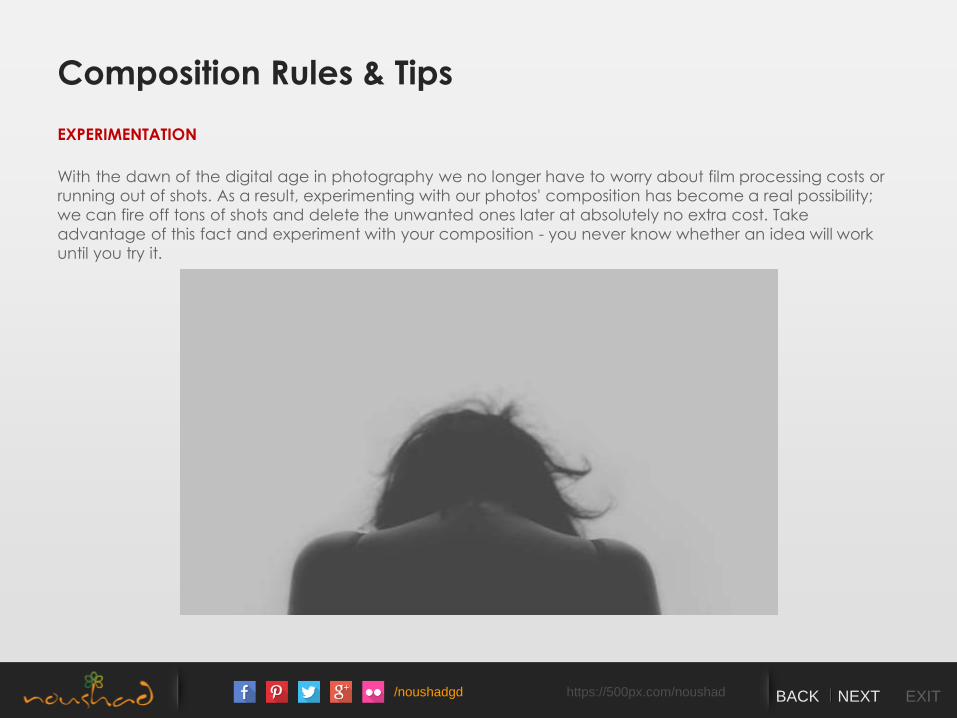
EXPERIMENTATION
With the dawn of the digital age in photography we no longer have to worry about film processing costs or
running out of shots. As a result, experimenting with our photos' composition has become a real possibility;
we can fire off tons of shots and delete the unwanted ones later at absolutely no extra cost. Take
advantage of this fact and experiment with your composition - you never know whether an idea will work
until you try it.
/noushadgd https://500px.com/noushad BACK NEXT EXIT
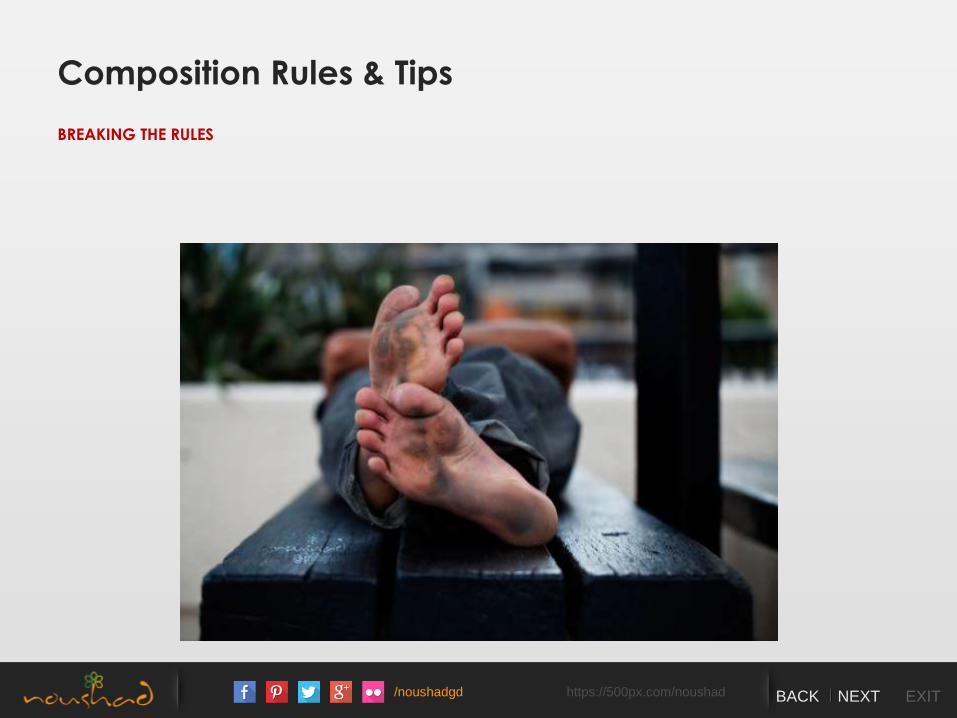
Composition Rules & Tips
BREAKING THE RULES
/noushadgd https://500px.com/noushad BACK NEXT EXIT
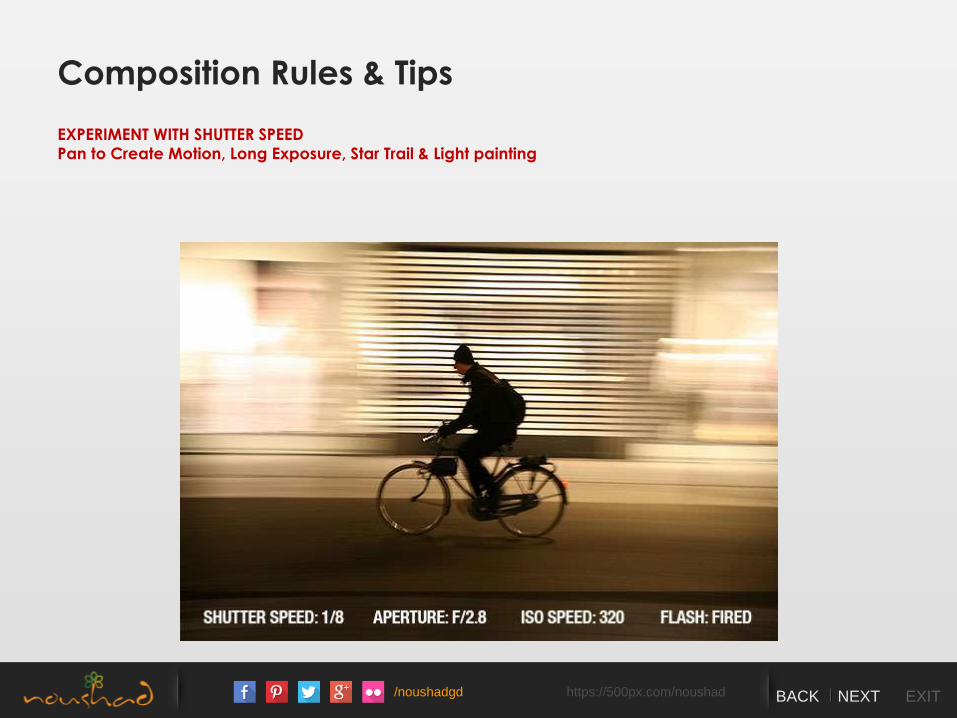
Composition Rules & Tips
EXPERIMENT WITH SHUTTER SPEED
Pan to Create Motion, Long Exposure, Star Trail & Light painting
/noushadgd https://500px.com/noushad BACK NEXT EXIT
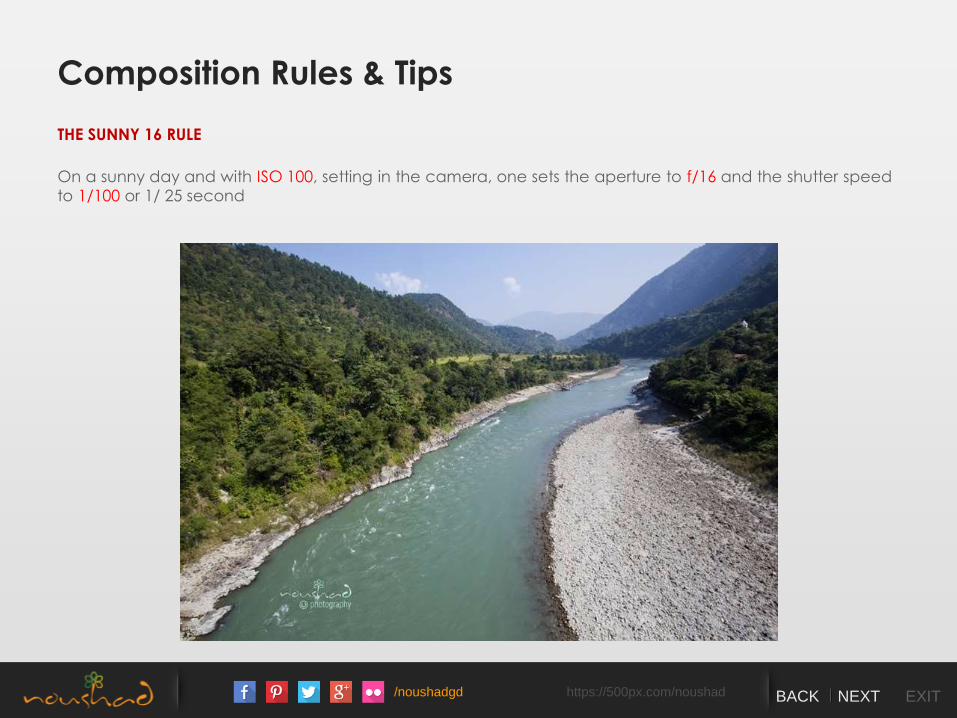
Composition Rules & Tips
THE SUNNY 16 RULE
On a sunny day and with ISO 100, setting in the camera, one sets the aperture to f/16 and the shutter speed
to 1/100 or 1/ 25 second
/noushadgd https://500px.com/noushad BACK NEXT EXIT
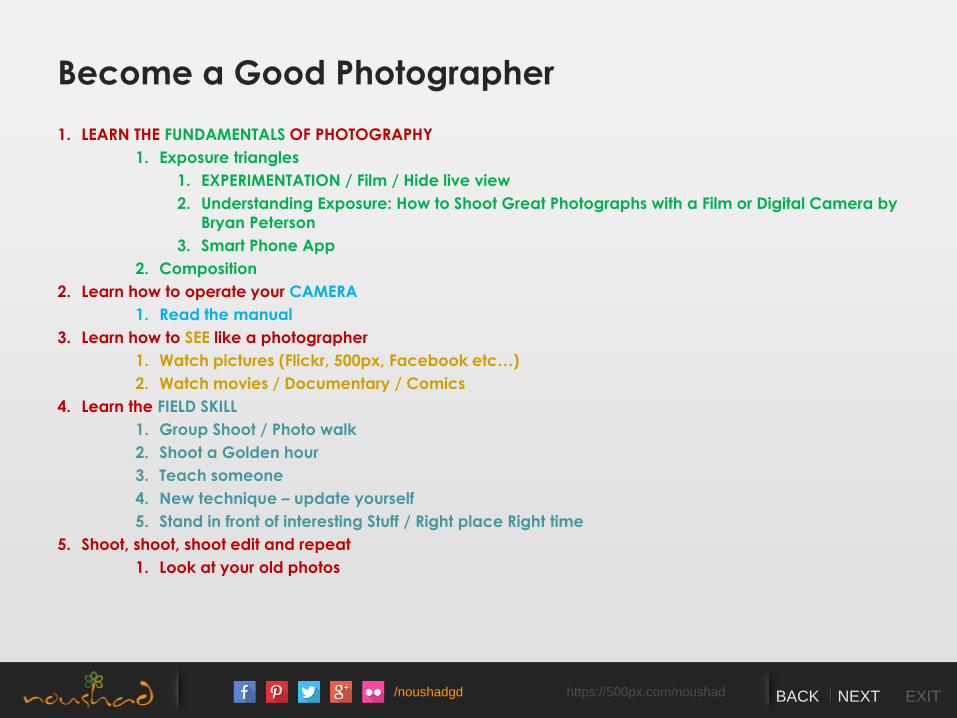
Become a Good Photographer
1. LEARN THE FUNDAMENTALS OF PHOTOGRAPHY
1. Exposure triangles
1. EXPERIMENTATION / Film / Hide live view
2. Understanding Exposure: How to Shoot Great Photographs with a Film or Digital Camera by
Bryan Peterson
3. Smart Phone App
2. Composition
2. Learn how to operate your CAMERA
1. Read the manual
3. Learn how to SEE like a photographer
1. Watch pictures (Flickr, 500px, Facebook etc…)
2. Watch movies / Documentary / Comics
4. Learn the FIELD SKILL
1. Group Shoot / Photo walk
2. Shoot a Golden hour
3. Teach someone
4. New technique – update yourself
5. Stand in front of interesting Stuff / Right place Right time
5. Shoot, shoot, shoot edit and repeat
1. Look at your old photos

/noushadgd https://500px.com/noushad BACK NEXT EXIT
THANK YOU &
HAPPY CLICKING!